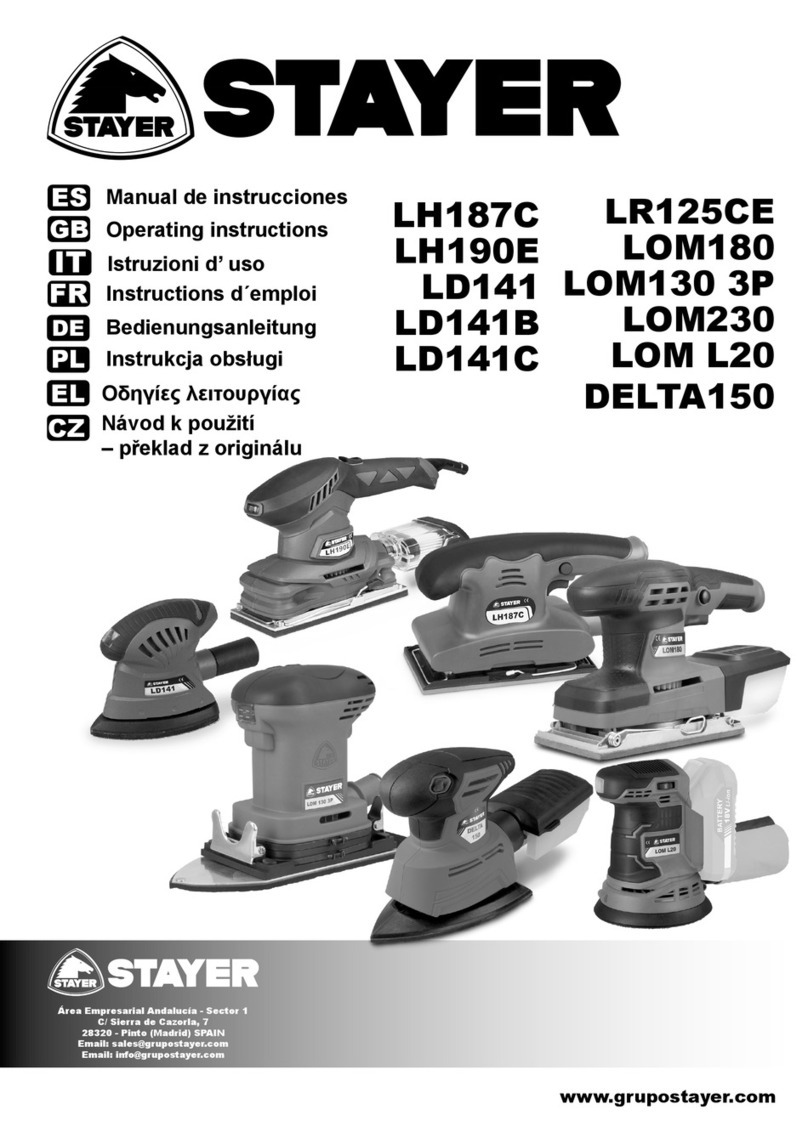
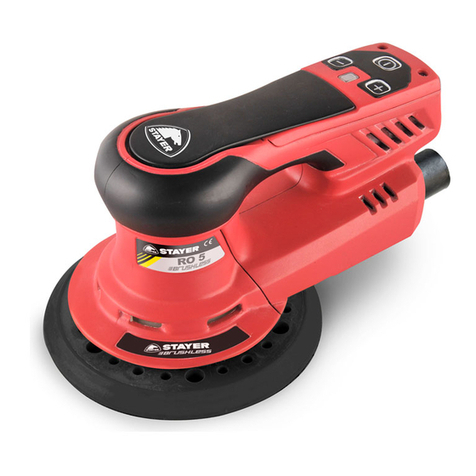
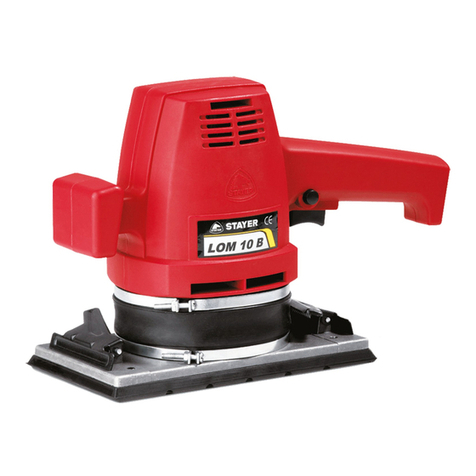
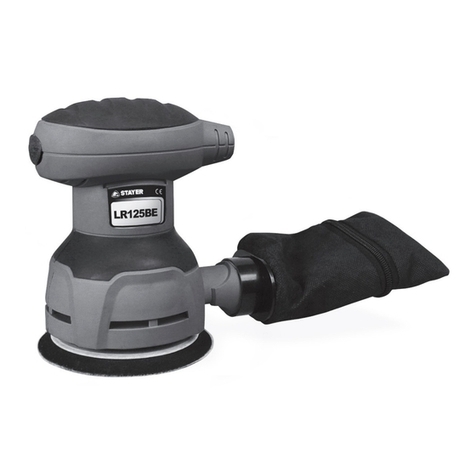
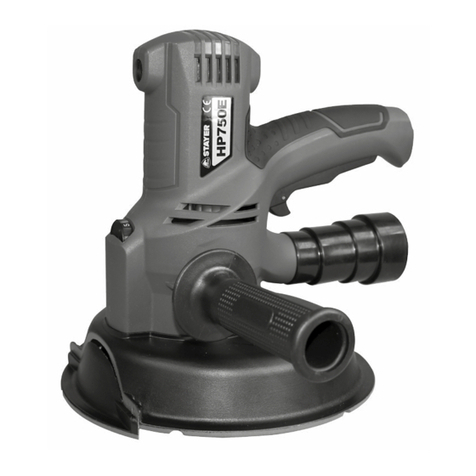
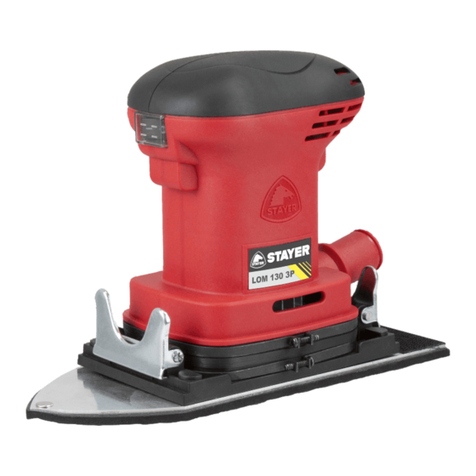
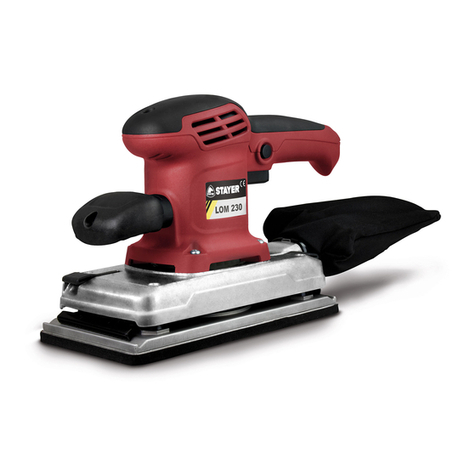
stayer LH190E User manual

www.grupostayer.com
ES
GB
Manual de instrucciones
Istruzioni d’ uso
Operating instructions
Área Empresarial Andalucía - Sector 1
C/ Sierra de Cazorla, 7
28320 - Pinto (Madrid) SPAIN
Email: sales@grupostayer.com
Email: info@grupostayer.com
LH187C
LH190E
LH227E
LR125CE
LD141
IT
Bedienungsanleitung
Instrukcja obsługi
FR Instructions d´emploi
PL

2
2

3

4
4
6.1.
LH227E LR125CE LD141
P1W280 300 180
n0min-1 0 - 12000 12000 13000
Ø . mm 0.8 2-
mm 227 x 115 ø 125 140 x 140 x 80
kg 2.1 1.5 0.9
LpA dB(A) 78 81 76
LWA dB(A) 88 91 85
a m/s2
hw 4.6 44.2
LH187C LH190E
P1W150 250
n0min-1 12000 6000-14000
Ø . mm 2 0.8
mm 90x187 187 x 92
kg 1.2 1.9
LpA dB(A) 84 86.6
LWA dB(A) 98 97.6
a m/s2
hw 4.5 9.2
EN60745, K = 3dB (LpA, LWA ) K = 1,5 m/s (ah)
2

ESPAÑOL
5
5
Este manual es acorde con la fecha de fabricación de su
máquina, información que encontrará en la tabla de datos
técnicos de la maquina adquirida, buscar actualizaciones
de manuales de nuestras maquinas en la pagina web:
www.grupostayer.com
La herramienta eléctrica ha sido diseñada para lijar y
pulir en seco madera, plástico, metal y superficies
emplastecidas o pintadas. Es especialmente apropiada
para trabajar perles, esquinas o puntos difícilmente
accesibles.
Instrucciones de seguridad especícas
Solamente emplee la herramienta eléctrica para lijar
en seco. La penetración de agua en el aparato eléctrico
comporta un mayor riesgo de electrocución.
¡Atención! Peligro de incendio. Evite el
sobrecalentamiento de la pieza y de la propia
lijadora. Vacíe siempre el depósito de polvo.
El material en polvo acumulado en el saco colector de
polvo, microltro, bolsa de papel (o la bolsa ltrante o ltro
del aspirador) puede llegar a autoincendiarse bajo unas
condiciones desfavorables, como, p. ej., al proyectarse
chispas al lijar metal. La probabilidad de que esto ocurra es
mayor si el material va mezclado con partículas de pintura,
poliuretano u otras sustancias químicas y si éste se
hubiese calentando tras un uso intenso de la herramienta.
• Asegure la pieza de trabajo. Una pieza de trabajo
jada con unos dispositivos de sujeción, o en un
tornillo de banco, se mantiene sujeta de forma mucho
más segura que con la mano.
• Mantenga limpio su puesto de trabajo. La mezcla de
diversos materiales es especialmente peligrosa. Las
aleaciones ligeras en polvo pueden arder o explotar.
• No utilice la herramienta eléctrica si el cable está
dañado. No toque un cable dañado, y desconecte
el enchufe de la red, si el cable se daña durante el
trabajo. Un cable dañado comporta un mayor riesgo
de electrocución.
Descripción del funcionamiento
Lea íntegramente estas advertencias de peligro
e instrucciones. En caso de no atenerse a las
advertencias de peligro e instrucciones siguientes,
ello puede ocasionar una descarga eléctrica, un
incendio y/o lesión grave.
Por favor reérase al manual adjunto para las instrucciones
de seguridad generales.
Por favor lea y comprenda completamente las
instrucciones antes de ensamblar y utilizar este equipo.
Montaje
Instalación de la bolsa de polvo (Fig. 2)
Instale la bolsa de polvo 6, en la toma de aspiración 9.
¡Aviso! Por razones de salud es estrictamente obligatorio
el uso de la bolsa recolectora de polvo.
Montaje de la caja colectora de polvo (LH190E g.5)
Coloque la caja colectora de polvo 6 en la toma de aspiración
9.
- Haciendo que las muescas encajen en la caja colectora 6.
- Proceda a girar en sentido de las agujas del reloj, hasta
enclavar.
- Para retirar la caja colectora 6, gire en sentido contrario a
las agujas del reloj y tire hacia afuera .
Instalación del papel de lijado / desbastado
(Fig. 4-6-7-8).
Desconecte primero el enchufe de alimentación.
- Suelte los retenes 8 de ambos lados.
- Coloque la parte abrasiva de la hoja de lijado/ desbaste
orientada al exterior del plato de lijado 7.
- El borde de la hoja de lijado/ desbaste, debe colocarlo
en la parte superior del plato de lijado 7 y asegure
con el retén delantero 8 (LH190E).
- Adhiera la hoja de lijado/ desbaste al plato de lijado
7. Asegurándose de que está bien tenso.
- Acabe de jar la hoja de lijado/ desbaste con el retén
posterior 8. (Fig.4-7-8).
- Asegúrese de que los agujeros de la hoja de lijado/
desbaste coinciden con las del plato de lijado 7, para
una perfecta aspiración.
Plato perforador (LH190E, Fig. 9)
Se ha suministrado un plato perforador 10, para hacer
agujeros en el papel lija.
- Los agujeros deben alinearse con los oricios de la
base lijadora 7.
- Debe colocar, como se indica antes, la hoja de lijar/
- desbastar.
- Luego ponga el plato perforador 10 en un lugar estable
y nivelado, y proceda a colocar el plato de lijado 7, con
la hoja de lija ya colocada, dentro del plato perforador,
haciendo un poco de presión hacia abajo, para que
perfore correctamente.
Descripción de funciones (Fig. 1)
1. Empuñadura frontal
2. Interruptor ON / OFF
3. Control de velocidad*
4. Botón de enclavamiento
5. Empuñadura principal
6. Bolsa de polvo / Caja colectora de polvo (LH190E)
7. Plato de lijado
8. Retén de sujeción de la lija
9. Toma de Aspiración
10. Plato perforador papel lija. (LH190E)
11. Tapa caja colectora de polvo.
12. Filtro de polvo Hepa.
*Los accesorios descritos son opcionales y no corresponden
al material que se adjunta de serie.

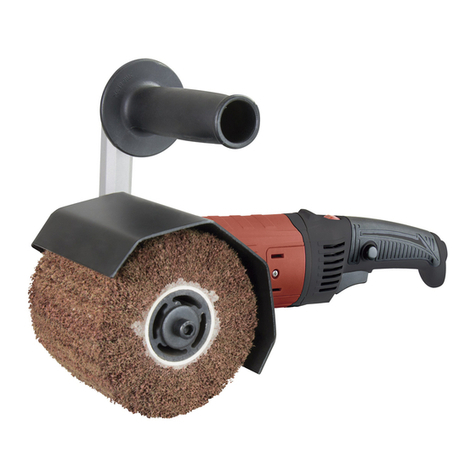
ESPAÑOL
6
6
Colocación y prueba
Mando de arranque / parada (Fig. 3).
Para arrancar el motor: Presione el mando 2.
Para operar continuamente: Presione el botón 4 mientras
aprieta el mando 2.
Para detener el motor: Suelte el mando 2 o en caso de
trabajo continuo simplemente presione brevemente el
mando 2.
LH190 E: Desplace hacia adelante el interruptor 2
para funcionamiento enclavado jo. Mueva hacia
atrás para parar.
Cambio de Herramienta
Escobillas del motor
- En caso de excesiva chispa en interior de la máquina
o funcionamiento irregular las escobillas deberán
serrevisadas obligatoriamente por un técnico
acreditado. No se autoriza la manipulación a nadie
que no sea un técnico acreditado.
Mantenimiento
Desconecte siempre el enchufe de alimentación antes
de iniciar cualquier labor de mantenimiento.
Solo LH190E (Fig.11)
Saque la tapa 11 de la caja colectora 6 y agite tanto
el ltro como cuadro de polvo, para limpiar. Fig. 11
Limpiar regularmente las ranuras de ventilación.
No utilice productos de limpieza agresivos para
limpiar el carcasa de plástico.
Mantenga los oricios de extracción de polvo libres
de suciedad u otras obstrucciones.
El agua nunca debe entrar en contacto con el ltro.
Puede usar aire comprimido. Sople primero desde el
interior.
Limpieza
- Mantenga todos los dispositivos de seguridad,
conductos de aire y carcasa limpios de polvo y
suciedad tanto como sea posible y adquiera el hábito
de limpiarlos inmediatamente después de usarlos.
- Limpie el equipo con un pincel de pelo semirrígido
y un paño ligeramente humedecido en una solución
jabonosa suave.
- No moje el interior ni use agentes de limpieza agresivos.
Servicio de Reparación
El servicio técnico le asesorará en las consultas que pueda
Ud. tener sobre la reparación y mantenimiento de su
producto, así como sobre piezas de recambio.
Los dibujos de despiece e informaciones sobre las piezas
de recambio las podrá obtener también en internet bajo:
info@grupostayer.com
Eliminación
Es obligatorio que las herramientas eléctricas, accesorios
y embalajes sean sometidos a un proceso de recuperación
que respete el medio ambiente.
Sólo para los países de la UE:
¡No arroje las herramientas eléctricas a la basura!
Conforme a la Directriz Europea 2002/96/CE sobre
aparatos eléctricosy electrónicosinservibles, trassu
transposición en ley nacional, deberán acumularse
por separado las herramientas eléctricas para ser
sometidas a un reciclaje ecológico.
Reservado el derecho de modicación.
Marcado Normativo
Características Técnicas
P1= Potencia
n0= Velocidad rotación
ø = Desplazamiento de la orbita
= Plato
= Peso
LWA = Nivel de potencia acústica
LpA = Nivel de presión acústica
= Vibración
Estos datos son válidos para una tensión nominal de [U]
230/240 V ~ 50/60 Hz – 110/120 V ~ 60 Hz. Los valores
pueden variar para otras tensiones y en ejecuciones
especícas para ciertos países.
Declaración de conformidad
Declaramos bajo nuestra sola responsabilidad que este
productoestá en conformidad con lasnormas o documentos
normalizados siguientes: EN60745-1, EN60745-2-3,
EN55014-1, EN55014-2, EN61000-3-2, EN61000-3-3 de
acuerdo con las regulaciones 2006/42/CE, 2014/30/EU.
Ramiro de la Fuente
Director Manager
Enero de 2020

ITALIANO
7
7
Questo manuale è coerente con la data di fabbricazione
del vostro computer, potrete trovare informazioni sui dati
tecnici della macchina acquistata controllo manuale degli
aggiornamenti delle nostre macchine sul sito:
www.grupostayer.com
L’elettroutensile è adatto per la levigatura e la lucidatura a
secco di superci in legno, di materie plastiche, di metallo,
di superci stuccate e superci verniciate. Lo stesso
è adatto in modo particolare per proli, angoli o punti
dicilmente accessibili.
Istruzioni di sicurezza speciche per la macchina
Utilizzare l’elettroutensile esclusivamente per
levigatura a secco. L’eventuale inltrazione di acqua in
un elettroutensile va ad aumentare il rischio d’insorgenza
di scosse elettriche.
Attenzione: Pericolo d’incendio! Evitare un
surriscaldamento del materiale in lavorazione
e della levigatrice. Prima di iniziare una pausa
svuotare sempre il contenitore per la polvere.
La polvere di abrasione nel sacchetto raccoglipolvere, nel
microlter, nel sacchetto raccoglipolvere in carta (o nel
sacchetto raccoglipolvere o nel ltro dell’aspirapolvere)
può prendere fuoco in caso di condizioni sfavorevoli come
la scia di scintille prodotta durante la levigatura del metallo.
Una situazione particolarmente pericolosa si viene a creare
quando la polvere di smerigliatura si mischia con resti di
vernice e poliuretano oppure con altri materiali chimici ed il
materiale in lavorazione si riscalda troppo nel corso di una
lavorazione di lunga durata.
• Assicurare il pezzo in lavorazione. Un pezzo in
lavorazione può essere bloccato con sicurezza in
posizione solo utilizzando un apposito dispositivo di
serraggio oppure una morsa a vite e non tenendolo
con la semplice mano.
• Mantenere pulita la propria zona di lavoro.
Miscele di materiali di diverso tipo possono risultare
particolarmente pericolose. La polvere di metalli
leggeri può essere inammabile ed esplosiva.
• Mai utilizzare l’elettroutensile con un cavo
danneggiato. Non toccare il cavo danneggiato ed
estrarre la spina di rete in caso che si dovesse
danneggiare il cavo mentre si lavora. Cavi danneggiati
aumentano il rischio di una scossa di corrente elettrica.
Descrizione del funzionamento
Leggere tutte le avvertenze di pericolo e le
istruzioni operative. In caso di mancato rispetto
delle avvertenze di pericolo e delle istruzioni
operative si potrà creare il pericolo di scosse
elettriche, incendi e/o incidenti gravi.
Le relative avvertenze di sicurezza si trovano nell’opuscolo
allegato.
Leggete attentamente le istruzioni per l’uso prima del
montaggio e della messa in esercizio.
Montaggio
Montaggio del sacchetto per raccolta polvere (Fig. 2)
Installare sacchetto di polvere 6, l’aspirazione 9.
Attenzione! Per motivi di salute è assolutamente necessario
usareil sacchetto per raccolta polvere.
Montaggio della scatola della polvere (LH190E g. 5)
Posizionare la scatola della polvere 6nel collettore di
aspirazione 9.
- Rendere le tacche andare bene nella tramoggia 6.
- Procedere a ruotare nella direzione di orario, no bloccare.
- Per rimuovere la tramoggia 6, ruotare in senso
antiorario per in senso orario e tirare fuori pure.
Fissaggio dei fogli abrasivi (Fig. 4-6-7-8)
Prima scollegare la spina di alimentazione.
- Rilasciare 8tenute entrambi i lati.
- Posizionare il foglio di levigatura abrasiva / rettica
partenze levigatura piastra 7.
- La levigatura del bordo del foglio / rettica, si deve
porre nella parte superiore della piastra di levigatura 7
e ssare con fermo anteriore 8 (LH190E).
- Allegare foglio abrasivo / rettica di levigatura pad 7.
Certo che lo è tesa.
- Terminare allegando il foglio di levigatura / rettica il
fermo posteriore 8. (Fig. 4-7-8).
- Assicurarsi che i fori del foglio di levigatura / rettica
corrispondono alla piastra di levigatura 7per un vuoto
perfetto.
Piastra punzone (LH190E, Figura 9)
Esso ha fornito una piastra punzone 10 per fare fori nel
carta vetrata .
- I fori devono essere allineati con i fori nella base
levigatrice 7.
- Deve essere collocato, come indicato in precedenza, il
foglio abrasivo / sgrossatura .
- Poi mettere la piastra punzone 10 su una supercie
piana e stabile, e procedere per posizionare la
levigatura 7con il foglio abrasivo e collocato all’interno
del punch, facendo aerrando un po ‘di pressione no
a pugni correttamente.
Descrizione dell’apparecchio (Fig. 1)
1. Impugnatura
2. ON / OFF
3. Controllo della velocità*
4. Pulsante di bloccaggio
5. impugnatura principale
6. Scatola di raccolta sacchetto di polvere / polvere (LH190E)
7. Piastra di levigatura
8. Fermo che tiene la carta vetrata
9. Prendere aspirazione
10. Piatto pugno carta vetrata. (LH190E)
11. Coprire casella di polvere.

ITALIANO
8
8
12. Filtro HEPA polvere.
*Gli accessori sono opzionali e non corrispondono al materiale
sono inclusi come standard.
Il posizionamento e test
Interruttore ON/OFF (Fig. 3)
Accensione: premete l’interruttore 2
Esercizio continuo: ssate l’interruttore 2 con il pulsante di
bloccaggio 4.
Spegnimento: premete brevemente l’interruttore 2, Potete
prescegliere il numero dei giri girando líapposita vite
godronata sul pulsante 2.
LH190E:spostareinavantil’interruttore2per ilfunzionamento
Immerso sso. Spostare indietro per fermarsi.
Cambio utensile
Spazzole al carbone
- In caso di uno sviluppo eccessivo di scintille fate
sostituire le spazzole al carbone da un elettricista.
Attenzione! Le spazzole al carbone devono essere
sostituite solo da un elettricista.
Pulizia, manutenzione e ordinazione dei pezzi di
ricambio
Solo LH190E (Fig. 11)
Rimuovere il coperchio 11 della tramoggia 6 e il ltro e
agitare casella polvere per pulizia. Figura 11
Pulire regolarmente le feritoie di ventilazione.
Non utilizzare detergenti abrasivi sulla custodia di plastica.
Mantenere le aperture libere di aspirazione della polvere
sporcizia o altri ostacoli.
L’acqua non deve mai entrare in contatto con il ltro. È
possibile utilizzare aria compressa. Colpo primo dal interno.
Prima di qualsiasi lavoro di pulizia staccate la spina dalla
presa di corrente.
Pulizia
- Tenete il più possibile i dispositivi di protezione, le
fessure di aerazione e la carcassa del motore liberi
da polvere e sporco. Stronate l’apparecchio con
un panno pulito o soatelo con l’aria compressa a
pressione bassa.
- Consigliamo di pulire l’apparecchio subito dopo averlo
usato.
- Pulite l’apparecchio regolarmente con un panno
asciutto ed un po’ di sapone. Non usate detergenti o
solventi perché questi ultimi potrebbero danneggiare
le parti in plastica dell’apparecchio.
- Fate attenzione che non possa penetrare dell’acqua
all’interno dell’apparecchio.
Servizio di Riparazione
Il servizio tecnico l’aiuterà a risolvere i suoi dubbi sulla
riparazione e la manutenzione del suo prodotto, così come
sui pezzi di sostituzione.
I disegni di sezioni e le informazioni sui pezzi di sostituzione
si potranno ottenere anche in Internet in:
info@grupostayer.com
Smaltimento
Avviare ad un riciclaggio rispettoso dell’ambiente pistola
a spruzzo, unità elettrica, accessori ed imballaggi scartati.
Solo per i Paesi della CE:
Non gettare elettroutensili dismessi tra i riuti domestici!
ConformementeallanormadelladirettivaCE2002/96
sui riuti di apparecchiature elettriche ed elettroniche
(RAEE) ed all’attuazione del recepimento nel diritto
nazionale, gli elettroutensili diventati inservibili
devono essere raccolti separatamente ed essere
inviati ad una riutilizzazione ecologica.
Con ogni riserva di modiche tecniche.
Normativa
Caratteristiche Tecniche
P1= Potenza
n0= Velocità orbitale
ø = Spostamento dell’orbita
= Piatto
= Massa
LWA = Livello di potenza acustica
LpA = Livello di pressione acustica
= Vibrazione
Questi dati sono validi per una tensione nominale di [U]
230/240 V ~ 50/60 Hz – 110/120 V ~ 60 Hz. I valori possono
variare per altre tensioni e nelle esecuzioni speciche per
determinati paesi.
Dichiarazione di conformità
Assumendone la piena responsabilità, dichiariamo che
il prodotto è conforme alle seguenti normative ed ai
relativi documenti: EN60745-1, EN60745-2-3, EN55014-
1, EN55014-2, EN61000-3-2, EN61000-3-3 in base alle
prescrizioni delle direttive 2006/42/CE, 2014/30/EU.
Ramiro de la Fuente
Director Manager
Gennaio 2020

ENGLISH
9
9
This manual is consistent with the date of manufacture of
your machine, you will nd information on the technical
data of the machine acquired manual check for updates of
our machines on the website:
www.grupostayer.com
The machine is intended for dry sanding and polishing of
wood, plastic, metal, ller, as well as for painted surfaces.
It is especially suitable for proles, corners or hard to reach
locations. Please refer to the booklet included in delivery
for the safety instructions.
Machine-specic Safety Warnings
Use the machine only for dry sanding. Penetration of water
into the machine increases the risk of an electric shock.
Caution, re hazard! Avoid overheating the object
being sanded as well as the sander. Always
empty the dust collector before taking breaks.
In unfavourable conditions, e. g., when sparks emit from
sanding metals, sanding debris in the dust bag, micro lter
or paper sack (or in the lter sack or lter of the vacuum
cleaner) can self-ignite. Particularly when mixed with
remainders of varnish, polyurethane or other chemical
materials and when the sanding debris is hot after long
periods of working.
• Secure the workpiece. A workpiece clamped with
clamping devices or in a vice is held more secure than
by hand.
• Keep your workplace clean. Blends of materials are
particularly dangerous. Dust from light alloys can burn
or explode.
• Never use the machine with a damaged cable. Do
not touch the damaged cable and pull the mains
plug when the cable is damaged while working.
Damaged cables increase the risk of an electric shock.
Functional Description
Read all safety warnings and all instructions.
Failure to follow the warnings and instructions may
result in electric shock, re and/or serious injury.
Please read the operating instructions carefully before
assembling and using.
Assembly
Fitting the dust bag (Fig. 2)
Fit the dust bag 6, in the vacuum intake 9.
Important! For health safety reasons it is imperative that
you use a dust bag.
Assembly the dust collector box (LH190E g.5)
Place the dust box 6in the vacuum intake 9.
- Making the notches t into the hopper 6.
- Proceed to rotate in clockwise direction, until it locks.
- To remove the hopper 6, rotate counterclockwise and
pull out.
Fastening the sanding/grinding paper (Fig. 4-6-7-8).
First disconnect the power plug.
- Release the latches 8on both sides.
- Place the abrasive sanding/grinding sheet outward the
sanding plate
- Place the sanding/grinding sheet edge on the top of
the sanding plate 7and fasten the front retainer 8
(LH190E).
- Attach sheet sanding/grinding to sanding plate 7. Sure
it is taut.
- Finish attaching the sanding/grinding sheet to the back
retainer 8. (Fig. 4, 7-8).
- Make sure the holes in the sanding/grinding sheet
match the sanding plate 7for a perfect vacuum.
Punch plate (LH190E, Fig. 9)
It has been provided a punch plate 10 to make holes in the
sandpaper.
- The holes should be lined up with the holes in the
sander base 7.
- Should be placed, as indicated before, the sanding/
grinding sheet.
- Then put the punch plate 10 on a stable level surface,
and proceed to place the sanding plate 7with the
sanding sheet and placed within the punch plate,
making a little pressure down to punch correctly.
Functions desciption (Fig.1)
1. Front handle
2. ON / OFF switch
3. Speed control*
4. Locking knob
5. Main handle
6. Dust bag/dust collection box (LH190E)
7. Sanding Plate
8. Sandpaper holding retainer
9. Vacuum intake
10. Plate punch sandpaper. (LH190E)
11. Cover dust box.
12. Hepa Filter dust.
*The accessories are optional and do not correspond to the
standard included material.
Placement and Testing
ON/OFF switch (Fig. 3)
To switch on: Press switch 2
Continuous operation: Secure switch 2with locking knob 4.
To switch o: Briey hold down switch 2. You can preselect
the speed by turning the knurled screw in switch 2.
LH190 E: Move forward switch 2 for xed nestled operation.
Move backwards to stop.

ENGLISH
10
10
Tool change
Carbon brushes
- In case of excessive sparking, have the carbon brushes
checked only by a qualied electrician. Important! The
carbon brushes should not be remplaced by anyone
but a qualied electrician.
Cleaning, maintenance and ordering of spare parts
Always pull out the mains power plug before starting any
cleaning work.
Only LH190E (Fig. 11)
Remove the lid 11 of the collector box 6 and both the lter
and shake dust box for cleaning. Figure 11
Regularly clean the ventilation slots.
Do not use abrasive cleaners on the plastic housing.
Keep openings free of dust extraction
dirt or other obstructions.
Water must never come into contact with the lter. You can
use compressed air. Blow rst from the inside.
Cleaning
- Keep all safety devices, air vents and the motor
housing free of dirt and dust as far as possible.
Wipe the equipment with a clean cloth or blow it with
compressed air at low pressure.
- We recommend that you clean the tool immediately
after you use it.
- Clean the equipment regularly with a moist cloth and
some soft soap. Do not use cleaning agents or solvents;
these may be aggressive to the tool’s plastic parts.
Ensure that no water can get into the interior of the tool.
Repair service
The technical service will provide you advice regarding
questions you may have on the repair and maintenance of
your product as well as on spare parts.
You may also obtain exploded views and information on
spare parts on the internet under:
info@grupostayer.com
Disposal and recycling
The machine, accessories and packaging should be sorted
for environmental-friendly recycling.
Only for EC countries:
Do not dispose of power tools into household waste!
According the European Guideline 2002/96/EC
for Waste Electrical and Electronic Equipment
and its implementation into national right, power
tools that are no longer usable must be collected
separately and disposed of in an environmentally
correct manner.
Subject to change without notice.
Legal Regulations
Technical features
P1= Power input
n0= Spinning speed
ø = Displacement of the orbit
= Sanding plate
= Mass
LWA = Acoustic power level
LpA = Acoustic pressure level
= Vibration
The values given are valid for nominal voltages [U] 230/240
V ~ 50/60 Hz - 110/120 V ~ 60Hz. For lower voltage and
models for specic countries, these values can vary.
Please observe the article number on the type plate of your
machine. The trade names of the individual machines may
vary.
Declaration of Conformity
We declare under sole responsability that this product is in
coformity with the following standards or standardisation
documents: EN60745-1, EN60745-2-3, EN55014-1,
EN55014-2, EN61000-3-2, EN61000-3-3, according to the
provisions of the directives 2006/42/CE, 2014/30/EU.
Ramiro de la Fuente
Director Manager
January, 2020

FRANÇAIS
11
11
Ce manuel est compatible avec la date de fabrication de
votre machine, vous trouverez des informations sur les
caractéristiques techniques de la machine contrôle manuel
acquis pour les mises à jour de nos machines sur le site:
www.grupostayer.com
L’outil électroportatif est conçu pour le ponçage et le
polissage à sec des surfaces en bois, métal, mastic et
matières plastiques ainsi que pour des surfaces vernies.
Il est particulièrement approprié pour travailler des prolés
et des coins ou pour les endroits d’accès dicile.
Instructions de sécurité spéciques à l’appareil
N’utiliser l’outil électroportatif que pour un travail
à sec. La pénétration d’eau dans un outil électroportatif
augmente le risque d’un choc électrique.
Attention! Risque d’incendie! Eviter la surchaue
des matériaux travaillés et de la ponceuse. Vider
toujours le bac de récupération des poussières
avant de faire une pause de travail.
Les particules de poussière se trouvant dans le sac à
poussières, le microltre, le sac en papier (ou dans le
sac à poussières en tissu ou le ltre de l’aspirateur)
peuvent s’enammer d’elles-mêmes dans des conditions
défavorables, p. ex. projection d’étincelles lors du ponçage
de pièces en métal, Ceci notamment lorsque les particules
de poussière sont mélangées à des résidus de vernis, de
polyuréthane ou d’autres substances chimiques et que
les matériaux travaillés sont très chauds après avoir été
travaillés pendant une période assez longue.
• Bloquer la pièce à travailler. Une pièce à travailler
serrée par des dispositifs de serrage ou dans un étau
est xée de manière plus sûre que tenue dans les
mains.
• Tenir propre la place de travail. Les mélanges de
matériaux sont particulièrement dangereux. Les
poussières de métaux légers peuvent être explosives
ou inammables.
• Ne jamais utiliser un outil électroportatif dont le
câble est endommagé. Ne pas toucher à un câble
endommagé et retirer la che du câble d’alimentation
de la prise du courant, au cas où le câble serait
endommagé lors du travail. Un câble endommagé
augmente le risque d’un choc électrique.
Description du fonctionnement
Lire tous les avertissements et indications. Le
non-respect des avertissements et instructions
indiqués ci-après peut entraîner un choc électrique,
un incendie et/ou de graves blessures sur les
personnes.
Vous trouverez les consignes de sécurité correspondantes
dans le petit manuel ci-joint.
Veuillez lire attentivement le mode d’emploi avant le
montage et la mise en service.
Montage
Montage du sac récupérateur de poussière (gure 2)
Installer le sac à poussière 6, dans l’aspiration 9.
Attention! Pour des raisons en rapport avec la santé, il est
absolument indispensable d’utiliser le sac récupérateur de
poussière.
Montage de la boîte à poussière (LH190E g. 5)
Placer le sac à poussière 6 dans le collecteur d’admission 9.
- Faire les encoches s’intégrer dans la trémie 6.
- Procéder à tourner dans le sens des aiguilles d’une
montre, jusqu’à ce que verrouiller.
- Pour supprimer la trémie 6dans le sens antihoraire
aiguilles d’une montre et tirez.
Fixation du papier abrasif (Fig. 4-6-7-8).
Abord débrancher la prise d’alimentation.
- Relâchez 8joints des deux côtés.
- Placez la feuille de ponçage abrasif / broyage ponçage
extérieur plaque 7.
- Le ponçage de bord de la feuille / broyage, vous devez
placer dans le haut du plateau de ponçage 7 et le xer
avec retenue avant 8 (LH190E).
- Joindre une feuille de ponçage / meulage de ponçage
7. Bien sûr, il est tendu.
- Achevez de xer la feuille de ponçage / meulage de
retenue arrière 8. (Fig. 4, 7-8).
- Assurez-vous que les trous dans la feuille de ponçage
/meulage correspondent le plateau de ponçage 7pour
un vide parfait.
Plaque coup de poing (LH190E, Fig. 9)
Il a fourni une plaque de poinçon 10 pour faire des trous
dans le papier de verre.
- Les trous doivent être alignés avec les trous de la base
de ponceuse 7.
- Il devrait être placé, comme indiqué plus haut, la feuille
abrasive/ébauche.
- Ensuite, mettre la plaque de poinçon 10 sur une
surface stable et de niveau, et procéder à placer le
ponçage 7avec la feuille de ponçage et placé dans le
bol à punch, faire saisir un peu de pression vers le bas
pour frapper correctement.
Description de l’appareil (gure 1)
1. Foregrip
2. ON / OFF
3. Contrôle de la vitesse *
4. Bouton de verrouillage
5. poignée principale
6. Boîte de collection sac à poussière/poussière (LH190E)
7. Plateau de ponçage
8. Retenue tenant le papier de verre
9. Prenez aspiration
10. Plaque coup de poing du papier de verre. (LH190E)

FRANÇAIS
12
12
11. Couvrir la boîte de poussière.
12. Filtre HEPA poussière.
* Les accessoires sont facultatifs et ne correspondent
pas à la matière sont inclus en tant que norme.
Placement et test
Interrupteur Marche / Arrêt (gure 3)
Mise en circuit: Appuyez sur l’interrupteur 2
Fonctionnement continu: Avec le bouton d’arrêt 4bloquez
l’interrupteur 2
Mise hors circuit: Appuyez brièvement sur l’interrupteur
2. En tournant la vis moletée dans l’interrupteur 2, vous
pouvez présélectionner la vitesse.
LH190 E: Avancer passer 2pour le fonctionnement niché
xe. Reculer pour arrêter.
Changement d’outil
Brosses à charbon
- Si les brosses à charbon font trop d’étincelles, fai.
tes-les contrôler par des spécialistes en électricité.
Attention! Seul un(e) spécialiste électricien(ne) est
autorisé à remplacer les brosses à charbon.
Nettoyage, maintenance et commande de pièces
de rechange
Retirez la che de contact avant tous travaux de nettoyage.
Seulement LH190E (Fig. 11)
Retirez le couvercle 11 de la trémie 6 et le ltre et serrer la
boîte à poussière pour le nettoyage. Figure 11
Nettoyez régulièrement les fentes de ventilation.
Ne pas utiliser de nettoyants abrasifs sur le boîtier en plastique.
Gardez les ouvertures libres de l’extraction de poussière
la saleté ou d’autres obstructions.
L’eau ne doit jamais entrer en contact avec le ltre. Vous
pouvez utiliser de l’air comprimé. Souer de l’intérieur en
premier.
Nettoyage
- Maintenez les dispositifs de protection, les fentes à air et
le carter de moteur aussi propres (sans poussière) que
possible. Frottez l’appareil avec un chion propre ou
souez dessus avec de l’air comprimé à basse pression.
- Nous recommandons de nettoyer l’appareil directement
après chaque utilisation.
- Nettoyez l’appareil régulièrement à l’aide d’un chion
humide et un peu de savon. N’utilisez aucun produit de
nettoyage ni détergeant ; ils pourraient endommager
les pièces en matières plastiques de l’appareil. Veillez
à ce qu’aucune eau n’entre à l’intérieur de l’appareil.
Service de Réparations
Le service technique vous conseillera pour les consultations
que vous pouvez avoir sur les réparations et la maintenance
de votre produit, ainsi que sur des pièces de rechange.
Les dessins des pièces de rechange et les informations
sur les pièces de rechange pourront être obtenues sur
internet à travers:
info@grupostayer.com
Elimination et le recyclage
Les outils électroportatifs, ainsi que leurs accessoires et
emballages, doivent pouvoir suivre chacun une voie de
recyclage appropriée.
Seulement pour les pays de l’Union Européenne:
Ne jetez pas votre appareil électroportatif avec les
ordures ménagères!
Conformément à la directive européenne
2002/96/CE relative aux déchets d’équipements
électriques et électroniques et sa réalisation dans
les lois nationales, les outils électroportatifs dont
on ne peut plus se servir doivent être séparés et
suivre une voie de recyclage appropriée.
Sous réserve de modications.
Normes
Caractéristiques techniques
P1= Puissance
n0= Oscillation
ø = Déplacement de l’orbite
= Patin
= Mass
LWA = Niveau de puissance acoustique
LpA = Niveau de pression acoustique
= Vibration
Ces données sont valables pour une tension nominale
de [U] 230/240 V ~ 50/60 Hz – 110/120 V ~ 60 Hz. Les
valeurs peuvent varier pour d’autres tensions et dans des
exécutions spéciques pour certains pays. Respectez
impérativement le numéro d’article se trouvant sur la plaque
signalétique de l’outil électroportatif. Les désignations
commerciales des diérents outils électroportatifs peuvent
varier.
Déclaration de Conformité
Nous déclarons sous notre propre responsabilité
que ce produit est en conformité avec les normes ou
documents normalisés suivants: EN60745-1, EN60745-
2-3, EN55014-1, EN55014-2, EN61000-3-2, EN61000-
3-3, conformément aux réglementations 2006/42/CE,
2014/30/EU.
Ramiro de la Fuente
Director Manager
January, 2020

DEUTSCH
13
13
DasHandbuchstehtimEinklangmitdemHerstellungsdatum
Ihrer Maschine, werden Sie Informationen über die
technischen Daten der Maschine erworben manuelle Prüfung
auf Updates unserer Maschinen auf der Website zu nden:
www.grupostayer.com
Das Elektrowerkzeug ist bestimmt zum trockenen Schleifen
und Polieren von Holz, Kunststo, Metall, Spachtelmasse
sowie lackierten Oberächen. Es ist besonders geeignet
für Prole, Ecken oder schwer zugängliche Stellen.
Gerätespezische Sicherheitshinweise
Verwenden Sie das Elektrowerkzeug nur für Trockenschli.
Das Eindringen von Wasser in ein Elektrogerät erhöht das
Risiko eines elektrischen Schlages.
Achtung Brandgefahr! Vermeiden Sie eine
Überhitzung des Schleifgutes und des Schleifers.
Entleeren Sie vor Arbeitspausen stets den
Staubbehälter.
Schleifstaub im Staubsack, Microlter, Papiersack (oder im
Filtersack bzw. Filter des Staubsaugers) kann sich unter
ungünstigen Bedingungen, wie Funkenug beim Schleifen
von Metallen, selbst entzünden. Besondere Gefahr besteht,
wenn der Schleifstaub mit Lack-, Polyurethanresten
oder anderen chemischen Stoen vermischt ist und das
Schleifgut nach langem Arbeiten heiß ist.
• Sichern Sie das Werkstück.EinmitSpannvorrichtungen
oder Schraubstock festgehaltenes Werkstück ist
sicherer gehalten als mit Ihrer Hand.
• Halten Sie Ihren Arbeitsplatz sauber.
Materialmischungen sind besonders gefährlich.
Leichtmetallstaub kann brennen oder explodieren.
• Benutzen Sie das Elektrowerkzeug nicht mit
beschädigtemKabel.BerührenSiedasbeschädigte
Kabel nicht und ziehen Sie den Netzstecker, wenn
das Kabel während des Arbeitens beschädigt
wird. Beschädigte Kabel erhöhen das Risiko eines
elektrischen Schlages.
Funktionsbeschreibung
Lesen Sie alle Sicherheitshinweise und
Anweisungen. Versäumnisse bei der Einhaltung
der Sicherheitshinweise und Anweisungen können
elektrischen Schlag, Brand und/oder schwere
Verletzungen verursachen.
Die entsprechenden Sicherheitshinweise nden Sie im
beiliegenden Heftchen.
Bitte vor Montage und Inbetriebnahme die
Betriebsanleitung aufmerksam lesen.
Montage
Montage des Staubfangsack (Bild 2)
Instale la bolsa de polvo 6, en la toma de aspiración 9.
Achtung! Benutzung des Staubfangsackes ist aus
Gesund-heitsgründen unbedingt erforderlich.
Montage der Staubbox (LH190E Bild 5)
Setzen Sie den Staubbehälter 6 in den Ansaugkrümmer
9.
- Machen Sie die Kerben in den Trichter passen 6.
- Dann drehen sich im Uhrzeigersinn, um im
Uhrzeigersinn, bis er einrastet.
- Um den Behälter zu entfernen 6, drehen gegen den
Uhrzeigersinn drehen und herausziehen.
Schleifpapierbefestigung (Bild 4-6-7-8)
Trennen Sie zunächst den Netzstecker.
- Lösen Sie die Verriegelungen 8auf beiden Seiten.
- Legen Sie das Blatt Schleif Schleifen/Schleifen
Schleifplatte 7nach außen.
- Der Blattrand Schleifen / Schleifen, müssen Sie in der
Oberseite der Schleifteller 7platzieren und mit der
vorderen Halte 8 (LH190E).
- Befestigen Schleifblatt/Schleifen zu Schleifteller 7.
Sicher, es ist stra.
- Beenden Anbringen des Schleifblatt/Schleifen der
Rückseite Halte 8. (Bild 4-7-8).
- Achten Sie darauf, die Löcher in der Schleifblatt/Schleif
passen die Schleifplatte 7für ein perfektes Vakuum.
Plattenstanze (LH190E, Bild 9)
Es wurde eine Stanzplatte 10 vorgesehen, um Löcher in
dem Schleifpapier zu machen.
- Die Löcher sollten mit den Bohrungen der Schleif 7.
- Platziert werden soll, wie bereits erwähnt, das
Schleifblatt/Schruppen.
- Dann legen Sie die Stanzplatte 10 auf eine stabile,
ebene Oberäche, und fahren Sie mit dem Schleif 7
mit dem Schleifblatt und in der Bowle gelegt legen, so
packte ein wenig Druck auf richtig zu stanzen.
Beschreibung der Funktionen (Bild 1)
1. Frontgri
2. ON/OFF
3. Drehzahlregelung *
4. Verriegelungstaste
5. Haupthandgri
6. Staubbeutel/Staubsammelkasten (LH190E)
7. Schleifplatte
8. Halter hält das Schleifpapier
9. Nehmen Aspiration
10. Plattenstanze Sandpapier. (LH190E)
11. Decken Sie Staubbox.
12. Hepa Filter Staub.
*Die Zubehörteile sind optional und müssen nicht auf das
Material entsprechen, sind serienmäßig.

DEUTSCH
14
14
Placement und-prüfung
Ein-/Ausschalter (Bild 3)
Einschalten: Schalter 2eindrücken
Dauerbetrieb: Mit Arretierknopf 4Schalter 2sichern
Ausschalten: Schalter 2kurz eindrücken Durch Drehen
der Rändelschraube im Schalter 2 können Sie die
Drehzahl vorwählen.
LH190 E: Vorwärts Schalter 2für feste eingebettet Betrieb.
Verschieben nach hinten zu stoppen.
Werkzeugwechsel
Kohlebürsten
- Bei übermäßiger Funkenbildung lassen Sie die
Kohlebürsten durch eine Elektrofachkraft überprüfen.
Achtung! Die Kohlebürsten dürfen nur von einer
Elektrofachkraft ausgewechselt werden.
Reinigung, Wartung und Ersatzteilbestellung
Ziehen Sie vor allen Reinigungsarbeiten den Netzstecker.
Nur LH190E (Bild 11)
Entfernen des Deckels 11 des Behälters 6und sowohl
dem Filter und Staubbehälter schütteln Reinigung. 11
Die Lüftungsschlitze regelmäßig zu reinigen.
Verwenden Sie keine aggressiven Reiniger auf dem
Kunststogehäuse.
Halten Önungen frei von Staub-Extraktion
Schmutz oder andere Hindernisse.
Wasser darf nicht in Kontakt mit dem Filter kommen. Sie
können komprimierte Luft zu verwenden. Schlag von innen
zuerst.
Reinigung
- Halten Sie Schutzvorrichtungen, Luftschlitze und
Motorgehäuse so staub- und schmutzfrei wie möglich.
Reiben Sie das Gerät mit einem sauberen Tuch ab oder
blasen Sie es mit Druckluft bei niedrigem Druck aus.
- Wir empfehlen, dass Sie das Gerät direkt nach jeder
Benutzung reinigen.
- Reinigen Sie das Gerät regelmäßig mit einem
feuchten Tuch und etwas Schmierseife.
- Verwenden Sie keine Reinigungs- oder Lösungsmittel;
diese könnten die Kunststoteile des Gerätes angreifen.
- Achten Sie darauf, dass kein Wasser in das
Geräteinnere gelangen kann.
Reparatur-Service
Der technische Dienst wird Ihnen Beratung zu Fragen,
die Sie auf die Reparatur und Wartung Ihres Produktes
sowie auf Ersatzteile haben. Sie können auch erhalten
Explosionszeichnungen und Informationen zu Ersatzteilen
im Internet unter:
info@grupostayer.com
Entsorgung und Recycling
Elektrowerkzeuge, Zubehör und Verpackungen sollen einer
umweltgerechten Wiederverwertung zugeführt werden.
Nur für EU-Länder:
Werfen Sie Elektrowerkzeuge nicht in den Hausmüll!
Gemäß der Europäischen Richtlinie 2002/96/
EG über Elektro- und Elektronik-Altgeräte und
ihrer Umsetzung in nationales Recht müssen
nicht mehr gebrauchsfähige Elektrowerkzeuge
getrennt gesammelt und einer umweltgerechten
Wiederverwertung zugeführt werden.
Änderungen vorbehalten.
Gesetzliche Regelungen
Technische wigenschaften
P1= Lelstung
n0= Schwingungszahl
ø = Verschiebung der Umlaufbahn
= Platte
= Gewicht
LWA = Schallleistungspegel
LpA = Schalldruckpegel
= Vibration
Angaben gelten für Nennspannungen [U] 230/240 V ~
50/60 Hz - 110/120 V ~ 60 Hz. Bei niedrigeren Spannungen
und in länderspezischen Ausführungen können diese
Angaben variieren. Bitte beachten Sie die Sachnummer
auf dem Typenschild Ihres Elektrowerkzeugs. Die
Handelsbezeichnungen einzelner Elektrowerkzeuge
können variieren.
Konformitätserklärung
Wir erklären in alleiniger Verantwortung, dass dieses
Produkt mit den folgenden Normen oder normativen
Dokumenten übereinstimmt: EN60745-1, EN60745-2-3,
EN55014-1, EN55014-2, EN61000-3-2, EN61000-3-3,
gemäß den Bestimmungen der Richtlinien 2006/42/CE,
2014/30/EU.
Ramiro de la Fuente
Director Manager
Januar 2020

POLSKI
15
15
WSKAZÓWKI BEZPIECZEŃSTWA
Należy przeczytać wszystkie wskazówki i
przepisy. Błędy w przestrzeganiu poniższych
wskazówek mogą spowodować porażenie
prądem, pożar i/lub ciężkie obrażenia ciała.
Należy odnosić się do ilustracji zawartych
w niniejszej instrukcji
1. Stanowisko pracy należy utrzymywać w czystości
i dobrze oświetlone.
2. Nie należy pracować tym elektronarzędziem w
otoczeniu zagrożonym wybuchem, w którym znajdują
się np. łatwopalne ciecze, gazy lub pyły. Podczas
pracy elektronarzędziem wytwarzają się iskry, które
mogą spowodować zapłon.
3. Podczas użytkowania urządzenia zwrócić uwagę
na to, aby dzieci i inne osoby postronne znajdowały
się w bezpiecznej odległości. Odwrócenie uwagi
może spowodować utratę kontroli nad narzędziem.
4. Wtyczka elektronarzędzia musi pasować do
gniazda. Nie wolno zmieniać wtyczki w jakikolwiek
sposób. Nie wolno używać adapterów w przypadku
elektronarzędzi z uziemieniem ochronnym.
5. Urządzenie należy zabezpieczyć przed deszczem
i wilgocią. Przedostanie się wody do elektronarzędzia
podwyższa ryzyko porażenia prądem.
6. Nigdy nie należy używać przewodu do innych
czynności. Nigdy nie należy nosić elektronarzędzia,
trzymając je za przewód, ani używać przewodu do
zawieszenia urządzenia; nie wolno też wyciągać
wtyczki z gniazdka pociągając za przewód. Przewód
należy chronić przed wysokimi temperaturami,
należy go trzymać z dala od oleju, ostrych krawędzi
lub ruchomych części urządzenia. Uszkodzone lub
splątane przewody zwiększają ryzyko porażenia
prądem.
7. W przypadku pracy elektronarzędziem pod gołym
niebem, należy używać przewodu przedłużającego,
dostosowanego również do zastosowań
zewnętrznych.
8. Jeżeli nie da się uniknąć zastosowania
elektronarzędzia w wilgotnym otoczeniu, należy użyć
wyłącznika ochronnego różnicowo-prądowego.
9. Podczas pracy z elektronarzędziem należy
zachować ostrożność, każdą czynność wykonywać
uważnie i z rozwagą. Nie należy używać
elektronarzędzia, gdy jest się zmęczonym lub będąc
pod wpływem alkoholu lub lekarstw.
10. Należy nosić osobiste wyposażenie ochronne i
zawsze okulary ochronne. Noszenie osobistego
11. Należy unikać niezamierzonego uruchomienia
narzędzia. Przed włożeniem wtyczki a także przed
podniesieniem lub przeniesieniem elektronarzędzia,
należy upewnić się, że elektronarzędzie jest
wyłączone. Trzymanie palca na wyłączniku podczas
przenoszenia elektronarzędzia lub podłączenie
do prądu włączonego narzędzia, może stać się
przyczyną wypadków.
12 Przed włączeniem elektronarzędzia, należy
usunąć narzędzia nastawcze lub klucze.
13. Należy unikać nienaturalnych pozycji przy pracy.
Należy dbać o stabilną pozycję przy pracy
i zachowanie równowagi. W ten sposób możliwa
będzie lepsza kontrola elektronarzędzia w
nieprzewidzianych sytuacjach.
14. Należy nosić odpowiednie ubranie. Nie należy
nosić luźnego ubrania ani biżuterii. Włosy, ubranie
i rękawice należy trzymać z daleka od ruchomych
części. Luźne ubranie, biżuteria lub długie włosy
mogą zostać wciągnięte przez ruchome części.
15. Jeżeli istnieje możliwość zamontowania urządzeń
odsysających i wychwytujących pył, należy upewnić
się, że są one podłączone i będą prawidłowo użyte.
16. Nie należy przeciążać urządzenia. Do pracy
używać należy elektronarzędzia, które są do
tego przewidziane. Odpowiednio dobranym
elektronarzędziem pracuje się wydajniej i
bezpieczniej.
17. Nie należy używać elektronarzędzia, którego
włącznik jest uszkodzony.
18. Przed regulacją urządzenia, wymianą osprzętu
lub po zaprzestaniu pracy narzędziem, należy
wyciągnąć wtyczkę z gniazda.
19. Nieużywane elektronarzędzia należy
przechowywać w miejscu niedostępnym dla dzieci.
Nie należy udostępniać narzędzia osobom, które go
nie znają lub nie przeczytały niniejszych przepisów.
20. Konieczna jest należyta konserwacja
elektronarzędzia. Należy kontrolować, czy ruchome
części urządzenia działają bez zarzutu i nie są
zablokowane, czy części nie są pęknięte lub
uszkodzone w taki sposób, który miałby wpływ na
prawidłowe działanie elektronarzędzia. Uszkodzone
części należy przed użyciem urządzenia oddać do
naprawy.
21. Należy stale dbać o ostrość i czystość
zamontowanego osprzętu.
22. Elektronarzędzia, osprzęt, narzędzia pomocnicze
itd. należy używać zgodnie z ich przeznaczeniem.
Uwzględnić należy przy tym warunki i rodzaj
wykonywanej pracy.

POLSKI
16
16
WSKAZÓWKI BEZPIECZEŃSTWA
PRZY PRACY ZE SZLIFIERKAMI
1. Elektronarzędzie należy używać jedynie do
szlifowania na sucho. Przeniknięcie wody do
elektronarzędzia podwyższa ryzyko porażenia
prądem.
2. Należy zabezpieczyć obrabiany przedmiot.
Zamocowanie obrabianego przedmiotu w urządzeniu
mocującym lub imadle jest bezpieczniejsze niż
trzymanie go w ręku.
3. Miejsce pracy należy utrzymywać w czystości.
Mieszanki materiałów są szczególnie niebezpieczne.
Pył z metalu lekkiego może się zapalić lub wybuchnąć.
4. Nie wolno używać elektronarzędzia z
uszkodzonym przewodem. Nie należy dotykać
uszkodzonego przewodu; w przypadku uszkodzenia
przewodu podczas pracy, należy wyciągnąć wtyczkę
z gniazda. Uszkodzone przewody podwyższają
ryzyko porażenia prądem
Opis funkcjonowania
Należy przeczytać wszystkie wskazówki i przepisy
oraz starannie je przechowywać dla dalszego
zastosowania. Nieprzestrzeganie powyższych
wskazówek może spowodować porażenie prądem,
pożarem lub poważnymi obrażeniami ciała. Podczas
czytania instrukcji należy odnosić się do ilustracji
gracznych znajdujących się na pierwszych stronach.
Opis:
1. Rękojeśćprzednia
2. Włącznik
3. Pokrętło wyboru prędkości
4. Blokada
5. Rękojeść
6. Worek na pył
7. Stopa szlierki
8. Uchwyt papieru ściernego
9. Króciec odciągu pyłu
Zastosowanie:
Urządzenie przeznaczone jest do wydajnego
szlifowania na sucho dużych powierzchni drewna,
tworzywa sztucznego, metalu i lakierowanych
powierzchni a także do polerowania.
Montaż:
Przed wszystkimi pracami przy elektronarzędziu
upewnij się że wtyczka jest odłączona od sieci.
Wymiana krążka szlierskiego / papieru (LR125E)
Stopa szlierki wyposażona jest w rzep, aby można
było szybko i łatwo zamocować krążek szlierski.
Przyłożyć krążek do jednej krawędzi stopy tak aby
ściśle do niej przylegał i mocno go docisnąć do
płyty. Należy zwrócić uwagę, aby otworu w krążku
pokrywały się z otworami w stopie. W przeciwnym
wypadku odciąg pyłu będzie nieskuteczny. Aby zdjąć
papier ścierny należy chwycić jeden jego koniec i
odciągnąć od stopy szlierskiej
Odsysanie zewnętrzne
Dostarczony króciec odciągu pyłu nałożyć na króciec
wydmuchowy (2). Można podłączyć wąż odsysania
do odkurzacza przemysłowego (np. Stayer).
Odkurzacz musi być dostosowany do rodzaju
obrabianego materiału.
Uruchamianie
Należy zwrócić uwagę na napięcie sieci!
Napięcie źródła prądu musi zgadzać się z
danymi na tabliczce znamionowej elektronarzędzia.
Elektronarzędzia przeznaczone do pracy pod
napięciem 230 V można przyłączać również do sieci
220 V.
Włączanie/wyłączanie
Aby włączyć szlierkę, należy wcisnąć
włącznik (2). W celu unieruchomienia
włącznika należy wcisnąć (4), aż do zablokowania.
Aby wyłączyć elektronarzędzie, należy zwolnić
włącznik,
lub – jeżeli jest zablokowany – nacisnąć go krótko w
celu odblokowania, a następnie zwolnić.
Praca
Nie wolno włączać szlierki bez założonego papieru
ściernego. Płyta szlierska może ulec uszkodzeniu.
Nie należy zbytnio dociskać szlierki do obrabianego
materiału. Wydajność szlifowania obniża się,
a elementy ruchome urządzenia i papier ścierny
zużywają dużo szybciej. Szlierkę należy trzymać
pewnie. Przed przystąpieniem do szlifowania należy
pozwolić maszynie uzyskać maksymalną prędkość,
następnie delikatnie przyłożyć całą powierzchnią
stopy do materiału i przesuwać lekko dociskając
szlierkę.
Konserwacja
Przed wszystkimi pracami przy elektronarzędziu
należy wyciągnąć wtyczkę z gniazda.
Aby zapewnić bezpieczną i wydajną pracę,

POLSKI
17
17
elektronarzędzie i szczeliny wentylacyjne należy
utrzymywać w czystości.
Usuwanie odpadów
Elektronarzędzia, osprzęt i opakowanie
należy poddać utylizacji zgodnie z
obowiązującymi zasadami ochrony
środowiska. Nie należy wyrzucać
elektronarzędzi do odpadów domowych!
Zgodnie z europejską wytyczną 2002/96/EG o starych,
zużytych narzędziach elektrycznych i elektronicznych
i jej stosowania w prawie krajowym, wyeliminowane,
niezdatne do użycia elektronarzędzia należy zbierać
osobno i doprowadzić do ponownego przetworzenia
zgodnego z zasadami ochrony środowiska.
Dokument przedstawiający treść deklaracji
zgodności
Oświadczamy, że produkty przedstawione w rozdziale
„Dane techniczne” odpowiadają wymaganiom
następujących norm i dokumentów normatywnych:
EN60745-1, EN60745-2-3, EN55014-1, EN55014-2,
EN61000-3-2, EN61000-3-3; 2006/42/CE, 2014/30/
EU.
Dokumentacja techniczna przechowywana jest
przez producenta:
Stayer Iberica S.A.
Area Empresarial De Andalucia, Sierra De Cazorla,
7, 28320 Pinto, Madrid – Spain.
Niżej podpisany jest odpowiedzialny za
przygotowanie dokumentacji technicznej i składa tę
deklarację w imieniu Stayer Iberica S.A.
Ramiro de la Fuente Muela,
Dyrektor generalny Stayer Iberica S.A.
Pinto, Madryt,
stycznia 2020
Dystrybutorem producenta w Polsce jest:
Północna Grupa Narzędziowa Sp. z o.o.,
14-100 Ostróda, ul. Hurtowa 6.
Umieszczone na urządzeniu symbole oznaczają:
Należy przeczytać wszystkie wskazówki i
przepisy.
Używaj ochraniaczy słuchu.
Używaj okularów ochronnych.
Używaj maski przeciwpyłowej.
P1 Moc
n0 Prędkość obrotowa
ø Wymiar tarczy
Wymiar
Waga
LpA Ciśnienie akustyczne
LWA Moc akustyczna
Poziom wibracji

ADRES PRODUCENTA:
Stayer Iberica S.A.
C/Sierra de Cazorla 7
Area Empresarial de Andalucia sector 1
28320 Pinto (Madrid) Spain
GENERALNY DYSTRYBUTOR NA TERENIE RP
PÓŁNOCNA GRUPA NARZĘDZIOWA SP. Z O.O.
ul Hurtowa 6
14-100 Ostróda
Tel. +48 89/6429700
Fax +48 89/6489701
e-mail. [email protected]
www. www.stayer.pl
CENTRALNY SERWIS
ul. Hurtowa 6
14-100 Ostróda
Tel. +48 89/6429734
Fax +48 89/6429735
e-mail. [email protected]

NOTES
19
19

www.grupostayer.com
Área Empresarial Andalucía - Sector 1
C/ Sierra de Cazorla, 7
28320 - Pinto (Madrid) SPAIN
Email: sales@grupostayer.com
Email: info@grupostayer.com
This manual suits for next models
4
Table of contents
Languages:
Other stayer Sander manuals

stayer
stayer LOM130PD User manual

stayer
stayer HP750BE User manual

stayer
stayer LS 1200 B User manual

stayer
stayer LH187B User manual

stayer
stayer LOM10B User manual

stayer
stayer LH187C User manual

stayer
stayer AGL181 User manual

stayer
stayer LH187C User manual

stayer
stayer LEN751E User manual

stayer
stayer LP600BE User manual

stayer
stayer AGL182 User manual

stayer
stayer LEN610 User manual

stayer
stayer LH187C User manual

stayer
stayer BRUSHLESS LP1000E User manual

stayer
stayer HP750BE User manual

stayer
stayer DS 125 User manual

stayer
stayer HP1010 User manual

stayer
stayer LP600BE User manual

stayer
stayer LU260E User manual

stayer
stayer LOM130 3P User manual