Standard Glass –Retrofit
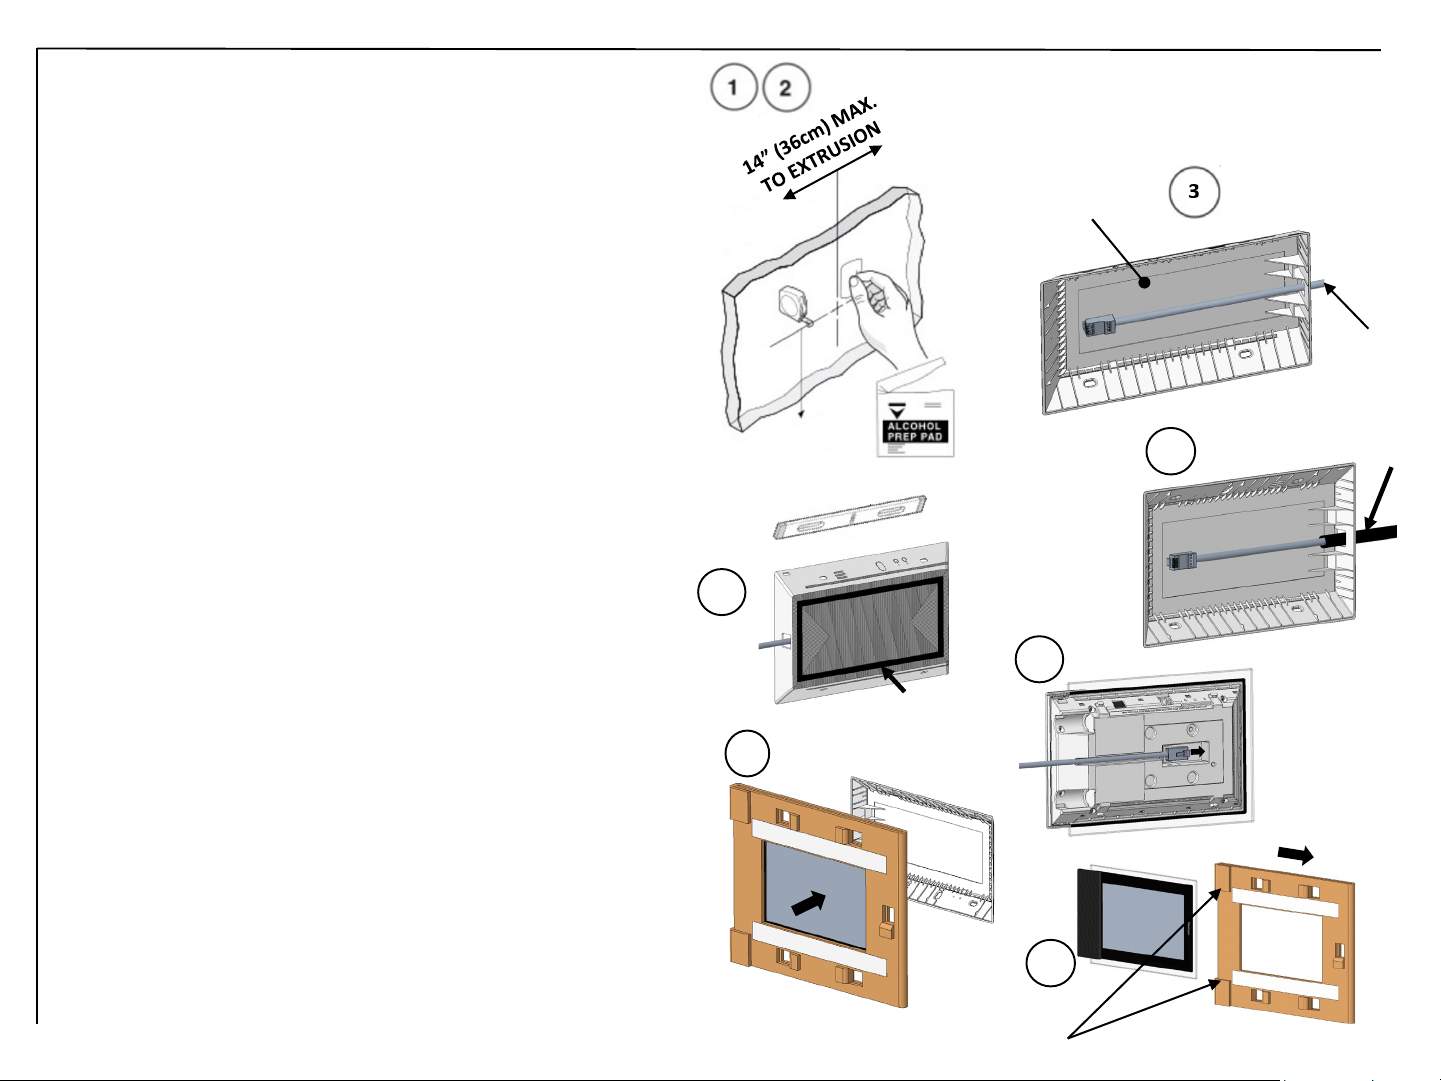
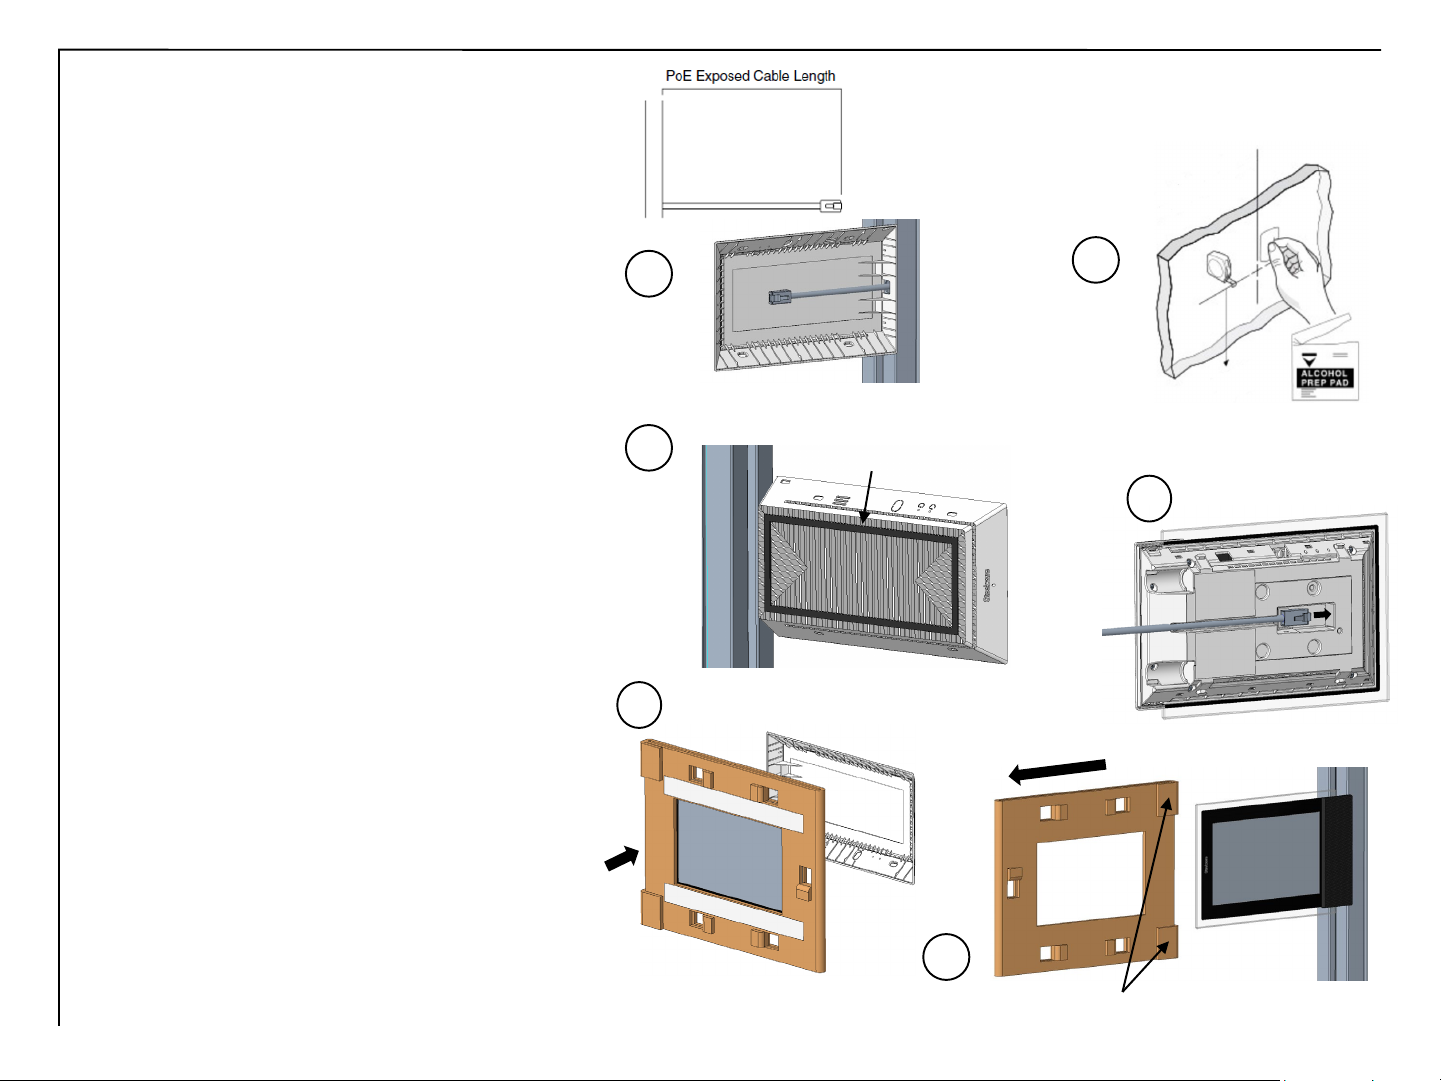
1. See page 5 to remove existing RW20. Temporarily locate
the glass mount bracket onto the glass. The glass
mounting bracket should be centered 52” (132cm) from
the floor.
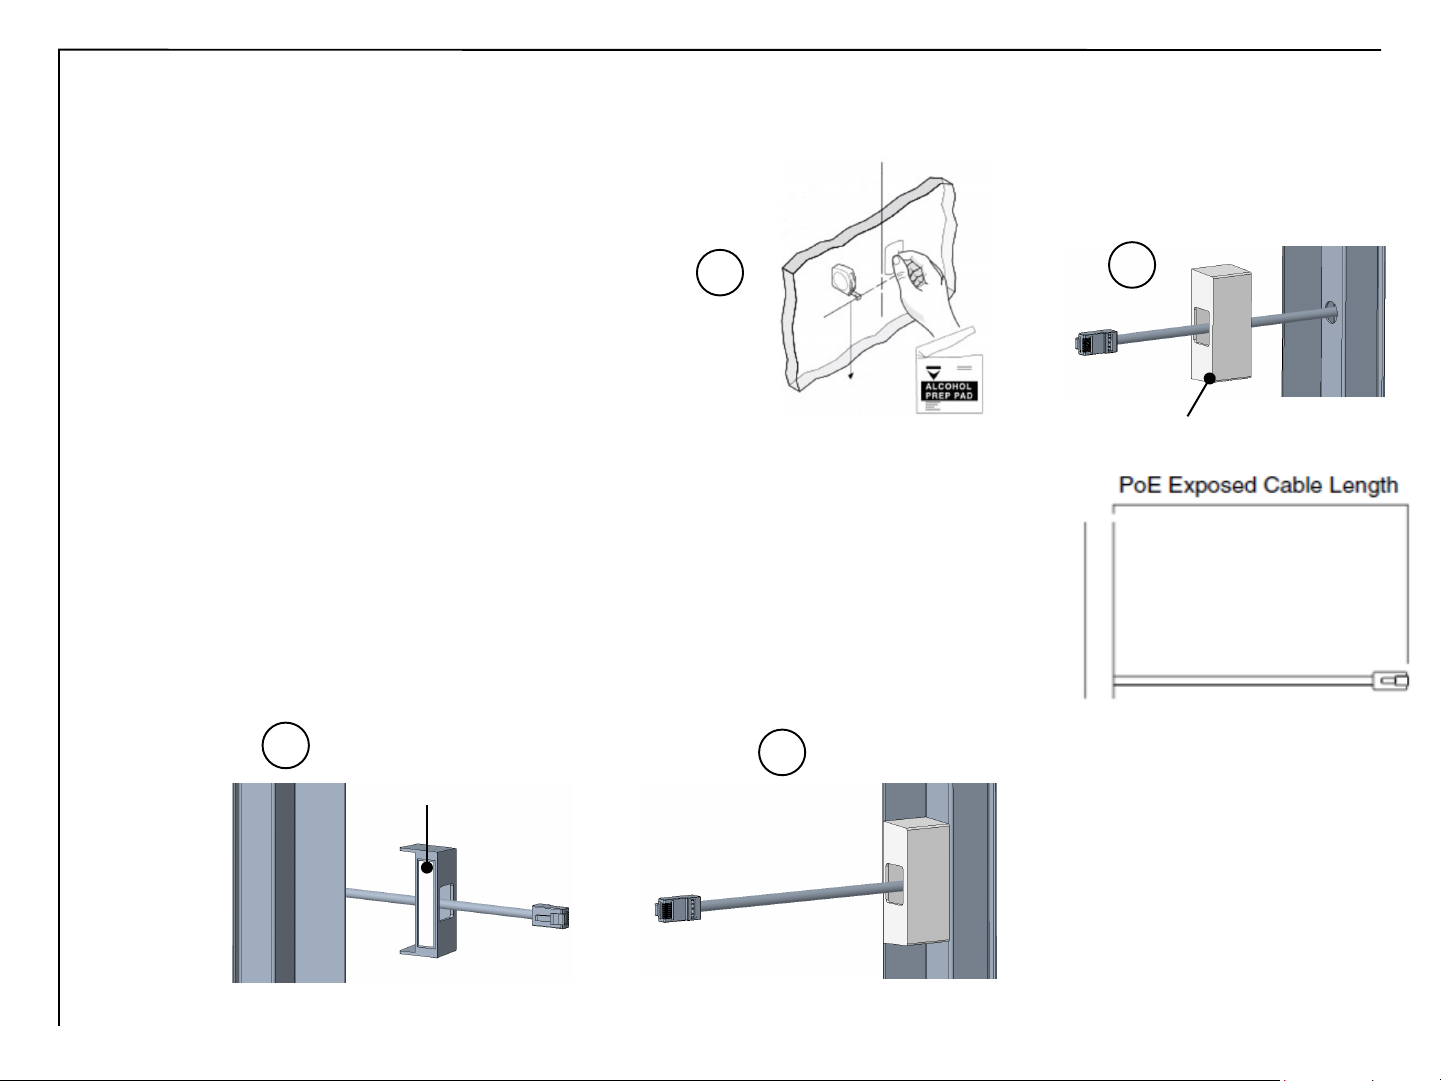
2. Thoroughly clean an area at least as large as the
mounting bracket using the alcohol wipe provided. Allow
to completely dry (approximately 20 seconds) before
attaching mount bracket. Removal of any vinyl applique is
required, vinyl must be cut to a 3-3/8” x 7-1/4” (8.5cm x
18.5cm) rectangle. Glass must be clean, free of any
residue and dry from any previous application used.
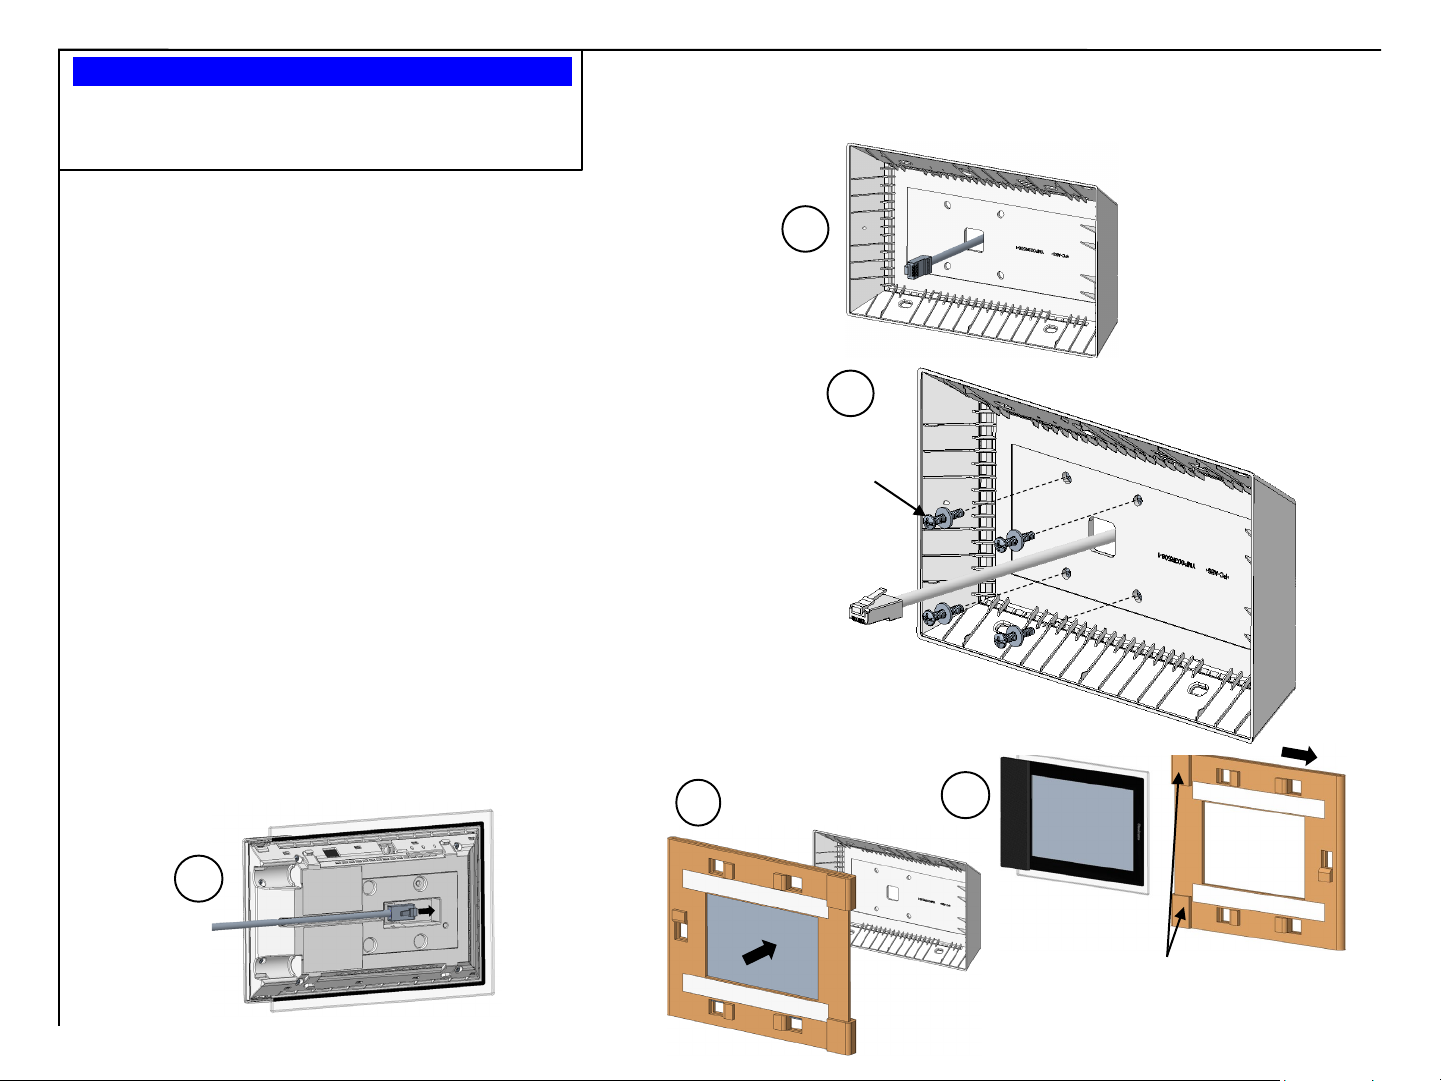
3. Route the PoE cable through the glass mounting bracket.
See Table 1for correct exposed length
4. Peel the backing film from the adhesive mounting strips
on the back of the glass mounting bracket.Ensuring the
glass mounting bracket is level, press the glass mounting
bracket onto glass.Hold even pressure for at least 15
seconds.
5. Slide PoE cable shroud over PoE cable and position
between the glass mounting bracket and the glass frame.
The PoE cable shroud should extend no more than a½”
(12mm) into the mount.
6. Plug the PoE cable into the back of the RoomWizard.
7. Install the RoomWizard module into the glass mount
bracket.
8. Peel or cut the tabs on the protective cover, then slide to
remove the protective cover.
RoomWizard©Mounting Kits
Retrofit Installation Instructions
GLASS
MOUNT
BRACKET
7
8
Page 8 of 22
Peel or cut the tabs on the protective cover
PoE CABLE
GLASS
MOUNT
BRACKET
5
PoE CABLE
COVER
REMOVE ADHESIVE
BACKING FILM FROM
ADHESIVE STRIP
6
4
52”
(132cm)
TO FLOOR