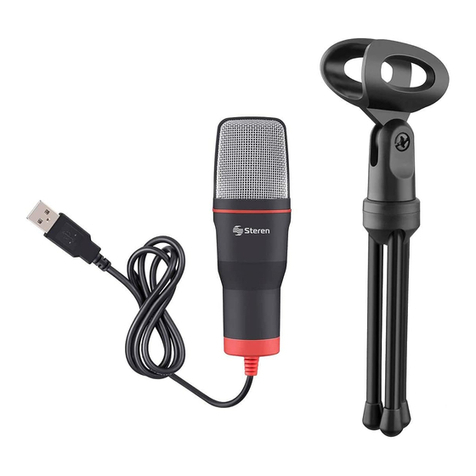
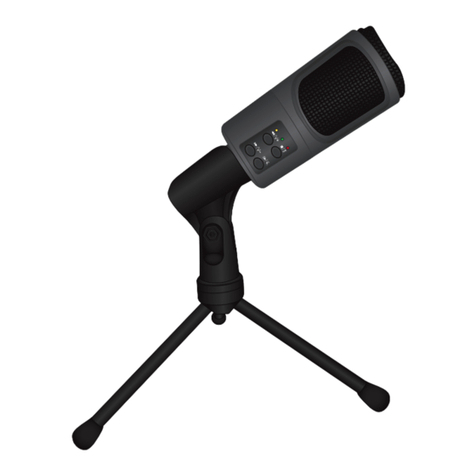
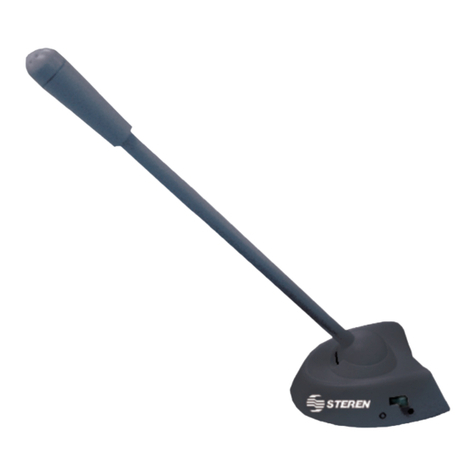
Steren COM-080 User manual

Product / Producto: DESKTOP
MICROPHONE WITH E-MAIL
FUNCTION / MICRÓFONO USB PARA
GENERAR ARCHIVOS DE AUDIO
Model / Modelo: COM-080
Brand / Marca: Steren
CONDICIONES
1. Para hacer efectiva esta garantía se requiere: La presentación de esta póliza y del producto, en el lugar en donde fue adquirido o en ELECTRONICA STEREN S.A. DE C.V.
2. ELECTRONICA STEREN S.A. DE C.V. se compromete a reparar el producto en caso de estar defectuoso sin ningún cargo al consumidor.
3. El tiempo de reparación en ningún caso será mayor a 30 días contados a partir de la recepción del producto en cualquiera de los sitios en donde pueda hacerse efectiva la
garantía.
4. El lugar donde puede adquirir partes, componentes, consumibles y accesorios, así como hacer válida esta garantía es: En cualquiera de las direcciones arriba mencionadas.
ESTA GARANTIA NO ES VALIDA EN LOS SIGUIENTES CASOS:
1. Cuando el producto ha sido utilizado en condiciones distintas a las normales.
2. Cuando el producto no ha sido operado de acuerdo con el instructivo de uso.
3. Cuando el producto ha sido alterado o reparado por personas no autorizadas por ELECTRONICA STEREN S.A. DE C.V.
Nota: El consumidor podrá solicitar que se haga efectiva la garantía ante la propia casa comercial, donde adquirió el producto. Si la presente garantía se extraviara, el
consumidor puede recurrir a su proovedor para que le expida otra póliza de garantía, previa presentación de la nota de compra o factura respectiva.
DATOS DEL DISTRIBUIDOR
DISTRIBUTION / NOMBRE / DISTRIBUIDOR:
ADDRESS / DOMICILIO:
PRODUCT / PRODUCTO: BRAND / MARCA:
MODEL / MODELO: SERIAL NUMBER / No. DE SERIE:
DATE OF DELIVERY / FECHA DE ENTREGA:
Call Center / Centro de Atención a Clientes
del Interior 01 800 500 9000
Mexico City / Cd. de México: 53 54 22 90
Warranty
CONDITIONS:
1. This warranty card with all the required information, the invoice or purchase ticket, the packing or package, must be presented with the product when warranty
service is required.
2. If product hasn’t exceed warranty period, the company will repair it free of charge including transportation charges.
3. The repairing time will not exceed 30 natural days, from the day the claim was received.
4. Steren sells parts, components, consumables and accessories to customer, as well as warranty service, at any of the following addresses:
THIS WARRANTY IS VOID ON THE NEXT CASES:
If the product has been damage by an accident, acts of God, mishandling, leaky batteries, failure to follow enclosed instructions, improper repair by unauthorized
personnel, improper safe keeping.
Notes:
a) The customer can also claim the warranty service on the purchase establishment.
b) If you lose the warranty card, we can reissue it just showing the invoice or purchase ticket.
Póliza de Garantía
This Steren product is guaranteed under
normal usage against defects in
workmanship and materials to the original
purchaser for one year from the date of
purchase.
Garantiza este producto por el término de
un año en todas sus partes y mano de obra
contra cualquier defecto de fabricación y
funcionamiento, a partir de la fecha de
entrega.
V0706

INSTRUCTIVO DE USO DE MICRÓFONO USB PARA GENERAR
ARCHIVOS DE AUDIO
Modelo: COM-080
Marca: Steren
Antes de utilizar su nuevo Micrófono USB lea este instructivo para
evitar cualquier mal funcionamiento. Guárdelo para futuras
referencias.
La forma más fácil y rápida de grabar y enviar mensajes de voz, música o
cualquier otra grabación de audio por correo electrónico o simplemente
guardarlos para usarlos posteriormente. Su nuevo equipo le permite
grabar los archivos mediante el toque de un botón y automáticamente los
adjuntará en un mensaje de correo electrónico. Así mismo, puede utilizar
el micrófono para conversaciones a través de programas de comunicación
y programas de reconocimiento de voz. Se conecta a través de un puerto
USB.
IMPORTANTE
Siempre utilice un paño suave, limpio y seco para limpiar el equipo.
No intente abrir el equipo, puede ocasionar malfuncionamiento y
anulación de la garantía.
No use ni almacene este equipo en lugares donde existan goteras o
salpicaduras de agua.
No lo exponga a fuentes de calor ni directamente a los rayos del sol.
REQUERIMIENTOS DE SISTEMA
1 puerto USB 1.1 o 2.0 disponible
Compatible con Windows 98, Windows ME, Windows 2000 y Windows XP.
CONTROLES
1.- Micrófono
2.- Regulador de intensidad
3.- Mensajes de voz
4.- Mensajes de correo electrónico
5.- Audífonos
INSTRUCTION MANUAL FOR DESKTOP MICROPHONE WITH E-MAIL
FUNCTION
Model: COM-080
Brand: Steren
Before using your new USB Desktop Microphone, please read this
instruction manual to prevent any damage. Put it away in a safe place
for future references.
The easiest and fastest way to record and send voice messages, music or
any other sound recordings by e-mail or if you want only save the files to
use them later. Your new equipment allows you to record the files pressing
only one button and automatically attach the message into a new e-mail
message, ready to send. Also, you can use the microphone to chatting
and for voice recognizer software.
Plug through the USB port.
IMPORTANT
Clean only with a soft, dry cloth.
Do not try to open the equipment, may cause malfunction and warranty
repeal.
Do not use or store the equipment near wet places.
Do not expose to heat sources or directly to sunlight.
SYSTEM REQUIREMENTS
1 available USB port (1.1 or 2.0)
Compatible with Windows 98, Windows ME, Windows 2000 and Windows
XP.
CONTROLS
1.- Microphone
2.- Intensity regulator
3.- Voice messages
4.- E-mail messages
5.- Earphones

INSTALACIÓN DEL SOFTWARE
1.- Inserte el disco de instalación en su computadora.
2.- Automáticamente se ejecuta el programa de instalación, de no ser así
ubique el archivo EMIC4all setup, y ejecútelo.
3.- Seleccione la opción Emic-S y presione Next para continuar.
4.- En las siguientes ventanas, presione Next para continuar (Fig. 1, 2 y 3)
5.- Comenzará la instalación de los drivers. El sistema le solicitará que
conecte el micrófono en un puerto USB. Presione OK para continuar
(Fig. 4).
6.- Si cuenta con Windows XP, es posible que aparezca una ventana de
advertencia, presione Next para seguir con la instalación (Fig. 5).
7.- Una vez finalizada la instalación, será necesario reiniciar la
computadora, cierre todos los programas activos y seleccione Yes, I want
to restart my computer now. Si no desea reiniciar en ese momento,
seleccione la otra opción. Presione Finish para confirmar la selección
(Fig. 6).
Nota:
Si aparece el asistente de nuevo hardware de Windows, seleccione la
opción de cancelar.
8.- Cuando haya reiniciado la computadora, aparecerá un mensaje de
configuración. Asegúrese de que el micrófono esté correctamente
conectado y cierre todos los programas de reproducción o grabación de
audio. Presione Next para continuar (Fig. 7).
SOFTWARE INSTALLATION
1.- Place the CD in your drive.
2.- Locates EMIC4all setup.exe file and run it.
3.- Choose Emic-S option, then press Next to continue.
4.- Press next to continue the installation (Fig. 1, 2 & 3) in the next
windows.
5.- The driver installation begins. Plug the device into the USB port when
the computer request. Press OK to continue (Fig. 4).
6.- If you use Windows XP, probably appears a warning window, press
Next to continue with the installation (Fig. 5).
7.- Once the installation finished, you must to restart the computer, close
all the active programs and choose Yes, I want to restart my computer
now. If you don’t want to restart the computer at that moment, choose the
other option. Press Finish to confirm the selection (Fig. 6).
Note:
If Found New Hardware Wizard appears on screen, choose Cancel
option.
8.- Once you have restarted the computer, a configuration message
appears. Make sure to connect the microphone and close all the audio
programs. Press Next to continue (Fig. 7).
Fig. 1 Fig. 2 Fig. 3
Fig. 4 Fig. 5 Fig. 6

9.- Asegúrese de conectar un par de bocinas o un par de audífonos
(audífonos no incluidos) en la entrada correspondiente del equipo y
presione el botón Click To Test, escuchará un bip. Utilice la barra de
Ajuste de Salida de Audio (Output Sound Volume) para graduar el nivel de
volumen de salida (Fig. 8) Si escucha el sonido, seleccione Yes, I can
hear the test sound y presione Next para continuar. Así mismo, si desea
seleccionar este equipo como reproductor de sonidos predeterminado,
presione el botón Set playback device y seleccione USB Audio CODEC.
Presione Aceptar para guardar los cambios y Next para continuar.
10.- Comience a hablar a una distancia entre 8 y 12 centímetros del
micrófono y revise que el indicador no muestra ninguna marca amarilla, de
ser así, aléjese un poco o cambie el nivel de sensibilidad, utilizando el
regulador de intensidad. Presione Next para continuar (Fig. 9).
11.- Presione los botones que se localizan en la base del micrófono.
Cuando los presione, se encenderán en la pantalla de la computadora
(Fig. 10). Presione finalizar para concluir la configuración. Ahora estará
listo para comenzar a utilizar el micrófono.
COMO UTILIZAR EL MICRÓFONO
En la barra de tareas aparece un ícono de micrófono. Presione encima de
él, utilizando el botón derecho del ratón (Fig. 11). Seleccione Open. Se
abrirá el programa de uso del micrófono.
9.- Make sure to plug a couple of speakers or a couple of earphones
(earphones are not included on the package) into the corresponding input
jack in the equipment, then press Click to Test button, you will hear a beep.
Use the output sound volume bar to set the volume level (Fig. 8).If you
hear the sound, choose Yes, I can hear the sound test, then press Next to
continue. Also, if you want to choose this equipment as predetermined
playback device, press Set playback device button and click on USB Audio
Codec. Press Accept to store the changes. Then press Next to continue.
10.- Place the microphone between 8 and 12 centimetres from the mouth
and start to talk. Check the indicator, and if you don’t see any yellow bar,
the equipment is correctly installed, otherwise, talk a little bit far or change
the sensitivity level, using the Intensity regulator. Press next to continue
(Fig. 9).
11.- Press the buttons located on the base of the microphone. When you
press one of them, automatically lights on the screen (Fig. 10). Press
Finish to conclude the configuration. Now you are ready to use the
microphone.
HOW TO USE THE MICROPHONE
On the task bar appear a microphone icon. Using the mouse, press on the
icon with the right button. Choose Open, then the microphone software
displays on the screen (Fig. 11).
Fig. 7 Fig. 8 Fig. 9
Fig. 10
Fig. 11

OPCIÓN “GENERAL”
1.- Ubicación de guardado (Save recorded files to)
Seleccione la carpeta donde quiere guardar el archivo de voz o música.
Para localizar la carpeta deseada, presione el botón de Buscar (Browse).
2.- Formato de grabado
Cuenta con cuatro opciones de formato de grabación: WA, MP3, HQ Wav
y HQ MP3. El formato WAV cuenta con buena calidad de sonido, pero el
tamaño del archivo generado es grande. Adiferencia del formato WAV, el
formato MP3, cuenta con buena calidad de sonido, pero el archivo final es
de un tamaño muy pequeño, ideal para envíos por correo electrónico. Los
formatos HQ Wav y HQ MP3 tienen mayor calidad pero menor
compresión, por lo que ocupan mayor espacio.
3.- Hold Down
Seleccione esta opción para realizar una grabación siempre y cuando
tenga presionado el botón correspondiente. Una vez que lo suelte, la
grabación terminará automáticamente.
4.- Click
Utilice esta opción para comenzar la grabación presionando sólo una vez
el botón deseado. En pantalla aparecerá el mensaje Recording. Para
detener la grabación, presione el botón una vez más (el mismo botón que
presionó para comenzar la grabación).
5.- Editor de Sonido (Use sound editor)
Esta opción le permite abrir un sencillo editor de sonido una vez que el
archivo de voz se generó. Aquí podrá poner marcas para edición, así
como abrir y guardar archivos MP3 y Wav generados en el programa
principal.
Si selecciona esta opción en el programa principal, cada vez que grabe un
archivo se abrirá el editor de sonido antes de realizar la función final
(guardar, adjuntar, etc.).
6.- Grabar (Rec)
Seleccione esta opción si solamente desea grabar un archivo de voz.
Para utilizar esta opción, presione el botón de e-mail o mensaje de voz
una vez o manténgalo presionado el tiempo que desee grabar
(dependiendo de la opción seleccionada Hold Down o Click), cuando
termine la grabación, el archivo se guardará automáticamente en la
ubicación que designó en el punto número 1.
7.- Grabar y adjuntar (Rec and attach)
Si desea enviar un mensaje de voz por correo electrónico, utilice esta
opción. Presione el botón de e-mail o mensaje de voz una vez o
manténgalo presionado el tiempo que desee grabar (dependiendo de la
opción seleccionada Hold Down o Click), una vez que termine la
grabación se adjuntará el archivo generado en un correo electrónico. Si
cuenta con Directorio Multimedia (Multimedia Address) se abrirá una
nueva ventana donde podrá seleccionar el destinatario.
8.- Grabar y guardar (Rec and save to file)
Esta opción le permite grabar un mensaje de voz y guardar el archivo final
en su computadora. Presione el botón de e-mail o de mensaje de voz una
vez o manténgalo presionado el tiempo que desee grabar (dependiendo
de la opción seleccionada Hold Down o Click), la grabación comenzara.
Cuando finalice la grabación, aparecerá una ventana nueva en donde
deberá asignar un nombre de archivo. Presione Guardar para almacenar
el archivo en la computadora.
OPTION “GENERAL”
1.- Save recorded files to
Choose the folder where you want to save the voice file or music file. To
locates the desired folder, press Browse.
2.- Record file format
When you want to record a file, you have four formats to choose: WAV,
MP3, HQ Wav and HQ MP3. Wav format has a good sound quality, but the
file size is big. The MP3 format has a good sound quality, but the final file
size is smaller than WAV, great for attached messages on e-mail. The HQ
Wav and HQ MP3 formats have best quality but less compression, so the
final files sizes are bigger then others.
3.- Hold down
Choose this option to make a record pressing and holding the
corresponding button. Once you release it, the recording will finish
automatically.
4.- Click
Use this option to start recording pressing just once the desired button. On
screen displays the message Recording. To stop it, press the button once
again (the same button that you pressed to begin recording).
5.- Sound Editor
This option allows you to edit your recorded messages with a simple
program. In this software you can put marks to edit the message, and
open and save MP3 and WAV files which are generated in the main
software.
If you choose this option in the main program, each time you record a file,
automatically the sound editor will open before make the final function
(save, attach, etc.).
6.- Rec
Choose this option if you only want to record a voice message. To use this
option, press e-mail button or message voice button on the microphone
base. Just click once or press and hold the button for the desired time to
record (depending of the selected option Hold Down or Click), when the
record finished, the final file will be stored automatically in the location that
you designated in the point 1.
7.- Rec and attach
If you want to send a voice message via e-mail, use this option. Just click
once or press and hold the button for the desired time to record
(depending of the selected option Hold Down or Click), when the recording
finish. automatically the software will load the e-mail service and attach the
final file into a new e-mail message. If you have a Multimedia Address) a
new window will display where you can select the recipient.
8.- Rec and save to file
This option allows you to record a voice message or audio file and save
the final file on the computer. Just click once or press and hold the button
for the desired time to record (depending of the selected option Hold Down
or Click). When your record finish, a new window displays, type a file name
and click on Save to store the file in the computer.

OPCIÓN “GENERAL” (Cont.)
9.- Grabar y transmitir (Rec and Upload)
Utilice esta función para grabar un mensaje y generar un enlace a una
página de Internet, de esta forma Ud. puede enviar el enlace a sus
conocidos y ellos podrán acceder al mensaje vía Internet. Presione el
botón de mensaje de voz o correo electrónico una vez o manténgalo
presionado el tiempo que desee grabar (dependiendo de la opción
seleccionada Hold Down o Click), una vez que termine la grabación, se
generará un enlace de Internet que posteriormente podrá copiar, así como
también se generará un archivo y se guardará en la carpeta
correspondiente. Para conocer cual es el enlace de Internet, acuda a la
opción Recordings, seleccione el archivo que desee y copie el link. Si
desea más información consulte la sección de Recordings.
10.- Ejecución automática
Seleccione esta opción, si desea que el programa de uso del micrófono se
ejecute automáticamente al iniciar Windows.
11.- Aplicar (Apply)
Cada vez que realice un cambio entre las diferentes opciones de
grabación, presione el botón de Aplicar (Apply) para realizar el cambio.
OPCIÓN “ADVANCED”
1.- Codificador MP3 externo (Use external MP3 encoder)
Seleccione esta opción si cuenta con un codificador MP3 externo, en caso
de ser así tendrá que introducir la ubicación del archivo que desea utilizar.
Si desea utilizar el codificador con el que cuenta su equipo, deje esta
opción en blanco (recomendado).
2.- Nombre de archivo (Prefix)
Introduzca el nombre con el que desea que sus archivos grabados de voz
aparezcan guardados en su computadora o en un correo electrónico.
3.- Fecha – hora / Numeración (Date/Time based / Enumerated)
Estas opciones forman parte del nombre de su archivo. Seleccione Fecha-
hora (Date/Time based) si desea que aparezca la fecha y la hora en que
se generó el archivo. Si desea una numeración continua, seleccione la
opción Numeración (Enumerated).
4.- Tiempo de grabado (segundos)
Ajuste el tiempo mínimo de grabación para generar un archivo.
5.- Libreta de direcciones multimedia (Use multimedia address book)
Seleccione esta opción si desea utilizar la agenda de direcciones que se
anexa con el software del equipo. Para poder utilizar esta opción es
necesario que anteriormente haya creado una agenda de direcciones
(consulte la sección de Libreta de Direcciones). Una vez que ha
seleccionado la opción de la agenda, cuando cree un archivo de audio y
se desee anexar a un correo electrónico, se abrirá la agenda y podrá
seleccionar una dirección electrónica.
Nota:
Es necesario realizar ajustes de configuración en la libreta de direcciones,
para poder establecer los parámetros de su correo electrónico (Consulte
la sección de Libreta de Direcciones Multimedia)
OPTION “GENERAL” (Cont.)
9.- Rec and Upload
Use this function to record a message and generate an Internet link, in this
way you can send the link to your friends and then, they can use the link in
every Internet navigator Just click once or press and hold the button for
the desired time to record (depending of the selected option Hold Down or
Click), once you finish a message, the software will generate an Internet
link, later you can copy and paste the link, also you can find the recorded
file in the corresponding folder. To know what is the Internet link, click on
Recording option, choose the desired file and copy the link, If you want
more information, refers to Recordings section.
10.- Launch at Windows StartUp
Choose this option, if you want to launch the program automatically when
you start Windows.
11.- Apply
Every time you change the options in the configuration, press this button
(Apply) to make the change.
OPTION “ADVANCED”
1.- External MP3 encoder
If you have some experience with external MP3 encoders, choose this
option. If you want to use the default encoder, leave this option blank.
2.- File name
Enter the file name to identify the generated music or voice messages
files. In this way you can find them on the computer.
3.- Date - Time based / Enumerated
This options are part of the filename. Choose Date / Time if you want the
date on the final file name. If you want progressive numbers, choose
Enumerated.
4.- Recording time (seconds)
Set the minimum recording time to generate an audio file.
5.- Multimedia address book
Choose this option if you want to use the address book included in the
software. To use this option it is necessary that previously you have
created an address book (please refers to Address book Section). Once
you have selected the address book option , when you create an audio file
and want to attach to an e-mail, automatically opens the address book and
you can select one of the stored e-mail addresses.
Note:
It is necessary to make some changes in the configuration, to establish the
parameters for your e-mail (Refers to Multimedia Address Book section).

OPCIÓN “EMIC4ALL”
Esta opción le permite registrarse en un servidor de Internet a fin de
generar una liga a sus archivos de voz creados y de esa forma las
personas podrán acceder a esos archivos a través de Internet.
Deberá introducir un nombre de usuario (Login) y una contraseña
(Password).
Algunas veces es necesario introducir el número de serie del equipo
durante la instalación.
OPCIÓN “RECORDINGS”
1.- Archivos grabados (Recorded files)
Muestra el nombre de las grabaciones realizadas.
Para seleccionar un archivo, presione sobre el, aparecerá una sombra en
el nombre del archivo.
2.- Adjuntar archivos (Attach selected files)
Adjunta los archivos seleccionados a un mensaje de correo electrónico.
Presione este botón y automáticamente abrirá su servicio de correo
electrónico predeterminado.
3.- Edición (Edit)
Seleccione esta opción si desea editar un archivo de voz anteriormente
grabado.
4.- Borrar (Delete selected files)
Borra los archivos seleccionados.
5.- Copiar enlace (Copy Link)
Utilice esta opción para copiar el enlace de Internet generado en un
archivo (ver opción Grabar y Transferir). Presione el botón Copy Link y
cópielo en una hoja en blanco de Word, posteriormente copie el enlace en
una ventana de su navegador de Internet o acceda directamente
presionando sobre él en la página de Word. Podrá acceder al archivo y
podrá escucharlo así como copiarlo a su computadora. Este enlace podrá
ser utilizado en cualquier computadora con acceso a Internet, sólo envíe
el enlace a las personas que deseen escucharlo.
6.- Subir archivo (Upload)
Permite hacer una copia de un mensaje en el servidor previamente
configurado de Internet.
OPTION “ EMIC4ALL”
This option allows you to register in an Internet server, so you can
generate links to your recorded messages and then, send to the people
you want to hear your messages, through the Internet.
You must type a Login and a Password.
Sometimes it is necessary to type device serial number while you are
installing the software.
OPTION: “RECORDINGS”
1.- Recorded files
Shows the recorded file name.
To choose a file, press on it, then appears a shadow underneath the file
name.
2.- Attach selected files
Attach the selected files into a new e-mail message. Press this button and
automatically loads the predetermined e-mail service.
3.- Edit
Choose this option if you want to edit a stored voice message.
4.- Delete
Delete selected files.
5.- Copy Link
Use this option to copy the Internet link, generated in an audio file (see
Rec and Upload option). Press Copy Link button and then copy into a
white Word page, later copy the only the link into your Internet navigator
window or access directly just pressing on the link in the Word page. You
can get access to the file and you can hear it, also you can download to
the computer. This link can be used in any computer with Internet access,
just send the link to your friends.
6.- Upload
Allows you to make a copy of a message into the server, previously
configured.

OPCIÓN “RECORDINGS” (Cont.)
7.- Sincronización (Sync)
Presione este botón para sincronizar los archivos seleccionados en el
servidor de Internet.
8.- Borrar enlace (Delete upload)
Los archivos generados para transmitir vía Internet (Rec and upload)
contienen un enlace con el cual podrá acceder a ellos a través de Internet.
Mediante esta opción, podrá borrar el enlace de Internet, pero el mensaje
no se borrará.
9.- Actualizar (Refresh)
Permite actualizar la condición de un archivo.
OPCIONES GENERALES
OK
Utiliza los parámetros previamente establecidos y minimiza el programa.
Cancelar (Cancel)
Cancela las opciones modificadas y minimiza la ventana del programa.
Aplicar (Apply)
Cada vez que realice un cambio entre las diferentes opciones de
grabación, presione el botón de Aplicar (Apply) para realizar el cambio.
Ayuda (Help)
Despliega una ventana nueva con información de ayuda del programa
(información disponible sólo en inglés).
LIBRETA DE DIRECCIONES MULTIMEDIA
El software suministrado cuenta con una opción que le permite guardar
direcciones de correo electrónico y posteriormente seleccionarlas para
anexarlas en los archivos generados específicamente para adjuntarlos a
un correo electrónico.
1.- En la opción Advanced del programa principal, seleccione la opción
Use multimedia address book.
2.- Presione el botón de Edit. La primera vez se mostrará en pantalla
Unable to Open multimedia address book. Presione Aceptar para
continuar.
3.- En la siguiente ventana, introduzca un nombre de archivo para
identificar su libreta de direcciones y presione Abrir para continuar.
4.- En pantalla se mostrará el editor de contactos. Acontinuación se
describen cada una de las funciones del editor.
a) Ubicación de la libreta indica el lugar donde se creará la libreta de
direcciones
b) Contactos (Contacts) muestra la lista de los contactos
almacenados en su libreta de direcciones
c) Guardar (Save) permite almacenar contactos nuevos así
como guardarlos cambios que se realicen a
contactos previamente guardados
d) Borrar (Delete) permite borrar los contactos seleccionados
e) Predeterminado (Default) cuando un contacto cuenta con diferentes
correos electrónicos, pero normalmente
utiliza sólo uno, se recomienda utilizar esta
opción para marcar el correo electrónico
como predeterminado
f) Visualizar (Preview) se muestra en pantalla una visualización de
los contactos guardados
g) Selección de imagen permite seleccionar y agregar una imagen
preestablecida para identificar a cada uno
de los contactos
h) Buscar (Browse) permite agregar sus propias imágenes en
formato, bmp, gif o jpg
i) Remover (Remove) utilice esta opción para borrar las imágenes
que no desee utilizar en la libreta de
direcciones
j) Buscar sonido (Browse) permite agregar un tono o melodía en
formato MP3 a un contacto de la libreta de
direcciones
OPTION: “RECORDINGS” (Cont.)
7.- Sync
Click this button to synchronize all selected messages, in the server.
8.- Delete upload
All the generated files to be transmitted via Internet (Rec and Upload)
contains a link. With this link you can get access to them through Internet
using any computer. With this option you can delete the Internet link, but
the message won’t delete.
9.- Refresh
Use Refresh button to update status of the selected records.
GENERAL OPTIONS
OK
Store the changes and minimize the program window.
Cancel
This option cancel all the changes and minimize the program window.
Apply
Every time you make a change in the different options of the software, you
must press Apply button to activate the changes.
Help
A new window displays on the screen. Here you can find help information
about the software (this information is available only in English).
MULTIMEDIA ADDRESS BOOK
Use this option to store e-mail addresses into an address book, then you
can use them when you need to attach an audio message into an e-mail.
In this way you can simplify the process to choose an e-mail address.
1.- In the Advanced option (main program), choose Use Multimedia
Address book option.
2.- Press Edit button. First time you can see a message: Unable to Open
Multimedia Address Book. Press Accept to continue.
3.- In the next window, type a file name to identify the address book and
press Open to continue.
4.- In the screen, you can see the Editor. In the next lines, you’ll see a
small description of each one of the editor functions.
a) Path to address book file indicates the place where you want to
create the address book
b) Contacts shows the stored contact list in the address
book
c) Save allows you to store new contacts or store
changes made in
the saved contacts previously
d) Delete allows you to delete the select contacts
e) Default when a contact has different e-mails, but
normally just use one, we recommend to
use this option to mark an email as
predetermined
f) Preview with this option you can see a
visualization of the stored contacts
g) Image selector allows you to choose and add a
pre-established image, to
identify each one of the contacts
in the address book
h) Browse allows you to add your own
images in bmp, gif or jpg format
i) Remove use this option to delete the
images that you don’t want to
use anymore
j) Browse allows you to search and add tones or
melodies in MP3 format to a specific contact
in the address book

k) Reproducir (Play) una vez que haya seleccionado un archivo
de audio, presione este botón para
comenzar su reproducción
l) Remover (Remove) utilice esta opción para borrar el archivo de
audio de un contacto
m) Nombre (Name) permite introducir el nombre de un contacto
nuevo o muestra el nombre de un contacto
previamente guardado
n) Correo electrónico permite introducir el correo electrónico de
un contacto (E-mail) nuevo o muestra el
correo electrónico de un contacto
previamente guardado
o) Teléfono (Phone) permite introducir el teléfono de un contacto
nuevo o muestra el número telefónico de un
contacto previamente guardado
p) Ayuda (Help) muestra información básica de ayuda de la
libreta de direcciones
q) Acerca de (About) muestra información técnica acerca de la
versión del editor de direcciones
r) Cerrar (Close) cierra el editor de direcciones
Nota:
Cada vez que realice un cambio o agregue un contacto nuevo es
necesario que presione el botón de Guardar (Save), en caso de que
realice un cambio y salga del programa, un mensaje le advertirá si desea
guardar o perder los cambios realizados.
k) Play once you have selected an audio file, press
this button start to play it
l) Remove use this option to delete the audio file from a
contact
m) Name allows you to enter the name of a new
contact or shows the name of a contact
previously stored
n) E-mail allows you to enter the e-mail of a new
contact or shows the e-mail of a contact
previously stored
o) Phone allows you to enter the phone number of a
new contact or shows the phone number of
a contact previously stored
p) Help shows basic help information about address
book
q) About displays technical information about
versions of the Address Book Editor
r) Close close the address book editor
Note:
Every time you make a change or add a new contact it is necessary that
you click Save button, in case that you made a change and leave the
program, a message will warning you about if you want to Save or not the
changes.
a
b
c
d
e
f
g
h
i
j
k
l
m
n
o
pq r

CONFIGURACIÓN DE CORREO ELECTRÓNICO EN LA LIBRETA DE
DIRECCIONES
Para poder utilizar la libreta de direcciones correctamente es necesario
que introduzca determinados parámetros tales como opciones SMTP,
usuario, correo electrónico, contraseña, entre otros. Pregunte a su
proveedor de correo electrónico para conocer estos parámetros.
Para acceder a estas opciones, presione Inicio, Programas, Emic, Utilities,
Multimedia Address Book.
Para configurar las opciones de correo electrónico, presione Settings.
ESPECIFICACIONES
Entrada: 5V (a través de puerto USB)
Dimensiones: 120 x 145 x 275 mm
Peso: 111 g
Nota:
El diseño del producto y las especificaciones pueden cambiar sin previo
aviso.
CONFIGURING E-MAIL ACCOUNTS IN THE ADDRESS BOOK
To use the address book correctly you must to enter some specific
parameters such as SMTP, user name, e-mail address, password, among
others. Ask to your e-mail provider to know this parameters.
To enter to this options, click on Start, Programs, Emic, Utilities,
Multimedia Address Book.
To set this option, click on Settings.
SPECIFICATIONS
Input: 5V (through USB port)
Dimensions: 4,7 x 5,7 x 10,8in
Weight: 111g
Note:
Product design and specifications are subject to change, without notice.
Table of contents
Other Steren Microphone manuals

Steren
Steren MIC-350 User manual

Steren
Steren MIC-550 User manual

Steren
Steren MIC-555 User manual

Steren
Steren NIC-060 User manual

Steren
Steren MIC-530 User manual

Steren
Steren WR-102D User manual

Steren
Steren MIC-PG48 User manual

Steren
Steren WR-2050 UHF User manual

Steren
Steren MIC-215 User manual

Steren
Steren WR-810 UHF User manual

Steren
Steren WR-102M User manual

Steren
Steren WR-8000UFH User manual

Steren
Steren MIC-280 User manual

Steren
Steren WR-803UHF User manual

Steren
Steren WR-805UHF User manual

Steren
Steren WR-058 User manual

Steren
Steren MIC-1058 User manual

Steren
Steren WR-810 User manual

Steren
Steren WE-202 User manual

Steren
Steren elite MIC-520 User manual