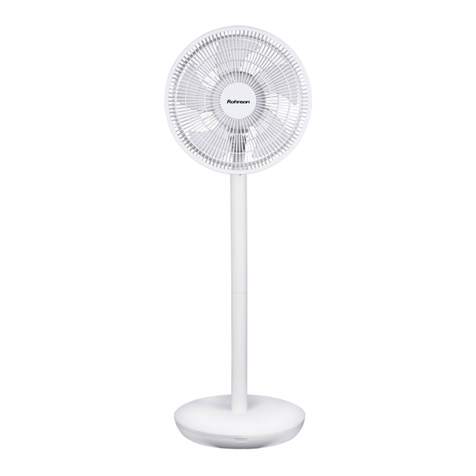
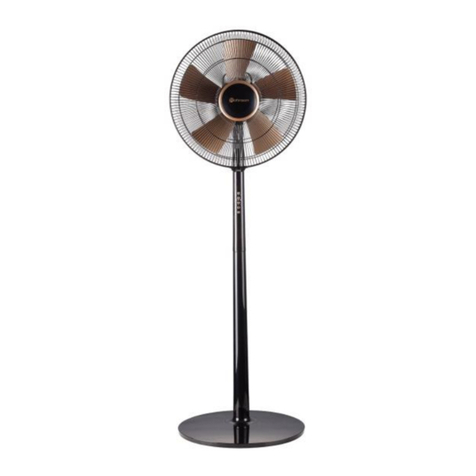
Rohnson R-8600 User manual

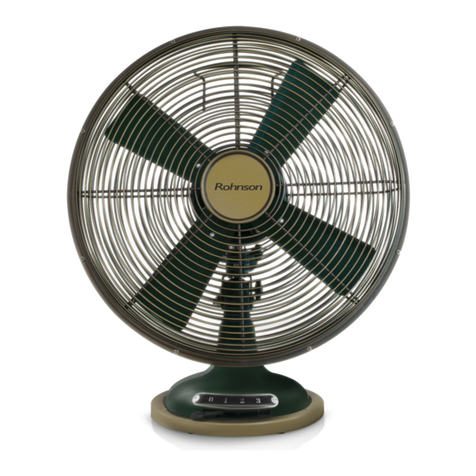
Stand fan with double blade and remote control
Model: R-8600
Instruction Manual
** Scan with your phone or QR reader to find out more about your machine
Read this Instruction Manual carefully before assembling or operating the
appliance and keep it for future reference.

SAFETY WARNING
•This appliance can be used by children aged from 8 years and above and persons with
reduced physical, sensory or mental capabilities or lack of experience and knowledge if
they have been given supervision or instruction concerning use of the appliance in a safe
way and understand the hazards involved.
•Children shall not play with the appliance.
•Cleaning and user maintenance shall not be made by children without supervision.
•If the supply cord is damaged, it must be replaced by the manufacturer, its service agent
or similarly qualified persons in order to avoid a hazard.
•To operate this device safely, the user must have read and understood these instructions
for use before using the device for the first time.
•Observe all safety instructions! Failure to do so may cause harm to you and others.
•Retain all instructions for use, and safety instructions for future reference.
•If you sell or pass the device on, you must also hand over these operating instructions.
•The device must only be used when it functions properly. If the product or part of the
product is defective, it must be taken out of operation and disposed of correctly.
•Never use the device in a room where there is a danger of explosion or in the vicinity of
flammable liquids or gases.
•Always ensure that a device which has been switched off cannot be restarted
unintentionally.
•Do not use devices with an on/off switch that does not function correctly.
•Keep children away from the device! Keep the device out of the way of children and other
unauthorized persons.
•Do not overload the device. Do not use the device for purposes for which it is not intended.
•Exercise caution and only work when in good condition: If you are tired, ill, if you have
ingested alcohol, medication, or illegal drugs, do not use the device, as you are not in a
condition to use it safely.
•This product is not intended to be used by persons (including children) or who are limited
in their physical, sensory or mental capacities or who lack experience and/or knowledge of
the product unless they are supervised, or have been instructed on how to use the product,
by a person responsible for their safety.
•Ensure that children are not able to play with the device.
•Always comply with all applicable domestic and international safety, health, and working
regulations.
PARTS DESCRIPTION
1. Front Grille
2. Guard ring
3. Safety screw
4. Locking clip
5. Secondary fan blades
6. Primary fan blades
7. Clamping nut
8. Rear grille
9. Motor shaft
10. Motor shaft pins
11. Front motor housing
12. Rear motor housing
13. Horizontal oscillation
mechanism
14. Vertical tilt mechanism
15. Digital display
16. Fan speed control dial
17. Control panel
18. Fan body securing
screw
19. Inner pole
20. Height adjustment
screw
21. Outer pole
22. Base plate
23. Base screw
24. Remote control
ASSEMBLY INSTRUCTIONS
The fan is packaged with its foundation and/or other parts unattached. You must attach
them before operating the fan.
WARNING: Never operate without its foundation and/or other parts attached. Do operate
the fan only in upright position; any other position could create a hazardous situation.

Assemble sequence of the foundation and other parts as follow:
1. Attach the base stand to the hole on the base.
Unscrew and remove the base fixing nut from the base stand if is tightened to the base
stand.
2. Position the base fixing nut on the other side of the base and firmly tighten it by turning
clockwise.
3. To disassembly, loosen the base fixing nut and detach the base stand from the base.
4. Loosen the fan head locking nut. Slightly increase the height of the extension tube as
described in section
Height adjustment. Attach the fan head to the extension tube of the base stand.
5.
Firmly tighten the extension tube locking nut by turning clockwise. To disassembly, loosen
the fan head
locking nut and detach the fan head from the extension tube.
Grill & Fan blade assembly
1. Put the rear guard on the adjustable head by inserting three holes on the rear guard to the three
pins on
the head. Firmly tighten the rear guard fixing nut by turning it clockwise.
2. Insert the big blade on the motor shaft with putting the attention of its correct position. The two
pins on
the motor shaft should match with two holes on the big blade holder.
3. Hold the big blade and firmly tighten the small blade to the motor shaft by turning it
anticlockwise.
Put the front guard on the rear guard. Make sure that each guide on the front guard is locked in the
outer
ring of the rear guard.
Close the plastic lock on the front blade. Firmly tighten the screw by turning it clockwise.
INSTRUCTIONS FOR USE

Before using the fan make sure that it is on a flat and stable surface.
Damage may occur if it is placed on an incline or decline.
Set all the switches to OFF position, then insert the plug directly into a standardAC
socket-outlet. Be sure plug fits tightly into outlet.
ON / Stand-By Button:
Press the ON button to start the unit. The unit will beep once and start to operate in at Low
speedsetting at the default speed of 18 in Normal Mode.
Again upon pressing this button the unit will be turned off and will remain in stand- by.
SWING Button:
Press the swing button and the fan head will oscillate horizontally through approximately
90˚angle in both the directions (Left-Right). .
Timer Button:
Turn the timer dial Press the timer button repeatedly to obtain the desired operating time.
(1 hour to 24 hours). Each time the button is pressed the time interval is incremented
upwards by 1hrs. The display panel will indicate timer value.
Timer ON Feature:
Select the time after which you want to operate the fan after the selected time is elapsed
the fan the unit will operate in normal mode at the speed of 8.
While the unit is in standby mode press the timer button once and the display will show up
the selected time in hours. Press the same timer button to select the desired time after
which you want the fan to start, the time can be selected from 1 to 18hrs. The fan will start
to operate once the selected time is elapsed.
Timer OFF Feature:
While the fan is operating press the timer button and the timer OFF indicator will illuminate
and the display will show up the selected time in hours.
Press the timer button to select the desired time after which you want the fan to stop, the
time can be selected from 1 to 24hrs. Once the selected time is reached the fan will turn
itself off and will remain in standby mode
Mode Button:
Press the mode button repeatedly to select the desired mode of operation. The fan can be
set to run in three different modes of operation: Normal,
Natural and Sleep. The icon corresponding to selected mode will appear on the display
panel.

Normal Mode:
Press the Mode button till the icon corresponding to the normal mode will glow on the
display panel.
The Fan will be set at the speed of 1 by default.
The Fan speed can be adjusted from 1 to 26 as per the requirements.
In this mode the fan will run at constant speed at which it is set
Natural Mode:
In this mode the fan will operate in a preset program which varies the speed of the fan
giving a natural breeze effect. Based on the fan speed the fan will operate in one of the
following modes.
The fan speed transitions automatically through a set range of fan speeds
depending on the already chosen fan speed to create a natural air flow.
High fan speed natural mode - Activates when the chosen fan speed is between fan
speeds 26 and 17. The fan speed will transition automatically in accordance with the below,
spending six seconds at each fan speed, and then the cycle will repeat.
26 (6s) > 22 (6s) > 18 (6s) > 14 (6s) > 18 (6s) >
22 (6s) > 26 (6s) > 22 (6s) > 18 (6s) > 14 (6s) >
10 (6s) > 14 (6s) > 18 (6s) > 22 (6s) > 18 (6s) >
14 (6s) > 10 (6s) > 6 (6s) > 10 (6s) > 14 (6s) > 18
(6s) > 22 (6s) > 26 (6s) > Repeat
Medium fan speed natural mode - Activates when the chosen fan speed is between fan
speeds 16 and 9.The fan speed will transition automatically in accordance with the below,
spending six seconds at each fan speed, and
then the cycle will repeat.
18 (6s) > 14 (6s) > 10 (6s) > 14 (6s) > 18 (6s) > 14
(6s) > 10 (6s) > 6 (6s) > 10 (6s) > 14 (6s) > 18 (6s)
> Repeat
Low fan speed natural mode - Activates when the chosen fan speed is between fan
speeds 8 and 1. The fan speed will transition automatically in accordance with the below
and then the cycle will repeat.
10 (10s) > 2 (30s) > 6 (10s) > 8 (10s) > 10 (10s) >
Repeat
Sleep mode:
The appliance transitions automatically to low fan speed natural mode in accordance with
the below sequences depending on the already chosen fan speed to reduce energy
consumption and noise level.
High fan speed sleep mode - Activates when the chosen fan speed is between fan speeds
26 and 17. The appliance will operate in high fan speed natural mode for 15 minutes, then

medium fan speed natural mode for 15 minutes, and then low fan speed natural mode until
the appliance is turned off.
Medium fan speed sleep mode - Activates when the chosen fan speed is between fan
speeds 16 and 9. The appliance will operate in medium fan speed natural mode for 15
minutes, and then low fan speed natural mode until the appliance is turned off .
Low fan speed sleep mode - Activates when the chosen fan speed is between fan speeds
8 and 1. The appliance will operate in low fan speed natural mode until the appliance is
turned off.
Note: The fan speed digits on the display will transition between the numbers 3, 2 and 1.
Respectively representing high, medium and low fan speed natural modes.
Control Panel
1. Timer button
2. Mode button
3. Oscillation button
4. Power button
Digital Display
1. Normal mode indicator light
2. Natural mode indicator light
3. Night mode indicator light
4. Fan speed digits
5. Hour digits
6. Timer indicator light
Note: After 30 seconds of inactivity the digital display will go into standby.
Remote Control
1. Power button
2. Up button
3. Timer button
4. Down button
5. Oscillation button
6. Mode button
7. Mute button

“” Up And Down Button (Remote Control Only)
Press the button + on the remote controller to increase fan speed. Press the button - on
the remote controller to decrease fan speed. 26 fan speeds available.
Note: Option only available in normal mode.
MAINTENANCE
1. Always remove the plug from the socket-outlet and allow the fan to stop acting before
clean the fan.
2. Clean the external surfaces of the fan with a soft damp (not dripping wet) cloth.
WARNING:
Do not immerse the fan in water.
Do not use any cleaning chemicals such as detergents and abrasives.
Do not allow the interior (special for the PCB) to get wet as this could create a
hazard.
3. When the unit is not in use, make sure that it is unplugged from the wall socket. To store
the fan, you may pack it in the original carton and store it in a cool and dry place until later
use.
4. In case of malfunction or doubt, do not try to repair the fan yourself, it may result in a fire
hazard or electric shock.
SPECIFICATIONS
MODEL NO
RATED VOLTAGE
RATED POWER
R-8600
220V-240V~50Hz/60Hz
DC motor 28W

IMPORTANT INFORMATION FOR CORRECT DISPOSAL OF THE PRODUCT IN
ACCORDANCE WITH EC DIRECTIVE 2002/96/EC.
At the end of its working life, the product must not be disposed of as urban waste.
It must be taken to a special local authority differentiated waste collection centre or to a
dealer providing this service. Disposing of a household appliance separately avoids
possible negative consequences for the environment and health, deriving form
inappropriate disposal and enables the constituent materials to be recovered to obtain
significant savings in energy and resources. As a reminder of the need to dispose of
household appliances separately, the product is marked with a crossed-out wheeled
dustbin.
Table of contents
Other Rohnson Fan manuals

Rohnson
Rohnson R-837 User manual

Rohnson
Rohnson R-859 User manual

Rohnson
Rohnson R-836 User manual

Rohnson
Rohnson R-810 User manual

Rohnson
Rohnson R-839 User manual

Rohnson
Rohnson R-818 User manual

Rohnson
Rohnson R-854 User manual

Rohnson
Rohnson R-849 User manual

Rohnson
Rohnson R-8200 User manual

Rohnson
Rohnson R-863 User manual

Rohnson
Rohnson R-8361 User manual

Rohnson
Rohnson R-8300 User manual

Rohnson
Rohnson R-860 User manual

Rohnson
Rohnson R-865 User manual

Rohnson
Rohnson R-838 User manual

Rohnson
Rohnson R-8400 User manual

Rohnson
Rohnson R-8510 User manual

Rohnson
Rohnson R-8371 User manual

Rohnson
Rohnson R-868 User manual

Rohnson
Rohnson R-858 User manual