Stiga B 250J-HT-UA User manual

Dispositivo tagliasiepi - MANUALE DI ISTRUZIONI
ATTENZIONE: prima di utilizzare la macchina, leggere attentamente
il presente libretto.
Hedge trimmer - OPERATOR’S MANUAL
WARNING: read thoroughly the instruction booklet before
using this machine.
Dispositif de taille-haies - MANUEL D’UTILISATION
ATTENTION: lire attentivement le manuel avant d’utiliser
cette machine.
Heckenschere - GEBRAUCHSANWEISUNG
ACHTUNG: vor Inbetriebnahme des Geräts die Gebrauchsanleitung
aufmerksam lesen.
Dispositivo recortadora de setos - MANUAL DE INSTRUCCIONES
CUIDADO: antes de utilizar esta máquina, lea atentamente el manual
de instrucciones.
Heggeschaar - GEBRUIKERSHANDLEIDING
LET OP: Voordat u de deze machine gaat gebruiken dient u eerst deze
handleiding aandachtig door te lezen.
Dispositivo cortador de sebes - MANUAL DE INSTRUÇÕES
ATENCAO! Antes de usar a moto-roçadeira, ler com atenção
este manual de instruções.
Σύστημα κλαδευτήρι θάμνων - ΕΓΧΕΙΡΙΔΙΟ ΟΔΗΓΙΩΝ
Προσοχή: πριν χρησιμοποιήσετε το μηχάνημα, διαβάστε προσεκτικά
το παρόν εγχειρίδιο.
Çit budama aparatı - KULLANIM KILAVUZU
DİKKAT! Makineyi kullanmadan önce talimatlar içeren kılavuzu dikkatle
okuyun.
Urządzenie do przycinania żywopłotów - INSTRUKCJE OBSŁUGI
UWAGA: Przed użyciem urządzenia przeczytaj uważnie niniejszą
instrukcję.
Obrezovalnik grmičevja - PRIROČNIK ZA UPORABU
POZOR: Preden uporabite stroj, pazljivo preberite priročnik
z navodili.
Шпалерные ножницы - РУKОВОДСТВО ПО ЭKСПЛУАТАЦИИ
ВНИМАНИЕ: Прежде чем пользоваться оборудованием, внимательно прочтите
зто руководсво по зксплуатации.
Rezač živice - PRIRUČNIK ZA UPORABO
POZOR: Prije nego pristupite uporabi stroja,
pažljivo pročitajte upute.
Häcksax - BRUKSANVISNING
VARNING: Läs igenom hela detta häfte innan du använder
maskinen.
Pensasleikkuri - KÄYTTÖOHJEET
VAROITUS: lue käyttöopas huolellisesti ennen koneen
käyttöä.
Hækkeklipper - BRUGSANVISNING
ADVARSEL: Læs instruktionsbogen omhyggeligt igennem,
før du tager denne maskine i brug.
Hekklipperutstyr - INSTRUKSJONSBOK
ADVARSEL: Les denne bruksanvisningen nøye før du bruker
maskinen.
Nůžky na živý plot - NÁVOD K POUŽITÍ
POZOR: Před použitím stroje si pozorně přečtěte tento návod
k použití.
Hekilõikur - KASUTUSJUHEND
TÄHELEPANU: enne masina kasutamist lugege tähelepanelikult
kasutusjuhendit.
IT
EN
FR
DE
ES
NL
PT
EL
TR
PL
SL
RU
HR
SV
FI
DA
NO
CS
171501184/5 05/2019
TB 250 J-HT-UA
HET 1501
ET


i
ITALIANO - Istruzioni Originali ..................................................................... IT
ENGLISH - Translation of the original instructions .......................................... EN
FRANÇAIS - Traduction de la notice originale ................................................ FR
DEUTSCH - Übersetzung der Originalbetriebsanleitung .................................. DE
ESPAGNOL - Traducción del Manual Original ............................................... ES
NEDERLANDS - Vertaling van de oorspronkelijke gebruiksaanwijzing .......... NL
PORTUGUÊS - Tradução do manual original ............................................... PT
ΕΛΛΗΝΙΚΑ - Μετάφραση του πρωτοτύπου των οδηγιών χρήσης ................ EL
TÜRKÇE - Orijinal Talimatların Tercümesi ...................................................... TR
POLSKI - Tłumaczenie instrukcji oryginalnej .................................................. PL
SLOVENŠČINA - Prevod izvirnih navodil ........................................................ SL
РУССКИЙ - Перевод оригинальных инструкций ....................................... RU
HRVATSKI - Prijevod originalnih uputa ........................................................... HR
SVENSKA - Översättning av bruksanvisning i original .................................... SV
SUOMI - Alkuperäisten ohjeiden käännös ...................................................... FI
DANSK - Oversættelse af den originale brugsanvisning ................................ DA
NORSK - Oversettelse av orginal bruksanvisning ........................................... NO
ČESKY - Překlad původního návodu k používání ........................................... CS

ii
IT - ATTENZIONE! - Questo accessorio può essere applicato solo sui modelli di decespuglia-
tori/tagliabordi con asta giuntabile, indicati sotto.
Per Comandi-Manutenzioni-Dati Tecnici-Avvertenze:
fare rifemento al Manuale di Istruzioni della macchina sulla quale viene montato l’accesso-
rio.
EN - WARNING! - This accessory can be applied only on models of brush cutters / trim-
mers with jointed rod, shown below.
For Commands - Maintenance - Technical Data - Warnings:
refer to the Instruction Manual of the machine on which you t the accessory.
FR - ATTENTION! - Cet accessoire peut être appliquée que sur les modèles des débrouss-
ailleuses / coupe-bordures avec une tige de xation assemblable, indiquées ci-dessous.
Pour Commandes - Maintenance - Données Techniques - Avertissements:
reportez-vous au manuel d’instructions de la machine sur laquelle vous monté l’accessoi-
re.
DE - ACHTUNG! - Dieses Zubehör kann nur bei modellen der Freischneider / Trimmer mit
Gelenkstange angebracht werden, unten gezeigt.
Für Befehle -Wartung - Technische Daten - Warnungen:
lesen Sie die Bedienungsanleitung der Maschine, auf dem Sie das Zubehör anpassen.
ES -
¡ATENCIÓN! -
Este accesorio se puede aplicar sólo en los modelos de desbrozadoras / recor-
tadoras con varilla articulada, que se muestran a continuación.
Para Comandos - Mantenimiento - Datos técnicos - Advertencias:
hacer referencia el manual de instrucciones de la máquina en la que está montado el accesorio.
NL -
LET OP! - Dit accessoire kan alleen worden toegepast op modellen van bosmaaiers /
trimmers met gelede staaf, hieronder weergegeven.
Voor Opdrachten - Onderhoud - Technisch Data - Waarschuwingen:
doen verwijzing de gebruiksaanwijzing van de machine waarop deze is gemonteerd acces-
soire.
PT - ATENÇÃO! -
Este acessório pode ser aplicada apenas em modelos de roçadeiras / apara-
dores com haste articulada, mostrados abaixo.
Para Comandos - Manutenção - Datos Técnico - Avisos:
fazer referência o manual de instruções da máquina na qual está montada acessório.
EL - ΠΡΟΣΟΧΗ! - Αυτό το εξάρτημα μπορεί να εφαρμοστεί μόνο σε μοντέλα κόφτες
βούρτσα / Ψαλίδια με συνένωση ράβδο, όπως φαίνεται παρακάτω.
για Εντολές - Συντήρηση - Τεχνική - προειδοποιήσεις:
κάνει αναφορά Εγχειρίδιο Οδηγιών της μηχανής στην οποία έχει τοποθετηθεί
αξεσουάρ.
TR - DİKKAT! - Bu aksesuar yalnızca aşağıda gösterilen fırça kesiciler / eklemli çubuk
makasları, modelleri uygulanabilir.
Için-Bakım - Teknik - Uyarıları - Komutları:
bu aksesuar monte edildiği makinenin Talimat Kılavuzu rifemento yapmak.
PL - OSTRZEŻENIE! - Ten element dodatkowy można być stosowana tylko w modelach z kosy /
nożyce z przegubowego pręta, przedstawione poniżej.
Dla Polecenia - Maintenance - Techniczno - Ostrzeżenia:
zrobić odnośnik Instrukcji obsługi maszyny, na której jest zamontowany osprzęt.
SL - POZOR! - Ta dodatek se lahko uporablja samo na modelih motorne kose / trat z
spojen palica, prikazane spodaj.
Za Ukazi - za vzdrževanje - tehnično-opozorila:
storiti referenčna navodilih za uporabo stroja, na katerem je montiran opremo.
RU - ВНИМАНИЕ! - Этот аксессуар может быть применен только на моделях
кусторезов / триммеров с сочлененной стержня, как показано ниже.
для Команды - технического - обслуживания - технико - предупреждения:
сделать ссылки руководства по эксплуатации машины, на которой он установлен
аксессуар.

iii
1) DATI TECNICI
TB 250J-HT - UA, HET 1501
2) Rapporto di riduzione 43 : 7
3) Tipo di taglio Lame falcianti
4) Numero dei denti 26
5) Passo dentatura 31,5 mm
6) Larghezza di taglio utile 400 mm
7) Diametro di taglio massimo 25 mm
8) Angolo di rotazione dell’utensile rispetto all’asta ± 90°
9) Utensile di taglio 118801757/0
HR - POZOR! - Ovaj dodatak može se primijeniti samo na modele šikare / trimera s eksi-
bilna zglobna štapa, prikazane u nastavku.
Za Naredbe - Održavanje - Tehničko - Upozorenja:
učiniti upućivanje upute za uporabu stroja na kojem je montiran pribor.
SV - VARNING! - Detta tillbehör kan endast användas på modeller av röjsågar / trimmers
med ledad stång, som visas nedan.
För Kommandon - Underhåll - Tekniska - Varningar:
gör hänvisning bruksanvisningen för den maskin där den är monterad tillbehör.
FI - VAROITUS! - Tämä lisälaite voidaan soveltaa vain malleja raivaussahat / trimmerit
nivelöityjä sauva, alla.
Komennot - Huolto - Tekninen - Varoitukset:
tehdä viite Käyttöohje koneen, johon se on asennettu lisälaite.
DA - ADVARSEL! - Dette tilbehør kan kun anvendes på modeller af buskryddere / Trimmere
med ende stang, der er vist nedenfor.
Til Kommandoer - Maintenance - Teknisk - Advarsler:
gøre henvisning instruktionen for den maskine, som den er monteret tilbehør.
NO - ADVARSEL! - Dette tilbehøret kan bare brukes på modeller av ryddesager / trimmere
med leddet stang, som vist nedenfor.
For Kommandoer - Maintenance - Teknisk - Advarsler:
gjøre henvisning bruksanvisningen for maskinen der det er montert tilbehør.
CS - UPOZORNĚNĺ! - Toto příslušenství lze použít pouze na modelech křovinořezy / vyžínače s
kloubovým tyčí, je uvedeno níže.
Příkazy pro - údržba - technicko - varování:
dělat referenční návodu pro stroje, na kterém je namontována příslušenství.
TB 250J - B 26 J - T 26 J

iv
2
3
6 7
2
5
4
1
1
3
4
4
1
3
11 23
4
45
2
4

v
1] EN - TECHNICAL SPECIFICATIONS
2] Gear ratio
3] Type of cut
4] Number of teeth
5] Toothing pitch
6] Useful cutting width
7] Maximum cutting diameter
8] Adjustment angle
(in relation to the bar)
9] cutting tools
1] FR - CARACTÉRISTIQUES TECHNIQUES
2]
Rapport de réduction
3]
Type de coupe
4]
Nombre de dents
5]
Écart des dents
6]
Largeur de coupe utile
7]
Diamètre de coupe maximum
8]
Angle de réglage
(par rapport à la barre)
9]
outil de coupe
1] DE - TECHNISCHE DATEN
2] Untersetzerverhältnis
3] Schnittart
4] Anzahl der Messer
5] Messerabstand
6] Nominale Schnittbreite
7] Maximaler Schnittdurchmesser
8] Justierwinkel
(bez. Messerbalken)
9] Schneidewerkzeug
1] ES - DATOS TÉCNICOS
2] Relación de reducción
3] Tipo de corte
4] Número de los dientes
5] Paso de dentadura
6] Anchura útil de corte
7] Diámetro máximo de corte
8]
Angulo de ajuste
(con respecto a la barra)
9] Herramienta de corte
1] NL - TECHNISCHE GEGEVENS
2]
Overbrengingsverhouding
3] Type van snijwijze
4] Aantal tanden
5] Steek tanden
6] Nuttige snijbreedte
7] Maximale snijdiameter
8] Hellingshoek
(ten opzichte van de balk)
9] Snijgereedschap
[1] PT - DADOS TÉCNICOS
[
2]
Relação de redução
3] Tipo de corte
4] Número de dentes
5] Passo entre dentes
6] Largura de corte útil
7] Diâmetro de corte máximo
8] Ângulo de ajuste
(em relação à barra)
9] Ferramentas de corte
[
1] EL - ΤΕΧΝΙΚΑ ΧΑΡΑΚΤΗΡΙΣΤΙΚΑ
2] Σχέση μίωσης
3] Τύπος κοπής
4] Αριθμός δοντιών
5] Βήμα δοντιών
6] Ωφέλιμο πλάτος κοπής
7] Μέγιστη διάμτρος κοπής
8] Γωνία ρύθμισης
(ως προς την μπάρα)
9] εργαλείων κοπής
1] TR - TEKNİK VERİLER
2]
Dişli oranı
3]
Keşici tipi
4]
Diş şayışı
5]
Diş adımı
6]
Nominal keşme ğenişliği
7]
Azami keşme çapı
8]
Ayarlama açışı
(kola çöre)
9] kesme aletlerinin
[
1] PL - DANE TECHNICZNE
[
2]
Stosunek redukcji
3]
Rodzaj krawędzi tnącej
4]
Liczba zębów
5]
Podziłka uzębienia
6]
Szerokość cięcia użytecznego
7]
Średnica cięcia maksymalnego
8]
Kąt regulacji
(w stosunku do drążka)
9] narzędzi skrawających

vi
1] SL - TEHNIČNI PODATKI
2]
Reduktorno razmerje
3]
Nastavek
4]
Število zobcev
5]
Razdalja med zobci
6]
Koristna dolžina rezila
7]
Maksimalni premer pri rezanju
8]
Kot reguliranja
(glede na palico)
9] rezalnega orodja s
1] RU - ТЕХНИЧЕСКИЕ
ХАРАКТЕРИСТИКИ
2] Передаточное число
3] Режущий орган
4] Чиско зубьев
5] Шаг зубьев
6] Полезная ширина реза
7] Максимальный диаметр реза
8] Регулировка угла
(относительно штанги)
9] применение режущего инструмента
1] HR - TEHNIČKI PODACI
2]
Reduktorni omjer
3]
Rezni nož
4]
Broj zubaca
5]
Korak zubaca
6]
Korisna duljina pri orezivanju
7]
Maksimalni promjer pri orezivanju
8]
Kut reguliranja
(u odnosu na šipku)
9] reznog alata
1]
SV - TEKNISKA
SPECIFIKATIONER
2]
Utväxlingsförhållande
3]
Klingtyp
4]
Antal klingor
5]
Tandspalt
6]
Max. skärbredd
7]
Max. kvistdiameter
8]
Vinkelreglering
(i förhållande till riggröret)
9] skärverktyg
1] FI - TEKNISET TIEDOT
2]
Välityssuhde
3]
Terätyyppi
4]
Hammasmäärä
5]
Hammastus
6]
Leikattava maksimileveys
7]
Leikattava maksimihalkaisija
8]
Korjauskulma
(runkoputken nähden)
9] käyttää leikkausteriä
1] DA - TEKNISKE DATA
2]
Udvekslingsforhold
3]
Klingetype
4]
Antal tænder
5]
Tandåbning
6]
Maks. skærebredde
7]
Maks. skærediameter
8]
AnTilpasningsvinkel
(i forhold til rigrøret)
9] skæreværktøjer
1] NO - TEKNISKE DATA
2]
Utvekslingsforhold
3]
Bladtype
4]
Antall tenner
5]
Tannåpning
6]
Maks. snittbredde
7]
Maks. snittdiameter
8]
Reguleringsvinkel
(i forhold til riggrøret)
9] kutteverktøy
1] CS - TECHNICKÉ PARAMETRY
2]
Převodový poměr
3]
Typ řezání
4]
Počet zubů
5]
Zubová mezera
6]
Užitečná délka lišt
7]
Maximální průměr řezaného materiálu
8]
Úhel náklonu lišty
9] řezací nástroj

7IDENTIFICAZIONE DEI COMPONENTI PRINCIPALI / SIMBOLI
IT
1. IDENTIFICAZIONE DEI COMPONENTI PRINCIPALI
1
2
3
5
4
6
COMPONENTI PRINCIPALI
1. Unità di azionamento
2. Asta di collegamento
3. Dispositivo di taglio (lama)
4. Impugnatura
5. Leva di sblocco
(per regolazione dell’inclinazione)
6. Protezione lama
ETICHETTA MATRICOLA
11. Nome ed indirizzo del costruttore
12. Modello
13. Potenza massima di utilizzo
14. Anno di costruzione
15. Numero di matricola
16. Codice articolo
Made in China
Max kW
Hedge Tr immer Attachment
L’esempio della dichiarazione di conformità
si trova nella penultima pagina del manuale.

PRESCRIZIONI DI SICUREZZA 8
IT
1) Attenzione! Pericolo.
2) Prima di usare questa macchina leggere il li-
bretto istruzioni.
3) Il vostro apparato uditivo è in pericolo di danno
irreversibile. Avvisiamo l’operatore addetto di que-
sta macchina, che usandola in condizioni normali
per uso giornaliero continuativo può venir esposto
ad un livello di rumore pari o superiore a: 85 dB
(A). È obbligatorio indossare l’equipaggiamento
di protezione individuale. Indossare sempre gli
occhiali di sicurezza (rischio di proiezioni) e prote-
zioni acustiche come il casco antirumore (rischio
di danni all’apparato auditivo) durante l’uso della
macchina. Nei casi in cui sia presente il rischio di
caduta di oggetti, indossare il casco di protezione.
4) Portare calzature di protezione e
guanti!
5) Pericolo di proiezioni! Allontanare qualunque
persona o animale domestico ad almeno 15 m
durante l’impiego della macchina!
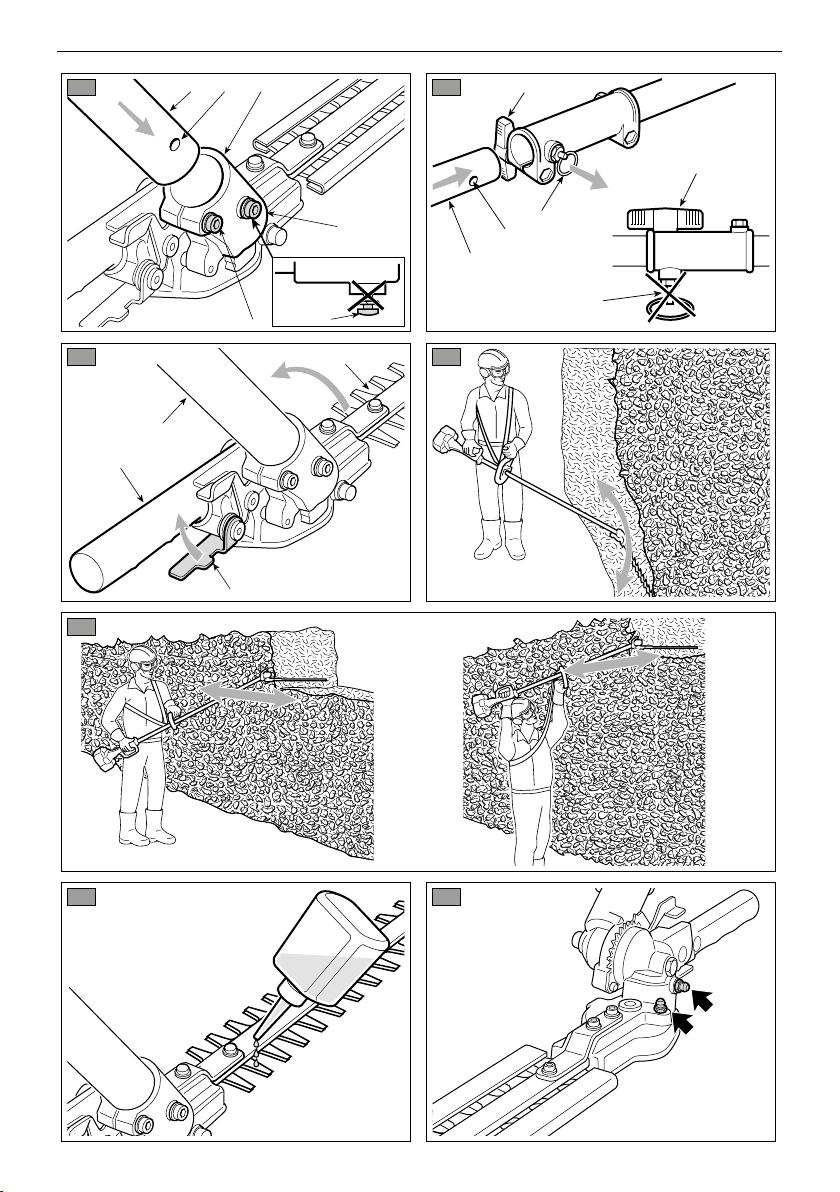
•) Operare in zona sgombra da ostacoli, scegliere
l’inclinazione del gruppo di taglio, rispetto al
terreno, più conveniente.
•) Operare sempre in posizioni stabili e sicure.
Evitare di lavorare su scale, gradini, ed in ge-
nerale su superci non perfettamente stabili.
•) È fatto obbligo all’utilizzatore adeguarsi alle
eventuali Normative Nazionali che possono
limitare l’uso della macchina.
2. SIMBOLI
ATTENZIONE: la macchina da voi acquistata è stata costruita per un uso hobbistico.
1 2 3 4 5
A) ADDESTRAMENTO
1) Leggere attentamente le istruzioni. Prendere
familiarità con i comandi e con un uso appropriato
della macchina. Imparare ad arrestare rapidamente
il motore.
2) Utilizzare la macchina per lo scopo al quale è
destinata, cioè per “il taglio e la regolarizzazione
di siepi, costituite da arbusti con rametti di ri-
dotte dimensioni”. Qualsiasi altro impiego può
rivelarsi pericoloso e causare il danneggiamento
della macchina.
Rientrano nell’uso improprio (come esempio, ma
non solo):
– taglio dell’erba in generale e in particolare in pros-
simità di cordoli;
– sminuzzamento di materiali per il compostaggio;
– lavori di potatura;
– usare la macchina per il taglio materiali di origine
non vegetale;
– utilizzare la macchina in più di una persona.
3) Non permettere mai che la macchina venga uti-
lizzato da bambini o da persone che non abbiano
la necessaria dimestichezza con le istruzioni. Le
leggi locali possono ssare un’età minima per l’u-
tilizzatore.
4) La macchina non deve essere utilizzata da più
di una persona.
5) Non utilizzare mai la macchina:
– con persone, in particolare bambini, o animali
nelle vicinanze;
– se l’utilizzatore è in condizioni di stanchezza o
malessere, oppure ha assunto farmaci, droghe,
alcool o sostanze nocive alle sue capacità di ri-
essi e attenzione;
– se l’utilizzatore non è in grado di tenere salda-
mente la macchina con due mani e/o di rimanere
stabilmente in equilibrio sulle gambe durante il
lavoro.
6) Ricordare che l’operatore o l’utilizzatore è re-
sponsabile di incidenti e imprevisti che si possono
vericare ad altre persone o alle loro pro prietà.
B) OPERAZIONI PRELIMINARI
1) Durante il lavoro, occorre indossare un abbiglia-
mento idoneo che non costituisca un impaccio per
l’utilizzatore.
– Indossare abiti protettivi aderenti, dotati di prote-
zioni antitaglio.
– Indossare guanti, occhiali protettivi e scarpe an-
titaglio con suola antiscivolo.
– Utilizzare le cue per proteggere l’udito.
– Non indossare sciarpe, camici, collane e comun-
que accessori pendenti o larghi che potrebbero
impigliarsi nella macchina o in oggetti e materiali
presenti sul luogo di lavoro.
– Raccogliere adeguatamente i capelli lunghi.
2) Prima di iniziare il lavoro, assicurarsi che tutte le
protezioni siano correttamente montate.
3. PRESCRIZIONI DI SICUREZZA

9PRESCRIZIONI DI SICUREZZA
IT
C) DURANTE L’UTILIZZO
1) Lavorare solamente alla luce del giorno o con
buona luce articiale.
2) Assumere una posizione ferma e stabile:
– evitare per quanto possibile di lavorare con suolo
bagnato o scivoloso o comunque su terreni
troppo accidentati o ripidi che non garantiscono
la stabilità dell’operatore durante il lavoro;
– evitare l’uso di scale e piattaforme instabili;
– non correre mai, ma camminare e prestare at-
tenzione alle irregolarità del terreno e alla pre-
senza di eventuali ostacoli.
3) Controllare che il regime di minimo della mac-
china sia tale da non permettere il movimento delle
lame e che, dopo un’accelerata, il motore torni ra-
pidamente al minimo.
4) Fare attenzione a non urtare violentemente la
lama contro corpi estranei e alle possibili proiezioni
di materiale causato dallo scorrimento delle lame.
5) Fermare il motore:
– ogni qualvolta si lasci la macchina incustodita.
– prima di fare rifornimento di carburante.
D) MANUTENZIONE E MAGAZZINAGGIO
1) Mantenere serrati dadi e viti, per essere certi
che la macchina sia sempre in condizioni sicure
di funzionamento. Una manutenzione regolare è
essenziale per la sicurezza e per mantenere il livello
delle prestazioni.
2) Indossare guanti da lavoro per ogni inervento sul
dispositivo di taglio.
3) Curare l’alatura delle lame. Tutte le operazioni
riguardanti le lame sono lavori che richiedono una
specica competenza oltre all’impiego di apposite
attrezzature; per ragioni di sicurezza, è bene che
siano eseguiti presso un centro specializzato.
4) Per motivi di sicurezza, non usare mai la mac-
china con parti usurate o danneggiate. I pezzi dan-
neggiati devono essere sostituiti e mai riparati.
Usare solo ricambi originali. I pezzi di qualità non
equivalente possono danneggiare la macchina e
nuocere alla sicurezza.
5) Riporre la macchina fuori dalla portata dei bam-
bini!
E) TRASPORTO E MOVIMENTAZIONE
1) Ogni volta che è necessario movimentare o tra-
sportare la macchina occorre:
– spegnere il motore, attendere l’arresto delle lame
e scollegare il cappuccio della candela;
– applicare la protezione delle lame;
– aerrare la macchina unicamente dalle impugna-
ture e orientare le lame nella direzione contraria
al senso di marcia.
2) Quando si trasporta la macchina con un auto-
mezzo, occorre posizionarla in modo da non costi-
tuire pericolo per nessuno e bloccarla saldamente
per evitarne il ribaltamento con possibile danneg-
giamento e fuoriuscita di carburante.
F) COME LEGGERE IL MANUALE
Nel testo del manuale, alcuni paragra contenenti
informazioni di particolare importanza sono con-
trassegnati con diversi gradi di evidenziazione, il
cui signicato è il seguente:
IMPORTANTE Fornisce precisazioni o altri
elementi a quanto già precedentemente indicato,
nell’intento di non danneggiare la macchina, o cau-
sare danni.
PERICOLO! Possibilità di gravi lesioni
personali o a terzi con pericolo di morte, in
caso di inosservanza.
9
15 m
15 m

UTILIZZO DELLA MACCHINA 10
IT
MONTAGGIO DELL’ASTA
(se fornita separatamente) (Fig. 1)
– Introdurre l’asta (1) nel manicotto (2) facendo
coincidere il foro (3) con la vite (4).
– Serrare a fondo le due viti (4) e (5). Dopo il ser-
raggio, la testa della vite (4) non deve sporgere.
ACCOPPIAMENTO DEL TAGLIASIEPI (Fig. 2)
– Estrarre il piolo di arresto (1) e spingere l’asta (2)
no ad avvertire lo scatto del piolo di arresto (1)
nel foro (3) dell’asta. L’inserimento può essere
agevolato ruotando leggermente la parte infe-
riore (2) nei due sensi; l’inserimento completo è
avvertibile dal piolo (1) che deve risultare com-
pletamente rientrato.
– Ad inserimento completato, serrare a fondo la
manopola (4).
MESSA IN SERVIZIO
IMPORTANTE Leggere attentamente anche
il Manuale di Istruzioni del decespugliatore a cui il
dispositivo tagliasiepi è applicato.
Prima di iniziare il lavoro occorre:
– Controllare che non vi siano viti allentate sulla
macchina e sulla lama;
– controllare che le lame siano alate e senza
segni di danneggiamento;
– controllare che le protezioni siano ben ssate
e ecienti;
– controllare il ssaggio delle impugnature.
• Modalità di utilizzo
– Tagliare rami di diametro massimo 5 mm; tagli
di rami di diametro superiore può danneggiare
il tagliasiepi.
– Procedere all’aggiustamento dell’angolo di incli-
nazione lama SOLO a motore spento. Prima di
procedere alla rimozione di rami impigliati nelle
lame SPEGNERE il motore.
– In lavoro evitare sempre di avvicinare le lame
alle parti del corpo.
– A macchina ferma, applicare sempre la prote-
zione lame.
• Regolazione dell’inclinazione della lama
(Fig. 3)
– Spegnere il motore e attendere l’arresto della
lama.
– Afferrare l’impugnatura (1) quindi, tenendo
ferma l’asta (3) con una mano, tirare la leva di
sblocco (2) ed imprimere all’impugnatura (1) il
movimento necessario a modicare l’inclina-
zione della lama (4).
– Rilasciando la leva (2), la lama rimane boccata
nella posizione desiderata.
• Taglio verticale (Fig. 4)
Il taglio deve essere eseguito con un movimento
ad arco dal basso verso l’alto, tenendo la lama il
più distante possibile dal corpo.
• Taglio orizzontale (Fig. 5)
I migliori risultati si ottengono con la lama legger-
mente inclinata (5° - 10°) nella direzione del taglio,
con un movimento ad arco ed un avanzamento
lento e costante, specialmente nel caso di siepi
molto folte.
LUBRIFICAZIONE DELLE LAME
DURANTE IL LAVORO (Fig. 6)
Se il dispositivo di taglio si scalda eccessivamente
durante il lavoro, occorre lubricare le superci
interne delle lame, con olio specico.
PERICOLO! Questa operazione deve
essere eseguita a motore spento e lame
ferme.
4. UTILIZZO DELLA MACCHINA

11 MANUTENZIONE E CONSERVAZIONE
IT
PERICOLO! Operare sempre a motore
spento.
1. CARTER RIDUTTORE LAME (Fig. 7)
– Provvedere ad ingrassare ogni 20 ore attraverso
gli ingrassatori presenti.
– Usare grasso a base di litio per alte temperature
e pressioni estreme.
2. MANUTENZIONE E AFFILATURA
DELLA LAMA
PERICOLO! Controllare periodica-
mente che le lame non siano piegate o dan-
neggiate e che il pettine sso della lama sia
integro.
Non è necessaria alcuna regolazione della di-
stanza fra le lame, in quanto il gioco è predeter-
minato in Fabbrica.
Se usate in conformità alle istruzioni, le lame non
richiedono alcuna manutenzione o intervento di
alatura.
L’alatura è necessaria solo quando la resa del
taglio diminuisce e i rami tendono ad incastrarsi
spesso.
IMPORTANTE In caso di necessità, è
necessario che ogni intervento sulla lama venga
eseguito presso un Centro specializzato, che di-
spone delle attrezzature più idonee ed è in grado
di eseguire le operazioni necessarie senza pregiu-
dicare la sicurezza della macchina.
Data l’evoluzione del prodotto, gli utensili sopra ci-
tati potrebbero essere sostituiti nel tempo da altri,
con caratteristiche analoghe di intercambiabilità e
sicurezza di funzionamento.
5. MANUTENZIONE E CONSERVAZIONE


13 IDENTIFICATION OF MAIN COMPONENTS / SYMBOLS
EN
1. IDENTIFICATION OF MAIN COMPONENTS
1
2
3
5
4
6
MAIN COMPONENTS
1. Starter unit
2. Connecting rod
3. Cutting device (blade)
4. Handgrip
5. Release lever (to regulate the inclination)
6. Blade protection
IDENTIFICATION PLATE
11. Name and address of the manufacturer
12. Model
13. Maximum power for use
14. Year of manufacture
15. Serial number
16. Article code
Made in China
Max kW
Hedge Tr immer Attachment
The example of the Declaration of Conformity is
provided on the penultimate page of the manual.

SAFETY REQUIREMENTS 14
EN
1) Warning! Danger.
2) Read the instruction booklet before using this
machine.
3) Your hearing is at risk of irreparable damage.
Anyone operating this machine under normal con-
ditions during continuous daily use may be expo-
sed to a noise level equal to or exceeding 85 dB
(A). The operator must wear Personal Protective
Equipment (PPE). Whenever the machine is in
use, safety goggles must be worn to safeguard
against ying objects, as must ear protectors, such
as a soundproof helmet, in order to protect the
operator’s hearing. If the operator is working in an
area where there is a risk of falling objects, a safety
helmet must also be worn.
4) Wear protective footwear and gloves!
5) Danger: objects thrown up by machine! Keep
people or animals at least 15 m away from the
machine during operation!
•) Work in an obstacle-free area, choosing the
most suitable tilt of the cutting unit in relation
to the ground. Make sure it is correctly tted on
the brush cutter.
•) Always work in stable, safe positions. Do not
work on stairs, steps and, in general, on surfa-
ces that are not perfectly stable.
•) The user must comply with any National Regu-
lations which can limit machine use.
2. SYMBOLS
WARNING: The machine you have purchased has been manufactured for domestic use.
1 2 3 4 5
A) TRAINING
1) Read the instructions carefully. Become ac-
quain ted with the controls and the proper use of
the machine. Learn how to stop the engine quickly.
2) Only use the machine for its intended use, that
is “the cutting and trimming of hedges, con-
sisting in plants with small sized branches”.
Any other use may be dangerous and severly
damage the machine.
Examples of improper use may include, but are
not limited to:
– general grass cutting and in particular, near
kerbs;
– chopping material for composts;
– pruning;
– using the machine for cutting non-plant material;
– use of the machine by more than one person.
3) Never allow children or persons unfamiliar with
these instructions to use the machine. Local regu-
lations may restrict the age of the operator.
4) The machine must never be used by more than
one person.
5) Never use the machine :
– when people, especially children or pets are in
the vicinity;
– if the user is tired or unwell, or has taken medi-
cine, drugs, alcohol or any substances which
may slow his reexes and compromise his
judgement;
– if the user is not capable of holding the machine
rmly with two hands and/or of remaining stan-
ding on the ground whilst working.
6) Remember that the operator or user is respon-
sible for accidents or hazards occurring to other
people or their property.
B) PREPARATION
1) Always wear adequate clothing when using the
machine which do not hamper movements in any
manner.
– Always wear slim-tting protective clothing, t-
ted with shear-proof protection devices.
– Always wear protective gloves and eye-goggles
and safety anti-shear boots with non-slip soles.
– Always wear ear and hearing protection de-
vices.
– Never wear scarves, shirts, necklaces, or any
hanging or apping accessory that could catch
in the machine or in any objects or materials in
the work area.
– Tie your hair back if it is long.
2) Before starting your work, make sure that all the
protection devices are correctly tted.
3. USING THE MACHINE

spare parts. Parts that are not of the same quality
can seriously damage the equipment and com-
promise safety.
5) Store the machine out of the reach of children!
E) TRANSPORTATION AND HANDLING
1) Whenever the machine is to be handled or
transported you must:
– turn o the engine, wait for the blades to stop
and diconnect the spark plug cap;
– apply the protection devices to the blades;
– only hold the machine using the handgrips and
position the blades in the opposite direction to
that used during operations.
2) When using a vehicle to transport the machine,
position it so that it can cause no danger to per-
sons and fasten it rmly in place to avoid it from
tipping over, which may cause damage or fuel
spillage.
F) HOW TO READ THE MANUAL
Certain paragraphs in the manual contain particu-
larly signicant information and are marked with
various levels of highlighting with the following
meaning:
IMPORTANT These give details or further
information on what has already been indicated,
and aim to prevent both damage to the machine,
and the machine from causing damage.
DANGER! Non-observance will re-
sult in the risk of serious injury or death to
oneself or others.
15 SAFETY REQUIREMENTS
EN
C) OPERATION
1) Work only in daylight or good articial light.
2) Take on a rm and well-balanced position:
– where possible avoid working on wet slippy
ground or in any case on uneven or ripid ground
which does not guarantee stability for the oper-
ator;
– avoid using unstable ladders or platforms;
– never run, but walk carefully paying attention to
the lay of the land and any eventual obstacles.
3) Check that when the machine is running at min-
imum speed and ticking over, there is no move-
ment of the blades and, after accelerating, the
engine quickly returns to minimum speed.
4) Make sure the blades do not come into violent
contact with foreign bodies and try to prevent any
material from being hurled after trimming.
5) Stop the engine:
– whenever you leave the machine unattended.
– before refuelling.
D) MAINTENANCE AND STORAGE
1) Keep all nuts, bolts and screws tightly fastened
to be sure the equipment is in safe working con-
dition. Routine maintenance is essential for safety
and for maintaining a high performance level.
2) Always wear protective gloves when handling
the cutting device.
3) Make sure the blades are well sharpened. All
operations on the blades require a certain level
of experience and specialised tools. For safety
reasons, take them to a specialised centre to be
sharpened.
4) For safety reasons, never use the machine with
worn or damaged parts. Damaged parts are to be
replaced and never repaired. Only use original
15
15 m
15 m

• Adjustment of blade inclination (Fig. 3)
– Turn the engine o and wait for the blade to
stop.
– Grasp the handgrip (1) then, holding the rod
(3) steady with one hand, pull the release lever
(2) move the handgrip (1) as needed to change
blade (4) inclination.
– On releasing the lever (2), the blade remains
blocked in the desired position.
• Vertical trimming (Fig. 4)
Proceed to cut by using curved movements from
the bottom towards the top, keeping the blade as
far from the body as possible.
• Horizontal trimming (Fig. 5)
The best results will be obtained with the blade
slightly inclined (5° - 10°) in the direction you are
cutting, proceed with a curved movement, slowly
and without interruptions, especially in the ca se of
very thick hedges.
LUBRICATING THE BLADES DURING JOBS
(Fig. 6)
If the cutting device gets excessively hot during
operations, grease the blade’s internal surfaces
with the specic oil.
DANGER! This operation must only
be performed when the blades have stopped
running and the motor is switched o.
USING THE MACHINE 16
EN
ASSEMBLING THE ROD
(if supplied separately) (Fig. 1)
– Insert the rod (1) in the sleeve (2) so that the
hole (3) coincides with the screw (4).
– Tighten the two screws (4) and (5) completely.
The head of the screw (4) must not stick out
when tightened.
CONNECTING THE HEDGE TRIMMER
(Fig. 2)
– Pull out the stop pin (1) and push the rod (2) right
down until the stop pin (1) clicks into the hole (3)
in the rod. This is easier to do if you rotate the
bottom of the rod (2) slightly in both directions.
The pin (1) is in place when it is completely lo-
dged in the hole.
– Once inserted, tighten the knob (4) securely.
SETTING AT WORK
IMPORTANT Also carefully read the opera-
tor’s manual for the brush cutter tted with the he-
dge trimming device.
Before starting work please:
– Check that all the screws on the machine and
the blade are tightly fastened;
– check that the blades are sharp and there are no
signs of any damage;
– check that the protection devices are well fa-
stened and working eciently;
– check that the handgrips are well fastened
• Directions for use
– Cut branches up to a maximum diameter of 5
mm; cutting branches with a larger diameter
could damage the hedge trimmer.
– ONLY adjust the tilt angle with the motor
switched o. SWITCH OFF the motor before
removing any branches caught up in the blades.
– Never bring the blades close to body parts while
working.
– Always t the blade guards when the device is
switched o.
4. USING THE MACHINE

DANGER! Always work with the mo-
tor switched o.
1. BLADE REDUCTION GEAR GUARD (Fig. 7)
– Lubricate every 20 hours through the grease
nipples provided.
– Only use lithium-based grease for high temper-
atures and extreme pressures.
2. MAINTENANCE AND SHARPENING
OF THE BLADE
DANGER! Periodically check that the
blades are not bent or damaged and that the
xed comb on the blade is intact.
Adjustment of the distance between blades is not
necessary, as this is predetermined by the manu-
facturer.
If the blades are used correctly, following all the
instructions provided, they will not require any
maintenance work and will not need sharpening.
It is necessary to sharpen the blades only when
the trimming performance decreases and the
branches tend to stick together.
NOTE Any intervention on the blade
should always be conducted at a specialised Cen-
tre that has the most appropriate tools and is able
to perform the operations without compromising
the safety of the machine.
Given the product evolution, the above mentio-
ned tools may be replaced in time by others, with
similar interchangeable and operating safety cha-
racteristics.
17 MAINTENANCE AND STORAGE
EN
5. MAINTENANCE AND STORAGE

This manual suits for next models
2
Table of contents
Languages:
Other Stiga Trimmer manuals

Stiga
Stiga SH 54 User manual

Stiga
Stiga T 26 J User manual

Stiga
Stiga HT 20 Li S User manual

Stiga
Stiga BC 900 D Li 48 User manual

Stiga
Stiga H 60 User manual

Stiga
Stiga HT 900 Li 48 User manual

Stiga
Stiga MH 500 Li 48 User manual

Stiga
Stiga HT 48 Li User manual

Stiga
Stiga SHT 660 K User manual

Stiga
Stiga TR 48 LI User manual

Stiga
Stiga SH 56 User manual

Stiga
Stiga SHP 60 User manual

Stiga
Stiga BC 500 Li 48 User manual

Stiga
Stiga MH 900 Li 48 User manual

Stiga
Stiga ST 311 User manual

Stiga
Stiga BC 900 D Li 48 User manual

Stiga
Stiga MH 500 Li 48 User manual

Stiga
Stiga MH 500 Li 48 User manual

Stiga
Stiga LT 500 Li 48 User manual

Stiga
Stiga HET 1501 User manual