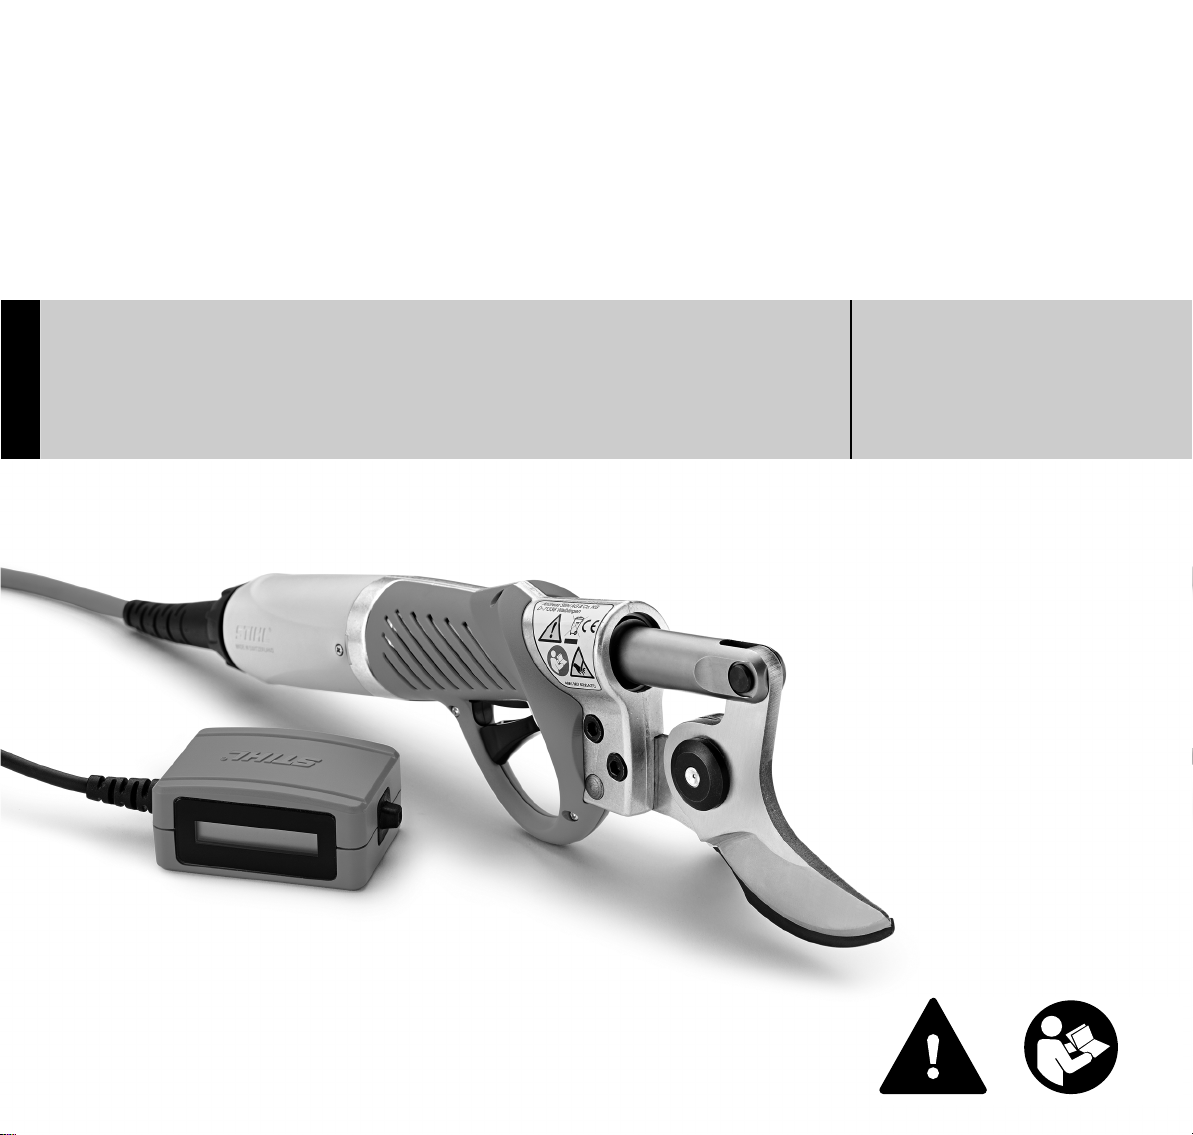
Stihl ASA 85 User manual

{
STIHL ASA 85
Instruction Manual
Skötselanvisning
Käyttöohje
Betjeningsvejledning
Bruksanvisning
οδηγίες χρήσης

Original Instruction ManualPrinted on chlorine-free paper
Printing inks contain vegetable oils, paper can be recycled.
© ANDREAS STIHL AG & Co. KG, 2016
0458-285-9721-A. VA1.H16.
0000006643_005_GB
ASA 85
English
1
{This instruction manual is protected by copyright. All rights reserved, especially the rights to reproduce, translate and process
with electronic systems.
Contents
Dear Customer,
Thank you for choosing a quality
engineered STIHL product.
It has been built using modern
production techniques and
comprehensive quality assurance.
Every effort has been made to ensure
your satisfaction and troublefree use of
the product.
Please contact your dealer or our sales
company if you have any queries
concerning this product.
Your
Dr. Nikolas Stihl
Guide to Using this Manual 2
Safety Precautions 2
Working Techniques 6
Connecting Charger to Power
Supply 8
Charging the Battery 8
Light Emitting Diodes (LED) on
Battery 9
LED on Charger 10
Assembling the Unit 11
Start-up 12
Fitting the Backpack 12
Switching On 13
Operating Instructions 14
Switching Off 17
Storing the Machine 18
Maintenance and Care 19
Maintenance 20
Minimize Wear and Avoid Damage 24
Main Parts 25
Specifications 27
Troubleshooting 28
Maintenance and Repairs 32
Disposal 32
EC Declaration of Conformity 32

ASA 85
English
2
This instruction manual covers
STIHL cordless pruning shears which
are also referred to as the power tool in
the descriptions.
Symbols in text
WARNING
Warning where there is a risk of an
accident or personal injury or serious
damage to property.
NOTICE
Caution where there is a risk of
damaging the machine or its individual
components.
Engineering improvements
STIHL's philosophy is to continually
improve all of its products. For this
reason we may modify the design,
engineering and appearance of our
products periodically.
Therefore, some changes, modifications
and improvements may not be covered
in this manual.
General
WARNING
–Minors should never be allowed to
operate this power tool. Watch
children to be sure that they do not
play with the power tool.
–This power tool may be operated
only by persons who have been
instructed in its use and proper
handling.
–This power tool may not be used by
persons who are not able to operate
it safely due to limited physical,
sensory or mental ability.
–Lend or rent your power tool only
together with this instruction manual
and only to persons who are familiar
with this model and its operation.
If you have not used this model before:
Have your dealer or a trained expert
show you how to operate it properly and
safely.
Observe all applicable local safety
regulations, standards and ordinances.
Keep bystanders, especially children,
and animals away from the work area.
The user is responsible for avoiding
injury to third parties or damage to their
property.
To operate this power tool you must be
rested, in good physical condition and
mental health.
If you have any condition that might be
aggravated by strenuous work, check
with your doctor before operating a
power tool.
Do not operate the cordless pruning
shears if you are under the influence of
any substance (drugs, alcohol) which
might impair vision, dexterity or
judgment.
Persons with pacemakers only: The
machine's electronic control system may
interfere with some pacemakers. To
reduce health risks, STIHL recommends
that persons with pacemakers consult
their physician and the pacemaker
manufacturer before operating this
power tool.
Notes on Pruning Shears
Guide to Using this Manual Safety Precautions
Special safety precau-
tions must be observed
when working with the
cordless pruning shears
because the blade is very
sharp.
It is important that you
read the instruction man-
ual before first use and
keep it in a safe place for
future reference. Non-
observance of the
instruction manual may
result in serious or even
fatal injury.
Never touch the blades
while the power tool is
connected to the battery
– risk of injury.

ASA 85
English
3
Switch off your pruning shears and
disconnect the connecting cord:
–before carrying out inspections,
adjustments or cleaning work
–before performing repairs and
maintenance work
–in the event of danger or in an
emergency
This avoids the risk of the cutting blade
closing unintentionally.
–before leaving the power tool
unattended
–before transporting, see section on
"Transporting"
–before storing
Notes on Connecting Cord
Do not use the connecting cord to pull,
hang up or transport your cordless
pruning shears.
Do not operate the power tool with a
damaged connecting cord or plug.
Straighten a twisted connecting cord
before use.
Avoid chafing, pinching or tugging the
connecting cord – risk of damage.
Protect from heat, oil, pointed objects,
sharp edges and the blades.
Notes on Backpack
WARNING
If the backpack emits fumes, heats up,
smells or makes noises, remove it from
your back, disconnect the connecting
cord from the power tool and
immediately move a safe distance away.
Keep backpack away from combustible
materials.
Do not place the backpack on raised
surfaces or hang it up (e.g. on branches)
– it may fall down.
Never sit or stand on the backpack. Do
not stand objects on the backpack.
For emergencies: Practice quickly
opening the buckles on the waist belt (1)
and chest strap (2), loosening the
shoulder straps and setting down the
backpack. To avoid damage, do not
throw the backpack to the ground when
practicing.
Intended Use
The cordless pruning shears are
designed exclusively for pruning vines,
branches, shrubs and bushes. Typical
areas of application are fruit growing as
well as tending green spaces, gardens
and vineyards.
Do not use your power tool for any other
purpose because of the increased risk of
accidents and damage to the power tool
itself.
Never attempt to modify your power tool
in any way since this may increase the
risk of personal injury. STIHL excludes
all liability for personal injury and
damage to property caused while using
unauthorized parts or accessories.
Clothing and Equipment
Wear proper protective clothing and
equipment.
Clothing must be sturdy but allow
complete freedom of movement.
Avoid clothing that could get caught in
scrub or moving parts of the power tool.
Do not wear a scarf, necktie or jewelry.
Tie up and confine long hair (e.g. with a
hair net, cap, etc.).
Wear sturdy shoes with non-slip soles.
Furthermore, remove the
battery:
1
4816BA002 KN
2
Wear heavy-duty work
gloves made of durable
material (e.g. leather).

ASA 85
English
4
WARNING
STIHL offers a comprehensive range of
personal protective clothing and
equipment.
Transporting
Carry the backpack on your back or by
the handle.
Transport your cordless pruning shears
in the holster. Do not carry it hanging
from the connecting cord.
Transporting short distances during
cutting work
–Always close the cutting blade, i.e.
standby mode.
–Put your cordless pruning shears in
the holster.
Transporting over longer distances
–Always close the cutting blade, i.e.
standby mode.
–Move switch on controller to OFF.
–Disconnect the connecting cord
from the power tool.
–Put your cordless pruning shears in
the holster.
Always remove the battery from the
battery bag when transporting the power
tool to and from the work area and in
vehicles.
Accessories
Only use original STIHL parts and
accessories that are explicitly approved
for this power tool by STIHL or are
technically identical. If you have any
questions in this respect, consult a
servicing dealer.
Drive
Battery
Observe the supplement sheet or
instruction manual for the STIHL battery
and keep in a safe place.
Further safety instructions – see
www.stihl.com/safety-data-sheets
Battery charger
Observe the supplement sheet for the
STIHL charger and keep in a safe place.
Before Starting Work
To reduce the risk of accidents, never
attempt to modify the controls or the
safety devices in any way.
Check that your power tool is in good
condition before starting work. Do not
use your power tool if any of its parts are
damaged – risk of accidents.
Pay special attention to the following
parts of the pruning shears:
–Cutting and anvil blades properly
assembled?
–Correct play between cutting and
anvil blades?
–Cutting and anvil blades in good
condition?
–Trigger moves freely?
–Handle clean, dry and free from oil
and dirt?
Pay special attention to the following
parts of the backpack:
–Battery correctly fitted and secured
with the strap?
–Backpack in good condition?
–Harness in good condition?
–Connecting cord, plug and
controller in good condition?
Never use defective or deformed
batteries.
During Operation
Wear the backpack under a jacket in
cold or wet weather conditions. Dry off
your power tool after finishing work. Do
not leave the power tool on the ground
or in the wet.
Take special care in slippery conditions,
on slopes or uneven ground.
To reduce the risk of eye
injuries, wear snug-fitting
safety glasses in accord-
ance with European
Standard EN 166. Make
sure the safety glasses
are a good fit.
4816BA001 KN

ASA 85
English
5
Watch out for tree stumps, roots and
rocks which could cause you to stumble
or fall.
To reduce the risk of accidents, take a
break in good time to avoid tiredness or
exhaustion.
Work calmly and carefully – in daylight
conditions and only when visibility is
good. Stay alert so as not to endanger
others.
The power tool is operated by one-
person only. Do not allow any other
persons in the work area.
Observe the blades – only cut in areas
that you can see.
Be extremely careful when cutting dense
rows of plants, check the other side
before starting work.
To avoid the risk of electrocution, do not
touch electric power lines – never cut
through electric power lines.
When working at heights:
–Always use a lift bucket
–Never work on a ladder or in a tree
–Never work on an insecure support
Never hold a branch with your free hand
directly next to the point you want to cut.
Always maintain a distance of at least
40 cm from the blades. Never touch the
cutting blade. It is very sharp – risk of
injury.
Be wary of flying or splintering material –
wear safety glasses.
Clear away fallen branches, scrub and
cuttings only when your cordless
pruning shears are in the standby mode
and fitted in the holster.
In the event of danger or an emergency,
switch off your power tool immediately
and disconnect the connecting cord.
If your power tool is subjected to
unusually high loads for which it was not
designed (e.g. heavy impact or a fall),
always check that it is in good condition
before continuing work – see also
"Before Starting Work". Make sure the
safety devices are working properly. Do
not continue using a power tool that is
not in a safe operating condition. In case
of doubt, consult your servicing dealer.
After Finishing Work / Storing
When the power tool is not in use, put it
in a place where it does not endanger
others. Secure it against unauthorized
use.
–Always close the cutting blade, i.e.
standby mode.
–Move switch on controller to OFF.
–Disconnect the connecting cord
from the power tool.
–Put your cordless pruning shears in
the holster.
–Remove the battery.
Vibrations
This power tool minimizes the vibrations
transmitted to the operator's hands.
However, the operator should seek
medical advice in the event of suspected
circulatory problems in the hands (e.g.
tingling sensation in the fingers).
Maintenance and Repairs
Before performing any repairs, cleaning
or maintenance work:
–Always close the cutting blade, i.e.
standby mode.
–Move switch on controller to OFF.
–Disconnect the connecting cord
from the power tool.
This avoids the risk of the cutting blade
closing unintentionally.
Service the power tool regularly. Do not
attempt any maintenance or repair work
not described in the instruction manual.
Have all other work performed by a
servicing dealer.
Only use high-quality replacement parts
in order to avoid the risk of accidents
and damage to your cordless pruning
shears. If you have any questions in this
respect, consult a servicing dealer.
Check the electrical contacts and ensure
that the insulation of the connecting
cords and plug of the charger show no
sign of aging (brittleness).
To reduce the risk of serious injury, have
work on the charger (e.g. replacing the
connecting cord) performed only by an
authorized servicing dealer or qualified
electrician.
Observe sharpening instructions – keep
the blades in good condition at all times
to ensure safe and proper operation.
To reduce the risk of injury in the event
of a malfunction, switch off the power
tool immediately, disconnect the
connecting cord and remove the battery.

ASA 85
English
6
Contact your servicing dealer – do not
use your power tool until the problem
has been rectified.
Holding and Controlling the Power Tool
The backpack is worn on the user's
back.
Hold the pruning shears firmly in your
right or left hand. Wrap your thumb firmly
around the handle housing for good
control. Do not touch any moving parts
of the pruning shears with your fingers.
Operate the trigger with your index
finger.
Check that the connecting cord is
properly and securely fitted and not
snagged.
Make sure you have a firm footing when
making cuts.
Cutting
To save energy, preset the cutting
blade's opening angle to the branch
diameter to be cut – see "Operating
Instructions".
To avoid damage to the cutting
mechanism during operation:
–Clear away pieces of metal and
solid objects from the work area.
–When working close to the ground,
make sure that no sand, grit or
stones get between the blades.
–Do not touch or cut wire fences or
wire with the blades.
–Check sharpness of cutting blade at
regular intervals.
–Do not swing the pruning shears
sideways while cutting.
–Do not use force to depress the
trigger.
NOTICE
The housing of the pruning shears can
become hot during intensive use or
while cutting heavier growth. In such a
case, reduce working speed or cutting
diameter. The electronic control system
reduces cutting performance if the
pruning shears become too hot.
Check condition and tightness of cutting
and anvil blades:
–if the cut is no longer clean or
effortless
–if they is a noticeable change in
behavior
–if the blades become blocked
Working Techniques
4816BA003 KN

ASA 85
English
7
Releasing blockages
If the branch diameter is too large, the
cutting blade locks in position during
closing. The cutting blade can only be
opened from this position.
NOTICE
If the pruning shears are jammed in the
cut, do not switch them off at the
controller since mechanical parts may
otherwise be damaged during removal
from the wood. To release the blockage,
always leave the pruning shears
switched on and remove them from the
wood as follows.
NSwing the pruning shears upwards
and pull them out of the cut.
Do not attempt to lever them out of the
cut sideways or downwards.
Sharpening the Cutting Blade
The sharpness of the cutting blade
influences the quality of the cut.
A dull cutting blade:
–increases the cutting force required
–consumes more energy (fewer cuts
per battery charge)
–increases wear on blade and all
mechanical parts
The resharpening frequency depends
on the hardness and diameter of the
wood being cut and the cutting rhythm.
Check sharpness of cutting blade at
regular intervals.
Sharpening intervals
When using the pruning shears for the
first time or after changing the blade,
check and resharpen the blade after the
first half hour of operation. Also check
the play between the cutting and anvil
blades and readjust if necessary.
Check sharpness of the blade at regular
intervals and resharpen it in good time.
A visual check every quarter hour
quickly gives you a feeling for how often
the blade needs resharpening.
During the cutting season, sharpen the
blade as required, but at least once a
day.
Possible Factors Influencing Running
Time
There are different factors that can
cause the running time of your cordless
pruning shears to vary.
Influencing factors are, e.g.:
–Temperature
–Battery's state of charge
–Type of material being cut
(hardness, diameter)
–Sharpness of blade
–Preset blade opening
–Too much play between cutting and
anvil blades
To reduce the risk of
injury, do not touch the
blades.
4816BA033 KN

ASA 85
English
8
Power supply (mains) voltage and
operating voltage must be the same.
NInsert the plug (1) in the wall
outlet (2).
A self test is performed after the charger
is connected to the power supply. During
this process, the light emitting diode (1)
on the charger lights up green for about
1 second, then red and goes off again.
A factory-new battery is not fully
charged.
Recommendation: Fully charge the
battery before using it for the first time.
NConnect the charger to the power
supply – mains voltage and
operating voltage of the charger
must be the same – see
"Connecting Charger to Power
Supply".
Operate the charger only in enclosed
and dry rooms at ambient temperatures
between +5°C to +40°C (+41°F to
+104°F)
Only charge dry batteries. Allow a damp
battery to dry before charging.
NPush the battery (1) into the
charger (2) until noticeable
resistance is felt – then push it as far
as stop.
The LED (3) on the charger comes on
when the battery is inserted – see "LED
on Charger"
Charging begins as soon as the
LEDs (4) on the battery glow green –
see "LEDs on Battery".
The charge time is dependent on a
number of factors, including battery
condition, ambient temperature, etc.,
and may therefore vary from the times
specified.
The battery heats up during operation in
the power tool. If a hot battery is inserted
in the charger, it may be necessary to
cool it down before charging. The
charging process begins only after the
battery has cooled down. The time
required for cooling may prolong the
charge time.
The battery and charger heat up during
the charging process.
AL 300, AL 500 Chargers
The AL 300 and AL 500 chargers are
equipped with a battery cooling fan
Connecting Charger to
Power Supply
3901BA015 KN
2
1
1
3901BA019 KN
Charging the Battery
2
3901BA009 KN
4
3901BA014 KN
3

ASA 85
English
9
AL 100 Charger
The AL 100 charger has no fan and
waits for the battery to cool down before
starting the charging process. The
battery is cooled by heat transfer to the
ambient air.
End of Charge
The charger switches itself off
automatically when the battery is fully
charged:
–LEDs on the battery go off.
–The LED on the charger goes off.
–The charger's fan is switched off (if
charger is so equipped)
Remove the fully charged battery from
the charger.
Four LEDs show the battery's state of
charge and any problems that occur on
the battery or power tool.
NPress button (1) to activate the
display – the display goes off
automatically after 5 seconds.
The LEDs can glow or flash green or
red.
During charging
The LEDs glow continuously or flash to
indicate the progress of charge.
A green flashing LED indicates the
capacity that is currently being charged.
The LEDs on the battery go off
automatically when the charge process
is completed.
If the LEDs on the battery flash or glow
red – see "If the red LEDs glow
continuously / flash".
Light Emitting Diodes (LED)
on Battery
LED glows continuously green.
LED flashes green.
LED glows continuously red.
LED flashes red.
1
3901BA010 KN
3901BA018 KN
80 - 100 %
60 - 80 %
40 - 60 %
20 - 40 %
0 - 20 %

ASA 85
English
10
During Operation
The green LEDs glow continuously or
flash to indicate the state of charge.
If the LEDs on the battery flash or glow
red – see "If the red LEDs glow
continuously / flash".
If state of charge is too low:
–One LED flashes green
–The following signals then sound for
a period of 1 minute:
NCharge the battery
If the red LEDs glow continuously / flash
The LED (1) on the charger may glow
continuously green or flash red.
Green continuous light ...
... indicates the following:
The battery
–is being charged
–is too hot and must cool down
before charging
See also "LEDs on battery".
The green LED on the charger goes off
as soon as the battery is fully charged.
Red flashing light ...
... may indicate the following:
–No electrical contact between
battery and charger – remove and
refit the battery
–Malfunction in battery – see also
"LEDs on Battery".
–Malfunction in charger – have
checked by a servicing dealer.
STIHL recommends an authorized
STIHL servicing dealer.
5x Long beep:
3901BA016 KN
80 - 100 %
60 - 80 %
40 - 60 %
20 - 40 %
0 - 20 %
A 1 LED glows
continuously
red:
Battery is too hot
1) 2)/cold 1)
1) When charging: Charge process
starts automatically after the battery
has cooled down / warmed up.
2) During operation: Power tool cuts
out – allow battery to cool down; it
may be necessary to take the
battery out of the power tool for this
purpose.
3) Electromagnetic problem or fault.
Take the battery out of the power
tool and refit it. Switch on the
machine – if the LEDs continue to
flash, the battery has a malfunction
and must be replaced.
B 4 LEDs flash
red
Malfunction in
battery 3)
3901BA036 KN
A
B
LED on Charger
1
3901BA019 KN

ASA 85
English
11
Fitting the Holster
NThread the holster's tongue (1)
through the loop (2) on the inside of
the waist belt on either the left (left-
handers) or right (right-handers).
NClose the press studs (3).
Fitting the Bag
The bag is used for accessories.
NSecure bag to webbing of waist belt
on either the left (right-handers) or
right (left-handers).
Fitting Power Tool Connecting Cord
NThread the connecting cord (1)
through the opening (arrow) in the
backpack.
NThread the connecting cord (1)
through the flaps (2) on either the
left (left-handers) or right (right-
handers).
Fitting Controller's Connecting Cord
NRoute the connecting cord out of the
backpack, through the opening
(arrow) in the waist belt to the left
(right-handers) or to the right (left-
handers).
NAttach the controller to the waist
belt.
Assembling the Unit
2
1
4816BA004 KN
4816BA005 KN
2
2
1
4816BA006 KN
22
4816BA007 KN

ASA 85
English
12
Before Using for First Time
Charge the battery fully before using it
for the first time.
Fitting the battery
NOpen the zipper on the backpack.
NPush the battery (rating label facing
up) into the bag until it engages
properly.
NClose the quick release buckle and
tighten the strap so that the battery
is held firmly in the bag.
NClose the zipper on the backpack.
Connecting the Pruning Shears
NPush the plug (1) into the pruning
shears' socket (2).
NFit the union nut (3) on the thread
and screw it down firmly.
Fitting the Backpack
Put on the backpack and adjust the
straps so that the back padding fits
snugly and securely against your back.
NAdjust the harness straps (1) to the
correct length.
NFasten and adjust the waist belt (2)
so that it rests comfortably on your
hips – thread the end of the belt
through the loop (3) – do not let it
hang down.
NFit the chest strap (4) at the required
height. The chest strap can be
secured to the upper or lower part of
the harness straps (1).
NAdjust chest strap (4) to correct
length and fasten it.
Start-up
4816BA008 KN
4816BA009 KN
2
13
Fitting the Backpack
4
4
2
3
4816BA010 KN
1
1

ASA 85
English
13
Adjusting length of waist belt
Spare belt (arrow) can be pulled through
the buckle (5) to lengthen the waist belt.
Removing the Backpack
NOpen quick release buckles on the
waist belt (1) and chest strap (2).
NLoosen the harness straps by lifting
the sliding adjusters and then take
off the backpack.
NMake sure you have a secure and
firm footing.
NCheck that bystanders are well clear
of the general work area of the
pruning shears.
NHold your cordless pruning shears
firmly.
NMove switch (1) on controller to ON.
Wait for the following acoustic signals
after switch-on:
NOperate the trigger (2) to open the
cutting blade.
The pruning shears are set at the factory
so that the closing motion of the cutting
blade is proportional to the movement of
the trigger.
4816BA037 ST
5
1
4816BA002 KN
2
33
Switching On
1x Long beep: Electronic control
OK
3x Short beep: Cordless pruning
shears ready for
operation
1
4816BA011 KN
2
4816BA012 KN

ASA 85
English
14
Controller
The controller is used to switch on the
cordless pruning shears, set the
following functions and view information
(battery's state of charge, number of
cuts, ...).
1Display
2On/off switch
3Control lever with the following
positions
The following commands are used in
menu navigation.
Functions after Switch-On
Status
The display shows the number of cuts
that can be performed before the next
recommended service is due.
After a few seconds the display
automatically changes to the battery's
state of charge.
If the number of cuts before the next
recommended service is 0 or less, the
changeover to the battery's state of
charge must be performed manually
with the control lever, i.e. "PUSH".
Menu Navigation
Battery's state of charge
Each bar represents 10% of the
battery's capacity
Menu commands:
Cut statistics
Menu commands:
Type of cut
The electronic control system classifies
each cut on the basis of its energy
consumption. The classifications (S, M,
L) show how many small, medium and
large cuts have been performed since
the counter was last set to "0" –
"RESET".
S Number of small cuts in %
M Number of medium cuts in %
L Number of large cuts in %
Menu commands:
Operating Instructions
4816BA013 KN
1
2
3
3
PGUP: Back to previous menu
item
PUSH: Confirm selection
PGND: Go to next menu item
XX # xxxxxxx
Batt: I I I I I I I I I I
4816BA014 KN
PGUP
PGND
PUSH
PGND ↓↑PGUP
# 123456 23h 45m
Left: Number of cuts since
counter was last set to "0"
– "RESET"
Right: Running time in hours
and minutes since coun-
ter was last set to "0" –
"RESET"
PUSH 2 sec. →RESET
PGND ↓↑PGUP
42% S 37% M 21% L
PUSH 2 sec. →RESET
PGND ↓↑PGUP

ASA 85
English
15
Blockages
The status display shows the number of
cutting blade blockages that have
occurred since the counter was last set
to "0" – "RESET".
This can be used to determined whether
the diameter of the wood cut
corresponds to the capacity of the tool
and whether the tool is being operated
properly.
Menu commands:
Adjusting cutting blade opening angle
The controller is set at the factory so that
the cutting blade only opens halfway
(50%) when the trigger is pulled twice in
quick succession.
To re-open the cutting blade fully, pull
the trigger again twice in quick
succession.
The four values shown enable the
cutting blade opening angle to be set
(50%, 60% or 70%) or the option to be
deactivated.
Menu commands:
Standby mode
The cutting blade can be set to the
constantly closed position for the
standby mode.
NPull the trigger twice in quick
succession and hold it there until 3
quick beeps sound.
Release the trigger – the cutting blade
remains closed. To re-open the cutting
blade:
NPull the trigger again.
This option can be deactivated by
pushing the control lever – "PUSH".
Menu commands:
Adjust cutting action of blade
(proportional cut / impulse cut)
The pruning shears are set at the factory
so that the closing motion of the cutting
blade is proportional to the movement of
the trigger.
This function can be deactivated so that
the cutting blade closes fully when the
trigger is operated (impulse cut).
This setting is automatically reset when
the cordless pruning shears are
switched off.
Menu commands:
xx XXL
PUSH 2 sec. →RESET
PGND ↓↑PGUP
1/2 50% ON
PUSH
↓
1/2 60% ON
PUSH
↓
1/2 70% ON
PUSH
↓
1/2 OFF
PUSH
↓
PUSH →PUSH
PGND ↓↑ PGUP
CLICK - CLICK ON
PUSH
↓
CLICK - CLICK OFF
PUSH →PUSH
PGND ↓↑ PGUP
REG ON
PUSH
↓
REG OFF
PGND ↓↑PGUP

ASA 85
English
16
Overview of menu navigation
XX # xxxxxxx
↓
(a)
Batt: I I I I I I I I I I
PGND ↓↑PGUP
(b)
# 123456 123h 45m PUSH
2 sec.
→RESET
PGND ↓↑PGUP
(c)
42% S 37% M 21% L PUSH
2 sec.
→RESET
PGND ↓↑PGUP
(d)
xx XXL PUSH
2 sec.
→RESET
PGND ↓↑PGUP
(e) (f) (g) (h)
1/2 50% ON PUSH →60% PUSH →70% PUSH →OFF PUSH →(e)
PGND ↓↑PGUP
(i) (j)
CLICK - CLICK ON PUSH →CLICK - CLICK OFF PUSH →(i)
PGND ↓↑PGUP
(k) (l)
REG ON PUSH →REG OFF PUSH →(k)
PGND ↓↑PGUP
(m)
XXXXXX Vx.xx PUSH
3 sec.
→Rectifying problems - see "Troubleshooting" PUSH →(m)
PGND ↓ (a) ↑PGUP

ASA 85
English
17
Short Work Breaks
Set the pruning shears to the standby
mode:
–before carrying them short
distances
–before clearing away fallen
branches, scrub and cuttings
NPull the trigger (1) twice in quick
succession and hold it there until
you hear 3 beeps, then release the
trigger.
Cutting blade closes and remains
closed.
NPut your cordless pruning shears in
the holster.
Longer Work Breaks
Switch off your pruning shears at the
controller:
–before carrying them longer
distances
–before taking a break
NPull the trigger (1) and hold it there
– the cutting blade remains closed.
NMove switch on controller to OFF.
NPut your cordless pruning shears in
the holster.
NOTICE
Do not move the switch on the controller
to OFF while the cutting blade is closing
or opening. Always wait until the blade is
in the fully closed or fully open position
because parts of the power tool might
otherwise be damaged.
Automatic shutdown
The pruning shears shut down
automatically if they are not operated for
more than 10 minutes while in the ON
position.
The following signals then sound for a
period of 20 seconds:
To restart the power tool:
NMove switch on controller to OFF.
Then
NMove switch on controller to ON.
Cleaning and Maintenance Work
Switch off your pruning shears at the
controller and disconnect the connecting
cord:
–before carrying out inspections,
adjustments or cleaning work
–before performing repairs and
maintenance work
NSwitch off your pruning shears at
the controller:
NUnscrew the union nut (1).
NRemove the plug (2).
Switching Off
1
4816BA015 KN
1
4816BA016 KN
5x Short beep: followed by a one
second pause
4816BA017 KN
21

ASA 85
English
18
Before and After Work
Switch off your pruning shears at the
controller, disconnect the connecting
cord and remove the battery:
–before leaving the power tool
unattended
–before transporting to and from the
work area and in vehicles
–before storing
NOpen the zipper on the backpack.
NOpen the quick release buckle on
the battery bag.
NRemove the battery.
Store your cordless pruning shears and
backpack in the case.
NStore the case indoors in a dry and
secure location – out of the reach of
children and other unauthorized
persons.
If the pruning shears are wet, allow them
to dry completely before storing.
If the backpack is wet, allow it to dry
completely with the zipper open before
storing.
Storing the Battery
NRemove the battery from the
backpack bag or charger.
NStore indoors in a dry and secure
location. Keep out of the reach of
children and other unauthorized
persons and protected from
contamination.
NDo not store spare batteries unused
– use in rotation.
To optimize the life of the battery, store
it at a state of charge of about 30%.
Storing the Charger
NRemove the battery.
NDisconnect the plug from the wall
outlet.
NStore the charger indoors in a dry
and secure location. Keep out of the
reach of children and other
unauthorized persons and
protected from contamination.
4816BA018 KN
Storing the Machine
Other manuals for ASA 85
1
Table of contents
Languages:
Other Stihl Power Tools manuals

Stihl
Stihl FG 3 User manual

Stihl
Stihl KM 55 R User manual

Stihl
Stihl KMA 130 R User manual

Stihl
Stihl FC-MM User manual

Stihl
Stihl KombiSystem HT-KM User manual

Stihl
Stihl KM 94 R User manual

Stihl
Stihl FS 460 C-M User manual

Stihl
Stihl KMA 130 R User manual

Stihl
Stihl KM 111 R User manual

Stihl
Stihl 4180 Series User manual