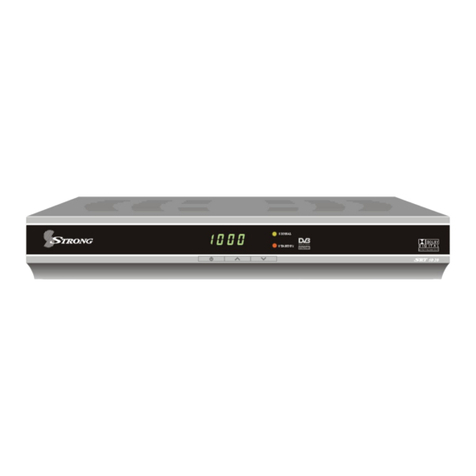
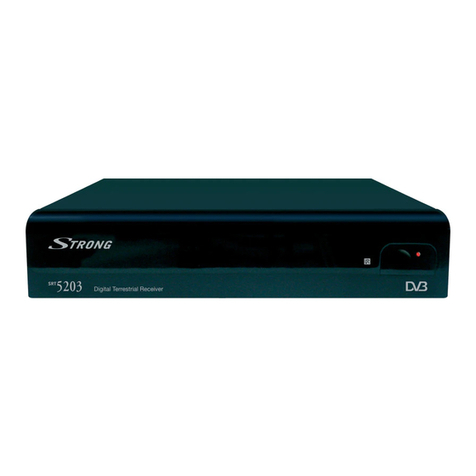
Strong SRT 80 User manual

User manual
Bedienungsanleitung
Manuel d’Utilisateur
Manuale Utente
Instrukcja obsługi
Manual de usuario
Manual do Utilizador
Picture similar
Digital Terrestrial
High Denition Receiver SRT 80


04 Jan 2015 18:46
HOTLINE
BG +359 32 634451
support_bg@strong.tv
DK support_dk@strong.tv
NL support_nl@strong.tv
AT 0820 400 150
support_at@strong.tv
€ 0,12/Min. österr. Festnetz
DE 0180 501 49 91
support_de@strong.tv
€ 0,14/Min. deutsches Festnetz
€ 0,42/Min. max. Mobilfunknetze
+36 1 445 26 10
support_hu@strong.tv
CEE
PL 801 702 017
support_pl@strong.tv
UA +380(44)228 24 73
support_ua@strong.tv
FR 0826 029 928
support_fr@strong.tv
€ 0,15 par mn poste fixe en France
IT 199 404 032
support_it@strong.tv
Da rete fissa 24,8 cent. al min.
12,5 cent. scatto alla risposta
Da rete mobile max 49 cent. al min.
15,6 cent. scatto alla risposta
www.strong.tv
Supplied by STRONG & Co, Japan
Represented by
STRONG Ges.m.b.H.
Franz-Josefs-Kai 1
1010 Vienna
Austria
Email: support_[email protected]

1
PART 1 • English
English
Licenses
ANY USE OF THIS PRODUCT IN ANY MANNER OTHER THAN PERSONAL USE THAT COMPLIES WITH THE MPEG-2
STANDARD FOR ENCODING VIDEO INFORMATION FOR PACKAGED MEDIA IS EXPRESSLY PROHIBITED WITHOUT A
LICENSE UNDER APPLICABLE PATENTS IN THE MPEG-2 PATENT PORTFOLIO, WHICH LICENSE IS AVAILABLE FROM
MPEG LA, LLC, 6312 S. Fiddlers Green Circle, Suite 400E, Greenwood Village, Colorado 80111 U.S.A.
THIS PRODUCT IS LICENSED UNDER THE AVC PATENT PORTFOLIO LICENSE FOR THE PERSONAL AND
NONCOMMERCIAL USE OF A CONSUMER TO (i) ENCODE VIDEO IN COMPLIANCE WITH THE AVC STANDARD (“AVC
VIDEO”) AND/OR (ii) DECODE AVC VIDEO THAT WAS ENCODED BY A CONSUMER ENGAGED IN A PERSONAL AND
NON-COMMERCIAL ACTIVITY AND/OR WAS OBTAINED FROM A VIDEO PROVIDER LICENSED TO PROVIDE AVC
VIDEO. NO LICENSE IS GRANTED OR SHALL BE IMPLIED FOR ANY OTHER USE. ADDITIONAL INFORMATION MAY BE
OBTAINED FROM MPEG LA, L.L.C. SEE HTTP://WWW.MPEGLA.COM

2
PART 1 • English
TABLE OF CONTENTS
1.0 INTRODUCTION 3
1.1 Safety Instructions 3
1.2 Storage 3
1.3 Equipment Set-up 3
1.4 Accessories 4
1.5 Usage of external USB Hard
Disk Devices 4
2.0 YOURRECEIVER 4
2.1 PIN-CODE DEFAULT: 0000 4
2.2 Your receiver 4
2.3 Remote Control 4
3.0 CONNECTION 5
3.1 Connecting to TV Set and Aerial 5
3.2 Connecting to Remote sensor and
External Power 5
4.0 GETTINGSTARTED 5
4.1 First Installation 5
4.2 Installation 6
5.0 OPERATION 6
5.1 Changing Channels 6
5.2 Accessing the Electronic Programme
Guide (EPG) with EPG button 6
5.3 Channel main menu 7
5.4 TV Channel Editor 7
5.5 Radio Channel list 7
5.6 EPG 7
5.7 LCN 7
6.0 TIME 8
6.1 Time main menu 8
7.0 TVSETUP 8
7.1 TV setup main menu 8
8.0 LANGUAGE 9
8.1 Language main menu 9
9.0 OTHERS 9
9.1 Others main menu 9
9.2 Parental Control 9
9.3 Update 10
9.4 Factory Setting 10
9.5 Calendar 11
9.6 Calculator 11
9.7 Game 11
9.8 Information 11
10.0 USB 11
10.1 USB main menu 11
10.2 Multimedia 11
10.3 Recorder Setting 12
10.4 Device Removed 12
11.0 TIMESHIFT ANDRECORD 12
11.1 Timeshift 13
11.2 Trick modes 13
11.3 Stop the Timeshift 13
11.4 Record 13
12.0 TROUBLESHOOTING 13
13.0 TECHNICALSPECIFICATIONS 14
STRONG declares that this item complies with the basic requirements and other relevant regulations of directives 2004/108/EC and
73/23/EC, RoHS 2002/95/EC
Subject to alterations. In consequence of continuous research and development technical specifications, design and appearance of
products may change. HDMI, the HDMI logo and High-Definition Multimedia Interface are trademarks or registered trademarks of
HDMI Licensing LLC in the United States and other countries. All other product names are trademarks or registered trademarks of their
respective owners. © STRONG 2015. All rights reserved.
04 Jan 2015 18:47

3
PART 1 • English
English
1.0 INTRODUCTION
1.1 SafetyInstructions
DO NOT INSTALL YOUR RECEIVER:
In a closed or poorly ventilated cabinet; directly on top of or under any other equipment; on a surface which
might obstruct the ventilation slots.
DO NOT EXPOSE THE RECEIVER OR ITS ACCESSORIES:
To direct sunlight or any other equipment that generates heat; to rain or intense moisture; to
intense vibration and to any shock which may cause permanent damage to your receiver or to any
magnetic objects, such as loudspeakers, transformers, etc.
Do not use a damaged power cord. It may cause a fire or an electric shock. Do not touch a power
cord with wet hands. It may cause an electric shock.
When the receiver is not used for a long period of time, you should unplug the power cord from the
wall socket.
Do not use alcohol or ammonia based liquids to clean the receiver. If you wish, you may clean
your receiver with a soft lint-free cloth slightly made damp with a mild soap solution, only after
disconnecting from the mains voltage supply. Make sure no foreign objects fall through the
ventilation slots because this could cause fire or an electric shock.
Do not place any objects on top of the receiver because this might prevent proper cooling of the
components inside.
SafetyPrecautions
Never open the receiver cover. Doing so will void the warranty. It is dangerous to touch the inside of
the receiver due to high voltage currents and possible electrical hazards. Refer all maintenance or
servicing to qualified service personnel.
When you are connecting cables, be sure that the receiver is disconnected from the mains supply.
Wait a few seconds after switching off the receiver before you move the receiver or disconnect
any equipment.
Use only approved extension cords with compatible wiring that is suitable for the electrical
power consumption of the installed equipment. Please ensure that the electrical power supply
corresponds with the voltage on the electrical identification plate at the back of the receiver.
If the receiver does not operate normally even after strictly following the instructions in this user manual, it is
recommended to consult your dealer.
1.2 Storage
Your receiver and its accessories are stored and delivered in a packaging designed to protect against electric
shocks and moisture. When unpacking it, make sure that all the parts are included and keep the packaging away
from children. When transporting the receiver from one place to another or if you are returning it under warranty
conditions, make sure to repack the receiver in its original packaging with its accessories. Failing to comply with
such packaging procedures could void your warranty.
1.3 Equipment Set-up
We recommend you consult a professional installer to set up your equipment. Otherwise, please follow the
instructions below:
Refer to the user manual of your TV and antenna.
Make sure that the HDMI cable and outdoor components are in a good condition.
If you use TV SCART connection, use then well shielded SCART cable.
This user manual provides complete instructions for installing and using this receiver. The symbols serve as
follows.
WARNING Indicates warning information.
Tips Indicates any other additional important or helpful information.
MENU Represents a button on the remote control or the receiver. (Bold сharacters)

4
PART 1 • English
Move to Represents a menu item within a window. (Italic сharacters)
1.4 Accessories
1. User manual
2. 1 remote control
3. 2x batteries (AAA type)
4. Infrared sensor ‘eye’ for receiving commands from the remote control
5. Double sided tape to mount the ‘eye’ on a surface
NOTE: The batteries should not be recharged, disassembled, electrically short-circuited, be mixed or
used with other types of batteries.
1.5 Usage of external USB Hard DiskDevices
It is recommended to use USB 2.0 or higher. If your device is not compatible to USB 2.0
specifications, recording, playback and other multimedia functions of the receiver might not work
properly. Pen drives may not work properly.
To ensure best performance of your USB storage device please format it to FAT32 system. Other file
systems are not supported by the receiver. STRONG cannot guarantee compatibility with all types
of USB storage devices.
It is advised not to store important information on USB storage devices used with the receiver.
Always make backups of data on your USB storage device before using it with this receiver.
STRONG will not take responsibility for any loss of information or circumstances caused by loss
of information.
2.0 YOURRECEIVER
2.1 PIN-CODE DEFAULT: 0000
2.2 Yourreceiver
Fig.1
1. Audio OUT
2. HDMI Output
3. S/PDIF Coaxial Digital Audio
4. TO TV
5. ANT IN
6. USB
7. Infrared sensor input
8. DC Input
2.3 RemoteControl
Fig.2
1. qSwitches the receiver on and standby
2. !Turns the volume on/off
3. PG+/PG Jump 15 places up/down in programme list or EPG
4. DTV/VCR No function
5. INFO Press for current channel information
Press repeatedly to see programme info and technical info
6. VOL+/VOL Controls the volume
7. MENU Opens and close the menu screen, one step back when in menu.
8. EXIT Exits from menu, exits from any screen.

5
PART 1 • English
English
9. pq Navigation buttons used to navigate menu items
Channel up/down
the previous or next file in multimedia.
10. tu Navigation buttons used to navigate menu items
Volume up/down
11. OK Confirms a selection within a menu
12. RECORD Records a TV programme
13. TIMESHIFT Activates the Timeshift function
14. 0~9 Enter numeric values and select the channel directly by entering its number
Numbers used in Multimedia functions
15. EPG Opens the Electronic Programme Guide
16. RECALL Switchs to the previous channel
17. AUDIO Selects audio mode and audio track
18. TV/RADIO Switchs between TV and radio
19. FAV Switchs between the favourite lists
20. FILE Jumps to Multimedia menu
21. TTX Opens interactive service
22. SUBTITLE Selects subtitles
23. 5Rewind a playback
24. 6Fast forward a playback
25. 3Stop
26. "Step by step
27. 2Pause/Freeze function
28. uPlayback
The remote control transmits a directional infrared beam. Be sure to aim the remote control directly at the infrared
sensor ‘eye’ provided with the unit during operation.
If the sensor is covered or there is a large object between the remote control and the sensor, the sensor will not
respond. The IR ‘eye’ can best be placed on the front of the TV, with help of the double sided tape (also provided).
The sensor may not able to receive the remote signal when it is exposed to direct sunlight or a strong artificial
light (fluorescent or strobe light). In this case, change the direction of the light or reposition the sensor to avoid
direct lighting.
3.0 CONNECTION
The unit will automatically detect if a HDMI connection is made to the TV and subsequently cut the analogue
Scart output. If no HDMI is connected, the Scart output will be active.
3.1 Connecting to TV Set andAerial
Fig.3
3.2 Connecting to Remote sensor and ExternalPower
Fig.4
4.0 GETTINGSTARTED
4.1 FirstInstallation
When you use the SRT 80 for the first time, the Installation menu appears. Use pqtu to setup the OSD
Language, Country Setting and Antenna power Connection. Press OK to start the channel search.

6
PART 1 • English
NOTE: The correct country setting is required to select the corresponding scan process in use for
that particular country. After the channel search you can change (additional) settings in the
menu, as described in this chapter.
Throughout the menu use the navigation buttons pqtu to select Highlight and change settings. Press OK to
confirm if a change is made. Press EXIT to exit the menu or press MENU to go one step back.
4.2 Installation
Press MENU to enter the Main menu. Press tu to highlight Installation, then press qto enter the Installation
menu. Press pq to highlight an item and press OK to enter the sub-menu. Press EXIT to exit or press MENU to
return one step back.
Antenna Power: ON/OFF. If an active (indoor-) antenna is used which requires 5 V power supply (check its
manual), you can switch it on here. If no 5 V is needed, this option is best left Off.
Country Setting: This menu is used for changing the country setting. The correct country setting is required
to select the corresponding scan process in use for that particular country.
Auto Scan: Select Auto Scan, then press OK, a warning window appears. Select Oand you will clear
the database and enter the AutoScan overview. Select Xto go one step back. Wait until the
auto scan is completed.
Manual Scan: If you want to (re-) scan a single channel multiplex and you know its properties, you can
do a manual scan. Select Manual Scan and press OK to enter the ManualScan menu. Press
pqtu to set Channel No., Frequency andBandwidth, then press OK to start channel scan.
Standby RF Loop: ON/OFF. The unit provides a loop through of the antenna signal, so a second unit/TV can
use the same antenna simultaneously. You can switch this feature OFF, if not required, to
save power in standby mode.
5.0 OPERATION
5.1 ChangingChannels
There are three ways of channel selection:
stepping through the channel list, selection by number and from the on-screen
channel list.
Stepping through the channel list:
To move through the channel list, press pq on the remote control.
Selected by number: Enter the channel number directly by pressing the 0~9 buttons, and then press OK to
select a channel (or wait a second after pressing numbers).
Selected by on-screen channels list:
You can also select the required channel directly from the on-screen channel list. Press OK
to get the programme list on screen and use pq and OK to select a channel. Use PG+ or
PG to jump 15 places in the list. The highlighted channel will be visible in the background.
5.2 Accessing the Electronic Programme Guide (EPG) with
EPGbutton
To access the EPG of all channels, press EPG to enter the EPG menu*. Press pq to select a channel. Press uto
switch to the events schedule of the selected channel. Press the YELLOW button to book a timer of the event.
With the BLUE button you can switch to the top line and use tu to select the FAV list you want to see.
Use BLUE again to switch to the EPG window.
When in the right window, use tu to select another date.
Use PG+ or PG to jump quickly in the lists.
Use MENU to return to left window.
Use EXIT to leave the EPG.
Pressing OK will switch to the highlighted channel
*Availability depends on broadcaster.

7
PART 1 • English
English
5.3 Channel mainmenu
Press MENU to enter the Main menu, then press tu to highlight Channel and qto enter the Channel menu.
Press pq to highlight an item and press OK to enter the sub-menu. Press EXIT to exit.
5.4 TV ChannelEditor
In the Channel menu, select TV Channel Editor and press OK to enter the TV channel Editor menu. Press pq to
highlight a channel.
The selected programme is shown in the preview window.
RED: Edit: Name, Move, Sortand Skip the channel.
NOTE: If LCN is activated it is not possible to move a channel to another position. See 5.7 for details.
To edit names, a pop-up keyboard screen is shown, where you can change the names
using the navigation buttons. Be sure to save the changes by selecting the ‘floppy-disk’
sign, press OK and confirm again or use the RED button.
GREEN:Lock a channel with PIN code, when Channel Lock is set ‘On’ in the Parental Control menu
YELLOW:Delete the selected channels or all channels at once.
BLUE:Go to the Top of the channel list, press BLUE again, you can go to Down. In the top line you
can select the FAV lists or all channels list which you want to edit. ‘Visible’ is the total list,
‘Invisible’ are channels which are set to be skipped in the edit Skip section.
FAV When FAV is pressed, then OK, you can make 8 favourites lists, distinguishable with a
symbol. Music, Sports, Shopping, News, Movies, Talk/News, List 1 and List 2. Highlight a
channel and assign a symbol to the channel with tu and press OK. These symbols are
then presented in the programme info banner and in the top line of the programme list.
5.5 Radio Channellist
In the Channel menu, select Radio Channel Editor and press OK to enter the RadioChannel Editor menu. Press pq
to highlight a channel and OK to listen to a radio channel.
NOTE: Basically, the operation of the Radio ChannelEditor is the same as the TV ChannelEditor, but
one point is different: In the Radio ChannelEditor mode, there is no video information, so it
will always display the logo of the radio station in the right side preview window, if included
in the broadcast.
5.6 EPG
This menu allows you to set the EPG (Electronic Programme Guide). In the Channel menu, select EPG and press
OK. If you want to return to the left of the programme list when you are browsing the section of programme on
the right, press MENU once.
Press pq to select a channel. Press uto switch to events schedule of the selected channel. Press the YELLOW
button to book a timer of the event.
With the BLUE button you can switch to the top line and use tu to select the FAV list you want to see.
Use BLUE again to switch to the EPG window.
When in the right window, use tu to select another date.
Use PG+ or PG to jump quickly in the list.
Use MENU to return to left window.
Use EXIT to leave EPG.
Pressing OK will switch to the selected channel
5.7 LCN
If the LCN (Logical Channel Number) function is activated, you can’t change the original programme number of
TV channels. LCN is a, by the broadcaster, pre-defined channel order. Not all countries or broadcasters use this

8
PART 1 • English
function. The default LCN setting is made by the country setting. The default setting can be overruled in this
menu, by setting the LCN Mode on/off.
6.0 TIME
6.1 Time mainmenu
The time menu allows you to set GMT Usage, Time Zone, Date, Time, SleepTime, Summer Time and AdvTimer. Press
MENU to enter the Main menu and tu to highlight Time, then press qto enter the Time menu. Press pq to
highlight an item and press OK to enter the sub-menu. Press EXIT to exit.
GMT Usage: This menu is used to select the usage of GMT. The options are: OFF/ON. Default is ON, the
GMT time is set by the broadcaster’s network.
Time Zone: This menu is valid only when selected “ON” in GMT Usage menu. The Time Zone range is
“-12:00 ~ +12:00”, increasing half hour progressively. Default time zones are according to
the country setting in the Installation menu, but can be overruled here. The default time
setting is best left unchanged.
Set Date: This menu is valid only when “OFF” is selected in GMT Usage. Press the0~9 buttons to input
the date.
Set Time: This menu is valid only when “OFF” is selected in GMT Usage. Press the 0~9 buttons to
input the time.
Sleep Time: This menu allows you to set the Sleep Time. The options are OFF/60/120/180 minutes. After
this time has passed the unit enters to standby.
Summer Time: Daylight Saving Time. This menu allows you to set the Summer Time. The options are
OFF/ON. If GMT Usage was set to “ON”, then the broadcaster will control the switch to
Summer time.
Adv Timer: This menu allows you to set the Advanced Recorder Schedule Mode. When in the Timer
window, press OK to add a timed event. Use the navigation buttons, to set the channel
type and number, start and end time, mode, timer mode.
Once: one time programming
Weekly: Every week, same day, same time, same channel.
Weekend day: Every Saturday and Sunday, same time, same channel.
Weekday: Every Mon, Tue, Wed, Thu, Friday: same time, same channel.
Daily: Every day, same time, same channel.
A timer event can be removed with the RED button.
NOTE: To make a recording a USB device must be connected and the timer mode must be set to
‘Recorder’, otherwise the unit will only wake up on the channel set, but not record.
7.0 TVSETUP
7.1 TV setup mainmenu
The TV setup menu allows you to set TV Format, TVMode, Video Output, TV Resolution, OSD Transparency and
Banner Display Time. Press MENU to enter the Main menu and tu to highlight TV Setup, then press qto enter
the TV Setup menu. Press pq to highlight an item and press OK to enter the sub-menu. Press EXIT to exit.
TV Format: 4:3PSPan&Scan: When a 4:3 TV should be connected, a 16:9 broadcast will be shown as a
centre cut-out, losing image content on the left and the right.
16:9LB Letterbox: When a widescreen TV is connected, a 4:3 broadcast will be shown with black bars left
and right.
16:9FIT: When a widescreen TV is connected, a 4:3 broadcast will be shown stretched from left
to right.
4:3LB Letterbox: When a 4:3 TV should be connected, a 16:9 broadcast will be shown with black bars above
and below, but not losing image content.

9
PART 1 • English
English
NOTE: Some TVs force its screen format to an own setting and cannot always be overruled.
TV Mode: PAL
Video Output: HDMI/SCART(CVBS)/SCART(RGB).
NOTE: When an HDMI cable is connected to the TV, the unit will automatically switch to HDMI
output (“Handshake”), and cut the analogue video outputs, to avoid that the TV switches to
Scart input.
TV Resolution: AUTO/1080p_50Hz/720p_50Hz/1080i_50Hz
NOTE: The unit will auto-negotiate with the TV or monitor for the optimum resolution setting
(“Handshake”).
OSD Transparency: The OSD (On Screen Display) can be made transparent in steps 1/2/3/4/5/6/7/8where 1 is
very transparent, 8 not transparent.
Banner Display Time: Automatic time-out of the OSD screen. Always On/1S/3S/5S/10S/30 seconds
8.0 LANGUAGE
8.1 Language mainmenu
The language menu allows you to set OSD Language, Audio Language, Subtitle Language and Digital Audio Output.
Press MENU to enter the Main menu and tu to highlight TV Setup, then press qto enter the TV Setup menu.
Press pq to highlight an item and press OK to enter the sub-menu. Press EXIT to exit.
OSD Language: This menu allows you to set the OSD language.
Audio Language: This menu allows you to set the Audio language. This language will be selected first, if
more than one audio stream should be available in the broadcast.
Subtitle Language: This menu allows you to set the Subtitle language. Select the preferred subtitle language
or OFF. This Subtitle will be selected first, if more than one Subtitle stream should be
available in the broadcast.
Type of Subtitle If a subtitle language is selected in the previous menu, select here if you want to
see the normal subtitles in the selected language or the specially adapted Hard of
Hearing subtitles.
Digital Audio Output: PCM/Bitstream: Select setting for digital audio to a Home Theatre Set.
PCM: (LPCM) Pulse code modulation is 2 channel stereo, Bitstream (RAW) is needed for multi
audio channel Dolby or AC3.
NOTE: Audio and subtitles depend on availability in broadcast.
9.0 OTHERS
9.1 Others mainmenu
The others menu allows you to set Parental Control, Update, FactorySetting, Calendar, Calculator, Game and
Information. Press MENU to enter the Main menu and tu to highlight TV Setup, then press qto enter the TV
Setup menu. Press pq to highlight an item and press OK to enter the sub-menu. Press EXIT to exit.
9.2 ParentalControl
This menu allows you to protect the installation menu and channel and change the password.
Menu Lock: To lock the menu items Channel/Installation/Time/TVSetup/Language/Others/USB. You can
set the menu lock to on/off.

10
PART 1 • English
Channel Lock: OFF/ON. If set to “ON”, select channels to be locked in the TV or radio channel editor page.
Parental Lock: No Block/Total Block/05/06/07/08/09/10/11/12/ 13/14/15/16/17/18. Age restriction
information to programmes can be transmitted by the broadcaster.
NOTE: If any of the above mentioned items are set to “ON”, then you need a valid PIN to gain access
to the Parental Control menu again.
Change Password: The default is “NO”, when you press tu, you are asked to enter the old password first (the
default password is ”0000”).
9.3 Update
9.3.1 ImageUpgrade
Enter the Others menu, select ImageUpgrade, then press OK. Press pqtu to select an item, then highlight Start
and press OK to start upgrade. Press EXIT to exit.
You can upgrade the software version via OTA or by a software image, obtained from the STRONG website, to
be used with a USB device. Preferably use an empty USB device formatted in FAT32, such as a Pen drive, only
containing the image in the root.
If an image is obtained from the STRONG website www.strong.tv, you must ‘unzip’ the file first on a PC and only
transfer the *.ssu file onto the USB device. Detailed instructions are also given on the website.
When in the upgrade page, use pqtu to select the image file and press OK to start the upgrade process. A
progress bar will be shown and after a successful upgrade, the unit will reboot and show the initial Installation
page. From here you can re-install the channels.
NOTE: Do not power the unit down or pull the mains plug during upgrade. Do not try to load any
other software than for this unit issued by the STRONG website www.strong.tv. Advisedly, do
not connect or disconnect any cables during upgrading. Trying to load any other software
might destroy the unit, but certainly void your warranty.
NOTE: If your unit should unexpectedly behave erratically after a software update, please perform
a factory reset. See 9.4 Factory Setting. For software upgrade it is possible to use a USB pen
drive or a HDD.
9.3.2 OTA ‘Over TheAir’
The unit is capable of receiving and processing OTA upgrades.
OTA updates are not always available from all network providers.
For details check the STRONG website www.strong.tv.
9.4 FactorySetting
This menu allows you to re-set the receiver back to factory settings and clear all existing channels. In the Others
menu, select Factory Setting and press OK. A valid Pin must be entered. Then a confirmation window is displayed.
Select the Oto return back to factory settings and clear all channels. Select the X button to cancel. Press EXIT
to exit.
The unit will reboot and display the first Installation screen.

11
PART 1 • English
English
WARNING: Use this function with care.
9.5 Calendar
This menu allows you to check the calendar as a service. Enter the Others menu, select Calendar and press OK. The
Calendar page is shown. Use the navigation buttons to walk through the dates. Press EXIT to exit.
9.6 Calculator
This function allows you to use the calculator. In the Others menu, select Calculator and press OK to enter the
Calculator page. Use the navigation buttons or numeric keys to enter data. Press RED to calculate. Press EXIT
to exit.
9.7 Game
This menu allows you to play some games. Press MENU to enter the Main menu. Press pq to highlight Game and
uto enter the Game menu. Press pq to highlight an item and OK to enter the game. Press EXIT to exit.
9.8 Information
This page will show you some technical information about this receiver, Model ID, software version, build date
and the STRONG website www.strong.tv.
10.0 USB
10.1 USB mainmenu
Press MENU to enter the Main menu. Press tu to highlight USB and qto enter the USB menu. Press pq to
highlight an item and OK to enter the sub-menu. Press EXIT to exit.
10.2 Multimedia
NOTE: You can jump to this menu with a shortcut on the RCU with the FILE button.
This menu allows you to play files from the USB port. In the USB menu, select Multimedia and press OK to enter
the Multimedia menu. Press pqtu and OK to select an item and OK to play an files. Press EXIT to exit.
In this menu numeric buttons are used to select options.
1, 2, 3, and 4perform numerous functions, like editing, selecting options, GoTo, Zoom and Step-function. Options
include random order play, repeat, character set, font size. Use pq to play previous or next file in multimedia.
Follow the button instructions on screen.
10.2.1 Movie
1: SetOption.
Random play order On/Off
Repeat All/Off
Text encode for movie subtitles, default Western Europe
Subtitle Font Size: small, normal, big (also depending on subtitle provider)
2: Browse by thumbnail or folder.
3 When folder is selected, change the folder’s size: small, normal or big.
10.2.2 Music
1: Set Option.
Random play order On/Off
Repeat All/Off
Info option, select Music info or Lyrics, if applicable.

12
PART 1 • English
2: Browse by thumbnail or folder.
3: When folder is selected, change the folder’s size: small, normal or big.
10.2.3 Photo
1: Set Option.
Random play order On/Off
Repeat All/Off
Interval time: slow, medium, fast
2: Browse by thumbnail or folder.
3: When folder is selected, change the folder’s size: small, normal or big.
NOTE: During Photo play, you can select music to play along with the pictures with the 2button.
Press tu to rotate the picture.
10.2.4 MyRecorder
1: Open the Edit window.
The name of a programme can be changed, follow the procedure with the coloured
buttons, as in the TV channel edit menu.
2: Device, view disk information, select partitions, format the disk if needed (FAT32)
NOTE: Formatting the disk will erase all content on it.
3: Select files to be deleted.
4: Delete selected files.
10.3 RecorderSetting
This menu allows you to set the Record Setting.Press pq to select an item and tu to change the setting.
Timeshift time: OFF/AUTO/TIMESHIFT
OFF: No Timeshift possible, no space reserved on USB device.
AUTO: Timeshift data saving will automatically commence after each channel change, meaning,
it is possible to go back some amount of time on the watched channel, depending on
reserved space on USB device.
2: Timeshift data saving will only commence if TIMESHIFT is pressed on remote control, and
picture will freeze. Continue watching with ubutton. Stop Timeshifting with 3.
One Button Recording: ON/OFF.
OFF: After pressing RECORD you have the possibility to enter a recording period, default is 2.00
hours. Press OK to start recording.
ON: Recording will start immediately when RECORD is pressed, without the possibility to enter
a record period.
Default Recording Period:
Maximum/00:15~24:00, increasing quarter of an hour progressively. Default is 2.00 hours.
10.4 DeviceRemoved
For safely removing a USB device, to prevent data loss and damage to unit and/or device. A removed device can
become active again if you disconnect and reconnect the USB device. In the USB menu, select Device Removed
and press OK to confirm. Then a window is displayed. Press OK again.
11.0 TIMESHIFT ANDRECORD
Plugging an external USB storage device on the USB port gives you access to Timeshift or you can record a
broadcasted programme.
Pause a broadcast programme and continue watching it a while later (Timeshift).
Record a broadcast programme.

13
PART 1 • English
English
When the space available on the USB Storage Device runs out, recording will stop.
NOTE: Please use a USB 2.0 disk when recording or Timeshifting. For Timeshift and recording, you
should use a bigger size USB pen drive or HDD (4GB) for recording.
11.1 Timeshift
Timeshift can be started in viewing mode by pressing TIMESHIFT. Press 5 6 to move to the time where you
desire to view. Press uto start normal playback.
11.2 Trickmodes
During the playback, it is possible to perform the following actions:
Press 2to pause the playback.
Press 6to fast forward the playback.
Press 5to rewind the playback.
Press GREEN for ‘step’ function.
11.3 Stop theTimeshift
Press 3to stop Timeshift.
11.4 Record
11.4.1 Instantrecording
In viewing mode, press RECORD to instantaneously start a recording on the current channel. If RECORD is
pressed again, the instant recording switches to duration mode. Press 3to stop a recording, then a confirmation
window appears. Select Oto stop the recording orXto continue the recording. The Recording mode is depending
on the One Button Recording setting in the Recorder setting menu.
NOTE: Please select a well-known brand USB 2.0 USB HDD for recording and Timeshift, such as
SAMSUNG, HITACHI and SONY. Some USB devices might not be usable nor supported due to
its quality. For software upgrade it is possible to use a USB pen drive or a HDD.
12.0 TROUBLESHOOTING
There may be various reasons for abnormal operation of the receiver. Check the receiver according to the
procedures shown below. If the receiver does not work properly after checking it, please contact your dealer or
the local Service Hotline. Do NOT try to open or disassemble the receiver. It may cause a dangerous situation and
warranty will be void.
Problem Possiblecause What todo
No signal found
The antenna is disconnected
The antenna is damaged/
misaligned
Out of digital signal area
Check the antenna lead
Check the antenna
Check with your dealer
No picture or sound Scart/AV/HDMI is not selected on
your TV
Check for the correct input on your
TV/monitor
When HDMI is connected,
the Scart output is switched
off automatically.
Scrambled channel message The channel is scrambled Select an alternative channel

14
PART 1 • English
Problem Possiblecause What todo
No response to remote control
The receiver is off
The remote control is not aimed
correctly
The infrared sensor ‘eye’ is
obstructed
The remote control batteries are
exhausted
Plug in and turn the receiver on
Aim the remote control at the
infrared sensor ‘eye’
Check for obstructions
Replace the remote control
batteries
Forgotten channel lock code
Forgotten menu lock code
PIN-CODE DEFAULT: 0000
Contact your dealer or the local
Service Hotline or contact STRONG
through the website.
After moving the receiver to
another room you find you are
no longer able to receive digital
reception
The signal strength/quality might
be less than before, if using an
indoor antenna.
If using an active (indoor) antenna,
is the antenna power supplied?
Try to use an outdoor antenna.
Playback of video (or Timeshift) is
stuttering, especially when playing
HD content.
Write or read speed of the USB
device could be too low
Make sure to use a USB Hard Disk
Drive with sufficient speed and
space. Pen drives (‘USB sticks’) may
not work.
13.0 TECHNICALSPECIFICATIONS
Demodulator
Demodulator: QPSK/16 QAM/64 QAM
Transmission mode: 2 K - 8 K
VideoDecoder
Video resolution: 1920 x 1080
Decoding & Video Out: PAL
Aspect ratio: 4:3 Letterbox, 4:3 Pan & Scan, 16:9
AudioDecoder
Audio mode: AAC/AC3/PCM/E-AC3
Sampling rate: 32, 44.1, 48 KHz
Audio mode: Stereo, Mono
Tuner
Front End: DVB-T, UHF & VHF Tuner
Input frequency range: 174 – 230 MHz (VHF) and 470 - 858 MHz (UHF)
Input signal level: -78 ~-20 dBm
Loop through frequency range: 47 - 862 MHz
Multimedia
Video recording and playback: MPEG-1 and MPEG-2 encoded (mpg), DVR, MPEG-4 H.264*
Audio playback: MP3, WMA*
Picture view: JPEG*
* STRONG cannot guarantee the playback of files although extensions are listed, as it depends on codec used, data bit rate and
resolution (all MPEG codec formats are supported).

15
PART 1 • English
English
Memory andSystem
Flash memory: 4 MB
Embedded SDRAM: 64 MB
Connectors
ANT IN - IEC Female
TO TV – IEC male
TV SCART (RGB, CVBS)
USB port (Type A) 5 V/800 mA (max.)
Audio output (L/R)
S/PDIF (coax.)
HDMI
IR sensor input
DC IN 12 V/1 A
GeneralData
Power adaptor: 100~240 V AC in, 50/60 Hz, DC out 12 V / 1 A
Power consumption: typ. 3.8 W, max. 7 W
Power consumption in standby: max. 0,4 W
Operating temperature: 0 ~ +40 °C
Storage temperature: -10 ~ +50° C
Operating humidity range: 10~85%, RH, Non-condensing
Size (WxDxH) in mm: 138 x 70 x 20
Weight: 96 g

16
PART 1 • English
Table of contents
Other Strong TV Receiver manuals

Strong
Strong SRT 5011 User manual

Strong
Strong SRT 8202 User manual

Strong
Strong SRT 8530 User manual

Strong
Strong SRT 5392 User manual

Strong
Strong PRIMA IV User manual

Strong
Strong PRIMA VI User manual

Strong
Strong SRT 5203 User manual

Strong
Strong SRT 5005 User manual

Strong
Strong SRT 5429 User manual

Strong
Strong PRIMA III User manual

Strong
Strong SRT 5000 User manual

Strong
Strong SRT 8201 User manual

Strong
Strong SRT 8205 User manual

Strong
Strong SRT 5510 MHP User manual

Strong
Strong SRT 82 User manual

Strong
Strong SRT 5222 User manual

Strong
Strong SRT 2400 User manual

Strong
Strong SRT 8525 User manual

Strong
Strong SRT 5020X User manual

Strong
Strong SRT 4950E User manual