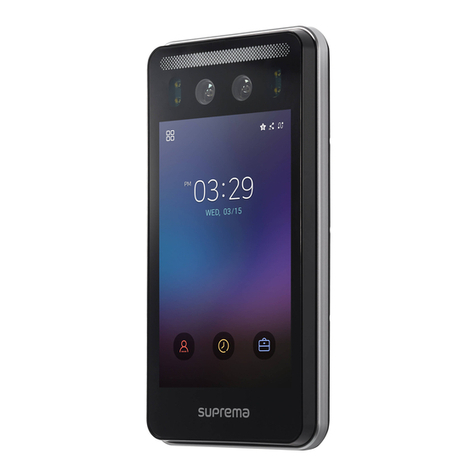
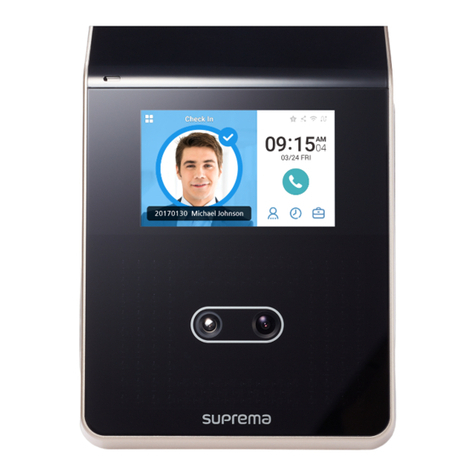
suprema FSF2ODB User manual

FaceStation F2
USER GUIDE
EN 102.00.FSF2-ODB V1.02A
Version 1.02
English

Safety Instructions
Observe the following instructions to use the product safely and prevent any risk of injury or property damage.
Warning
Noncompliance with instructions can lead to serious injury or death.
Installation
Do not install the device under direct sunlight or UV light.
•Product damage, malfunction, discoloration, or deformation may occur.
Do not install the product in a location with direct sunlight, moisture, dust, or soot.
•Fire or electric shock may occur.
Do not install the product in a location with heat from an electric heater.
•Fire or electric shock may occur due to overheating.
Install the product in a dry location.
•Otherwise, product damage or electric shock may occur due to moisture.
Install the product in a location with no electromagnetic interference.
•Otherwise, product damage or electric shock may occur.
The user should not install or repair the product independently.
•Fire, electric shock, or personal injury may occur.
•If the product has been damaged due to independent installation or repair of the product by the user, free A/S service
will not be provided.
Operation
Do not allow liquids such as water, beverages, or chemicals get into the product.
•Fire, electric shock, or product damage may occur.
Caution
Noncompliance of instructions could lead to minor injury or product damage.
Installation
Do not install the power supply cable in a location where people pass by.
•Product damage or physical injury may occur.
Do not install the product near a highly magnetic object such as a magnet, TV, monitor (especially CRT), or speaker.
•Product failure may occur.
Use only a D.C 24 V and 2.5 A or higher power supply adaptor.
•If the proper power supply is not used, the product may not operate properly.
Use a separate power supply for the Secure I/O 2, electric lock, and FaceStation F2, respectively.
•If connecting and using the power supply to these devices together, the devices may malfunction.
Keep the minimum separation distances between the devices when install multiple devices.
•Otherwise, RF performance is affected to the other device, the devices may not operate normally.

Operation
Do not drop the product or apply an impact to the product.
•Product failure may occur.
Manage the password with care; do not to disclose it to others and change it periodically.
•Otherwise, illegal intrusion may occur.
Do not press the buttons on the product forcibly or using a sharp tool.
•Product failure may occur.
When cleaning the product, wipe the product with a soft and dry cloth. Do not apply water, benzene, or alcohol.
•These may cause product failure.
FaceStation F2 uses a capacitive screen and buttons. If the environment is moist from wet weather, or the product
surface is smeared with a large amount of water, wipe the product off with a dry towel before using it.
RTC battery
Replacing the battery with an incorrect type of battery may cause explosion.
Discard the battery according to appropriate regional or international waste regulations.

Introduction
Components
NOTE
•Components may vary according to the installation environment.
•When assembling the product with the bracket, you can use the included bracket fixing screw (Star Shaped) instead of the
product fixing screw for enhanced security.
•For additional content regarding product installation, visit the Suprema website (https://www.supremainc.com) and view
the installation guide.
FaceStation F2
Wall Bracket
Fixing Screw x6
PVC Anchor x6
Diode
Connection Cable
(1x2-pin, 1x3-pin, 3x4-pin)
Drilling Template
Quick Guide
120Ωresistor
Open Source Software
Guide
Bracket Fixing Screw
(Star Shaped)
Cable Cover

Name and function of each part
Name
Description
LED lamp
Turned on when the user is detected in the dark.
Infrared camera
Capture the infrared face image.
Visual camera
Capture an actual face image.
LCD screen
Provides UI for operation.
RF card and mobile access
card authentication unit
Part to scan the card for entrance.
Speaker
USB (Type-C) cable slot
Fingerprint sensor
Relay (3 pins)
Visual camera
SAM card slot
Power Supply (2 pins)
RS-485 (4 pins)
TTL Input (4 pins)
Wiegand Input/Output
(4 pins)
Ethernet
RF card and mobile access card
authentication unit
LCD screen
Infrared camera
LED lamp

Fingerprint sensor
Reads fingerprints.
Speaker
Delivers sound.
Ethernet
Connect the Ethernet cable.
TTL input (4 pins)
Connect the TTL input cable.
Relay (3 pins)
Connect the relay cable.
Wiegand input/output
(4 pins)
Connect the Wiegand input/output cable.
Power supply (2 pins)
Connect the power supply cable.
RS-485 (4 pins)
Connect the RS-485 cable.
SAM card slot
Insert the SAM card.
USB (Type-C) cable slot
Connect the USB cable.

Cables and connectors
Power supply
Pin
Name
Color
1
PWR +VDC
Red (white stripe)
2
PWR GND
Black (white stripe)
Relay
Pin
Name
Color
1
RLY NO
White
2
RLY COM
Blue
3
RLY NC
Orange
RS-485
Pin
Name
Color
1
485 TRXP
Blue
2
485 TRXN
Yellow
3
485 GND
Black
4
SH GND
Gray
TTL input
Pin
Name
Color
1
TTL IN0
Red
2
TTL IN1
Yellow
3
TTL GND
Black
4
SH GND
Gray
Wiegand input and output
Pin
Name
Color
1
WG D0
Green
2
WG D1
White
3
WG GND
Black
4
SH GND
Gray

Correct face registration and authentication method
Cautions for registering a face
•When registering a face, maintain a distance of 60 cm to 100 cm between the device and the face.
•Do not change your face expression.
•Do not wear masks, hats, or eye patches.
•Do not raise head up or lower head.
•Do not close your eyes.
•Do not wear thick makeup.
•Be careful not to display two faces on the screen. Register one person at a time.
•If you do not follow the instructions on the screen, the face registration may take longer or may fail.
Cautions for authenticating a face
•Ensure that the face appears in the center of the device's screen. When the guideline is displayed, follow the
instructions shown on the screen to authenticate the face.
•If a part of the face is covered with a hat, a mask, an eye patch, or sunglasses authentication may fail. Do not cover the
face; allow the device to recognize both the eyebrows and the face.
How to enroll a fingerprint
In order to improve the fingerprint authentication rate, register the fingerprint correctly. FaceStation F2 can recognize a
fingerprint even if the angle and position of a user's fingerprint input change. If you register the fingerprint with attention
to the following matters, the authentication rate can be improved.
Selecting a finger for fingerprint input
•In preparation for the case that the fingerprint of a specific finger cannot be used, for
example if the user is lifting a load with one hand or a finger gets hurt, up to 10
fingerprints for each user can be registered.
•In the case of a user whose fingerprint cannot be recognized well, the authentication
rate can be improved by enrolling the same finger twice repeatedly.
•If a finger has a cut or the fingerprint is blurry, select another finger for the
fingerprint.
•It is recommended to use the index finger or the middle finger when scanning the
fingerprint. The authentication rate can be reduced if it is difficult to place another
finger at the center of fingerprint sensor accurately.

Fingerprint enroll method
1
When a message saying “Place your finger on the sensor.” is displayed on the LCD screen for enrolling the
fingerprint, place the finger with the fingerprint you wish to enroll on the fingerprint authentication unit and press the
finger gently for better authentication.
2
When the re-input screen is displayed after a beep sound, scan the fingerprint of the enrolled finger again (scan the
fingerprint of a finger to be enrolled twice).
NOTE
Cautions for enrolling a fingerprint
When a fingerprint is recognized, it is compared with the initially registered fingerprint, so the initial fingerprint enroll is the most
important. Pay attention to the following matters when enrolling the fingerprint.
•Place the finger deep enough to contact with the sensor completely.
•Place the center of the fingerprint in the center of the sensor.
•If a finger has a cut or the fingerprint is blurry, select another finger for the fingerprint.
•Scan the fingerprint correctly without moving according to the instruction on the screen.
•If you make the finger upright so that the contact area with the sensor is decreased or the angle of finger is warped,
fingerprint authentication may not be performed.
When the fingerprint recognition fails
FaceStation F2 can recognize a fingerprint regardless of a change in season or finger condition. However, the authentication rate
may vary according to the external environment or fingerprint input method.
If the fingerprint authentication cannot be done smoothly, it is recommended to take the following measures.
•If the finger is smeared with water or sweat, dry off the finger and then scan the finger.
•If the finger is too dry, blow your breath on the fingertips and then scan the finger.
•If the finger has a cut, register the fingerprint of another finger.
•The initially enrolled fingerprint often may have not been scanned correctly, so enroll the fingerprint again according to
‘Cautions for enrolling a fingerprint’.

Admin Menu
All Menus
1Press and authenticate with the Admin level credential.
2Select the desired menu.
NOTE
•If the administrator has not been designated, the menu screen will be displayed when you press .

User
Registering User Information
The user information, including the face and fingerprint, can be registered.
1Press and authenticate with the Admin level credential.
2Select USER > , and choose a credential you want to register.
There are two steps for the user registration. Some options are available after the credential has been registered.
•: Register a user photo.
•Name: Enter the user name.
•ID: Enter a number between 1 and 429467295 to register as the user ID. If User ID Type set to Alphanumeric, a combination of
alphanumeric characters and symbols (_, -) can be used for the ID. Up to 32 characters can be input.
•Face: Register a face for user authentication. Press Face > Next and register a face according to the instructions on the screen.
To add more faces, press . Refer to Registering a face to learn more about the face registration.
•Fingerprint: Register a fingerprint for user authentication. Press Fingerprint > Next and register a fingerprint according to the
instructions on the screen. To add more fingerprint, press . Refer to Registering a fingerprint to learn more about the
fingerprint registration.
•Card: Register a card for user authentication. Press Card > Next and scan the card that will be assigned to the user. To register
an additional card, press .
•PIN: Enter the PIN you wish to use. Enter the PIN you wish to use, and then reenter the same PIN for confirmation. Enter a
number between 4 and 16 digits to prevent leaking.
•Operator Level: Select the level you wish to assign to a user.
NOTE
Available menus vary according to the set operator level.
•None: This is the general user level; menus cannot be accessed.
•Administrator: All menus can be accessed.
•Configuration: AUTHENTICATION, DISPLAY & SOUND, DEVICE, NETWORK and EVENT LOG menus can be accessed.
•User Management: USER and EVENT LOG menu can be accessed.
•Period: Set an expiry date to use the user account.
•Duress: Select this option to add the fingerprint as a duress fingerprint. When threatened by someone to open the door, the
user can authenticate using this fingerprint to send an alarm signal to BioStar 2.

•Extended Private Auth Mode: Change the authentication method according to the user. You can set whether to use the
extended private auth mode. this mode allows you to combine user authentication methods, including both faces and
fingerprints. Otherwise, you can use the device's basic authentication mode. You can modify it in BioStar 2.
3To save settings, press OK.
Registering a face
1Press and authenticate with the Admin level credential.
2Select USER > .
3Select Face > Next.
4Adjust a distance between the face and screen and look straight at the camera of the device.
5Once your face is captured successfully, press OK > Save. To retake a photo, press Re-Shot.
NOTE
•The visual face data of FaceStation F2 are not compatible with face templates of FaceStation 2 or FaceLite.
•You can register Visual Face not only directly from FaceStation F2 but from the BioStar 2 by uploading photos or importing
CSV files. You can also register Visual Face with your smartphone via a link sent from BioStar 2. To learn more about how to
register Visual Face for each method, please refer to the BioStar 2 help manual.
•To use a Visual Face feature correctly, take a picture by following instructions below.
- When registering a face, maintain a distance of 60 cm to 100 cm between the device and the face.
- Do not change your face expression.
- Do not wear masks, hats, or eye patches.
- Do not raise head up or lower head.
- Do not close your eyes.
- Do not wear thick makeup.
- Be careful not to display two faces on the screen. Register one person at a time.
- If you do not follow the instructions on the screen, the face registration may take longer or may fail.
Registering a fingerprint
1Press and authenticate with the Admin level credential.
2Select USER > .
3Select Fingerprint > Next.
4Scan your fingerprint and verify the same fingerprint again.
NOTE
•Place the finger deep enough to contact with the sensor completely.
•Place the center of the fingerprint in the center of the sensor.
•If a finger has a cut or the fingerprint is blurry, select another finger for the fingerprint.
•Scan the fingerprint correctly without moving according to the instruction on the screen.
•If you make the finger upright so that the contact area with the sensor is decreased or the angle of finger is warped,
fingerprint authentication may not be performed.

Modifying User Information
User Management or Administrator can modify the registered user information. A user’s face, fingerprint, or card can be
added, and the PIN and level can be modified.
1Press and authenticate with the Admin level credential.
2Select USER > .
3Select your search terms. You can search for a user by All, User ID, Name, Face,Fingerprint, and Card.
4Select a user you wish to modify.
5Modify the information by referring to Registering User Information and press OK.
•To delete a user, select and then press OK.
NOTE
•Access Group can be registered in BioStar 2. For detailed contents regarding registering an access group, refer to the
BioStar 2 Administrator Manual.
Delete All Users
You can delete all registered users at once.
1Press and authenticate with the Admin level credential.
2Select USER > .
3Check Delete All to delete all registered users and press OK.
4When you press OK, all registered users will be deleted.

View User Usage
You can see the number of registered users, faces, fingerprints, and cards at a glance.
1Press and authenticate with the Admin level credential.
2Select USER > . User usage information appears.

Authentication
Auth Mode
Set the authentication mode. You can make a combination of face, fingerprint, PIN, card, or ID and you can also set a
schedule for each authentication mode.
Registering auth mode
1Press and authenticate with the Admin level credential.
2Select AUTHENTICATION > Auth Mode,and press .
3Press +and select one of options you want to use. To add additional options, repeat this step.
4Press Schedule and set a schedule.
NOTE
•You can combine selected authentication mode to authenticate all in order or only some of the selected authentication
mode to authenticate. For example, if you combines the authentication mode with + + , a user should
authenticate a face, fingerprint, and PIN, and if you combine the authentication mode with + / , a user
authenticates a face first and fingerprint or PIN.
•A schedule can be set in BioStar 2. If there is a no preset schedule, only Always can be selected.
•For detailed content regarding setting a schedule, refer to BioStar 2 Administrator's manual.
5Press OK to save the settings.
Modifying auth mode
You can set the schedule to be used for each authentication method using a card.
1Press and authenticate with the Admin level credential.
2Select AUTHENTICATION > Auth Mode.
3Select the authentication mode to modify.
4Modify the authentication mode by referring to Registering auth mode and press OK.
Deleting auth mode
You can set the schedule to be used for each authentication method using a card.
1Press and authenticate with the Admin level credential.
2Select AUTHENTICATION > Auth Mode.
3Press and select the authentication mode to delete. You can select multiple options.
4Press OK. To delete the selected option, press OK. Or, press Cancel to cancel the deletion.

Server Matching
You can set the server matching. When this option is activated, it performs user authentication matching in BioStar 2, not
in the device. It can be used when the device has too much user information or when the device is installed outside.
1Press and authenticate with the Admin level credential.
2Select AUTHENTICATION and activate Server Matching (Fingerprint, Card, ID).
NOTE
•It is only available for fingerprint, card and ID options.
•When you use the server matching option, you need to activate the option in both Biostar 2 and the device. Refer to the
administrator manual of BioStar 2 to learn how to set the server matching settings in BioStar 2.
Face
You can change settings regarding the face authentication.
3Press and authenticate with the Admin level credential.
4Select AUTHENTICATION > Face.
5Select and set the desired item.
•Ambient Brightness: Detect the ambient brightness and adjust the intensity of IR LED. Change settings according to the
installation environment.
•Motion Sensor: Set the sensitivity for detecting motion near the device. If Motion Sensor is set to OFF, tap the screen to
authenticate the face.
•Enroll Timeout: If a face is not registered during the set time, the face registration will be canceled.
•Auth Timeout: If the authentication is not completed during the set time, the authentication will fail.
•Duplicate Check: When registering a face, you can check duplicates.
•Face Detect Setting: set the face recognition area by adjusting the size and position of the detected area.
NOTE
•It is recommended to maintain the default values of options under Face Detect Setting. The default values of each option
are as follows:
-Maximum Head Rotation Angle: 15
-Minimum Face Width: 66

-Maximum Face Width: 250
-Search Range X coordinate: 144
-Search Range Width: 432
•Security Level: Set the security level for 1:N authentication.
•Operation Mode: Set the operation mode of the device when the face is authenticated.
-Fusion Matching: Use both visual and infrared cameras to increase the face authentication accuracy.
-Fast Matching: The device authenticates users who pass an access point without a pause within the authentication
distance.
•Face Detection: The device prevents user authentication using fake faces, such as photos. It is available when Operation Mode is set to
Fusion Matching.
•Advanced Settings: Set the settings of the face recognition, such as mask detection, thermal camera.
-Check Mode: Set the check mode depending on the usage.
-Authentication Fail Sound: Set the alarm to trigger when a user is not wearing a mask, or the measured temperature is
higher than preset threshold.
-Mask Detection: Set the mask detection mode to detect whether a user is wearing a mask or not. If you select Enabled
(Hard), it refuses authentication of users who are not wearing a mask and saves event logs. If you select Enabled (Soft),
users who are not wearing a mask can authenticate but event logs still be saved.
-Thermal Camera: Set the thermal camera options. If you select Enabled (Hard), it refuses authentication of users with
elevated temperature than the preset threshold and saves event logs. If you select Enabled (Soft), users with elevated
temperature than the preset threshold can authenticate but event logs still be saved.
NOTE
•Set the Check Mode depending on the usage when Mask Detection or Thermal Camera is activated.
-Check After Authentication: Measure the temperature after a successful authentication.
-Check Before Authentication: Authenticate only when the user is within the range of the preset temperature
threshold. When this mode is activated, it does not attempt to authenticate user’s identity if their temperature has
been detected to be above the threshold.
-Check Only: Detect temperature without authentication. This mode allows users within the range of the preset
threshold to access without checking their identity or access rights.
•When Thermal Camera is enabled, you can set advanced settings.
-Celsius/Fahrenheit: Change the unit of temperature.
-Low Threshold Temperature: Set the minimum threshold temperature to limit the access. Users with detected
temperature below the threshold will be denied access. It can be set between 1°C to 45°C and cannot be higher than
the value of the maximum threshold temperature.
-High Threshold Temperature: Set the maximum threshold temperature to limit the access. Users with detected
temperature over the threshold will be denied access. It can be set between 1°C to 45°C and cannot be higher than
the value of the minimum threshold temperature.
-Save Temperature Data: Save temperature data. When this mode is activated, it saves both authentication and
temperature logs. When this mode is deactivated, it only saves authentication logs.
-Show Thermal Infrared Image: Display infrared imaging on the screen of the devices.
-Dynamic ROI: If there are ambient light sources near the device, the thermal camera may incorrectly measure the
subject's temperature. You can set the thermal camera to automatically measure the skin temperature by detecting
the ROI (Region of Interest) and to avoid detecting the temperature of ambient light devices.
-Camera Configuration: Configure the thermal camera settings for accurate measurement.
•When Thermal Camera is enabled, you can configure the thermal camera settings for accurate measurement depending
on environment.
-Distance(cm): Set up the distance between the user and device.
-Emissivity: Set up the emissivity to precisely measure the temperature of the user.
-ROI X(%), ROI Y(%), ROI Width(%), ROI Height(%): If there are lights in the device field of view they may be
detected instead of the desired subject. Set the temperature measurement area by adjusting the size and position of
ROI (Region of Interest).
-Skin Temperature Compensation: You can set the thermal camera to adjust its temperature value automatically
measuring the ambient conditions.
-Skin Temperature Correction: You can set the thermal camera to compensate for variations in caused by the
ambient environment that consistently affect temperature measurement. For example, if the environment is causing
temperature to be measured at 0.1°C higher, set the temperature correction to -0.1.

-FW: It shows the current firmware version of the thermal camera when it is connected properly.
•It is recommended to maintain the default values of the camera configuration settings for the best performance. The default
values of each option are as follows:
-Distance(cm): 100
-Emissivity: 0.98
-ROI X(%): 30
-ROI Y(%): 25
-ROI Width(%): 50
-ROI Height(%): 55
•The supported thermal camera is TCM10-FSF2.
•For details on installing and connecting the thermal camera, visit the Suprema website (https://www.supremainc.com) and
view the TCM10-FSF2 setup guide.
Fingerprint
You can change settings regarding the fingerprint authentication.
1Press and authenticate with the Admin level credential.
2Select AUTHENTICATION > Fingerprint.
3Select and set the desired item.
•Security Level: Set the security level for 1:N authentication.
•Matching Timeout: Set the fingerprint matching timeout. If the authentication is not completed during a set time, the
authentication will fail.
•View Image: Set to view the original image when scanning the fingerprint.
•Sensor Sensitivity: Set the sensitivity of the fingerprint authentication sensor. To obtain more precise fingerprint information by
increasing the sensor sensitivity, set the sensor sensitivity higher.
•1:N Fast Mode: Set the fingerprint authentication speed. If you select Auto, the authentication speed will be set according to all
fingerprint templates enrolled on the device.
•Template Format: Set the fingerprint template format. SUPREMA is set as the default, and if you change the template format, all
fingerprints saved previously cannot be used. Use caution when changing the Template Format.
•Sensor Mode: When Auto On is set, the fingerprint sensor recognizes a user's fingerprint and turns on. When Always On is set,
the sensor is always on.
•Live Finger Detection: Set the level of the fake fingerprint detection. The higher the fake fingerprint detection level, the higher
This manual suits for next models
1
Table of contents
Other suprema Touch Terminal manuals

suprema
suprema BioLite Net User manual

suprema
suprema BioStation 2 User manual

suprema
suprema FaceStation F2 User manual

suprema
suprema XS2-DPB User manual

suprema
suprema X-station User manual

suprema
suprema BioStation L2 User manual

suprema
suprema biostation User manual

suprema
suprema biostation User manual

suprema
suprema BioStation T2 User manual

suprema
suprema BioStation L2 User manual