Deutsch ItalianoEspañol
Usar Corriente AC
1. Enchufe un extremodel adaptador decorriente en la ficha de corriente
de la paredy el otroextremo en la parte posterior delmonitor. Vea la
Fig. 9. Nota: Use sólo el adaptadoretiquetado SALIDA: 13.5V DC
con el monitor.
2. Encienda el monitor. El LED en la parte frontal del monitor debe
permanecer iluminado. Vea la Fig. 9.
3. Ajuste el volúmena un nivelque le agrade.
Sintonía Fina
Ajuste la imagende vídeo usandolos desviadores para ajustar V-
MANTENER, CONTRASTE yBRILLO enla parteposterior delmonitor,
según sea necesario.
Otras aplicaciones
Grabar con una VCR
1. El monitor vienecon clavijas desalida para Audio/Vídeo para conectara la
VCR al grabar.
2. Conecte los enchufesdel cable blancoy amarillo para audio/vídeo a las
clavijas blanca y amarilla para audio/vídeo del monitor,y a las clavijasde
entrada blanca yamarilla de laVCR, coincidiendo el color delos enchufes
con el color de las clavijas tanto enel monitor como enla VCR. Vea laFig.
10.
Visión Nocturna
La cámara tieneseis LEDs dealta intensidad para recoger imágenes clarasen
lugares con pocailuminación. Para encender la función devisión nocturna,
deslice la tecla como se muestra en lailustración de la derecha. Vea la Fig. 11.
Nota: Apague la funciónde visión nocturnacuando no la use, para ahorrar
energía.
Solamente Audio
La pantalla puedeser apagada paramonitorear solamente el audio. Para apagarla
pantalla, presione elbotón en elpanel frontal como muestra la ilustraciónde la
derecha. Vea la Fig. 12.
Resolviendo Problemas
Si no obtiene señal alguna
Verifique el encendido enla cámara y el monitor.
Asegúrese de quelos enchufes decorriente han sido insertados hasta elfinal.
Verifique que el desviador de CANALEStanto en la cámara como enel
monitor están definidos en el mismo número.
Si la cámara/monitor está alimentadospor baterías, reemplace todas las
baterías por otrasnuevas.
Si puede recibirsonido, pero notiene imágenes, o las imágenes sonpobres,
verifique el botónPANTALLA ENCENDIDA/APAGADAen el panelfrontal,
o ajuste eldesviador V-MANTENER/CONTRASTE/BRILLO en la parte
posterior del monitor.
Si la señal es pobre, ohay interferencia
Cambie la definición de canal tanto en la cámara como en el monitor y
colóquelos en el mismo número.
Si hay un horno microondas en uso en el camino entre la cámara y el monitor,
remueva el horno microondas o apáguelo.
Asegúrese de quela cámara yel monitor están dentro de ladistancia
recomendada (distancia deaproximadamente 300 pies,100 metros sin
obstrucciones).
Precauciones
Mantenga todas sus piezas y accesorios lejos de los niños.
El rendimiento dela cámara puedees afectada por huelgas digitales o
suciedad en la superficie de la lente. Evite tocar la superficie de la lente con
sus dedos.
Para limpiar el objetivo use un soplador o un paño blando y seco.
Mantenga seco. Precipitación, humedad y líquidoscontienen minerales que
corroen los circuitos electrónicos.
No use nialmacene enlocales sucioso polvorientos.
No almacene enlocales calientes. La alta temperatura puedereducir la
duración de los dispositivos electrónicos e deformar o derretir los plásticos.
No almacene enlocales excesivamente fríos. Cuando el aparato se calienta
(hasta su temperaturanormal), la humedadse forma en el interior dela caja,
lo que puede dañar los circuitos electrónicos.
No intente abrir la caja. Este dispositivo puede dañarse con el manejo por
personas no expertas.
Evite dejar caer o causar fuertes impactos.
Use este producto usando solamente la fuente de alimentación u otros
accesorios suministrados.
No sobrecarguelos tomacorrientes olas extensiones. Esto puede causar
incendio o choque eléctrico.
Tengasiempre en cuentaque está utilizando la banda deuso público general
al usar el sistema y que el sonido y el video pueden ser transmitidos a otros
dispositivos receptores de 2,4 GHz. Conversaciones, aun de una sala a otra
cerca de la cámara pueden ser transmitidas. Para proteger la privacidad de su
casa, apague la cámara cuando no está en uso.
Contenido del paquete
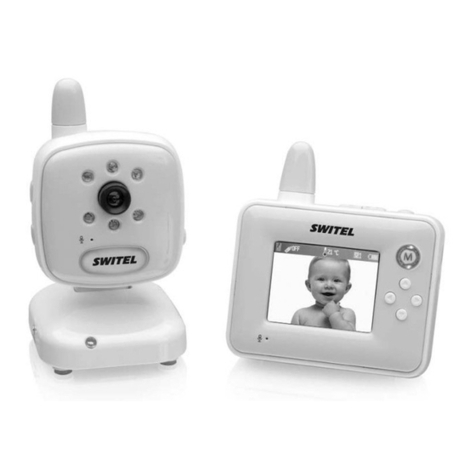
Una Cámara
Un Monitor
Dos Adaptadores de Corriente
Placa de montaje
Tornillosde fijación ybujes
Este Manual delUsuario
Nota: Los adaptadores AC de corriente NO DEBEN serintercambiados. Use
solo el adaptadoretiquetado SALIDA: 9VDC con lacámara. Use sóloel
adaptador etiquetado SALIDA: 13.5VDC conel monitor.
Diseño del Productor
Cámara (Fig. 1)
1. LEDs Infrarrojos (Seis LEDs proporcionan luz infrarroja para visión
nocturna.)
2. Objetivo
3. Cuerpo del objetivo
4. Micrófono
5. Agujeros de montaje
6. Compartimento para Baterías
7. LED Indicador deCorriente
8. APAGADO/ENCENDIDO/NOCTURNO(OFF/ON/NIGHT,Tecla
APAGADO/ENCENDIDOy ENCENDIDOVISION NOCTURNA.)
9. Selector de Canal(Seleccione el canalal correr la tecla deslizadora hastael
número de canalque quiere. Nota: Debe seleccionar enmismo canal para la
cámara y el monitor.)
10. Enchufe Adaptador de Corriente 9V
Monitor (Fig. 2)
1. Compartimento para Baterías
2. Pantalla ENCENDIDA/APAGADA (La pantallapuede ser apagada para
monitorear sólo el audio.)
3. LED Indicador deCorriente
4. Control deAlimentación Eléctrica / Volumen
5. Enchufe Adaptador de Corriente 13.5V
6. Selector de Canal(Seleccione el canalal correr la tecla deslizadora hastael
número de canalque quiere. Nota: Debe seleccionar enmismo canal para la
cámara y el monitor.)
7. Clavija deAudio (Blanca)
8. Clavija de Video (Amarilla)
9. V-MANTENER(V-HOLD)
10. BRILLO (BRIGHT)
11. CONTRASTE (CONT)
Instalación
Antes de hacer la conexión:
Asegúrese de queel conmutador ENCENDIDO/ APAGADO/ NOCHE en la
parte trasera dela cámara yel control y el control deAlimentación Eléctrica/
Volumen en la partefrontal del monitor esténen laposición deAPAGADO.
Ajuste los interruptoresde canal enla parte trasera de la cámaray del
monitor en el canal deseado.
Instalación de la Cámara
Fuente de Energía
La cámara utiliza4 pilas tamañoAA o la energía eléctrica CAdoméstica.
Cargar las Baterías
1. Abra el compartimientode las pilasen la parte trasera de lacámara.
Vea la Fig. 3.
2. Inserte las pilashaciendo coincidir lossignos (+) ymenos (-) según el
esquema dentro delcompartimiento de laspilas. Vea la Fig. 3.
3. Cierre la tapa del compartimento de baterías. Asegúrese de que la tapa
del compartimento debaterías está cerradacorrectamente.
Nota 1: Nunca mezcle bateríasviejas con baterías nuevas.
Nota 2: Remueva lasbaterías de la cámara si no planea usarla por un
período de tiempo.
4. Ponga en ENCENDIDOel interruptor dealimentación eléctrica. El
LED en laparte inferior dela cámara debe permanecer iluminado. Vea
la Fig. 3.
Usar Corriente AC
1. Conecte una puntadel adaptador suministradoal tomacorriente en la
pared y la otra en la parte inferior de lacámara. Vea la Fig. 4.
Nota: Use sólo eladaptador etiquetado SALIDA:9V DC con la
cámara.
2. Deslice el conmutadorENCENDIDO /APAGADO / NOCHE ala
posición de ENCENDIDO. El LED enla parte inferior dela cámara
debe permanecer iluminado. Vea laFig. 4.
Sintonía Fina
Coloque la cámara en un localadecuado, a apunteel objetivo haciael área
de observación y ajuste el ángulogirando el cuerpodel objetivo. Vea la
Fig. 5.
Montaje de la Cámara en laPared
Nota: Antes de sujetar la cámara pruebe la recepción del monitor.
Coloque a unapersona sosteniendo lacámara contra la pared en elárea
seleccionada para montaje mientras que otra persona verifica la recepción
del monitor. Si se presentainterferencia oproblemas deotro tipo,deberá
seleccionar una ubicacióndiferente para montarla cámara.
1. Taladredos agujeros separados52 mm, en la posición demontaje de la
cámara.
2. Fije la placa de montaje en la pared usando los bujes y tornillos
suministrados. Vea la Fig. 6.
3. Coloque la cámara contra la placa de montaje de manera que los
espárragos en laplaca de montajeentren en los agujeros en laparte
trasera de la cámara. Después tire de la cámara hacia abajo para
deslizar los espárragos en los canales recortados. Vea laFig. 7.
Instalación del monitor
Fuente de Energía
El monitor emplea pilas tamaño 10 C o alimentación eléctrica CA
doméstica.
Cargar las Baterías
1. Abra la tapa del compartimento de baterías en la dirección indicada
por la lecha. Vea la Fig 8.
2. Inserte las pilashaciendo coincidir lossignos (+) y menos (-) según el
esquema dentro del compartimiento de las pilas. Vea laFig. 8.
3. Cierre la tapa del compartimento de baterías. Asegúrese de que la tapa
del compartimento debaterías está cerradacorrectamente.
Nota 1: Nunca mezcle bateríasviejas con baterías nuevas.
Nota 2: Remueva lasbaterías de la cámara si no planea usarla por un
período de tiempo.
4. Encienda el monitor. El LED en la parte frontal del monitor debe
permanecer iluminado. Vea la Fig 8.
5. Ajuste el volúmena un nivelque le agrade.
1
2
1
2
2
1
1
.
.
.
.
.
1
1
2
3
2
Benutzen von Netzstrom
1. Stecken Sie daseine Ende desNetzteils in eine Netzsteckdose und das
andere Ende in den Anschluss auf der Rückseite des Monitors. Siehe
Fig. 9. Hinweis: Benutzen Sie das Netzteil,das mit OUTPUT: 13.5V
DC bezeichnet ist, nur für den Monitor.
2. Schalten Sie denMonitor ein. Die LED auf derVorderseite des
Monitors sollte aufleuchten. Siehe Fig. 9.
3. Stellen Sie die Lautstärke auf eine angenehme Höhe ein.
Feineinstellung
Stellen Sie dasVideobildmit Hilfe der Schaltknöpfe V-HOLD,
KONTRAST undHELLIGKEIT aufder Rückseitedes Monitorsein.
Andere Anwendungen
Aufnahme auf einen Videorecorder
1. Der Monitor besitztAudio/Video-Output-Buchsen zum Anschließen eines
Videorecorders für dieAufnahme.
2. Schließen Sie dieweißen und gelbenStecker des Audio/Videokabels an die
Audio/Video-Buchsen des Monitors unddie Input-Buchsen des
Videorekorders an, wobei diedie Farben der Stecker mit denFarben der
Buchsen übereinstimmen sollten. Siehe fig. 10.
Nachtansicht
Die Kamera besitztsechs leistungsfähige LEDszur Aufnahme von klaren
Bildern in dunklerUmgebung. Wenn Sie die Nachtansicht-Funktion benutzen
wollen, schieben Sieden Schalter wiein der Abbildung gezeigt nachrechts.
Siehe Fig. 11.
Hinweis: WennSie die Nachtansicht-Funktionnicht benötigen, sollten Sie sie
ausschalten, um Strom zu sparen.
Nur Audio
Der Bildschirm kann ausgestellt werden, wenn Sie nur Audio verwenden wollen.
WennSie den Bildschirmausschalten wollen, drücken Sie dieTaste auf der
Vorderseite des Monitors wiein der Abbildunggezeigt. Siehe Fig. 12.
Problembehebung
Wenn Sie kein Signal erhalten
Gberprüfen Sie die Stromversorgungvon Kameraund Monitor.
Gehen Sie sicher, dasalle Netzsteckerkorrekt eingestecktsind.
Gehen Sie sicher, dassdie Kanal-Schalterauf derKamera unddem Monitor
auf den gleichen Kanal eingestellt sind.
WennKamera/Monitor mit Batterienbetrieben wird, ersetzen Sie die
Batterien durch neue.
WennSie nurTonund kein Bild empfangen, oder wenndie Bildqualität
schlecht ist, überprüfenSie den SCREENON/OFF-Schalter auf der
Vorderseite oder stellen denV-HOLD/ KONTRAST/HELLIGKEIT-Knopf
auf der Rückseite des Monitors ein.
Wenn das Signal schlecht ist, oder es Störungengibt
Wählen Sie einen anderen Kanal für die Kamera und den Monitor.
Entfernen Sie ein Mikrowellengerät, wenn es sich zwischen Kamera und
Monitor befindet, oder schalten Sie es aus.
Gehen Sie sicher, dass derAbstandzwischen Kamera undMonitor nicht zu
groß ist (maximal 100 Meter (300 feet) bei klarer Sicht).
Vorsichtsmaßnahmen
Halten Sie alle Teile und Zubehör außerhalbder Reichweite von Kindern.
Die Kameraleistung kanndurch Fingerabdrücke oderSchmutz auf dem
Objektiv beeinträchtigt werden. Vermeiden Sie das Berührendes Objektivs
mit Ihren Fingern.
Wenndas Objektiv verschmutztist, benutzen Sie ein Gebläse, umSchmutz
oder Staub wegzublasen, oder benutzen ein weiches trockenes Tuch zum
Wischen.
Halten Sie das Gerät trocken. Niederschlag, Feuchtigkeit und Flüssigkeiten,
die Mineralien enthalten, können Rostbildung am elektronischen Kreislauf
verursachen.
Benutzen Sie dieGeräte nicht anstaubigen oder schmutzigen Orten oder
bewahren sie dort auf.
Setzen Sie dieGeräte keiner Hitzeaus. Hohe Temperaturenkönnen die
Lebenszeit elektronischer Geräteverkürzen und das Verformen oder
Schmelzen von Kunststoffteilen verursachen.
Setzen Sie dasGerät keiner extremenKälte aus. Wenn sich die Einheiten
(auf ihre Normaltemperaturen) erhitzen, kann es zu Feuchtigkeitsbildung
innerhalb des Gehäuseskommen, was u.U. die elektronischen Platinen
beschädigen kann.
Versuchen Sie nicht, das Gehäuse zuöffnen. Das Gerät kann durch
unfachmännische Behandlung beschädigt werden.
Vermeiden Sie Fallenlassen oder starke Stöße.
Betreiben Sie dieses Gerät nur mit der dafür vorgesehenen Stromversorgung
oder bereitgestelltem Zubehör.
Vermeiden Sie das Überbelasten von Netztsteckdosenoder
Verlängerungskabeln, da dies zuFeuer oder elektrischem Schlag führen kann.
Denken Sie daran,dass Sie öffentliche Wellenlängen benutzen, wennSie das
System verwenden, unddass Ton und Videozu anderen 2,4 GHz-
Empfangsgeräten übertragen werdenkann. Unterhaltungen, selbst in der
Nähe der Kamera,können übertragen werden. Schalten Sie zum Schutz Ihrer
Privatsphäre Ihre Kamera immer aus, wenn Sie sie nicht benutzen.
Was Sie erhalten
Eine Kamera
Ein Monitor
Zwei Netzteile
Befestigungsplatte
Befestigungsschrauben und Dübel
Dieses Benutzerhandbuch
Hinweis: Die Netzteile KÖNNEN NICHTvertauscht benutztwerden.
Benutzen Sie das Netzteil, das mit OUTPUT: 9VDC bezeichnet ist, nurfür
die Kamera. Benutzen Sie das Netzteil, das mit OUTPUT: 13.5VDC
bezeichnet ist nur für den Monitor.
Produkt-Layout
Kamera (Fig. 1)
1. Infrarot-LEDs (Sechs LEDsfür Infrarotlichtbei Nachtaufnahmen.)
2. Linse
3. Objektivkopf
4. Mikrofon
5. Schlüssellöcher
6. Batteriefach
7. LED zur Stromanzeige
8. AUS/EIN/NACHT (OFF/ON/NIGHT, Schalter für STROMAUS/STROM
EIN und NACHANSICHT EIN.)
9. Schalter für Kanalauswahl(Wählen Sie einenKanal, indem Sie den Schieber
auf die Nummer des gewünschten Kanals schieben. Hinweis: Sie müssen
für die Kamera und den Receiver den gleichenKanal auswählen.)
10. 9V-Netzteilanschluss
Monitor (Fig. 2)
1. Batteriefach
2. Bildschirm EIN/AUS (Bildschirm kann ausgeschaltet werden, wenn nur
Audio benötigt wird.)
3. LED-Stromanzeige
4. Ein/Aus/Lautstärkenregelung
5. 13.5V Netzteilanschluss
6. Schalter für Kanalauswahl(Wählen Sie einenKanal, indem Sie den Schieber
auf die Nummer des gewünschten Kanals schieben. Hinweis: Sie müssen
für die Kamera und den Receiver den gleichenKanal auswählen.)
7. Audio-Buchse (Weiß)
8. Video-Buchse (Gelb)
9. V-HOLD
10. HELLIGKEIT (BRIGHT)
11. KONTRAST (CONT)
Einrichtung
Bevor Sie die Verbindung erstellen:
Gehen Sie sicher, dass derSchalter EIN/AUS/NACHTauf der Rückseite der
Kamera sowie dieEin/Aus/Lautstärkenregelung auf derVorderseite des
Monitors jeweils aufdieAUS-Position eingestellt ist.
Stellen Sie dieKanalschalter auf derRückseite der Kamera und des
Monitors auf den gleichen Kanal ein.
Einstellen der Kamera
Stromversorgung
Die Kamera benutzt4 Batterien derGröße AAoder gewöhnlichen
Netzstrom.
Einlegen der Batterien
1. Öffnen SiedieAbdeckung des Batteriefachsauf der Rückseite der
Kamera. Siehe Fig. 3.
2. Legen Sie dieBatterien entsprechend derMarkierungen für diePlus- (+)
und Minus- (-)Pole innerhalb desBatteriefachs ein. Bitte sehen Sie
hierzu Abb.4. Siehe Fig. 3.
3. Schließen Sie das Batteriefach fest zu.
Hinweis 1: Verwenden Sie niemals alte und neueBatterien
zusammen.
Hinweis 2: Entfernen Siedie Batterien, wenn Sie die Kamera für eine
längere Zeit nicht benutzen wollen.
4. Stellen Sie den EIN/AUS-Schalter auf die EIN-Position. Die LED auf
der Unterseite der Kamera sollte aufleuchten. Siehe Fig. 3.
Benutzen von Netzstrom
1. Stecken Sie das eine Ende des mitgelieferten Netzteils in eine
Netzsteckdose und schließendas andere Endeauf der Unterseite der
Kamera an. Siehe Fig. 4. Hinweis: Benutzen Sie dasNetzteil, das
mit OUTPUT:9V DCbezeichnet ist, nur für die Kamera.
2. Stellen Sie denEIN/AUS/NACHT-Schalterauf die EIN-Position. Die
LED auf der Unterseite der Kamera sollte aufleuchten. Siehe Fig. 4.
Feineinstellung
Stellen Sie die Kamera an einemgeeigneten Ort auf,richten das Objektiv
auf den Überwachungsbereich und stellen denWinkel ein,indem Sie das
Objektiv drehen. Siehe Fig. 5.
Anbringen der Kamera an einer Wand
Hinweis: Der Empfang desMonitors sollte getestetwerden, bevor die
Kamera an einemOrt fixiert wird. Lassen Sie eine Person die Kameraan
der gewünschten Stelle halten, während eineandere Person den Empfang
am Bildschirm prüft. Wenn es Störungen gibt,müssen Sie die Kamerau.
U. an einer anderen Stelle anbringen.
1. Bohren Sie ander gewünschten Positionfür die Kamera zwei Löcher
auf einer LinieimAbstand von 52mm.
2. Fixieren Sie diemitgelieferte Befestigungsplatte mitHilfe der Dübel
und Schrauben an der Wand. Siehe Fig. 6.
3. Halten Sie dieKamera gegen dieBefestigungsplatte, so dass die
Stiftschrauben auf derBefestigungsplatte durch dieSchlüssellöcher
auf der Rückseite der Kamera zeigen. Führen Sie die Kameradann
nach unten, um die Stiftschrauben in die Löchergleiten zu lassen.
Siehe Fig. 7.
Einrichten des Monitors
Stromversorgung
Der Monitor benutzt10 Batterien derGröße C oder gewöhnlichen
Netzstrom.
Einlegen der Batterien
1. Öffnen Siedas Batteriefachin Pfeilrichtung. Siehe Fig. 8.
2. Legen Sie die Batterien entsprechend der Markierungen für die Plus-
(+) und Minus-(-) Pole innerhalbdes Batteriefachs ein. Bitte sehen
Sie hierzu Fig. 8.
3. Schließen Sie das Batteriefach fest zu.
Hinweis 1: Verwenden Sie niemals alte und neueBatterien
zusammen.
Hinweis 2: Entfernen Siedie Batterien, wenn Sie die Kamera für eine
längere Zeit nicht benutzen wollen.
4. Schalten Sie denMonitor ein. Die LED auf derVorderseite des
Monitors sollte aufleuchten. Siehe Fig. 8.
5. Stellen Sie die Lautstärke auf eine angenehme Höhe ein. .
1
2
1
2
2
1
1
.
.
.
.
.
1
1
2
3
2
Uso della corrente AC
1. Inserire un capodell'adattatore di correntein dotazione in una presa a
muro e l'altro capo nel retro del monitor. Vedi Fig 9. Nota: Usare con
il monitor esclusivamente l'adattatore etichettato OUTPUT: 13.5V DC.
2. Accendere il monitor. Si illumineràil LED sullaparte anteriore del
monitor. Vedere la figura 9.
3. Regolare il volumesu un livelloconfortevole.
Sintonizzazione
Regolare l'immagine delvideo usando ipomelli di regolazione V-HOLD,
CONTRASTO eLUMINOSITÀ nel retrodel monitor, a seconda del
bisogno.
Altre applicazioni
Registrazione su un VCR
1. Il monitor vienefornito con delleprese di output Audio/Video per il
collegamento a unVCR perla registrazione.
2. Collegare le spinebianca e gialladel cavo audio/video alle prese biancae
gialla audio/video del monitor e alle prese biancae gialla di inputdel VCR,
combinando i colori delle spine con le presesia del monitor chedel VCR.
Vedere la figura 10.
Visione notturna
La telecamera ha sei LED ad alta intensità per riprendere delle immagini chiare
in luoghi non illuminati. Per accendere la funzionedi visione notturna, spostare
l'interruttore come mostratonell'illustrazione sulla destra. Vedere lafigura 11.
Nota: Spegnendo la funzionedi visione notturnaquando non è necessaria si
risparmia corrente.
Solo Audio
Lo schermo sipuò spegnere peril monitoraggio dell'audio soltanto. Per
spegnere lo schermo,premere il pulsantesul pannello frontale come mostrato
nell'illustrazione a destra. Vedere la figura 12.
Soluzione dei problemi
Se non si riceve alcun segnale
Controllare la corrente sulla telecamera e sul monitor.
Assicurarsi che lespine della correntesiano inserite fino in
fondo.Controllare se gli interruttori dei CANALI sulla telecamera e sul
monitor sono impostati sullo stesso numero.
Se la telecamera/monitorè alimentato dalle batterie, sostituire tuttele
batterie con dellebatterie nuove.
Se si riceve il suono, ma non si ricevono le immagini, oppure se le immagini
sono povere, controllareil pulsante SCHERMOACCESO/SPENTO
(ON/OFF) sul pannellofrontale oppure regolareil pomello V-HOLD/
CONTRASTO/LUMINOSITÁ nelretro delmonitor.
Se il segnale è debole ovi sono delle interferenze
Cambiare le impostazioni del canale sulla telecamerea e sul monitor e usare
lo stesso canale.
Se c'è un forno a microonde nel percorso fra la telecamera e il monitor,
rimuovere il forno a microonde oppure spegnerlo.
Assicurarsi che la telecamera e il monitor non siano troppo lontani l'uno
dall'altro (la distanza non deve superare i 100 metri e i due apparecchi
devono essere ben visibili).
Precauzioni
Teneretutte le partie gli accessori lontani dalla portatadei bambini.
Le prestazioni dellatelecamera possono essereridotte da impronte delle dita
o sporcizia sullasuperficie della lente.Evitare di toccare la lente conle dita.
Se l'obiettivo si sporca, utilizzare uncompressore o un pannomorbido
asciutto per eliminarepolvere e sporcizia.
Mantenete l'apparecchiatura asciutta. Pioggia, umidità ei liquidi in genere
contengono minerali checorrodono i circuitielettronici.
Non usare odepositare in luoghipolverosi o sporchi.
Non depositare inluoghi caldi: lealte temperature abbreviano la vita dei
dispositivi elettronici edeformano o fondonocerti componenti in plastica.
Non lasciare inluoghi molto freddi. Quando l'apparecchiatura si scalda (alla
sua normale temperatura) si può formare della condensaal suo interno, che
può danneggiare leschede elettroniche.
Non cercare di aprire la scatola. La manipolazione da partedi inesperti può
danneggiare l'apparecchiatura.
Evitare di lasciarecadere e iforti urti.
Usare quest'apparecchiatura solocon gli alimentatoriforniti con essa o
forniti in seguitocome accessori.
Non sottoporre spine e prolunghe asollecitazioni meccaniche: ciò può
causare incendi oscosse elettriche.
Il sistema trasmettele informazioni medianteradioonde pubbliche, pertanto i
dati audio e video potrebbero raggiungere altri dispositividi ricezione a 2,4
GHz. È quindipossibile che venganotrasmesse via radio anche le
conversazioni provenienti dastanze attigue aquella in cui è posizionata la
fotocamera. Per tutelare la privacy, spegnere sempre la fotocamera quando
non utilizzata.
Contenuto della scatola
Una telecamera
Un Monitor
Due adattatori dicorrente
Piastra di montaggio
Viti di fissaggio e tasselli a espansione
Questo manuale d'uso
Nota: Gli adattatori AC NON si devonoscambiare. Usare con la telecamera
soltanto l'adattatore etichettato OUTPUT: 9V DC. Usare con ilmonitor
esclusivamente l'adattatore etichettato OUTPUT: 13.5V DC.
Descrizione del Prodotto
Telecamera (Figura. 1)
1. LED a raggiinfrarossi (Sei LEDforniscono luce a raggi infrarossi perla
visione notturna.)
2. Obiettivo
3. Corpo dell'Obiettivo
4. Microfono
5. Fori per viti
6. Comparto della Batteria
7. Spia LED dellacorrente
8. SPENTO/ACCESO/NOTTE (OFF/ON/NIGHT. Interruttore CORRENTE
SPENTA/CORRENTE ACCESAe VISIONE NOTTURNA ACCESA.)
9. Interruttore di Selezione dei Canali (Selezionare il canale facendo scorrere
l'interruttore a cursoresul numero dicanale che si desidera. Nota: Occorre
selezionare lo stesso canale sulla telecamera e sul monitor.)
10. Spina dell'Adattatore di Corrente a 9V
Monitor (Figura. 2)
1. Comparto della Batteria
2. Schermo ON/OFF (Loschermo si puòspegnere solo per il monitoraggio
audio.)
3. Spia LED dellacorrente
4. Controllo Volume/Alimentazione
5. Spina Adattatore di Corrente da 13.5V
6. Interruttore di Selezione dei Canali (Selezionare il canale facendo scorrere
l'interruttore a cursoresul numero dicanale che si desidera. Nota: Occorre
selezionare lo stesso canale sulla telecamera e sul monitor.)
7. Presa Audio (Bianca)
8. Presa Video (Gialla)
9. V-HOLD
10. LUMINOSITA(BRIGHT)
11. CONTRASTO (CONT)
Installazione
Prima di effettuare la connessione:
Verificare che l'interruttore ON/OFF/NIGHT sullaparte posteriore della
fotocamera e il Controllo volume/alimentazione sulla parte anteriore siano
posizionati su OFF.
Impostare gli interruttore dei canali sulla parte posteriore della fotocamerae
del monitor sullostesso canale.
Configurazione della telecamera
Alimentazione
La fotocamera viene alimentata da batterie 4 AA o da corrente CA.
Per mettere le batterie
1. Aprire il coperchiodel vano batteriesul lato posteriore della
fotocamera. Vedere la figura 3.
2. Inserire le batteriein modo cheil segno più(+) e il segno (-)
corrispondano con quelliindicati nel vanobatterie. Fare riferimento
alla figura 3.
3. Chiudere il coperchiodel comparto dellebatterie. Accertarsi che il
coperchio del comparto batterie sia chiuso bene ebloccato.
Nota 1: Non mescolare mai delle batterie vecchiecon quelle nuove.
Nota 2: Rimuovere le batteriedalla telecamera senon si ha in
programma di usarla per un certo periodo ditempo.
4. Posizionare l'interruttore dialimentazione su ON.Il LED sulla parte
posteriore della fotocamerasi illuminerà. Vedere la figura 3.
Uso della corrente AC
1. Inserire un'estremità dell'adattatoredi corrente fornitoin dotazione in
una presa amuro e l'altraestremità nella presa posizionata nella parte
inferiore della fotocamera. Vedi Fig. 4. Nota: Usare con la
telecamera esclusivamente l'adattatore etichettato OUTPUT: 9VDC.
2. Posizionare l'interruttore ON/OFF/NIGHTsu ON. Il LED nella parte
inferiore della fotocamerasi illuminerà. Vedere la figura 4.
Sintonizzazione
Collocare la fotocameranella posizione desiderata,puntare l'obiettivo
verso l'area di osservazione quindi regolarel'angolazione ruotando
l'obiettivo. Vedere la figura 5.
Montaggio della fotocamera al muro
Nota: È consigliabile testarela ricezione delmonitor prima di fissare la
fotocamera in posizione. Mettere unapersona conla telecamera
appoggiata al muro nella zona di montaggio selezionata,mentre un'altra
persona controlla laricezione sul monitor. Se sono presenti delle
interferenze o altriproblemi, sarà necessarioselezionare un altro posto
per il montaggiodella telecamera.
1. Aprire due forialla distanza di52mm l'uno dall'altro, in linea retta,in
corrispondenza della posizionedi montaggio dellatelecamera.
2. Fissare la piastradi montaggio almuro utilizzando i tasselli per pareti
e le viti fornite indotazione. Vedere la figura 6.
3. Collocare la fotocamera di fronte alla piastra di montaggio in modo da
inserire i perni della piastra all'interno dei fori sulla parte posteriore
della fotocamera. Quindifar scorrere lafotocamera verso il basso in
modo da inserirei perni nelleapposite scanalature. Vedere lafigura 7.
Configurazione del monitor
Alimentazione
Il monitor viene alimentato da batterie 10 C o da corrente CA.
Per mettere le batterie
1. Aprire il coperchiodel comparto batterienella direzione della freccia.
Vedere la figura 8.
2. Inserire le batterie in modo che il segno più (+) e il segno (-)
corrispondano con quelliindicati nel vanobatterie. Fare riferimento
alla figura 8.
3. Chiudere il coperchiodel comparto dellebatterie. Accertarsi che il
coperchio del comparto batterie sia chiuso bene ebloccato.
Nota 1: Non mescolare maidelle batterie vecchiecon quelle nuove.
Nota 2: Rimuovere le batteriedalla telecamera senon si ha in
programma di usarla per un certo periodo ditempo.
4. Accendere il monitor. Si illumineràil LED sullaparte anteriore del
monitor. Vedere la figura 8.
5. Regolare il volumesu un livelloconfortevole.
1
2
1
2
2
1
1
.
.
.
.
.
1
1
2
3
2
