manuals.online logo
Brands
  1. Home
  2. •
  3. Brands
  4. •
  5. Symmons
  6. •
  7. Plumbing Product
  8. •
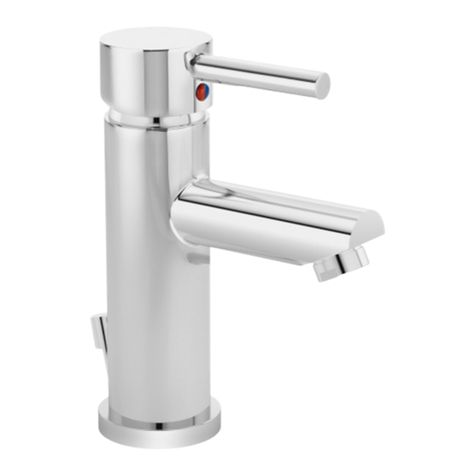
  9. Symmons S-71 Series User manual

Symmons S-71 Series User manual

S-71, S-72, S-73, S-74 Series
INSTALLATION, OPERATION AND SERVICE INSTRUCTIONS
IMPORTANT:
• Water lines MUST be thoroughly flushed BEFORE and
AFTER installing the faucet to prevent foreign matter,
i.e. copper chips, sand, stones, etc. from clogging and
possibly damaging the sealing surface of the cartridge.
• Integral supply check included (S-73 and S-74 series only).
Note: Recommended minimum operating water supply
pressure is 40 psi.
INSTALLATION:
(Supply stop valves must have a 3/8” O.D. compression outlet.)
1. Apply a bead of sealant to the underside of the faucet
escutcheon.
2. (S-72 and S-74 series): Install u-shaped anchor bar (KN-23),
spacers (KN-26) and nuts (L-36) loosely on mounting bolts.
Position deck plate (SPF-28) and mounting gasket (SPF-27)
under base through sink with flat in center hole towards
the back of sink basin. Secure by tightening nuts from
underside. Insert faucet supply through deck plate aligning
flat on faucet body above threaded shank with flat in deck
plate center hole. Secure faucet to deck plate by placing the
washer (K-60), locknut (SPF-38) and hex nut (SPF-26) on the
supply shank. Hand tighten only! Adjust position of faucet
to achieve optimum spray into basin. Tighten faucet securely
to basin or deck plate.
(S-71 and S-73 series): Insert faucet with flange (SPF-5)
through hole in basin. Secure faucet to basin by placing the
washer (K-60), locknut (SPF-38) and hex nut (SPF-26) on the
supply shank. Hand tighten only! Adjust position of faucet
to achieve optimum spray into basin. Tighten faucet securely
to basin.
3. Connect 4-10C mixing valve to bottom of supply shank using
supply nut provided (S-73 and S-74 series only). Make
connection to water supplies using the appropriate connectors.
4. Install grid drain (if applicable) by removing flange and tube
from drain body and inserting tail piece into trap. Apply
bead of sealant to underside of flange and insert flange and
tube through drain opening. Place bottom gasket mounting
washer and mounting nut onto flange and tube assembly.
Screw drain body on tube until tight.
5. To flush faucet, remove spray outlet, using vandal proof
wrench (LL-60K) provided with faucet. Open cold supply and
depress handle holding down for ten seconds (S-71 and
S-72 series only). Open hot supply and repeat above pro-
cedure (S-73 and S-74 series only). Allow faucet to shut
off and replace spray outlet.
Temperature adjustment (S-73 and S-74 series only)
Make sure the faucet has been properly installed and thor-
oughly flushed. Set the mixing valve (4-10C) to the desired
maximum temperature by inserting a 1/4” hex socket key
into the mating hex socket in center of valve and turning
counter clockwise for hotter, clockwise for colder. 110ºF
recommended unless otherwise specified.
Adjustment of cycle time
After faucet has been operated through a number of cycles
and supply water temperature is at designed level, adjust-
ment of this feature can be made as follows.
Cycle Time: Faucet is factory set to shortest cycle time with
6 timing washers (LL-28).
Loosen set screw (LL-27) in cap (SPF-104), remove cap. To
increase time, remove one or more of the washers (LL-28) on
stem. To reduce time, add washers. When desired time cycle
is achieved replace cap and tighten set screw.
Note: When setting MAXIMUM cycle time, you MUST
maintain at least 3 timing washers (LL-28) so as not to exceed
(per ASME A112.18.1) .25 gal/cycle at 60 psi.
6 "
1
2
4 "
3
8
2 "
7
8
2 "
1
8
2 " with optional3 hole deck plate
1
2
1 "
max.
1
8
"
7
8
"
1
2
min.
deck hole
4"
6"
optional3 hole deck plate
2"
4"
15˚
"-14
NPSM
1
2
"-20 UNC
with spacer
1 "
1
8
withoutspacer
spacer
1
4
S-71/S-73 S-72/S-74
Metering Faucet
Parts
LL-4A
Piston washer screw
K-60
Washer
LL-11A
Piston cylinder
LL-24
Control rod
LL-31
Retaining ring
LL-32-JIB
Piston spring
LL-37A
Shut-off washer
LL-44
Spindle guide large o-ring
LL-46
Control spindle small o-ring
LL-47
Control spindle large o-ring
LL-49
Piston quadring
SPF-26
Hex nut
SPF-38
Lock washer
SPF-103
Bushing
Repair Parts
L-42
Coupling nut for S-71 only (2)
LL-1A
Complete control cartridge
LL-1B
Complete control cartridge for
quick-closing
LL-3N
Upper housing
LL-27
Handle set screw
LL-28
Cycle time washers
LL-35
Thrust washer
LL-48
Upper housing o-rings (3)
LL-101
In-line screen
LN-100
Aerator and key
(vandal resistant 0.5 gpm)
LT
-4AA Piston assembly
MV
-10 Rubber washer
MV
-107 Checks
SPF-5
Flange
SPF-104
Cap and set screw
SPF-104C
Cap (cold) and set screw
SPF-104H
Cap (hot) and set screw
4-10C
Mechanical mixing valve
RL-266
Control spindle kit
RL-267
Piston spring and cylinder kit
RL-271
Mounting kit
RL-272
O-ring kit (contains LL-44, LL-46,
LL-47, LL-48, LL-49)
LL-27W
3/32" hex socket key to remove
handle set screw
LL-60K
Spray outlet wrench to remove
spray outlet (included with
faucet)
Other standar
d tools required:
A
djustable or 1" and 1/4" open end wrench,
pliers, 3/32" hex socket key*
Notes:
*1) Item not included.
**2) Use caution not to damage piston quadring
while servicing piston assembly (
LT-4AA).
***3) Do not squeeze ends of spring (LL-32-JIB)
causing spring to fully compr
ess.
LL-27
LL-28
SPF-103
LN-100
3/32" HEX SOCKET KEY*
SPF-104
MV-10
4-10C
LL-3N
LL-48
LL-35
LL-1A
LL-46
LL-47
LL-44
LL-32-JIB***
LL-31
LL-11A
LL-4A
LL-37A
LL-24
LL-49
MV-107
S-73 ONLY
RL-266
RL-267
LL-101
SPF-5
K-60
SPF-38
SPF-26
RL-271
LT-4AA**
S-71 and S-73 Series
MV-10
4-10C
MV-107
S-74 ONLY
3/32" HEX SOCKET KEY*
SPF-104
LL-3N
LL-48
LL-35
LL-1A
LL-46
LL-47
LL-44
LL-32-JIB***
LL-31
LL-11A
LL-4A
LL-37A
LL-24
LL-49
RL-266
LT-4AA**
Parts
LL-4A
Piston washer screw
K-60
Washer
LL-11A
Piston cylinder
LL-24
Control rod
LL-31
Retaining ring
LL-32-JIB
Piston spring
LL-37A
Shut-off washer
LL-44
Spindle guide large o-ring
LL-46
Control spindle small o-ring
LL-47
Control spindle large o-ring
LL-49
Piston quadring
SPF-26
Hex nut
SPF-27
Deck plate gasket
SPF-28
Deck plate
SPF-38
Lock washer
SPF-103
Bushing
Repair Parts
L-42
Coupling nut for S-71 only (2)
LL-1A
Control cartridge
LL-1B
Control cartridge for
quick-closing
LL-3N
Upper housing
LL-27
Handle set screw
LL-28
Cycle time washers
LL-35
Thrust washer
LL-48
Upper housing o-rings (3)
LL-101
In-line screen
LN-100
Aerator and key
(vandal resistant 0.5 gpm)
LT
-4AA Piston assembly
MV
-10 Rubber washer
MV
-107 Checks
SPF-104
Cap and set screw
SPF-KIT
Mounting Kit
4-10C
Mechanical mixing valve
RL-266
Control spindle kit
RL-267
Piston spring and cylinder kit
RL-272
O-ring kit (contains LL-44, LL-46,
LL-47, LL-48, LL-49)
LL-27W
3/32" hex socket key to remove
handle set screw
LL-60K
Spray outlet wrench to remove
spray outlet (included with
faucet)
Other standar
d tools required:
A
djustable or 1" and 1/4" open end wrench,
pliers, 3/32" hex socket key*
RL-267
Notes:
*1) Item not included.
**2) Use caution not to damage piston quadring
while servicing piston assembly (
LT-4AA).
***3) Do not squeeze ends of spring (LL-32-JIB)
causing spring to fully compr
ess.
LL-27
LL-28
SPF-103
LN-100
LL-101
SPF-28
SPF-27
K-60
KN-23
KN-26
SPF-KIT
L-36
SPF-38
SPF-26
S-72 and S-74 Series
1. General maintenance may require the repair or replacement of the car-
tridge unit.
2. Shut off water supply to the faucet.
3. Remove cap (SPF-104) by loosening allen screw with 3/32” hex socket
key.
4. Remove cycle time washers (LL-28).
5. Using an adjustable wrench, loosen bushing (SPF-103). Remove cartridge
assembly from faucet body.
6. Slide the upper housing (LL-3N off control cartridge (LL-1A).
7. Control cartridge (LL-1A) can be either replaced or repaired at this point.
Disassemble cartridge by opening retaining ring (LL-31) and sliding down
piston cylinder (LL-11A).
8. Ordinary service may only require the rebuilding of the cartridge using
the replacement o-rings and washers from RL-272.
9. Reassemble, reversing the above procedures.
SERVICE INSTRUCTIONS
TROUBLE SHOOTING CHART
Problem Cause Solution (Follow service instructions)
Faucet runs too long or too short Timing
Remove handle - then add washers (LL-28)
to stem to shorten time or remove washers
to lengthen time.
Faucet drips
Seat washer worn or foreign matter (chips,
dirt, solder, etc.) is between washer and
seat surface.
Disassemble cartridge and remove piston
(LT-4AA). Unscrew LL-4A and clean seat
washer (LL-37A). Checks S.S. pin (LL-24) for
burr then reassemble.
Faucet runs constantly Seat washer not closing on seat surface or
seat washer and/or seat surface worn.
Remove piston (LT-4AA) and spring (LL-32-JIB).
Check for burr on pin (LL-24) and check
spring. Both LT-4AA and LL-32-JIB may have
to be replaced. Excessive wear may require
cartridge replacement LL-1A.
Not enough flow from faucet In-line screen clogged
Disassemble supply to faucet. Remove
in-line screen (LL-101) in inlet to faucet.
Rinse screen with water or de-liming agent.
Reassemble faucet supply.
Water leaks from under handle Stem washers worn
Remove cartridge and replace with o-rings
LL-48. If leak persists replace control spindle
kit RL-266.
Faucet leaks under counter 4-10C connections not seated properly Check connections on 4-10C.
Faucet bleeding between hot and cold,
not holding consistent temperature (S-73
or S-74)
Integral checks in mechanical mixing valve
(4-10C) not operating properly Clean or replace checks (MV-107)
Handle is loose Set screw has loosened Tighten set screw
Symmons Industries, Inc. ■31 Brooks Drive ■Braintree, MA 02184
Phone: (800) 796-6667 ■Fax: (800) 961-9621
Website: www.symmons.com ■Email: [email protected]
Copyright © 2016 Symmons Industries, Inc. Printed in U.S.A. ■ZV-321 REV A ■032916
For California Residents
WARNING: This product contains chemicals known to the State of California to cause cancer, birth defects, or other reproductive harm.
5 Year Warranty - for industrial/commercial installations. Refer to www.symmons.com/warranty for complete warranty information.

This manual suits for next models

3

Other Symmons Plumbing Product manuals

Symmons Duro 363DTB-18 Manual

Symmons

Symmons Duro 363DTB-18 Manual

Symmons 4200TRMTC Installation instructions

Symmons

Symmons 4200TRMTC Installation instructions

Symmons RL324 User manual

Symmons

Symmons RL324 User manual

Symmons Origins 9600-PLR Manual

Symmons

Symmons Origins 9600-PLR Manual

Symmons SLW-8702-1.5 User manual

Symmons

Symmons SLW-8702-1.5 User manual

Symmons Origins S-243-LAM Series Quick guide

Symmons

Symmons Origins S-243-LAM Series Quick guide

Symmons Symmetrix S202PP Manual

Symmons

Symmons Symmetrix S202PP Manual

Symmons Carrington Shower System User manual

Symmons

Symmons Carrington Shower System User manual

Symmons Duro SLC-3612-1.5 Manual

Symmons

Symmons Duro SLC-3612-1.5 Manual

Symmons Allura 4700-TRM Installation instructions

Symmons

Symmons Allura 4700-TRM Installation instructions

Symmons SLS-5512-STN User manual

Symmons

Symmons SLS-5512-STN User manual

Symmons Naru Trim Series Installation instructions

Symmons

Symmons Naru Trim Series Installation instructions

Symmons Canterbury Trim Series Installation instructions

Symmons

Symmons Canterbury Trim Series Installation instructions

Symmons Symmetrix S2502 Series Manual

Symmons

Symmons Symmetrix S2502 Series Manual

Symmons Duro SK3610PO Manual

Symmons

Symmons Duro SK3610PO Manual

Symmons Canterbury 4-163 Manual

Symmons

Symmons Canterbury 4-163 Manual

Symmons S6350B DIA ACTIVSENSE Product manual

Symmons

Symmons S6350B DIA ACTIVSENSE Product manual

Symmons Identity Trim Series Installation instructions

Symmons

Symmons Identity Trim Series Installation instructions

Symmons Origins S-23 Series Quick guide

Symmons

Symmons Origins S-23 Series Quick guide

Symmons Ultra-Sense S-6080 Quick guide
Symmons

Symmons Ultra-Sense S-6080 Quick guide

Symmons Elm S-5504-TRM Manual

Symmons

Symmons Elm S-5504-TRM Manual

Symmons Allura SRT-4770 Quick guide

Symmons

Symmons Allura SRT-4770 Quick guide

Symmons SRT-4172 Quick guide

Symmons

Symmons SRT-4172 Quick guide

Symmons Sereno Trim Series Installation instructions

Symmons

Symmons Sereno Trim Series Installation instructions

Popular Plumbing Product manuals by other brands

Sanela SLU 45M Instructions for use

Sanela

Sanela SLU 45M Instructions for use

Reece Posh Domaine 9508099 Operation and maintenance

Reece

Reece Posh Domaine 9508099 Operation and maintenance

EZ FLO Prestige 10036LF quick start guide

EZ FLO

EZ FLO Prestige 10036LF quick start guide

enware TFC714700 Installation & maintenance instructions

enware

enware TFC714700 Installation & maintenance instructions

aquabrass pulmi 33045 installation guide

aquabrass

aquabrass pulmi 33045 installation guide

Helvex KUBICA E-776 installation guide

Helvex

Helvex KUBICA E-776 installation guide

KWC SIRIUS BS300N Installation and operating instructions

KWC

KWC SIRIUS BS300N Installation and operating instructions

Gessi VIA BAGUTTA 35905 manual

Gessi

Gessi VIA BAGUTTA 35905 manual

American Standard Skyline Champion 4 Elongated Right Height Toilet... Specification sheet

American Standard

American Standard Skyline Champion 4 Elongated Right Height Toilet... Specification sheet

KEUCO IXMO 59509 Mounting instruction

KEUCO

KEUCO IXMO 59509 Mounting instruction

Gerber 40-584 Installation

Gerber

Gerber 40-584 Installation

Borg & Overstrom T3 user guide

Borg & Overstrom

Borg & Overstrom T3 user guide

Kalia SKYRIDGE KF1712 Installation instructions / warranty

Kalia

Kalia SKYRIDGE KF1712 Installation instructions / warranty

Vetter 9987076900 Translation of the original operating manual

Vetter

Vetter 9987076900 Translation of the original operating manual

Pfister Venturi F-529-7VN Maintenance & Care Guide

Pfister

Pfister Venturi F-529-7VN Maintenance & Care Guide

Grohe 34 214 manual

Grohe

Grohe 34 214 manual

Lefroy Brooks M1-4301 Installation, operating,  & maintenance instructions

Lefroy Brooks

Lefroy Brooks M1-4301 Installation, operating, & maintenance instructions

VADO watergames Installation & maintenance instructions

VADO

VADO watergames Installation & maintenance instructions

manuals.online logo
manuals.online logoBrands
  • About & Mission
  • Contact us
  • Privacy Policy
  • Terms and Conditions

Copyright 2025 Manuals.Online. All Rights Reserved.