2020.11.9 1/3
02-01-0016
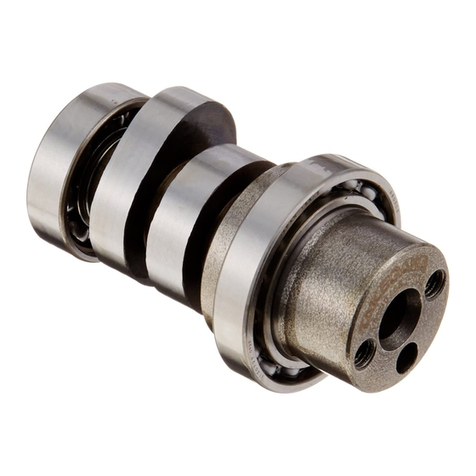
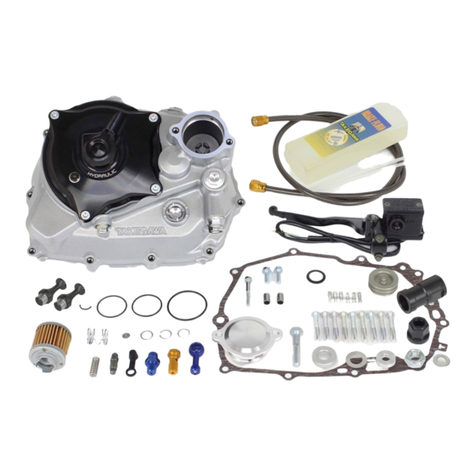
Heavy Duty Centrifugal Clutch Kit (32-weight type) Instruction Manual
◎ The use ignoring the instructions that are written in the manual, if the accident or damage has occurred, we can not assume any
responsibility for compensation.
◎ This product is the above-mentioned vehicle exclusive goods.Is not possible attached to the other vehicle. Please note.
◎ Installation of this product requires engine removal and mounting. Please prepare and refer to a genuine parts service manual in
order to perform installation work properly. Installation of this product requires engine removal and mounting. Please prepare and
refer to genuine parts service manual in order to perform installation work properly. This instruction manual, as well as genuine
parts service manual, is prepared with those persons in mind who have basic skills and knowledge in tuning. Therefore, we recommend
those who are technically inexperienced or do not have enough tools to ask a technically-reliable specialist shop for the work.
◎ When using this product with a heavy duty oil pump, please use our Super oil pump kit (01-16-0058/0059/0065/0066).
Takegawa heavy-duty oil pump (01-16-0054/0055/0056/0057) previously sold may interference with and the centrifugal clutch, but it is
possible to prevent interference by using low (height) head bolt. Please check the installation procedure for details.
◎ This product installation and use, when a problem occurs to after market goods, guarantee other than this product, also can not
assume any in any such matters.
◎ If it was the case or mounting that has been processed like a product, it will not be covered under warranty.
◎ It is not possible to inquire of the combination of other manufacturers.
◎ Some of bolts, nuts, dowel pins and seals will be reused. However, be sure to replace worn-down or severely-damaged ones with new ones.
◎ Engine oil needs to conform to API SF or better in the particular viscosity class such as SAE 10W-40 or 15W-50 .
◎ Lock nut wrench (special tool) and rotor holder are required to install this product.
Takegawa parts number Lock nut wrench:08-02-0033(Size 12.7mm) / 08-02-0034(Size 9.5mm)、Rotor holder:00-01-1001
◎ Do not use this Kit with an engine of 88 cc or larger.
◎ Do Not Use with “R stage / 17R stage / Super head + R / Super head 4V + R / DOHC / DESMO head” mounted car.
◎ Please always drove at below the allowable maximum speed of 10,000 rpm. Otherwise, the clutch outer could be damaged.
◎ It is necessary to adjust the gear (sprocket).because the primary reduction ratio changes from original ratio.
18/67(3.722) → 17/69(4.058) (Simply change to the less tooth (minus about 3T) in rear sprocket.)
○ Changed the clutch type from “roller type”to “weight type” and strengthened the clutch by increasing the clutch weight.
○ Avoid the clutch slipping of centrifugal clutch equipped high-perfortmance engine. It can be sufciently transmitted the engine power.
Especially efcient for S-Stage.
Adaptation model Monkey(6V Centrifugation clutch model)
Chassis numbers (Z50J-1000001 ~ 1510400)
Product number 02-01-0016
Thank you very much for purchasing our products.
Thank you so you will comply with the following matters at the time of use.Before installation, please check your always kit contents.
If there is a point of notice event, Please contact us the dealer of purchase.
◎ If the description, such as photos or Illustration different with this part.
☆ Please read carefully before use ☆
~ feature ~
Caution When the handling of ignoring this display, property damage and human shows the assumption of what injury.
■ Always try to drive your motorcycle at a legal speed, abiding by the laws.
■ When performing the work, etc., be sure during the cold (when the engine and the mufer is cold). (It may cause burns.)
■ When performing the work, it should be made to prepare the tools for the job. (Breakage of parts, it may cause injury.)
■ Do the work must always specied torque using a torque wrench. (Damage of bolts and nuts, and cause of dropout.)
■ The product and the frame, might have edges or protrusions. Please go to protect your hands when you work. (It may cause injury.)
■ Be sure to each part inspection before operation, check the loosening of the threaded portion, be sure to securely tighten the
specied torque if there is loose. (It may cause detachment of the parts.)
■ Gasket always use new parts. Also, parts can be re-used may be checked, if wear or damage, it is always replaced with new parts.
(Cause trouble.)
Warning When the handling of ignoring this display people died, shows the contents of the serious injury possibility is
assumed.
■ If you start the engine, be sure in a well-ventilated place. In the sealed such place, please do not start the engine.
(There is a risk of carbon monoxide poisoning.)
■ During operation, when an abnormality occurs, immediately stop the vehicle in a safe place, please stop running.
(It may lead to an accident.)
■ When performing the work, do the work safely stabilize the vehicle in a horizontal location.
(There is a risk of injury vehicle collapsed while working.)
■ Inspection, maintenance, the instruction manual or, inspection methods such as service manuals, to protect the way, should be done
correctly. (unsuitable inspection and maintenance, there is a risk that result to an accident.)
■ When carrying out the inspection and maintenance, etc., if found damaged parts, replace the damaged parts to avoid possible to reuse
the parts. (There is a risk that lead to accidents Continued use.)
◎ Please note. Performance up, the design change, the product and the price in the cost up, etc. are subject to change without notice.
◎ Keep this manual stored until this product is discarded.
CONTACT Address : 3-5-16 Nishikiorihigashi Tondabayashi Osaka JAPAN
TEL: +81-721-25-1357 FAX:+81-721-24-5059 e-mail:
[email protected] URL http://www.takegawa.co.jp
Please contact with your name and country name provided. (Only English please)

