manuals.online logo
Brands
  1. Home
  2. •
  3. Brands
  4. •
  5. Tandberg Data
  6. •
  7. Storage
  8. •
  9. Tandberg Data NEO LTO-7 User manual

Tandberg Data NEO LTO-7 User manual

Quick Start Guide
NEO LTO-7
Internal Tape Drive
Step 1
Register the Unit
It is essential to activate your warranty. Technical and warranty
support are not available until the warranty is active:
1. Go to http://Registration.tandbergdata.com/ and select Service &
Support > My Products.
2. At the Site Login, enter your
email address and password,
and click GO.
3. Click Register New Product.
4. Fill in the information (including
serial number) and click Submit.
Your warranty certificate will be emailed to you. Follow the instructions
included in the email to complete the registration process.
Step 2
Install and Connect to Host HBA
The following instructions are valid ONLY for servers with an HBA that
supports internal SAS ports. If you do not already have a SAS card
installed, you must supply an SAS cable and a supported HBA card and
cable. If your drive is fiber channel, then you will need a fiber channel
(FC) cable and supported FC HBA card. Refer to www.tandbergdata.com
for recommended products. You need a spare PCI slot for the new HBA.
1. If necessary, install the new HBA.
Follow the instructions supplied with the HBA to install the new
SAS HBA or FC HBA card.
2. Attach the mounting
hardware with the four
supplied M3 x 3mm
screws.
Enter
Enter
IMPORTANT:
Follow the instructions in the screw pack. You may
damage your tape drive if you use screws that are too long,
because the Tandberg LTO half-height tape drive allows only
3mm of the engagement of the screw into the drive.
NOTE: The illustration shows one method of mounting hardware; it does not
apply to all servers. Please refer to your server documentation.
Install the Tape Drive
1. Slide the tape drive into the drive bay.
2. Secure the drive with the supplied screws.
IMPORTANT:
If cable access for the tape drive bay is awkward, it
may be easier to access power and other connections if the tape
drive is installed in the top bay. You may need to move other
devices to lower bays to achieve this.
Step 3
Connect Network and Power Cords
1. Connect the customer-supplied SAS or FC cables to the server SAS
or FC HBA card and to the drive interface port.
2. Connect the SAS/FC and power cables to the tape drive.
CAUTION:
Always use a spare power cable from the server's
internal power supply. Never use the SAS connecting cable to
supply power.
3. Power up the server.
Watch the boot screen carefully after installation. Check to see that
the new SAS or FC tape drive is listed in the boot sequence. If there
are any error or unexpected messages, go back and check the cabling
carefully.
4. Install drivers.
For Windows systems, download the latest drivers from
www.tandbergdata.com. For other operating systems, patch to the
latest version of the operating system, following the instructions in
the patch documentation.
5. Upgrade backup software.
Always upgrade your software application to ensure it works
correctly with the tape drive. Tandberg Data does NOT recommend
native backup applications, such as Windows Backup, because they
do not support the full features of the tape drive and may cause
performance problems.
NOTE: Some backup applications require you to use their own drivers. Refer
to the documentation of your software application to ensure you are using the
recommended driver.
Step 4
Hardware Encryption and Tandberg LTO-7 Tape Drive
Your Tandberg LTO-7 tape drive provides the ability to hardware
encrypt your data, applying the strongest level of AES industry-
standard encryption and protecting the data from unauthorized access
and use.
Your Tandberg drives uses the LTO Ultrium 6000 GB data cartridge and
is compatible with the cartridges of its predecessors, the Ultrium Tape
Drive Generation 6, and Generation 5. The drive completes these
functions:
•Reads and writes Ultrium 7 cartridges to Ultrium 7 format,
including WORM and Data Encryption.
•Reads and writes Ultrium 6 cartridges to Ultrium 6 format,
including WORM and Data Encryption.
•Support for encryption on Ultrium 5, Ultrium 6, and Ultrium 7 tape
cartridges.
Hardware encryption can be used with or without compression and
without speed or capacity penalties.
CAUTION:
Hardware encryption is a powerful feature, but should
be used with care. If you need to import your media onto another
machine or to recover after disaster you will be required to enter
an encryption key.
•Hardware encryption is turned off by default and is switched on by
settings in your backup application, where you also generate and
supply the encryption key.
•Your backup application must support hardware encryption for it to
work. The software supplied with the tape drive provides this
support. See www.tandbergdata.com for an up-to-date list of backup
software.
•You should keep a record or backup of your encryption keys and
store them in a secure place separate from the computer running the
backup software.
•If you are unable to supply the key when requested to do so, neither
you nor Tandberg Data Support will be able to access the encrypted
data.
*10400743+001*
10400743-001
http://tandbergdata.com
You can get additional technical support on the Internet at the Overland Storage Support web
page, or by contacting us using the information found on the Contact Us page on our web site.
RMN-A-01-14 ©2016 Tandberg Data
Step 5
Choosing and Looking After Media
Your high-performance tape drive works best with high-performance
Tandberg LTO-7 media. For optimum performance always use a data
cartridge that matches the specification of your tape drive.
The recommended cleaning cartridge is the Tandberg LTO universal
cleaning cartridge. This cartridge is designed to work with any Ultrium
drive and may be used for up to 50 cleanings.
It pays to look after your media.
Many tape drive and backup failures are caused by damaged or badly
handled tape media.
•Keep media in the case provided.
•Follow the temperature, humidity and acclimitization guidelines on
the media packaging.
•Avoid dropping it or rough handling, as this is likely to damage the
cartridge.
•Inspect it regularly for damage.
•Do not exceed normal cartridge life (260 full volume backup or
restore operations).
For detailed information on media care and best practice and to order
online, refer to www.tandbergdata.com
Step 6
Understanding the LEDs
1. Clean (amber)
•On: cleaning cartridge in use.
•Off: the drive does not require cleaning.
•Flashing: the drive needs cleaning.
2. Tape (amber)
•Off: no fault has been detected.
•Flashing: the cartridge currently in the drive is faulty
(damaged or unsupported). Discard the cartridge.
3. Drive (amber)
•Off: no fault has been detected.
•Flashing: the drive mechanism has detected a hardware error.
4. Ready (green)
•On: the drive is ready for use.
•Off: the drive power is off or there was a failure during self-test.
•Flashing: the drive is busy.
Step 7
User Guides
This and knowledge base articles available online:
http://www.tandbergdata.com
Select your product from the drop-down menus to view
the documentation available.
http://www.tandbergdata.com
Warranty and Technical Support
For warranty and technical support information, see our
Technical Support Services web page:
http://www.tandbergdata.com
For information on contacting Tandberg Data Support,
see our Contact Support web page:
http://www.tandbergdata.com

Other Tandberg Data Storage manuals

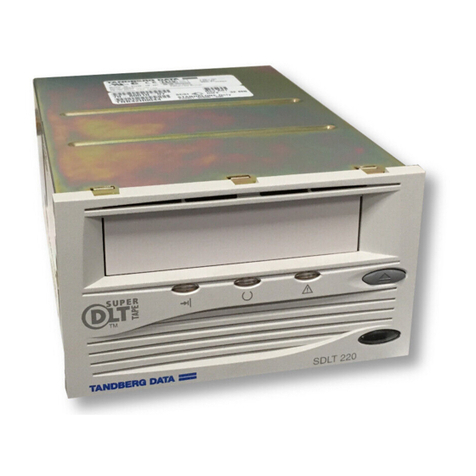
Tandberg Data SDLT220-320 INTEGRATION User manual

Tandberg Data

Tandberg Data SDLT220-320 INTEGRATION User manual

Tandberg Data DLT7000 User manual

Tandberg Data

Tandberg Data DLT7000 User manual

Tandberg Data STORAGELIBRARY REV2 ONLINE - QUICK User manual

Tandberg Data

Tandberg Data STORAGELIBRARY REV2 ONLINE - QUICK User manual

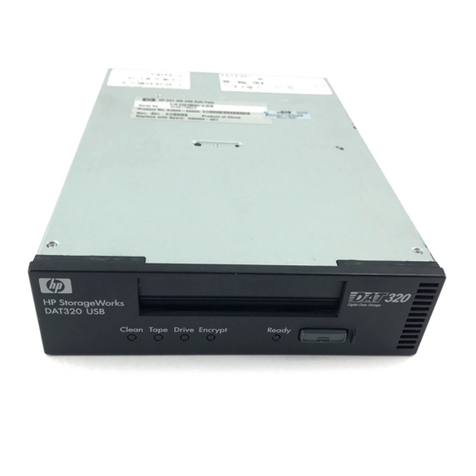
Tandberg Data DAT320 User manual

Tandberg Data

Tandberg Data DAT320 User manual

Tandberg Data SLR7 User manual

Tandberg Data

Tandberg Data SLR7 User manual

Tandberg Data StorageLibrary T24 LTO User manual

Tandberg Data

Tandberg Data StorageLibrary T24 LTO User manual

Tandberg Data DLT-V4 Owner's manual

Tandberg Data

Tandberg Data DLT-V4 Owner's manual

Tandberg Data StorageLibrary LTO-3 SCSI User manual

Tandberg Data

Tandberg Data StorageLibrary LTO-3 SCSI User manual

Tandberg Data SLRTAPEDRIVE - User manual

Tandberg Data

Tandberg Data SLRTAPEDRIVE - User manual

Tandberg Data StorageLibrary T40 User manual

Tandberg Data

Tandberg Data StorageLibrary T40 User manual

Tandberg Data SLR AUTOLOADER PROGRAMMER User manual

Tandberg Data

Tandberg Data SLR AUTOLOADER PROGRAMMER User manual

Tandberg Data RDX QuikStation User manual

Tandberg Data

Tandberg Data RDX QuikStation User manual

Tandberg Data StorageLoader DLT VS160 User manual

Tandberg Data

Tandberg Data StorageLoader DLT VS160 User manual

Tandberg Data RDX QuikStor User manual

Tandberg Data

Tandberg Data RDX QuikStor User manual

Tandberg Data StorageLoader DLT VS160 User manual

Tandberg Data

Tandberg Data StorageLoader DLT VS160 User manual

Tandberg Data DAT 160 User manual

Tandberg Data

Tandberg Data DAT 160 User manual

Tandberg Data NAS Hardware Viking FS-1500 Instruction Manual

Tandberg Data

Tandberg Data NAS Hardware Viking FS-1500 Instruction Manual

Tandberg Data STORAGE CAB4000 - User manual

Tandberg Data

Tandberg Data STORAGE CAB4000 - User manual

Tandberg Data SDLT220-320 INTEGRATION User manual

Tandberg Data

Tandberg Data SDLT220-320 INTEGRATION User manual

Tandberg Data DAT 160 User manual

Tandberg Data

Tandberg Data DAT 160 User manual

Tandberg Data DLT-V4 User manual

Tandberg Data

Tandberg Data DLT-V4 User manual

Tandberg Data Storage Library T24 User manual

Tandberg Data

Tandberg Data Storage Library T24 User manual

Tandberg Data StorageLibrary T40+ Series User manual

Tandberg Data

Tandberg Data StorageLibrary T40+ Series User manual

Tandberg Data LTO-5 User manual

Tandberg Data

Tandberg Data LTO-5 User manual

Popular Storage manuals by other brands

Dell PowerVault NX300 Getting started

Dell

Dell PowerVault NX300 Getting started

Hiddn SafeDisk installation manual

Hiddn

Hiddn SafeDisk installation manual

Stardom iTANK MT1-B31BP user manual

Stardom

Stardom iTANK MT1-B31BP user manual

Qualstar RLS-8350 Product specification

Qualstar

Qualstar RLS-8350 Product specification

Spectra Logic T120 LIBRARY instructions

Spectra Logic

Spectra Logic T120 LIBRARY instructions

Seagate Medalist Pro Series product manual

Seagate

Seagate Medalist Pro Series product manual

7bit Wicher CDTV user guide

7bit

7bit Wicher CDTV user guide

VERITAS Velocity 7330 Hardware installation guide

VERITAS

VERITAS Velocity 7330 Hardware installation guide

Sony Memory Card DKA-MC10F operating instructions

Sony

Sony Memory Card DKA-MC10F operating instructions

CnMemory Airy manual

CnMemory

CnMemory Airy manual

AmbiCom WL54-CF Specifications

AmbiCom

AmbiCom WL54-CF Specifications

HP NetStorage 6000 Management guide

HP

HP NetStorage 6000 Management guide

HP StorageWorks 9000 Virtual Libr user guide

HP

HP StorageWorks 9000 Virtual Libr user guide

AmbiCom WL1100B-PC Product specifications

AmbiCom

AmbiCom WL1100B-PC Product specifications

Skope BB380r-2 Assembly, installation and operation instructions

Skope

Skope BB380r-2 Assembly, installation and operation instructions

Sony MS-M16/TQ operating instructions

Sony

Sony MS-M16/TQ operating instructions

Seagate Business Storage 2-Bay NAS quick start guide

Seagate

Seagate Business Storage 2-Bay NAS quick start guide

Dot Hill Systems AssuredSAN 4000 Series Customization guide

Dot Hill Systems

Dot Hill Systems AssuredSAN 4000 Series Customization guide

manuals.online logo
manuals.online logoBrands
  • About & Mission
  • Contact us
  • Privacy Policy
  • Terms and Conditions

Copyright 2025 Manuals.Online. All Rights Reserved.