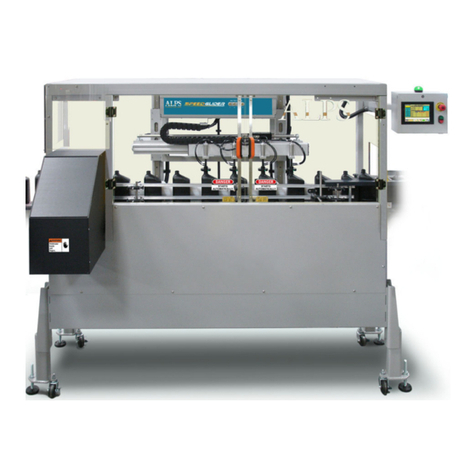
Alps Electric FlexPitch User manual

Original Instructions [English] 2206220752 Rev A
Operator Manual
PLACEHOLDER
Flex Pitch DUO Leak Tester

Copyright © 2021 ALPS
All rights reserved. Printed in the USA.
Due to continued product development this information may change without notice. The
information and intellectual property contained herein is condential between ALPS and the client
and remains the exclusive property of ALPS. If you nd any problems in the documentation, please
report them to us in writing. ALPS does not warrant that this document is error-free.
No part of this publication may be reproduced, stored in a retrieval system, or transmitted in any
form or by any means, electronic, mechanical, photocopying, recording or otherwise without the
prior written permission of ALPS.
This manual reects the product conguration as was current at the time of its writing. An item’s
display in this manual does not guarantee the item’s availability at any time in the future. Images
shown are for representation purposes only. Products may vary from the images displayed. ALPS
is not liable for typographical errors or changes to specications presented.

iii
www.alpsleak.com
Contents
1 Introduction ..................................................................................................................................1
1.1 About This Manual .........................................................................................................................1
1.2 Software............................................................................................................................................1
1.3 System Modications.....................................................................................................................1
1.4 Machine Designation and Serial Number Location ...............................................................2
2 Safety ..............................................................................................................................................3
2.1 Safety Labels....................................................................................................................................3
2.2 Cautions and Warnings.................................................................................................................3
2.3 Safety: Warning Labels and Descriptions .................................................................................4
2.4 Danger! Arc, Shock, and Flash Hazard:......................................................................................4
2.5 Risk of Hot Surfaces Hazard ........................................................................................................4
2.6 Lock Out Tag Out............................................................................................................................4
2.7 Warning! Watch Your Hands and Fingers.................................................................................5
2.8 Danger! Do not operate Without Guards in Place .................................................................5
2.9 Danger! Starts Automatically ....................................................................................................... 5
2.10 Safety: Warning Messages .........................................................................................................6
3 Flex Pitch DUO Specications ..................................................................................................6
4 Safety-Operational Status/Conditional Status...................................................................... 7
4.1 Operational Status: Conditional status of the machine........................................................7
5 Glossary of Common Terms ..................................................................................................... 7
6 Introduction to Components.................................................................................................... 9
7 Theory of Operations................................................................................................................11
7.1 Leak Test Operations...................................................................................................................11
7.2 Pressure Test.................................................................................................................................11
7.3 Test 1 (T1) (Stabilize Test) ...........................................................................................................11
7.4 Test 2 (T2) (Leak Test) ..................................................................................................................11
7.5 Pressure Decay Values................................................................................................................12
8 Emergency Door Sensors Positions......................................................................................13
9 Advanced Operator HMI Use..................................................................................................13
9.1 HMI Password Protection...........................................................................................................13
9.2 ALPS Password Denitions Overview ......................................................................................14
9.3 How to Log In and Out................................................................................................................14
9.4 How to Enter Passwords ............................................................................................................15

iv
www.alpsleak.com
10 How to Edit Settings with the HMI ......................................................................................16
10.1 Changing settings and values .................................................................................................16
10.2 Test Pressures & Reject Limits Overview .............................................................................20
10.3 Test Pressures & Reject Limits Helpful Hints ......................................................................20
10.4 Container Size and Stroke Overview.....................................................................................21
10.5 How to Use Container Size and Stroke ................................................................................22
10.6 Probe Take O Overview..........................................................................................................24
10.7 How to Use Probe Take O .....................................................................................................24
10.8 Reject Timing ...............................................................................................................................26
10.9 Conveyor Speed Setting ...........................................................................................................27
11 Optional Functions Overview & Use...................................................................................27
11.1 Spacing Wheel (Optional).........................................................................................................28
11.2 Automatic Rail Guide (Optional) .............................................................................................29
11.3 Automatic Carriage Height (Optional)...................................................................................29
11.4 Reject Verication (Optional)...................................................................................................30
11.5 Down Stream Jam Timer (Optional).......................................................................................30
12 Recipes Overview ....................................................................................................................31
12.1 How to Use Recipes...................................................................................................................32
12.2 Load Existing Recipe..................................................................................................................33
12.3 Test Results Menu......................................................................................................................35
13 All Results, Individual Results, Timer Details and Recent Rejects Overview..............37
13.1 How to Use All Results ..............................................................................................................38
13.2 How to Use Individual Results ................................................................................................39
13.3 How to Use The Cycle Time Statistics ...................................................................................40
14 Alarm Log & Counters Overview .........................................................................................43
14.1 How to Use Alarm Log ..............................................................................................................44
15 Manual Test Overview............................................................................................................46
15.1 How to Use Manual Test ..........................................................................................................47
16 Inputs and Outputs Overview ..............................................................................................48
16.1 Analog Inputs ..............................................................................................................................49
16.2 Digital Inputs................................................................................................................................50
16.3 Analog Inputs ..............................................................................................................................50
16.4 Digital Outputs............................................................................................................................51
16.5 I/O Forcing, and Maintenance.................................................................................................51

v
www.alpsleak.com
16.6 Interface I/O Screen...................................................................................................................53
17 How to Use Inputs and Outputs..........................................................................................54
17.1 How to Use Analog Inputs .......................................................................................................55
17.2 How to Use Digital Inputs.........................................................................................................55
17.3 How to Use Analog Outputs....................................................................................................55
17.4 How to Use Digital Outputs.....................................................................................................55
18 Station Diagnostic overview..................................................................................................55
19 How to use Station Diagnostic.............................................................................................56
19.1 Station Diagnostics Results......................................................................................................56
20 Analog Calibration Overview and Use................................................................................57
21 About Overview and Use.......................................................................................................57
22 Supervisor Menu Introduction.............................................................................................61
22.1 System Options Overview and Interface I/O .......................................................................61
23 Auxiliary Test Overview ..........................................................................................................62
24 How to use Auxiliary Test ......................................................................................................63
25 Reject Alarms Overview .........................................................................................................63
26 How to Use Reject Alarm.......................................................................................................64
27 System Bypass Overview and Use ......................................................................................65
28 Set Up New Bottle...................................................................................................................65
29 Auto Self-Test Overview.........................................................................................................68
29.1 How to Use Auto Self-Test .......................................................................................................68
30 Laser Height Quick Reference Procedure (IB-1500).......................................................69
31 Part One Changeover/Setup New Container: ..................................................................70
31.1 Left: Zeros will appear in the sub-display. Press the Zero-shift button........................70
31.2 Part two Zero-Shift Function: Adjusting vertical position of the laser sensor mount:70
31.3 Part three FlexPitch Container Height Calibration.............................................................71
31.4 Part 4: Access Initial Setup Screens:......................................................................................73
31.5 Part 5: Laser Controller - Initial Setup:..................................................................................73
31.6 Reference Light Registration-Gain Adjust ............................................................................74
31.7 Perform basic settings in this order:....................................................................................75
31.8 Receiving/Blocked Light Mode (2.L-d) ...................................................................................75
31.9 Averaging/High-Pass Filter .......................................................................................................76
31.10 Averaging: (AvE) ........................................................................................................................76
31.11 Output Mode (4.out) ...............................................................................................................76

vi
www.alpsleak.com
31.12 Output Mode ............................................................................................................................77
31.13 Set for judgment value (P.V.).................................................................................................77
32 Maintenance Menu.................................................................................................................78
32.1 Flex Pitch Routine Maintenance Schedule...........................................................................79
33 HMI Reference Tables ............................................................................................................80
33.1 Software........................................................................................................................................80
34 HMI Navigation and Information .........................................................................................80
34.1 Screen Navigation ......................................................................................................................81
34.2 Home Screen...............................................................................................................................82
34.3 Information..................................................................................................................................85
34.4 Alarm Screen...............................................................................................................................86
34.5 Event History ...............................................................................................................................87
34.6 Reports .........................................................................................................................................88
34.7 Documentation...........................................................................................................................89
34.8 Diagnostics...................................................................................................................................90
34.9 Options .........................................................................................................................................92
34.10 Interface I/O ..............................................................................................................................94
34.11 Calibration .................................................................................................................................95
34.12 I/O Status ...................................................................................................................................96
34.13 I/O Forcing .................................................................................................................................99
34.14 Large Values........................................................................................................................... 100
34.15 Systems ................................................................................................................................... 101
34.16 Station Overview ................................................................................................................... 103
34.17 Pressure Curves.................................................................................................................... 104
34.18 Test Statistics ......................................................................................................................... 105
34.19 Main Counters....................................................................................................................... 108
34.20 Alarm Counters ..................................................................................................................... 110
34.21 Settings Main ......................................................................................................................... 111
34.22 Settings Options 1 ................................................................................................................ 113
34.23 Setting Option 2 .................................................................................................................... 115
34.24 Change Container................................................................................................................. 116
34.25 Recipes .................................................................................................................................... 119
34.26 Settings.................................................................................................................................... 121
34.27 Counters ................................................................................................................................. 122

vii
www.alpsleak.com


1
www.alpsleak.com
1 Introduction
1.1 About This Manual
The ALPS Flex Pitch DUO Multi-Moving head leak tester provides high speed leak testing of a
wide range of container types including shingling, reverse-taper, and small containers which are
traditionally dicult to test. The Flex Pitch DUO has a smaller footprint to perform leak testing on
an existing conveyor line, requiring no conveyor line modications. The Flex Pitch DUO has built
in exibility with 2 test heads for a variety of container sizes up to 4” diameter and 10” Height. This
makes the Flex Pitch DUO ideal to leak test dicult containers. The Flex Pitch DUO Multi-Moving
head leak tester provides tool-less adjustments and no formatted parts to change, making quick
container changeovers. The Flex Pitch DUO uses servo motors and linear slide combination coupled
with an encoder (mounted to the top of the conveyor) to track the conveyor movement and speed.
As molded containers enter the machine, the Multi-Moving test heads locate and leak test each
container. After the test is completed, good containers pass through the machine, and defective
containers are ejected from the conveyor line with a reason displayed on the HMI.
A single electrical cabinet is installed on the backside of the machine containing the AC power
circuits, servo motor drives, DC power supplies, power contactors, and main disconnect. The control
system features a multi-channel PLC and color touch screen interface with an intuitive, icon-based
menu structure. Standard features include an integrated Self-Test feature for each station.
1.2 Software
Installation of any new or modication of existing software into the FlexPitch DUO machine not
approved by Air Logic Power Systems LLC may adversely aect the operation or performance of the
machine and possibly void the warranty and or service agreements. Please consult Air Logic Power
Systems Service Department prior to installing or modifying existing software on this machine.
1.3 System Modications
Mechanical or electrical modications not approved by Air Logic Power Systems LLC to the FlexPitch
DUO system may also void the warranty and/or service agreements. Please contact the Air Logic
Power Systems Sales or Service Department 1-800-325-8717 for approval or assistance with any
machine modications.

2
www.alpsleak.com
1.4 Machine Designation and Serial Number Location
This individual machine is identied with an ID and Serial Number plaque axed to the inside door
surface of the control enclosure as shown below. Along with it are the 24-Hour service hot-line
phone number 1-800-325-8717 and the UL Panel Rating plate.
Table 1: Machine Label Locations
Label
1 ALPS 24-hour service hot-line phone number 1-800-325-8717
2 Identication and serial number plaque
3 ALPS rating label
4 UL Certication Sticker

3
www.alpsleak.com
2 Safety
2.1 Safety Labels
The symbols used on the machine were developed by the International Organization for
Standardization (ISO) and are dened below. These symbols may include yellow warnings triangles,
blue mandatory action circles, or red prohibited action circles.
Symbol Denition
High voltage warning
Lockout Tag-out required
Pinch points, hand and nger hazards
Do not operate without guards in place
Notice that machine starts automatically
Hot surface hazard
2.2 Cautions and Warnings
Please review the following cautions and warnings before operating or performing maintenance on
the machine.
CAUTION Read the instructions before using the machine. Only qualied personnel
should operate the Flex Pitch DUO.
WARNING High pressure hoses, ttings and couplings are important for the safety of the
machine. Use only hoses, ttings and couplings recommended by ALPS.
WARNING To ensure machine safety, use only original spare parts from ALPS or
approved by ALPS.
WARNING Do not use the machine if a supply cord or important parts of the machine are
damaged, e.g. safety devices, high pressure hoses, applicator.

4
www.alpsleak.com
2.3 Safety: Warning Labels and Descriptions
Safety is always critical. The ALPS FlexPitch machine is equipped with a full complement of warning
decals and labels. A standard series of warning and caution labels are in place to inform the
operator of certain hazards relative to the function of this machine. Please observe these warnings.
2.4 Danger! Arc, Shock, and Flash Hazard:
The potential for serious or fatal injury exists. Located on the outer door surface of the High-
Voltage Control enclosure. Do not open to explore or attempt to aect repairs in this area. In case
of breakdown, initiate Lock-Out Tag-Out procedures to secure the machine. Notify authorized
personnel.
2.5 Risk of Hot Surfaces Hazard
This symbol can be found in areas where a potential burn hazard exists. FlexPitch servo motors have
hot surfaces. Do not touch motor surfaces while in operation or after being recently shut down.
2.6 Lock Out Tag Out
This decal appears prominently next to the main power switch on the side of the High Voltage
Control cabinet at the rear of the machine. Lock-out and tag-out procedures are covered in the
service and maintenance manual.

5
www.alpsleak.com
2.7 Warning! Watch Your Hands and Fingers
This warning is seen on the front of the discharge chute. Do not thrust your hand up this chute while
the machine is operating. Contact with moving container material poses a slight to moderate threat
of injury.
2.8 Danger! Do not operate Without Guards in Place
This warning is located on the lower front portion and rear plexiglass guard of the machine. It
cautions the operator not to attempt to operate this machine without a plexiglass guard panel in
place. The potential for severe injury exists while the machine is operating. Please keep hands, long
hair, low hanging jewelry, and loose clothing away from the moving parts.
2.9 Danger! Starts Automatically
This warning is displayed on all plexiglass doors as a warning that the machine starts and stops
automatically as a function of its normal operating scheme.

6
www.alpsleak.com
2.10 Safety: Warning Messages
Note these Warnings and Cautions:
Cautions: Caution messages can appear before procedures. Messages of this type indicate possible
damage to the machine or loss of data if a step or procedure is not properly observed.
Warnings: Warning messages imply that a potential health hazard exists in the performance of any
random procedure.
WARNING Only trained and or certied personnel should operate or rig the Flex Pitch
DUO for shipment or movement.
3 Flex Pitch DUO Specications
Dimensions W-D-H 96.5” x 50” x 96” (2451 mm x 1270 mm x 2348 mm)
Weight 2000 lbs (9000 kg)
Medium (Min/Max
container sizes) up to 4” (102 mm) diameter & 10” (254 mm) height
Capacity Up to 250 CPM (depending on container size)
Power Requirement 120 VAC 50/60Hz. 15 Amps
Air Supply 80-100 psi, 4 SCFM
Air Flow Line ¼” NPT connection, dry non-lubricated air
Operating Pressure 80 psi
Control/Display 10” HMI
Communication Ethernet
Phase Single-Phase

7
www.alpsleak.com
4 Safety-Operational Status/Conditional Status
4.1 Operational Status: Conditional status of the machine
Figure 1: Operational Status Lights
Table 2: HMI Status LED: Color Code Indicates Running Status
Color Status/Condition
Green Normal operating status.
Yellow Machine in bypass Mode or in Pause Condition.
Red Machine stopped, door ajar or waiting for operator to press START. The circuit is open,
interrupted, e-stop has been pressed or a fault has occurred.
5 Glossary of Common Terms
Table 3: Glossary of Terms
Term Description
Encoder Generates digital electronic pulses that represent the position, speed of the FlexPitch
Air Preparation Unit Cleans and regulates the incoming air supply, indicates a lockout valve, primary particulate lter,
coalescing lter, reject supply regulator, and an FlexPitch supply regulator.
Available Test Time
The calculated maximum amount of time to perform the leak test. This calculation is based
on the following factors: Max Fill Time, Test 1, Test 2, Probe-Retract and CPM (containers per
minute).
CPH/CPM//BPH/BPM Containers Per Hour/ Containers Per Minute / Containers Per Hour / Containers Per Minute
Downstream Photo-Eye Photo-eye that senses a backlog of containers at the exit
End of T1 Pressure Test result displays the pressure in the container at the end of Test 1.

8
www.alpsleak.com
Term Description
End of T2 Pressure Test result displays the pressure in the container at the end of Test 2.
Fill Pressure The pressure used to ll the container. This pressure is set in PSI.
Fill Valve The Solenoid valve that controls the air used to pressurize the container.
HMI An acronym meaning: Human Machine Interface. This is also referenced as the Operator Touch
Screen.
IWC Inches of water column. (One inch of water = 27.7 IWC = 1 PSI).
PE Acronym for Photo-eye. An electronic sensor for container status communication to the PLC
PLC An acronym for Programmable Logic Controller.
Recipe A set of test setting values that can be saved and used for a particular container.
T1 Maximum An acronym for Test 1 which refers to the maximum allowed pressure percent loss during test
one (T1).
T1 Minimum An acronym for Test 1 which refers to the minimum allowed pressure percent loss during Test
one (T1). Note: This is normally set to“0”as any container with a loss lower than this is rejected.
T1 Pressure Loss An acronym for Test results for Test 1 which refers to the total pressure loss during Test one (T1).
T2 Maximum An acronym for Test results for Test 2 which refers to the maximum allowed pressure percent loss
during test two (T2).
T2 Pressure Loss An acronym for Test results for Test 2 which refers to the maximum during test two (T2).
Test 1 (T1) Time
Test 1 function where the applied pressure must reach the target pressure for the test to begin. If
target pressure is reached, the pressure loss must not exceed the maximum percentage amount
allowed during the allotted time or the container will be rejected
Test 2 (T2) Time
Test 2 function begins when test 1 is completed and no rejects have occurred. During Test 2, the
pressure loss must not exceed the maximum percentage amount allowed during the allotted
time or the container will be rejected.
Test Leak Orice When performing a self-test, a pressure path to a test orice is opened. The orice size can help
determine the size of the leak that can be detected based on current test settings.

9
www.alpsleak.com
6 Introduction to Components
Table 4: Working Components
Ref # Components
1DOWNSTREAM JAM PHOTO EYE
2CARRIAGE HEIGHT ADJUSTER BAR
3STACK LIGHT
4HMI
5EMERGENCY STOP PUSH-BUTTON
6USB PORT
7UPSTREAM PHOTO EYE
8 ENCODER WHEEL & BRACKET
9SPACING WHEEL MOTOR
10 SPACING WHEEL BRACKET
11 EMERGENCY STOP PUSH-BUTTON
12 DOOR HANDLE
13 REJECT CHUTE

10
www.alpsleak.com
Ref # Components
14 CONVEYOR
15 PNEUMATIC CONTROL AND FILTRATION UNIT
16 ADDITIONAL PNEUMATIC FILTRATION
17 RESTING PADS / MOUNTING FEET
18 CASTERS
Ref # Components
1 LIGHT STACK
2 CONVEYOR
3 UPSTREAM PHOTO-EYE
4 E-STOP CONNECTION BLOCK
5SPACING WHEEL
6 TEST HEAD SERVO MOTOR
7 AUTO CARRIAGE HEIGHT MOTOR

11
www.alpsleak.com
Ref # Components
8 RESTING PADS / MOUNTING FEET
9 CASTERS
10 CARRIAGE LEAD SCREW
11 CARRIAGE HEIGHT ADJUSTER BAR
12 CARRIAGE LOCKING HANDLES
13 DOWNSTREAM JAM PHOTO-EYE
14 ENCODER
7 Theory of Operations
7.1 Leak Test Operations
Figure 1: Peak Pressure Chart
7.2 Pressure Test
Untested containers are transferred from line conveyor to the FlexPitch. When the FlexPitch begins to
detect containers the test-probes will extend to seal and pressurize the containers. The Pressure Test
ensures the container reaches the specied Peak Pressure. If any one of the containers fails to reach
Peak Pressure, that container will be rejected for a Fill Failure.
7.3 Test 1 (T1) (Stabilize Test)
T1 is considered a pressure stabilization period. T1 is the time allowed for pressure curve to atten
out. (See the graph above) Test 1 will reject the container if Maximum % percent value is exceeded. If
Maximum % value is not exceeded, Test 2 is performed.
7.4 Test 2 (T2) (Leak Test)
Test 2 is performed for as much time as the conveyor speed and container travel will allow. This is done
so the smallest possible leak can be detected. In Test 2 the container will be rejected if the T2 Maximum
% percent value is exceeded. If the T2 Maximum % is not exceeded the container is considered good.
At the end of this period, the probe is retracted and the test cycle is completed.

12
www.alpsleak.com
7.5 Pressure Decay Values
Unless otherwise specied the pressure units of measurement entered or displayed in the HMI are
shown in Inches of Water Column (IWC).
Photo Eye Function and Position
7.5.1 Photo Eyes Introduction and Positions
Containers transition from the production line conveyor into the FlexPitch conveyor for leak testing.
During this transition containers will be monitored and controlled by various photo eyes. The machine
will reject failed or untested containers at the reject station.
Figure 2: Reject Cylinder
Table 5: Photo eye Function Table
Ref # Photo Eye Function
1 Container Present Photo-Eye Monitors the line of incoming containers to determine that a container is present to initi-
ate the test cycle.
2 Downstream Jam Photo-Eye Temporarily pauses the machine when the sensor eld is broken. It automatically restarts
the machine when the sensor eld is clear
3 Reject Photo Eye
Detects a failed container and res the reject cylinder at the appropriate time. It is also
used to detect untested containers that may have been missed by the Container Present
Photo-eye (issues an Unexpected Container Warning)
4Reject Verication/Chute Moni-
tor Photo-Eye
Veries that rejected containers have left production line. If the sensor fails to detect the
container, or if the sensor eld has not been broken after a reject occurs, the machine
and conveyor will shut down and an alarm condition called a Reject Verication Fault is
generated.
Other manuals for FlexPitch
4
Table of contents
Other Alps Electric Test Equipment manuals

Alps Electric
Alps Electric SC Linear Leak Tester User manual

Alps Electric
Alps Electric SPEEDGLIDER User manual

Alps Electric
Alps Electric FlexPitch User manual

Alps Electric
Alps Electric SPEEDGLIDER User manual

Alps Electric
Alps Electric SPEEDGLIDER Instruction manual

Alps Electric
Alps Electric FlexPitch Instruction manual

Alps Electric
Alps Electric FlexPitch User manual

Alps Electric
Alps Electric FlexPitch User manual