TCL TAC-09CHSA/F6 User manual

Air Conditioner Service Manual
Inverter air conditioner
Service Manual
Models
TAC-09CHSA/F6 TAC-12CHSA/F6
CONTENTS
1. Important Notice
2. Technical Specifications
3. Product Dimensions
4. Refrigeration cycle diagram
5. Operation details
6. Wiring diagram
7. Explosion view and parts
8. Precaution
9Names of parts
10. Installation
11.Troubleshooting

Air Conditioner Service Manual
1
1. Important Notice
This service manual is intended for use by individuals possessing adequate
backgrounds of electrical, electronic and mechanical experience. Any
attempt
to repair the appliance may result in personal injury and property
damage.
The manufacturer or seller cannot be responsible for the
interpretation of
this information, nor can it assume any liability in
connection with its use.
The information, specifications and parameter are subject to change due to
technical modification or improvement without any prior notice. The
accurate
specifications are presented on the nameplate label.
How to order spare parts
To have your order filled promptly and correctly, please furnish the
following
information:
1.
Model No. with Indoor or Outdoor
2.
No. in the Explosion View
3.
Part Name
4.
The quantity you ordered

Air Conditioner Service Manual
2
2. Technical Specifications
Model
TAC-09CHSA/F6
TAC-12CHSA/F6
Type
heating pump
heating pump
Control type
remote
remote
Rated cooling capacity
Btu/h
9000(3412-11500)
12000(5200-13500)
W
2640(1000~3370)
3520(1520~3950)
Rated heating capacity
Btu/h
9500(3412-12600)
12500(5500-14500)
W
2780(1000~3690)
3660(1520~4240)
EER for cooling
W/W
3.22
3.23
COP for heating
W/W
3.62
3.61
Moisture removal
Liters/h
1
1.2
Pressure
High(DP)
MPa
4.5
4.5
Low(SP)
MPa
1.9
1.9
Indoor noise level at
cooling
SUPER
dB(A)
42
42
High
dB(A)
38
38
Med
dB(A)
36
36
Low
dB(A)
34
34
MUTE
dB(A)
32
32
Outdoor noise level
dB(A)
52
52
Electrical Data
Power supply
220-240V/50Hz
220-240V/50Hz
Voltage Range
V
170-265
170-265
Rated current
Cooling
A
3.8(1.8~7.2)
5.0(1.8~8.0)
Heating
A
3.6(1.8~7.5)
4.7(1.8~8.8)
Rated input
Cooling
W
820(320~1250)
1090(320~1550)
Heating
W
770(320~1350)
1010(320~1650)
Annual energy consumption
kwh (cooling)
410
545
Max Current
Cooling
A
7.2
8.0
Heating
A
7.5
8.8
Max Power input
Cooling
W
1250
1550
Heating
W
1350
1650
Refrigerating System
Refrigerant/Charge
Gram
R410A:780g
R410A:1000g
Compressor
Model
39A23MYJ&FJKD
39A23MYJ&FJKD
MFG
RECHI
RECHI
Type
Rotary
Rotary
Fan System
Indoor air circulation(Cooling/Heating)
m3/h
600/600
650/650
Indoor fan type
Cross flow
Cross flow
Indoor fan speed
H/M/L
Cooling
rpm
1120/1000/880/750/600
1180/1050/900/750/600
Heating
rpm
1120/1050/980/900/800
1180/1100/1000/900/800
Dry
rpm
750
750
Sleep
rpm
750
750
Indoor fan motor output
W
20
20
Outdoor fan type
Propeller
Propeller
Outdoor fan speed
rpm
1000
1000
Outdoor fan motor output
W
33
33
Connections
Connecting Pipe
Gas
Inches
Φ12(1/2'')
Φ12(1/2'')
Liquid
Inches
Φ6(1/4'')
Φ6(1/4'')
Connecting Wiring
Size x Core number
4×1.5
4×1.5
Drainage Pipe
O.D 16mm
O.D 16mm
Net dimensions
(W x H x D)
Indoor
mm
890×308×205
890×308×205
Outdoor
mm
817×328×553
817×328×553
Packing dimensions
(W x H x D)
Indoor
mm
1015×384×311
1015×384×311
Outdoor
mm
858×321×558
858×321×558

Air Conditioner Service Manual
3
3. Product Dimensions
Indoor Unit:
Outdoor Unit:
Model
Indoor unit
Outdoor unit
A
B
C
D
E
F
G
H
I
J
K
TAC-09CHSA/F6
890
307
205
760
550
256
508
302
277.8
48
55
TAC-12CHSA/F6
890
307
205
760
550
256
508
302
277.8
48
55

Air Conditioner Service Manual
4
4. Refrigeration cycle diagram
Cooling only
Heat pump
Capillary
Compressor
Accumulator
Heat exchange
(condenser)
Heat exchange
(Evaporator)
2-way valve
Liquid side
3-way valve
Gas side
Cooling
Heating
Gas side
3-way valve
Liquid side
2-way valve
Heat exchange
(Evaporator)
Heat exchange
(condenser)
Accumulator
Compressor
4-way valve
Capillary Assembly
Check valve

5
Note: Each mode and relevant function will be further specified in following pages.
Remote controller
1
2
4
3
5
6
9
7
MODE button
FAN SPEED button
TEMP UP button
TIMER button
SLEEP button
To select the mode of operation.
To switch the conditioner on and off.
To select the fan speed of auto/low/mid/high.
To set automatic switching-on/off.
Crease the temperature or time by 1 unit.
To activate the function SLEEP .
Air Conditioner Service Manual
5.Operation Details
Remote Control
The remote controller is not presetting as Cooling Only Air Conditioner or Heat Pump by manufacturer.
Each time after the remote controller replace batteries or is energized, the arrowhead will flashes on the
front of Heat or Cool on LCD of the remote controller.
User can preset the remote controller type depending on the air conditioner type you have purchased as
follows:
Press any button when the arrowhead flashes on the front of Cool , Cooling Only is set.
Press any button when the arrowhead flashes on the front of Heat , Heat Pump is set.
If you don t press any button within 10 seconds, the remote controller is preset as Heat Pump
automatically.
Note :
If the air conditioner you purchased is a Cooling Only one, but you preset the remote controller as Heat
Pump, it doesn t bring any matter. But if the air conditioner you purchased is a Heat Pump one, and you
preset the remote controller as Cooling Only, then you CAN NOT preset the Heating operation with the
remote controller.
8
DISPLAY button
In cooling mode, press this button, the unit will give
the maximum cooling temperature with 16
In heating mode, press this button, the unit will give
the maximum heating temperature with 31 .
9
SWING button
10
To activate or deactivate of the movement of the
DEFLECTORS .
12
HEALTH button
9
3
4
2
1
8
5
6
79
10
11
9
ON/OFF button
11
To LED display (if present)switch on/off the
12
TURBO button
Mildew button
To switch - on /off HEALTHY funtion.
It is a button
which controls the ionizer or plasma generator only
for inverter type.
ECO button
In cooling mode,press this button ,the temperature
will increase 2 on the base of setting temperature:
In heating mode, press this button, the temperature
will decrease 2 on the base of setting temperature.
Mute indicator

Air Conditioner Service Manual
6
Electronic Controller
1. Safety Protection
(1) Time Delay for Safety protection
z3 minutes delay for compressor ---The compressor is ceased for 3minutes before restarting to
balance the pressure in the refrigeration cycle in order to protect the compressor.
z2 minutes delay for 4-way valve---The 4-way valve will be ceased for 2 minutes late after
compressor to prevent the refrigerant-gas abnormal noise when the HEATING
operation is
OFF or switch to the other operation mode.
(2) Discharge temperature protection
There is a temperature sensor on top of compressor, when temperature on top of
compressor
exceeded the limit, system control will shut down the compressor and the display board will
show the error code.
(3) Lower voltage protection
When AC voltage ≤158V and keep it for 10 seconds, unit will be shut down for protection.
(4) Over voltage protection
When AC voltage ≥260V, unit will be shut down and recover while AC≤255V.
(5) Over current protection
When the current of outdoor unit is overload, controller shut down the unit immediately and show
error code.
(6) Compressor abnormity protection
When compressor start on or in the process of running, if there is no feedback to controller or
load of compressor is abnormity, the air conditioner will shut down, and show error code.
(7) IPM module protection
IPM module has high temperature & over current protection itself, if there is signal feedback to
IPM, the outdoor unit will shut down, LED on outdoor PCB will show the error code.
2. “Feel” Mode Operation
(1) When the “Feel” mode is selected, the operation mode and initial temperature set are
determined by the initial room temperature at start-up of the operation except to turn off the air
conditioner and operates it again.
(2) If the mode is change to “Feel” from other mode, the “Feel” mode doesn’t operate until
compressor stop for more than 3 minutes.
Mode Initial Room Temperature Initial Set Temperature
COOLING RT=26℃23℃
DRY 26℃>RT≥20℃RT-2℃
HEATING for Heat Pump/
FAN for Cooling Only RT<20℃-
zIn the “Feel” mode, when the controller receives the up or down signal of temperature,
the set
temperature can adjust by 1℃upper or lower. The biggest you can adjust by 2℃upper or lower.
3. “COOLING” Mode Operation
(1) Compressor frequency control
According to difference room temperature and set temperature (δt = RT-ST), running frequency of
compressor is controlled by electronic controller. When room temperature is much higher than set
temperature, the compressor will start at a high frequency, and as room temperature goes down, the
compressor running frequency will go down. When room temperature is lower than set temperature,

Air Conditioner Service Manual
7
thecompressor will run at very low frequency. In general, unit will change its running frequency
according toδt to make room temperature closing to set temperature.
(2) Outdoor temperature affects running frequency of the compressor
Outdoor temperature affect compressor’s running frequency. Difference inlet temperature of
outdoor unit is adapted by difference compressor running frequency. While outdoor temperature is
about 30℃, the compressor will run in high frequency.
If unit run in “cooling” mode and outdoor temperature is less than -2℃,the controller will shut down
compressor and show error code, while the ambient temperature is over 1℃, the compressor will run
automatically.
(3) Auto fan control in cooling mode
In cooling mode (include cooling in “feel” mode), fan speed is determined by
δ
t, as the following
diagram:
4.“DRY” Mode Operation
(1) The system for DRY operation used the same refrigerant circle as the cooling one.
(2) When the system operates in DRY mode, at first it operates in cooling mode, the set
temperature (ST) is “RT-2℃”. After that, t he system will operate in cooling mode with lowest
fan speed for 30 minutes and then change to middle speed for 30seconds as a cycle. During
the course of this operation, you can’t use remote controller to adjust the fan speed but you can
control the vane direction.
(3) In the dry mode, when RT≤12℃, the compressor will stop and operates again at RT≥14℃.
5. “HEATING” Mode Operation (available for Heat Pump only)
(1) Frequency control
Same as the frequency control in cooing mode, the running frequency of compressor is
controlled by controller. Unit change its running frequency according to
δ
t to make the room
temperature closing to the set temperature.
(2) Indoor fan motor control
1) Cold Air Prevention Control
zThe function is intended to prevent cold air from being discharged when heating mode
selected or while in defrosting.
zThe indoor fan speed will be controlled as following.
zIn heating operation, if air conditioner turn off, the indoor fan motor will run most for 30
RT‐ST
℃
3.5
3.0
1.5
1.0
δt come down
δt come up
High fan
Min fan
Low fan
Breeze
Temperature up
Temperature down
Setting
Low fan
Stop
37℃
33℃
25℃
34℃
28℃
22℃

Air Conditioner Service Manual
8
seconds since the stop of compressor.
2) Auto fan control (heating)
In heating mode (include in “I feel” mode) , fan speed is determined by δtas the following:
(3) 4-way valve control
In heating mode, 4-way valve will power on ahead of compressor for 5 seconds, and cut off
for 2 minutes later than compressor. 4-way valve will not power off unless the machine to be
switched off, mode changed or on the process of defrosting.
(4) Defrosting
Defrosting is controlled by the microprocessor.
When one of the following conditions is satisfied, unit comes into defrosting:
a.
Outdoor heat exchanger Temperature (OPT) is continuously less than 3℃while the unit runs
for more than 40 minutes, and OPT is keeping under -6℃for more than 3 minutes.
b.
Outdoor heat exchanger Temperature (OPT) is continuously less than 3℃meanwhile the
unit runs for more than 80 minutes, and OPT is keeping under -4℃for more than 3
minutes.
c.
Outdoor heat exchanger Temperature (OPT) is continuously less than 3℃while the unit runs
for more than 120 minutes, and OPT is keeping below -2℃for more than 3 minutes.
Before the air con comes into defrosting, compressor running frequency drop down to a
lower frequency firstly, then the compressor shuts down.
In defrosting, the max. frequency of compressor is F9 (a little less than the highest
frequency ). In this period all protection function are available.
In defrosting, LED showing by winking.
No matter what AC come into or out of defrosting, indoor fan motor speed is the same as Cold
Air Prevention Control.
While one of the following conditions is satisfied, unit comes out of defrosting and shifts to
heating mode:
a.
Outdoor coil Temperature (OPT) ≥15℃.
b.
The time of defrosting keeps for more than 10 minutes.
(5) Indoor exchanger overheat protection
When Indoor exchanger Temperature (IPT) is higher than 55℃, unit comes into indoor exchanger
RT‐ST
δt come down
δt come up
℃
3.5
3.0
1.5
1.0
High fan
Min fan
Low fan
3.5
1.5
Compressor ON
OFF
ON
OFF
ON
OFF
NORMAL 800
4-way valve
Expansion valve
Outdoor fan motor
50S Defrosting time ≤10Mins 15S 15S
10S

Air Conditioner Service Manual
9
overheat protection. The compressor drops its frequency toward to F1 level until IPT≤52℃
If IPT≤52℃and keep for 5 minutes, control system doesn’t limit running frequency.
If IPT>62℃, control system shut down compressor, and recover while IPT drop less than 50℃.
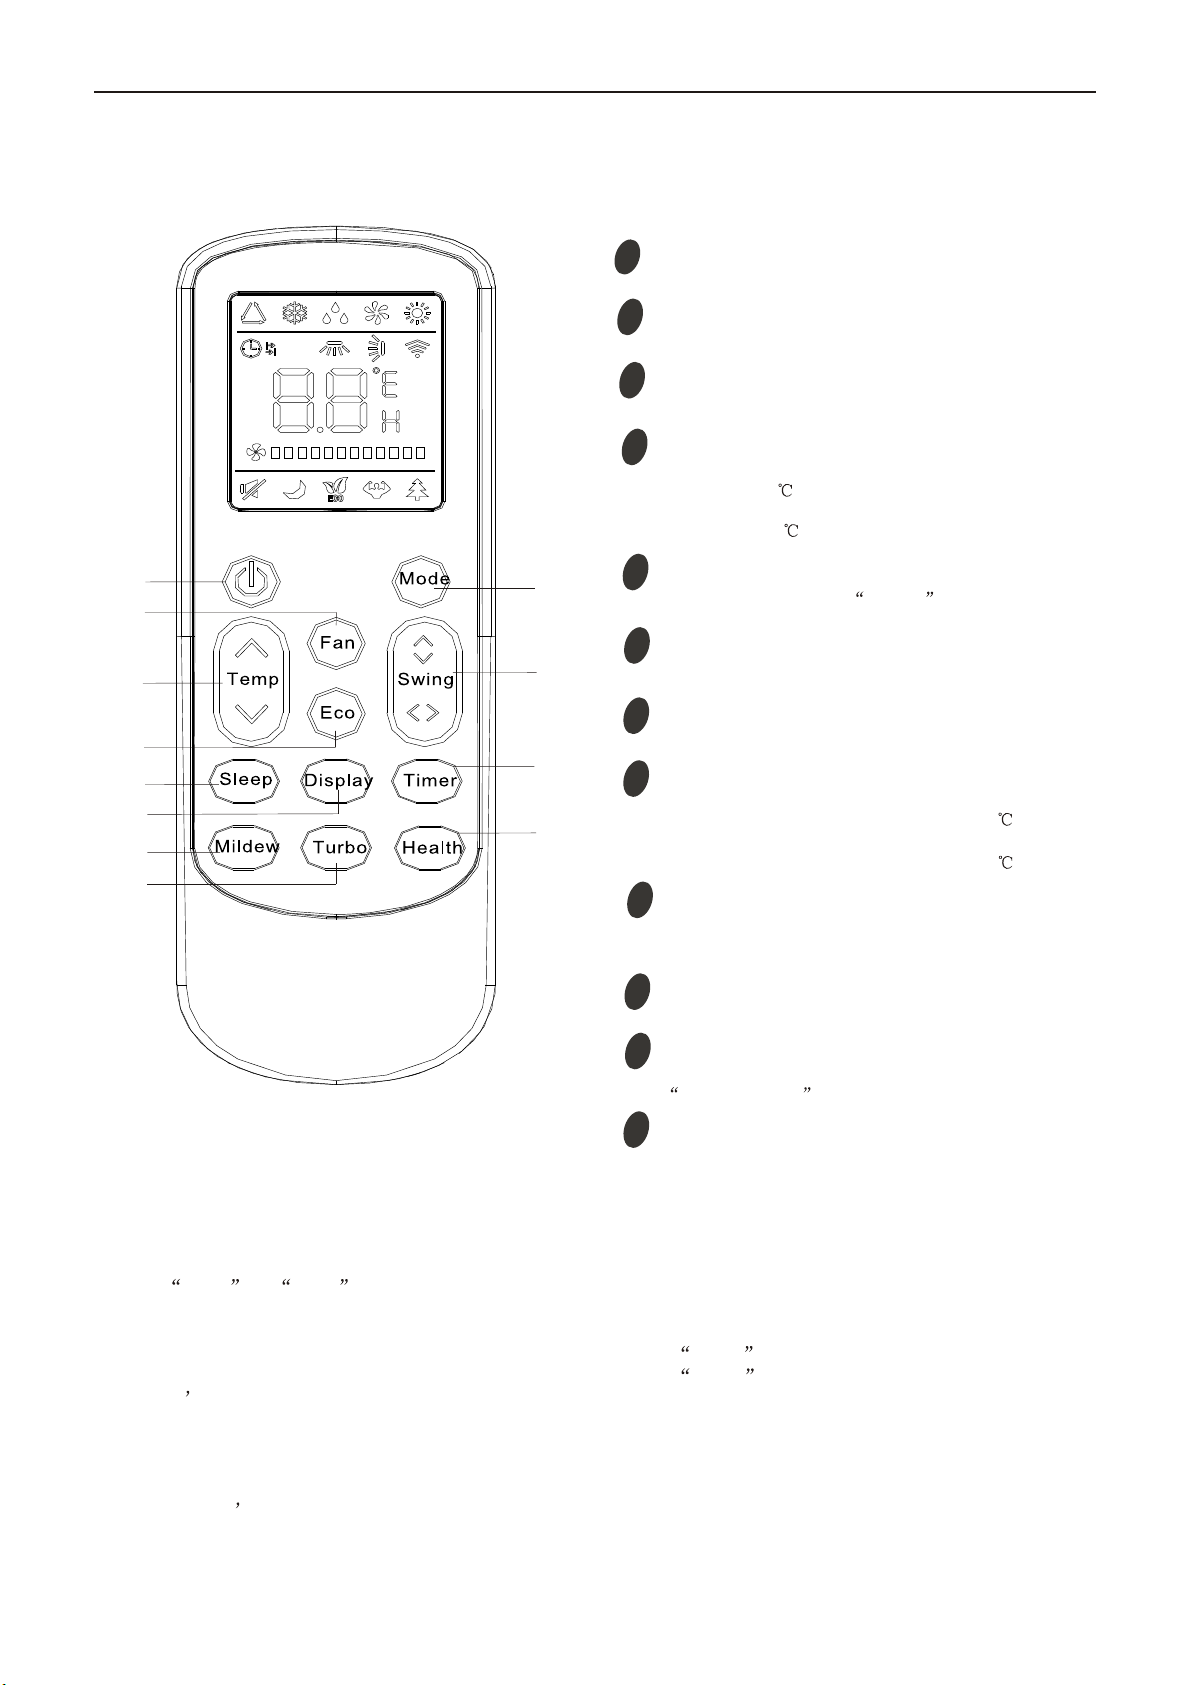
6. “SLEEP” mode
When the SLEEP button is pressed, the AC operates as following:
zThe indoor fan speed is set at low speed, the power lamp and the sleep lamp is on, the
display of temperature will close after 5 minutes.
zWhen selecting COOLING/DRY operation with SLEEP mode, the set temperature will be
raised by 1℃1 hour later and by 2℃2 hour later.
zWhen selecting HEATING operation with SLEEP mode, the set temperature will be dropped by
1℃1 hour later and 2℃2 hours later.
zAfter the System operates in SLEEP mode for 8 hours, it will stop automatically.
7. EMERGENCY Operation
When the EMERGENCY Operation switch is pressed one time, COOLING mode is selected
and if the EMERGENCY Operation switch press again within 3s, HEATING mode selected, while
press once again, the unit will switch off.
When the remote controller missing, failed or the batteries run down, press the EMERGENCY
Operation switch on front of the indoor unit for function test.
NOTE: Do not press the EMERGEMCY Operation switch during normal operation.
8. AUTO-RESTART Function (Option)
While air conditioner is operating in one mode, all of its operation data, such as working mode,
preset temperature etc. would be memorized into IC by main PCB. If power supply cut off due to
reasons and recover again, the AUTO-RESTART function will set
synchronously and the air
conditioner would work at the same mode as before.
Auto-restart Pre-setting (optional):
If Auto-restart function is needed, follow the steps below to activate this function:
1) Pulling the air-con's plug out of socket.
2) Pressing and holding the Emergency button (ON/OFF) on the indoor, then insert the plug
into the socket again.
3) Keep pressing the Emergency button for more than 10 seconds until three short beeps
heard, the Auto-restart function been activated.
9. Protection and Failure Display
zWhen protection display is available, controller will show error code, digital LED shows
error code and setting temperature by turns.
zIf there is more than one failure, it will show error codes according to the error list sequence.
zTo insure the signal communication of indoor and outdoor unit, any failure code relates to
outdoor unit will remain display for 2 minutes maximum after it’s recovered.
zAmong all the failure codes, sensor failure can be recovery automatically once it comes normal.

Air Conditioner Service Manual
10
zError list
Failure Type
LED Code DigitalLEDCode
Indoor and outdoor communication failure RUN、TIMER –both winking E0
Outdoor communication failure RUN、TIMER –both winking EC
Indoor room temperature sensor (IRT) RUN-1 time/8s E1
Indoor coil temperature sensor (IPT) RUN-2 times /8s E2
Outdoor coil temperature sensor (OPT) RUN-3 times /8s E3
System abnormity RUN-4 times /8s E4
Model configuration wrong RUN-5 times /8s E5
Indoor fan motor fault RUN-6 times /8s E6
Outdoor temperature sensor RUN-7 times /8s E7
Exhaust temp. sensor RUN-8 times /8s E8
IPM drive and module fault RUN-9 times /8s E9
Outdoor fan motor fault (DC motor) RUN-10 times /8s EF
Current sensor fault RUN-11 times /8s EA
Indoor unit EEPROM fault RUN-12 times /8s EE
Temp. switch fault ( on top of the
compressor)
RUN-13 times /8s EP
Voltage sensor fault RUN-14 times /8s EU
zProtection display code list:
zOutdoor failure display
There is a LED on outdoor power board, it blinks 1s ON and 1s OFF while compressor standby and it
always light (ON) while compressor running; If there is failure happened on ODU,The indicator (LED)
alerts the fault in a cycle as such that it is bright for 0.5 seconds, dark for 0.5 seconds, blinks “n” times
and then dark for 3 seconds. For details as table below:
Protection Type Function Indicator (flash) DigitalLEDCode
Overvoltage /lower voltage protection RUN: Blink; TIMER: 1 blink /8 sec P1
Overcurrent protection RUN: Blink; TIMER: 2 blink /8 sec P2
Exhaust over temperature protection RUN: Blink; TIMER: 4 blink /8 sec P4
Too cool protection in cooling mode RUN: Bright; TIMER: 5 blink /8 sec P5
Overheat protection in cooling mode RUN: Bright; TIMER: 6 blink /8 sec P6
Overheat protection in heating mode RUN: Bright; TIMER: 7 blink /8 sec P7
Outdoor over temperature
/ lower temperature protection RUN: Bright; TIMER: 8 blink /8 sec P8
Drive protection (software control ) RUN: Blink; TIMER: 9 blink /8 sec P9
Module protection (hardware control) RUN: Blink; TIMER: 10 blink /8 sec P0

Air Conditioner Service Manual
11
blink time (n)
Failure
1 IPM protection
2 Over voltage /lower voltage
3 Overcurrent
4 Exhaust over temperature protection
5 Outdoor coil over temperature protection
6 Drive fault and protection (V1,VP1)
7 Communication fault with indoor unit
8 Compressor overheat fault (compressor top switch)
9 Short-circuit / open-circuit fault of outdoor temperature sensor
10 Short circuit / open-circuit fault of outdoor heat exchanger temperature
sensor
11 Short-circuit / open-circuit fault of exhaust temperature sensor
12 Voltage sensor fault
13 Current sensor fault
14 IPM fault
15 Communication fault between power source board and IPM
16 No feedback from DC fan motor(outdoor unit)
17 Defrost state
Display on outdoor power source board:

Air Conditioner Service Manual
12
6.Wiring diagram
MODEL: TAC-09CHSA/F6, TAC-12CHSA/F6
INDOOR UNIT:
OUTDOOR UNIT

Air Conditioner Service Manual
13
7.
Explosion view and parts
Indoor Unit- TAC-09CHSA/F6
No.
Part No.
Part Name
Q’ty
Remark
1
210826415
Installation Plate
1
2
210736128C
Base
1
3
210735670A
Vertical Vane Assembly
2
4
210736129
Vertical Vane Supporter
1
5
210735719
Cross Fan
1
6
1070100010
Bearing Mount
1
7
211231849C
Evaporator
1
8
210737230A
Face Frame
1
9
210701846S
Screw Cover
2
10
210737232A
Vane
1
11
210735679A
Air Filter
2
12
210735683
Display PCB Box
1
13
210901144E
Display PCB
1
14
210738428B
Front Panel
1
15
1170120045AC
Power Supply Cord
1
16
210900478A
Terminal
1
17
1070040006
Cable Clamp
1
18
210901224
Transformer
1
19
210901714CN
Main PCB
1
20
210900333
Indoor Sensor Assembly
1
21
210735668
Electrical Box
1
22
210901145
Indoor Motor
1
23
210735663
Indoor Motor Cover
1
24
210736144
Right Vertical Vane connector
1
25
1170020045AA
Step Motor
1
26
210736130
Step Motor Supporter
1
27
210702833A
Drainage Hose
1
28
1170020011
Vane Motor
1
29
210735673A
In And Out Pipe Fixer
1
30
210901289T
Remote Controller
1
Not shown in Explosion view
31
210737935
Remote Controller supporter
1
32
1190042144MM
Indoor Carton
1
33
211353703
Left Foaming
1
34
211353702
Right Foaming
1
20
28
21
23
18
16
15
13
12
11
10
9
8
7
6
543
2
1
22
19
24
29
14
17
2526 27

Air Conditioner Service Manual
14
Indoor Unit- TAC-12CHSA/F6
No.
Part No.
Part Name
Q’ty
Remark
1
210826415
Installation Plate
1
2
210736128C
Base
1
3
210735670A
Vertical Vane Assembly
2
4
210736129
Vertical Vane Supporter
1
5
210735719
Cross Fan
1
6
1070100010
Bearing Mount
1
7
211231806E
Evaporator
1
8
210737230A
Face Frame
1
9
210701846S
Screw Cover
2
10
210737232A
Vane
1
11
210735679A
Air Filter
2
12
210735683
Display PCB Box
1
13
210901144E
Display PCB
1
14
210738428B
Front Panel
1
15
1170120045AC
Power Supply Cord
1
16
210900478A
Terminal
1
17
1070040006
Cable Clamp
1
18
210901224
Transformer
1
19
210901714CP
Main PCB
1
20
210900333
Indoor Sensor Assembly
1
21
210735668
Electrical Box
1
22
210901145
Indoor Motor
1
23
210735663
Indoor Motor Cover
1
24
210736144
Right Vertical Vane connector
1
25
1170020045AA
Step Motor
1
26
210736130
Step Motor Supporter
1
27
210702833A
Drainage Hose
1
28
1170020011
Vane Motor
1
29
210735673A
In And Out Pipe Fixer
1
30
210901289T
Remote Controller
1
Not shown in Explosion view
31
210737935
Remote Controller supporter
1
32
1190042144MN
Indoor Carton
1
33
211353703
Left Foaming
1
34
211353702
Right Foaming
1
20
28
21
23
18
16
15
13
12
11
10
9
8
7
6
543
2
1
22
19
24
29
14
17
2526 27

Air Conditioner Service Manual
15
Indoor Unit-TAC-09CHSA/F6
10 11 12
8
9
765
17
13 14 16
15
19
18
20
21
23
22
24
4321
25
No.
Part No.
Part Name
Q’ty
Remark
1
1071990040
Grille
1
2
1080050011
Top cover
1
3
211201160
Condenser
1
4
1080050004
Outdoor motor supporter
1
5
1170040162
Outdoor motor
1
6
1070030050AA
Propeller fan
1
7
1080050001
Left grille supporter
1
8
210800275
Front plate
1
9
1070251931
Fan guard
1
10
211206855
Compressor and accessories
1
11
1120110016
4-way valve
1
12
211233354
4-way valve assembly
1
13
210800433
Base
1
14
1080050002
Right plate
1
15
1120120021
Two-way valve
1
16
1080050003
Valve supporter
1
17
211206766
Three-way valve
1
18
1070350971
Electrical box cover
1
19
1070040008
Cable clamp
1
20
1170200061
Terminal
1
21
210900955Q
Outdoor PCB Assembly
1
22
1171990046
Inductor
1
23
211233262
Capillary assembly
1
24
1080050120
Partition plate
1
25
1170230007E
Pipe Temp. sensor and
outdoor Temp. sensor
1
26
1170230006A
Discharge Temp. sensor
1
27
211369053
Base carton
1
Not shown in explosion view
28
211311128AHA
Cabinet carton
1
29
211311130
Base foaming
1
30
211311129
Cover foaming
1

Air Conditioner Service Manual
16
Indoor Unit-TAC-12CHSA/F6
10 11 12
8
9
765
17
13 14 16
15
19
18
20
21
23
22
24
4321
25
No.
Part No.
Part Name
Q’ty
Remark
1
1071990039
Grille
1
2
210800539
Top cover
1
3
211244352
Condenser
1
4
1080050004
Outdoor motor supporter
1
5
1170040162AB
Outdoor motor
1
6
1070030060
Propeller fan
1
7
1080050001
Left grille supporter
1
8
210800537
Front plate
1
9
210754635
Fan guard
1
10
211239580
Compressor and accessories
1
11
1120110016J
4-way valve
1
12
211239923
4-way valve assembly
1
13
210800545
Base
1
14
210800541
Right plate
1
15
1120120045
Two-way valve
1
16
1080050003
Valve supporter
1
17
211206766
Three-way valve
1
18
1070350971
Electronic Box Cover
1
19
1070040003
Cable clamp
1
20
1170200061
Terminal
1
21
210901772AC
Outdoor PCB Assembly
1
22
210901769
Inductor
1
23
211244313
Capillary assembly
1
24
1080050119
Partition plate
1
25
1170230007E
Pipe Temp. sensor and
outdoor Temp. sensor
1
Not shown in explosion view
26
1170230006C
Discharge Temp. sensor
1
27
211369052
Base carton
1
28
211311098BAZ
Cabinet carton
1
29
211311099
Base foaming
1
30
211311100
Cover foaming
1

Air Conditioner Service Manual
17
8. Precaution
8.1 SAFETY RULES AND RECOMMENDATIONS FOR THE INSTALLATION
zRead this guide before installing and using the appliance.
zDuring the installation of the indoor and outdoor units the access to the working area should be
forbidden to children.
Unforeseeable accidents could happen.
zMake sure that the base of the outdoor unit is firmly fixed.
zCheck that air cannot enter the refrigerant system and check for refrigerant leaks when moving
the air conditioner.
zCheck that air cannot enter the refrigerant system and check for refrigerant leaks when moving
the air conditioner.
zThe ratings of the fuse installed in the built in-control unit are T 5A / 250V.
zThe user must protect the indoor unit with a fuse of suitable capacity for the maximum input
current or with another overload protection device.
zEnsure that the mains voltage corresponds to that stamped on the rating plate. Keep the switch or
power plug clean. Insert the power plug correctly and firmly into the socket, thereby avoiding the risk of
electric shock or fire due to insufficient contact.
zCheck that the socket is suitable for the plug, otherwise have the socket changed.
zThe appliance must be fitted with means for disconnection from the supply mains having a contact
separation in all poles that provide full disconnection under over voltage category III conditions, and
these means must be incorporated in the fixed wiring in accordance with the wiring rules.
zThe air conditioner must be installed by professional or qualified persons. Do not install the appliance at
a distance of less than 50 cm from inflammable substances (alcohol, etc.) Or from pressurized
containers (e.g. spray cans).
zIf the appliance is used in areas without the possibility of ventilation, precautions must be taken to
prevent any leaks of refrigerant gas from remaining in the environment and creating a danger of fire.
zThe packaging materials are recyclable and should be disposed of in the separate waste bins .Take the
air conditioner at the end of its useful life to a special waste collection center for disposal.
zOnly use the air conditioner as instructed in this booklet. These instructions are not intended to cover
every possible condition and situation. As with any electrical household appliance, common sense and
caution are therefore always recommended for installation, operation and maintenance.
zThe appliance must be installed in accordance with applicable national regulations.
zBefore accessing the terminals, all the power circuits must be disconnected from the power supply.
zThe appliance shall be installed in accordance with national wiring regulations.
zThis appliance can be used by children aged from 8 years and above and persons with reduced physical,
sensory or mental capabilities or lack of experience and knowledge if they have been given supervision or

Air Conditioner Service Manual
18
instruction concerning use of the appliance in a safe way and understand the hazards involved. Children
shall not play with the appliance. Cleaning and user maintenance shall not be made by children without
supervision.
8.2
SAFETY RULES AND RECOMMENDATIONS FOR THE USER
zDo not try to install the conditioner alone; always contact specialized technical personnel. Cleaning and
maintenance must be carried out by specialized technical personnel. In any case disconnect the
appliance from the mains electricity supply before carrying out any cleaning or maintenance.
zEnsure that the mains voltage corresponds to that stamped on the rating plate. Keep the switch or
power plug clean. Insert the power plug correctly and firmly into the socket, thereby avoiding the risk of
electric shock or fire due to insufficient contact.
zDo not pull out the plug to switch off the appliance when it is in operation, since this could create a spark
and cause a fire, etc.
zThis appliance has been made for air conditioning domestic environments and must not be used for
any other purpose, such as for drying clothes, cooling food, etc.
zThe packaging materials are recyclable and should be disposed of in the separate waste bins. Take the
air conditioner at the end of its useful life to a special waste collection center for disposal.
zAlways use the appliance with the air filter mounted. The use of the conditioner without air filter
could cause an excessive accumulation of dust or waste on the inner parts of the device with
possible subsequent failures.
zThe user is responsible for having the appliance installed by a qualified technician, who must check that
it is earthed in accordance with current legislation and insert a thermomagnetic circuit breaker.
zThe batteries in remote controller must be recycled or disposed of properly. Disposal of Scrap Batteries
--- Please discard the batteries as sorted municipal waste at the accessible collection point.
zNever remain directly exposed to the flow of cold air for a long time. The direct and prolonged exposition
to cold air could be dangerous for your health .Particular care should be taken in the rooms where there
are children, old or sick people.
zIf the appliance gives off smoke or there is a smell of burning, immediately cut off the power supply and
contact the Service Centre.
zThe prolonged use of the device in such conditions could cause fire or electrocution.
zHave repairs carried out only by an authoritative Service Centre of the manufacturer. Incorrect
repair could expose the user to the risk of electric shock, etc.
zUnhook the automatic switch if you foresee not to use the device for a long time.
The airflow direction must be properly adjusted.
zThe flaps must be directed downwards in the heating mode and upwards in the cooling mode.
zOnly use the air conditioner as instructed in this booklet. These instructions are not in ended to cover
every possible condition and situation. As with any electrical household appliance, common sense
and caution are therefore always recommended for installation, operation and maintenance.

Air Conditioner Service Manual
19
zEnsure that the appliance is disconnected from the power supply when it will remain inoperative for a
long period and before carrying out any cleaning or maintenance.
zSelecting the most suitable temperature can prevent damage to the appliance.
8.3
SAFETY RULES AND PROHIBITIONS
zDo not bend, tug or compress the power cord since this could damage it. Electrical shocks or fire are
probably due to a damaged power cord. Specialized technical personnel only must replace a damaged
power cord.
zDo not use extensions or gang modules.
zDo not touch the appliance when barefoot or parts of the body are wet or damp.
zDo not obstruct the air inlet or outlet of the indoor or the outdoor unit. The obstruction of these openings
causes a reduction in the operative efficiency of the conditioner with possible consequent failures or
damages.
zIn no way alter the characteristics of the appliance.
zDo not install the appliance in environments where the air could contain gas, oil or sulphur or near
sources of heat.
zThis appliance is not intended for use by persons (including children) with reduced physical, sensory or
mental capabilities, or lack of experience and knowledge, unless they have been given supervision or
instruction concerning use of the appliance by a person responsible for their safety.
zDo not climb onto or place any heavy or hot objects on top of the appliance.
zDo not leave windows or doors open for long when the air conditioner is operating.
zDo not direct the airflow onto plants or animals.
zA long direct exposition to the flow of cold air of the conditioner could have negative effects on plants and
animals.
zDo not put the conditioner in contact with water. The electrical insulation could be damaged and thus
causing electrocution.
zDo not climb onto or place any objects on the outdoor unit
zNever insert a stick or similar object into the appliance. It could cause injury.
zChildren should be supervised to ensure that they do not play with the appliance. If the supply cord is
damaged, it must be replaced by the manufacturer, its service agent or similarly qualified persons in
order to avoid a hazard.
This manual suits for next models
1
Table of contents
Other TCL Air Conditioner manuals

TCL
TCL TACM2O-28HIA User manual

TCL
TCL Inverter TAC-09CHSD/XAB1I User manual

TCL
TCL TAC-24CF/E User manual

TCL
TCL W5P93 Specification sheet

TCL
TCL iQool-2MS9K9K Operating manual

TCL
TCL TCE-25CHSD User manual

TCL
TCL TAC-09CHSA/XP User manual

TCL
TCL AC12000E User manual

TCL
TCL H8W35W Specification sheet

TCL
TCL TCC-09C2HRH/DV User manual