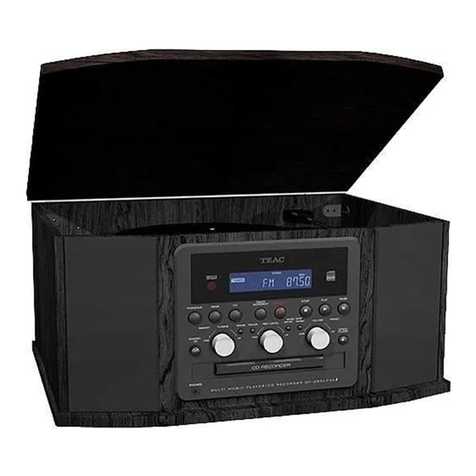
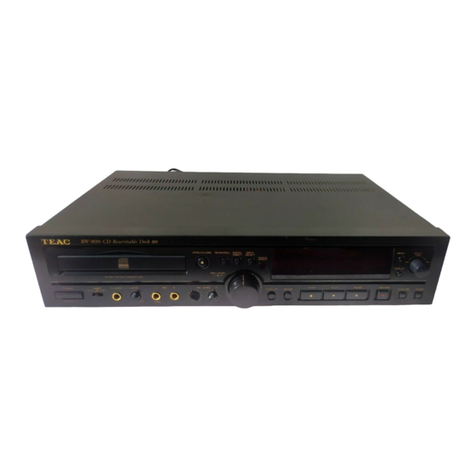
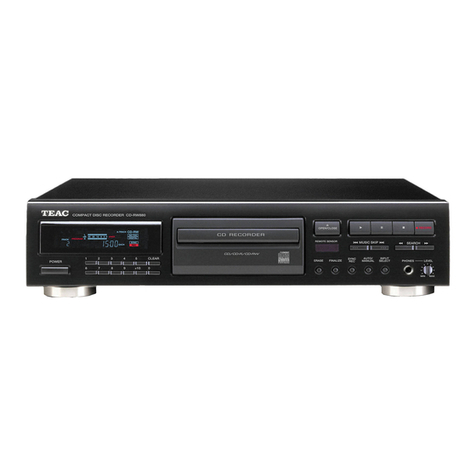
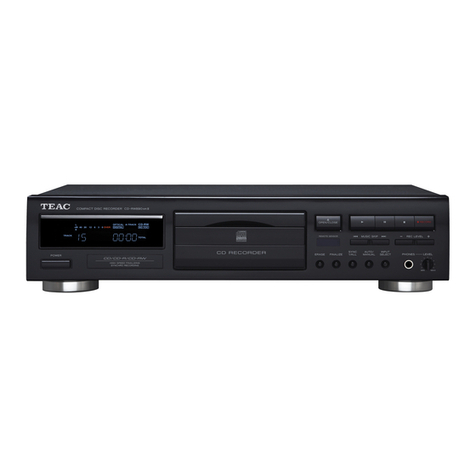
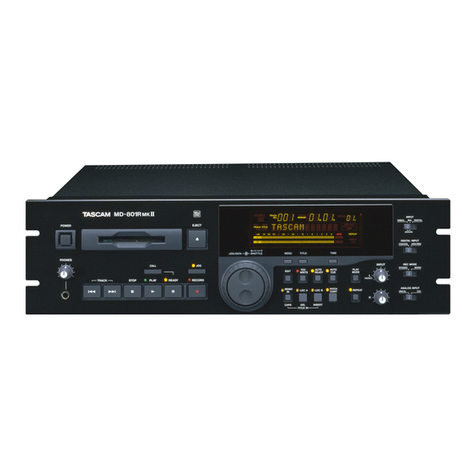
Teac RW-H500 User manual

OWNER’S MANUAL
MANUEL DU PROPRIETAIRE
BEDIENUNGSANLEITUNG
MANUALE DI ISTRUZIONI
MANUAL DEL USUARIO
3D0033100B
RW-H500
CD Rewritable Deck

2
WARNING: TO PREVENT FIRE OR SHOCK HAZARD, DO NOT EXPOSE THIS APPLIANCE TO RAIN OR MOISTURE.
CAUTION: TO REDUCE THE RISK OF ELECTRIC SHOCK, DO NOT REMOVE COVER (OR BACK). NO USER-
SERVICEABLE PARTS INSIDE. REFER SERVICING TO QUALIFIED SERVICE PERSONNEL.
Y
E
RTHE EXCLAMATION POINT WITHIN AN EQUILATERAL TRIANGLE IS INTENDED TO ALERT THE USER TO THE PRESENCE OF IMPORTANT
OPERATING AND MAINTENANCE (SERVICING) INSTRUCTIONS IN THE LITERATURE ACCOMPANYING THE APPLIANCE.
THE LIGHTNING FLASH WITH ARROWHEAD SYMBOL, WITHIN AN EQUILATERAL TRIANGLE, IS INTENDED TO ALERT THE USER TO THE
PRESENCE OF UNINSULATED "DANGEROUS VOLTAGE" WITHIN THE PRODUCT’S ENCLOSURE THAT MAY BE OF SUFFICIENT MAGNITUDE TO
CONSTITUTE A RISK OF ELECTRIC SHOCK TO PERSONS.
AC POWER CORD CONNECTION
CAUTION:
TO PREVENT ELECTRIC SHOCK, MATCH WIDE BLADE OF PLUG TO
WIDE SLOT, FULLY INSERT.
CORDE DE CONNEXION CA
ATTENTION:
POUR ÉVITER LES CHOCS ÉLECTRIQUES, INTRODUIRE LA LAME
LA PLUS LARGE DE LA FICHE DANS LA BORNE
CORRESPONDANTE DE LA PRISE ET POUSSER JUSQU’AU FOND.
For CANADA Pour le CANADA
Optical pickup :
Type : KRS-202A or KRS-220B
Manufacturer : SONY Corporation
Laser output : Less than 0.1 mW(Play) and 32 mW(Record)
on the objective lens
Wavelength : 777 - 787 nm
CAUTION
<DO NOT REMOVE THE PROTECTIVE HOUSING USING
SCREWDRIVER.
<USE OF CONTROLS OR ADJUSTMENTS OR PERFORMANCE OF
PROCEDURES OTHER THAN THOSE SPECIFIED HEREIN MAY
RESULT IN HAZARDOUS RADIATION EXPOSURE.
<IF THIS PRODUCT DEVELOPS TROUBLE, MAKE A CONTACT
WITH OUR SERVICEMAN, AND DO NOT USE THE PRODUCT IN A
TROUBLED STATE.
TO THE USER
This equipment has been tested and found to comply with the limits for a Class B digital device, pursuant to Part 15 of the FCC Rules. These
limits are designed to provide reasonable protection against interference in a residential area. This device generates and uses radio
frequency energy and if not installed and used in accordance with the instructions, it may cause interference to radio or TV reception. If
this unit does cause interference with TV or radio reception you can try to correct the interference by one or more of the following
measures :
a) Reorient or relocate the receiving antenna.
b) Increase the separation between the equipment and the receiver.
c) Plug the equipment into a different outlet so that it is not on the same circuit as the receiver. If necessary, consult the dealer or an
experienced radio/TV technician for additional suggestions.
CAUTION
Changes or modifications to this equipment not expressly approved by TEAC CORPORATION for compliance could void the user's authority
to operate this equipment.
For U.S.A.
Important Safety Instructions
This product has been designed and manufactured according to
FDA regulations “title 21, CFR, chapter 1, subchapter J, based on the
Radiation Control for Health and Safety Act of 1968“, and is
classified as class 1 laser product. There is not hazardous invisible
laser radiation during operation because invisible laser radiation
emitted inside of this product is completely confined in the
protective housings.
The label required in this regulation is shown ①.
For U.S.A.
①

3
CAUTION
<Read all of these Instructions.
<Save these Instructions for later use.
<Follow all Warnings and Instructions marked on the audio equipment.
1) Read Instructions — All the safety and operating instructions should
be read before the product is operated.
2) Retain Instructions — The safety and operating instructions should
be retained for future reference.
3) Heed Warnings — All warnings on the product and in the operating
instructions should be adhered to.
4) Follow Instructions — All operating and use instructions should be
followed.
5) Cleaning — Unplug this product from the wall outlet before cleaning.
Do not use liquid cleaners or aerosol cleaners. Use a damp cloth for
cleaning.
6) Attachments — Do not use attachments not recommended by the
product manufacturer as they may cause hazards.
7) Water and Moisture — Do not use this product near water — for
example, near a bath tub, wash bowl, kitchen sink, or laundry tub; in a
wet basement; or near a swimming pool; and the like.
8) Accessories — Do not place this product on an unstable cart, stand,
tripod, bracket, or table. The product may fall, causing serious injury to
a child or adult, and serious damage to the product. Use only with a
cart, stand, tripod, bracket, or table recommended by the manufacturer,
or sold with the product. Any mounting of the product should follow the
manufacturer’s instructions, and should use a mounting accessory
recommended by the manufacturer.
9) A product and cart combination should be moved
with care. Quick stops, excessive force, and uneven
surfaces may cause the product and cart combination
to overturn.
10) Ventilation — Slots and openings in the cabinet
are provided for ventilation and to ensure reliable operation of the
product and to protect it from overheating, and these openings must not
be blocked or covered. The openings should never be blocked by
placing the product on a bed, sofa, rug, or other similar surface. This
product should not be placed in a built-in installation such as a
bookcase or rack unless proper ventilation is provided or the
manufacturer’s instructions have been adhered to.
11) Power Sources — This product should be operated only from the
type of power source indicated on the marking label. If you are not sure
of the type of power supply to your home, consult your product dealer
or local power company. For products intended to operate from battery
power, or other sources, refer to the operating instructions.
12) Grounding or Polarization — This product may be equipped with a
polarized alternating-current line plug (a plug having one blade wider
than the other). This plug will fit into the power outlet only one way. This
is a safety feature. If you are unable to insert the plug fully into the
outlet, try reversing the plug. If the plug should still fail to fit, contact
your electrician to replace your obsolete outlet. Do not defeat the safety
purpose of the polarized plug.
13) Power-Cord Protection — Power-supply cords should be routed so
that they are not likely to be walked on or pinched by items placed upon
or against them, paying particular attention to cords at plugs,
convenience receptacles, and the point where they exit from the
product.
14) Outdoor Antenna Grounding — If an outside antenna or cable
system is connected to the product, be sure the antenna or cable
system is grounded so as to provide some protection against voltage
surges and built-up static charges. Article 810 of the National Electrical
Code, ANSI/NFPA 70, provides information with regard to proper
grounding of the mast and supporting structure, grounding of the lead-
in wire to an antenna discharge unit, size of grounding conductors,
location of antenna-discharge unit, connection to grounding electrodes,
and requirements for the grounding electrode.
Note to CATV system installer:
This reminder is provided to call the CATV system installer’s attention to
Section 820-40 of the NEC which provides guidelines for proper
grounding and, in particular, specifies that the cable ground shall be
connected to the grounding system of the building, as close to the point
of cable entry as practical."
15) Lightning — For added protection for this product during a lightning
storm, or when it is left unattended and unused for long periods of time,
unplug it from the wall outlet and disconnect the antenna or cable
system. This will prevent damage to the product due to lightning and
power-line surges.
16) Power Lines — An outside antenna system should not be located in
the vicinity of overhead power lines or other electric light or power
circuits, or where it can fall into such power lines or circuits. When
installing an outside antenna system, extreme care should be taken to
keep from touching such power lines or circuits as contact with them
might be fatal.
17) Overloading — Do not overload wall outlets, extension cords, or
integral convenience receptacles as this can result in risk of fire or
electric shock.
18) Object and Liquid Entry — Never push objects of any kind into this
product through openings as they may touch dangerous voltage points
or short-out parts that could result in a fire or electric shock. Never spill
liquid of any kind on the product.
19) Servicing — Do not attempt to service this product yourself as
opening or removing covers may expose you to dangerous voltage or
other hazards. Refer all servicing to qualified service personnel.
20) Damage Requiring Service — Unplug this product from the wall
outlet and refer servicing to qualified service personnel under the
following conditions:
a ) when the power-supply cord or plug is damaged.
b ) if liquid has been spilled, or objects have fallen into the product.
c ) if the product has been exposed to rain or water.
d)if the product does not operate normally by following the operating
instructions. Adjust only those controls that are covered by the
operating instructions as an improper adjustment of other controls may
result in damage and will often require extensive work by a qualified
technician to restore the product to its normal operation.
e) if the product has been dropped or damaged in any way.
f)when the product exhibits a distinct change in performance _ this
indicates a need for service.
21) Replacement Parts — When replacement parts are required, be
sure the service technician has used replacement parts specified by
the manufacturer or have the same characteristics as the original part.
Unauthorized substitutions may result in fire, electric shock, or other
hazards.
22) Safety Check — Upon completion of any service or repairs to this
product, ask the service technician to perform safety checks to
determine that the product is in proper operating condition.
23) Wall or Ceiling Mounting — The product should be mounted to a
wall or ceiling only as recommended by the manufacturer.
24) Heat — The product should be situated away from heat sources
such as radiators, heat registers, stoves, or other products (including
amplifiers) that produce heat.
ANTENNA
LEAD IN
WIRE
ANTENNA
DISCHARGE UNIT
(NEC SECTION 810-20)
GROUNDING CONDUCTORS
(NEC SECTION 810-21)
GROUND CLAMPS
POWER SERVICE GROUNDING
ELECTRODE SYSTEM
(NEC ART 250. PART H)
NEC - NATIONAL ELECTRICAL CODE
ELECTRIC
SERVICE
EQUIPMENT
Example of Antenna Grounding
as per National Electrical
Code, ANSI/NFPA 70
GROUND
CLAMP
Important Safety Instructions

ENGLISH FRANÇAIS
Contents Sommaire
4
Thanks for buying a TEAC. Read this manual
carefully to get the best performance from
this unit.
Nous vous remercions pour l’achat d’un
appareil TEAC. Lire ce manuel avec
attention pour obtenir les meilleures
performances possibles de cet appareil.
Before Use.................................................... 6
Compact Disc............................................... 8
Connections................................................ 12
Remote Control Unit ................................. 16
Basic Operation......................................... 18
Playback...................................................... 20
Repeat Playback........................................ 26
Shuffle Playback........................................ 26
Programmed Playback ............................. 28
Before Recording ...................................... 32
How to copy a CD...................................... 36
Basic Recording ........................................ 38
CD Synchronous Recording..................... 44
Synchronized Recording.......................... 46
Advanced Recording ................................ 48
Finalize......................................................... 56
Erase or Unfinalize a CD-RW................... 58
Time Display............................................... 60
Sleep Timer................................................. 62
Error Message ........................................... 64
Troubleshooting .................................... 66
Specifications ....................................... 66
Voltage Conversion
(General export models only)
Be sure to remove the power cord from
the AC outlet before repositioning the
voltage converter switch.
1. Locate the voltage selector on the rear
panel.
2. Using a flat-bladed screwdriver, set to
the appropriate 230V or 120V position
according to your area.
IN NORTH AMERICA USE ONLY ON 120 V
SUPPLY.
Changement de tension
(Modèles s'exportation générale
seulement)
Bien débrancher le cordon d'alimentation
de la prise secteur avant de repositionner
le sélecteur de changement de tension.
1. Localiser le sélecteur de tension par le
arrièle du appareil.
2. En utilisant un tournevis à lame plate,
régler sur la position appropriée 230V
ou 120V en fonction de la tension
locale.
DANS L'AMÉRIQUE DU NORD:
UTILISABLE SUR 120 V D'ALIMENTATION
UNIQUEMENT.
CAUTION:
Recording pre-recorded tapes, records, or
other published or broadcast material may
infringe copyright laws. Check before
recording.
MISE EN GARDE:
Le réenregistrement d’oeuvres
enregistrées sur cassette ou sur disque,
ou diffusées sur les ondes peut
contrevenir à la législation sur les droits
d’auteur. Renseignez-vous avant
d’effectuer un tel enregistrement.
Avant Utilisation........................................... 6
Disques Compacts ...................................... 8
Connexions................................................. 12
Boîtier de télécommande......................... 16
Fonctionnement de base.......................... 18
Lecture ........................................................ 20
Lecture répétitive ...................................... 26
Lecture dans un ordre aléatoire ............. 26
Lecture programmée ............................... 28
Avant d'enregistrer ................................... 32
Pour copier un CD ..................................... 36
Enregistrement simple.............................. 38
Enregistrement synchronisé d'un CD..... 44
Enregistrement synchronisé.................... 46
Enregistrement avancé ............................ 48
Finalisation.................................................. 56
Effacer ou définaliser un CD-RW............ 58
Affichage du temps................................... 60
Programmation du temps de veille..........62
Message d'erreur...................................... 64
Dépannage ................................................. 67
Caractéristiques ........................................ 67

DEUTSCH ESPAÑOL
IndiceInhalt Indice
5
ITALIANO
Vielen Dank für den Kauf dieses TEAC-
Geräts. Bitte lesen Sie diese Anleitung
sorgfältig durch, um die Leistungs-fähigkeit
dieses Geräts optimal nutzen zu können.
Grazie per aver acquistato un prodotto
TEAC. Leggere attentamente questo
manuale per ottenere le migliori prestazioni
da questo apparecchio.
Enhorabuena por la adquisición de un
TEAC. Lea detenidamente este manual a fin
de obtener el mejor rendimiento de esta
unidad.
ATTENZIONE:
La registrazione di nastri preregistrati,
dischi o di altro materiale pubblicato o
trasmesso può violare le leggi relative al
copyright. Verificare prima di registrare.
PRECAUCIÓN:
La grabación de cintas y discos
pregrabados así como de otros materiales
publicados o emitidos puede infringir las
leyes sobre derechos de autor.
Compruébelo antes de proceder a la
grabación.
Prima dell'uso............................................... 7
Come tenere i CD......................................... 9
Collegamento ............................................. 13
Funzionamento col telecomando............ 17
Operazioni fondamentali .......................... 19
Riproduzione............................................... 21
Riproduzione Repeat................................. 27
Shuffle ......................................................... 27
Riproduzione Program.............................. 29
Preliminari alla registrazione................... 33
Duplicazione di un CD............................... 37
Registrazione di base................................ 39
Registrazione sincronizzata da CD......... 45
Registrazione sincronizzata..................... 47
Registrazione avanzata ............................ 49
Funzione Finalize........................................ 57
Cancellazione o"riapertura"
di un CD-RW...................................... 59
Visualizzazione dei tempi ......................... 61
Temporizzazione della funzione Sleep....63
Messaggi d’errore..................................... 65
Ricerca guasti............................................ 69
Caratteristiche tecniche........................... 69
Vor Inbetriebnahme .................................... 7
Handhabung von Compact Discs.............. 9
Anschluß..................................................... 13
Betrieb mit der Fernbedienung ............... 17
Grundlegende Funktionen........................ 19
Wiedergabe................................................ 21
Wiedergabewiederholung....................... 27
Shuffle-Funktion......................................... 27
Programmierte Titelfolge ......................... 29
Vor der Aufzeichnung............................... 33
Kopieren einer CD ..................................... 37
Grundlegende Aufnahmefunktionen...... 39
CD Synchron-Kopierfunktion................... 45
Synchrone Aufzeichnung......................... 47
Fortgeschrittene Aufnahmefunktionen
.. 49
Finalize-Funktion........................................ 57
Löschen oder “Aufschließen”
einer CD-RW .................................... 59
Zeitanzeige ................................................. 61
Sleep Timer-Funktion................................ 63
Fehlermeldungen....................................... 65
Fehlerbeseitigung ..................................... 68
Technische Daten ..................................... 68
HINWEIS:
Durch Aufzeichnen bespielter Cassetten,
Schallplatten oder von anderweitig
veröffentlichtem oder ausgestrahltem
Material werden u.U. Urheberrechte
verletzt. Prüfen Sie dies vor der
Aufnahme.
Previo al empleo.......................................... 7
Manipulación de discos............................. 9
Conexión ..................................................... 13
Contador de tiempo................................... 17
Funcionamiento básico ............................ 19
Reproducción............................................. 21
Repetición .................................................. 27
Reproducción al azar................................ 27
Reproducción de programa..................... 29
Antes de grabar......................................... 33
Cómo copiar un CD.................................... 37
Grabación básica ...................................... 39
Grabación sincronizada de CD................ 45
Grabación sincronizada ........................... 47
Grabación avanzada................................. 49
Cierre de sesión......................................... 57
Borrado o rehabilitación de un CD-RW..59
Visualización del tiempo........................... 61
Desconexión programada........................ 63
Mensajes de error..................................... 65
Solución de problemas............................. 70
Especificaciones ....................................... 70

ENGLISH FRANÇAIS
Before Use Avant Utilisation
6
Lire ceci avant de faire fonctionner
l'appareil
<La température nominale doit être
comprise 5°C et 35°C (41°F et 95°F). Le
graveur/lecteur de disques compacts est
plus sensible aux températures extrêmes
que les lecteurs de disques compacts
ordinaires.
<Le taux d'humidité relative doit être
compris entre 30 et 90° sans
condensation.
<L'appareil pouvant dégager de la chaleur
lorsqu'il fonctionne, laisser un
dégagement suffisant au-dessus de
l'appareil afin de permettre une
ventilation naturelle.
<La tension d'alimentation de l'appareil
doit être celle indiquée à l'arrière de
l'appareil. En cas de doute, contacter un
électricien.
<Choisir avec soin l'endroit où vous
placerez votre appareil. Eviter de le
placer directement au soleil ou près
d'une source de chaleur. Eviter aussi les
endroits sujets à des vibrations, à de la
poussière excessive, à la chaleur, au
froid ou à l'humidité.
<Ne pas placer RW-H500 sur le dessus de
l’amplificateur/récepteur.
<Ne pas ouvrir le coffret car ceci
risquerait de provoquer des dommages
aux circuits ou des chocs électriques. Si
un objet rentre dans l'appareil, contacter
votre revendeur.
<Lors du débranchement du cordon
d'alimentation de la prise murale,
toujours tirer sur la fiche et non sur le
cordon.
<Pour garder le capteur laser propre, ne
pas y toucher et ne pas oublier de fermer
le tiroir du disque.
<Ne pas essayer de nettoyer l'appareil
avec des solvants chimiques car ceci
pourrait endommager le fini de l'appareil.
Utiliser un chiffon propre et sec.
<Garder soigneusement ce manuel
d'instructions pour une référence
ultérieure.
Read this before operation
<The nominal temperature should be
between 5°C and 35°C (41°F and 95°F).
The CD-RW recorder is more sensitive to
extremes of temperature than ordinary
CD players.
<Relative humidity should be 30 to 90
degrees non-condensing.
<As the unit may become hot during
operation, always leave sufficient space
above the unit for ventilation.
<The voltage supplied to the unit should
match the voltage as printed on the rear
panel. If you are in any doubt regarding
this matter, consult an electrician.
<Choose the installation location of your
unit carefully. Avoid placing it in direct
sunlight or close to a source of heat. Also
avoid locations subject to vibrations and
excessive dust, heat, cold or moisture.
<Do not place the unit on the
amplifier/receiver.
<Do not open the cabinet as this might
result in damage to the circuitry or
electrical shock. If a foreign object
should get into the set, contact your
dealer.
<When removing the power plug from the
wall outlet, always pull directly on the
plug, never yank the cord.
<To keep the laser pickup clean, do not
touch it, and do not forget to close the
disc tray.
<Do not attempt to clean the unit with
chemical solvents as this might damage
the finish. Use a clean, dry cloth.
<Keep this manual in a safe place for
future reference.
IMPORTANT(for U.K.Customers)
DO NOT cut off the mains plug from this
equipment. If the plug fitted is not suitable
for the power points in your home or the
cable is too short to reach a power point,
then obtain an appropriate safety approved
extension lead or consult your dealer.
If nonetheless the mains plug is cut off,
remove the fuse and dispose of the plug
immediately, to avoid a possible shock
hazard by inadvertent connection to the
mains supply.
If this product is not provided with a mains
plug, or one has to be fitted, then follow the
instructions given below:
IMPORTANT. DO NOT make any
connection to the larger terminal which is
marked with the letter E or by the safety
earth symbol |or coloured GREEN or
GREEN-and-YELLOW.
The wires in the mains lead on this product
are coloured in accordance with the
following code:
BLUE : NEUTRAL
BROWN : LIVE
As these colours may not correspond with
the coloured markings identifying the
terminals in your plug proceed as follows:
The wire which is coloured BLUE must be
connected to the terminal which is marked
with the letter N or coloured BLACK.
The wire which is coloured BROWN must
be connected to the terminal which is
marked with the letter L or coloured RED.
When replacing the fuse only a correctly
rated approved type should be used and be
sure to re-fit the fuse cover.
IF IN DOUBT — CONSULT A COMPETENT
ELECTRICIAN.
The equipment draws nominal
nonoperating power from the AC outlet
with its POWER switch in the STANDBY
position.
Obs! nätströmställaren skiljer ej hela
apparaten fran nätet.

DEUTSCH ESPAÑOL
Prima dell'usoVor Inbetriebnahme Previo al empleo
7
ITALIANO
Bitte vor Inbetriebnahme lesen
<Die empfohlene Betriebstemperatur
beträgt 5 °C bis 35 °C (41 °F bis 95 °F). Ein
CD-RW Recorder ist in bezug auf
Temperatureinflüsse wesentlich
empfindlicher als ein CD Player.
<Die relative Luftfeuchtigkeit sollte
zwischen 30 und 90 Prozent (nicht
kondensierend) betragen.
<Da sich das Gerät während des Betriebs
erwärmt, sollten Sie bei der Aufstellung
stets auf genügenden Platz achten, so
daß eine ausreichende Luftzirkulation
gewährleistet ist.
<Achten Sie stets darauf, daß die
Spannung Ihres Stromnetzes mit dem auf
der Geräterückseite angegebenen Wert
übereinstimmt. Sollten Sie dazu Fragen
haben oder im Zweifel sein, wenden Sie
sich bitte an einen Elektrofachmann.
<Wählen Sie einen geeigneten Standort
für den Receiver. Nicht geeignet sind
Standorte, die direkter
Sonneneinstrahlung, Heizquellen,
Vibrationen, Staubeinwirkung, starken
Temperaturschwankungen oder
Feuchtigkeit ausgesetzt sind.
<Stellen Sie das Gerät nicht auf einen
Verstärker oder Receiver.
<Niemals das Gehäuse öffnen, da
hierdurch Schäden an der Elektronik
und/oder elektrische Schläge verursacht
werden können. Falls ein Fremdkörper in
das Geräteinnere gelangen sollte,
wenden Sie sich bitte an Ihren
Fachhändler.
<Bei Abziehen des Netzkabels darauf
achten, das Kabel am Stecker zu halten.
Niemals am Kabel ziehen.
<Um den Laser-Tonabnehmer
sauberzuhalten, diesen nicht berühren
und den CD-Halter stets einfahren.
<Zur Gehäusereinigung niemals
Lösungsmittel verwenden, da hierdurch
die Gehäuseoberfläche beschädigt
werden kann. Ein sauberes trockenes
Tuch verwenden.
<Bewahren Sie diese
Bedienungsanleitung auf, um bei
eventuell später auftauchenden Fragen
darin nachschlagen zu können.
Leggere questo manuale prima di procedere
all'uso
<La temperatura nominale di
funzionamento deve essere compresa tra
5°C e 35°C. Ricordare che, rispetto ai
normali lettori CD, i registratori CD-RW
sono molto più sensibili agli sbalzi di
temperatura.
<L’umidità relativa deve essere compresa
fra 30 e 90 gradi, senza provocare
fenomeni di condensa.
<Dato che l’apparecchio può diventare
caldo durante il funzionamento,
raccomandiamo di garantire adeguate
condizioni di ventilazione, lasciando
sempre sopra di esso sufficiente spazio
libero.
<La tensione d'alimentazione c.a.
applicata all’apparecchio deve
corrispondere alla tensione stampata sul
pannello posteriore. In caso di dubbio,
chiedere consiglio a un elettricista.
<Scegliere con cura il luogo in cui
installare l'apparecchio. Evitare di
esporlo alla diretta luce del sole o ad una
sorgente di calore. Evitare inoltre luoghi
soggetti a vibrazioni o ad eccessive
accumulazioni di polvere, calore, freddo
od umidità.
<Non posare RW-H500 direttamente
sull'amplificatore /sintomizzatore.
<Non aprire la cassa dell'apparecchio. Ciò
potrebbe danneggiarne la circuitazione o
causare scariche elettriche. Se un
qualche oggetto estraneo dovesse
essere entrato nell'apparecchio stesso,
rivolgersi al rivenditore.
<Per staccare la spina dalla presa di rete,
agire direttamente sulla spina stessa,
evitando di tirare il cavo.
<Per mantenere pulito il lettore laser,
evitare di toccarlo e chiudere sempre il
vano CD.
<Evitare di pulire l'apparecchio con
solventi chimici poichè ciò potrebbe
danneggiare la rifinitura esterna. Fare
semplicemente uso di un panno pulito ed
asciuto.
<Tenere questo manuale in un luogo di
facile accesso, per ogni eventuale futuro
riferimento.
Lea lo siguiente antes de poner en
funcionamiento el aparato
<La temperatura nominal deberá estar
comprendida entre 5 °C y 35 °C (41 °F y 95
°F). La grabadora de CD-RW es más
sensible a las temperaturas extremas
que los reproductores de CD normales.
<La humedad relativa deberá ser de 30 a
90 grados sin condensación.
<La unidad puede calentarse durante su
funcionamiento, por lo que siempre
deberá dejar espacio suficiente por
encima de ella para la ventilación.
<La tensión suministrada a la unidad
deberá coincidir con la tensión rotulada
en el panel posterior. En caso de duda,
consulte a un electricista.
<Elija con cuidado el lugar de instalación
para su aparato. No lo coloque a la luz
solar directa o cerca de fuentes que
generen calor. Evite también lugares
expuestos a vibraciones y muy
polvorientos, calurosos, fríos o húmedos.
<No coloque el RW-H500 sobre el
amplificador/receptor.
<No abra el gabinete ya que esto podría
producir daños en los circuitos o
electrochoques. Si entrara algún objeto
en el interior del aparato, póngase en
contacto con su concesionario.
<Al desenchufar el cordón del
tomacorriente, tire siempre de la clavija,
nunca del cordón.
<Para mantener limpio el fonocaptor laser,
no lo toque y no olvide cerrar la bandeja
portadisco.
<No utilice solventes químicos para
limpiar el aparato ya que podría dañar el
acabado. Use un paño seco y limpio.
<Guarde este manual en un lugar seguro
para usarlo como referencia en el futuro.

ENGLISH FRANÇAIS
Compact Disc 1 Disques Compacts 1
8
About CD-R and CD-RW discs
Caution:
Please use CD-R and CD-RW discs bearing
the "DIGITAL AUDIO" mark.
CD-R and CD-RW discs designed for
computing systems cannot be used with this
unit.
In this manual, although we refer to "CD-R"
and CD-RW" discs, we always mean "CD-R
Digital Audio" and "CD-RW Digital Audio",
even when this is not explicitly stated.
CD-R discs can be recorded once only. Once
they have been used for recording, they
cannot be erased or re-recorded. However,
if space is available on the disc, additional
material can be recorded. The packaging of
CD-R discs will include the following logo :
By contrast, a CD-RW disc can be used in
much the same way as a CD-R disc, but the
last track or tracks recorded can be erased,
and the space on the disc can be re- used
for other recordings. The packaging of CD-
RW discs will include the a logo similar to
the following :
However, you should note that an audio CD
created using a CD-RW disc may not play
back satisfactorily on every audio CD player.
CD-R, by contrast, may be played
satisfactorily on the majority of audio CD
players.
B
A
Remarques concernant les
disques compacts CD-R et CD-RW
Précautions:
Utiliser toujours des disques CD-R et CD-RW
portant la mention "DIGITAL AUDIO".
Les disques CD-R et CD-RW conçus pour les
systèmes informatiques ne doivent en aucun
cas être utilisés sur cet appareil.
Bien que dans ce manuel, il soit fait
référence aux disques "CD-R" et CD-RW", il
s'agit toujours de disques "CD-R Digital
Audio" et "CD-RW Digital Audio", même
lorsque ceci n'est pas explicitement précisé.
Les disques CD-R ne permettent qu'un seul
enregistrement. Lorsqu'ils ont été utilisés
pour un enregistrement, ils ne peuvent plus
être effacés ou ré-utilisés pour un autre
enregistrement. Cependant, s'il reste de la
place sur le disque, il est possible
d'enregistrer sur cet espace disponible. Le
logo suivant figure toujours sur l'emballage
des disques CD-R :
Un disque CD-RW s'utilise de la même façon
qu'un disque CD-R, à ceci près que la ou les
dernière(s) pistes enregistrées peuvent être
effacées et l'espace ainsi libéré sur le
disque peut être ré-utilisé pour d'autres
enregistrements. Le logo suivant figure
toujours sur les disques CD-RW :
Il convient toutefois de noter qu'un disque
compact audio créé à partir d'un disque CD-
RW risque de ne pas fonctionner
correctement sur tous les lecteurs de
disques compacts audio.
Par contre, un CD-R fonctionnera
correctement sur la majorité des lecteurs de
disques compacts.
B
A
Finalisation
Bien qu'il soit possible d'enregistrer des
données audio sur un CD-R ou un CD-RW,
un lecteur de disque compact standard ne
pourra pas lire ce type de disque tant que
vous n'aurez pas créé une table des
matières finalisée au début du disque.
Ce processus, qui consiste à créer la table
des matières s'appelle la finalisation. Une
fois cette table créée, il n'est plus possible
d'enregistrer d'autres données sur le
disque.
Il convient de noter que dans le cas d'un
CD-RW, après avoir été finalisé, celui-ci
peut être "définalisé". Ceci permet
d'enregistrer d'autres titres, sous réserve,
toutefois qu'il reste de la place sur le disque.
Disques enregistrables
Le terme "disque enregistrable" tel qu'utilisé
dans ce manuel, désigne un CD-R ou un CD-
RW non finalisé, sur lequel il reste
suffisamment de place pour enregistrer un
autre morceau.
Finalizing
Although audio data may be written on a CD-
R or CD-RW disc, a standard CD player will
not be able to play back the audio until a
final table of contents (TOC) has been
written at the start of the disc.
The process of writing this table of contents
is known as "finalizing". Once this has been
done, no further data can be written to the
disk.
Note that a CD-RW disc that has been
finalized can be "unfinalized". This allows
further tracks to be recorded to the disc,
provided that there is space on the disc.
Recordable discs
In this manual, we use the term "recordable"
disc to describe a CD-R or CD-RW disc that
has not been finalized, and has enough
space to record.
A B

DEUTSCH ESPAÑOL
Come tenere i CD 1
Handhabung von Compact Discs 1
Manipulación de discos 1
9
ITALIANO
Informazioni sui dischi CD-R e
CD-RW
Attenzione:
Raccomandiamo di usare dischi CD-R e CD-
RW contrassegnati dalla scritta “DIGITAL
AUDIO”. Questi registratori non accettano
infatti dischi CD-R e CD-RW progettati per
essere utilizzati nei masterizzatori dei
computer.
Lungo il manuale, quando vengono citati
dischi CD-R e CD-RW, anche se non è scritto
direttamente s’intende sempre che si tratta
di “CD-R Digital Audio” e “CD-RW Digital
Audio”.
I dischi CD-R possono essere registrati una
volta sola: dopo averli incisi, è impossibile
cancellarli o sovrapporre un’altra
registrazione. Quando però rimane ancora
spazio disponibile, si può aggiungere
un’ulteriore registrazione. Sull’involucro dei
dischi CD-R deve spiccare il seguente logo :
I dischi CD-RW si utilizzano praticamente
come i CD-R, con la differenza che si può
cancellare l’ultimo brano registrato, o altri
brani vicini, riutilizzando quello spazio per
altre registrazioni. Sull’involucro dei dischi
CD-RW deve apparire un logo simile a
questo :
Facciamo comunque notare che un disco
CD-RW potrebbe avere difficoltà ad essere
letto su un normale lettore di CD audio.
Viceversa, i dischi CD-R vengono letti
benissimo su quasi tutti i lettori di CD audio.
B
A
“Finalizzazione” dei dischi
Un lettore di CD non sarà in grado di leggere
i dati audio registrati su un CD-R o CD-RW
(non potrà cioè riprodurre il suono) finché
non sarà stato inciso all’inizio del disco
l’indice definitivo del contenuto (TOC).
Il processo di scrittura del TOC è di solito
definito “finalizzazione” del disco: quando
un disco è stato “finalizzato”, sarà
impossibile registrarvi altri dati.
Questo non vale, però, per i CD-RW che,
anche dopo l’incisione del TOC, possono
essere “riutilizzati” permettendo così di
registrare altri brani, purché ovviamente ci
sia spazio disponibile.
Dischi registrabili
In questo manuale utilizziamo il termine
“disco registrabile” per indicare sia un CD-R
che un CD-RW non ancora “finalizzato”, sul
quale c’è spazio disponibile per altre
registrazioni.
CD-R und CD-RW Discs
Vorsicht:
Bitte verwenden Sie ausschließlich CD-R und CD-
RW Discs mit der Aufschrift “DIGITAL AUDIO”.
CD-R sowie CD-RW Discs, die zur Verwendung
mit Computern entwickelt wurden, können auf
diesem Recorder nicht eingesetzt werden.
Wenn in dieser Bedienungsanleitung von “CD-R”
oder “CD-RW” Discs die Rede ist, bezieht sich
dies stets auf die komplette Bezeichnung “CD-R
Digital Audio” oder “CD-RW Digital Audio”, auch
dann, wenn dies an entsprechender Stelle nicht
nochmals zusätzlich erwähnt wird.
CD-R Discs können lediglich einmal beschrieben
werden. Wurden CD-Rs bereits einmal
beschrieben, können sie nicht gelöscht oder
erneut beschrieben werden. Falls auf einer
bereits beschriebenen CD-R allerdings noch Platz
zur Verfügung steht, kann zusätzliches
Audiomaterial aufgezeichnet werden. Auf der
Verpackung von CD-R Discs findet sich das
folgende Logo
:
Die Verwendung von CD-RW Discs ist
weitgehend identisch mit der von CD-Rs, mit dem
Unterschied, daß der (die) zuletzt
aufgenommenen Titel gelöscht und der dadurch
frei gewordene Platz auf der CD-RW für neue
Aufzeichnungen genutzt werden kann. Auf der
Verpackung von CD-RW Discs findet sich
ebenfalls das oben gezeigte Logo:
Wir möchten allerdings an dieser Stelle darauf
hinweisen, daß eine auf einer CD-RW erstellte
Audio-CD möglicherweise nicht auf allen
handelsüblichen CD-Playern zufriedenstellende
Resultate bei der Wiedergabe liefert.
Im Unterschied hierzu liefern CD-R Audio-CDs auf
der Mehrzahl aller CD-Player zufriedenstellende
Resultate.
B
A
Finalizing
Bevor nicht ein “endgültiges Inhaltsverzeichnis
(final Table Of Contents - TOC) auf einer CD
angelegt wurde, ist ein handelsüblicher CD-
Player nicht in der Lage, aufgezeichnete
Audiospuren wiederzugeben, obwohl
möglicherweise bereits Audiodaten auf die CD-R
oder CD-RW Disc geschrieben wurden.
Den Vorgang des Anlegens eines
Inhaltsverzeichnisses bezeichnet man daher als
"Finalizing". Sobald diese Funktion einmal
ausgeführt wurde, können erst einmal keine
weiteren Daten auf die entsprechende CD-R oder
CD-RW geschrieben werden.
Es besteht jedoch bei CD-RW Discs die
Möglichkeit, die “Finalizing”-Funktion rückgängig
zu machen. Vorausgesetzt, daß noch ausreichend
Platz auf der CD vorhanden ist, können nun erneut
weitere Audiodaten aufgezeichnet werden.
Beschreibbare CDs
Sofern in dieser Bedienungsanleitung von
“beschreibbaren” CDs die Rede ist, bezieht sich
dies auf CD-R oder CD-RW Discs, die noch nicht
abgeschlossen (finalized) sind und auf denen
noch ausreichend Platz zur Aufzeichnung von
Audiodaten vorhanden ist.
Acerca de los discos CD-R y
CD-RW
Precaución:
Utilice discos CD-R y CD-RW que exhiban el
distintivo "DIGITAL AUDIO".
Los discos CD-R y CD-RW diseñados para
sistemas informáticos no se pueden utilizar
con esta unidad.
En el presente manual se emplean los
términos "CD-R" y "CD-RW" en referencia a
los discos "CD-R Digital Audio" y "CD-RW
Digital Audio", aunque no se mencione
explícitamente.
Los discos CD-R pueden grabarse una sola
vez. Cuando hayan sido utilizados para
grabar, ya no podrán borrarse ni volverse a
grabar. No obstante, si hay espacio
disponible en el disco, será posible grabar
material adicional. El embalaje de los discos
CD-R exhibirá el siguiente logotipo
:
Por el contrario, un disco CD-RW puede
usarse de forma muy parecida a un CD-R,
aunque en este caso podrán borrarse pistas
empezando desde la última, y el espacio del
disco podrá utilizarse de nuevo para otras
grabaciones. El embalaje de los discos CD-
RW
:
exhibirá un logotipo similar al siguiente:
Sin embargo, deberá advertir que un CD-
Audio creado con un disco CD-RW puede
que no se reproduzca satisfactoriamente en
todos los equipos de CD-Audio.
Los CD-R, por el contrario, suenan
perfectamente en la mayoría de los
reproductores de CD-Audio.
B
A
Cierre de sesión
Aunque pueden grabarse datos de audio en
un disco CD-R o CD-RW, un equipo de CD
normal no podrá reproducir el audio
mientras no se haya grabado un índice
(TOC) definitivo al principio del disco.
El proceso de grabación de este índice se
conoce como "cierre de sesión". Una vez
cerrada la sesión, no se podrán grabar más
datos en el disco.
Advierta que un disco CD-RW permite
reabrir una sesión cerrada. De esta forma,
podrán grabarse más pistas en el disco
siempre que haya espacio disponible.
Discos grabables
En este manual utilizamos el término
"grabable" para referirnos a los discos CD-R
o CD-RW que no han cerrado la sesión y que
disponen de suficiente espacio para grabar.
ENGLISH FRANÇAIS
A
10
<Always place the disc on the disc tray
with the label side uppermost. (Compact
discs can be played or recorded only on
one side.)
<To remove a disc from its storage case,
press down on the center of the case and
lift the disc out, holding it carefully by the
edges.
How to remove the disc
How to hold the disc
<Never touch the recording (non-label)
side of a disc on which you will be
recording. Recording on a disc requires a
cleaner surface than playing back, and
fingerprints, dust, grease, etc. can cause
errors in the recording process.
<Should the disc become dirty, wipe the
surface radially with a soft, dry cloth :
<Never use such chemicals as record
sprays, antistatic sprays or fluid, benzine
or thinner to clean the discs. Such
chemicals will do irreparable damage to
the disc's plastic surface.
<Discs should be returned to their cases
after use to avoid dust and scratches
that could cause the laser pickup to
"skip."
<Do not expose discs to direct sunlight or
high humidity and temperature for
extended periods. Long exposure to high
temperatures will warp the disc.
<CD-R and CD-RW discs are more
sensitive to the effects of heat and
ultraviolet rays than ordinary CDs. It is
important that they are not stored in a
location where direct sunlight will fall on
them, and which is away from sources of
heat such as radiators or heat-generating
electrical devices.
<Printable CD-R and CD-RW discs aren't
recommended, as the label side might be
sticky and damage the unit.
<Do not stick papers or protective sheets
on the discs and do not use any
protective coating spray.
<Use a soft oil-based felt-tipped pen to
write the information on the label side.
Never use a ball-point or hard-tipped pen,
as this may cause damage to the
recorded side.
<Never use a stabilizer. Using
commercially available CD stabilizers
with this unit will damage the
mechanisms and cause them to
malfunction.
<Do not use irregular shape CDs
(octagonal, heart-shape, etc.). CDs of the
sort can damage the unit:
<If you are in any doubt as to the care and
handling of a CD-R/CD-RW disc, read the
precautions supplied with the disc, or
contact the disc manufacturer directly.
D
C
B
A
Compact Disc 2 Disques Compacts 2
C
D
B
<Placer toujours le disque sur le plateau, la
face imprimée sur le dessus (les disques
compacts ne sont enregistrés que sur une
seule face.)
<Pour sortir un disque de son emballage,
appuyer sur la partie centrale de l'étui et sortir
le disque en veillant à bien le tenir par les
bords.
Comment sortir un disque de son
emballage
Comment tenir le disque.
<Ne jamais toucher la face enregistrable (celle
sans étiquette) d'un disque sur lequel vous
souhaitez réaliser un enregistrement. Un
enregistrement exige une surface encore plus
propre qu'en lecture; des traces de doigts, de
poussière, ou de gras peuvent compromettre
une lecture correcte du disque.
<Si la surface du disque est sale, l'essuyer
soigneusement à l'aide d'un chiffon doux et
sec :
<Ne jamais utiliser de produits chimiques, tels
que des sprays, des liquides antistatiques, de
l'essence ou des diluants pour nettoyer les
disques. Ces produits chimiques risquent de
provoquer des dégâts irréparables sur la
surface en plastique du disque.
<Ranger les disques dans leur étui après
utilisation afin d'éviter de les rayer ou que de
la poussière ne se dépose, ceci pouvant
compromettre la lecture par la tête laser
<Ne pas exposer les disques à la lumière
directe du soleil, à une température élevée ou
à une humidité excessive pendant une période
prolongée. De telles expositions risquent de
provoquer une déformation du disque.
<Les disques CD-R et CD-RW sont plus
sensibles aux effets de la chaleur et aux
rayons ultraviolets que les disques compacts
ordinaires. Il est donc particulièrement
important de les ranger dans un endroit à
l'abri de la lumière directe du soleil et de toute
source de chaleur, telle que des radiateurs ou
des appareils électriques, susceptibles de
dégager de la chaleur.
<Il est déconseillé d'utiliser des disques CD-R
et CD-RW inscriptibles, la face portant
l'étiquette risquant d'être collante et
d'endommager l'appareil.
<Ne jamais coller d'étiquette ou de feuille de
protection sur le disque; ne pas utiliser de
spray destiné à déposer sur le disque une
couche de protection.
<Utiliser, pour écrire des informations sur la
face portant l'étiquette, un feutre utilisant une
encre à base d'huile. Ne jamais utiliser de
stylo bille ou de stylo à pointe dure, qui
risquerait d'abîmer la surface enregistrée du
disque.
<Ne jamais utiliser de stabilisateurs.
L'utilisation, avec cet appareil, de
stabilisateurs pour CD disponibles dans le
commerce, pourrait endommager les
mécanismes de l'appareil et provoquer son
dysfonctionnement.
<Ne pas utiliser de CD ayant une forme
irrégulière (octogonale, en forme de coeur,
etc.), ceux-ci risquant d'endommager
l'appareil :
<En cas de doute quant à la manipulation des
CD-R ou CD-RW, lire les instructions fournies
avec le disque ou contacter directement le
fabricant du disque.
D
C
B
A

DEUTSCH ESPAÑOL
11
ITALIANO
Come tenere i CD 2
Handhabung von Compact Discs 2
Manipulación de discos 2
<Appoggiare il disco nell’apposito cassetto
sempre con l’etichetta rivolta verso l’alto. (i CD
si possono leggere o registrare soltanto su un
lato).
<Per estrarre un disco dalla custodia protettiva,
premere al centro dell’astuccio e sollevare il
disco afferrandolo accuratamente solo per i
bordiCome togliere il disco
Come afferrare il disco
<Non toccare mai con le mani il lato di
registrazione dei dischi (quello senza
etichetta): il processo di registrazione esige
infatti una superficie molto più pulita di quanto
richiesto per la riproduzione, perché impronte
digitali, tracce di unto, eccetera, potrebbero
provocare errori di scrittura.
<Se il disco dovesse comunque sporcarsi,
pulirlo con un panno soffice asciutto,
strofinando con movimento radiale dal centro
verso la periferia :
<Per pulire i CD non usare mai prodotti chimici
,come spray per dischi analogici, fluidi o spray
antistatici, benzina o solventi, che potrebbero
tutti danneggiare irreparabilmente la
superficie plastica registrata.
<Dopo l’uso, conservare sempre i dischi entro
le relative custodie, per evitare che eventuali
graffi costringano il pickup laser a compiere
spiacevoli “salti”.
<Non conservare i dischi per lunghi periodi
esposti alla luce solare diretta o in condizioni
di eccessiva umidità e temperatura. Il calore
troppo elevato può addirittura incurvare la
superficie del disco.
<Rispetto ai normali CD, i dischi CD-R e CD-RW
sono inoltre molto più sensibili agli effetti del
calore e delle radiazioni ultraviolette.
Importante perciò non conservarli in luoghi
esposti alle luce solare diretta e tenerli
lontano da sorgenti di calore, come radiatori o
apparecchiature elettriche in grado di
generare calore.
<Non sono consigliabili dischi CD-R e CD-RW
con etichette personalizzabili, che possono
diventare vischiose e danneggiare il
registratore.
<Non attaccare pezzi di carta sui dischi e non
spruzzarvi rivestimenti protettivi.
<Per scrivere informazioni sul lato con
l’etichetta usare solo pennarelli morbidi non a
base acquosa, evitando le penne a sfera che
possono danneggiare i dati registrati.
<Non usare mai uno stabilizzatore. I normali
stabilizzatori per CD disponibili in commercio
potrebbero danneggiare le parti meccaniche
causando malfunzionamenti dell’apparecchio.
<Non utilizzare CD di forma irregolare
(ottagonale, a cuore, eccetera) perché
possono danneggiare il registratore :
<In caso di dubbi sul modo di conservare e
maneggiare un disco CD-R e CD-RW, attenersi
alle istruzioni allegate al disco stesso, oppure
rivolgersi direttamente al fabbricante.
D
C
B
A
<Legen Sie die CD stets mit der Labelseite nach
oben in die CD-Schublade. (Compact Discs
können nur auf einer Seite beschrieben und
wiedergegeben werden.)
<Um eine CD aus der CD-Hülle zu nehmen,
drücken Sie auf den mittleren Haltering und
nehmen Sie die CD vorsichtig aus ihrer
Halterung, wobei Sie diese lediglich am Rand
berühren sollten.
Entnehmen einer CD
Anfassen einer CD
<Berühren Sie niemals die Schreibschicht
(unbedruckte Seite) einer CD. Im Gegensatz
zur Wiedergabe bedarf das Beschreiben einer
CD einer absolut sauberen Schreibschicht.
Fingerabdrücke, Staub, Fett, usw. können zu
Schreibfehlern bei der Aufzeichnung führen.
<Sollte eine CD einmal verschmutzt sein,
wischen Sie diese von innen nach außen mit
einem weichen, trockenen Tuch ab:
<Verwenden Sie zur Reinigung einer CD
niemals chemische Reinigungsmittel, wie
Record-Sprays, Antistatic-Sprays oder
Flüssigkeiten wie Benzin oder Verdünner, da
diese Substanzen irreparable Schäden an
einer CD anrichten.
<Zur Vermeidung von Kratzern und Staub, die
den Laser-Pickup “aus seiner Bahn werfen”
könnten, sollten CDs nach Gebrauch stets in
die jeweilige CD-Hülle zurückgelegt werden.
<Setzen Sie Ihre CDs nicht über längere Zeit
direkter Sonneneinstrahlung, anderen
Wärmequellen sowie extrem hoher
Luftfeuchtigkeit aus, da dies zu Verformungen
führen kann.
<CD-R und CD-RW Discs sind empfindlicher
gegenüber Hitze und ultravioletter
Lichteinstrahlung als vorbespielte CDs. Daher
ist es wichtig, daß sie nicht an einem Ort
aufbewahrt werden, an dem sie direkter
Sonneneinstrahlung, der Einwirkung von
Heizkörpern oder elektrischen Geräten mit
erhöhter Wärmeentwicklung ausgesetzt sind.
<Bedruckbare CD-R sowie CD-RW Discs sind
nicht zu empfehlen, da deren Labelseite mit
einem Film überzogen ist, der den Recorder
beschädigen kann.
<Kleben Sie keine Papiere oder Schutzfolien
auf die CDs, und verwenden Sie keine Sprays
zum Aufbringen einer Schutzschicht.
<Verwenden Sie einen weichen Filzschreiber,
dessen Tinte auf einer Öl-Emulsion basiert, um
die Labelseite Ihrer CDs zu beschriften.
Verwenden Sie niemals einen Kugelschreiber
oder Ball-Penn Stift (Roller).
<Verwenden Sie keinen CD-Stabilisator. Die
Verwendung von handelsüblichen CD-
Stabilisatoren in diesem Recorder beschädigt
das Laufwerk und führt daher zu
Fehlfunktionen.
<Ungewöhnlich geformte CDs (achteckig,
herzförmig, usw.) eignen sich nicht zur
Verwendung mit diesem Recorder. Sie können
erheblichen Schaden am Gerät
verursachent:
<Falls Sie nicht sicher sind und weitere Fragen
bezüglich der Handhabung und Umgang mit
CD-R/CD-RW Discs haben, lesen Sie bitte die
Vorsichtsmaßnahmen, die meist auf der
Innenseite der CD-Hülle abgedruckt sind oder
wenden Sie sich an den Hersteller der
entsprechenden CD.
D
C
B
A
<Coloque siempre el disco en la bandeja con la
cara de la etiqueta hacia arriba.
(Los discos compactos sólo se reproducen y
graban por una cara).
<Para extraer un disco de su estuche, presione
el centro de la caja y levante con cuidado el
disco sosteniéndolo por los bordes.
Extracción del disco
Así se sostiene el disco
<No toque nunca la cara grabada (sin etiqueta)
de un disco en el que vaya a grabar. La
grabación requiere una superficie más limpia
que la reproducción, y las huellas, polvo,
grasa, etc., pueden ocasionar errores en el
proceso de grabación.
<Si se ensucia el disco, pase un paño seco y
suave por la superficie, en sentido radial :
<No utilice nunca productos químicos como los
aerosoles para discos de vinilo o
antiestáticos, bencina o aguarrás para limpiar
los discos. Tales sustancias causarán daños
irreparables en la superficie de plástico del
disco.
<Los discos deberán devolverse a sus estuches
después de usarlos para evitar la acumulación
de polvo y los rayados, que podrían producir
"saltos" en el lector láser.
<No exponga los discos a la luz solar directa ni
a niveles elevados de temperatura o humedad
durante períodos prolongados. Las altas
temperaturas deforman los discos con el
tiempo.
<Los discos CD-R y CD-RW son más sensibles a
los efectos del calor y los rayos ultravioleta
que los CD normales. No conviene guardarlos
en lugares donde puedan quedar expuestos a
la luz solar directa, y deberán mantenerse
alejados de fuentes de calor como los
radiadores o los aparatos eléctricos que
desprendan calor.
<No se recomiendan los CD-R y CD-RW
imprimibles, ya que el lado de la etiqueta
puede tener restos de adhesivo y dañar la
unidad.
<No adhiera papeles ni láminas de protección a
los discos, ni aplique ningún tipo de aerosol de
revestimiento.
<Utilice un rotulador de punta blanda para
escribir en el lado de la etiqueta. No emplee
nunca bolígrafos ni lápices de punta dura, ya
que podría dañar la cara grabada del disco.
<No utilice nunca estabilizadores. Los
estabilizadores de CD existentes en el
mercado producirán daños en los
mecanismos y anomalías en su
funcionamiento.
<No utilice discos de diseño irregular
(octogonales, forma de corazón, etc.), ya que
pueden dañar la unidad :
<Si tiene alguna duda sobre el cuidado y
manipulación de un disco CD-R/CD-RW, lea
las instrucciones facilitadas con el disco o
póngase directamente en contacto con el
fabricante.
D
C
B
A

ENGLISH FRANÇAIS
Connexions 1
12
Connections 1
C
CD, MD, etc.
MD, DAT, etc. <Turn off the power of all the equipment
before making connections.
<Read instructions of each component you
intend to use with RW-H500.
LINE IN/OUT jacks
Connect the LINE IN/OUT jacks to the
amplifier by audio signal connection
cords.LINE IN wCD-R REC
LINE OUT wCD-R PLAY
<Make sure to connect :
white plug wwhite jack(L:left)
red plug wred jack(R:right)
<Be sure to insert each plug securely. To
prevent hum and noise, do not bundle the
connection cords with the power cord or
speaker cord.
A
LLRRPLAYREC
DIGITAL OUT
DIGITAL IN
REMOTE CONTROL A/B
CD-R / MD / TAPE
Connection to the TEAC amplifier AV-H500D
Connect the LINE IN/OUT jacks to the CD-
R/MD jacks, and slide the MD/TAPE
switch to MD :
Connection to the TEAC amplifier A-H500
A-H500 doesn't have jacks for CD-R.
Connect the LINE IN/OUT jacks to the
MD/TAPE 2 PLAY/REC jacks of the A-
H500.
Slide the MD/TAPE switch to MD :
Then you can use "MD deck operation
buttons" of the system remote control
unit(RC-710, RC-711 or RC-767) to operate
this unit.
(Note that the SEARCH buttons for the
MD doesn't work.)
The input selector of A-H500 is
MD/TAPE2.
If MD/TAPE 2 PLAY/REC jacks are not
available, use the TAPE 1 PLAY/REC
jacks.
Slide the MD/TAPE switch to TAPE :
Then you can use "tape deck operation
buttons" of the system remote control
unit(RC-710/711, RC-767 or RC-612/613) to
operate this unit.
(Note that the REVERSE PLAY button for
the TAPE doesn't work.)
The input selector of A-H500 is TAPE1.
When the setting of the MD/TAPE switch
is changed, unplug the power cord from
the AC outlet and plug it again.
B
B
B
(AV-H500D, A-H500)
RW-H500
B
B
D
A
<Coupez l’alimentation électrique de tout
l’équipement avant de faire les
branchements.
<Lisez les instructions de chaque appareil
que vous avez l’intention d’utiliser avec
votre lecteur-enregistreur RW-H500.
Connecteurs LINE IN/OUT
Branchez ces prises sur l’Amplificateur à
l’aide du câble à fiches coaxiales.
LINE IN wCD-R REC
LINE OUT wCD-R PLAY
<Assurez vous de connecter :
Fiche blanche
wconnecteur blanc (L:gauche)
Fiche rouge
wconnecteur rouge (R:droit)
<Assurez-vous que chaque fiche est
enfoncée bien à fond. Pour éviter le
ronflement, éloignez les câbles de
raccordement du cordon d’alimentation
et des câbles des haut-parleurs.
A
Raccordement à l'amplificateur TEAC AV-
H500D
Connecter les prises LINE IN/OUT aux
connecteurs CD-R/MD, et mettre
l'interrupteur MD/TAPE sur MD :
Raccordement à l'amplificateur TEAC A-H500
L'amplificateur A-H500 ne possède pas
de connecteurs pour CD-R.
Raccorder les fiches LINE IN/OUT aux
connecteurs MD/TAPE 2 PLAY/REC situés
sur l'amplificateur A-H500.
Positionner l'interrupteur MD/TAPE sur
MD:
Vous pourrez alors utiliser les boutons de
commande de la "platine MD" situés sur
la télécommande (RC-710, RC-711 ou RC-
767) pour commander cet appareil.
(Remarque: Les touches SEARCH
(Recherche) de la platine MD ne sont pas
actives.)
Le sélecteur d'entrée de l'amplificateur
A-H500 correspond au
sélecteurMD/TAPE2.
Si vous ne disposez pas des prises
MD/TAPE 2 PLAY/REC, il vous suffira
d'utiliser les connecteurs TAPE 1
PLAY/REC. Régler l'interrupteur MD/TAPE
sur TAPE :
Vous pourrez alors commander cet
appareil en utilisant les touches de
commande prévues pour la platine
cassette situées sur la télécommande
(RC-710, RC-711, RC-767 ou RC-612/613).
(Remarque: Le bouton REVERSE PLAY
(lecture arrière) de la bande ne
fonctionne pas.)
Le sélecteur d'entrée de l'amplificateur
A-H500 est TAPE1.
Quand le réglage du bouton MD/TAPE
est changé, débrancher le câble
d'alimentation de la prise et brancher le
de nouveau.
B
B
B

DEUTSCH ESPAÑOL
Collegamento 1Anschluß 1 Conexión 1
13
ITALIANO
<Schalten Sie alle Geräte ab, bevor Sie
Anschlüsse vornehmen.
<Lesen Sie die Bedienungsanleitungen zu
allen Geräten, die Sie zusammen mit dem
RW-H500 verwenden wollen.
LINE IN/OUT Buchsen
Verbinden Sie diese Buchsen mit dem
Verstärker mit Hilfe des Audio Kabels.
LINE IN wCD-R REC
LINE OUT wCD-R PLAY
<Stellen Sie die Verbindung sicher :
Weißer Stecker wWeiße Buchse (links)
Roter Stecker wRote Buchse (rechts)
<Stellen Sie sicher, daß alle Stecker fest
eingesteckt sind. Um Brummen und
Geräusche zu verhindern, dürfen die
Anschlußkabel nicht mit dem Strom- oder
Lautsprecherkabel gebündelt werden.
Anschluß an den TEAC-Verstärker AV-H500D
Verbinden Sie die LINE IN/OUT-
Anschlüsse mit den CD-R/MD-
Anschlüssen, und stellen Sie den
MD/TAPE-Umschalter in die Stellung
“MD” :
Anschluß an den TEAC-Verstärker A-H500
Der A-H500 verfügt nicht über CD-R-
Anschlüsse.
Verbinden Sie die LINE IN/OUT-
Anschlüsse des Recorders mit den
MD/TAPE 2 PLAY/REC-Anschlüssen des
A-H500, und stellen Sie den MD/TAPE-
Umschalter in die Stellung “MD”:
Nun können Sie mittels der Tasten zur
MD-Steuerung auf der entsprechenden
Systemfernbedienung (RC-710, RC-711
oder RC-767) den Recorder bedienen.
(Allerdings haben die MD-SEARCH-
Tasten keine Funktion.)
Stellen Sie den Eingangswahlschalter
des A-H500 bitte auf MD/TAPE2.
Falls der Anschluß an den MD/TAPE 2
PLAY/REC-Buchsen nicht möglich ist,
verwenden Sie bitte die TAPE 1
PLAY/REC-Anschlüsse.
Stellen Sie den MD/TAPE-Umschalter in
die Stellung “TAPE” :
Nun können Sie mittels der Tasten zur
MD-Steuerung auf der entsprechenden
Systemfernbedienung (RC-710, RC-711,
RC-767 oder RC-612/613) den Recorder
bedienen.
(Allerdings hat die TAPE-REVERSE PLAY-
Taste keine Funktion.)
Stellen Sie den Eingangswahlschalter
des A-H500 bitte auf “TAPE1”.
B
B
B
A
Collegamento dell’amplificatore
TEAC AV-H500D
Collegare i terminali LINE IN/OUT del
registratore ai connettori CD-R/MD
dell’amplificatore e spostare l’interruttore
MD/TAPE in posizione MD :
Collegamento dell’amplificatore
TEAC A-H500
L’amplificatore A-H500 non dispone di
connettori per CD-R.
Collegare i terminali LINE IN/OUT del
registratore ai connettori MD/TAPE 2
PLAY/REC dell’amplificatore.
Spostare l’interruttore MD/TAPE in
posizione MD :
Si può ora azionare l’apparecchio tramite
i “tasti funzionali per la sezione MD” del
telecomando del sistema (RC-710, RC-711
o RC-767).
(Accertarsi che non siano operativi i tasti
SEARCH della sezione MD).
Il selettore d’ingresso sull’A-H500 è
MD/TAPE 2.
Quando non sono disponibili i connettori
MD/TAPE 2 PLAY/REC, collegarsi a TAPE
1 PLAY/REC.
Spostare l’interruttore MD/TAPE in
posizione TAPE :
Si può ora azionare l’apparecchio tramite
i “tasti funzionali per la sezione TAPE”
del telecomando del sistema (RC-710, RC-
711, RC-767 o RC-612/613).
(Accertarsi che non sia operativo il tasto
REVERSE PLAY della sezione TAPE).
Il selettore d’ingresso sull’A-H500 è TAPE 1.
Quand la posizione del pulsante
MD/TAPE è cambiata staccare il cavo di
alimentazione dalla presa di corrente e
poi reinserite la spina nella presa.
B
B
B
<Prima di effettuare le connessione
spegnere l’alimentazione elettrica a tutta
l’apparecchiatura.
<Leggere le istruzioni relative ad ogni
componente che si desidera usare con il
del RW-H500.
Prese LINE IN/OUT
Vanno collegate, con gli appositi cavetti,
alle prese MD REC/PLAY
sull'amplificatore con cavo di
connessione segnale audio.
LINE IN wCD-R REC
LINE OUT wCD-R PLAY
<Accertatevi che le connessioni siano
esatte:
Spinotto biancowpresa bianca(a sinistra)
Spinotto rosso wpresa rossa (a destra)
<Controllare che ogni spina sia inserita a
fondo. Per evitare ronzii e rumore non
avvolgere insieme i cordoni di
collegamento con il cavo di
alimentazione o dell’altoparlante.
A
<Apague todos los equipos antes de
realizar las conexiones.
<Lea las instrucciones de todos los
componentes que prevé utilizar junto con
la pletina para RW-H500.
Salidas LINE IN/OUT
Conecte estas salidas a las entradas MD
REC/PLAY del amplificador con el cable
de conexión para señales de audio.
LINE IN wCD-R REC
LINE OUT wCD-R PLAY
<Asegúrese conectar
Clavija blanca
wterminal blanco (izquierda)
Clavija roja
wterminal rojo (derecha)
<Compruebe que enchufa firmemente
todos los enchufes. Para evitar
interferencias y ruidos, no entrelace los
cables de conexión con el cable de
alimentación o los cables de los
altavoces.
A
Wenn der MD/TAPE-Umschalter betätigt
wird, ziehen Sie bitte kurz den
Netzstecker und stecken ihn dann erneut
ein.
Conexión al amplificador TEAC AV-H500D
Conecte los terminales LINE IN/OUT a
CD-R/MD, y deslice el interruptor
MD/TAPE a la posición MD:
Conexión al amplificador TEAC A-H500
El amplificador A-H500 no dispone de
conectores para CD-R.
Conecte los terminales LINE IN/OUT a los
terminales MD/TAPE 2 PLAY/REC del A-
H500.
Sitúe el interruptor MD/TAPE en la
posición MD:
Así podrá utilizar los botones de MD del
mando a distancia del sistema (RC-710,
RC-711 o RC-767) para controlar la
unidad.
(Advierta que no funcionan los botones
SEARCH de la sección de MD).
El selector de entrada del amplificador A-
H500 es MD/TAPE2.
Si no dispone de terminales MD/TAPE 2
PLAY/REC, utilice TAPE 1 PLAY/REC.
Sitúe el interruptor MD/TAPE en la
posición TAPE: .
Así podrá utilizar los botones del
reproductor de casete del mando a
distancia del sistema (RC-710, RC-711,
RC-767 o RC-612) para controlar la
unidad.
(Advierta que no funciona el botón
REVERSE PLAY de la sección de cinta).
El selector de entrada del amplificador
A-H500 es TAPE1.
Cuando se instale un MD/TAPE habrá
que cambiar el interruptor, desconectar
el cable de la fuente de alimentación y
volver a conectarlo.
B
B
B

ENGLISH FRANÇAIS
Connexions 2
14
Prises REMOTE CONTROL
Si vous disposez d'un amplificateur TEAC
A-H500 ou AV-H500D, vous pourrez
bénéficier des fonctions de lecture
directe AI et de commande du système.
Vous pourrez également utiliser la
télécommande (fournie avec l'A-H500 ou
l'AV-H500D) pour commander cet
appareil.
Connecter la prise REMOTE COTROL (A
ou B) au connecteur REMOTE COTROL (A
ou B) situé sur l'A-H500 (ou tout autre
appareil de la gamme Référence 500) à
l'aide d'un cordon de raccordement de
télécommande.
D
Connections 2
REMOTE CONTROL jacks
If you have TEAC amplifier A-H500 or AV-
H500D, convenient system control
operations and AI direct play functions
are possible. And you can use the system
remote control unit (provided with A-H500
or AV-H500D) to operate this unit.
Connect the REMOTE COTROL jack (A or
B) to the REMOTE COTROL jack (A or B)
of A-H500 (or one of the Reference 500
series) by a remote control connection
cord.
D
C
DIGITAL IN/OUT terminals
Connect the component with optical
cables.
DIGITAL IN wDIGITAL OUT(CD,MD, etc.)
DIGITAL OUT wDIGITAL IN(MD, etc.)
<When using DIGITAL OPTICAL IN/OUT
terminals, remove the caps from the
terminals. When you do not use them,
leave the caps in place.
C
AC Power Cord
Plug this AC power cord into an AC wall
socket.
E
E
As the unit may become hot during
operation, always leave sufficient space
above the unit for ventilation.
Do not place the unit on an amplifier or a
receiver.
Bornes DIGITAL IN/OUT
Raccorder l'appareil à l'aide de câbles
optiques.
DIGITAL IN wDIGITAL OUT(CD,MD, etc.)
DIGITAL OUT wDIGITAL IN(MD, etc.)
<Si vous utilisez les bornes DIGITAL
OPTICAL IN/OUT, enlever les bouchons
de protection placés sur ces bornes. En
cas de non utilisation, les laisser en
place.
C
Cordon d’alimentation (CA)
Branchez ce cordon d’alimentation CA
sur une prise de courant CA murale.
E
L'appareil pouvant dégager de la chaleur
lorsqu'il fonctionne, laisser un
dégagement suffisant au-dessus de
l'appareil afin de permettre une
ventilation naturelle.
Ne pas placer RW-H500 sur le dessus de
l’amplificateur/récepteur.

DEUTSCH ESPAÑOL
Collegamento 2Anschluß 2 Conexión 2
15
ITALIANO
REMOTE CONTROL Buchsen
Betrieben an den TEAC-Verstärkern A-
H500 und AV-H500D stehen Ihnen die
Annehmlichkeiten der
Systemfernbedienung sowie AI-
Funktionen zur Direktwiedergabe zur
Verfügung. Mit der
Systemfernbedienung, die zum
Lieferumfang des A-H500 und des AV-
H500D gehört, läßt sich auch der CD-
Recorder bequem bedienen.
Verbinden Sie mittels
Fernbedienungskabel jeweils die
REMOTE COTROL-Anschlüsse (A oder B)
des Recorders mit denen des A-H500
(oder einem anderen Gerät aus der
Reference 500 Serie).
D
DIGITAL IN/OUT Buchsen
Schließen Sie an den jeweiligen
Eingängen des Recorders entweder
optische Kabel an.
DIGITAL INwDIGITAL OUT(CD,MD,usw.)
DIGITAL OUT wDIGITAL IN(MD,usw.)
<Sofern Sie die DIGITAL OPTICAL IN/OUT-
Anschlüsse verwenden, entfernen Sie
bitte zuvor die Schutzkappen. Bei
Verwendung anderer Anschlüsse lassen
Sie die Kappen bitte gesteckt.
C
Netzsteckdose
Stecken Sie den Netzstecker in eine
Netzsteckdose.
E
Prese REMOTE CONTROL
Chi possiede un amplificatore TEAC A-
H500 oppure AV-H500D, potrà effettuare
utili operazioni di controllo del sistema e
disporre della funzione di lettura diretta
AI. Potrà inoltre azionare questo
registratore tramite il telecomando in
dotazione ai suddetti amplificatori.
Collegare il terminale REMOTE CONTROL
(A o B) del registratore all’omonimo
connettore (A o B) dall’A-H500 (o altro
apparecchio della Serie H-500) tramite un
cavo per collegamento a distanza.
D
Terminali DIGITAL IN/OUT
Per i collegamenti, usare a fibre ottiche.
DIGITAL INwDIGITAL OUT(CD,MD, ecc.)
DIGITAL OUT wDIGITAL IN(MD, ecc.)
<Quando si utilizzano i terminali DIGITAL
OPTICAL IN/OUT, ricordarsi di togliere i
relativi copriterminale; quando invece
questi terminali non servono, i
copriterminale possono rimanere al loro
posto.
C
Uscita potenza
Inserire questo cavo in una presa di rete,
oppure nella presa AC OUTLETS.
EToma de corriente
Conecte este cable a una toma mural.
E
Salidas REMOTE CONTROL
Si dispone de un amplificador TEAC A-
H500 o AV-H500D, será posible utilizar las
prácticas funciones de control del
sistema y reproducción directa AI.
Además, podrá usar el mando a distancia
del sistema (suministrado con el A-H500
o el AV-H500D) para controlar la unidad.
Conecte el terminal REMOTE CONTROL
(A o B) al mismo terminal del A-H500 (o
equipo de la serie Reference 500)
mediante un cable de conexión de
control remoto.
D
Dato che l’apparecchio può diventare
caldo durante il funzionamento,
raccomandiamo di garantire adeguate
condizioni di ventilazione, lasciando
sempre sopra di esso sufficiente spazio
libero.
Non posare RW-H500 direttamente
sull'amplificatore /sintomizzatore.
Da sich das Gerät während des Betriebs
erwärmt, sollten Sie bei der Aufstellung
stets auf genügenden Platz achten, so
daß eine ausreichende Luftzirkulation
gewährleistet ist.
Stellen Sie das Gerät nicht auf einen
Verstärker oder Receiver.
Terminales DIGITAL IN/OUT
Conecte el componente mediante cables
coaxiales u ópticos.
DIGITAL IN wDIGITAL OUT(CD,MD, etc.)
DIGITAL OUT wDIGITAL IN(MD, etc.)
<Cuando utilice los terminales DIGITAL
OPTICAL IN/OUT, retire las tapas
protectoras. Si no los utiliza, deje las
tapas puestas en los terminales.
C
La unidad puede calentarse durante su
funcionamiento, por lo que siempre
deberá dejar espacio suficiente por
encima de ella para la ventilación.
No coloque el RW-H500 sobre el
amplificador/receptor.

ENGLISH FRANÇAIS
Remote Control Unit Boîtier de télécommande
16
Battery Installation
Remove the battery compartment cover.
Insert two “AA“ (R6, SUM-3) dry batteries.
Make sure that the batteries are inserted
with their positive “+“ and negative “_“
poles positioned correctly.
Close the cover.
Battery Replacement
If the distance required between the remote
control unit and main unit decreases, the
batteries are exhausted. In this case replace
the batteries with new ones.
Precautions concerning batteries
<Be sure to insert the batteries with
correct positive “+“ and negative “_“
polarities.
<Use batteries of the same type. Never use
different types of batteries together.
<Rechargeable and non-rechargeable
batteries can be used. Refer to the
precautions on their labels.
<When the remote control unit is not to be
used for a long time (more than a month),
remove the batteries from the remote
control unit to prevent them from leaking.
If they leak, wipe away the liquid inside
the battery compartment and replace the
batteries with new ones.
<Do not heat or disassemble batteries and
never dispose of old batteries by throwing
them in a fire.
3
2
1
The provided Remote Control Unit allows the
unit to be operated from a distance.
When operating the remote control unit,
point it towards the REMOTE SENSOR on the
front panel of the unit.
<Even if the remote control unit is operated
within the effective range, remote control
operation may be impossible if there are
any obstacles between the unit and the
remote control.
<If the remote control unit is operated near
other appliances which generate infrared
rays, or if other remote control devices
using infrared rays are used near the unit,
it may operate incorrectly. Conversely, the
other appliances may operate incorrectly.
Mise en place des piles
Retirer le couvercle du compartiment des
piles.
Introduire deux piles “AA“ (R6, SUM-3).
S'assurer que les piles sont correctement
mises en respectant les polarités plus +
et moins _.
Fermer le couvercle jusqu'au déclic.
Remplacement des piles
Si vous remarquez que la distance entre le
boîtier de télécommande et le lecteur
devient plus courte pour un fonctionnement
correct, ceci indique que les piles sont
usées. Dans ce cas, remplacer les piles par
des nouvelles.
Précautions à observer concernant les piles
<Bien placer les piles en respectant les
polarités plus +et moins _.
<Utiliser des piles du même type. Ne
jamais essayer d'utiliser des types de pile
différents ensemble.
<Des piles ou des batteries peuvent être
utilisées. Se référer à leurs étiquettes
pour les précautions à respecter.
<Si le boîtier de télécommande n'est pas
utilisé pendant une longue période (pluss
d'un mois), retirer les piles du boîtier de
télécommande pour éviter des fuites de
pile. Si elles coulent, essuyer le liquide
dans le compartiment des piles et
remplacer les piles par des neuves.
<Ne pas chauffer, démonter les piles ni les
mettre au feu.
3
2
1
Le boîtier de télécommande fourni permet la
commande à distance defourni permet la
commande à distance de l'appareil. Pour
l'utilisation du boîtier de télécommande, le
diriger vers le détecteusation du boîtier de
télécommande, le diriger vers le détecteur
de télécommande du panneau avant de
l'appareil.
<Même si le boîtier de télécommande est
activé dans la zone de fonctionnement, la
commande à distance peut être
impossible s'il y a des obstacles entre le
lecteur et le boîtier de télécommande.
<Si le boîtier de télécommande fonctionne
dans le voisinage d'autres appareils
générant des rayons infrarouges, ou si
d'autres télécommandes utilisant des
rayons infrarouges sont utilisées près du
lecteur, le lecteur peut de ne pas bien
fonctionner. Dans la situation inverse, les
autres apaareils peuvent ne pas bien
fonctionner.

DEUTSCH ESPAÑOL
Funzionamento col telecomando
Betrieb mit der Fernbedienung Contador de tiempo
17
ITALIANO
Die mitgelieferte Fernbedienungseinheit
ermöglicht die Bedienung des Gerät bequem
vom Sitzplatz aus.
Die Fernbedienung auf den Fern-
bedienungs-Empfangssensor am Gerät
richten.
<Innerhalb des zulässigen
Entfernungsbereichs kann der
Signalempfang durch zwischen
Fernbedienung und Empfangssensor
befindliche Gegenstände behindert
werden.
<Bei Fernbedienbetrieb kann der Gerät
Fehlfunktionen zeigen, wenn er in der
Nähe eines Infrarotstrahlen
ausstrahlenden Geräts betrieben wird
oder wenn im gleichen Raum Infrarot-
Fernbedienungen anderer Geräte
verwendet werden. Umgekehrt kann die
Fernbedienung dieses Geräts
Fehlfunktionen bei anderen mit
Infrarotsignalen zu bedienenden Geräten
verursachen.
Einlegen der Batterien
Die Batteriefach-Abdeckung entfernen.
Zwei Batterien “AA“ (R6, SUM-3) unter
Beachtung der Polarität (+/_) einlegen.
Die Abdeckung wieder anbringen.
Batteriewechsel
Sollte es erforderlich werden, den Abstand
zwischen Gerät und Fernbedienung zur
Funktionsauslösung zu verringern, wird ein
Batteriewechsel notwendig. Stets zwei neue
Batterien einlegen.
Batterie-Vorsichtsmaßnahmen
<Die Batterien unter Beachtung der
korrekten Polarität ( +und _) einlegen.
<Stets zwei Batterien des gleichen Typs
verwenden, niemals eine gebrauchte und
eine frische Batterie zusammen
verwenden.
<Sowohl Einweg- als auch
wiederaufladbare Batterien können
verwendet werden.
Die Sicherheitshinweise auf den
Batterien beachten.
<Bei längerem Nichtgebrauch (über einen
Monat) sollten die Batterien entnommen
werden, um ein Auslaufen im
Batteriefach zu verhindern. Ausgelaufene
Batterien entnehmen und nach Säubern
des Batteriefachs gegen frische
auswechseln.
<Batterien nicht erhitzen, zerlegen oder
verbrennen.
3
2
1
Installazione batterie
Rimuovere il coperchio del vano batterie.
Inserire due batterie “AA“ (R6, SUM-3).
Accertarsi che le batterie siano inserite
con i poli positivo +e negativo _nelle
posizioni corrette.
Chiudere il coperchio fino a sentire uno
scatto.
Sostituzione batterie
Se si notasse che la distanza di
funzionamento diminuisce, ciò indica che le
batterie sono scariche. In tale caso
sostituire le batterie con altre di nuove.
Precauzioni riguardanti le batterie
<Accertarsi di inserire le batterie con le
polarità +e _nella posizione corretta.
<Usare batterie dello stesso tipo. Non
usare mai tipi diversi di batterie assieme.
<Possono essere usate sia batterie
ricaricabili che batterie non ricaricabili.
Fare riferimento alle indicazioni
sull'etichetta.
<Quanddo si prevede di non utilizzare il
telecomando per un lungo periodo (più di
un mese), rimuovere le batterie per
prevenire perdite. Se si verificassero
delle perdite, pulire il vano batterie e
sostituire le batterie con altre di nuove.
<Non riscaldare o disassemblare le
batterie e non gettarle nel fuoco.
3
2
1
L'unità di telecomando in dotazione pemette
di comandare a distanza l'apparecchio.
Quando si utilizza l'unità di telecomando,
puntarla verso il sensore sul pannello
anteriore dell'apparecchio.
<Anche se l'unità di telecomando viene
utilizzata entro il campo efficace, il
comando a distanza potrebbe essere
impossibile se vi sono degli ostacoli tra il
telecomando ed il lettore.
<Se l'unità di telecomando viene utilizzata
in prossimità di altri apparecchi che
generano raggi infrarossi oppure se altri
dispositivi di comando a distanza
utilizzanti raggi infrarossi vengono
utilizzati in prossimità del lettore, esso
potrebbe funzionare in modo scorretto.
Dal punto di vista opposto anche gli altri
apparecchi potrebbero funzionare in
modo scorretto.
Instalación de las pilas
Abra la tapa del compartimiento de las
pilas.
Coloque dos pilas “AA“ (R6, SUM-3).
Asegúrese de que las pilas queden
ubicadas con sus polos positivo +y
negativo _correctamente posicionados.
Cierre la tapa hasta que se trabe.
Cambio de pilas
Si nota que ha disminuido la distancia
necesaria para un control correcto entre el
control remoto y el reproductor, significa
que las pilas están gastadas. En este caso,
reemplácelas por nuevas.
Precauciones con las pilas
<Asegúrese de insertar las pilas con sus
polaridades positiva +y negativa _
correctas.
<Utilice el mismo tipo de pilas. Nunca
utilice diferentes tipos de pilas juntas.
<Pueden utilizarse pilas recargables y no
recargables. Refiérase a las
precauciones en sus rótulos.
<Si no va a utilizar el control remoto por
mucho tiempo (más de un mes), retire las
pilas para evitar pérdidas. Si se produce
pérdidas, limpie el líquido en el interior
del compartimiento y cambie las pilas por
nuevas.
<No caliente ni desarme las pilas y nunca
arroje pilas gastadas al fuego.
3
2
1
La unidad de control remoto suministrada le
permite controlar el aparato a distancia.
Cuando opere con el control remoto, diríjalo
hacia el sensor remoto en el panel frontal
del aparato.
<Aunque se utilice la unidad dentro del
margen de funcionamiento efectivo, es
imposible el control a distancia si hay
obstáculos entre el reproductor y el
control remoto.
<Si se utiliza la unidad cerca de otros
aparatos que generen rayos infrarrojos o
si se emplean otros aparatos de control
remoto por rayos infrarrojos cerca del
reproductor, es posible que éste no
funcione correctamente. Del mismo
modo, es posible que los otros aparatos
tampoco funcionen correctamente.

ENGLISH FRANÇAIS
Basic Operation Fonctionnement de base
18
MULTI JOG, MUSIC SKIP, ENTER
In most cases, pressing the MUSIC SKIP
buttons of the remote control unit is
equivalent to rotating the MULTI JOG,
and pressing the ENTER button is
equivalent to pressing the MULTI JOG.
A
Shuffle Program Continue
PLAY MODE
Every time the PLAY MODE button of the
remote control unit is pressed, the
playback mode is changed as follows:
<"CONTINUE" is the normal playback
mode.
B
PLAY MODE
MULTI JOG, MUSIC SKIP, ENTER
Dans la plupart des cas, le fait d'appuyer
sur les touches MUSIC SKIP de la
télécommande a le même effet que si
vous actionnez le bouton MULTI JOG, et
le fait d'appuyer sur la touche ENTER
produit le même effet que si vous
appuyez sur la touche MULTI JOG.
A
MODE LECTURE
Pour passer d'un mode de lecture à un
autre, il vous suffit d'appuyer sur la
touche PLAY MODE de la télécommande:
<le mode de lecture normale est le mode
"CONTINUE".
B
B
C
A
ENTER
MUSIC
SKIP
MULTI JOG
power standby indicator
This indicator lights up in the power
standby mode.
When the unit is turned on, the power
standby indicator goes out.
CVoyant power standby
Ce voyant est allumé lorsque l’appareil est
en mode power standby; il est éteint
quand l’appareil est sous tension.
C

DEUTSCH ESPAÑOL
Operazioni fondamentaliGrundlegende Funktionen Funcionamiento básico
19
ITALIANO
MULTI JOG, MUSIC SKIP, ENTER
In molti casi, premere i tasti MUSIC SKIP
del telecomando equivale a ruotare la
manopola MULTI JOG dell’apparecchio;
inoltre, premere MULTI JOG equivale a
premere ENTER.
A
PLAY MODE
Ogni volta che si preme il tasto PLAY
MODE del telecomando si commutano in
sequenza i vari tipi di riproduzione
disponibili:
<Normalmente, la riproduzione è di tipo
“CONTINUE”.
B
MULTI JOG, MUSIC SKIP, ENTER
In den meisten Fällen führt das Betätigen
der MUSIC SKIP-Tasten auf der
Fernbedienung zum gleichen Ergebnis
wie das Drehen des MULTI JOG
(Datenrades). Das Drücken der ENTER-
Taste entspricht dem Drücken des MULTI
JOG.
A
Wiedergabebetriebsart
Bei jedem Betätigen der PLAY MODE-
Taste auf der Fernbedienung, ändert sich
die Wiedergabebetriebsart in folgender
Reihenfolge:
<"CONTINUE" ist der normale
Wiedergabemodus.
B
MULTI JOG, MUSIC SKIP, ENTER
En la mayoría de los casos, pulsar los
botones MUSIC SKIP del mando a
distancia equivale a girar el mando
MULTI JOG, y pulsar el botón ENTER
equivale a pulsar el mando MULTI JOG.
A
PLAY MODE
Cada vez que pulse el botón PLAY MODE
del mando a distancia, el modo de
reproducción cambiará en el siguiente
orden:
<"CONTINUE" es el modo de reproducción
normal.
B
Standby-Anzeige
Diese Anzeige leuchtet, wenn das Gerät
auf "Standby" geschaltet ist. Sie erlischt
beim Einschalten.
CIndicatore Power
(accensione/standby)
Si illumina quando l'apparecchio è
alimentato ma in condizione di attesa; si
spegne quando l'apparecchio viene
acceso.
Cindicador de espera
Este indicador permanece iluminado en
el modo de espera, y apagado cuando la
unidad está encendida.
C

ENGLISH FRANÇAIS
Playback 1 Lecture 1
20
This unit can be used to play back CDs
including CD-R and CD-RW discs that
have been recorded and finalized on
other types of recorder.
Press the POWER switch to turn the unit
ON.
Press the OPEN/CLOSE button(L).
Place a disc on the disc tray with the
label side uppermost.
Press the OPEN/CLOSE button(L) to
close the disc tray.
When a disc is loaded into the unit, the
display briefly shows TOC Reading as it
determines the contents of the disc.
When the TOC has been read, the display
will show one of the following:
4
3
2
1
CD:
A commercial pre-recorded CD or a
finalized CD-R
CD-R, NO TOC:
A CD-R which has yet to be finalized
CD-RW, NO TOC:
A CD-RW which has yet to be finalized
CD-RW:
A finalized CD-RW
blank:
No disc or unreadable disc
The music calendar light, to show the
available unplayed tracks. If there are
more than 20 tracks on a disc, the track
number 1-20 and OVER indicator will light.
Press the PLAY button(y) to start
playback.
5
nombre total
de plages
durée totale d'écoute
total number of the tracks
total play time
elapsed time
track number
music calendar
temps écoulé
numéro de la plage
Affichage du Calendrier
des plages
Cet appareil permet de lire des disques
compacts et notamment des disques CD-
R et CD-RW enregistrés et finalisés sur
d'autres types d'appareils.
Appuyer sur la touche POWER pour
mettre l'appareil sous tension.
Appuyer sur la touche OPEN/CLOSE(L).
Mettre un disque dans le tiroir à disque
en veillant à ce que la face imprimée
soit visible.
Appuyer sur la touche OPEN/CLOSE(L)
pour fermer le tiroir.
Dès lors que vous avez chargé un disque
dans l'appareil, l'indication TOC apparaît
sur l'afficheur, indiquant que l'appareil lit
le contenu du disque. Une fois cette
opération terminée, l'afficheur indique
l'une des mentions suivantes, qui précise
le type de disque placé dans l'appareil:
4
3
2
1
CD:
Disque compact du commerce
pré-enregistré ou CD-R finalisé
CD-R, NO TOC:
CD-R non finalisé
CD-RW, NO TOC:
CD-RW non finalisé
CD-RW:
CD-RW finalisé
Aucune mention:
Absence de disque ou disque illisible
Le voyant "sommaire musical", indique le
nombre de pistes disponibles. Si le
disque comporte plus de 20 pistes, le
voyant 1-20 et OVER s'allume.
Appuyer sur la touche PLAY(y) pour
faire démarrer la lecture
5
1
3
2
4
5
1 2 43
5
Table of contents
Other Teac Recording Equipment manuals

Teac
Teac HD-R1 Instruction Manual

Teac
Teac LX Series User manual

Teac
Teac LP-R660USB User manual

Teac
Teac RW-D280 User manual

Teac
Teac Tascam Porta-02MKII Ministudio User manual

Teac
Teac CD-RW890 User manual

Teac
Teac CDR56S-6XX User manual

Teac
Teac HD-R1 User manual

Teac
Teac CD-RW2000 Owner's manual

Teac
Teac DS Series User manual