10
型名:アナログターンテーブル
TN-570
シリアルナンバー:
お買い上げ日:
販売店名:
お客様のご連絡先
故障の状況 ( できるだけ詳しく )
本機を廃棄する場合に必要になる収集費などの費用は、
お客様のご負担になります。
この機器は絶対に分解・改造しないでください。
この機器に対して、当社指定のサービス機関以外に
よる修理や改造が行われた場合は、保証期間内で
あっても保証対象外となります。
当社指定のサービス機関以外による修理や改造に
よってこの機器が故障または損傷したり、人的・物
的損害が生じても、当社は一切の責任を負いません。
取扱説明書の裏表紙が保証書になっています。保証書
は、お買い上げの際に販売店が所定事項を記入してお
渡ししておりますので、大切に保管してください。万
が一販売店印の捺印やご購入日の記載が無い場合は、
無償修理保証の対象外になりますので、ご購入時のレ
シートなどご購入店・ご購入日が確認できるものを一
緒に保管してください。保証期間はお買い上げ日より
1 年です。
当社は、この製品の補修用性能部品 ( 製品の機能を維
持するために必要な部品 ) を製造打ち切り後 8 年間保
有しています。
修理に関するご相談、並びにご不明な点は、お買い上
げの販売店または弊社サービス部門 ( 裏表紙に記載 ) に
お問い合わせください。
9 ページの「困ったときは」に従って調べていた
だき、なお異常のあるときは使用を中止し、必ず電源
プラグをコンセントから抜いて、お買い上げの販売店
またはティアック修理センター ( 裏表紙に記載 ) にご連
絡ください。
なお、本体の故障もしくは不具合により発生した付随
的損害 ( 録音内容などの補償 ) の責についてはご容赦く
ださい。
修理に際しましては保証書をご提示ください。
保証書の規定に従って、修理させていただきます。
修理すれば使用できる場合は、ご希望により有料に
て修理させていただきます。
技術料:故障した製品を正常に修復するための料金
です。
測定機等の設備費、技術者の人件費、技術
教育費が含まれています。
部品代:修理に使用した部品代金です。
その他修理に付帯する部材等を含む場合もあ
ります。
その他:
製品を送るために必要な送料 / 梱包料などがあ
ります。
サンプリング周波数
8/11025/16/2205/32/441/48kHz
量子化ビット数16 ビット
出力 -210 ~ -150dBm
サンプリング周波数
48/96/192kHz
量子化ビット数 24bit
AC アダプター電源
入力 AC 100V ~ AC 240V 50-60Hz
出力 12 V 500mA
消費電力
スタンバイ 02W 以下
オン
0 23W 以下
33 3W 以下
45 325W 以下
質量 約 9Kg
動作保証温度 5℃~35℃
外形寸法 ( 幅、高さ、奥行 )
420 x 1315 x 355 mm ( 突起部を含む )
o 性能データは、20℃で規定しています。
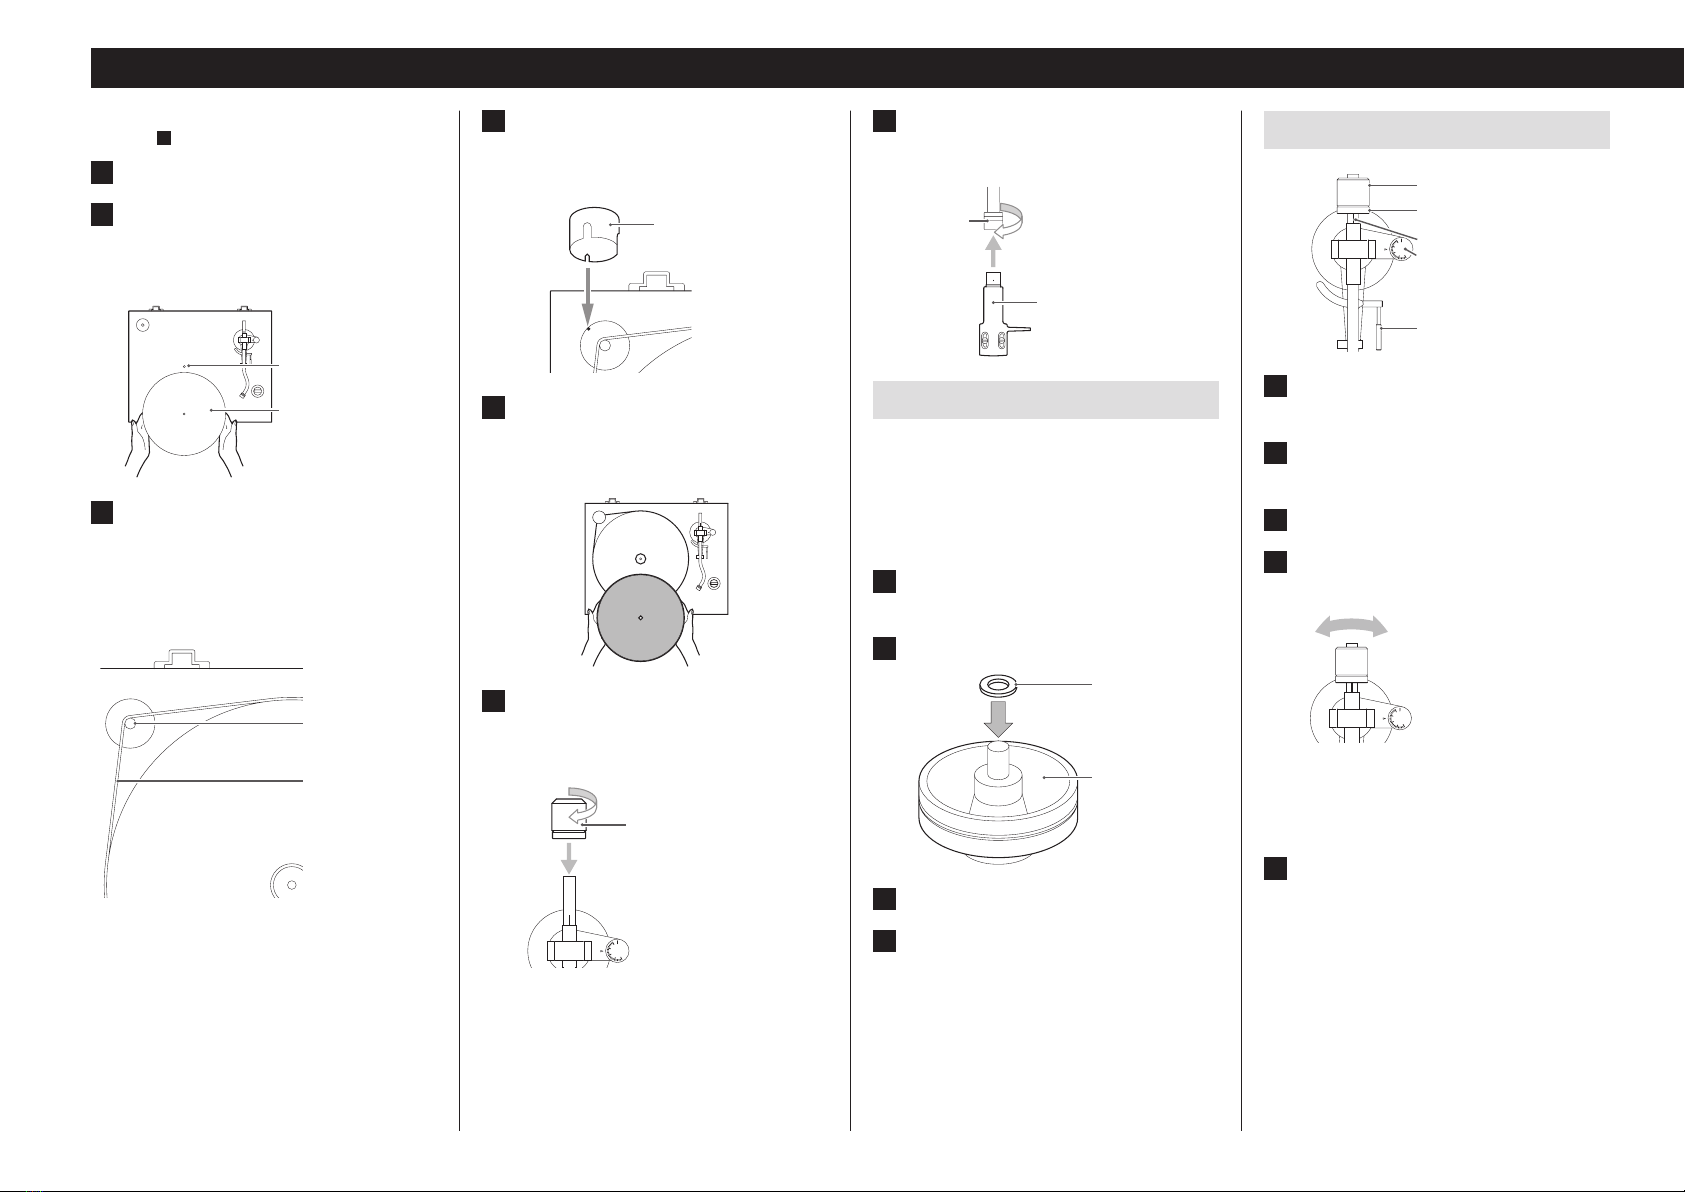
ターンテーブルシート x 1
ドーナツ盤用アダプター x 1
カウンターウエイト x 1
ヘッドシェル x 1
オーディオテクニカ製 VM 型 ( デュアルマグ
ネット ) ステレオカートリッジ (AT100E 同等
品 ) を装着済み
ターンテーブル x 1
プーリーカバー x 1
ワッシャー x 4
六角レンチ x 1
GND 端子付き RCA オーディオケーブル x 1
AC アダプター (GPE053A-V120050-Z) x 1
取扱説明書 ( 保証書付き )( 本書 ) x 1
仕様及び外観は改善のため予告なく変更することがあ
ります。
取扱説明書のイラストが一部製品と異なる場合があり
ます。
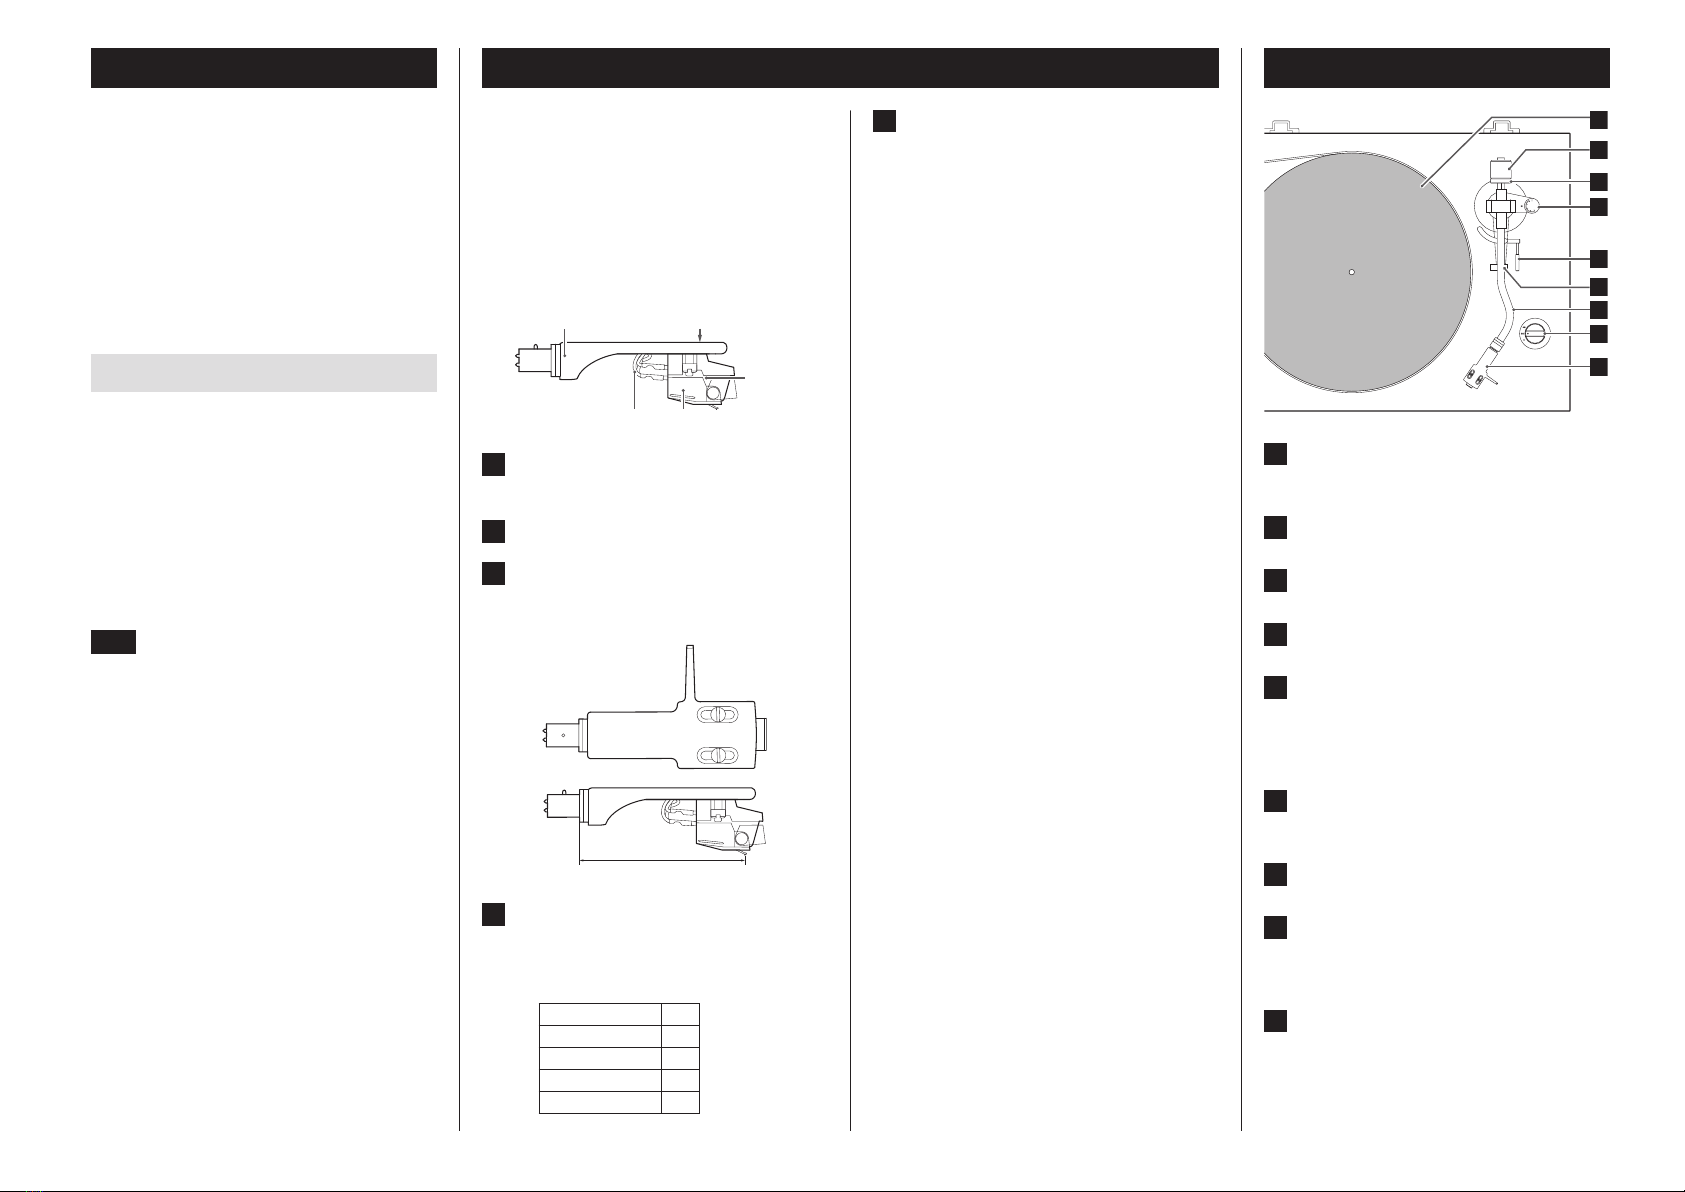
駆動方式 回転検出型高精度制御ベルトドライブ
モータ DC モータ
回転数 33 1/3rpm, 45rpm
回転検出精度 ±005% (33 1/3rpm)
ワウ・フラッター 01%
SN 比 67dB (A-weighted、20kHz LPF) 以上
ターンテーブル アクリル、直径 30cm
台座 人工大理石、木
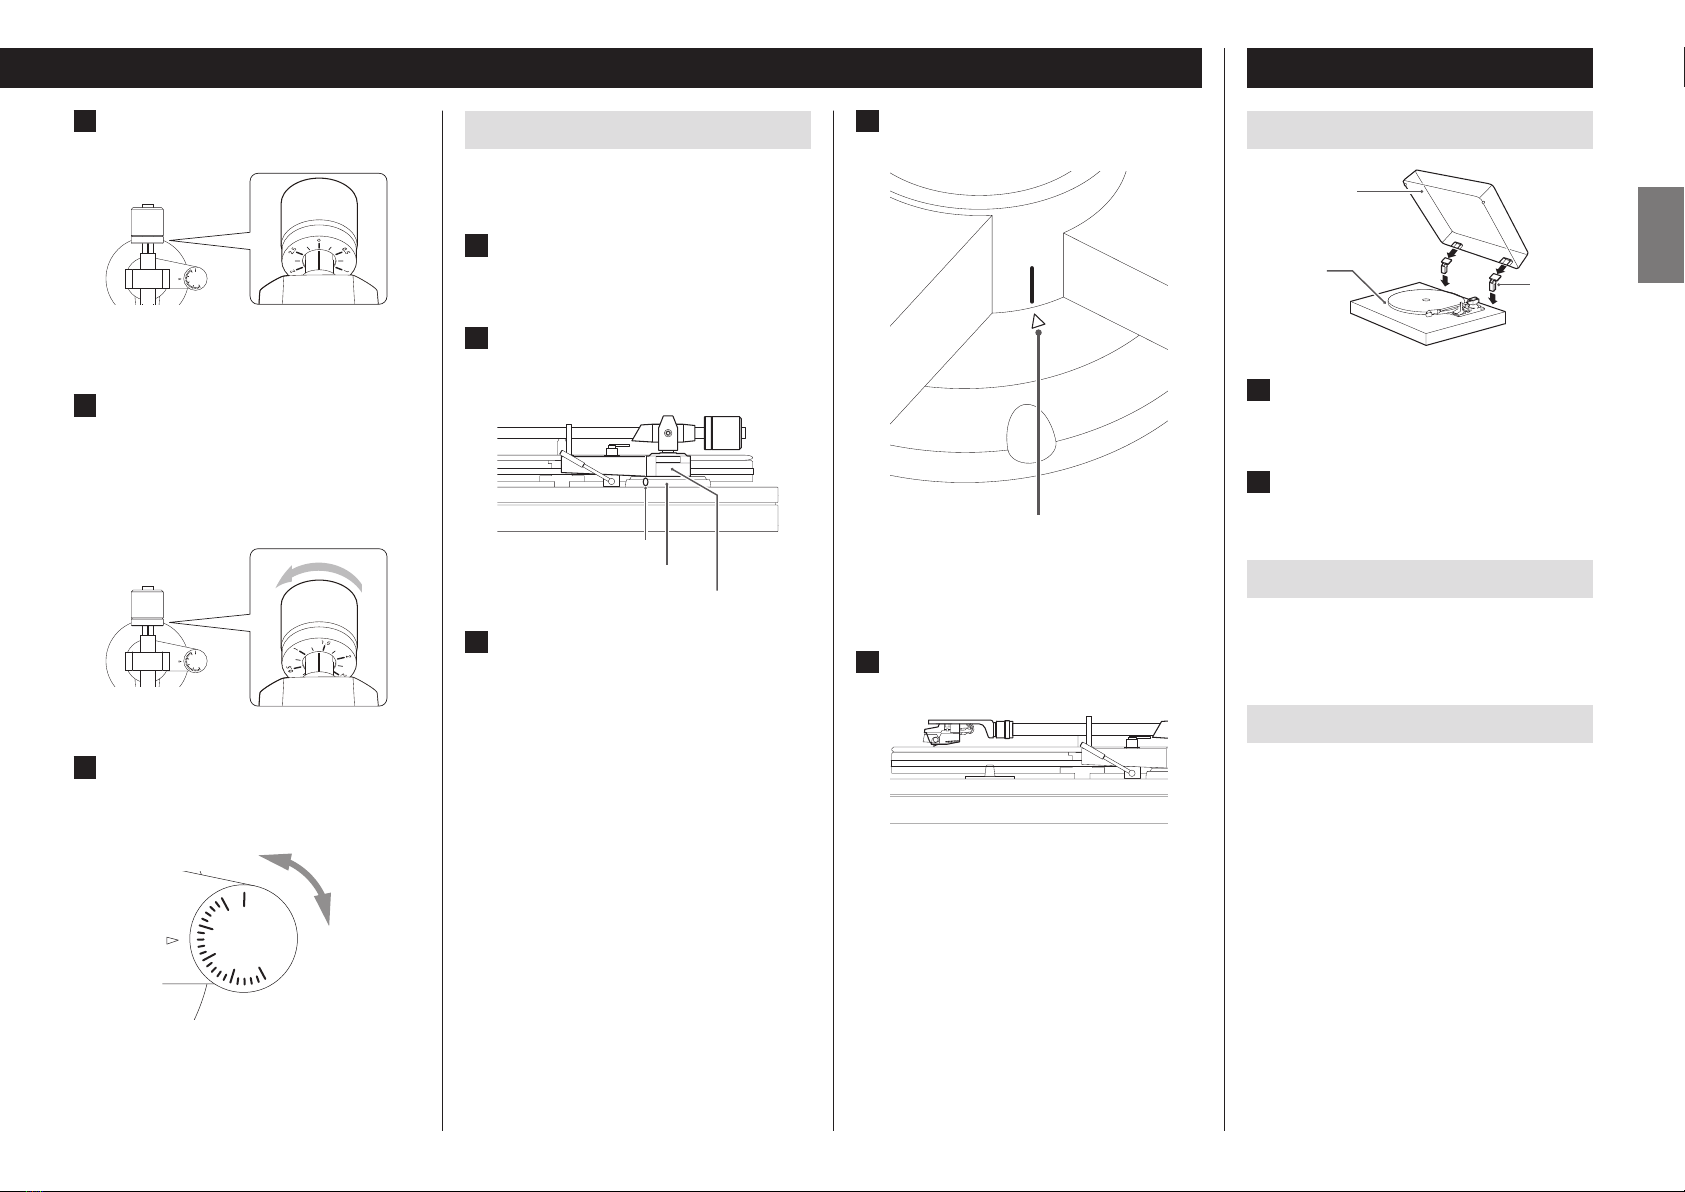
アーム形式
スタティックバランス S 字型トーンアーム
実効アーム長 223mm
針圧可変範囲 0 ~ 5g
適合カートリッジ自重 15 ~ 23 g
( ヘッドシェル含む )
オーバーハング 18mm
トラッキングエラー 3°以内
アーム高さ調整範囲 約 6mm
形式 VM 型(MM 型と同等)
出力電圧 45mV (1kHz, 5cm/sec)
針圧 14±04g
カートリッジ質量 65±02g
付属ヘッドシェル質量
10g ( ネジ、ナット、ワイヤー含む )
o 針の寿命は、使用環境にもよりますが約 300 時間
です。
o 本機に装着されているカートリッジは、オーディオテ
クニカ製「AT100E」(VM 型)と同等品です。(装
着しているカートリッジの交換針本体色は緑色になり
ます。オーディテクニカのマークは付いていません。)
※VM 型は MM 型と同じ特性です。
PHONO EQ THRU 45mV±3dB
PHONO EQ ON 230mV ( − 13dBV)
出力端子 RCA ジャック
USB20 準拠 (Full Speed)
USB コネクタ タイプ B
USB バスパワー対応 5V 500mA
o 別売りの USB ケーブルを接続してパソコンから供給。