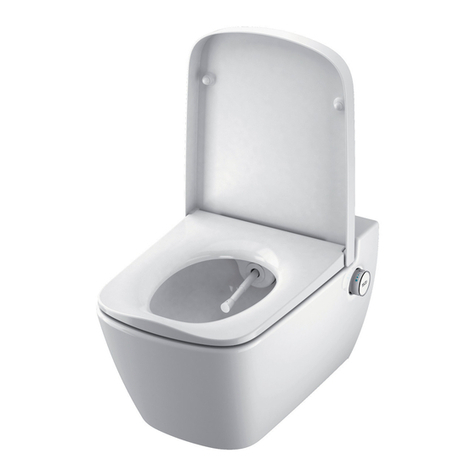
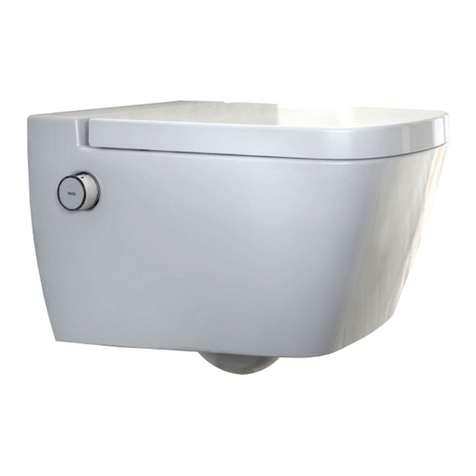
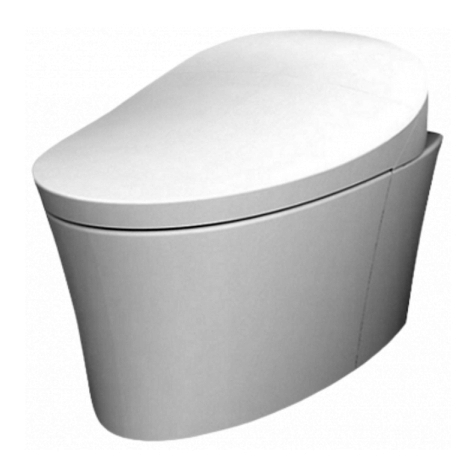
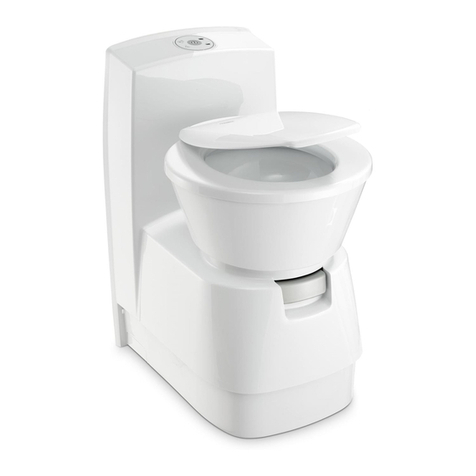
TECE TECElux 100 9600100 Instruction Manual

TECElux
Sanitary systems
TECHNICAL GUIDELINES

1-2
TECElux

1-3
Contents
Introduction 1-4
Design -
Advanced features -
Product range 1-6
TECElux module -
Upper glass facings with actuation unit -
Lower glass attachment facings for toilet attachment -
Accessories -
Shell installation 1-13
Installation in a TECEprofil pre-wall -
Installation as an individual module in front of a solid wall -
Installation in a floor-to-ceiling C-profile metal stud wall -
Installation in floor-to-ceiling metal stud wall with UA-profiles -
Installation in a wooden stud wall -
Attaching individual modules to the floor -
Connecting the drain bend -
Panel facing and wall construction -
Power supply -
Power and water connection with TECEone -
Fine installation 1-26
Lower glass attachment facing for standard toilet -
Lower glass attachment facing for shower toilet and seats -
Lower glass attachment facing for TECEone -
Upper glass facing with manual actuation unit -
Upper glass facing with electronic actuation -
Programming the sen-Touch electronics -
TECElux

1-4
TECElux – Introduction
Introduction
The TECElux toilet terminal conceals the working parts
behind the wall. An extremely flat glass facing closes the
inspection opening and conceals the cistern, connections
for water and power and, depending on the version, an
odour extraction or height adjustment for the ceramic.
Design
With its simple aesthetics, TECElux blends in with the archi-
tecture of any bathroom. The terminal's large glass surface
consists of two parts that give the appearance of a single
unit. The glass facing serves as a splash guard for the wall
and means that the wall does not have to be tiled.
The toilet terminal can be combined with practically any
ceramic and even with shower toilets.
TECElux has already received numerous awards for its
intelligent combination of design and function.
TECElux

1-5
Advanced features
Electronic “sen-Touch” flush actuation
A simple touch with the finger actuates the flush. The flush
can also be activated without contact, by moving to within
in a mm range. A sensor ensures energy-saving con-
sumption – and eortless toilet flushing.
With the manual actuation option, the flush is actuated via
buttons. These are available in various colours and mate-
rial variants.
“ceramic-Air” air purification system
Odours are drawn away at the source, and the cleaned
air is passed back into the room. There is no need for
any additional fresh air which would first have to be
warmed. The air purification system starts when someone
approaches, and stops automatically after a short run-on
time. This avoids unnecessary power consumption. The
activated carbon filter has a long life and does not have to
be replaced until around five years.
Note: Certain ceramics are not suitable for using “ceram-
ic-Air” – see the table on page -.
“m-Lift” height adjustment
TECElux enables you to adjust the height of the toilet
ceramic at any time, even after the module has been
installed. The ceramic does not have to be removed to do
this. The height can be continuously adjusted in an cen-
timetre range by means of an adjusting spindle. The glass
front moves with the ceramic, so the overall appearance is
not marred by any joints or gaps.
“smart-Connect” interface
Additional functions on the toilet require space, and
frequently also a power connection or extra water connec-
tion. Up until now, the technology was simply added on
to the ceramic, and the water and power lines were laid
visibly next to the toilet. These makeshift solutions are now
a thing of the past.
The new toilet terminal takes equal account of aesthetic
and functional factors: TECElux integrates the system com-
ponents into the pre-wall module invisibly and safely. The
large inspection opening is covered by a flat glass facing
that permits quick access to the components behind it at
any time.
As an open interface between the toilet functions and the
bathroom architecture, the toilet terminal can be combined
with virtually any ceramic and also with shower toilets.
TECElux

1-6
TECElux – Range
Product range
A TECElux toilet terminal always consists of:
(A) a TECElux module
(B) an upper flush plate and
(C) a lower facing for toilet attachment and notches for dierent power and water connections.
“sen-Touch” (w)
Order no. 9650002
“sen-Touch” (s)
Order no. 9650003
Standard toilet (w)
Order no. 9650100
Standard toilet (s)
Order no. 9650105
TECEone (w)
Order no. 9650109
TECEone (s)
Order no. 9650110
A
TECElux module
B
Upper flush plate
C
Lower attachment facing
White buttons (w)
Order no. 9650000
Black buttons (s)
Order no. 9650005
Bright chrome buttons (w)
Order no. 9650001
Bright chrome buttons (s)
Order no. 9650004
Shower toilet (w)
Order no. 9650101
Order no. 9650103
Order no. 9650104
Shower toilet (s)
Order no. 9650106
Order no. 9650107
Order no. 9650108
Shower toilet seat (w)
Order no. 9650102
TECElux 100
Order no. 9600100
TECElux 200
Order no. 9600200
TECElux 400
Order no. 9600400
TECElux toilet terminal (w/s)
(w) = white glass, (s) = black glass
TECElux

1-7
C
Overview of lower attachment facings and accessories for toilets and shower toilets
* TECElux 400 not required, as odour extraction is already included with the TOTO Neorest.
When using the “sen-Touch” upper flush plate, the TOTO remote actuation remains without function.
If using the manual actuation, order control cable (order no. 9820259).
(w) = white glass, (s) = black glass
(w)
(s)
(w)
(s)
(w) (w)
(s)
(w)
(s)
(w)
(s)
Standard ceramics (connection dimension
mm) x
TOTO Neorest AC *
TOTO Neorest EW * x x
TOTO Washlet CF
TOTO Washlet EK
(with side connections: TCFG#NW)
TOTO Washlet GL
(with side connections: TCFG#NW)
TOTO Washlet Giovannoni
x x
TOTO Washlet SG
TOTO Washlet EK
(with concealed connections: TCFCGV)
TOTO Washlet GL
(with concealed connections: TCFCGV)
x x
Duravit D-Code x x
Duravit Sensowash Starck
Duravit Sensowash Slim x
Villeroy & Boch Viclean U x x
Villeroy & Boch Viclean U+ x x
Villeroy & Boch Viclean L x
Geberit AquaClean
Geberit AquaClean plus
x
Geberit AquaClean
Geberit AquaClean plus
x
Geberit AquaClean Sela
Geberit AquaClean Mera x
Grohe Sensia
Grohe Sensia Arena
x
TECEone x
TECElux

1-8
TECElux module
The TECElux module is a dry-wall construction element,
available in three dierent versions. All modules consist of
the same self-supporting, stable mounting frame and the
tried and trusted TECE dual-flush cistern.
Other common components:
• Robust, self-supporting mounting frame. All toilet mod-
ules are statically self-supporting and can withstand a
max. load of kg.
• Can be installed in a C-profile, UA-profile, TECEprofil or
wooden stud wall. Corner installation also possible.
• For combination with the upper glass facing with actua-
tion unit and the lower toilet glass facing
• For standard ceramics with a fixing centre of mm.
• Integrated foot brake facilitates height adjustment.
• Adjustable foot support for floor construction of to
mm. For attaching to the floor or on a TECEprofil rail.
• Toilet drain bend with DN/ adapter.
• Clearly visible meter marking sticker.
TECElux 100 module
With TECE concealed cistern and
dual-flush technology.
The flush is actuated mechanically
by buttons or electronically via
“sen-Touch”.
The module can be optionally fitted
with the “ceramic-Air” air purifica-
tion system (only in conjunction
with the “sen-Touch” upper glass
facing with actuation unit).
Order no.
TECElux 200 module
With TECE concealed cistern,
dual-flush technology and manual
height adjustment.
The flush is actuated mechanically
by buttons or electronically via
“sen-Touch”.
The module can be optionally fitted
with the “ceramic-Air” air purifica-
tion system (only in conjunction
with the “sen-Touch” upper glass
facing with actuation unit).
Order no.
TECElux 400 module
With TECE concealed cistern,
dual-flush technology, manual
height adjustment and “ceram-
ic-Air” air purification system.
The flush is only actuated electroni-
cally (sen-Touch).
Order no.
TECElux – Range
TECElux

1-9
TECElux 400 module technology
2
1
4
5
8
9
3
6
7
) flexible water connection (concealed)
) set screw for height adjustment
) electronic dual-flush activation
) “ceramic-Air” odour extraction
) exit opening for cleaned air, activated carbon filter
) power connection, sockets*
) depth-adjustable support for the lower glass facing
) holding bolts for ceramic
) flexible drain bend
* not within the scope of delivery
Note:
It is possible to install the “ceramic-Air” odour extraction
system in all well-known toilet ceramics. However, the
flushing water remains standing in the flush pipe of some
ceramics with a higher sitting position or higher flushing
rim, resulting in the bowl becoming partially or completely
full.
The following table lists ceramics for which the use of
“ceramic-Air” was not possible at the time this document
was written:
Manufacturer Product Item no.
Catalano Zero VSxxN
Duravit Strength
Strength
Architec (Duraplus)
Ideal Standard Mia/SimplyU Jxx
SoftMood Txx
Ventuno Stand-WC Txx
Keramag U RimFree
by Citterio - tief
CASSINI - tief
EMANI by Citterio - tief
ERA - tief
It! RimFree
Plus
Silk - flach
Visit xx
Laufen LP
Villeroy & Boch Omnia classic
Omnia O.novo
TECElux

1-10
Upper glass facings with actuation unit
Upper glass facings with manual operating unit
Upper glass facing for TECElux module with two-spring
mounted actuation buttons.
Including actuating rods and mounting material.
Dimensions: xxmm
Design in white glass, white buttons:
Order No.
Design in white glass, bright chrome buttons:
Order No.
Design in black glass, black buttons:
Order No.
Design in black glass, bright chrome buttons:
Order No.
Upper glass facing with electronic “sen-Touch” actuation
Upper glass facing with actuation unit for TECElux module
with electronic “sen-Touch” actuation buttons and mount-
ing material.
Incl. plug-in power pack ( V connection voltage) with
dual-flush actuation motor
Dimensions: xxmm
Design in white glass
Order no.
Design in black glass
Order no.
Lower glass attachment facings for toilet
attachment
Lower glass facing for TECEone
Lower glass facing for combination with the TECEone
ceramic with shower function.
Includes sound-insulation kit and two long reinforced pipes
for the hot and cold water connections.
Dimensions: xxmm
Design in white glass
Order no.
Design in black glass
Order no.
Lower glass attachment facing for standard toilet
Lower glass facing for combination with toilet ceramics,
distance mm.
incl. sound insulation kit
Dimensions: xxmm
Design in white glass
Order no.
Design in black glass
Order no.
TECElux – Range
TECElux

1-11
Untere Befestigungsglasplatte für Dusch-WC (TOTO,
Geberit)
Lower glass facing for combination with shower toilet
TOTO Neorest AC and EW or Geberit AquaClean
/ plus.
incl. sound insulation kit and replacement reinforced pipe
for cistern.
If a TOTO shower toilet is installed, use shower toilet con-
nection set ().
Dimensions: xxmm
Design in white glass
Order no.
Design in black glass
Order no.
Lower glass facing for Duravit shower toilet.
Lower glass facing for combination with Duravit shower
toilet SensoWash C.
incl. sound insulation kit, replacement reinforced pipe and
long reinforced pipe.
Dimensions: xxmm
Design in white glass
Order no.
Design in black glass
Order no.
Lower glass facing for Geberit Aquaclean Sela shower
toilet.
Lower toilet glass facing for combination with Geberit
AquaClean Sela shower toilet.
incl. sound insulation kit, and long reinforced pipe.
Dimensions: xxmm
Design in white glass
Order no.
Design in black glass
Order no.
Lower glass facing for shower toilet seat
Lower glass facing for combination with shower toilet seat
TOTO Washlet GL and EK, Washlet Giovannoni, V&B
viClean U and Geberit Aquaclean and plus.
incl. sound insulation kit and replacement reinforced pipe
for cistern.
If a TOTO shower or V&B shower toilet seat is installed,
use shower toilet connection set ().
Dimensions: xxmm
Design in white glass
Order no.
TECElux

1-12
Accessories
“ceramic-Air” extraction upgrade kit
Upgrade kit for subsequent installation of “ceramic-Air”
odour extraction for TECElux or TECElux toilet
terminals.
Upgrade kit consists of:
• odour extraction housing incl. fan and air outlet
• Filter cartridge
• Mounting materials
• Flush pipe with connection for odour extraction
• Drain valve
Order no.
Connection set for shower toilet
Connection set comprising:
• long reinforced hose with connection for TOTO Neorest,
TOTO Washlet and V&B ViClean U
Order no.
Connection set for electrical connection
For fixed electrical connection of the “sen-Touch” glass
facing in protection area II.
Connection set comprising:
• Empty socket, protection class IP
• Transformer /V.
• “sen-Touch” connection cable
Order no.
TECElux – Range
TECElux

1-13
TECElux – Shell installation
Shell installation
TECElux module dimensions — front view
Dimensions of side view and wall construction following detailed installation
Dimensions of TECElux module with bare-wall protection and mounted glass
facings
Universal module technology is also used on TECElux
modules. This also increases the possible areas of installa-
tion:
• in a TECEprofil pre-wall
• in front of a solid wall
• in a C-profile wall
• in a UA-profile wall
• in a wooden stud wall
Installation in a TECEprofil pre-wall
The simple mounting technology enables you to work
swiftly and reliably. TECElux modules can be integrated
quickly and safely into a TECEprofil wall in a few simple
steps:
• Release the foot brake
• Place the module foot on the lower continuous profile
brace
• Pull the module out: the foot break is tight enough to
hold the weight of the module and prevent it from slip-
ping back
• Attach the module to the top profile brace with corner
joints
• Apply the foot brake again
• Tighten the module feet only hand-tight!
• Mount the centre profile braces
In addition to installation in a pre-wall, the module can also
be mounted in a free-standing wall made up of TECEprofil
system parts:
TECElux

1-14
Installation in a free-standing TECEprofil wall
Installation as an individual module in front of
a solid wall
The TECElux module is also suitable for individual mount-
ing. Compatible attachments are available for various
installation situations. The TECElux module is statically
designed so that, in standard cases, it only has to be
attached to the load-bearing structural shell at four points.
The mounting material supplied with the attachment units
is suitable for mounting on solid walls. Use suitable cavity
plugs when mounting in front of lightweight partition walls.
The partition wall should also be reinforced at the mount-
ing points. The procedure should be followed in line with
the dry-wall construction.
Take into account the installation instructions for the dry-
wall system used.
Individual mounting with depth-adjustable universal
attachments
Individual mounting with depth-adjustable universal attachments
The universal module is placed directly against the wall.
The pre-wall depth can be adjusted using the universal
attachments. The module's height can be adjusted by
means of the extractable module feet. The foot brake
prevents the module from sinking down. In this way, the
module can be accurately positioned before the module
feet and universal attachments are attached to the struc-
ture.
Universal attachment 9380000
Adjustment range of universal attachment 150-240 mm
TECElux – Shell installation
TECElux

1-15
Individual assembly with height-adjustable module
attachment
Individual assembly with height-adjustable module attachment
With the height- and depth-adjustable module attach-
ment, variable supporting structure heights of mm
to mm can be achieved. In this way, for instance, the
height of the module can be adjusted to suit a given tile
pattern.
Universal attachment 9380002
Adjustment range of the height-adjustable module attachment 130-200 mm
When using the TECElux without barriers in front of
a solid wall, an additional mounting set is required in the
module's bowl area.
Adjustment range of universal attachment 150-240 mm
Mounting in this way with four attachments is sucient to
meet the increased static demands of a barrier-free toilet
system. The second mounting set is not required for
TECElux or due to the stronger frame construc-
tion.
TECElux

1-16
Installation with module attachment for wall corner instal-
lation
Individual module installation with module attachment for wall corner installation
With the module attachment for wall corner installation,
TECElux modules can be attached to a solid structural wall
at an angle of °. In the process, only one side is screwed
into the structure. Two angle brackets are included for
mounting the panel facing. Thanks to the small side length
of the attachment, structures with a base area of just
.m are possible.
Module attachment for wall corner installation 9380004
Mounting the module attachment for wall corner installation
Dimensions of module attachment for wall corner installation
TECElux – Shell installation
TECElux

1-17
Installation with module attachment for variable corner
installation
Module attachment for variable corner installation 9380003
Installation of module attachment for variable corner installation
The universal module can be directly attached to the
structure with the corner attachment. The corner attach-
ment enables a TECEprofil brace to be mounted in paral-
lel. A storage surface can be created with two TECEprofil
panels, an angle bracket and a corner attachment. The
corner installation requires very little space. The mounting
set has a side length of just .cm. The depth from the
front edge of the module up to the corner is only cm.
Despite the small installation depth, it is possible to install
a DN drainage pipe behind a toilet module.
Dimensions of module attachment for variable corner installation
Installation examples with module attachments for variable corner installations
TECElux

1-18
Installation in a floor-to-ceiling C-profile metal
stud wall
Installation in a floor-to-ceiling C-profile metal stud wall
In double-stud walls, the individual stud rows must be
tightly connected to each other in accordance with
DIN. To achieve this, cm long brackets are
screwed between the C-profiles. Two reinforcement brack-
ets must be attached directly above the universal module.
Using the supplied self-tapping screws, the module is
screwed to each of the four points with the wall profiles.
The module feet are at the front under the horizontal
C-profile and can be dowelled to the floor.
Module attachment with installation in a floor-to-ceiling C-profile metal stud wall
Follow the installation instructions for the dry-wall system
used.
Installation in floor-to-ceiling metal stud wall
with UA-profiles
Installation in a floor-to-ceiling UA-profile metal stud wall
If particularly wide or high walls have a higher rigidity,
UA-profiles (DIN part ) can be used instead of
C-profiles. This measure is only relevant for toilet and bidet
modules.
For a disabled toilet facility only UA-profiles may be used
for the front and rear struts for strength reasons. The
installation of toilet facilities in public places for disabled
and elderly people must be carried out in accordance with
DIN-.
To attach a TECElux module or , two holes (mm)
must be drilled on both sides of the TECElux module frame
at a distance of and mm beneath the upper edge
of the module.
The module is then attached to the UA profile using
mounting set ().
TECElux – Shell installation
TECElux

1-19
Mounting holes must be drilled to attach the module
Module attachment with installation in a floor-to-ceiling UA-profile metal stud wall
Installation in a wooden stud wall
In addition to metal stud walls, the module can also
be installed in wooden stud walls in accordance with
DIN-. For this purpose, the frame can be mounted
using special wood screws (order number ) on
the vertical struts.
Module attachment during installation in a wooden stud wall
To attach a TECElux module or , two holes (mm)
must be drilled on both sides of the TECElux module frame
at a distance of and mm beneath the upper edge
of the module. The module is then attached to the wooden
studs.
TECElux

1-20
Attaching individual modules to the floor
Unless screwed tightly to a section tube, the feet of the
TECElux modules should be attached to the bare floor
using the screws and dowels supplied. In the process,
the entire length of the dowels must be anchored in the
screed. The screed's compressionstrength must be at
least N/mm. If mounting on a wooden floor, reliable
fastening to the floor structure must be ensured.
Connecting the drain bend
A connection to the DN or DN connecting sleeve
can be created using the drain bend. It is possible to
create a welded connection with the DN connection
trims of the flexible drain bend (only on modules with
“m-Lift” function, TECElux and ).
The flexible drain bend can be installed horizontally on
both sides, or vertically downwards.
Horizontal installation of the flexible drain bend (TECElux 200 and 400)
Vertical installation of the flexible drain bend (TECElux 200 and 400)
If installed horizontally, the fastening clip is directly
screwed onto the module frame. If installed vertically, the
clip must be screwed into the wall.
Flexible length extension
If the flexible drain bend is used, cleaning spirals should
not be inserted as they could damage the flexible element.
Panel facing and wall construction
The pre-wall is clad with conventional wet room boards
(e.g. TECEprofil panel plates ), at least mm or
x.mm.
The large bare-wall protection must also be mounted.
Attach the bare-wall protection to the module.
TECElux – Shell installation
TECElux
This manual suits for next models
19
Table of contents
Other TECE Toilet manuals

TECE
TECE TECEone User manual

TECE
TECE TECEone User manual
TECE
TECE one 9700200 User manual

TECE
TECE TECEone User manual

TECE
TECE U2 TECEfilo Instruction Manual
TECE
TECE TECEone User manual
TECE
TECE TECEplanus Installation manual

TECE
TECE TECEone User manual

TECE
TECE TECEone Instruction Manual

TECE
TECE TECElux 100 Manual
Popular Toilet manuals by other brands

Stealth
Stealth N7717 product manual

Delabie
Delabie SHA XS 113710 manual

Simas
Simas FLOW FL63 Installation and maintenance instructions

Kohler
Kohler BRAZN 1PC K-EX22378T-NS installation instructions

VILLEROY & BOCH GROUP
VILLEROY & BOCH GROUP GUSTAVSBERG 4330 installation instructions

Thetford
Thetford Porta Potti Excellence user manual