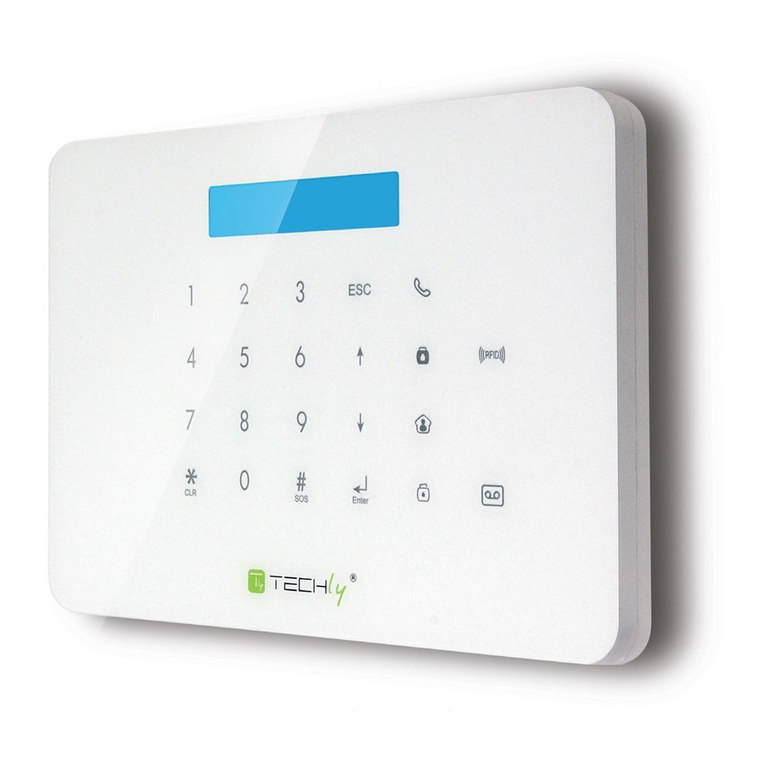
Techly I-ALARM-KIT002 User manual

WIRELESS GSM/APP
www.techly.com
Installation manual
WiFi/SMS/GSM alarm system
UP TO 110
ACCESSORIE
S
110

EN
DE ITFR
2
Features
- 32-bit high speed processor, reliable
capability
- 100% wireless conguration, D.I.Y.
Installation
- Built-in 1,000,000 RF codes
- Supports 10 remote controls and 100
wireless sensors
- The alarm system can be controlled
by SMS, App or phone call
- Stores 5 phone numers and 5 SMS
numbers for alarm alert
- Wireless self-learning code
- Supports exit and entry delay arm/
alert
- Adding new accessories fast and easy
- Supports arm and disarm by App
- Supports remote monitor by App
- Supports remote control/arm/disarm/
monitor by phone
- SMS notication for power o, power
recovery and low battery
- Supports global GSM
850/900/1800/1900MHz
- Wi- 802.11b/g/n
Package contents
Panel x 1
PIR motion detector x 1
Door/window contact x 2
Keypad x 1
RFID tag x 2
Remote control x 2
Adapter x 1
User’s manual x 1
Control Panel Features
SIM
1. Status /GSM signal indicator
2. Power status indicator
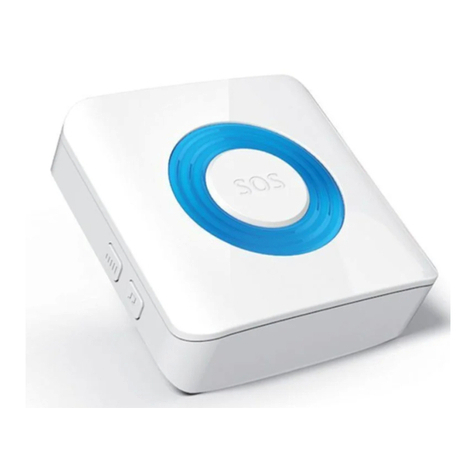
3. Panic button (SOS)
4. Panel
5. Stand
6. Monitoring MIC
SIM
1. SIM card slot
2. Connect button
3. Power on/o
4. Power supply interface
5. USB upgrade port

EN
DE ITFR
3
www.techly.com
LED Indications
1. Status/ Low Power Indicator
Blue (o): system is disarmed
Blue (continuous): system is armed
Blue (blinking): the alarm has been triggered
White (fast blinking): searching GSM network
White (slow blinking): GSM signal is normal
2. Power/GSM Signal Indicator
Green (continuous):
not connected
Green+Blue (continuous):
connected to the network
Specications
Product name
I-ALARM-KIT002
Power supply
Input: AC 110-240V / 50-60Hz
Output: DC 12V /1A
GSM working frequency
850/900/1800/1900 mHz
Operating frequency
433.92MHz (±75KHz)
Wi-Fi
802.11b/g/n
Standby current
60mAh
Alarm current
120mAh
Internal backup batteries
Lithium Batteries: 7.4V /500mAh
Supports wireless accessories
10 remote controls, 100 wireless
detectors
Operating frequency
433.92MHz (±75KHz)
Internal siren
90dB
Housing material
ABS plastic
Operating conditions
Temperature: -10° C~55°C
Humidity: ≤ 80% (non-condensing)
Plans and position the alarm system
Control panel
Remote control
Outdoor siren
Keypad
Zone Sensor 1: "Front door"
Zone Sensor 2: "Living room PIR"
Zone Sensor 3: "Entrance window"
Zone Sensor 4: "Terrace Window"
Zone sensor 5: "Terrace door"
Zone sensor 6: "Bedroom Window"
Zone Sensor 7: "Bedroom PIR"
Zone Sensor 8: "Gas kitchen"
Zona sensor 9: "Bath water"
A
B
C
D
1
2
3
4
5
6
7
8
9
9
3
D1
C
B
2
7
6
85
4
A

EN
DE ITFR
4
Android and iOS Apps Operations
Download the APP and set up the alarm system
The TECHLY system can be controlled and congured by using the TLY ALARM02
APP. Search for the TLY ALARM02 APP in the Apple Store or Google Play. Download
and install the APP on your smartphone/tablet
Notice: The alarm system can be used and congured only via SMS, even
if you use the Android app or Apple. The use of SMS will be charged by the
telecommunications provider. Please contact your provider regarding the
costs for sending SMS
Create and add the main account
1) Start the APP on your phone and select "Register"

EN
DE ITFR
5
www.techly.com
2) Create an account for your Alarm system
3) If all required elds are entered please select the ( ) (upper right corner) to
create the account
4) Login to your account by entering the credentials you entered in step 2
Techlyproof
5) Press "Login"

EN
DE ITFR
6
Connect the device to your WiFi network
1) Before you can set up the Wi connection of the alarm system
please make sure your smartphone is connected to the alarm
system own Wi-Fi network
2) Go to Smartphone Wi-Fi settings without closing the APP
3) Connect the Smartphone to the alarm system through the Wi-Fi
network
4) Return to APP
5) Wait for the notication "Open Wi-Fi network available" (wait
at least 3 minutes). Make sure that the setting "Detects open
wireless networks" is enable on the device
6) From the APP account select "Add Device"
7) Once your smartphone is connected to the Wi-Fi network of the
alarm system, the smartphone should be able to detect the product
ID. If not, press the "Get ID Alarm" to request the product ID. If for
some reason the product ID is still not available, reset the WiFi
module of the alarm system (see chapter "How to reset the WiFi
network settings")
Make sure that your device is set to its setting "Detect open wireless networks"

EN
DE ITFR
7
www.techly.com
8) Select the WiFi connection you wish to connect the alarm system from the list
of available WiFi networks
9) If the WiFi connection is encrypted (preferable), please enter the password of
the corresponding WiFi network
10) Press "Connect" and waiting for the conrmation "the conguration was
successful"
11) Enter a name for the alarm system
12 Insert the phone number of the Sim installed in the alarm system in the eld
"Number of the SIM (phone number)". Start with the country code (eg IT 0039).
Without this code, the alarm system can not be controlled or congured from
outside of your country
13) Press ( ) (right corner) to save these settings
14) After adding the device, it will appear on your home screen APP

EN
DE ITFR
8
15) Select the device to continue
16) After selecting the device, it will appear the alarm system control panel. From
the control panel you can control / congure the alarm system. To access the
settings menu, slide the screen to the left

EN
DE ITFR
9
www.techly.com
Delete a device from your account
Select the device from the device list. Swipe the device to the left side of the
screen. On the right side ofthe device a "DeIete" button will appear. Press the
"DeIete" button and the device will be deleted.

EN
DE ITFR
10
Add/remove an account
The alarm system can be fully congured by an additional user account. With this
feature you can give another user full access to your alarm system for example
a family member.
If you wish to add extra users to the alarm system (maximum 5 users including
main account) you need to register additional accounts using the APP.
1) Start the APP on your phone and select "Register"

EN
DE ITFR
11
www.techly.com
2) Create an additional account for your Alarm system
3) If all required elds are entered please select the ( ) (upper right corner) to
create the account
Now the user account is created we will need to add this user to the alarm
system
4) Start the APP on your phone/tablet and login with the credentials of the main
user created in chapter "Create and add the main account"

EN
DE ITFR
12
5) Press and hold the Alarm system you would like to add the user account to
6) The conguration page is opened
7) Select the option “User list"
8) Select the option “Add a user account"

EN
DE ITFR
13
www.techly.com
9) In the pop-up screen enter the account name of the User you wish to add to
the alarm system
10) Press "Conrm"
11) The user will be listed in the user list
12) You can remove the user from the user list by pressing the icon ( ) behin the
account name (only the main user can add or delete other accounts), selecting
"Conrm" in the following screen.

EN
DE ITFR
14
Congure the alarm system
All settings of the system can be controlled and congured by using the APP or by
sending text message commands. The APP can congure the alarm system via 2
dierent ways: Wi-Fi and text messages.
When using the APP you can choose with every adjustment which communication
you wish to use for changing these settings
Congure alarm numbers
These numbers are the mobile numbers that will receive a text message and/or
will be called when the alarm is triggered.
You need to make sure the country code is entered rst. For example the country
code for the Italy is 0039. You can add multiple phone numbers to the list. Send a
message when you nished adding phone numbers.
You can set up to ve phone numbers which should receive a text message or
should be called during an alarm event.
Remark: Only mobile numbers entered as alarm number can control the alarm
system by text message commands or by the APP!

EN
DE ITFR
15
www.techly.com
Select ( ) to set the phone numbers to receive a phone call on an alarm event.
Select ( ) to set the phone numbers to receive a text message on an alarm
event.
Choose the type of communication ( ) to set the parameters and
press ( ) (upper right corner)
By text message command:
You can also set the numbers by sending a text message with "5" (call) or "6“ (text
message) to the alarm system. You will receive a text message with the current
settings.
Copy the received text into a new text message, modify the text by adding/editing
the phone numbers and send the text message back to the GSM-number of the
alarm system.
Notice: When conguring 5 numbers without using the APP you will need to
send 2 SMS text messages (the maximum amount characters to congure 5
numbers exceeds the maximum amount of characters per default SMS). In this
case use the copied text and remove the last row"5.XXXXXXXXX " and send the
SMS. After you received a reply from the alarm "OK" paste the text again and
now delete the rows 1. until 4. So only the text "5.XXXXXXXXX" remains
Change Language of the text message by App

EN
DE ITFR
16
Alarm notications
The alarm system will check the programmed phone numbers one by one.
Firstly every registered user will get a push notication using the Wi-Fi internet
connection. If the alarm system is not disarmed the alarm system will send a text
message one by one to the programmed phone numbers. When this is fullled
the alarm system will start calling the programmed phone numbers. If one of
the phone number has the voicemail enabled the system will call the next phone
number. Between every text message and phone call there will be a time span of
approximately 15 seconds (depending on additional voicemail duration).
Push notication 1 SMS 1
Push notication 2 SMS 2
Push notication 3
→
SMS 3
→
TEL 1
→
TEL 2
→
TEL 3
→
TEL 4
→
TEL 5
Push notication 4 SMS 4
Push notication 5 SMS 5
If the alarm system is switched o during the notication process the alarm
system will stop sending/calling the remaining phone numbers. For example:
Phone number 2 receives a text message notication and switches o the alarm
system via the APP, phone number 3 will not receive a text message.
Arm or disarm the alarm system by APP
1) First select the status of you alarm system
2) Then select the type of communication you wish to use to set up the alarm
system, SMS or Wi-Fi

EN
DE ITFR
17
www.techly.com
If you need use text message, please see page 25
Request the status or settings of the Alarm system
The APP is not updated with every status or setting that is changed on the alarm
system. You can update the settings by pressing the “Synchronize settings” button.
To request the alarm status by text message, please check page 25
Change Sensor (zone) name by APP
Every sensor is provided with a zone number. You can change the sensor (zone)
name to a preferred name. You can change the name of the sensors 1 to 9. Every
sensor name can be used up to 30 characters. The names of the sensors above 9
cannot be changed.
With the APP:
For changing the sensor name by text message, please refer to page 26

EN
DE ITFR
18
Congure the delay time
When a delay time is set, the alarm system will beep every second as warning of
the delay. The last 15 seconds the speed of the beeps will increase. The delay you
can set here is the entry delay (only for sensors congured as single
group) and exit delay time (for all sensors congured as normal, home or single
group).
With the APP:
For changing delay time by text message, please refer to page 27

EN
DE ITFR
19
www.techly.com
Adjust siren volume and time of alarm
Both settings can be adjusted by this menu
With the APP:
For adjusting siren volume and time by text message, please refer to page 28
Hard Reset - Restore factory defaults
This needs to be done when, for example, a new SIM card is installed. Push the
button ( ) on the back of the alarm system and press the SOS button on the
alarm system simultaneously. Release them after 2 slow and 3 fast beeps. Wait
for 10 seconds. If the panel beeps twice the alarm system has been restored to
factory defaults.
For restore factory defaults by text message, please refer to page 29
Remark: After you restored the factory defaults you need to switch the alarm
system o and on again! Please wait almost 10 seconds before restarting the
alarm system
Warning: Hard reset does not reset the Wi-Fi settings

EN
DE ITFR
20
Reset Wi-Fi network settings
If for some reason the Alarm system can no longer connect to your Wi-Fi you can
recongure the Wi-Fi settings of the Alarm system. First you need to reset the
Wi-Fi settings.
1) Press and hold the button ()of the alarm system for about 7-8 seconds until
you hear 3 beeps.
2) Open the APP and login to your account
3) Congure the Alarm system by selecting the device from the device list and
hold the button until the conguration setup is shown
4) Press “Congure Network”
Remark: After you restored the Wi-Fi network settings you need to
switch the alarm system o and on again! Please wait almost 10
seconds before restarting the alarm system
Table of contents
Languages:
Other Techly Security System manuals
Popular Security System manuals by other brands

Response Electronics
Response Electronics miGuard DS26 instructions

DMP Electronics
DMP Electronics 265HINT installation guide

Matelec
Matelec FPC-12670 Operation manual

Cortex
Cortex COR-ACC995-V2 quick start guide

Zeta Alarm Systems
Zeta Alarm Systems INFINITY ID2 quick start guide

Perenio
Perenio Smart Security Kit manual