manuals.online logo
Brands
  1. Home
  2. •
  3. Brands
  4. •
  5. Techni Sport
  6. •
  7. Indoor Furnishing
  8. •
  9. Techni Sport RTA-TS70 User manual

Techni Sport RTA-TS70 User manual

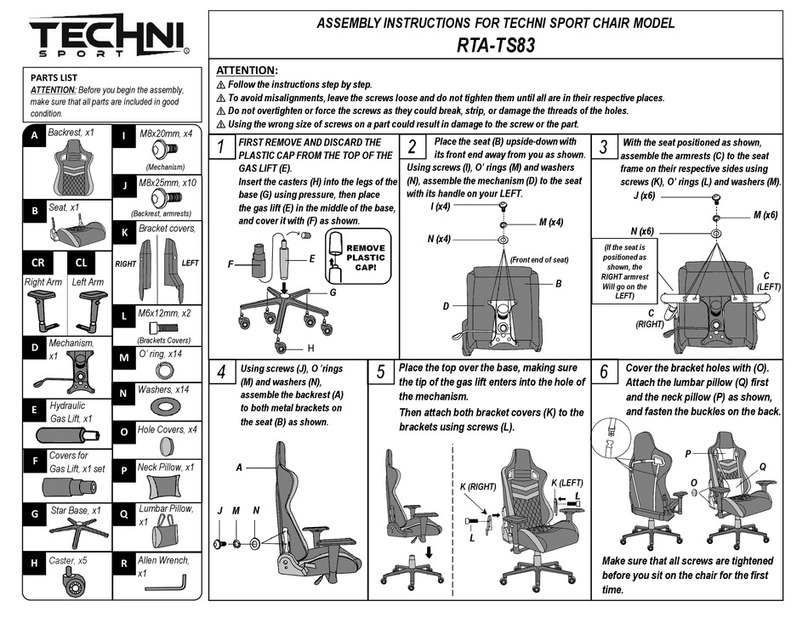
PARTS LIST
ATTENTION: Before you begin the assembly,
make sure that all parts are included in good
condition.
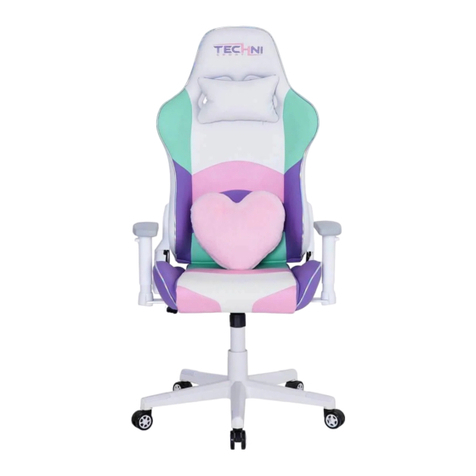
ASSEMBLY INSTRUCTIONS FOR TECHNI SPORT CHAIR MODEL
RTA-TS70
ATTENTION:
⚠Follow the instructions step by step.
⚠To avoid misalignments, leave the screws loose and do not tighten them until all are in their respective places.
⚠Do not overtighten or force the screws as they could break, strip, or damage the threads of the holes.
⚠Using the wrong size of screws on a part could result in damage to the screw or the part.
Backrest, x1
Seat, x1
Hydraulic
Gas Lift, x1
Covers for
Gas Lift, x1 set
Star Base, x1
Caster, x5
Hole Covers, x4
M6x8mm, x4
Insert the casters (H) into the legs of
the base (G) using pressure.
REMOVE AND DISCARD THE PLASTIC
CAP FROM THE TOP OF THE GAS LIFT
(E), and place the gas lift in the middle of the
base and cover it with (F) as shown.
Place the seat (B) upside-down with
its back end towards you as shown.
Using screws (L), assemble the mechanism
(D) to the seat with its handle facing to your
LEFT.
With the seat positioned as shown,
assemble the armrests (C) to the
seat frame on their respective sides using
screws (L) as shown.
M8x20mm, x16
Tighten the screws well before you sit on the
chair for the first time.
First attach the lumbar pillow (Q),
then the neck pillow (P) by
fastening the buckles behind the
backrest as shown.
A
B
CArmrests
(Sitting on the chair,
Not looking at it)
E
F
G
H
P
N
M
I
L
K
Left
Using screws (M), attach to the
brackets on their respective sides,
first the covers (J), then the covers (K), and
finally cover the holes with (I) as shown.
DMechanism,
x1
Right
Lumbar Pillow,
x1
ONeck Pillow, x1
Allen Wrench, x1
JSeat Covers
(Sitting on the chair,
Not looking at it)
Right Left
Bracket Covers
(Sitting on the chair,
Not looking at it)
Right Left
EF
H
G
REMOVE
CAP!
B
D
L x4
(Back end of seat)
C
(LEFT)
(Back end of seat)
C
(RIGHT)
L x8
A
Place the seat over the base making
sure the tip of the gas lift enters into
the hole of the mechanism. Then assemble
the backrest (A) to the seat brackets on both
sides using screws (L) as shown.
L x4
FIRST!
(M) (J)
KM
I
P
Q
CHAIR’S FUNCTIONS:
(1) Chair height: Pull UP the lever that is under the seat. The chair goes down
while sitting on it, or up if you lift your body.
(2) Chair tilting: Pull the same lever OUT horizontally to unlock this function.
While unlocked, the chair will tilt freely. When the chair is in the normal position,
push the lever IN to lock the tilting function.
(3)Tilting tension: Turn the mechanism’s knob in either direction to apply more or
less tension. With less tension, the tilting will feel more easy.
(4) Backrest reclining: Pull UP the lever that is located on the rear right side of
the seat and releaseit when the desired position is reached.
WARNING: For your safety, the chair’s tilt function (2) in the mechanism should
be in the LOCKED (IN) position prior to use the backrest reclining function.
(5) To adjust the armrest height, pull UP the button that is under the armrest and
release it once the desired height is reached.
WARNINGS:
•Do not stand up on the chair or use it as ladder.
•Use the chair to seat only one person at a time.
•Do not use the chair if parts are damaged or if screws are loose or missing.
•Do not seat near the edge of the seat and always sit properly on the chair to avoid going beyond your balance point and fall off the chair.
•The chair is intended for teenagers and adults. If small children are using the chair, please keep close observation on them.
•Do not allow small children to play with the chair.
•Not paying attention to these warnings could result in severe injuries.
CARE AND MAINTENANCE:
•To clean the chair it is recommended to use a soft cloth lightly damped in a solution of smooth soap and water, then dry with a clean towel.
•Do not use solvents or abrasive materials to clean any part of the chair.
•Before applying a cleaning agent, test on a small hidden area of the chair, like underneath the seat.
•Do not expose the product to direct sunlight or to extreme environmental conditions.
•Every 4 months, inspect the chair completely and make sure that all screws are tighten.
(1)
(2)
(4)
(5)
(3)

Other Techni Sport Indoor Furnishing manuals

Techni Sport Echo Series User manual

Techni Sport

Techni Sport Echo Series User manual

Techni Sport Echo Series User manual

Techni Sport

Techni Sport Echo Series User manual

Techni Sport Echo Series User manual

Techni Sport

Techni Sport Echo Series User manual

Techni Sport TS83 User manual

Techni Sport

Techni Sport TS83 User manual

Techni Sport RTA-TS38C User manual

Techni Sport

Techni Sport RTA-TS38C User manual

Techni Sport Echo TSF44 User manual

Techni Sport

Techni Sport Echo TSF44 User manual

Techni Sport TS36C User manual

Techni Sport

Techni Sport TS36C User manual

Techni Sport TSC81 User manual

Techni Sport

Techni Sport TSC81 User manual

Techni Sport RTA-TSXXL2 User manual

Techni Sport

Techni Sport RTA-TSXXL2 User manual

Techni Sport TS42 User manual

Techni Sport

Techni Sport TS42 User manual

Techni Sport RTA-TS220L User manual

Techni Sport

Techni Sport RTA-TS220L User manual

Techni Sport CHAIR RTA-TSF71 User manual

Techni Sport

Techni Sport CHAIR RTA-TSF71 User manual

Techni Sport TSXL1 User manual

Techni Sport

Techni Sport TSXL1 User manual

Techni Sport RTA-TS42 User manual

Techni Sport

Techni Sport RTA-TS42 User manual

Techni Sport TS42 User manual

Techni Sport

Techni Sport TS42 User manual

Techni Sport RTA-TS200 User manual

Techni Sport

Techni Sport RTA-TS200 User manual

Techni Sport RTA-TS205 User manual

Techni Sport

Techni Sport RTA-TS205 User manual

Techni Sport RTA-TS83 User manual

Techni Sport

Techni Sport RTA-TS83 User manual
Popular Indoor Furnishing manuals by other brands
SARMOG 7076k quick start guide

SARMOG

SARMOG 7076k quick start guide

ChargeTech PPL8 installation guide

ChargeTech

ChargeTech PPL8 installation guide

Dorel Living DL8676-R manual

Dorel Living

Dorel Living DL8676-R manual

GWINNER MEDIA CONCEPT MC969K Installation

GWINNER

GWINNER MEDIA CONCEPT MC969K Installation

Furniture of America Brinley CM3790T Assembly instructions

Furniture of America

Furniture of America Brinley CM3790T Assembly instructions

Habitat Radius RADI-3D-SS15-A Assembly instructions

Habitat

Habitat Radius RADI-3D-SS15-A Assembly instructions

Wren Kitchens Vogue WALL UNIT 700 Tall 2 Door Assembly guide

Wren Kitchens

Wren Kitchens Vogue WALL UNIT 700 Tall 2 Door Assembly guide

INK+IVY Mateo 267555 Assembly instructions

INK+IVY

INK+IVY Mateo 267555 Assembly instructions

Bob's Discount Furniture Montana Counter Storage Bench 20058856001 Assembly instructions

Bob's Discount Furniture

Bob's Discount Furniture Montana Counter Storage Bench 20058856001 Assembly instructions

Mocka Livi Bar Stool Assembly instructions

Mocka

Mocka Livi Bar Stool Assembly instructions

VENETA 4 Sided L Frame Outside Mount installation instructions

VENETA

VENETA 4 Sided L Frame Outside Mount installation instructions

PAIDI Book-shelf 2S 1508 Instructions for use

PAIDI

PAIDI Book-shelf 2S 1508 Instructions for use

AmazonBasics B00IIFW2L4 manual

AmazonBasics

AmazonBasics B00IIFW2L4 manual

Next Maison 900529 Assembly instructions

Next

Next Maison 900529 Assembly instructions

NATHAN JAMES Theo 66501 manual

NATHAN JAMES

NATHAN JAMES Theo 66501 manual

GPM WIMBLEDON OBDWIM5GY Assembly instructions

GPM

GPM WIMBLEDON OBDWIM5GY Assembly instructions

New Classic Furniture U3969-25-eby Assembly instruction

New Classic Furniture

New Classic Furniture U3969-25-eby Assembly instruction

pottery barn kids DOUBLE MARKET BIN manual

pottery barn kids

pottery barn kids DOUBLE MARKET BIN manual

manuals.online logo
manuals.online logoBrands
  • About & Mission
  • Contact us
  • Privacy Policy
  • Terms and Conditions

Copyright 2025 Manuals.Online. All Rights Reserved.