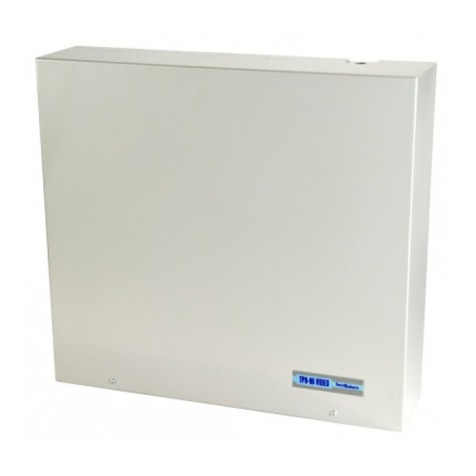
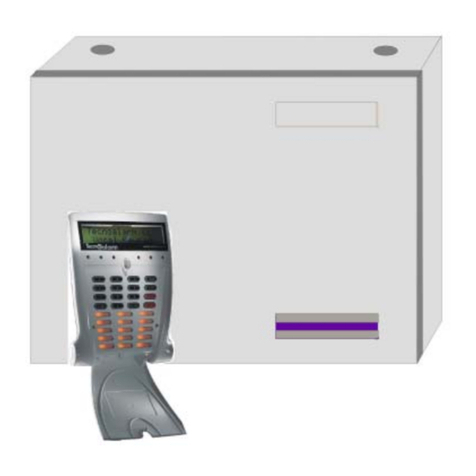
Tecnoalarm TP8-96 User manual

USER MANUUSER MANU
USER MANUUSER MANU
USER MANUALAL
ALAL
AL
Release: 1.0
Update March2011
Language: English
FWversion 0.7.05-->
TP8-96 VITP8-96 VI
TP8-96 VITP8-96 VI
TP8-96 VIDEODEO
DEODEO
DEO
EN60950-1
EN50130-4
EN50081-1
8 TO 96 ZONES EXPANDIBLE
CONTROL PANEL WITH
INTEGRATED ETHERNET

1-2 User manual Ver.1.0 - 03/11 TP8-96 VIDEO
The product features can be subject to change without notice. Unauthorized reproduction or distribution of this manual,
or any portion of it, on any device and in any form, is prohibited. The contents of this manual may be subject to change
without notice

1-3
Ver.1.0 - 03/11 User manualTP8-96 VIDEO
CONFORMITY
Hereby, Tecnoalarm srl declares that the present equipment is in compliance with the essential requirements and other
relevant provisions of the R&TTE 1999/05/EC directive.
The declaration of conformity is available on the website: www.tecnoalarm.com.

1-4 User manual Ver.1.0 - 03/11 TP8-96 VIDEO

1-5
Ver.1.0 - 03/11 User manualTP8-96 VIDEO
Index
1 - General features
TP8-96VIDEOsystem...............................................................................................................Page 7
Master code................................................................................................................................Page 7
Standardusercode.................................................................................................................... Page 8
Controlbytelephone...................................................................................................................Page 8
Functioning...................................................................................................................................Page 8
2 - Console LCD300/S
SignalingoftheconsoleLCD300/S..........................................................................................Page 9
Arming-Singleandmultiplearming.........................................................................................Page 11
Arming-Directarming............................................................................................................... Page 11
Disarming-Singleandmuultipledisarming............................................................................ Page 12
Disarming- Directdisarming................................................................................................... Page 12
Arming-Exclusionofopenzones.............................................................................................Page 13
Hold-upalarmrelease................................................................................................................ Page 13
Panicalarmrelease....................................................................................................................Page 14
3 - Key point PROX K6N
Signalingof thePROXK6N......................................................................................................Page 15
Arming.........................................................................................................................................Page 16
Arming-Exclusionofopenzones.............................................................................................Page 15
By-pass........................................................................................................................................ Page 15
Disarming....................................................................................................................................Page 16
Panicalarmrelease....................................................................................................................Page 16
4 - Programming of the console LCD300/S
Accesstoprogramming.............................................................................................................Page 19
Clockmenu..................................................................................................................................Page 20
Functionmenu............................................................................................................................. Page 20
Programmenu.............................................................................................................................Page 21
Timemenu-Timers....................................................................................................................Page 23
Timemenu-Accessperiods.....................................................................................................Page 25
Telephonemenu-GSM.............................................................................................................Page 28
Telephonemenu-Tecnocell......................................................................................................Page 29
Telephonemenu-Channels...................................................................................................... Page 33
Telephonemenu-Callback...................................................................................................... Page 34
Codemenu-Mastercode......................................................................................................... Page 35
Codemenu-Standardusercodes...........................................................................................Page 37

1-6 User manual Ver.1.0 - 03/11 TP8-96 VIDEO
Keysmenu................................................................................................................................... Page 39
Wirelesskeymenu..................................................................................................................... Page 41
Consolesmenu............................................................................................................................Page 43
Keypointmenu.............................................................................................................................Page 45
Exclusionmenu............................................................................................................................Page 46
Testmenu.....................................................................................................................................Page 47
Optionmenu................................................................................................................................ Page 49
5 - Controle by telephone
Remotecontrol............................................................................................................................Page50
Index

1-7
Ver.1.0 - 03/11 User manualTP8-96 VIDEO
General features
TP8-96 VIDEO SYSTEM
The security system TP8-96 VIDEO is a new generation equipment which is able to control up to 96 zones.
The control panel is programmed by the installer using a PC or the console LCD300/S.
The end user can make simple settings through the console.
Accesslevels
TheTP8-96 VIDEOsystempermitstwoaccesslevelsformanagement/programmingofitsfunctions.
Master level
Themasterlevelpermitsprogrammingof the user functionsaswellasarming/disarmingof the control panel and
activation/deactivationoftheremotecontrols.
To enter the master menu enter the master code (it is usually given by the installer to the owner of the system).
Thedefaultmastercodeis:12345
Standard user level
Thestandard userlevel permits only simple functions such as arming/disarming of the controlpanel. Typeone ofthe
usercodes to enterthe standard usermenu (until 200codes are available).Theuser codesareprogrammed bythe
holderof the mastercode.
Operations executable by the master code
Programming
- Clock setting
- Association of chime to the zones (acoustic signaling for zone opening)
- Creationandmodificationofprograms
- Programmingof64timersforautomaticarming
- Programmingof 8 access periods during which codesand keysare enabled
- ProgrammingoftheGSM section
- ProgrammingoftheexternalGSMcommunicator
- Programmingof8telephonechannels
- Enabling of the call back function
- Programming of the master code and its attributes
- Programmingofthestandardusercodesandtheirattributes
- Programmingofthetranspondersandtheirattributess
- Programmingof the wireless keys and their attributes
- Programmingof theconsoles
- Programmingofthekeypoints
- Access to the exclusion menu
- Accesso to the test menu
- Access to the option menu
Operations executable through the console
- Activation/deactivationoftheremotecontrols
- Armingoftheprograms
- Totaldisarmingofthecontrolpanel(allprograms)
- Partialdisarmingofthecontrol panel
- Directarming/disarmingofallprogramsofthecontrolpanel
- Readingoftheeventbuffer
- Resetofalarmmemorysignaling
- Abortofthe active telephonecalls

1-8 User manual Ver.1.0 - 03/11 TP8-96 VIDEO
Operations executable by the standard user codes
Programming
Thestandardusercodesdonotpermitprogramming.
Operations executable through the console (many of these functions are only available if the code has been
enabledfor)
-Activation/deactivationoftheremotecontrols
-Armingofthe programs
-Totaldisarmingoftheprograms
-Partialdisarmingoftheprograms
-Direct arming/disarming of allthe programs
-Readingoftheeventbuffer
-Resetof alarm memorysignaling
-Comunicatorblock(abortoftheactivetelephonecalls)
Control by telephone
Someoperations can be executed by telephone, calling the controlpanel whichanswers emitting a confirmation beep.
Enter the master code or one of the standard user codes to enter telephone menu.
Functioning
The control panel can be armed through the programs (1 to 8) which can be set up by the installer and by the holder of
the master code.
Theprogramsgroupthezones which are enabledforthedetection of the alarmswhentheprogramis armed.
Theprogramscanbearmed one at time (single arming) orseveralsimultaneously.

1-9
Ver.1.0 - 03/11 User manualTP8-96 VIDEO
Signaling of the LCD300/S console
TheLCD300/S console permits arming/disarming of the programs, it alsopermits interactionwith theremote controls,
moreoveruserswhoareenabledcanentertheprogrammingmenus.
Theconsoleprovides two groupsofLED; the first,belowthe display, represents generalsignalingof the controlpanel;
the second, below the keypad, is composed of 15 pairs of LED for viewing of the status of the associated programs.
General alarm LED -
The system constantly checks its functions, any trouble is immediately signaled. The LED is
blinking while the alarm is active. As soon as the alarm stops, the LED becomes lit to signal alarm
memory.
The signaling of alarm memory continues until it is reset. The general alarms are stored in the event
buffer.
If the LED is blinking slowly, it signals a general alarm. If it is blinking quickly, it signals a GSM
trouble.

1-10 User manual Ver.1.0 - 03/11 TP8-96 VIDEO
CM LED
As soon as the user starts pressing the keys, the CM (comand mode) LED is lit signaling that the
console is in use. All the other consoles of the system are automatically inhibited.
It is switched off 10 seconds after stroke the last key and all the other consoles are enabled again.
Tamper alarm LED
TheLED signals tamper alarm. The anti-tamper protectionof the system is always active evenif the
programsaredisarmed.
ThetamperalarmLEDcan be:
OFF - notamper alarm
Blinking-tamper alarmactive
ON - alarm memory. The signaling of alarm memory contiunes until it reset. The tamper alarms are
storedintheeventbuffer.
Low battery alarm LED
TheLED signalslow batteryalarm.
The low battery alarm LED can be:
OFF-batteryvoltage is OK
Blinking - batteryvoltage islow (low batteryalarm active)
ON - battery failure. The battery is not able to support the system anymore.
Power failure alarm LED
TheLEDsignalspower(230VAC)failure.
ThepowerfailurealarmLEDcanbe:
OFF - mains power is OK.
Blinking-powerfailurealarmactive
ON - alarm memory. Mains power has been missing.
Mains power LED
TheLEDsignals the presenceofmains power (230VAC).
ThemainspowerLED can be:
OFF - mains power is missing
ON - mains power is present

1-11
Ver.1.0 - 03/11 User manualTP8-96 VIDEO
Arming - Single and multiple arming
How can programs be armed one at a time? (single arming)
Enter a code which permits arming of all the programs to be armed.
Thearmingproceduredescribed below permits theselectionofone or more programsamongthoseassociated to the
code.
A - Enter the code
B - Select the numbers of
theprogramstobearmed
C - Press YES to confirm
armingoftheprograms
How can all the programs associated to the code be armed simultaneously? (direct arming)
Thearmingprocedure described belowpermitsdirect arming ofallthe programs associatedtothe code.
A - Enter the code
B - Press YES to confirm
armingoftheprograms
Arming - Direct arming

1-12 User manual Ver.1.0 - 03/11 TP8-96 VIDEO
Disarming - Single and multiple disarming
How can programs be disarmed one at a time? (single disarming)
Enter a code which permits disarming of all the programs to be disarmed.
Thedisarmingproceduredescribed below permits theselectionofone or more programsamongthoseassociated to the
code.
A - Enter the code
B - Select the numbers of
theprograms to be
disarmed
C - Press YES to confirm
disarmingoftheprograms
How can all the programs associated to the code be disarmed simultaneously? (direct
disarming)
Thedisarmingprocedure described belowpermitsdirect disarming ofallthe programs associatedtothe code.
A - Enter the code
B - Press NO to confirm
disarmingoftheprograms
Disarming - Direct disarming

1-13
Ver.1.0 - 03/11 User manualTP8-96 VIDEO
Arming - Exclusion of open zones
How can programs be armed excluding open zones?
Only the codes enabled for arming with exclusion of the open zones can execute this operation. The code permits
armingofall the associatedprograms.
Thebelowarming procedure describesbothsingle and multiplearming,it permits theselectionamong the programs
associated to the code.
A - Enter the code
B - Select the numbers of the
programstobearmed
C - Press YES to confirm
armingoftheselected
programs
D-Open zonesareviewedon
the display in an acoustic and
visiveway
Press YES to exclude the open
zones and arm the selected
programs
Hold-up alarm release
Hold-up alarm release
Onlythe codes enabled for hold-up alarm can execute this operation. In case of hold-up,the user will apparently disarm
the system and simultaneously release a hold-up alarm.
To release the hold-up alarm, enter a valid code but decrease or increase it by one unit.
For example, the master code is 54321.
Decrease the last digit by one unit, e.g. 54320.
Alternatively, increase the last digit by one unit, e.g. 54322.

1-14 User manual Ver.1.0 - 03/11 TP8-96 VIDEO
How is a panic alarm activated ?
Thepanic alarmis releasedby simultaneous pressing of the arrow up and arrow down keys.
Theprogramstatus(armed/disarmed)doesnotinterferewiththepanicalarmrelease.Thealarmcanbereleased
anytime.
A - To release the panic alarm, press the arrow up and
arrowdownkeys simultaneously onthe LCD300/S console.
Panic alarm release

1-15
Ver.1.0 - 03/11 User manualTP8-96 VIDEO
Signaling of the PROX K6N transponder reader
with mini keypad
Program alarm
The alarm is signaled only if the alarm system is armed.
The LED blinks for the entire duration of the alarm. Once the alarm has stopped, the LED remains lit
to signal alarm memory.
The signaling of alarm memory is active until the next arming.
Zone status
Theopenzonesaresignaledonlyduringthe arming phase.
ThePROXK6Ntransponderreaderwithminikeypadpermitsarming/disarmingoftheassociatedprograms.Thedevice
permits the control of maximum 6 programs.
The device must recognize a transponder before it enables the keypad. If the keypad is enabled, it is possible to select
theprogramstobearmed/disarmed.
The program status is signaled through the yellow LED, numbered from 1 to 6, on the left of the keypad. The 4 general
alarmLEDarepresent on theupperpartof the device.

1-16 User manual Ver.1.0 - 03/11 TP8-96 VIDEO
Generalalarm
The system constantly controls its functions, any trouble is signaled immediately. The LED is blinking
while the alarm is active. As soon as the alarm stops the LED becomes lit to signal alarm memory.
Thesignaling of alarm memory continuesuntil itreset. The general alarms arestored inthe event
buffer.
Recognition transponder
The LED is lit when the reader recognizes a transponder. The user has 10 seconds to press a key and
to arm a program. On every keystroke the counter is reset. Once this time has expired, the keypad
does not accept commands any more.
TheLED blinks tosignal thata transponder hasbeen recognized by another device.
If the recognition transponder LED and the general alarm LED are lit simultaneously, the system
signalsan attempt atarming withunknown transponder (falsekey).
Program status
The program status LED signals the status of the associated programs (max. 6).
During the arming phase, the LED of the selected program blinks quickly for 10 seconds. During this
time it is possible to arm/disarm other programs and to exclude voluntarily the open zones.
Each LED signals the status of the program it is associated to, it can be:
OFF-programdisarmed
Blinking quickly - in arming phase (it blinks for 10 seconds)
ON-programarmed
Blinkingslowly - program partset
How to arm the programs
Toarmoneorseveralprograms,approachavalidtranspondertothereader.Thereaderreadsthetransponder,verifies
its validity and enables the keypad.
A-Approachthe transponderto the
reader(thegreentransponderLEDis
lit).
B - Within 10 seconds, select the
numbersoftheprogramstobe
armed.TheyellowprogramLEDof
theprogram blinks quickly(arming
phase).Then, theLED remains lit
signalingthat theprogram is armed.
Arming

1-17
Ver.1.0 - 03/11 User manualTP8-96 VIDEO
How to arm programs with exclusion of open zones
Onlythe transpondersenabled forarming withexclusion ofopen zones can execute this operation.
A-Approachthe transponderto the
reader(thegreentransponderLEDis
lit).
B - Within 10 seconds press the
numbersoftheprogramstobe
armed.TheyellowprogramLED
blinks quickly (arming phase). If the
armedprogramcontainsopenzones,
the ON LED starts blinking, too.
C - Press the F1 key (within 10
seconds). This key permits to
excludethe open zones from the
program.TheLEDremainslit
signalingthat theprogram is armed.
How to parset an armed program
Onlythe transponders enabled for bypass can execute this operation.
A-Approachthe transponderto the
reader(thegreentransponderLEDis
lit).
B - Within 10 seconds enter the
numbersoftheprogramstobe
partset.
TheyellowprogramLEDstarts
blinking slowly signaling that the
armedprogramispartset.
Arming - Exclusion open zones
Bypass

1-18 User manual Ver.1.0 - 03/11 TP8-96 VIDEO
Disarmingprograms
How to disarm the programs
Todisarmoneorseveralprograms,approachavalidtranspondertothereader.
Thereaderreadsthetransponder,verifiesitsvalidityandenablesthekeypad.
A-Approachthe transponderto the
reader(thegreentransponderLEDis
lit).
B - Within 10 seconds, enter the
numbersoftheprogramstobe
disarmed.TheyellowprogramLEDis
switchedoff signaling that the
programisdisarmed.
How to release the panic alarm
The panic alarm is released by simultaneous pressing of the F1 and F3 keys. The status of the programs (armed/
disarmed)doesnothaveany effect on panicalarmrelease.The alarm can bereleasedanytime.
A - To release the panic alarm,
press the F1 and F3 keys simultaneously
Panic alarm release

1-19
Ver.1.0 - 03/11 User manualTP8-96 VIDEO
Access to programming
Master code
The holder of the master code has access to some of the system's programming. In stand-by, on the displays of the
consoles are viewed the date and the time. The access to programming is possible through any console. The access to
programming inhibits all of the system's consoles.
1 - Enter the programming menu
Toentertheprogrammingmenu,followthesteps
illustratedby the oppositefigure.
Thefigureshowsthesequence of keystrokes and
what is viewed on the display.
In the example, the master code is 12345 (default
code).Accordingtoprogramming,thecodelength
can be 4, 5 or 6 digits. The holder of the master code
can only change the number of the code, he cannot
modify its length.
1 - Enter the master code
2 - Select the menu using the arrow keys
3 - To confirm press the YES key
2 - Selection of the menu
The clock menu is the first to appear.
Every menu has its name and its number. On the
display, the number of the menu is viewed on the first
line on the right and the name on the second line on
the left.
Theprogramming menu ofthe systemis composed of
differentmenus; there are two waysof selecting the
menu.
The first is to use the arrow keys which permit to
scroll the menu list up and down.
If you know the number of the menu you can use the
other way, i.e. enter the menu by typing the
correspondingnumber.
3 - Sequence of the menus
TheoppositefigureshowstheTP8-96VIDEO
programmingmenus.
The arrow up and arrow down keys permit to scroll
theprogrammingmenus.
Thedirectaccessnumbersofthemenus are viewed
on the display on the first line (on the right).
Inthefigure,thedirect access numbershavebeen
ear-markedby awhite circle
Theygiveshortcut access tothecorresponding menu.

1-20 User manual Ver.1.0 - 03/11 TP8-96 VIDEO
Clock
Functions
Clock menu
The Clock menu permits the setting of the date and time of the system. The parameters which can be modified are:
hours, minutes, day, month and year. The system automatically modifies the weekday and the type (working day or
holiday) according to the date.
1 - Date and time setting
The digits which indicate the hour start blinking. Use
the number keys to set the hour.
Move the cursor using the arrow up key and set the
minutes.
To set the day, month and year repeat the same
operations.
ToconfirmandquitpressEXIT.
Selectanothermenuorpress EXIT again to quit
programming.
Function menu
TheFunctionmenupermitsenabling/disablingof the zones for thechimefunction.
When a chime zone detects an alarm, the system releases the acoustic signal programmed for this function.
Please note, the chime function is enabled only if the system is disarmed.
1 - Chime function
Select Functions > Chime and press YES. On the
displayareviewedthenumberandthenameofthe
first zone.
Select the zone and use the YES or NO keys to
enable or not the zone for the chime function.
Press YES to enable the zone.
Press NO to disable the zone.
Repeatthesame operations fortheother zones.
ToquitthemenupressEXIT.
Selectanothermenuor press EXITtoquit
programming.
Select the clock menu - Press the YES key
Select the function menu - Press the YES key
Menu 2
Clock
Menu 5
Functions
Other manuals for TP8-96
2
Table of contents
Other Tecnoalarm Control Panel manuals
Popular Control Panel manuals by other brands

NAPCO
NAPCO Magnum Alert 2600 Operating & installation instructions
Mastervolt
Mastervolt EasyView 5 manual
DINSpace
DINSpace SNAP Series installation instructions

Sealey
Sealey SAC3103B quick start guide

Balboa Water Group
Balboa Water Group TP500 user guide

Viessmann
Viessmann Vitotronic 200 GW1 operating instructions
Victron energy
Victron energy Skylla-i Control GX manual
See Water
See Water OSSIM-TP-100 Series Installation and operation manual
Frick
Frick QUANTUM LX Control Panel Assembly and maintenance instructions

Nibe
Nibe SMO 05 user manual
Teletek electronics
Teletek electronics ECLIPSE Series user manual
Sensitron
Sensitron PL4+ Quick installation guide
