Tecsis E3907 User manual

Force Pressure Temperature SwitchService
Operating manual
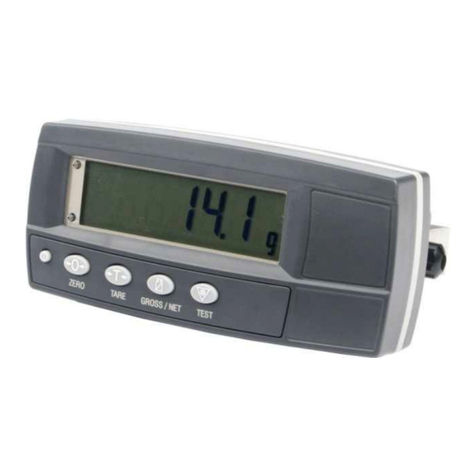
E3907
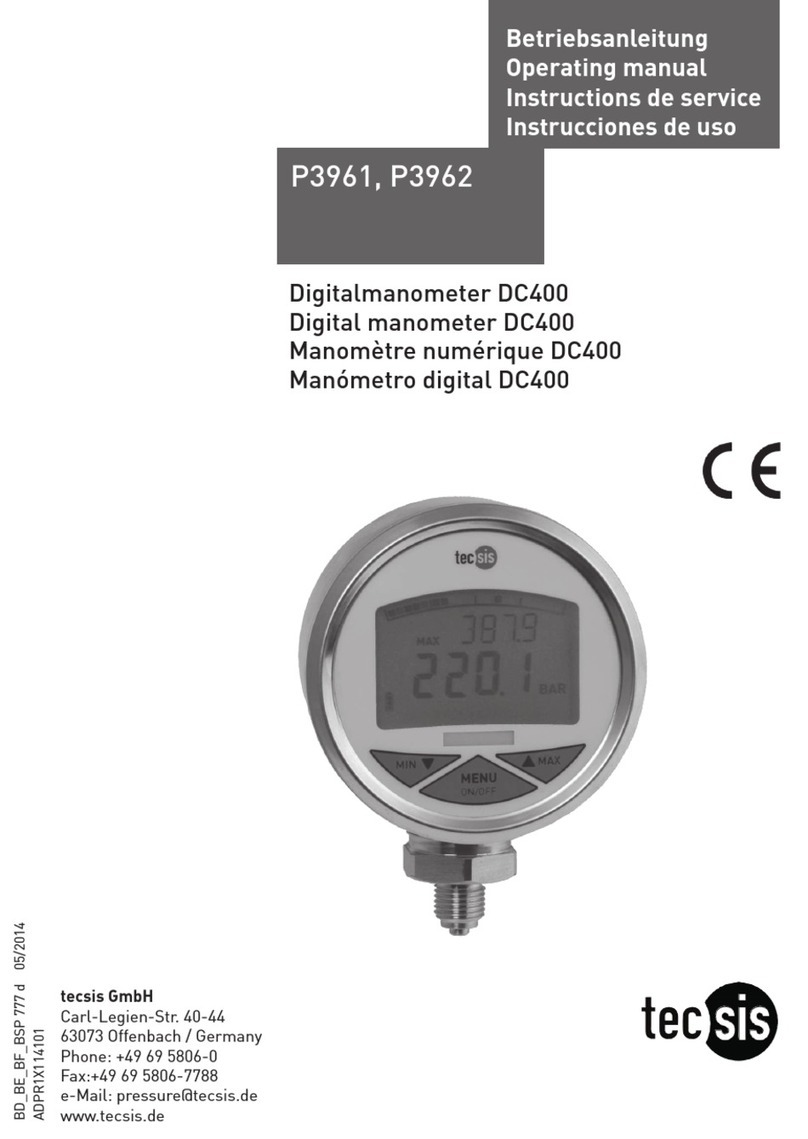
Universal handheld measuring device
with datalogger
BD 984 i 02/2013

Operating manual
E3907
Manufacturer, Location Tecsis GmbH, Germany-63073 Offenbach am Main
Valid for E3907 handheld measuring device with datalogger
Copyright © 2006 – 2015 tecsis GmbH, Offenbach, Germany
Reproduction prohibited Reproduction, in whole or in part, only with written permission
Change notice Subject to technical changes.

Operating manual
E3907
www.tecsis.de BE 984 i
1. Safety notes 1
1.1 General references ..........................................................................................1
1.2 Intended use.....................................................................................................2
1.3 General dangers............................................................................................... 2
1.4 Residual dangers.............................................................................................2
1.5 Notes identification..........................................................................................2
1.6 Health and safety rules.................................................................................... 2
1.7 Qualified personnel .........................................................................................3
1.8 Technical changes...........................................................................................3
2. References 3
3. Introduction 4
3.1 Brief description ..............................................................................................4
3.2 Power supply.................................................................................................... 4
3.3 Safe and proper use ........................................................................................5
3.4 Dimensions - Weight........................................................................................ 5
4. Instructions 6
4.1 Connection description...................................................................................6
4.2 Switching on the device..................................................................................8
4.3 Menu description .............................................................................................8
4.3.1 Brief handling overview E3907 8
4.3.2 Menu description 9
4.4 Operating example......................................................................................... 10
4.5 Measuring with the E3907............................................................................. 10
4.5.2 Parameters of a Sensor 11
4.5.3 Measuring with the E3907 11
4.6 Serial interface...............................................................................................11
4.6.1 Transfer rate / specification RS232 (V.24) / USB 11
4.6.2 Operation via the serial interface 11
4.6.3 Handling with serial interface / USB 14
4.6.4 Operation and function principle of the E3907-Data Logger 15
4.7 Calibration......................................................................................................16
4.7.1 Calibrate the active sensor with control (ACT wCON) 16
4.7.2 Calibrate the active sensor without control (ACT nCON) 16
4.7.3 Calibrate the passive sensor with control (ACT wCON) 16
4.7.4 Calibrate the passive sensor without control (ACT nCON) 16
4.7.5 Calibrate with current 4-20mA 17
4.8 Interface and Connectivity............................................................................17
4.8.1 Connection for strain gauge sensors: 17
4.8.2 Connection for active Sensors: 17
4.8.3 Visual evaluation: 17
4.8.4 Trigger input: 17
4.8.5 RS232 / USB: 17
5. Product phases 18
5.1 Transport........................................................................................................18
5.2 Commissioning and installation...................................................................18
5.3 Normal operation ...........................................................................................18
5.4 Maintenance and cleaning............................................................................ 19
5.5 Information for the safe disposal ................................................................. 19

Operating manual
E3907
BE 984 i www.tecsis.de

Operating manual
E3907
www.tecsis.de BE 984 i 1
1. Safety notes
1.1 General references
The enclosed operating instruction is intended for technically qualified personnel who has corresponding knowledge
in the field of measurement and industrial process & control technology.
The precise information about all safety notes contained in this operation manual and warnings, as well as its
technical implementation are precondition for the safe installation, the initiation, the secure operation and the
maintenance of tecsis devices. For this purpose it is absolutely necessary that all measures are carried out by
qualified personnel. All persons concerned with the project planning, installation and service of tecsis devices, must
be familiar to the security concepts in automatic control and should be qualified in this sense.
For clarity reasons, the enclosed operating instruction cannot represent complete details in all conceivable cases of
applications for the handling of tecsis devices. Further, we cannot consider the entire types of installation, handling
and maintenance. If you wish further information or if special problems occur, which were not ,or not at length
represented in this operating instruction, contact us, please..
The oblivion of the safety notes can and will lead to material damages, body injuries and death.
Tecsis devices may only be operated in accordance with the applications described in this operation
manual. Built-in devices may only be operated in appropriate installations.
With the connection and the initiation of the device, the customer accepts the general sale and delivery conditions
of tecsis GmbH. Further, he accepts eventually incomplete operation manuals. The information described is
without guarantee. Errors and changes are reserved.
Intended Purpose, Improper Usage
A tecsis device is used for displaying, processing and controlling or regulation of processes. It shall not be used as
the only tool for the prevention of dangerous states to machines and plants. Machines and plants must be
constructed in such a way, that erroneous states cannot lead to a dangerous situation for the staff (e.g. by
independent limit switches, mechanical locking devices). It must be guaranteed in particular that device-operating
errors, its malfunction or it’s breakdown do not lead to great property damages or danger for the staff.
Consequently, the device then can be used to prevent the machine or the technical installations from error
conditions.
It is also important that the use of devices does not endanger precautions for the safety of technical installations.
Emergency-off settings must remain effective in all operation modes.
Installation Notes
tecsis devices must be installed and connected by compliance with the relevant DIN- and VDE-norms. They must
be installed in such manner that an unintentional use is sufficiently excluded. The corresponding hardware and
software safety precautions are to be observed in such manner that an interruption of the supply and signal cables
cannot lead to an undefined or dangerous state. Supply and signal cables must be installed in such way, that
disturbing signals (e.g. inductive or capacitive intersperses) will not cause derogations to the function of tecsis
devices.
Disturbance, Maintenance and Repair Notes
The devices do not contain parts which can be maintained on the customer side. Repairs shall be carried out by
tecsis exclusively.
If assuming that a safe operation of the device is not possible anymore, it must be closed down and protected
against unintentional handling immediately. This, in particular, applies:
- If the device shows visible damages
- If the device is no longer operative
Operating manual
E3907
2 BE 984 i www.tecsis.de
- If parts of the device are loose or slack
- If the connection cables show visible damages
Furthermore, we point out that all obligations of tecsis exclusively result from the respective sales contract in which
the guarantee has been conclusively settled.
1.2 Intended use
Tecsis devices shall be used exclusively for measurement tasks and directly related control tasks. Any other usage
is considered as not intended.
1.3 General dangers
The equipment is state of the current safety requirements. Residual risks arising from the machine when it is
operated by untrained personnel and operated inappropriately. Any person who is in charge of installation,
operation, maintenance and repairs of the device has to read the manual and especially the safety instructions must
been read and understood.
1.4 Residual dangers
Safety engineering considerations of measurement technology have to be planned by the system designer /
equipment providers / operators to realize and take responsibility for that residual risks and to keep them as low as
possible. The relevant regulations and laws must be observed. Residual risks or dangers associated with the
measurement device should be noted.
1.5 Notes identification
Should there be any residual dangers in working with the device, this manual will refer to it with following signs:
Warning:
Possible risk of serious or life-threatening injuries. The accident prevention regulations have to be
recognized.
Attention:
Indicates a potential risk for damage to the product, process, person or environment.
Notation:
Additional information.
Important:
Reference to more detailed technical information.
1.6 Health and safety rules
To make sure our products cause no eventual risks or health threads, please mind the following health and safety
rules:
1. Please read all relevant sections of these instructions carefully before beginning work.
2. All warning labels on containers and packages must be observed.
3. Installation, operation, maintenance and repair work may only be performed by trained personnel in accordance
with the instructions given. If one of these instructions is not met, the users of the product are solely responsible for
all consequences

Operating manual
E3907
www.tecsis.de BE 984 i 3
4. Before opening the equipment, it must be disconnected from any supply.
1.7 Qualified personnel
Qualified personnel are persons who are familiar with the installation, operation, maintenance and upkeep of the
equipment and have the necessary qualifications. The device may only be used by qualified personnel according to
the technical data in connection with the special safety rules and regulations.
1.8 Technical changes
The product may not be changed constructive without our. Any modification shall exclude our liability for any
resulting damages. Repairs and modifications to the circuit boards are prohibited.
2. References
The following documents contain reference information about the E3907 handheld measuring device:
-AE 984.pdf, Datasheet of the E3907

Operating manual
E3907
4 BE 984 i www.tecsis.de
3. Introduction
This manual describes the features and installation procedures for the E3907 with firmware version 3.
3.1 Brief description
The E3907 is a DC measuring amplifier for passive or active sensors. A flexible data logger can store up to 3000
measured values with time and date. Mobile operation is possible by battery or accu operation, however, it can also
be operated with a power unit. Measuring or logging values are transmitted via an RS-232 interface to a pc or
printer. 10 parameter sets for sensors are available. There, in each case, the calibration data , the sensor
designation and the physical unit are being stored. Functions such as tare, min./max.-recall and min./max.-delete
are available during the measurement procedure. Via a trigger input the data logger or the interface can be
controlled externally.
If the E3907is being delivered with one or more sensors, these sensors will be in-calibrated to the E3907 and are
immediately ready for operation. An assignment of sensors to the corresponding parameter set is documented on
the rear of the device
3.2 Power supply
Mains operation:
Power supply: 6V DC, min. 1,8A
Fuse: Self-reset-able fuse 1,5A
Under-Overcut: Can cause measurement errors or defects.
Stress peaks: Be derived using protection components.
Voltage dropouts: Voltage dropouts up to 10ms are without consequences.
Warning:
Remove batteries when using external power supply!
The E3907 must only be used with ground reference voltage supplies, switching power supplies without earth
reference can cause measurement errors.
Battery Operation:
Battery operation: 4 x Typ: Mignon AA 1,5V
Accu operation: 4 x Typ: NiMH Mignon AA mit min. 1500mAh und 1,2V
The battery charging time for a battery capacity of 2.7 Ah approximately 9-10 hours. The constant charging current
for charging the battery is approximately 290mA. The end of charging process will be recognized with a minus delta
peak method (overcharge protection). For rapid charging of the batteries is an external battery charger (eg
Ansmann 4 - 6) recommended. The batteries can be charged at off, and while the E3907 is running.
Power supply: If the permissible battery voltage falls below the indicator starts blinking

Operating manual
E3907
www.tecsis.de BE 984 i 5
3.3 Safe and proper use
Attention:
- Protect the device from moisture, condensation, rain, snow...
- Protect the device from direct sunlight
- Protect the device from dust and dirt
- Protect the device from high or excessive ambient temperature
- Protect the device from excessive vibration.
3.4 Dimensions - Weight
Dimensions in mm: LxWxH: 200x100x40 Weight: 0,5kg

Operating manual
E3907
6 BE 984 i www.tecsis.de
4. Instructions
4.1 Connection description
Key assignment:
ENTER: Switch on the device
Confirm, one step forward in the menu
ESC: Switch off the device
Exit, one step back in the menu
:Scroll up
:Scroll down
USB: USB-Socket for: USB-Connector Type B
RS232: RS232-Socket for: 3,5mm jack 3pol.; front: GND; middle: RxD; outside: TxD
6V DC: Supply socket: 2,1mm supply connector; inside: +6V DC; outside: GND
Trig: Trigger jack for: 2,5mm Klinke 2pol.; Vorne: Trigger+; Außen: GND
SENSOR: Sensor socket for: SUB-D HD 15pol.

Operating manual
E3907
8 BE 984 i www.tecsis.de
4.2 Switching on the device
Press the ENTER button to switch on the device.
4.3 Menu description
4.3.1 Brief handling overview E3907

Operating manual
E3907
www.tecsis.de BE 984 i 9
4.3.2 Menu description
1 MEASURE Measuring mode
SENSOR__ Sensor selection for measuring mode, sensor 0-9
Here the sensor parameter set for the measurement is being selected.
The sensor parameter set must match the connected sensor.
2 SYSTEM All system parameters are being stored in this menu column.
2.1 LANG Language adjustment
The menu language can be chosen in German, English, French or Spanish
2.2 INFO Information query was configured factory-sided an is not variable
VERS NO. Software version
2.3 SCI Interface configuration
BAUD Baud rate adjustment must be conform with the receiver (pc or printer).
SCI MODE Interface configuration only refers to the measuring mode, not the logg mode!
OFF Interface off
HAND At key stroke ENTER the measured value is issued.
AUTO¹ Interval time, adjustable from 10ms to 1h (at high measuring rate only possible with highest baud
rate)
TRIGGER At impulse on trigger input the measured value is issued.
INTERFAC Auswahl der zu verwendenden Schnittstelle
USB USB interface is activated
RS232 RS232 interface is activated
2.4 RATE Measuring rate and average value
RATE Measuring rate adjustment can be chosen between 1/s and 1000/s. At fast courses (screw joint,
insert press...) always choose a fast measuring rate, e.g. 1000/s, at very slow courses a small rate,
e.g. 1/s.
AVERAGE Forming an average value, the numbers indicate by how many measurements an average value is
accumulated. Applicable at e.g. vibrations, control oscillations....
2.5 PASS Password query
After entering the password 9373 it is possible to enter menu 3 CALIB . There the sensor
parameters can be modified.
2.6 LCD LCD-contrast adjustment
If the LCD becomes unreadable by external influences e.g. solar radiation, heat or cold, the LCD-
contrast can be corrected here by using the or key
2.7 LOGG Data logger adjustments
LOGGMODE Data logger configuration.
OFF Off-switch for logger operation, by this the measuring mode is possible only.
HAND At each key stroke on ENTER a logg value is being taken over.
AUTO Adjustment of the measuring intervals.
DIAGRAM With each increasing flank of the trigger signal a logg value is being taken over.
WINDOW The window operation is being started by an increasing trigger flank and can only be finished by a
decreasing flank.
LOGGSEND Logger values are issued through the interface, press ENTER twice.
LOGGDEL Logger values are deleted, beforehand there will be a safety query whether the buffer should be
deleted.
2.8 DATE Date and time adjustment
DATE Date
TIME Time
3 CALIB Calibration menu
this is active only, if the password has been entered correctly
in 2.5PASS. For the calibration the sensor needs to be connected to the sensor socket.
¹If the SCI → AUTO interval is shorter than the set measuring rate, then the interface displays the same output until
a new value is recorded.
Sensor__ Sensor number or name of the sensor which is to be calibrated.
POINTDIS Measuring range with decimal indication of the sensor, e.g. 100,0; 200,0; 63,00;...

Operating manual
E3907
10 BE 984 i www.tecsis.de
Call menu "POINTDIS", after pressing ENTER the final value of the sensor can be entered, by
PLUS or MINUS the numeric character can be edited, by ENTER the next figure can be edited, if all
figures are edited, by PLUS and/or MINUS the comma will be shifted. For the completion of the
input press ENTER, thereafter the final value is being logged in the E3907
UNIT Input of the physical unit, e.g. Kg, Ncm, t, gr, kN, N•m, bar...
DESIG Name of the sensor e.g. sensor 1,2,3, silo, tank, mixer, balance1, motor, test1..
CALIB Selection of the sensor type (active, passive, 4-20mA, with or without calib. control..)
4.4 Operating example
- The E3907 is switched on by pressing ENTER
- Control time and date in SYSTEM menu or adjust if necessary
- Adjust language
Call menu 2 SYSTEM – 2.1 LANG. When ENTER button was pressed, the 3907 is in the selection mode. With keys
PLUS and/or MINUS the language can be selected. With ENTER the selected language will be stored. With ESC
the selected language will be discarded.
- Adjust time
Call menu 2 SYSTEM – 2.8 DATE. When ENTER button was pressed TIME will appear on the LCD. Press ENTER
again and the time can be adjusted. With PLUS and MINUS the hours can be adjusted. After ENTER the minutes
can be adjusted with PLUS and MINUS. With ENTER the selected time will be stored. With ESC the selected time
will be discarded
- Change to the measuring mode
From menu 1 MEASUR by pressing ENTER the list of all sensors is called. With PLUS and/or. MINUS a sensor
parameter set is being chosen. With ENTER the GM 80 is being adjusted to this sensor parameter set. With ESC it
is possible to switch back to menu 1 MEASUR from any mode.
- Change measuring rate by measuring mode
The measuring mode can be left by pressing ESC. After pressing ESC again, the GM 80 will be in menu 1
MEASUR. From there the menu 2 SYSTEM – 2.4 Rate can be called. Select RATE by key PLUS and/or INUS. By
pressing key ENTER the set measuring rate is being displayed first. By key PLUS and/or MINUS a new measuring
rate can be adjusted. By ENTER the new measuring rate will be taken over, by ESC the new measuring rate will be
discarded..
- Switch off E3907
E3907 is switched off, when ESC button is pressed >3 seconds.
4.5 Measuring with the E3907
4.5.1 Selected sensor
Force sensor with measuring range: 200KN
Sensitivity 2mV/V
Designation e.g.: Press
Parameter set: Sensor no.: 3
Option: 100% Calibration control

Operating manual
E3907
www.tecsis.de BE 984 i 11
4.5.2 Parameters of a Sensor
After entering the password (9373) in menu 2SYSTEM-2.5PASS, the sensor can be installed in the calibration
menu. Following parameters are possible:
Sensor__ Sensor no. 3 , Sensor 0 – 9 possible
POINTDIS 200,0 Match meas. range and decimal point (max. 9999)
UNIT _kN, 1 – 3 digit unit possible
DESIGN Press, up to 8 digit name (or numbers) arbitrary
CALIB PAS_wCON , Select Passive with cal. control. See data sheet of sensor
0% LOAD Unload sensor, 0% value of sensor is assigned to display
100% CON Autom. Calibration, 100% value of sensor is assigned to display for example 200,0 kN
SAVE ENTER or ESC , Confirm or discard
4.5.3 Measuring with the E3907
In order to be able to now measure with this sensor, the sensor " Press" is selected in the measuring mode. During
a measurement, a minimum and maximum value buffer can be called with the MINUS key. The respective
displayed minimum or maximum value can be deleted by ENTER.
If the measured value shall be sent through an interface to a pc or printer, the baud rate must be adjusted to the
receiver and at SCI-MODE the operating mode must be chosen. For example: HAND, a measured value with time
is displayed during every keystroke on ENTER while measuring.
For data logging, adjust operating mode in the logger mode, e.g. choose AUTO and interval time e.g. 10 sec and
change to measuring mode. A measured value with time is now stored every 10 sec. In mode LOGGSEND, these
data can then be sent through the interface.
Notation:
When running the device via USB port, the baud rate must be set correctly. This must match the
baud rate of the virtual com port on the receiving PC.
4.6 Serial interface
The E3907 handheld instrument uses for the serial data transfer either a RS232 or a USB interface.
The USB interface is managed on the PC as a virtual COM port. For the use of the USB port, the
PC must have a Windows operating system (2k, XP, Vista, 7) and it must be installed the USB
drivers from tecsis. After installing the drivers, the virtual COM port below can be used as described
below.
4.6.1 Transfer rate / specification RS232 (V.24) / USB
Parity: none
Number of data: 8 (1Byte) 8N1
Stoppbit: 1
Baudrate adjustable (2400; 4800; 9600; 19200; 38400; 115200 Baud)
Even in USB mode, the baud rate in the E3907 handheld device and the connected device must
match.
4.6.2 Operation via the serial interface
Through the serial interface, measurement values can be issued singly or automatically by the E 3907.
The commands can be sent to the E 3907 via a terminal program or PLC.
If the E3907 is in the measuring mode, following commands are available:

Operating manual
E3907
12 BE 984 i www.tecsis.de
4.6.2.1 Command overview
ASCII
HEX
Description
0
0x30
Query continuous measured value (signed integer)
1
0x31
Query maximal value (signed integer)
2
0x32
Query minimal value (signed integer)
3
0x33
Tare display
4
0x34
Reset maximal value
5
0x35
Reset minimal value
6
0x36
Actuate calibration control for sensors with 100 % control resistance
7
0x37
Switch off calibration control for sensors with 100 % control resistance
A
0x41
Read-Out datalogger
B
0x42
Delete datalogger
C
0x43
Read-Out current sensor parameter
D
0x44
Read-Out status
E
0x45
Read-Out complete status
g
0x67
Change protocol setup
k
0x6B
ENTER
l
0x6C
PLUS
m
0x6D
MINUS
n
0x6E
ESC
Outside of the measuring mode following commands are available:
ASCII
HEX
Description
A
0x41
Read-Out datalogger
C
0x43
Read-Out current sensor parameter
D
0x44
Read-Out status
E
0x45
Read-Out complete status
a
0x61
Write time
b
0x62
Read-Out time
c
0x63
Write company header
d
0x64
Read-Out company header
e
0x65
Write all sensor parameters
f
0x66
Read-Out all sensor parameters
g
0x67
Change protocol setup
k
0x6B
ENTER
l
0x6C
PLUS
m
0x6D
MINUS
n
0x6E
ESC

Operating manual
E3907
www.tecsis.de BE 984 i 13
4.6.2.2 Read-Out of current sensor parameters:
Sensor designation
8Byte
ASCII
Display final value
2Byte
packed BCD-figure
Unit
3Byte
ASCII
Sensor type and digit
1Byte
0xAB: A ... Sensor type, B ... digit of the dec. point (binary coded)
Sensor type:
0xXXXX XXXX
||||
0000 ... active with calibration control 0%load and 100% load calibration
0001 ... active without calibration control 0%load and 100% load calibration
0010 ... active without calibration control 0%load calibration and edit 100%load V
0011 ... active without calibration control edit 0%load V and 100%load V
0100 ... passive with calibration control 0%load and 100% load calibration
0101 ... passive without calibration control 0%load and 100% load calibration
0110 ... passive without calibration control 0%load calibration and edit 100% load in mV/V
0111 ... passive without calibration control edit 0%load and 100% load in mV/V
1000 ... current 0%load and 100% load calibration
1001 ... current 0%load calibration and edit 100%load in mA
1010 ... current edit 0%load mA and 100%load mA
Dec. point:
0xXXXX XXXX
||||
|000 ... _5000___
|001 ... _5,000__
|010 ... _50,00__
|011 ... _500,0__
|100 ... 5,000___
0%load
2Byte
HEX-value (MSB/LSB)
100% load
2Byte
HEX- value (MSB/LSB)
4.6.2.3 Read out status:
Status 2Byte, general error condition of the E3907
4.6.2.4 Read-Out complete status:
Status
2Byte
general error condition of the GM 80
Measuring rate
1Byte
0x01 … 1000/sec
0x02 … 100/sec
0x03 ... 10/sec
0x04 ... 1/sec
Average value
1Byte
0x01 ... x/1
0x02 ... x/2
0x04 ... x/4
0x08 ... x/8
0x10 ... x/16
0x20 ... x/32
SCI_MODE
1Byte
0x00 ... interface off
0x04 … hand mode
0x08 … automatic mode
0x0C … trigger mode
SCI_MODE_DELAY
1Byte
0x02 …10ms
0x03 … 100ms
0x04 … 1s
0x05 … 10s
0x06 ... 1min
0x07 ... 10min
0x08 ... 1h
LOGGMODE
1Byte
0x00 ... logger off
0x04 ... hand mode
0x08 ... automatic mode
0x0C ... graph mode
0x10 ... screen mode
LOGGMODE_DELAY
1Byte
0x01 … 1ms
0x02 …10ms
0x03 … 100ms
0x04 … 1s
0x05 … 10s
0x06 ... 1min
0x07 ... 10min
0x08 ... 1h
Language
1Byte
0x00 ... GERMAN
0x02 ... ENGLISH
0x04 ... FRENCH
0x06 ... SPANISH
Protocol status
1Byte
0xXXXX XXXX (binary coded)
|||| ||||
|||| |||1 ... do not send conclusion character
|||| ||1 ... send CR/LF
|||| |1 ... send CR
|||| 1 ... send LF
4.6.2.5 Read time
The writing is identically with the data block for receipt of time, however, the data block for writing is protected with a
checksum and the corresponding weighted checksum

Operating manual
E3907
14 BE 984 i www.tecsis.de
4.6.2.6 Read time
DAY.MONTH.YEAR
2xspace
HOURS:MINUTES:SECONDS
4.6.2.7 Write company header
The input is ended either if 256 characters are received or if the character ETX (0x03) Strg-C is contained in the
character string.
4.6.2.8 Read Company Header
With this command the company header, which is stored in the E3907, can be read.
4.6.2.9 Write all parameters
The write-data block for all sensors is identical to the received read all parameters-data block. However for the
writing of sensor parameters a checksum and the corresponding weighted checksum is required.
4.6.2.10 Read all parameters
The output of all parameters from sensor 1 to sensor 10 occurs in following sequence:
Sensor designation
Final display value
Unit
Sensor type (calibration type) / decimal place
Calibration values 0% load, 100% load with respectively 2 bytes
For this see command read-out of current sensor parameters.
4.6.2.11 Change protocol setup
Protocol status
1Byte
0xXXXX XXXX (binary coded)
|||| ||||
|||| |||1 ... no closing character is sent
|||| ||1 ... send CR/LF
|||| |1 ... send CR
|||| 1 ... send LF
4.6.2.12 Calculation of the Checksum (CS) and the Weighted Checksum (wCS)
The calculation takes place via all parameter bytes (without the command byte). At the CS all bytes are added
(overflows are not considered here). For the calculation of the wCS the CS is added to the wCS. At overflow the
wCS is incremented by 1.
4.6.3 Handling with serial interface / USB
Formatting the serial interface output:
Output format in SCI mode:
HAND:
Algebraic sign, measured value, unit, time and CRLF
AUTO:
10ms
Signed integer and CRLF
100ms
Signed integer and CRLF
1s
Algebraic sign, measured value, unit, time and CRLF
10s
Algebraic sign, measured value, unit, time and CRLF
1min
Algebraic sign, measured value, unit, time and CRLF
10min
Algebraic sign, measured value, unit, time and CRLF
1h
Algebraic sign, measured value, unit, time and CRLF
TRIGGER:
Signed integer and CRLF
Output Format in LOGG mode:
HAND:
Algebraic sign, measured value, unit, time and CRLF
AUTO:
Algebraic sign, measured value,unit and CRLF
DIAGRAM:
Algebraic sign, measured value,unit and CRLF
WINDOW:
Algebraic sign, measured value,unit and CRLF

Operating manual
E3907
www.tecsis.de BE 984 i 15
Adjustments in the SCI Mode
SCI OFF: At this adjustment a transfer of measured values from the E3907 is disabled. The E3907 can be
controlled however with the E3907-commands.
HAND: In this mode a measured value is issued via the serial interface when the Enter key is pressed at the E3907.
AUTO: In this mode a measured value is issued via the serial interface in the adjusted delay
TRIGGER: At a trigger event In this mode, a measured value is written in the logger. Since the trigger pulses may
occur in 10ms raster and additional time-logg is not possible. The flank of the trigger pulse must be on HIGH for at
least 4ms. Then it must be on LOW for at least 6ms.
WINDOW: This mode reacts to increasing, respectively decreasing flanks. With a decreasing flank the logging of
the measured values is started. Now the measured values are written in the data logger in 1ms raster. A decreasing
flank ends the recording.
4.6.4 Operation and function principle of the E3907-Data Logger
The data logger can, if the E3907 is not in the measuring mode, be read by the menu option 2,7 LOGG - SENDING
or by the command "A" via the interface. Outside of the measuring mode the data logger is deleted only by the
menu option 2,7 LOGG - DELETION.
If the E3907 is in the measuring mode, the data logger can be read with the command "A" and be deleted with the
command "B".
If the measuring mode is being switched on from the menu option 1MEASURING-sensor selection,
the starting time of the measurement, the current sensor designation, the final value of the measuring range, the
adjusted measuring rate and the logger mode (e.g.: AUTO 1ms) are saved in the logger.
NOTE: All previous measured values are deleted here!
With the read-out of the data logger via the serial interface different adjustments are sent from the E3907.
a) Company header
b) Starting time of the measurement
c) Sensor designation
d) Final display value
e) Adjusted measuring rate
f) Adjusted logger mode
g) Thereafter the measured values
In the HAND MODE the measured values are always logged with the time. The measured value is logged at the
data in the AUTOMODE. A time can be assigned to each measured value by the indicated starting time.
Since in GRAPHS and in the WINDOW MODE trigger events smaller than 1sec can occur, an additional time log is
not possible.
Adjustments in the Logg Mode
LOGG OUT: Here the data logger is switched off. The logg mode in the measuring mode is switched to "LOGG
OUT" as soon as the entire data logger has been edited.
HAND: In this mode a measured value is written into the data logger when the enter key was pressed at the
E3907. By an additional logg of time, there is a time assignment for each measured value.
AUTO : In this mode in the adjusted Delay a measured value is written into the data logger. By the stored
starting time there is a time assignment for each measured value.
GRAPH: In this mode at a trigger event a measured value is written into the logger. Since the trigger pulses
occur in 10ms raster, an additional logg of the time is not possible. The flank of the trigger pulse must
stand on HIGH for 4ms at least. Afterwards on LOW for at least 6ms.

Operating manual
E3907
16 BE 984 i www.tecsis.de
WINDOW: This mode reacts to increasing and/or decreasing flanks. At an increasing flank the logging of the
measured values is started. From now on the measured values are written in the data logger with
1ms raster. A decreasing flank ends the recording LOGG OUT.
4.7 Calibration
4.7.1 Calibrate the active sensor with control (ACT wCON)
Calibration possibilities:
- After pressing the ENTER key, the automatic calibration begins. The device will read the 0% Load value and
display WARM UP. After that the 100% Load value will be read and the device will display WARM UP. After the
WARM UP is finished the device will display SAFE?. Press ENTER to confirm or ESC to reject.
4.7.2 Calibrate the active sensor without control (ACT nCON)
Calibration:
- measure 0% Load and measure 100% Load
- measure 0% Load and enter the difference [100% Load in V – 0% Load in V]
- enter 0% Load in V and enter difference [100% Load in V – 0% Load in V]
Press key or and choose between 0% Load or Sensitivity
0% Load - Relieve sensor from load
or Sensitivity - Enter the value fort the sensitivity in V
Press Key or and choose between 100% Load or Sensitivity
100% Load -Calibrate with 100% Load
or Sensitivity - Enter the value for the sensitivity in V
SAFE - Accept calibration values
4.7.3 Calibrate the passive sensor with control (ACT wCON)
Calibration:
The device will read the 0% Load value and display WARM UP. After that the 100% Load value will be read and the
device will display WARM UP. After the WARM UP is finished the device will display SAFE?. Press ENTER to
confirm or ESC to reject.
4.7.4 Calibrate the passive sensor without control (ACT nCON)
Calibration:
- measure 0% Load and measure 100% Load
- measure 0% Load and enter 100% Load in mV/V
- enter 0% Load in mV/V and enter 100% Load in mV/V
Press key or and choose between 0% Load or Sensitivity
0% Load -Relieve sensor from load
or Sensitivity - Enter the value fort the sensitivity in V
Press Key or and choose between 100% Load or Sensitivity
100% Load -Calibrate with 100% Load
or Sensitivity - Enter the value for the sensitivity in mV/V
SAFE - Accept calibration values.
Table of contents
Other Tecsis Measuring Instrument manuals

Tecsis
Tecsis P3922 User manual

Tecsis
Tecsis E3906 User manual

Tecsis
Tecsis E1932 User manual

Tecsis
Tecsis P2590 User manual

Tecsis
Tecsis P2107 User manual

Tecsis
Tecsis Manoport E3905 User manual

Tecsis
Tecsis E3904 User manual

Tecsis
Tecsis F7301 User manual

Tecsis
Tecsis E1999X500 User manual

Tecsis
Tecsis P2600 User manual
Popular Measuring Instrument manuals by other brands

PCB Piezotronics
PCB Piezotronics J357B14 Installation and operating manual

Badger Meter
Badger Meter Blancett B2800 Standard Programming manual

Bierer
Bierer HP72 operating instructions

SBC
SBC Saia PCD AWD3D5WS Assembly and operating instructions

Seneca
Seneca S311D L Series installation manual

Ahlborn
Ahlborn ALMEMO 2490-2 operating instructions