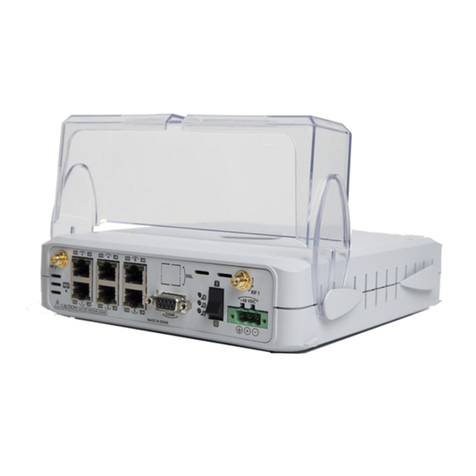
Teldat RS1800 Series User manual

RS1800 series
Installation Manual
Copyright© Teldat Dm1010-I Version 1.2 07/2020 Teldat S.A.
Teldat S.A. Manual
RS1800 series 1

Legal Notice
Warranty
This publication is subject to change.
Teldat S.A. offers no warranty whatsoever for information contained in this manual.
Teldat S.A. is not liable for any direct, indirect, collateral, consequential or any other damage connected to the deliv-
ery, supply or use of this manual.
Manual Teldat S.A.
2RS1800 series

Table of Contents
I RelatedDocuments................................. 1
Chapter1 AboutthisGuide.................................. 2
1.1 Supporteddevices................................... 2
1.2 Who should read this manual? . . . . . . . . . . . . . . . . . . . . . . . . . . . . . . 2
1.3 When should this manual be read? . . . . . . . . . . . . . . . . . . . . . . . . . . . . 2
1.4 Whatisinthismanual?................................. 2
1.5 Whatisnotinthismanual? ............................... 2
1.6 How is the information organized? . . . . . . . . . . . . . . . . . . . . . . . . . . . . 3
1.7 Technicalsupport.................................... 3
Chapter2 RS1800series................................... 4
2.1 Characteristics..................................... 4
2.1.1 Powersupply ..................................... 4
2.1.2 Hardwaremonitoring.................................. 4
Chapter 3 Components and Power Supply . . . . . . . . . . . . . . . . . . . . . . . . . . 5
3.1 Components...................................... 5
3.1.1 Frontpanel ...................................... 5
3.1.2 Rearpanel....................................... 7
3.1.3 Sidepanels..................................... 10
3.1.4 Undersidepanel................................... 10
3.2 Mounting an anti-theft security cable . . . . . . . . . . . . . . . . . . . . . . . . . . 11
3.3 Rackinstallation................................... 11
3.3.1 Standalone ..................................... 12
3.3.2 Wallmounting.................................... 12
3.4 Plug-inModules................................... 12
3.5 Powersource .................................... 12
3.5.1 Powersource .................................... 12
3.6 RSTbutton ..................................... 13
3.6.1 Rebootingthedevice................................. 13
3.6.2 Defaultconfiguration................................. 13
3.7 Dataconnections................................... 14
3.7.1 4-port Ethernet switch connections . . . . . . . . . . . . . . . . . . . . . . . . . . . 14
3.7.2 WANconnections................................... 15
3.7.3 WWAN antenna connection (cell connector) . . . . . . . . . . . . . . . . . . . . . . . 15
Teldat S.A. Table of Contents
RS1800 series i

3.7.4 Connecting the GPS antenna . . . . . . . . . . . . . . . . . . . . . . . . . . . . . 17
3.7.5 Wireless LAN internal antennas . . . . . . . . . . . . . . . . . . . . . . . . . . . . 17
3.7.6 Connecting for configuration . . . . . . . . . . . . . . . . . . . . . . . . . . . . . . 18
3.8 InstallingtheSIMcard................................. 18
Chapter4 Compliance.................................... 21
4.1 Manufacturerinformation ............................... 21
4.2 Riskidentification................................... 21
4.3 Safetywarnings ................................... 21
4.4 WEEEinformation.................................. 23
4.5 REACH....................................... 23
4.6 Power usage and energy efficiency . . . . . . . . . . . . . . . . . . . . . . . . . . . 23
4.7 PSUenergyefficiency ................................ 23
4.8 EC declaration of conformity (non-radio version) . . . . . . . . . . . . . . . . . . . . . 24
4.9 EC declaration of conformity (radio version) . . . . . . . . . . . . . . . . . . . . . . . 25
4.10 CEmarking..................................... 25
4.11 Nationalrestrictions.................................. 25
4.12 FCCstatements................................... 26
4.12.1 Interference..................................... 26
4.12.2 Radiationexposure.................................. 26
4.12.3 Radio frequency interference requirements. . . . . . . . . . . . . . . . . . . . . . . . 26
4.13 Operatingfrequency ................................. 26
4.14 Intended use of the equipment . . . . . . . . . . . . . . . . . . . . . . . . . . . . . 26
Appendix A Technical Information. . . . . . . . . . . . . . . . . . . . . . . . . . . . . . . 27
A.1 Troubleshooting................................... 27
A.2 Updatingthesoftware................................. 28
A.3 Connectingtothedevice ............................... 28
A.3.1 Connecting using the local console (Aux connector) . . . . . . . . . . . . . . . . . . . . 28
A.4 Connectors ..................................... 29
A.4.1 LANconnector(switch)................................ 29
A.4.2 WANBase-Tconnector................................ 29
A.4.3 WANSFPconnector................................. 29
A.4.4 WWANconnector .................................. 29
A.4.5 GPSconnector ................................... 30
A.4.6 Configurationconnector................................ 30
A.4.7 Powersupplyconnector................................ 30
Table of Contents Teldat S.A.
ii RS1800 series

A.5 Technicalspecifications................................ 30
A.5.1 Hardwarearchitecture................................. 31
A.5.2 LANinterface .................................... 31
A.5.3 WANBase-Tinterface................................. 31
A.5.4 WANSFPinterface.................................. 31
A.5.5 WirelessWANinterface................................ 33
A.5.6 GPSinterface.................................... 33
A.5.7 Wireless LAN interface (radio 1) . . . . . . . . . . . . . . . . . . . . . . . . . . . . 34
A.5.8 Wireless LAN interface (radio 2) . . . . . . . . . . . . . . . . . . . . . . . . . . . . 35
A.5.9 Configurationinterface ................................ 35
A.5.10 Powersupply .................................... 36
A.5.11 Dimensionsandweight................................ 36
A.5.12 Environmental specifications . . . . . . . . . . . . . . . . . . . . . . . . . . . . . . 36
Appendix B CE Radio Information. . . . . . . . . . . . . . . . . . . . . . . . . . . . . . . 37
B.1 RFWANspecifications................................ 37
B.2 WI-FIspecifications.................................. 38
Appendix C FCC Radio Information . . . . . . . . . . . . . . . . . . . . . . . . . . . . . . 40
C.1 LTE EM7455 WWAN frequency requirements . . . . . . . . . . . . . . . . . . . . . . 40
Teldat S.A. Table of Contents
RS1800 series iii
I Related Documents
Teldat Dm704-I Configuration and Monitoring
Teldat Dm748-I Software Updating
Teldat Dm781-I Cellular Interface
Teldat Dm812-I GPS
Teldat Dm830-I MNGPLAT Feature
bintec Next Generation WLAN Manual
Teldat S.A. Related Documents
RS1800 series 1
Chapter 1 About this Guide
This is the installation manual for the RS1800 series router and contains information on how to correctly install the
device in a working environment.
1.1 Supported devices
The information provided in this installation manual only applies to the RS1800 series router.

Note
The Wi-Fi version includes an embedded bintec WE2022ac access point.
Communication with the embedded access point is possible thanks to a separate port in the switch in-
terface. This port can appear under "wlan" or be listed as port 5.
1.2 Who should read this manual?
1.3 When should this manual be read?
Read this guide as soon as you are ready to familiarize yourself with the device and its components.
This manual will help you understand your new device in greater depth.
1.4 What is in this manual?
This installation guide contains the following information:
• A description of the features available in the RS1800 series router.
• Technical specifications.
• Power supply requirements.
• Elements that can be connected when the router is operating.
• How to install and uninstall the modules and power sources.
• A description of the LEDs and connectors in the device.
• Troubleshooting.
1.5 What is not in this manual?
This manual does not contain information on software or device configuration. For details on how to configure this
device, please see the relevant protocol manuals found at the Teldat website: http://www.teldat.com
Note
For information on how to configure the bintec WE2022ac Wi-Fi access point, refer to the "bintec Next
Generation WLAN" manual.
1 About this Guide Teldat S.A.
2RS1800 series

For more information on the latter, please refer to the "bintec Next Generation WLAN" manual.
This manual should be read by the support personnel who need to configure, maintain and monitor the device.

1.6 How is the information organized?
Each chapter focuses on a specific part of the hardware and its components. All descriptive and technical specifica-
tions, as well as information on a given component, can be found in the relevant chapter.
1.7 Technical support
Teldat S.A. offers technical support. Device software can be upgraded on a regular basis for maintenance purposes
and in case new features are developed.
Contact information:
Tel.: +34 918 076 565 - Fax: +34 918 076 566
Teldat S.A. 1 About this Guide
RS1800 series 3

Chapter 2 RS1800 series

2.1 Characteristics
2.1.1 Power supply
2.1.2 Hardware monitoring
The LEDs on the front panel are used to monitor the hardware in the RS1800 series router. These LEDs provide
visual information on the state of the device and reference the condition of the hardware components, indicating
whether or not there is connectivity, data flow, etc.
For further information on the LED panel, please see Components on page 5.
2 RS1800 series Teldat S.A.
4RS1800 series
For further information on the different RS1800 series power supplies, please see Components and Power Supply
on page 5, Power source on page 12.

Chapter 3 Components and Power Supply
The following chapter provides detailed information on the chassis of the RS1800 series router and its components.
This information includes:
• Components.
• Information on assembly.
• Power supply.
• RST button.
• Data connection.
• SIM cards installation.
• Embedded Access Point.
3.1 Components
3.1.1 Front panel
The following figure shows the front panel.
Fig. 1: Front Panel of the RS1800w device
Fig. 2: Front Panel of the RS1800 device
The front panel components are as follows:
Front panel components
Item Description
A LED panel.
The LED panel provides information on the status of the components (indicating whether they are active or not) and
on network activity.
LEDs
LED Definition Status Indication
Power Power / Switch On-Off Off -> No power through PSU.
On -> Powered through PSU.
Status General Status /
Default Configuration Process
Off -> System off.
Red -> Error, component operating incorrectly.
Green -> System initialized and operating.
Amber (blink) -> Default configuration.
Teldat S.A. 3 Components and Power Supply
RS1800 series 5

WAN-1 Base-T / SFP Off -> No link, or not used.
Green -> Link (1G). Blinking: traffic activity.
Amber -> Link (<1G). Blinking: traffic activity.
Red -> Error. Interface failure.
WAN-2 Base-T / SFP Off -> No link, or not used.
Green -> Link (1G). Blinking: traffic activity.
Amber -> Link (<1G). Blinking: traffic activity.
Red -> Error. Interface failure.
LAN Switch LAN switch interface activity Green -> connected (all connected ports at 1G). Blinking: connec-
tion data activity.
Amber -> connected (at least one port at <1G). Blinking: connec-
tion data activity.
Red -> Disconnected.
Off -> Interface off.
WLAN-1
(Depending on
the model)
Access Point 2.4 GHz radio Off -> Radio module and/or SSIDs inactive.
Red -> No connection, or connection disabled (shutdown).
Amber -> Enabled, but no associated STAs.
Green -> Connected. Blinking: connection data activity.
WLAN-2
(Depending on
the model)
Access Point 5 GHz radio Off -> Radio module and/or SSIDs inactive.
Red -> No connection, or connection disabled (shutdown).
Amber -> Enabled, but no associated STAs.
Green -> Connected. Blinking: connection data activity.
Cell
(Depending on
the model)
Status Off -> System stopped.
Red -> Interface is unavailable because it is installing, disabled
(shutdown), or due to auto-test failure.
Amber -> Idle:
• Rapid blinking. It has not registered in the network, or the qual-
ity is insufficient.
• Slow blinking. GSM connection (GPRS).
• Steady. WCDMA (UMTS / HSDPA) connection.
Green -> Connected. Blinking: connection data activity.
RSSI.
Coverage indication
Off -> No coverage.
1-to-4 LEDs -> Level of coverage.
SIM-1 Off -> SIM-1 not used.
ON -> SIM-1 in use.
3 Components and Power Supply Teldat S.A.
6RS1800 series

SIM-2 Off -> SIM-2 not used.
ON -> SIM-2 in use.
GPS
(Depending on
the model)
GPS Status Off -> GPS not available or not configured.
Green -> GPS coordinates have been acquired. Blinking: NMEA
data.
Amber -> Bad quality (HDOP).
Red -> Error.
Cloud Cloud Information Off -> No Cloud configuration.
Green -> Registering /connecting to the Cloud.
Amber -> Connected to the Cloud. Blinking: traffic exchange with
the Cloud controller.
Red -> Cloud registration error.
3.1.2 Rear panel
The following figure shows the rear panel. Here you will find the majority of the RS1800 series router connectors.
Fig. 3: Rear panel
The following table provides information on each connector, as well as a description:
Rear panel components
Item Description
AFunction.
B RST. Reset button. For further information on how the reset button works, please
see RST button on page 13.
C 4-port Gigabit Ethernet switch.
For more information on the LAN interface, refer to:
-4-port Ethernet switch connections on page 14
-LAN connector (switch) on page 29
-LAN interface on page 31
D Eth WAN-1 Base-T. WAN Gigabit Ethernet.
For more information on the WAN interface, refer to:
-WAN connections on page 15
-WAN Base-T connector on page 29
-WAN Base-T interface on page 31
Teldat S.A. 3 Components and Power Supply
RS1800 series 7

E Eth WAN-1 SFP.
For more information on the SFP interface, refer to:
-WAN connections on page 15
-WAN SFP connector on page 29
-WAN SFP interface on page 31
F Eth WAN-2 Base-T. WAN Gigabit Ethernet.
For more information on the WAN interface, refer to:
-WAN connections on page 15
-WAN Base-T connector on page 29
-WAN Base-T interface on page 31
G Eth WAN-2 SFP.
For more information on the SFP interface, refer to:
-WAN connections on page 15
-WAN SFP connector on page 29
-WAN SFP interface on page 31
H Aux. Provides access to the RS1800 series local console for configuration and
monitoring purposes.
For more information on the Aux connector, refer to:
-Connecting for configuration on page 18
-Configuration connector on page 30
-Configuration interface on page 35
I SIM Card 1-2. Slot where you can insert the SIM cards for -4G models.
Refer to Installing the SIM card on page 18 for more information on SIM installa-
tion.
J On/Off switch.
K Power source connection (PSU).
Refer to Power source on page 12 for more information on Power connection and
Power supply on page 36 for power specifications applicable to theRS1800
series device.
L LED S (Status). Refer to LEDs on page 5 for more information.
M LED PWR (Power). Refer to LEDs on page 5 for more information.
N Functional earthing. Usually disconnected.
O Cell connectors. Depend on model.
For more information on the Cellular interface, refer to:
-WWAN antenna connection (cell connector) on page 15
3 Components and Power Supply Teldat S.A.
8RS1800 series

-WWAN connector on page 29
-Wireless WAN interface on page 33
P GPS connector. Dependant on model.
For more information on the GPS interface, refer to:
-Connecting the GPS antenna on page 17
-GPS connector on page 30
-GPS interface on page 33
In addition to the foregoing, the rear panel also has LEDs linked to the Switch Ethernet interfaces.
3.1.2.1 LEDs
The following figure shows the router's Ethernet switch LED indicators:
Fig. 4: Switch LEDs
Switch LED indicators
LED Description
Yellow Connected to 10 M:
- Steady: Not transferring data.
- Blinking: Transferring data.
Yellow + Green Connected to 100 M:
- Steady: Not transferring data.
- Blinking: Transferring data.
Green Connected to 1000 M:
- Steady: Not transferring data.
- Blinking: Transferring data.
None The interface is either unavailable, not installed or not registered.
The following figure shows the router's WAN LED indicators (only for the Base-T connector):
Fig. 5: WAN LEDs
WAN LED indicators
LED Description
Teldat S.A. 3 Components and Power Supply
RS1800 series 9

Yellow Connected to 10 M:
- Steady: Not transferring data.
- Blinking: Transferring data.
Yellow + Green Connected to 100 M:
- Steady: Not transferring data.
- Blinking: Transferring data.
Green Connected to 1000 M:
- Steady: Not transferring data.
- Blinking: Transferring data.
None Interface is either unavailable, not installed, or not registered.
3.1.3 Side panels
Two antenna connectors are located on the side panels.
Fig. 6: Left and right side panels
The connectors are as follows:
Side panel connectors
Item Description
A Aux 2 and Aux 3 connectors. Reserved for future use.
3.1.4 Underside panel
The following components are located on the underside panel:
3 Components and Power Supply Teldat S.A.
10 RS1800 series

Fig. 7: Underside panel
Underside panel components
Item Description
A Adhesive rubber feet (these are not required for rack mounting).
3.2 Mounting an anti-theft security cable
RS1800 series devices feature a standard Kensington security slot for optionally attaching a security cable. The T-
bar lock of the security cable allows the device to be attached to an anchor point, thus preventing potential thefts.
The security slot is located on the rear panel of the housing, as shown in the following figure:
Fig. 8: Security Slot
3.3 Rack installation
The RS1800 series device can be installed in a 19” rack. The rack mounting brackets and screws are not provided
by default and must be acquired separately.
Both mounting brackets are attached to the device by means of 5 screws, as shown in the following figure:
Fig. 9: Rack anchors
Teldat S.A. 3 Components and Power Supply
RS1800 series 11

Note
The device has been designed to allow brackets to be attached to the front or rear of the router
chassis.
3.3.1 Standalone
RS1800 series devices can be placed as standalones on a flat, stable surface. The adhesive rubber feet must be
stuck to the underside panel to prevent the router from sliding.
Make sure there is enough space around the router (for ventilation purposes) and check that the power cord and
data cables can easily reach it.
3.3.2 Wall mounting
The RS1800 series device cannot be mounted on a wall.
3.4 Plug-in Modules
The RS1800 series does not have plug-in modules.
3.5 Power source
The RS1800 series router is powered through an external AC/DC power adapter.
Warning
The equipment must be used with the power supply provided by the manufacturer.
Workplace conditions. Main characteristics
• Avoid humid and/or dusty locations.
• Direct exposure to sunlight and other heat sources should be avoided. The device should not be placed amongst
papers, magazines or other elements that could hinder natural air circulation.
• The device should not be placed close to strong electromagnetic fields (such as speakers, engines, etc.).
• Knocks and/or strong vibrations should be avoided during transport, operation and storage.
Warning
3.5.1 Power source
To avoid electric shocks, residual current circulation and other unwanted effects that affect communications, the fol-
lowing is recommended:
Warning
For safety and EMC purposes, the external power supply must be connected to a grounded power out-
let.
3 Components and Power Supply Teldat S.A.
12 RS1800 series
The electric current in power cables, telephone lines and communication cables is dangerous. To pre-
vent electric shocks, before installing, handling or opening the equipment covers, connect and discon-
nect the cables following the steps set forth in Connecting on page 13 and Disconnecting on page 13.
To connect the power supply to the device, please follow the steps set out in Connecting on page 13.

Note
We recommend plugging all interconnected communication devices to the same grounded power out-
let.
3.5.1.1 Connecting
• Make sure the on/off power supply switch is in the OFF position (0).
• Make sure the power supply is NOT connected to the mains or to the device.
• Connect all data cables.
• Connect the external adapter power cable to the device.
• Connect the adapter power cable to the main supply (wall socket).
• Put the device's on/off power supply switch in the ON position (1).
3.5.1.2 Disconnecting
• Put the on/off power supply switch in the OFF position (0).
• Disconnect the adapter power cable from the main supply (wall socket).
• Remove the power supply cable from the device.
• Disconnect the data cables.
3.6 RST button
The different RST button features are described below.
Fig. 10: RST button
3.6.1 Rebooting the device
Once the device is operating normally, pressing the RST button will force a restart.
Note
It will also force the embedded Access Point (if present) to restart.
3.6.2 Default configuration
The RST button allows you to boot the device with its default configuration (including the embedded Access Point, if
present). To do so, follow these steps:
• With the device switched off, press and hold the RST button down while you turn the router on using the ON/OFF
switch (1).
• The PWR LED (green) will light up and LED 'S' will begin to blink (amber). It will carry on blinking for 10 seconds.
• To boot the device with the default configuration, release the RST button while LED 'S' is still blinking (i.e., before
the 10-second period expires).
Teldat S.A. 3 Components and Power Supply
RS1800 series 13

3.6.2.1 Default configuration
The router has an embedded access point, the default configuration looks like a template for a Wi-Fi configuration. It
includes all the necessary elements to deploy a very basic Wi-Fi network. To activate this configuration, all you need
to do is enter the enable command at the WNMS feature menu.
This configuration will provide two Wi-Fi networks: test_ssid_1 and test_ssid_2. The first one is placed in the 2.4 GHz
band and the second one in the 5 GHz band. The password for both networks matches their ssid name.
The DHCP server configuration is divided into two parts. The first one focuses on giving an address to the embedded
access point, while the second strives to give an address to the Wi-Fi clients that connect to the access point.
A bridge is installed to separate the traffic belonging to Wi-Fi clients from access point communications. Two VLANs
are configured for this purpose.
The communication with the embedded access point is carried out via a separate port in the switch interface. This
port is named "wlan" or listed as port 5.
The router's default configuration establishes the following access IP and mask address:
• IP address: 192.168.0.1
• IP mask: 255.255.255.0
The embedded access point's default configuration establishes the following IP and mask address:
• IP address: DHCP client with no.192.168.100.150/24 as default
Note
Only the RS1800w models have an embedded access point.
Note
Be careful when modifying the template configuration, as one subtle change could easily ruin the base
configuration and prevent it from working. Thus, make sure you understand the template before apply-
ing any changes.
Note
Some devices leave the factory with customized settings. This personalization means your router's de-
fault configuration (and that of the embedded access point, where applicable) may be different from the
one shown above.
3.7 Data connections
The RS1800 series router has the following data connections.
3.7.1 4-port Ethernet switch connections
The RS1800 series router incorporates a 4-port 10/100/1000 Base-T switch with automatic MDI/MDIX to connect to
a local area network (LAN).
Please pay careful attention to the labeling to avoid mistaking this switch for other types of ports:
3 Components and Power Supply Teldat S.A.
14 RS1800 series

Fig. 11: LAN switch ports
Note
Only the LAN 1 connector is available during booting and in BIOS mode.
3.7.2 WAN connections
The RS1800 series has 4 Ethernet interfaces for WAN connection. These ports have 2 connectors - SFP for an op-
tical link and RJ45 for a 10/100/1000 Base-T link - but they cannot work simultaneously. These interfaces are totally
independent from the switch and are handled like every other interface.
Please pay careful attention to the labeling to avoid mistaking these ports for other types of ports:
Fig. 12: WAN connectors
Note
WAN connectors do not work during booting and in BIOS mode.
3.7.2.1 Laser information
Choose SFP transceivers that meet the following regulations
• Class 1
• IEC/EN60825-1:2007 2nd Edition or a later one, European standard
• FCC 21 CFR Chapter 1, Subchapter J (in accordance with FDA and CDRH re-
quirements)
• Application of CE marking in accordance with the 2014/30/EU EMC Directive
and the 2014/35/EU Low Voltage Directive
• UL and/or CSA registered component for North America
• 47 CFR Part 15, Class A
Warning
Laser Radiation. Do not use optical instruments directly or without proper protection. CLASS 1 LASER
PRODUCT.
The SFP modules to be installed in the card socket should be class 1 devices that comply with the IEC/
EN 60825-1:2007 standard.
3.7.3 WWAN antenna connection (cell connector)
The RS1800 series has two connectors for WWAN antennas in the rear panel and two connectors for WWAN anten-
nas in the side panels (on -4G models).
Teldat S.A. 3 Components and Power Supply
RS1800 series 15
This manual suits for next models
2
Table of contents
Other Teldat Network Router manuals

Teldat
Teldat 5Ge-Rail User manual

Teldat
Teldat iM8-Cx User manual

Teldat
Teldat ATLAS 160 User manual

Teldat
Teldat RXL14000 User manual

Teldat
Teldat REGESTA-PRO-ER Series User manual

Teldat
Teldat Atlas 250 User manual

Teldat
Teldat T200 User manual

Teldat
Teldat C1+LS User manual

Teldat
Teldat G1N User manual

Teldat
Teldat Teldat-3Ge-USB User manual

Teldat
Teldat 3ge User manual

Teldat
Teldat Regesta Smart PLC User manual

Teldat
Teldat C1+L User manual

Teldat
Teldat K Seres User manual

Teldat
Teldat H1 HSDPA User manual

Teldat
Teldat C User manual

Teldat
Teldat ATLAS X60 User manual

Teldat
Teldat Atlas 250 User manual

Teldat
Teldat M8-Smart User manual

Teldat
Teldat C+ Series User manual