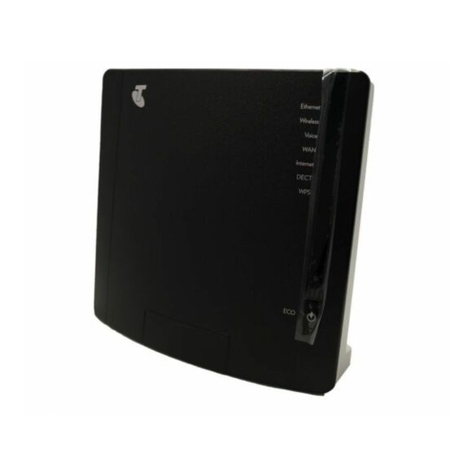
Telstra T-GATEWAY User manual

GettinG connected
with your
t-Gatewaytm
for more information
www.telstra.com/help;
www.telstra.com/apps;
www.telstra.com/myonlinetoolkit
13 7663
visit a telstra store

2
LET’S GET THIS SHOW
ON THE ROAD
This guide is designed to help you get started
with your new T-Gateway™. Please make sure
you keep it in a safe place, as you may find
you need to refer to it again at a later date.

INTRODUCINGYOUR T-GATEWAY™ 04
Welcome to BigPond ADSL 05
What’s in the Box 06
About your T-Gateway 08
GETTING STARTED WITH YOUR T-GATEWAY 13
Power on your T-Gateway 14
Connect your T-Gateway to the filter/splitter 19
Connect with a wall-mounted phone 24
CONNECTINGDEVICESTO YOUR T-GATEWAY 30
Connect via Ethernet Cable 31
Connect via Wi-Fi 36
Activate your T-Gateway and broadband service 38
MANAGINGYOUR T-GATEWAY 59
The Gateway Management Interface 60
How To 61
Troubleshooting 75
3
WHAT’S
INSIDE

4
INTRODUCING
YOUR T-GATEWAY
In this section:
WELCOME TO YOUR T-GATEWAY 5
Learn what your T-Gateway can do 5
WHAT’SIN THE BOX 6
Check that you have everything to get started 7
ABOUT YOUR T-GATEWAY 8
Learn what all the parts of your T-Gateway do 10

5
WELCOME TO
YOUR T-GATEWAY
CONGRATULATIONSON YOUR NEW CONNECTION
Thank you for choosing BigPond Broadband and this T-Gateway, your new connection to
the world of high-speed Internet and home entertainment.
Your T-Gateway lets you connect all your compatible devices using the Ethernet ports
and Wi-Fi such as: T-Hub®, T-Box®, computers, smartphones, tablets, game consoles
and even your smart TV!
We’re sure you’re already happy with your purchase, but we’d like to highlight some of
the exciting things you can do with the T-Gateway:
•Turn your portable hard drive into a shared storage device using the USB port,
•Easily share media throughout your home with any devices that are DLNA certified®,
•Share your printer across all your networked computers using the USB port,
•If your ADSL service isn’t available you will have peace of mind knowing that if you have
a Telstra or BigPond Mobile Broadband you can still access the internet via your
T-Gateway as a backup,
•Securely share your internet connection with guests, using multiple SSIDs.
Note: Not sure what USB ports are? Unsure whether your device is DLNA certified®?
Turn to page 82 for a glossary that explains the meaning of these terms, and more.

6
WHAT’S IN
THE BOX
HERE’SWHAT COMESWITH YOUR T-GATEWAY
1. T-Gateway
2. Power adaptor
3. Ethernet Cable
Connect your computer or other device via a cable.
4. 2 x Telephone cables (T-Gateway), 2x Filter/splitters
Connect your phone on your ADSL line.
5. User guide
Detailed information about your T-Gateway.
6. Wireless security card
Contains the details you’ll need to connect any device to your T-Gateway via Wi-Fi.
WIRELESS
SECURITY CARD
1.
2.
3.
4.
5.
6.

7
BEFORE YOU
GET STARTED
CONFIRM YOUR LINE HASBEEN ACTIVATED
It can take a few days after you place your order for ADSL to be activated
on your line.
Check if your ADSL service has been activated by visiting
telstra.com/trackmyorder and entering your 12 digit order number,
or contact us through one of the options in the ‘More Help’ section.
If you have a compatible Telstra or BigPond Mobile Broadband service,
you can use it to get online until your ADSL service is active.
CHECK YOU HAVE EVERYTHINGYOU NEED
Check that you’ve got all the contents in the image to the left. If anything is
missing, contact us via the ‘More Help’ section.
Got more than two phones? You’ll need additional filters. You can find them
at a Telstra Shop. If you have a wall-mounted phone or you need a special
filter, please contact us through one of the options in the ‘More Help’ section.

8
ABOUT YOUR
T-GATEWAY
YOUR T-GATEWAY FROM THE FRONT
Your Gateway has 8 indicator lights on the front panel.
These lights are active when:
1
3
5
2
4
6
7
8

9
1. Ethernet
A device is connected to your T-Gateway via Ethernet cable.
2. Wireless
A device is connected to your T-Gateway via Wi-Fi.
3. Voice
Your Telstra Internet call is made via your T-Gateway (not available on ADSL).
4. WAN
Your T-Gateway is connected to an active ADSL line/ NBN port.
5. Internet
Your ADSL line has a working Internet connection.
6. DECT
Your cordless handset is paired with your T-Gateway.
7. WPS
Secure setup is active on your T-Gateway.
8. Status/ECO Power
Your T-Gateway is on or in idle mode.
NEED TO KNOW MORE?
The indicator lights will change depending on the status of your Gateway.
For an explanation of what the lights mean, see page 79.
To understand more about the terms used here, see page 81.

10
YOUR T-GATEWAY FROM THE BACK & SIDE
wireless user codes
Network Name: Wireless Key:
Made in Vietnam
Rated Input: 12V 2A
7353-9124
ACCESS KEY : MCH9Z2P0
technicolor
TG797n v3
MAC : A4B1E9987C42
SN : CP1304RAZYM
GW : DSLCBA649EKV6
OUI - SN : A4B1E9-CP1304RAZYM N104006
Telstra987C43 C319224D6B
PSTN DSL
WPS DECT
1 2 3 GbE WAN RESET
3 4 5 6 7 8 9
1
2
10

11
1. WPS (Wi-Fi Protected Setup) button
Press this button to activate WPS (see page 80 for an explanation of
WPS LED colours).
2. DECT button
Press this button to pair your T-Hub and/or T-Hub 2 handset
(or other DECT compliant handsets) with your T-Gateway.
3. Telephone port (green)
This port is currently not in use for ADSL services.
4. Telephone port (black)
Connect one of the included grey telephone cables from here to your
‘Local Phone’ socket on the filter/splitter to allow calls to be made
with any DECT paired handset.
5. Ethernet Ports 1-3 (yellow: Fast Ethernet)
Connect any devices such as computers, smart TV’s, T-Hub®,
T-Box®or printers via a cable.
6. Ethernet Port 4 (yellow: Gigabit Ethernet or GbE)
Connect any devices such as game consoles or a T-Box for super-fast speeds.
7. Gigabit Ethernet port WAN (red)
This port is to connect your T-Gateway to your Velocity or Telstra on the
NBN service allowing high speed transfer over Fibre networks.
8. Power Socket
Used with the supplied power adaptor in the kit.
9. Power button
This button is to turn your T-Gateway on and off.
10. USB ports (Back port – High Power 1000mA; Side port – Normal Power 500mA)
Connect USB hard drives or printers; or connect a Telstra Mobile Broadband device
for Internet without ADSL on any of the USB ports.

12
NOW LET’S GET YOU CONNECTED
So now that you have an idea of what your Gateway can do, it’s time to help
you get it all working. In the next two sections, we’ll help you set up your
Gateway and connect your devices to it:
GETTING STARTED WITH YOUR T-GATEWAY
Power on your T-Gateway and connect it to your phone line – see page 14.
CONNECTING DEVICES TO YOUR T-GATEWAY
Connect devices using Ethernet cable or Wi-Fi – see page 31.
T
-Gateway
T-GatewayT
™
SmartT
V
SmartTVSmartT
T
-Bo
T-BoT
x
Powe
r
Filter/Splitte
r
Phon
e
Lin
e
Handse
t
T
able
TableT
t
T
-Hu
T-HuT
b
Personal Compute
r

13
GETTING STARTED
WITH YOUR T-GATEWAY
In this section:
POWER ON YOUR T-GATEWAY 14
Connect your T-Gateway to power and switch it on – 4 tasks 15
CONNECT YOUR T-GATEWAY TO YOUR PHONE LINE 19
Connect your T-Gateway and install filter/splitters on your phone – 4 tasks 20
Connect the wall-mounted filter/splitter - 4 tasks 24

14
POWER ON
YOUR T-GATEWAY
Important Note: Make sure you place your T-Gateway in a location that’s close to a
working phone socket and power point for your ADSL service.
STEP 1:
Plug your T-Gateway into the power point.
Connect the power adaptor from the kit to the power socket on
the bottom right of the back of your T-Gateway.
wireless user codes
Network Name: Wireless Key:
Made in Vietnam
Rated Input: 12V 2A
7353-9124
ACCESS KEY : MCH9Z2P0
technicolor
TG797n v3
MAC : A4B1E9987C42
SN : CP1304RAZYM
GW : DSLCBA649EKV6
OUI - SN : A4B1E9-CP1304RAZYM N104006
Telstra987C43 C319224D6B
PSTN DSL
WPS DECT
1 2 3 GbE WAN RESET
CABL
CABL

15
Important Note: If you have power saving power boards, check that the adaptor is
plugged into an ‘always-on’ socket.
STEP 2:
Plug the other end of the power adaptor firmly into a wall socket
and make sure it is switched on.
wireless user codes
Network Name: Wireless Key:
Made in Vietnam
Rated Input: 12V 2A
7353-9124
ACCESS KEY : MCH9Z2P0
technicolor
TG797n v3
MAC : A4B1E9987C42
SN : CP1304RAZYM
GW : DSLCBA649EKV6
OUI - SN : A4B1E9-CP1304RAZYM N104006
Telstra987C43 C319224D6B
PSTN DSL
WPS DECT
1 2 3 GbE WAN RESET
wireless user codes
Network Name: Wireless Key:
Made in Vietnam
Rated Input: 12V 2A
7353-9124
ACCESS KEY : MCH9Z2P0
technicolor
TG797n v3
MAC : A4B1E9987C42
SN : CP1304RAZYM
GW : DSLCBA649EKV6
OUI - SN : A4B1E9-CP1304RAZYM N104006
Telstra987C43 C319224D6B
PSTN DSL
WPS DECT
1 2 3 GbE WAN RESET
wireless user codes
Network Name: Wireless Key:
Made in Vietnam
Rated Input: 12V 2A
7353-9124
ACCESS KEY : MCH9Z2P0
technicolor
TG797n v3
MAC : A4B1E9987C42
SN : CP1304RAZYM
GW : DSLCBA649EKV6
OUI - SN : A4B1E9-CP1304RAZYM N104006
Telstra987C43 C319224D6B
PSTN DSL
WPS DECT
1 2 3 GbE WAN RESET

16
STEP 3:
Press the Power button on the bottom right at the back of
your Gateway to switch it on.
wireless user codes
Network Name: Wireless Key:
Made in Vietnam
Rated Input: 12V 2A
7353-9124
ACCESS KEY : MCH9Z2P0
technicolor
TG797n v3
MAC : A4B1E9987C42
SN : CP1304RAZYM
GW : DSLCBA649EKV6
OUI - SN : A4B1E9-CP1304RAZYM N104006
Telstra987C43 C319224D6B
PSTN DSL
WPS DECT
1 2 3 GbE WAN RESET
wireless user codes
Network Name: Wireless Key:
Made in Vietnam
Rated Input: 12V 2A
7353-9124
ACCESS KEY : MCH9Z2P0
technicolor
TG797n v3
MAC : A4B1E9987C42
SN : CP1304RAZYM
GW : DSLCBA649EKV6
OUI - SN : A4B1E9-CP1304RAZYM N104006
Telstra987C43 C319224D6B
PSTN DSL
WPS DECT
1 2 3 GbE WAN RESET
wireless user codes
Network Name: Wireless Key:
Made in Vietnam
Rated Input: 12V 2A
7353-9124
ACCESS KEY : MCH9Z2P0
technicolor
TG797n v3
MAC : A4B1E9987C42
SN : CP1304RAZYM
GW : DSLCBA649EKV6
OUI - SN : A4B1E9-CP1304RAZYM N104006
Telstra987C43 C319224D6B
PSTN DSL
WPS DECT
1 2 3 GbE WAN R
ESET

17
STEP4:
Wait a couple of minutes until the light labelled ECO on the front of
your T-Gateway stops blinking green and becomes a steady RED.
A B

18
STEP5: COMPLETE
The first step is complete! Your T-Gateway is now powered up and
ready for you to connect to your phone line.
SEQUENCE & DURATION OF THE ECO LED
The ECO indicator will go through the following sequence of light status
when you turn on the gateway:
1. Steady Green – this will last roughly 20 seconds
2. Blinking Red – this will last roughly 20 seconds
3. Steady Green – this will last roughly 15 seconds
4. Steady Red – Proceed with the next section.
IS THE ECO LIGHT NOT ON?
If the ECO indicator light doesn’t come on, check that the power adaptor is plugged
in firmly and that the switch is on, at both ends.
If the light comes on but doesn’t turn to a solid red, try cycling the power
(switch your T-Gateway off and on again).
If your T-Gateway still doesn’t work, you may have a faulty component.
Please contact us through one of the options in the ‘More Help’ section,
to arrange for a replacement.

19
CONNECT YOUR T-GATEWAY TO THE FILTER/SPLITTER
STEP 1:
Take one of the grey phone cables from the kit and connect it to the
grey DSL socket at the back of the Gateway.
CONNECT YOUR T-GATEWAY
TO YOUR PHONE LINE
wireless user codes
Network Name: Wireless Key:
Made in Vietnam
Rated Input: 12V 2A
7353-9124
ACCESS KEY : MCH9Z2P0
technicolor
TG797n v3
MAC : A4B1E9987C42
SN : CP1304RAZYM
GW : DSLCBA649EKV6
OUI - SN : A4B1E9-CP1304RAZYM N104006
Telstra987C43 C319224D6B
PSTN DSL
WPS DECT
1 2 3 GbE WA N RESET
wireless user codes
Network Name: Wireless Key:
Made in Vietnam
Rated Input: 12V 2A
7353-9124
ACCESS KEY : MCH9Z2P0
technicolor
TG797n v3
MAC : A4B1E9987C42
SN : CP1304RAZYM
GW : DSLCBA649EKV6
OUI - SN : A4B1E9-CP1304RAZYM N104006
Telstra987C43 C319224D6B
PSTN DSL
WPS DECT
1 2 3 GbE WAN RESET

20
STEP 2:
Take a filter/splitter from the kit and connect the other end of the
phone cable to the ‘ADSL MODEM’ socket on the filter/splitter.
Note: Got a wall-mounted phone and socket? Turn to page 24 for instructions.
LOCAL
PHONE
ADSL
MODEM
LOCAL
PHONE
ADSL
MODEM
LOCAL
PHONE
ADSL
MODEM
LOCAL
PHONE
ADSL
MODEM
LOCAL
PHONE
ADSL
MODEM
LOCAL
PHONE
ADSL
MODEM
Other manuals for T-GATEWAY
1
Table of contents
Other Telstra Gateway manuals

Telstra
Telstra DEVG2020 User manual

Telstra
Telstra Elite User manual

Telstra
Telstra Gateway Max User manual

Telstra
Telstra bigpond velocity User manual

Telstra
Telstra T-GATEWAY User manual

Telstra
Telstra ULTIMATE Gateway User manual
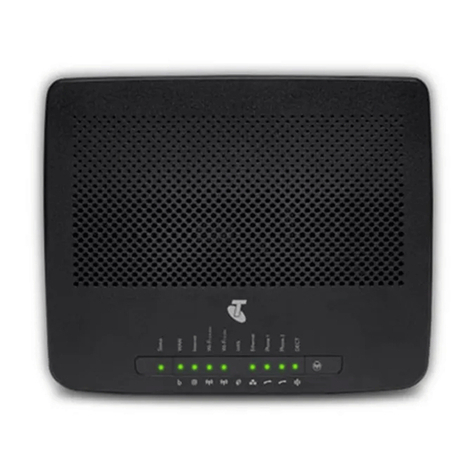
Telstra
Telstra Gateway Max User manual

Telstra
Telstra Elite User manual
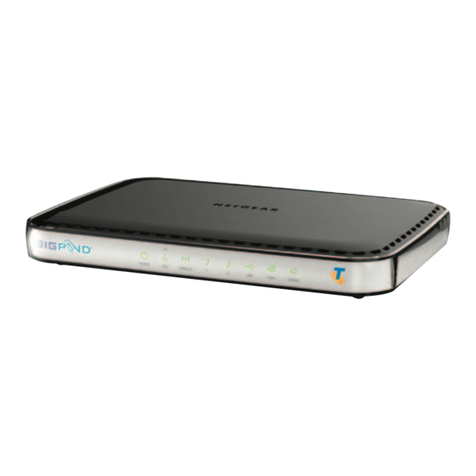
Telstra
Telstra TG797n V3 User manual

Telstra
Telstra TG797n V3 Assembly instructions