manuals.online logo
Brands
  1. Home
  2. •
  3. Brands
  4. •
  5. Tennant
  6. •
  7. Scrubber
  8. •
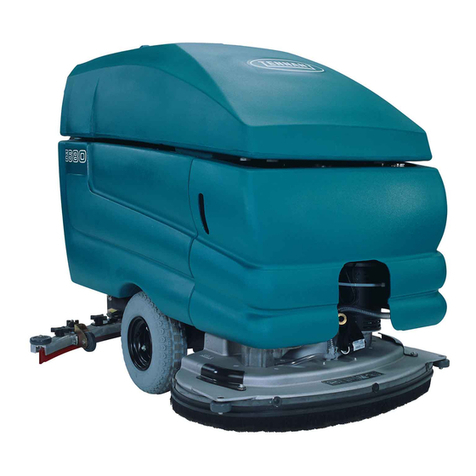
  9. Tennant 7200 Training manual

Tennant 7200 Training manual

IB 340487 (6-01) LITHO IN U.S.A. 1
No. 340487
Machine: 7100,7200,7300
8200,8210,8300
Published: 6-01/00
System: SCRUBBING
INSTRUCTION BULLETIN
NOTE: DO NOT DISCARD the Parts List from the Instruction Bulletin. Place the Parts
List in the appropriate place in your machine manual for future reference.
Retaining the Parts List will make it easier to reorder individual parts and will
save you the cost of ordering an entire kit.
NOTE: Numbers in parenthesis ( ) are reference numbers for parts listed in Bill of Materials.
Installation instructions for kit number 375429, 375430 and 375431
SYNOPSIS / PROBLEM:
This kit contains the parts needed to replace the solution and recovery tank level switches
on the models 7100/7200, 8200/8210 and 7300/8300 scrubbers and sweeper/scrubbers.
Please follow step-by-step instructions.
SPECIAL TOOLS / CONSIDERATIONS: Metri--Pac wire test harness, voltmeter
(Estimated time to complete: 1 hour)
PREPARATION:
(Refer to FIG. 1 thru 7)
FOR SAFETY: Before leaving or servicing machine, stop on level surface and set parking
brake. Then turn off machine and remove key.
1. Disconnect battery cables from machine.
WARNING: Always disconnect battery cables from machine before working
on electrical components.
SOLUTION TANK PRESSURE SWITCH REPLACEMENT, 7100:
(Refer to FIG. 1)
1. Open the tank cover on the rear of the machine and locate the pressure switch 385732 and
34 inch tube 386966 on the top of the solution tank. (Refer to FIG. 1)
2. Disconnect the old pressure switch from the main wire harness.
3. Remove and discard the old pressure switch and tube from the solution tank.
NOTE: Lubricate the tube switch assemblies and hoses with a small amount of liquid soap for
easier installation.
4. Install the new tube/switch assembly 375428 in the solution tank switch opening.
(Refer to FIG. 1)
5. Connect the new tube/switch assembly 375428 to the main harness. Close the tank cover.
Check the new switch for proper operation.
IB 340487 (6-01) LITHO IN U.S.A.2
Replace 385732 and
386966 w/ 374428
FIG. 1 -- SOLUTION TANK PRESSURE SWITCH INSTALLATION, 7100
IB 340487 (6-01) LITHO IN U.S.A. 3
RECOVERY TANK PRESSURE SWITCH REPLACEMENT, 7100:
(Refer to FIG. 2)
1. Remove and set aside the tank cover, cable and mounting bolts.
2. Disconnect the vacuum fan from the main harness. Remove and set aside the vacuum fan
and mounting hardware.
3. Locate the original float switch in the recovery tank. (Refer to FIG. 2)
4. Disconnect and remove the float switch and 8 inch tube from the recovery tank.
(Refer to FIG. 2)
NOTE: Lubricate the tube/switch assemblies and hoses with a small amount of liquid soap for
easier installation.
5. Install the new 8 inch tube/switch assembly 375426 in the recovery tank switch opening.
Connect the switch to the main harness. (Refer to FIG. 2)
6. Replace and reconnect the vacuum fan to the main harness. Replace the tank cover, cable
and mounting hardware.
Replace 385744 and
385732 w/ 375426
FIG. 2 -- RECOVERY TANK PRESSURE SWITCH INSTALLATION, 7100
IB 340487 (6-01) LITHO IN U.S.A.4
RECOVERY TANK PRESSURE SWITCH REPLACEMENT, 7200:
(Refer to FIG. 3)
1. Remove and set aside the tank cover, cable and mounting bolts.
2. Disconnect the vacuum fan from the main harness. Remove and set aside the vacuum fan
and mounting hardware.
3. Locate the original float switch 385732 in the recovery tank. (Refer to FIG. 3)
4. Disconnect and remove the float switch 385732 and vacuum tube 385744 from the
recovery tank. (Refer to FIG. 3)
NOTE: Lubricate the tube/switch assemblies and hoses with a small amount of liquid soap for
easier installation.
5. Install the new 8 inch tube/switch assembly 375426 in the recovery tank switch opening.
(Refer to FIG. 3)
6. Replace and reconnect the vacuum fan to the main harness.
7. Replace the tank cover, cable and mounting hardware.
IB 340487 (6-01) LITHO IN U.S.A. 5
Replace 385732 and
385744 w/ 375426
FIG. 3 -- NEW RECOVERY TANK SWITCH INSTALLATION, 7200
IB 340487 (6-01) LITHO IN U.S.A.6
RECOVERY TANK PRESSURE SWITCH REPLACEMENT, 8200/8210:
(Refer to FIG. 4 and 5)
1. Open the engine cover, and the engine side door.
2. Remove and set aside the engine cover support bracket to access the float switches on the
recovery tank. (Refer to FIG. 1 and 2)
3. Locate the original float switches on the recovery tank. (Refer to FIG. 2)
4. Disconnect and remove the float switch 385730 and 14 inch tube 385747 from the
recovery tank. (Refer to FIG. 5)
NOTE: Lubricate tube/switch assemblies and hoses with a small amount of liquid soap for
easier installation.
5. Install the new 14 inch tube/switch assembly 375427 in the recovery tank switch opening.
(Refer to FIG. 5)
Remove engine cover
support bracket
FIG. 4 -- ENGINE COVER SUPPORT BRACKET REMOVAL, 8200/8210
SOLUTION TANK PRESSURE SWITCH REPLACEMENT, 8200/8210:
(Refer to FIG. 5)
1. Open the solution tank cover, and locate the float switch 385732.
2. Disconnect the float switch 385732 from the main harness. (Refer to FIG. 5)
3. Remove the float switch 385732 and 8 inch tube 385744 from the solution tank.
(Refer to FIG. 5)
NOTE: Lubricate tube/switch assemblies and hoses with a small amount of liquid soap for
easier installation.
4. Install the new 8 inch tube/switch assembly 375426 in the solution tank switch opening.
(Refer to FIG. 5)
5. Connect the new 8 inch tube/switch assembly 375426 to the main harness.
IB 340487 (6-01) LITHO IN U.S.A. 7
Replace 385732 and
385744 w/ 375426
Replace 385747 and
385730 w/ 375427
Solution tank
Recovery tank
FIG. 5 -- SOLUTION AND RECOVERY TANK PRESSURE SWITCH INSTALLATION,
8200/8210
IB 340487 (6-01) LITHO IN U.S.A.8
RECOVERY TANK PRESSURE SWITCH REPLACEMENT, 7300/8300:
(Refer to FIG. 6)
1. Open the recovery tank cover, and locate the float switch 385732 and 8 inch tube 375744.
2. Disconnect and remove the float switch 385732 and 8 inch tube 385744 from the recovery
tank. (Refer to FIG. 6)
NOTE: Lubricate tube/switch assemblies and hoses with a small amount of liquid soap for
easier installation.
3. Install the new 8 inch tube/switch assembly 375426 in the recovery switch opening.
Connect the new switch to the main wire harness. (Refer to FIG. 6)
4. Close the recovery tank cover.
NOTE: TO CONFIRM PROPER PRESSURE SWITCH OPERATION, PERFORM THE
FOLLOWING:
1. Remove the switch from the tank to be tested. Solution tank has 8 inch tube/switch
assembly. Recovery tank has 14 inch tube/switch assembly.
For 8 inch tube/switch assembly -- Measure and place a mark at 4 inches from the bottom
of the tube.
For 14 inch tube/switch assembly -- Measure and place marks at 4 and 10 inches from the
bottom of the tube.
2. Connect the switch to an ohmmeter with the metri--pac test wire harness (375023), or use
clips to directly clamp on to the switch harness. The ohmmeter should read O.L. before
switch is activated.
3. Slowly lower the switch into a 5 gallon bucket of water filled with roughly twelve inches of
water. The switch should read below 1 ohm when activated at the 4 or 10 inch level.
4. Hold the tube at the 4 in or 10 in level for 30 seconds. If there are no leaks in the
tube/switch assembly, the ohm reading will hold steady. If a leak is present, or if the switch
is malfunctioning, the ohm reading will show O.L. (open loop).
IB 340487 (6-01) LITHO IN U.S.A. 9
Replace 385732 and
385744 w/ 375426
FIG. 6 -- SOLUTION TANK PRESSURE SWITCH INSTALLATION, 7300/8300
IB 340487 (6-01) LITHO IN U.S.A.10
SOLUTION TANK PRESSURE SWITCH REPLACEMENT, 7300/8300:
(Refer to FIG. 7)
1. Open the solution tank cover, and locate the float switch 385732 and 34 inch tube 386966.
2. Disconnect and remove the float switch 385732 and 34 inch tube 386966 from the
recovery tank. (Refer to FIG. 7)
NOTE: Lubricate tube/switch assemblies and hoses with a small amount of liquid soap for
easier installation.
3. Install the new 34 inch tube/switch assembly 375428 in the solution tank switch opening.
Connect the new switch to the main wire harness. (Refer to FIG. 6)
4. Notice that the tube/ switch assembly has HIGH and LOW pressure settings.
(Refer to FIG. 6)
5. Close the recovery tank cover. Check the new 34 inch tube/switch assembly 375428 for
proper operation .
Replace 385732 and 386966
w/ 375428
FIG. 7 -- RECOVERY TANK PRESSURE SWITCH INSTALLATION, 7300/8300
IB 340487 (6-01) LITHO IN U.S.A. 11
BILL OF MATERIALS FOR ES LEVEL PRESSURE SWITCH KIT 375429
TENNANT
Ref. Part No. Description Qty.
1 375426 Switch assy, press 3 inch, 8” tube 1
BILL OF MATERIALS FOR ES LEVEL PRESSURE SWITCH KIT 375430
TENNANT
Ref. Part No. Description Qty.
2 375427 Switch assy, dual press, 14” tube 1
BILL OF MATERIALS FOR ES LEVEL PRESSURE SWITCH KIT 375431
TENNANT
Ref. Part No. Description Qty.
2 375428 Switch assy, press 3 inch, 34” tube 1
TENNANT COMPANY
P. O. Box 1452
Minneapolis, MN 55440-1452

Other manuals for 7200

3

This manual suits for next models

5

Other Tennant Scrubber manuals

Tennant T16 Training manual

Tennant

Tennant T16 Training manual

Tennant T3 User manual

Tennant

Tennant T3 User manual

Tennant T20 Gas User manual

Tennant

Tennant T20 Gas User manual

Tennant Nobles T350 User manual

Tennant

Tennant Nobles T350 User manual

Tennant T7AMR User manual

Tennant

Tennant T7AMR User manual

Tennant T581 User manual

Tennant

Tennant T581 User manual

Tennant T300e User manual

Tennant

Tennant T300e User manual

Tennant T380AMR User manual

Tennant

Tennant T380AMR User manual

Tennant T981 User manual

Tennant

Tennant T981 User manual

Tennant NOBLES EX-SC-1020P User manual

Tennant

Tennant NOBLES EX-SC-1020P User manual

Tennant T1 User manual

Tennant

Tennant T1 User manual

Tennant T20 LPG Operating and installation instructions

Tennant

Tennant T20 LPG Operating and installation instructions

Tennant 8300 User manual

Tennant

Tennant 8300 User manual

Tennant T981 User manual

Tennant

Tennant T981 User manual

Tennant 5300 User manual

Tennant

Tennant 5300 User manual

Tennant t500 User manual

Tennant

Tennant t500 User manual

Tennant 7100 Training manual

Tennant

Tennant 7100 Training manual

Tennant 8400 User manual

Tennant

Tennant 8400 User manual

Tennant 7300 Training manual

Tennant

Tennant 7300 Training manual

Tennant T591 User manual

Tennant

Tennant T591 User manual

Tennant Nobles SPEED SCRUB 1701 PLUS Product manual

Tennant

Tennant Nobles SPEED SCRUB 1701 PLUS Product manual

Tennant CS16 User manual

Tennant

Tennant CS16 User manual

Tennant T191 User manual

Tennant

Tennant T191 User manual

Tennant T3 User manual

Tennant

Tennant T3 User manual

Popular Scrubber manuals by other brands

Numatic NX300 Original instructions

Numatic

Numatic NX300 Original instructions

CYP CPLUS-V11PE2 Operation manual

CYP

CYP CPLUS-V11PE2 Operation manual

Vax VCW-05 user guide

Vax

Vax VCW-05 user guide

Viper TP24TSCRUB owner's manual

Viper

Viper TP24TSCRUB owner's manual

Eagle power FASTRACTS SC12 Operation and parts manual

Eagle power

Eagle power FASTRACTS SC12 Operation and parts manual

COMAC VISPA 35B Manual use and maintenance

COMAC

COMAC VISPA 35B Manual use and maintenance

Clarke Bext-100 Operator's manual

Clarke

Clarke Bext-100 Operator's manual

Nobles Speed Scrub Rider Operator's manual

Nobles

Nobles Speed Scrub Rider Operator's manual

Comet CPS 50E manual

Comet

Comet CPS 50E manual

Numatic TTB 1840 Owner's instructions

Numatic

Numatic TTB 1840 Owner's instructions

Lamona HJA2180-1 User's installation guide

Lamona

Lamona HJA2180-1 User's installation guide

IPC Eagle CT40ECS Operation manual

IPC Eagle

IPC Eagle CT40ECS Operation manual

Drieaz DefendAir F284 owner's manual

Drieaz

Drieaz DefendAir F284 owner's manual

Johnny Vac JVC50BC Operator's manual

Johnny Vac

Johnny Vac JVC50BC Operator's manual

Drieaz HEPA 700 quick start guide

Drieaz

Drieaz HEPA 700 quick start guide

sunjoe 24V-PWSCRB-LTW Operator's manual

sunjoe

sunjoe 24V-PWSCRB-LTW Operator's manual

Factory Cat Micro-HD V2.0 operating instructions

Factory Cat

Factory Cat Micro-HD V2.0 operating instructions

Kärcher BD 50R Classic Original instructions

Kärcher

Kärcher BD 50R Classic Original instructions

manuals.online logo
manuals.online logoBrands
  • About & Mission
  • Contact us
  • Privacy Policy
  • Terms and Conditions

Copyright 2025 Manuals.Online. All Rights Reserved.