manuals.online logo
Brands
  1. Home
  2. •
  3. Brands
  4. •
  5. TFA
  6. •
  7. Weather Station
  8. •
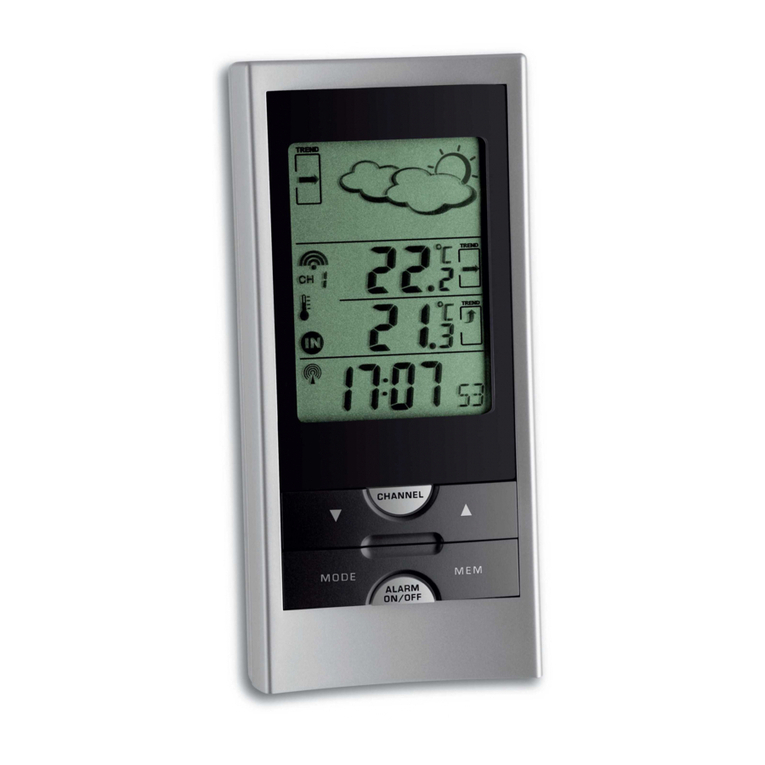
  9. TFA 35.1019 User manual

TFA 35.1019 User manual

LIABILITY DISCLAIMER
•The manufacturer and supplier cannot accept anyresponsibilityfor anyincorrect
readings and anyconsequences that occur should an inaccurate reading takeplace.
•This product isnot to be used for medical purposes or for public information.
•This product isonlydesigned to be used in the home asindication of the future
weather and isnot 100% accurate.Weather forecasts given bythisproduct should be
taken onlyas an indication and notas being totallyaccurate.
•The specifications of this product maychange without prior notice.
•This product isnot a toy.Keep outof the reach ofchildren.
•No partof this manual may be reproduced without written consent of the
manufacturer.
R&TTE Directive 1999/5/EC
Summary of the Declaration of Conformity : We hereby declare that this wireless transmission device does
comply with the essentialrequirements of R&TTE Directive 1999/5/EC.
When this keyis pressed and held down, both the
minimum and maximum recordings will be erased and
reset to the current indoor temperature level.
“OUTDOOR& MIN/MAX” key With each press,the outdoor temperature will alternate
between the current, minimum or maximum temperature
readings.
When this keyis pressed and held down, both the
minimum and maximum recordings will be erased and
reset to the current outdoor temperature level.
POSITIONING THE WEATHER STATION:
The Weather Station comes attached with a removable table stand, which
provides the option of table standing or wall mounting the unit.Before wall
mounting, please ensure thatthe signals of the outdoor temperature can
be received from the desired location. To wall mount:
1. Fixa screw(not supplied) into the desired wall, leaving the head
extended outthe byabout 5mm.
2. Remove the stand bypulling it awayfrom the base ofthe Weather
Station and hang the station onto the screw.Ensure that itlocks
safelyinto place before releasing.
POSITIONING THE OUTDOOR TRANSMITTER
The Temperature Transmitter is supplied with a holder that maybe attached to awall with
the three screwsor double-sided tape (supplied). To attach to
the wall, please follow the stepsbelow:
1. Markthe wall using a pen through the holes in the holder
to obtain the exact drilling position.
2. Drill holes in the wall at the points marked.
3. Screwholder onto wall.
There is also double sided tape included with the wallmount. Thiscan be used instead of
drilling. Please mount this on a smooth surface instead ofa brickone. The surface can,
however, affect the transmission range,for example: if the unit isattached to a piece of
metal, it maythen either reduce or increase the transmitting range. For this reason, we
recommend notplacing the unit on anymetal surfacesor in anyposition where a large
metal surface is in the immediate proximity(garage doors, double glazing etc.). Choosea
sheltered place. Avoid direct rain and sunshine. Before securing in place, please ensure
thatthe Weather Station can receive the signal from the Temperature Transmitter at the
position that you wish to situate them. The Temperature Transmitter clicks in or out of the
holder easily.When inserting or removing the Temperature Transmitter from the wall holder
pleasehold both units securely.
RESETTING:
From time to time, resetting of the Weather Station is necessary. E.g. ifused batteriesneed
to be changed or when the unit ismoved to a newlocation. To reset:
1. Open the batterycover and remove batteries from the both the Temperature
transmitter and the Weather Station.
2. Wait at least 30 seconds and then repeat the procedures specified in Setting up
(above).
REPLACING BATTERIES:
For best performance, replace batteriesonce a year to maintain optimum running accuracy.
Please help inthe preservation of the environment and return used batteries
to an authorized depot.
CARE AND MAINTENANCE:
•Extreme temperatures,vibration and shockshouldbe avoided asthese maycause
damage to the unit and give inaccurate forecasts and readings.
•When cleaning the displayand casing, use a soft damp cloth only. Do not use
solvents or scouring agents as theymaymarkthe LCD and casing.
•Do not submerge the unit inwater.
•Immediatelyremove all low powered batteriesto avoid leakage and damage. Replace
onlywith newbatteries of the recommended size.
•Do not make anyattempts to repair the unit.Return it to its original point ofpurchase
for repair byaqualified engineer. Opening and tampering with the unit mayinvalidate
its guarantee.
•Do not expose the unit to extreme and sudden temperature changes, this may lead to
rapid changesin forecasts and readings and therebyreduce its accuracy.
SPECIFICATIONS:
Recommended operating temperature : 0ºC to +50ºC
Temperature measuring range
Indoor : -9ºCto +69ºC with 1ºC resolution
(“OFL” displayed ifoutside this range)
Outdoor : -29.9ºCto +69.7ºC with 0.1ºC
resolution
(“OFL” displayed ifoutside this range)
Relative humiditymeasuring range : 21% to 95%
(“- - -” displayed if outside this range)
Indoor Temperature checking interval : every8 seconds
Outdoor Temperature reception : every5 minutes
Power source
Receiver : 2 xAA, IEC, LR6, 1.5V
Transmitter : 2 xAAA, IEC, LR3, 1.5V
Batterylife cycle : approximately12 months
(Alkaline batteries recommended)
Dimensions (L x WxH)
Weather Station (without stand) : 99 x 30 x100 mm
Outdoor Transmitter : 59 x 22 x65 mm
THE WEATHER FORECASTING ICONS
There are 3weather icons on the second line of LCD which can be displayed in anyof the
following combinations:
Sunny Cloudywith sunnyintervals Rainy
For everysudden or significant change in the air pressure, the weather icons will update
accordinglytorepresent the change in weather. Ifthe icons do notchange, then it means
either the air pressure has not changed or the change has been too slow for the Weather
Station to register.However, ifthe icon displayed is a sun or raining cloud, there will be no
change of icon if the weather getsanybetter (with sunnyicon) or worse (with rainyicon)
since the icons are alreadyat their extremes.
The icon displayed forecaststhe weather in terms ofgetting better or worse and not
necessarilysunnyor rainyas each icon indicates. E.g. if the current weather is cloudyand
the rainyicon isdisplayed, it doesnot mean thatthe product is faultybecause it is not
raining,it simplymeans that the air pressure has dropped and the weather is expected to
get worsebut not necessarilyrainy.
Note:
After setting up, readings for weather forecasts should be discarded for the next 12-24
hours. Thiswill allowsufficienttime for the Weather Station to operate ata constantaltitude
and therefore result in a more accurate forecast.
Common toweather forecasting, absolute accuracycannot be guaranteed. The weather
forecasting feature is estimated to have an accuracylevel of about 75% due to the varying
areas the Weather Station has been designed for use in. In areas that experience sudden
changes in weather (for example from sunnyto rain), the Weather Station will be more
accurate compared to use in areas where the weather is stagnant most of the time (for
example mostlysunny).
Ifthe Weather Station is moved to another location significantlyhigher or lower than its
initial standing point(for example from the ground floor to the first floor ofa house), reset
both unit (see Resetting). Bydoing this, the Weather Station will not mistake the new
location as being a possible change in air-pressure when reallyit is due to the slight change
of altitude. Again, discard weather forecasts for the next12 to 24 hoursas this will allow
time for operation at a constant altitude.
THE WEATHER TENDENCY INDICATOR
Working together with the weather icons are the weather tendencyindicators (located on
the left hand side of the weather icons).When the indicator points upwards,it means that
the air-pressure is increasing and the weather is expected to improve.When the indicator
points downwards, the air-pressure is dropping and the weather is expected to become
worse.
Taking this into account, we can see howthe weather haschanged and isexpected to
change. For example, if the indicator is pointing downwards together with cloud and sun
icons,then the lastnoticeable change in the weather was when itwassunny(the sun icon
only). Therefore, the next change in the weather will be cloud with rain icons since the
indicator is pointing downwards.
Note:
Once the weather tendencyindicator has registered anychange of weather, it will remain
permanentlyvisualized on the LCD.
OUTDOOR TEMPERATURE READING:
The outdoor temperature reading islocated on the bottom rowof the LCD and will
automaticallybe displayed from when the batteries were inserted. Ifthe outdoor
temperature does not showon the LCDwithin 10 minutes a reset(see Reset below)
becomes necessary. See also item “433 MHz Reception Check” on this.
433MHz RECEPTION CHECK
Ifthe temperature data is not being received 10 minutes after setting up (the displayshows
“- - -”) please checkthe following points:
1. The distance of the Weather Station or Temperature transmitter should be at least
1.5 to 2 meters away from anyinterfering sourcessuch as computer monitors or TV
sets.
2. Avoid placing the Weather Station onto or in the immediate proximityof metal window
frames.
3. Using other electrical products such as headphones or speakers operating on the
same signal frequency(433MHz) mayprevent correct signal transmission and
reception.
4. Neighboursusing electricaldevicesoperating on the 433MHzsignal frequencycan
also cause interference.
Note:
When the 433MHzsignal is received correctly,do not re-open the batterycover of either the
transmitter or Weather Station,as the batteriesmayspring free from the contacts and force
a falsereset. Should this happen accidentallythen reset all units(see Reset below)
otherwise transmission problems mayoccur.
The maximum transmission range is around 25 m from the transmitter to the Weather
Station (in open space). However, this depends on the surrounding environment and
interference levels.Ifno reception is possible despite the observation ofthese factors, all
system units have to be reset (see Reset below).
USING THE WEATHER STATION:
“INDOOR & MIN/MAX” key With each press,the LCD screen will alternate between
the current, minimum or maximum indoor temperature
readings.
WIRELESS 433 MHz WEATHER STATION
Instruction Manual
INTRODUCTION:
Congratulations on purchasing thisWireless Weather Station as an example of superior
design and engineering. The operation of this productis simple and straightforward and by
reading this instruction manual,users will gain the optimum benefits of all its features.
The Weather Station:
FEATURES:
•Indoor temperature reading in °C with minimum and maximum recording.
•Outdoor temperature reading in °C with minimum and maximum recording.
•Indoor relative humidityreading
•Weather forecasting with 3weather icons
•Weather tendencyindicator
•Wall mountable or table standing
The OutdoorTransmitter:
SETTING UP:
1. To set up,firstlyopen the batterycover at the backofthe transmitter and the Weather
Station.
2. Checking the correct polarization, insert 2 xAA, IEC LR6,1.5V batteries into the
batterycompartment of the Weather Station and replace the cover.
3. Checking the correct polarization, insert 2 xAAA, IEC LR3, 1.5V batteriesintothe
batterycompartment of the outdoor transmitter and replace the cover.
4. Position the outdoor transmitter in an appropriate location at such adistance to the
Weather Station (typicallyup to 25m) that sufficient communication via 433MHzsignal
is guaranteed (see Positioning).
5. The transmitter needsto be started within 3 minutes of starting the Weather Station,
otherwise reception problems mayoccur. If there is no reception after 10 minutes i.e.
the displayshows“- - -“,then bothunitsneed tobe reset (see ‘433MHz Reception
Check’ and ‘Reset’).
6. Nowcheckthat the Weather Station has received the indoor temperature and
humidityreadings on the LCD. The outdoor temperature will be transmitted by 433
MHzsignals.
LCD SCREEN
Immediatelyafter inserting the batteriesinto the receiver,all the segmentson the LCD
screen willlight up briefly,before displaying the indoor and outdoor temperatures and
humidityreadings as well as the sun with cloud icons.
INDOOR TEMPERATURE READING:
On the top line lefthand side of the LCD is the indoor temperature reading. The Weather
Station will automaticallystart measuring the indoor temperature once the batteriesare
inserted.
RELATIVE HUMIDITY READING:
The relative humiditydisplayisnext to the indoor temperature reading. With this feature,
users can determine howcomfortable the relative humidityis within their current indoor
surroundings.Again, readings willautomaticallybe taken once the batteries are inserted.
Hanging Hole
Battery Cover
INDOOR &
MIN/MAX & RESET
Key Detachable Stand
OUTDOOR & MIN/MAX & RESET key
Holder
Battery cover
Battery cover
Indoor Relative
Humidity Reading
Indoor Temperature in °C
Weather Tendency
Indicator Weather Icons
Outdoor Temperature Reading in
°C

Other TFA Weather Station manuals

TFA MEMO User manual

TFA

TFA MEMO User manual

TFA WEATHERHUB User manual

TFA

TFA WEATHERHUB User manual

TFA Nexus User manual

TFA

TFA Nexus User manual

TFA Xeno User manual

TFA

TFA Xeno User manual

TFA WeatherHub COSY RADAR User manual

TFA

TFA WeatherHub COSY RADAR User manual

TFA 35.1129 User manual

TFA

TFA 35.1129 User manual

TFA 35.1133 User manual

TFA

TFA 35.1133 User manual

TFA 35.1135 User manual

TFA

TFA 35.1135 User manual

TFA EXACTO User manual

TFA

TFA EXACTO User manual

TFA 31.5002 User manual

TFA

TFA 31.5002 User manual

TFA 35.1065 User manual

TFA

TFA 35.1065 User manual

TFA 35.1089.IT User manual

TFA

TFA 35.1089.IT User manual

TFA Weather PRO User manual

TFA

TFA Weather PRO User manual

TFA TWIN PLUS User manual

TFA

TFA TWIN PLUS User manual

TFA 30.3049 User manual

TFA

TFA 30.3049 User manual

TFA 30.3057.01 User manual

TFA

TFA 30.3057.01 User manual

TFA QUADRO User manual

TFA

TFA QUADRO User manual

TFA LIFE User manual

TFA

TFA LIFE User manual

TFA weather boy User manual

TFA

TFA weather boy User manual

TFA 35.1093 User manual

TFA

TFA 35.1093 User manual

TFA Weather Station User manual

TFA

TFA Weather Station User manual

TFA 35.1091 User manual

TFA

TFA 35.1091 User manual

TFA AXIS 35.1079 User manual

TFA

TFA AXIS 35.1079 User manual

TFA VIEW BREEZE User manual

TFA

TFA VIEW BREEZE User manual

Popular Weather Station manuals by other brands

TZS First AUSTRIA FA-2461-7 instruction manual

TZS First AUSTRIA

TZS First AUSTRIA FA-2461-7 instruction manual

Flytec Windwatch PRO operating manual

Flytec

Flytec Windwatch PRO operating manual

Emos ESW6001 manual

Emos

Emos ESW6001 manual

XFARM xSense Pro Quick Guide to installation and use

XFARM

XFARM xSense Pro Quick Guide to installation and use

Oregon Scientific BHB613 user manual

Oregon Scientific

Oregon Scientific BHB613 user manual

Emos E6018 manual

Emos

Emos E6018 manual

Campbell T107 instruction manual

Campbell

Campbell T107 instruction manual

Biowin 170504 Instructions for use

Biowin

Biowin 170504 Instructions for use

Chung’s Electronic C-8105 User instructions

Chung’s Electronic

Chung’s Electronic C-8105 User instructions

ECOWITT GW1000 Operation manual

ECOWITT

ECOWITT GW1000 Operation manual

La Crosse Technology WS-3500 Operation manual

La Crosse Technology

La Crosse Technology WS-3500 Operation manual

BIOS WEATHER 339BC manual

BIOS WEATHER

BIOS WEATHER 339BC manual

STIL 3026 instruction manual

STIL

STIL 3026 instruction manual

Heitronic 49540 Installation and operating instructions

Heitronic

Heitronic 49540 Installation and operating instructions

Explore Scientific WSH1008 instruction manual

Explore Scientific

Explore Scientific WSH1008 instruction manual

Hama TH50 user manual

Hama

Hama TH50 user manual

Aetos 700w user manual

Aetos

Aetos 700w user manual

Froggit WH2800 user manual

Froggit

Froggit WH2800 user manual

manuals.online logo
manuals.online logoBrands
  • About & Mission
  • Contact us
  • Privacy Policy
  • Terms and Conditions

Copyright 2025 Manuals.Online. All Rights Reserved.