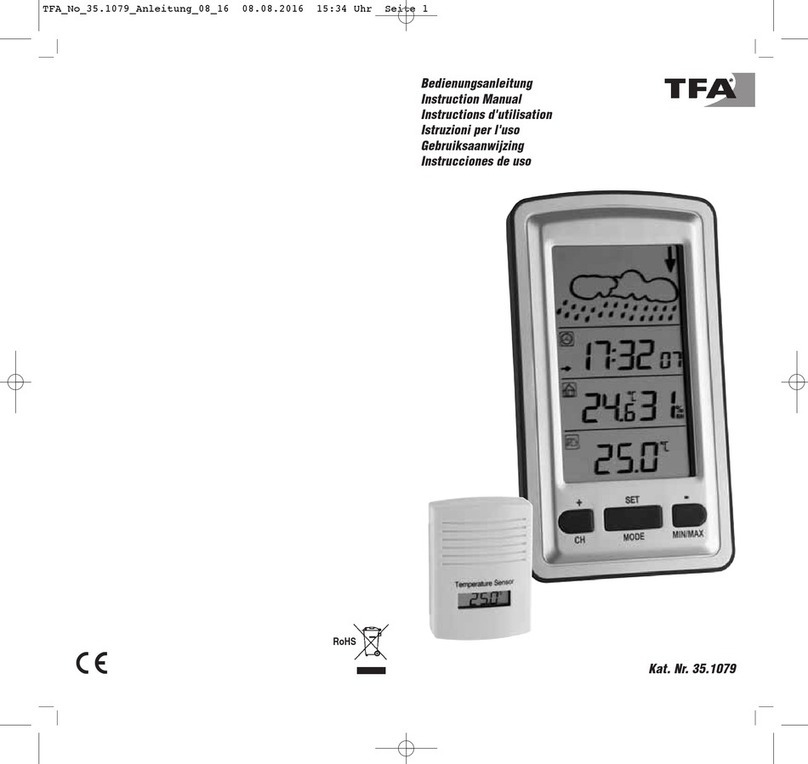
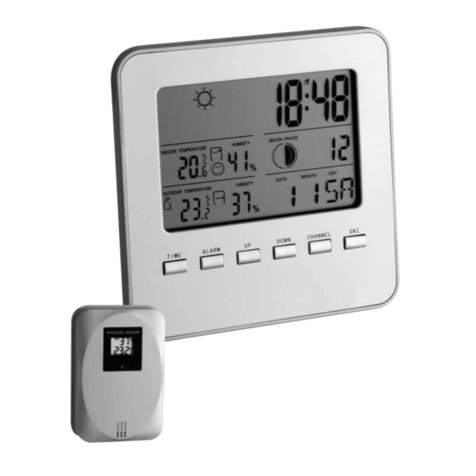
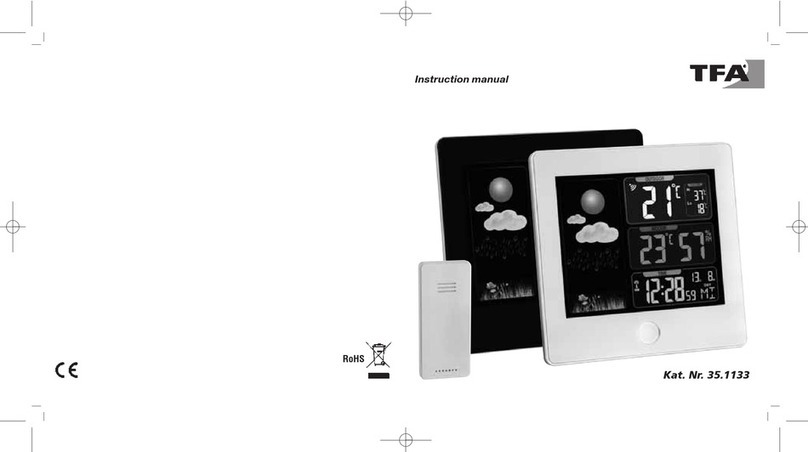
TFA 35.1130 User manual

Bedienungsanleitung
Instruction manual
Mode d'emploi
Istruzioni per l'uso
Gebruiksaanwijzing
Kat. Nr. 35.1130
RoHS
TFA_No. 35.1130_Anleitung 04.04.2014 11:05 Uhr Seite 1

32
Fig. 1 Fig. 2
B 1
B 2
A 1
A 2
B 3
B 6
C 1
C 3
C 4
E 1
E 3
B 8
B 7
C 2
B 9
D 2
E 7
E 5
D 3
C 5
D 1
B 5
A 3 A 4
B 4 E 2 E 4 E 6
TFA_No. 35.1130_Anleitung 04.04.2014 11:05 Uhr Seite 2

Fig. 3
54
Meteotime Fiesta - Wetter-Info-Center
Vielen Dank, dass Sie sich für dieses Gerät aus dem Hause TFA entschieden
haben.
1. Bevor Sie mit dem Gerät arbeiten
•Lesen Sie sich bitte die Bedienungsanleitung genau durch. So werden Sie
mit Ihrem neuen Gerät vertraut, lernen alle Funktionen und Bestandteile
kennen, erfahren wichtige Details für die Inbetriebnahme und den Umgang
mit dem Gerät und erhalten Tipps für den Störungsfall.
•Durch die Beachtung der Bedienungsanleitung vermeiden Sie auch Beschä-
digungen des Gerätes und die Gefährdung Ihrer gesetzlichen Mängelrechte
durch Fehlgebrauch.
•Für Schäden, die aus Nichtbeachtung dieser Bedienungsanleitung verur-
sacht werden, übernehmen wir keine Haftung. Ebenso haften wir nicht für
inkorrekte Messwerte und Folgen, die sich aus solchen ergeben können.
•Beachten Sie besonders die Sicherheitshinweise!
•Bewahren Sie diese Bedienungsanleitung gut auf!
Das Meteotime Fiesta Wetter-Info-Center bietet Ihnen eine professionelle
Wettervorhersage für den aktuellen Tag und die nächsten drei Tage. Die Wetter-
vorhersagen werden von Meteorologen erstellt und durch den Zeitzeichen-Sen-
der DCF77 in Deutschland abgestrahlt und sind in fast ganz Europa empfangbar.
Insgesamt ist der Empfangsbereich der Zeitzeichen-Sender in 90 meteorologische
Regionen (60 Regionen mit 4-Tages-Vorhersage, 30 Regionen mit 2-Tages-Vor-
hersage) aufgeteilt. Die gewünschte Stadt wird einfach ausgewählt und die
jeweils aktuelle Wettervorhersage der Region wird auf dem Display dargestellt.
Somit hat man jederzeit einen schnellen Überblick über den Wetterverlauf der
nächsten Tage. Die Aktualisierung der Wetterdaten erfolgt täglich.
Diese Wetterstation ermöglicht es, unbefristet und ohne weitere Kosten Wet-
terdaten des privaten Anbieters Meteotime über das DCF-Zeitsignal zu emp-
fangen.
Der Versand und die Richtigkeit der übertragenen Daten obliegt Meteotime.
• 60 Regionen mit 4-Tagesvorhersage (390 Städte)
• 30 Regionen mit 2-Tagesvorhersage (80 Städte)
2. Lieferumfang
• Wetterstation (Basisgerät) • Außensender
• Batterien • Bedienungsanleitung
3. Einsatzbereich und alle Vorteile Ihres neuen Gerätes auf einen Blick
• Aktuelle Profi-Wettervorhersage für 90 Wetterregionen in Europa
• Niederschlags-Wahrscheinlichkeit
F 1 F 2
TFA_No. 35.1130_Anleitung 04.04.2014 11:05 Uhr Seite 3

76
Meteotime Fiesta - Wetter-Info-Center
• Windgeschwindigkeit und Windrichtung
• Außentemperatur über max. 3 kabellose Außensender (433 MHz)
• Thermometer für innen
• Regionale Informationen der Tages- und Nachttemperatur
• Informationen über kritische Wetterlagen
• Funkuhr und Kalender (24 Std. Format)
• Einstellung der Zeitzone
• Max/Min Speicher für Temperatur
• Trendanzeige für Temperatur (steigend, gleichbleibend oder fallend)
• Temperaturanzeige in °Celsius
• Auswahl aus 7 Sprachen (Voreinstellung: Deutsch, weitere Sprachen: Schwe-
disch, Niederländisch, Italienisch, Französisch, Spanisch und Englisch
• Bis zu 5 Favoriten-Orte können zur einfachen Abfrage bestimmt werden
• Personalisierung des Ortes (bis zu 10 Zeichen)
• 2 Weckfunktionen: Wochentag (W-ALM) und einmalige Weckzeit (S-ALM)
• Weckzeit-Vorverschiebung bei kalter Außentemperatur auf Kanal 1 (P-ALM)
• Batterie-Schwach-Anzeige für alle Geräte
• Energieversorgung mit 2 x AA Batterien für die Wetterstation und 2 x AAA
Batterien für den Außensender
4. Zu Ihrer Sicherheit
• Das Produkt ist ausschließlich für den oben beschriebenen Einsatzbereich
geeignet. Verwenden Sie das Produkt nicht anders, als in dieser Anleitung
dargestellt wird.
• Das eigenmächtige Reparieren, Umbauen oder Verändern des Gerätes ist
nicht gestattet.
• Dieses Gerät ist nicht zur öffentlichen Information geeignet und nur für den
privaten Gebrauch bestimmt.
Vorsicht!
Verletzungsgefahr:
• Bewahren Sie die Geräte und die Batterien außerhalb der Reichweite von
Kindern auf.
• Batterien nicht ins Feuer werfen, kurzschließen, auseinander nehmen oder
aufladen. Explosionsgefahr!
• Batterien enthalten gesundheitsschädliche Säuren. Um ein Auslaufen der Bat-
terien zu vermeiden, sollten schwache Batterien möglichst schnell ausge-
tauscht werden. Verwenden Sie nie gleichzeitig alte und neue Batterien oder
Batterien unterschiedlichen Typs. Beim Hantieren mit ausgelaufenen Batte-
rien chemikalienbeständige Schutzhandschuhe und Schutzbrille tragen!
Meteotime Fiesta - Wetter-Info-Center
Wichtige Hinweise zur Produktsicherheit!
• Setzen Sie das Gerät keinen extremen Temperaturen, Vibrationen und
Erschütterungen aus.
• Der Außensender ist spritzwassergeschützt, aber nicht wasserdicht. Suchen
Sie einen niederschlagsgeschützten Platz für den Außensender aus.
5. Bestandteile
Basisstation (Empfänger)
Display-Anzeige (Fig. 1):
A:Erster Display-Abschnitt
A 1: Funkuhrsignal-Empfangszeichen
A 2: Empfangsindikator für Wetterdaten heute
A 3: Aktivierte Alarmsymbole
A 4: Uhrzeit und Datum/Stadt/Alarmeinstellungen/ Informationen über
kritische Wetterlagen
B: Zweiter Display-Abschnitt
B 1: Wochentag heute
B 2: Tag/Nacht-Symbol
B 3: Wetterprognose heute
B 4: Windrichtung, Windstärke heute
B 5: Regenwahrscheinlichkeit heute
B 6: Temperatur maximal (Tag)/ minimal (Nacht) heute
B 7: Empfangsindikator für Meteotime-Signal
(im Empfangstest-Modus blinkend)
B 8: Empfangsanzeige und Kanalsymbol für Außentemperatur mit
Tendenzanzeige
B 9: Symbol für Innentemperatur, Innentemperatur mit Tendenzanzeige
C. Dritter Display-Abschnitt
C 1: Tag 2, 3 und 4 Wochentag
C 2: Tag 2, 3 und 4 Tag/Nacht-Symbol
C 3: Tag 2, 3 und 4 Wetterprognose
C 4: Tag 2, 3 und 4 Empfangsindikator für Wetterdaten
C 5: Tag 2, 3 und 4 Temperatur maximal (Tag) / minimal (Nacht)
D: Gehäuse (Fig. 2):
D 1: Wandaufhängung
D 2: Batteriefach
D 3: Ständer (ausklappbar)
TFA_No. 35.1130_Anleitung 04.04.2014 11:05 Uhr Seite 4

98
Meteotime Fiesta - Wetter-Info-Center
E: Tasten (Fig. 2):
Die Basisstation verfügt über 7 Tasten
E 1: [DAY/NIGHT] Taste
• Informationen zu kritischen Wetterlagen
↔
Wechsel der Vorhersage von Tag
auf Nacht
• Drücken Sie diese Taste 3 Sekunden lang, um in den automatischen Wechsel
zu gelangen.
E 2: [CHANNEL] Taste
• Wechsel zwischen den Messungen der Temperatur auf den Kanälen 1, 2 und
3.
• Drücken Sie diese Taste 3 Sekunden lang, um in den automatischen Wechsel
zu gelangen.
E 3: [MEM] Taste
• Anzeigen der maximalen- und minimalen gemessenen Temperatur
• Halten Sie die [MEM] Taste für 3 Sekunden gedrückt, um die Max. und Min.
Speicher zu löschen
E 4: [SET] Taste
• Uhrzeit und Datum
→
Ort/Stadt
→
W-Alarm
→
S-Alarm
→
P-Alarm
• Halten Sie die [SET] Taste für 3 Sekunden gedrückt, um folgende Einstellung
auszuwählen: <1> Land, <2> Zeitzone, <3> Sprache
E 5: [TEST
✔
] Taste
• Überprüfung eines Ortes für bestmöglichen Empfang der Wetterstation
• Fügen Sie die Stadt in die Liste Ihrer Wunsch-Städte ein
ODER
• Löschen Sie die Stadt aus der Liste Ihrer Wunsch-Städte
• Änderung Ihrer Heimatstadt
E 6: [
▲
] Taste
• Erhöhung des Wertes während der Einstellung
• Wecker einschalten (OFF
→
ON)
• 3 Sekunden gedrückt halten, um einen DCF77 Zeitempfang zu starten
• Folgetage mit allen Vorhersage-Infos in die Anzeige bringen
E 7: [
▼
] Taste
• Verringerung des Wertes während der Einstellung
• Einen der voreingestellten Städte - Favoriten auswählen (max. 5)
• Wecker ausschalten (ON
→
OFF)
• 3 Sekunden gedrückt halten, um einen bereits einmal eingeloggten Außen-
sender zu suchen (für neuen Außensender während der Suche nochmals 3
Sekunden drücken!)
Meteotime Fiesta - Wetter-Info-Center
F: Außensender (Fig. 3):
F 1: Batteriefach
F 2: Ständer (abnehmbar) mit Wandaufhängung
6. Inbetriebnahme
• Öffnen Sie das Batteriefach vom Außensender und von der Basisstation.
• Entfernen Sie den jeweiligen Batterieunterbrechungsstreifen.
• Die Basisstation sucht automatisch nach dem Funkuhr-Signal und dem
Meteotime-Signal.
• Ein kurzer Signalton ertönt und alle Segmente werden angezeigt.
• Das Funksignal-Symbol blinkt und
SUCHE SIG.
erscheint im Display.
• Die Uhrzeit und das Datum werden in wenigen Minuten angezeigt. Es gibt
eine große Menge von meteorologischen Informationen für alle Regionen
und für alle Tage, deswegen benötigt das Gerät ca. 24 Stunden ab dem Zeit-
punkt der Anfangseinstellung für den vollständigen Empfang aller Daten.
• Ist die Wetterstation in der Lage, ein Meteotime-Signal zu empfangen, so
wird das Meteotime-Symbol in der zweiten Anzeigereihe angezeigt, das
Symbol wird andernfalls angezeigt.
Symbol → Wetterdaten komplett empfangen
Symbol → Wetterdaten unvollständig
• Verändert sich das Meteotime-Symbol zu ,
bedeutet dies, dass es potenzielle Störquellen in
der Nähe der Wetterstation gibt. Störquellen
können durch elektronische Geräte wie Fernseh-
geräten, Computer, Haushaltsgeräte, etc. kom-
men. Sie können auch durch Beton, Metall oder
elektrischen Geräten in dem Gebäude verursacht
werden. Auch kann eine zu große Entfernung
zum nächsten Funkuhrturm die Ursache sein.
• Sie können die TEST-Funktion nutzen, um eine
bessere Position zu finden.
• Drücken Sie die [TEST
✔
] Taste, zeigt die Info-Box
die Meldung
EMPF.TEST
an.
• Nehmen Sie die Wetterstation, um einen guten
Standort zu finden.
• blinkt: Der Test funktioniert und der Meteo-
time-Empfang ist gut. Sie können das Gerät in
dieser Position belassen.
TFA_No. 35.1130_Anleitung 04.04.2014 11:05 Uhr Seite 5

1110
Meteotime Fiesta - Wetter-Info-Center
• blinkt: Der Test funktioniert und der Meteotime-Empfang ist schwach. Sie
müssen weiterhin nach einer besseren Position suchen.
• Der Test dauert ca. 1 Minute. Sie können den Test mit der [TEST
✔
] Taste
starten und auch jederzeit den Test durch Drücken der [TEST
✔
] Taste been-
den.
•
EMPF.TEST
: die Empfangsqualität während des Empfangstest wird von 1 (sehr
schlecht) bis 9 (sehr gut) dargestellt.
6.1
Wechsel Uhrzeit + Datum Stadt Alarm
• Sie können die [SET] Taste nutzen, um zwischen der Anzeige von Uhrzeit
und Datum, der Stadt, dem Wochentagsalarm (W-ALM), dem Einzelalarm (S-
ALM) und dem Vor-Alarm (P-ALM) zu wechseln.
6.2
Auswahl des Landes und der Stadt
• Drücken Sie die [SET] Taste für 3 Sekunden und im Info-Fenster wird
LAND
EINST.
angezeigt. Drücken Sie [
▲
] oder [
▼
] um das Land zu auszuwählen.
Zum Beispiel: Wenn in der Info-Box
D/GER
erscheint, haben Sie „Deutsch-
land” ausgewählt.
• Drücken Sie [SET], um das Land zu bestätigen. Das Informationenfenster
zeigt
STADT EINST.
an.
• Dann drücken Sie [
▲
] oder [
▼
], um die Stadt zu wählen. Beispiel:
frank-
furtM
ist die Stadt 'Frankfurt am Main'.
• Drücken Sie [SET], um diese Auswahl zu akzeptieren.
• Auf dem Display erscheint
EINST.VORG.
6.3 Aktivierung von Favoriten
• Sobald Sie Ihre Stadt eingestellt haben, wie oben beschrieben, können Sie
noch weitere Städte für einen erleichterten Zugriff speichern.
• Anstatt die Eingabe mit der [SET] Taste zu beenden, können Sie wie folgt
fortfahren:
• Wenn 'Frankfurt am Main' in Ihrer Auswahl enthalten sein soll, drücken
Sie [TEST
✔
] um zu bestätigen.
✔
wird auf Ihrer gewählten Stadt ange-
zeigt und in Ihrem persönlichen Speicherplatz hinterlegt.
• Jetzt können Sie mit [
▲
] oder [
▼
] andere Städte desselben Landes aus-
wählen, und drücken Sie dann die [TEST
✔
] Taste, um zu bestätigen.
• Wenn Sie Städte in verschiedenen Ländern auswählen möchten, dann
müssen Sie die Einstellungen mit der [SET] Taste beenden und das Land
wie vorhin beschrieben ändern.
Meteotime Fiesta - Wetter-Info-Center
• Sie können bis zu fünf Städte als Favoriten wählen. Wenn Sie versuchen,
mehr Städte hinzufügen, dann zeigt die Info-Box
SPEICHER .V
an.
• Wenn die Einstellung abgeschlossen ist, drücken Sie die [SET] Taste, um zu
bestätigen und die Einstellung zu beenden.
•ACHTUNG:
Wenn Sie die Batterien zum ersten Mal einlegen und Sie die Auswahl der
Stadt überspringen, wird die Voreinstellung „Frankfurt am Main” angezeigt.
6.4 Anzeige von Favoriten
• Wenn Sie mehr als eine Stadt als Favorit ausgewählt haben, z.B. Frankfurt
am Main, Paris und Stockholm, dann können Sie durch das Drücken der [
▼
]
Taste durch diese Städte blättern, wenn das Infofenster die Stadt anzeigt
(Drücken Sie die [SET] Taste, bis Sie den Namen der Stadt sehen).
frankfurtM [▼] PARIS[▼] STOCKHOLM
6.5 Löschen von Städten aus der Favoritenliste
• Drücken Sie die [SET] Taste für 3 Sekunden,
LAND EINST.
wird im Info-Fenster
angezeigt. Drücken Sie die [
▲
] oder [
▼
] Taste, um das Land auszuwählen.
• Drücken Sie die [SET] Taste, um das Land zu bestätigen.
• Dann drücken Sie die [
▲
] oder [
▼
] Taste, um die Stadt mit
✔
auszuwählen.
• Drücken Sie die [TEST
✔
] Taste,
✔
um von der Stadt zu entfernen und diese
Stadt aus der Favoritenliste zu entfernen.
• Wiederholen Sie dies, wenn Sie mehr als eine Stadt aus der Liste löschen
möchten.
• Jetzt können Sie auch mit der [
▲
] oder [
▼
] Taste eine weitere Stadt für ihre
Favoriten auszuwählen.
• Nachdem Sie die Änderungen vorgenommen haben, drücken Sie die [SET]
Taste zum Verlassen. Im Info-Fenster wird
EINST.VORG.
angezeigt. Nach 4
Sekunden schaltet die Wetterstation in den Zeit-Datum-Modus.
6.6 Anpassung des Ortsnamen
• Drücken Sie die [SET] Taste für 3 Sekunden und auf dem Informationsfenster
wird
LAND EINST.
angezeigt. Drücken Sie [
▲
] oder [
▼
] Taste, um das Land zu
wählen. Haben Sie Deutschland ausgewählt, so wird es durch
D/GER
darge-
stellt.
• Drücken Sie die [SET] Taste, um das Land zu bestätigen. Das Informationsfen-
ster zeigt
STADT EINST.
an.
• Dann drücken Sie die [
▲
] oder [
▼
] Taste um die Stadt zu wählen und der
Name der Stadt wird im Info-Fenster angezeigt, z.B.
frankfurtM
. Sie können
nun eine neue Stadt, die in der Nähe von Frankfurt am Main liegt, eingeben.
TFA_No. 35.1130_Anleitung 04.04.2014 11:05 Uhr Seite 6

1312
Meteotime Fiesta - Wetter-Info-Center
• Drücken Sie die [MEM] Taste, und ein Cursor blinkt an der ersten Position
des Info-Fensters.
Folgende Eingabebefehle gelten:
Taste Funktion
[
▲
] oder [
▼
] Buchstabenauswahl
[SET] <1> Akzeptieren Sie die ausgewählten Buchstaben
und springen Sie zur nächsten Position.
ODER
<2> Wenn Sie keinen Buchstaben eingegeben
haben und der Cursor in der letzten Position
blinkt, bestätigen Sie mit diesem Knopf ihre
Auswahl und übertragen Sie die Auswahl in
ihren Speicher.
[TEST
✔
] Eine Position zurück.
** Der Ort, den Sie zum Einfügen Ihrer Beschreibung ausgewählt haben, wird
immer noch unter seinem eigenen Namen geführt.
• Drücken Sie die [SET] Taste, um zu bestätigen und die Einstellung zu verlassen.
• Auf dem Display erscheint
EINST.VORG.
6.7 Einstellung der Zeitzone und der Sprache
• Drücken Sie die [SET] Taste für 3 Sekunden, bis im Info-Fenster
LAND EINST.
angezeigt wird.
• Drücken Sie die [SET] Taste. Im Info-Fenster wird
ZONE +OOHR
angezeigt. Stel-
len Sie die Zeitzone mit der [
▲
] oder [
▼
] Taste ein.
• Drücken Sie die [SET] Taste. Im Info-Fenster wird die Sprache anzeigt. Wäh-
len Sie die gewünschte Sprache mit der [
▲
] oder [
▼
] Taste aus. Es gibt insge-
samt sieben Sprachen zur Auswahl: Deutsch, Swedisch, Dutch, Italiano, Fran-
cais, Español, English.
• Drücken Sie die [SET] Taste. Im Info-Fenster wird
EINST.VORG.
angezeigt. Nach
4 Sekunden schaltet das Gerät in den Zeit-Datum-Modus.
•ACHTUNG:
Der Einstellungs-Modus wird automatisch nach ca. 30 Sekunden beendet,
wenn innerhalb dieser Zeit keine Einstellungen vorgenommen werden.
Meteotime Fiesta - Wetter-Info-Center
6.8
Wechsel Tagwetterinformationen Nachtwetterinformationen
• Die Wetterstation ist in der Lage, automatisch jeweils Wettervorhersagen für
den Tag und die Nacht zu geben. Die [DAY/NIGHT] Taste kann genutzt wer-
den, um einen Ausblick auf den TAG (für 10 Sekunden) zu geben, wenn Sie
derzeit Prognosen für die NACHT angezeigt bekommen, oder umgekehrt.
• Drücken Sie die [DAY/NIGHT] Taste 3 Sekunden lang, bis das Symbol
angezeigt wird, um einen automatischen Wechsel der Anzeige einzustellen.
6.9
Informationen zu kritischen Wetterlagen (siehe Anhang)
• Das Meteotime-Signal enthält Informationen über kritische Wetterbedin-
gungen wie: Windböen, gefrierende Nässe, schwerer Schneefall, Blitz, starke
UV-Strahlen, dichter Nebel, Bise, Mistral, etc. für heute und für die nächsten
drei Tage. Ein Warnsignal für kritische Witterungsbedingungen wird in
dem Fall aktiviert.
• Manchmal gibt es in 4 Tagen mehr als eine kritische Wetterlage. Drücken Sie
die [DAY/ NIGHT] Taste, um die Informationen über kritische Wetterbedin-
gungen nacheinander anzuschauen. Ein spezielles Symbol wird aufblinken.
TFA_No. 35.1130_Anleitung 04.04.2014 11:05 Uhr Seite 7

1514
Meteotime Fiesta - Wetter-Info-Center
• Wird keine Taste gedrückt, schaltet die Anzeige zwischen den Informationen
zur kritischen Wetterlage automatisch hin und her, damit Sie diese wahrneh-
men können.
7. Wettersymbole (siehe Anhang)
•
Es gibt 15 Wettersymbole für den Tag und 15 Wettersymbole für die Nacht.
8. Empfang des Außensenders
•
Nach Empfang der Uhrzeit und Wetterdaten werden die Messdaten des
Außensenders an die Basisstation übertragen und das Suchsignal blinkt.
8.1
Zusätzliche Außensender
• Als Ersatz- oder Zusatzaußensender zu Ihrem Meteotime Fiesta Wetter-Info-
Center kann der Außensender Kat.Nr. 30.3127 genutzt werden.
Meteotime Fiesta - Wetter-Info-Center
• Wenn Sie zusätzliche Außensender anschließen wollen, wählen Sie mit dem
CHANNEL Schiebeschalter im Batteriefach des Außensenders für jeden
Außensender einen anderen Kanal aus (2 oder 3).
• Legen Sie zwei neue Batterien 1,5 V AA in das Batteriefach vom Außensen-
der. Achten Sie auf die richtige Polarität beim Einlegen der Batterien.
• Wählen Sie mit der [CHANNEL] Taste auf der Basisstation den freien Kanal aus.
• Drücken und halten Sie die [
▼
] Taste auf der Basisstation für drei Sekunden
und starten die Initialisierung.
• Das Empfangssymbol blinkt oberhalb der Kanalnummer.
• Sobald die Außenwerte empfangen wurden, bleibt das Empfangssymbol ste-
hen und die empfangenen Außenwerte erscheinen im Display.
8.2
Empfangsanzeige
• Das Wellen-Symbol über dem Kanal-Symbol zeigt den aktuellen Verbin-
dungszustand des Außensenders:
Suche nach einem Außensender-Signal
Erfolgreicher Empfang eines Außensender-Signals
Seit einer Stunde wird kein Signal mehr empfangen
8.3
Suche nach Außensendern
• Die Wetterstation kann durch Drücken und Halten der [
▼
] Taste manuell
aktiviert werden, um Signale von externen Außensendern zu suchen.
8.4
Anzeige der Temperatur des Außensenders (Kanal)
Statische Anzeige:
• Drücken Sie die [CHANNEL] Taste, um Messungen von
den verschiedenen Außensendern auszuwählen, entspre-
chend der jeweiligen Kanäle 1, 2 oder 3.
Automatische Sendersuchlauf-Anzeige:
• Drücken Sie die [CHANNEL] Taste, bis das Symbol angezeigt wird, um
den automatischen Sendersuchlauf aller Kanäle zu aktivieren. Die Messun-
gen von jedem Außensender-Kanal werden abwechselnd jeweils für 5
Sekunden angezeigt.
•HINWEIS
:
Die Funktion des automatischen Sendersuchlaufs kann nur aktiviert werden,
wenn mehrere Außensender in Betrieb sind und diese auf unterschiedliche
Kanäle eingestellt sind.
TFA_No. 35.1130_Anleitung 04.04.2014 11:05 Uhr Seite 8

1716
Meteotime Fiesta - Wetter-Info-Center
9. Höchst- und Tiefsttemperaturen
•
Die maximale und minimale Temperatur von innen und außen wird automa-
tisch von der Wetterstation gespeichert. Für die Anzeige drücken Sie die
[MEM]
Taste und die entsprechenden Indikatoren, oder werden
angezeigt.
•
Drücken Sie die
[MEM]
Taste für etwa 3 Sekunden, um die gespeicherten
Daten zu den maximalen und minimalen Temperaturen zu löschen.
10. Alarmfunktionen
•
Es gibt drei verschiedene Alarmfunktionen:
Wochentagalarm (W-ALM) :
Der Alarm ertönt jeden Tag von Montag bis Freitag zur eingestellten Zeit.
Einzelalarm (S-ALM):
Ein einmaliger Alarm, der nur zu einem eingestellten Zeitpunkt ertönt.
Vor-Alarm (P-ALM):
Frühere Weckzeit bei Frostgefahr
10.1
Einstellung der Alarme
• Drücken Sie die [SET] Taste, um den Wochentagsalarm (W-ALM), den Einzel-
alarm (S-ALM) und den Vor-Alarm (P-ALM) aufzurufen.
•
OFF
wird vor dem jeweiligen Alarm angezeigt, wenn der Alarm ausgeschal-
tet ist.
10.1.1
Wochentagalarm (W-ALM) und Einzelalarm (S-ALM):
• Drücken Sie die [SET] Taste, um den Wochentagsalarm(W-ALM) oder den
Einzelalarm (S-ALM) aufzurufen.
• Drücken Sie die [SET] Taste für 3 Sekunden und die Stunden werden blinken.
• Wählen Sie die Stunde mit der [
▲
] oder [
▼
] Taste aus.
• Drücken Sie die [SET] Taste, um zu bestätigen und die Minuten werden blin-
ken.
• Wählen Sie die Minute mit der [
▲
] oder [
▼
] Taste aus.
• Drücken Sie die [SET] Taste, um die Einstellung zu verlassen und die Alarm-
symbole oder werden aktiviert.
10.1.2
VOR-ALARM
(frühere Weckzeit bei Frostgefahr=Außentemperatur bei Sender 1 =/< 0°C)
• Der Vor-Alarm (P-ALM) kann eingestellt werden, wenn der Alarm für
Wochentage (W-ALM) oder einzelne Tage (S-ALM) eingestellt ist und ein
Außensender auf Kanal 1 installiert ist.
Meteotime Fiesta - Wetter-Info-Center
• Drücken Sie mehrmals die [SET] Taste, um den Vor-Alarm (P-ALM) aufzurufen.
• Drücken Sie die [SET] Taste für 3 Sekunden.
• Die Zahl
15
blinkt und dies bedeutet, dass dieser 15 Minuten vor dem
Wochentagsalarm oder dem Einzelalarm ertönt.
• Wählen Sie mit der [
▲
] oder [
▼
] Taste den Vor-Alarm im Intervall zwischen
15 und 90 Minuten.
• Drücken Sie die [SET] Taste, um die Einstellung zu verlassen und das Alarmsym-
bol wird aktiviert.
10.2
Deaktivierung der Alarme
• Ertönt der Alarm, dann blinken die Alarmsymbole , oder .
Drücken Sie die [
▲
] oder [
▼
] Taste, um den Alarm sofort zu stoppen.
• Der Alarm ertönt für 2 Minuten, wenn keine Taste gedrückt wird und wird
danach automatisch deaktiviert.
• Drücken Sie die [SET] Taste, um den Wochentagsalarm (W-ALM), den Einzel-
alarm (S-ALM) oder den Vor-Alarm (P-ALM) aufzurufen.
• Drücken Sie die [
▼
] Taste, um den Alarm auszuschalten und den Alarm auf
„OFF” zu ändern.
• Drücken Sie die [
▲
] Taste, um den Alarm wieder einzuschalten.
11. Batteriewechsel
•
Sind die Batterien der Basisstation zu schwach,
erscheint das Batteriesymbol in der Displayzeile
der Wetterprognose für den heutigen Tag.
•
Sind die Batterien im Außensender zu schwach,
erscheint das Batteriesymbol in der Displayzeile
der Außentemperatur.
•
Öffnen Sie die Batteriefächer und legen Sie
neue Batterien ein. Vergewissern Sie sich, dass
die Batterien polrichtig eingelegt sind. Schlie-
ßen Sie die Deckel wieder.
•ACHTUNG
:
Bei einem Batteriewechsel muss der Kontakt zwischen Außensender und Basis-
station wieder hergestellt werden – also Batterien immer in beide Geräte neu
einlegen oder manuelle Außensendersuche starten.
12. Pflege und Wartung
• Reinigen Sie die Geräte mit einem weichen, leicht feuchten Tuch. Keine
Scheuer- oder Lösungsmittel verwenden!
•
Entfernen Sie die Batterien, wenn Sie die Geräte längere Zeit nicht verwenden.
• Bewahren Sie Ihre Geräte an einem trockenen Platz auf.
TFA_No. 35.1130_Anleitung 04.04.2014 11:05 Uhr Seite 9

1918
Meteotime Fiesta - Wetter-Info-Center
13. Fehlerbeseitigung
Problem Lösung
Keine Anzeige ➜ Batterien polrichtig einlegen
auf der Basisstation ➜ Batterien wechseln
Kein Außensender- ➜Kein Außensender installiert
empfang ➜Batterien des Außensenders prüfen
Anzeige „---“ (keine Akkus verwenden!)
➜Manuelle Außensendersuche starten
➜ Neuinbetriebnahme von Außensender und
Basisstation gemäß Betriebsanleitung
➜ Anderen Aufstellort für Außensender und/oder
Basisstation wählen
➜ Abstand zwischen Außensender und Basisstation
verringern
➜ Beseitigen der Störquellen
Kein DCF Empfang / ➜TEST-Funktion nutzen, um eine bessere Position
keine Wetterinformation zu finden
➜ Manuellen Empfangsversuch starten
➜ Empfangsversuch in der Nacht abwarten
Unkorrekte Anzeige ➜Batterien wechseln
14. Entsorgung
Dieses Produkt wurde unter Verwendung hochwertiger Materialien und
Bestandteile hergestellt, die recycelt und wiederverwendet werden können.
Batterien und Akkus dürfen keinesfalls in den Hausmüll!
Als Verbraucher sind Sie gesetzlich verpflichtet, gebrauchte Batte-
rien und Akkus zur umweltgerechten Entsorgung beim Handel
oder entsprechenden Sammelstellen gemäß nationaler oder loka-
ler Bestimmungen abzugeben.
Die Bezeichnungen für enthaltene Schwermetalle sind:
Cd=Cadmium, Hg=Quecksilber, Pb=Blei
Dieses Gerät ist entsprechend der EU-Richtlinie über die Entsorgung
von Elektro- und Elektronik-Altgeräten (WEEE) gekennzeichnet.
Dieses Produkt darf nicht mit dem Hausmüll entsorgt werden. Der
Nutzer ist verpflichtet, das Altgerät zur umweltgerechten Entsor-
gung bei einer ausgewiesenen Annahmestelle für die Entsorgung
von Elektro- und Elektronikgeräten abzugeben.
Meteotime Fiesta - Wetter-Info-Center
15. Technische Daten
Basisstation:
Messbereich Innentemperatur -10°C…+60°C
Temperaturauflösung 0,1 °C
Betriebstemperatur 0°C…+40°C
Spannungsversorgung Batterien 2 x 1,5 V AA
Gehäusemaße 102 x 28 (52) x 117 mm
Gewicht 156 g (nur das Gerät)
Außensender:
Messbereich Außentemperatur -40°C…+70°C
Funkübertragungsfrequenz 433 Mhz
Funkübertragungsbereich Bis zu 30 Meter (im Freien)
Spannungsversorgung Batterien 2 x 1,5 V AAA
Gehäusemaße 38 x 18 (53) x 105
Gewicht 42 g (nur das Gerät)
TFA_No. 35.1130_Anleitung 04.04.2014 11:05 Uhr Seite 10

2120
Meteotime Fiesta - Weather Info Center
Thank you for choosing this instrument from TFA.
1. Before you start using it
•Please make sure to read the instruction manual carefully. This information
will help you to familiarise yourself with your new device, to learn all of its
functions and parts, to find out important details about its first use and how
to operate it, and to get advice in the event of faults.
•Following and respecting the instructions in your manual will prevent dam-
age to your instrument and loss of your statutory rights arising from
defects due to incorrect use.
•We shall not be liable for any damage occurring as a result of non-following
of these instructions. Likewise, we take no responsibility for any incorrect
readings and for any consequences which may result from them.
•Please take particular note of the safety advice!
•Please keep this instruction manual for future reference.
The Weather info center Meteotime Fiesta provides a professional weather
forecast for the current and the next three days. The weather forecasts are made
by professional meteorologists and are sent out with the radio-time signal gen-
erator DCF77 in Germany and can be received in almost all of Europe. The recep-
tion area for the radio-time signal generator is divided into a total of 90 meteor-
ological regions (60 regions with 4 day forecast, 30 regions with 2 day forecast).
The desired city is simply selected and the respectively current weather forecast
for the region is shown on the display. This gives you a quick overview of the
weather situation for the following days at any time. Updating the weather data
is done every day.
This weather station allows the reception of weather data of the private
provider Meteotime via DCF without time limit and additional costs.
Meteotime is responsible for the dispatch and the correctness of the transmit-
ted data.
• 60 regions with 4 days forecast (390 cities)
• 30 regions with 2 days forecast (80 cities)
2. Scope of delivery
• Weather station (basic station) • Outdoor transmitter
• Batteries • Instruction manual
3. Field of operation and all the benefits of your new instrument at a
glance
• Weather status for 90 regions in Europe
• Rain/snow/hail probability
Meteotime Fiesta - Weather Info Center
• Wind speed and wind direction
• Outdoor temperature via up to 3 wireless outdoor transmitters (433 MHz),
1 transmitter is included
• Indoor thermometer
• Regional day-time temperature and night-time temperature information
• Critical weather alert
• Radio-controlled clock and calendar (24 hours format only)
• Time-zone setting
• Maximum and minimum memories of temperature readings
• Temperature trends (UP/ FLAT/ DOWN)
• Temperature unit in degree °C
• 7-languages (Default: German, other languages: Swedish, Dutch, Italian,
French, Spanish and English)
• Maximum of 5 cities’ weather information can be selected and displayed
• Personalized place name / city (up to 10 letters)
• Two alarms (weekday alarm (W-ALM) and single alarm (S-ALM)
•
Programmable pre- alarm (P-ALM) in case of frost for outdoor sensor (Channel 1)
• Battery low indicator for main unit and wireless sensor
• Powered by 2 x AA batteries for basic station and 2 x AAA batteries for the
outdoor sensor
4. For your safety
• This product is exclusively intended for the field of application described
above. It should only be used as described within these instructions.
• Unauthorised repairs, modifications, calibrations or changes to the product
are prohibited.
• This product is not to be used for public information; it is only intended for
home use.
Caution!
Risk of injury:
• Keep these instruments and the batteries out of the reach of children.
• Batteries must not be thrown into a fire, short-circuited, taken apart or
recharged. Risk of explosion!
• Batteries contain harmful acids. Low batteries should be changed as soon as
possible to prevent damage caused by a leaking.
• Never use a combination of old and new batteries together, or batteries of
different types. Wear chemical-resistant protective gloves and safety glasses
when handling leaking batteries.
TFA_No. 35.1130_Anleitung 04.04.2014 11:05 Uhr Seite 11

2322
Meteotime Fiesta - Weather Info Center
Important information on product safety!
• Do not place your product near extreme temperatures, vibrations or shocks.
• The outdoor transmitter is protected against splash water, but is not water-
tight. Choose a shady and dry position for the transmitter.
5. Elements
Basic station (Receiver)
Display (Fig. 1):
A:First display section
A 1: Reception indicator for radio controlled time
A 2: Reception indicator for weather information for today
A 3: Symbols for activated alarms
A 4: Time and date / cities / setting of alarms / critical weather information
description
B: Second display section
B 1: Weekday for today
B 2: Day/Night symbol
B 3: Weather forcast for today
B 4: Wind direction and strength for today
B 5: Probability of rain for today
B 6: Maximum temperature (today) / minimum temperature (tonight)
B 7: Reception indicator for Meteotime signal
(will be flashing during the reception test)
B 8: Reception symbol and channel symbol for outdoor temperature with
tendency
B 9: Symbol for indoor temperature, indoor temperature with tendency
C. Third display section
C 1: Day 2, 3 and 4 weekday
C 2: Day 2, 3 and 4 day/night symbol
C 3: Day 2, 3 and 4 weather forecast
C 4: Day 2, 3 and 4 reception indicator for weather data
C 5: Day 2, 3 and 4 maximum temperature (day) / minimum temperature
(night)
D: Housing (Fig. 2):
D 1: Wall mount hole
D 2: Battery compartment
D 3: Stand (foldout)
Meteotime Fiesta - Weather Info Center
E: Buttons (Fig. 2):
There are total 7 buttons on the basic station:
E 1: [DAY/NIGHT] button
• Critical weather information
↔
Day/Night weather status change
• Press and hold this button for 3 seconds to enter into auto circulation display
mode .
E 2: [CHANNEL] button
• Read outdoor temperature of channels 1, 2 and 3
• Press and hold this button for 3 seconds to enter into auto circulation display
mode .
E 3: [MEM] button
• Show the maximum and minimum measured temperature readings
• Press and hold this button for 3 seconds to clear all the Max. and Min.
records
E 4: [SET] button
• Time and date
→
city
→
W-ALM
→
S-ALM
→
P-ALM
• Press and hold this button for 3 seconds to select your <1> Country, <2> Time
Zone, <3> Language
E 5: [TEST
✔
] button
• Find the place for the best possible reception
• Add the city into the list of your desired cities
OR
• Remove the city out of the list of desired cities
• Edit your home town
E 6: [
▲
] button
• Increasing of the value during setting
• Turn ON the alarm (OFF
→
ON)
• Press and hold this button for 3 seconds to enforce a radio controlled clock
DCF signal search
• Switch to next days’ weather information
E 7: [
▼
] button
• Decreasing of the value during setting
• Choose one of the pre-selected cities (max. 5)
• Turn OFF the alarm (ON
→
OFF)
• Press and hold this button for 3 seconds to search for an already connected
outdoor transmitter (for a new outdoor transmitter press the button again
for three seconds)
TFA_No. 35.1130_Anleitung 04.04.2014 11:05 Uhr Seite 12

2524
Meteotime Fiesta - Weather Info Center
F: Outdoor transmitter (Fig. 3):
F 1: Battery compartment
F 2: Stand (removable) with wall mount hole
6. Getting started
• Open the battery compartment of the outdoor sensor and the basic station.
• Remove the battery insulation strip.
• The basic station will automatically scan for the radio-controlled clock signal
and the Meteotime weather signal.
• The device will alert you with a beep and all LCD segments will be displayed
for a short moment.
• The time signal symbol will be flashing and
SUCHE SIG.
(
SEARCH
in English)
appears on the display.
• The time and date signal will be received after a few minutes. Since there is
a large amount of weather information for all regions and days, the unit
needs about 24 hours from the time of the initial setup to complete the
reception of all data.
• If the basic station is able to receive the Meteo-
time signal successfully, the Meteotime icon
appears in the second row of the display. Other-
wise, the Meteotime icon will be .
Symbol → Weather information
is received completely
Symbol →Weather information
is incomplete
• If the Meteotime icon changes to , that means
there are potential sources of interference on
the unit. The sources of interference may come
from the electronics equipment such as TV-set,
computers, household machines etc. It may also
be due to lots of concrete, metal parts and elec-
trical equipment in the building. It may also be
due to your living area if it is very far away from
the radio-controlled clock tower.
• You may use the TEST function to find a better
location
• Press the [TEST
✔
] button,
EMPF.TEST
(
SCAN
in
English) appears in the display.
Meteotime Fiesta - Weather Info Center
• Take the basic station to find a good location.
• flashing: The test is running and the Meteotime signal reception is good.
You may leave the device in this position.
• flashing: The test is running and the Meteotime signal reception is poor.
You need to keep on looking for a better location.
• The test lasts about 1 minute. You can restart the test with the [TEST
✔
] but-
ton at any time, and also discontinue the test by pressing the [TEST
✔
] button.
•
SCAN
: the signal strength will be indicated from 1 (very bad) to 9 (very
good).
6.1 Switch time and date
city
alarm
• You may press the [SET] button to switch from the display of the time and
date to city, weekday alarm (W-ALM), single alarm (S-ALM) and pre-alarm (P-
ALM).
6.2 Select the country and the city
• Press and hold the SET button for 3 seconds,
LAND EINST.
(
COUNTRY
in Eng-
lish) appears in the display. Press the [
▲
] or [
▼
] button to select the country.
Press the [SET] button to confirm the country.
STADT EINST
(
CITY
in English)
appears in the display.
• Then, press the [
▲
] or [
▼
] button to select the city
• Press the [SET] button to accept the setting.
• In the display appears
EINST.VORG.
(
EXIT
in English)
6.3 Activate favourites
• Once you have set your city as described above, you may select more cities
for easy access. Instead of terminating the setting with the [SET] button, you
continue as follows:
• If ‘Frankfurt am Main’ is your selection as one of your favourite cities,
then press the [TEST
✔
] button to confirm. A
✔
will be shown on top of
your selected city, and it will be stored into your personal memory list.
• Now, you may press the [
▲
] or [
▼
] button to select more cities in the same
country, and then press the [TEST
✔
] button to confirm.
• If you wish to select cities from different countries, you have to exit the
setting with the [SET] button and re-enter it again as described above in
order to change the country.
TFA_No. 35.1130_Anleitung 04.04.2014 11:05 Uhr Seite 13

2726
Meteotime Fiesta - Weather Info Center
• You may select maximum FIVE cities as favourites. If you want to add more
cities, then
SPEICHER .V
(
MEMFULL
in English) appears in the display.
• When all settings are done, press the [SET] button to confirm and exit the
setting mode.
•REMARK:
If after inserting the batteries for the first time, you are skipping the city
selection, the product will select by default ”Frankfurt am Main” as your
selected city.
6.4 Display of favourites
• If you have selected more than one city as favourite, for example “Frankfurt
am Main”, “Paris” and “Stockholm”, then you are able to scroll through
these cities by pressing the [
▼
] button when the name of the city appears in
the display. (Press the [SET] button until it shows the city name).
frankfurtM [▼] PARIS[▼] STOCKHOLM
6.5 Remove a city from the list of favourites
• Press and hold the [SET] button for 3 seconds,
LAND EINST.
(
COUNTRY
in Eng-
lish) appears in the display. Press the [
▲
] or [
▼
] button to select the country.
• Press the [SET] button to confirm the country.
• Then, press the [
▲
] or [
▼
] button to go to your selected city with the
✔
.
• Press the [TEST
✔
] button to remove the
✔
. Now this city is removed from
the favourites.
• Repeat this if you wish to remove more cities from your list
• Now, you may also press the [
▲
] or [
▼
] button to select another favourite
city.
• Once you have made all you changes, press the [SET] button to quit.
EINST.VORG.
(
EXIT
in English) appears in the display. After 4 seconds, it will go
to the date-time mode.
6.6 Personalize a place name
• Press and hold the [SET] button for 3 seconds.
LAND EINST.
(
COUNTRY
in Eng-
lish) appears in the display. Press the [
▲
] or [
▼
] button to select the country.
• Press the [SET] button to confirm the country. In the display appears
STADT
EINST
(
CITY
in English).
• Then, press the [
▲
] or [
▼
] button to select the city, and the city name appears
in the display.
• Press the [MEM] button; a cursor flashes on the first position of the informa-
tion window.
Meteotime Fiesta - Weather Info Center
Apply the following input commands:
Button Function
[
▲
] or [
▼
] Selection of a letter
[SET] <1> Accept the selected letter and go to the
next position.
OR
<2> If you have not entered any letter and the
cursor is flashing at the last position, confirm
the entry with this button and your place
will also be included in the memory with imme-
diate effect.
[TEST
✔
] One position back in the data entry process
** The place that you have selected to enter your own description will still
exist under its own name.
• Press the [SET] button to confirm and exit.
• In the display appears
EINST.VORG.
(
EXIT
in English)
6.7 Setting of the time zone and language
• Press and hold the [SET] button for 3 seconds,
LAND EINST.
(
COUNTRY
in Eng-
lish) appears in the display.
• Press the [SET] button again, then
ZONE +OOHR
(
ZONE +OOH
in English)
appears in the display.
• Press the [
▲
] or [
▼
] button to adjust the time zone.
• Press the [SET] button again, then the language appears in the display.
• Press the [
▲
] or [
▼
] button to select your desired language. There are total
seven languages for selection: German, Swedish, Dutch, Italian, French,
Spanish and English.
• Press the [SET] button,
EINST.VORG
(
EXIT
in English) appears in the display.
After 4 seconds, it will change to the date-time mode.
•REMARK:
If you do not have any selection into the setup mode up to 30 seconds, it will
automatically exit the setup mode.
TFA_No. 35.1130_Anleitung 04.04.2014 11:05 Uhr Seite 14

2928
Meteotime Fiesta - Weather Info Center
6.8
Switch day weather information night weather information
• The device is able to automatically switch to the day-weather and night-
weather respectively. The user can press the [DAY/NIGHT] button to see the
day-weather (for 10-second period) if currently show the night-weather or
vice versa.
• Press and hold the [DAY/NIGHT] button for 3 seconds to enter into auto cir-
culation display mode .
6.9 Critical
weather information (see appendix)
• The Meteotime weather signal contains critical weather information such as:
Gust, frozen, rain, heavy snow, thunder, strong UV, dense fog, bise, mistral,
etc. for today and the coming three days. In this case a warning symbol
for critical weather conditions will be activated.
• Sometimes there are more than one critical weather information in the 4-
days. Press the [DAY/ NIGHT] button to read the critical weather information
one by one. The special icon of the day will flash when you read the infor-
mation.
Meteotime Fiesta - Weather Info Center
• If no button is pressed, the critical weather information will be displayed, so as
to make sure you are aware of the critical weather details.
7. Weather symbols (see appendix)
•
There are total 15 weather symbols for day and 15 weather symbols for night.
8. Reception of the outdoor transmitter
•
After receiving the time and weather data, the measured values from the out-
door transmitter are transmitted to the base station and the search signal will
be flashing.
8.1
Additional outdoor transmitters
• As a replacement or additional transmitter for your weather station METEO-
TIME FIESTA you can use the transmitter (Cat. 30.3127).
TFA_No. 35.1130_Anleitung 04.04.2014 11:05 Uhr Seite 15

3130
Meteotime Fiesta - Weather Info Center
• If you want to connect additional transmitters, select the CHANNEL slide in
the battery compartment of the transmitter, for each outdoor transmitter
another channel (2 or 3).
• Insert two new batteries 1,5 V AA in the battery compartment of the out-
door transmitter. Ensure batteries polarities are correct.
• Select with the [CHANNEL] button on the basic station the free channel.
• Press and hold the [
▼
] button on the basic station for three seconds and
start the initialization.
• The reception symbol will be flashing above the channel number.
• As soon as the outdoor values are received, the reception symbol remains
and the received outdoor values appear on the display.
8.2
Reception symbols
• The wave icon above the current channel icon shows the connection status
of the corresponding transmitter:
Searching for the signals from the transmitter
Corresponding transmitter signal received successfully
No signals received for over 1 hour
8.3
Search for outdoor transmitter
• The weather station can be activated manually by press-
ing and holding the [
▼
] button to locate signals from an
outdoor transmitter.
8.4
Indication of the outdoor temperature (channel)
Static display:
• Press the [CHANNEL] button to select the measurements from the different
outdoor transmitters on channel 1,2, or 3.
Channel Auto-Scan display:
• To enable an automatic scan of all channels, press and hold the [CHANNEL]
button, until the icon is displayed. The measurements from each remote
channel will be displayed in 5 seconds alternatively.
•NOTE
:
the channel auto-scan feature can be active only if there are more than one
outdoor transmitters operating and are set to different channels.
Meteotime Fiesta - Weather Info Center
9. Maximum and minimum temperatures
•
The maximum and minimum recorded indoor and outdoor temperatures will
be automatically stored in the memory of the main unit. Press the
[MEM]
but-
ton, the respective indicators, or will then be displayed.
•
To clear the memory, hold the
[MEM]
button for 3 seconds. The maximum and
minimum temperature records will be erased.
10. Alarm functions
•
There are three different alarm functions:
Weekday alarm (W-ALM):
This is a repeat alarm that will be activated daily from Monday to Friday at a
set time.
Single alarm (S-ALM):
This is a single alarm that will be activated once at a set time.
Pre-alarm (P-ALM):
Earlier wake-up time in case of frost.
10.1
How to set the alarms
• Press the [SET] button to toggle between weekday alarm (W-ALM), single
alarm (S-ALM) or pre-alarm (P-ALM).
•
OFF
appears in the display of each alarm when the alarm is turned off.
10.1.1
Weekday alarm (W-ALM) and single alarm (S-ALM):
• Press the [SET] button to set the weekday alarm (W-ALM) or the single alarm
(S-ALM).
• Press and hold the [SET] button for 3 seconds, the hour digits will be flash-
ing.
• Enter the hour by using [
▲
] or [
▼
] button.
• Press the [SET] button to confirm, the minute digits will be flashing.
• Enter the minutes by using [
▲
] or [
▼
] button.
• Press the [SET] button to exit and the respective alarm symbols [ ] or [ ]
will be activated.
10.1.2 Setting the ice warning
PRE-ALARM
(outdoor temperature at transmitter 1 =/< 0°C)
• If the weekday (W-ALM) or the single day (S-ALM) alarm is set and an out-
door transmitter is installed on channel 1, the ice warning alarm (P-ALM) can
be programmed.
TFA_No. 35.1130_Anleitung 04.04.2014 11:05 Uhr Seite 16

3332
Meteotime Fiesta - Weather Info Center
• Press several times the [SET] button, to enter into the ice warning alarm set-
ting mode P-ALM.
• Press and hold the [SET] button for three seconds.
• The number
15
will be flashing, meaning that if selected, the alarm will
sound 15 minutes earlier than the weekday or single alarm.
• Select the desired ice warning alarm interval in 15 minutes increments
between 15 and 90 minutes by using the [
▲
] or [
▼
] button.
• Press the [SET] button to exit and the alarm symbol will be activated.
10.2
Deactivate the alarms
• When an alarm sounds, the respective alarm icons , oder . will
be flashing. Press the [
▲
] or [
▼
] button to stop the alarm immediately.
• If no button is pressed, the alarm will sound for 2 minutes and then stop
automatically.
• Press the SET button to toggle between the weekday alarm (W-ALM), single
alarm (S-ALM) or pre-alarm (P-ALM).
• To turn off the alarm, press the [
▼
] button to change the alarm time display
to “OFF”.
• To turn on the alarm, press the [
▲
] button.
11. Battery replacement
•
When the batteries of the outdoor sensor are
used up, the low battery symbol appears on the
display of the outdoor temperature.
•
When the batteries of the basic station are used
up, the low battery symbol appears on the dis-
play of the weather forecast for today.
•
Open the battery compartments and insert the
new batteries. Make sure they have the correct
polarity. Close the covers again.
•Please note
:
When the batteries are changed, the contact between outdoor transmitter
and basic station must be restored – so always insert new batteries into both
units or start a manual transmitter search.
12. Care and maintenance
• Clean the instruments with a soft damp cloth. Do not use solvents or scour-
ing agents.
• Remove the batteries, if you do not use the products for a lengthy period of
time.
• Keep the instruments in a dry place.
Meteotime Fiesta - Weather Info Center
13. Troubleshooting
Problems Solution
No indication ➜ Ensure that the polarities of all batteries are
at the weather station correct
➜ Change the batteries
No transmitter reception ➜No installation of an outdoor transmitter
Display “---“ ➜Check batteries of outdoor transmitter
(do not use rechargeable batteries!)
➜Restart the outdoor transmitter and the basic
station according to the manual
➜Start the manual search for the outdoor trans-
mitter
➜ Choose another place for the outdoor trans-
mitter and/or the basic station
➜ Reduce the distance between the outdoor trans-
mitter and the basic station
➜ Check if there is any source of interference
No DCF reception / ➜Use the TEST function to look for a better
no weather forecast location
➜Start the manual search for the DCF signal
➜Wait for attempted reception during the night
Incorrect indication ➜Change the batteries
14. Waste disposal
This product has been manufactured using high-grade materials and compo-
nents which can be recycled and reused.
Never dispose of empty batteries and rechargeable batteries in
household waste.
As a consumer, you are legally required to take them to your retail
store or to an appropriate collection site depending on national or
local regulations in order to protect the environment
The symbols for the heavy metals contained are:
Cd=cadmium, Pb=lead
This instrument is labelled in accordance with the EU Waste Electri-
cal and Electronic Equipment Directive (WEEE).
TFA_No. 35.1130_Anleitung 04.04.2014 11:05 Uhr Seite 17

3534
Meteotime Fiesta - Weather Info Center
Please do not dispose of this instrument in household waste. The
user is obligated to take end-of-life devices to a designated collec-
tion point for the disposal of electrical and electronic equipment,
in order to ensure environmentally-compatible disposal.
15. Specifications
Basic station:
Measuring range
Indoor temperature -10°C…+60°C
Resolution 0,1 °C
Operating temperature 0°C…+40°C
Power consumption Batteries 2 x 1,5 V AA
Housing dimensions 102 x 28 (52) x 117 mm
Weight 156 g (instrument only)
Outdoor transmitter:
Measuring range
Outdoor temperature -40°C…+70°C
Transmission frequency 433 MHz
Transmission range max. 30 m (free field)
Power consumption Batteries 2 x 1,5 V AAA
Housing dimensions 38 x 18 (53) x 105
Weight 42 g (instrument only)
Meteotime Fiesta - Centre info météo
Nous vous remercions d'avoir choisi l'appareil de la Société TFA.
1. Avant d'utiliser l'appareil
•Veuillez lire attentivement le mode d'emploi. Vous vous familiariserez ainsi
avec votre nouvel appareil, vous découvrirez toutes les fonctions et tous les
éléments qui le composent, vous noterez les détails importants relatifs à sa
mise en service et vous lirez quelques conseils en cas de disfonctionnement.
•En respectant ce mode d'emploi, vous éviterez d'endommager votre appa-
reil et de perdre vos droits résultant d'un défaut pour cause d'utilisation
non-conforme.
•Nous n'assumons aucune responsabilité pour des dommages qui auraient
été causés par le non-respect du présent mode d'emploi. De même, nous
n’assumons aucune responsabilité pour des relevés incorrects et les consé-
quences qu’ils pourraient engendrer.
•Suivez bien toutes les consignes de sécurité!
•Conservez soigneusement le mode d'emploi!
Le centre info météo Meteotime FIESTA vous offre des prévisions météo profes-
sionnelles du jour en cours et des 3 jours suivants. Les prévisions météo sont
effectuées par des professionnels et sont envoyées vers la station en même
temps que le signal horaire DCF77, émis depuis l’Allemagne, pour une réception
à travers toute l’Europe. Les zones de réception du signal horaire sont divisées en
90 régions météo (60 régions avec une prévision à 4 jours, 30 régions avec une
prévision à 2 jours). Votre cité est sélectionnée très simplement et les prévisions
météo de la région s’affichent ensuite à l’écran. Vous consultez alors à votre
guise le bulletin météo d’un coup d’œil pour le jour en cours et les jours à venir.
La mise à jour des données météo se fait quotidiennement.
Avec cette station météo, il est possible de recevoir les données météo du servi-
ce privé Meteotime par signal DCF sans limites et sans frais additionnels.
L’envoi et la justesse des données transmises incombent à Meteotime.
• 60 régions avec prévisions météo de 4 jours (390 cités)
• 30 régions avec prévisions météo de 2 jours (80 cités)
2. Contenu de la livraison
• Station météo (station de base) • Émetteur extérieur
• Piles • Mode d'emploi
3. Aperçu du domaine d'utilisation et tous les avantages de votre
nouvel appareil
• Prévisions météo pour les 90 régions météorologiques d’Europe
• Probabilité de pluie
TFA_No. 35.1130_Anleitung 04.04.2014 11:05 Uhr Seite 18

3736
Meteotime Fiesta - Centre info météo
• Vitesse et direction du vent
• Possibilité de gérer jusqu’à 3 capteurs thermomètres extérieurs (1 seul cap-
teur est fourni avec la station)
• Température intérieure
• Températures régionales pour la journée et la nuit
• Alertes météo
• Heure et date radio-pilotées (format 24H uniquement)
• Réglage du fuseau horaire
• Enregistrement des températures minimales et maximales
•
Indicateur de tendance pour les températures (HAUTE/STABLE/BASSE)
• Affichage de la température en °C
• 7 langues d’affichage au choix parmi (par défaut: allemand, autres langues :
suédois, néerlandais, italien, français, espagnol et anglais)
• Possibilité de sélectionner jusqu’à 5 villes favorites
• Personnalisation d’un lieu (jusqu'à 10 caractères)
• Deux alarmes : une quotidienne (W-ALM) et une ponctuelle (S-AL M)
• Réglage d'une heure de réveil plus précoce en cas de risque de gel (P-ALM)
pour l’émetteur extérieur (Canal 1)
• Indicateurs de piles faibles
• Deux piles 1,5 V AA pour la station météo et deux piles 1,5 V AAA pour
l'émetteur
4. Pour votre sécurité
• L'appareil est destiné uniquement à l'utilisation décrite ci-dessus. Ne l'utili-
sez jamais à d'autres fins que celles décrites dans le présent mode d'emploi.
• Vous ne devez en aucun cas réparer, démonter ou modifier l'appareil par
vous-même.
• Cet appareil ne convient ni à l'information publique, il est destiné unique-
ment à un usage privé.
Attention!
Danger de blessure:
• Gardez les appareils et les piles hors de la portée des enfants.
• Ne jetez jamais les piles dans le feu, ne les court-circuitez pas, ne les démon-
tez pas et ne les rechargez pas. Risques d'explosion!
• Les piles contiennent des acides nocifs pour la santé. Une pile faible doit être
remplacée le plus rapidement possible, afin d'éviter une fuite. N'utilisez
jamais de piles anciennes avec des piles neuves simultanément ou bien enco-
re des piles de types différents. Pour manipuler des piles qui ont coulé, utili-
sez des gants de protection chimique spécialement adaptés et portez des
lunettes de protection !
Meteotime Fiesta - Centre info météo
Conseils importants de sécurité du produit!
• Évitez d’exposer l’appareil à des températures extrêmes, à des vibrations ou
à des chocs.
• L’émetteur extérieur est résistant aux éclaboussures d'eau mais il n'est pas
étanche. Choisissez un emplacement à l'ombre et protégé de la pluie pour
votre émetteur.
5. Composants
Station de base (récepteur)
Affichage (Fig. 1):
A:Première section d'affichage
A 1: Indicateur de réception pour l’horloge radio-pilotée
A 2: Indicateur de réception pour les prévisions météorologiques pour la
journée en cours
A 3: Symboles d'alarme activés
A 4: Date et heure/villes / réglage des alarmes / informations sur les
situations météorologiques critiques
B: Deuxième section d'affichage
B 1: Jour de la semaine pour la journée en cours
B 2: Symbole de jour / de nuit
B 3: Prévisions météorologiques pour la journée en cours
B 4: Rafales de vent et force du vent pour la journée en cours
B 5: Probabilité de pluie pour la journée en cours
B 6: Température maximale (jour) / minimale (nuit)
B 7: Indicateur de réception du signal Meteotime (clignotant en mode test)
B 8: Symbole de réception et canal de la température extérieure avec
indicateur de tendance
B 9: Symbole de la température intérieure, température intérieure avec
indicateur de tendance
C. Troisième section d'affichage
C 1: Jour 2,3 et 4 Jour de la semaine
C 2: Jour 2,3 et 4 Symbole du jour/de la nuit
C 3: Jour 2,3 et 4 Prévisions
C 4: Jour 2,3 et 4 Indicateur de réception pour les prévisions météorologiques
C 5: Jour 2,3 et 4 Température maximale (jour) / minimale (nuit)
TFA_No. 35.1130_Anleitung 04.04.2014 11:05 Uhr Seite 19

3938
Meteotime Fiesta - Centre info météo
D: Boîtier (Fig. 2):
D 1: Œillet de suspension
D 2: Compartiment à piles
D 3: Support (dépliable)
E: Touches (Fig. 2):
Votre station est équipée de 7 touches de fonctions qui sont les suivantes:
E 1: Touche [DAY/NIGHT]
• Permet d’alterner entre l’information sur les situations météorologiques cri-
tiques et l’affichage des données météo prévues pour le jour et l’affichage
des données météo prévues pour la nuit
• Maintenez la touche appuyée pendant 3 secondes pour passer en affichage
alterné .
E 2: Touche [CHANNEL]
• Permet d’alterner entre les températures du canal 1, 2 et 3
• Maintenez la touche appuyée pendant 3 secondes pour passer en affichage
alterné .
E 3: Touche [MEM]
• Permet d’afficher les données minimales/maximales des températures
• Maintenez la touche appuyée pendant 3 secondes pour effacer la mémoire
maximale et minimale.
E 4: Touche [SET]
• Heure et date
→
Ville
→
W-ALM
→
S-ALM
→
P-ALM
• Appuyez sur la touche [SET] pour que l'affichage change
• Maintenez la touche [SET] appuyée pendant 3 secondes pour sélectionner (1)
le pays, (2) le fuseau horaire, (3) la langue d’affichage.
E 5: Touche [TEST
✔
]
• Permet de tester la meilleure réception possible de la station météo
• Permet d’ajouter une ville pré-enregistrée à votre liste de villes favorites
OU
• Permet de supprimer une ville pré-enregistrée de votre liste de villes favorites
• Permet de personnaliser une ville pré-enregistrée
E 6: Touche [
▲
]
• Permet d’augmenter les valeurs lors des réglages
• Permet d’activer l’alarme (OFF
→
ON)
• Maintenez la touche [▲] pendant 3 secondes pour chercher le signal horaire
DCF-77
• Apporter toutes les prévisions sur l'écran pour les jours suivants
E 7: Touche [
▼
]
• Permet de réduire les valeurs lors des réglages
Meteotime Fiesta - Centre info météo
• Permet de sélectionner une des villes préenregistrées (max. 5)
• Permet de désactiver l’alarme (ON
→
OFF)
• Maintenir la touche [
▼
] appuyée pendant 3 secondes afin de rechercher le
signal du capteur extérieur (appuyez encore sur la touche pendant 3 secon-
des pour rechercher un émetteur déjà enregistré)
F: Émetteur (Fig. 3):
F 1: Compartiment à piles
F 2: Support (dépliable) avec œillet de suspension
6. Mise en service
• Ouvrez les compartiments à piles de l’émetteur et de la station de base.
• Enlevez les films respectifs de protection des piles.
• La station météo commence à chercher le signal Meteotime ainsi que le
signal horaire DCF-77.
• Un signal sonore se fait entendre et tous les segments LCD s'allument.
• Le symbole de réception clignote et
SUCHE SIG.
(
CHERCHE.SIG
en français)
apparaît sur l’écran.
• L’heure et la date apparaissent sur l'écran au bout de quelques minutes. Le
transfert des données météo comme la prévision prend un peu plus de
temps. La réception de toutes les données peut prendre jusqu’à 24 heures
après la mise en œuvre de la station.
• Si la station est connectée au signal Meteotime, le symbole Meteotime
s’affichera dans la deuxième ligne de l’écran. S’il n’y a pas de signal, le sym-
bole sera .
Symbole →Données météo réceptionnées
dans leur totalité
Symbole →Données météo incomplètes
• Dans le cas où le symbole Meteotime changerait
et deviendrait , cela signifie qu’il y a des sour-
ces potentielles d’interférences. Ces sources d’in-
terférences peuvent provenir d’équipements
électroniques tels que téléviseurs, ordinateurs,
appareils ménagers, etc. Elles peuvent aussi être
dues à des murs en béton, à des pièces métalli-
ques ou tout autre équipement électrique au
sein d’un même bâtiment. Il est également possi-
ble que votre habitation soit trop éloignée de
l’antenne DCF, située à Francfort.
TFA_No. 35.1130_Anleitung 04.04.2014 11:05 Uhr Seite 20
Table of contents
Languages:
Other TFA Weather Station manuals
Popular Weather Station manuals by other brands

Bresser
Bresser Thermo Hygro Quadro NLX Instruction manua

National Geographic
National Geographic VA Colour RC Weather station instruction manual

ECOWITT
ECOWITT WS3900 manual

LEXIBOOK
LEXIBOOK MeteoClock SM1300 owner's manual

Gill
Gill Metpak PRO user manual

Sainlogic
Sainlogic WS-0835 Plus Professional user manual