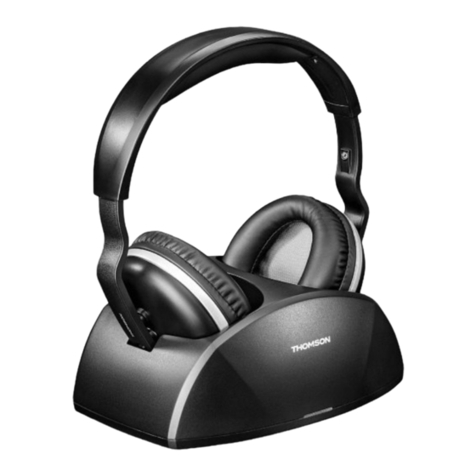
THOMSON Senior 4in1 User manual

WirelessHeadphones
„Senior 4in1“
Casque sans l
Schnurloser Kopfhörer

GOperating Instructions
FMode d‘emploi
DBedienungsanleitung
EInstrucciones de uso
IIstruzioni per l‘uso
NGebruiksaanwijzing
PInstrukcja obsługi
HHasználati útmutató
CNávod kpoužití
QNávod na použitie
SBruksanvisning

Pic. 1 Pic. 2 Pic. 7
Pic. 5 Pic. 6
Pic. 3 Pic. 4 Pic. 8

2
GOperating instruction
Thank you for choosing aThomson product.
Take your time and read the following instructions and infor-
mation completely.Please keep these instructions in asafe
place for futurereference. If you sellthe device, please pass
these operating instructions on to the new owner.
1. Explanation of Warning Symbols and Notes
Risk of electric shock
This symbol indicates product parts energized with a
dangerous voltage of sucient magnitude to constitute a
risk of electric shock.
Warning
This symbol is used to indicate safety instructions or to draw
your attention to specichazards and risks.
Note
This symbol is used to indicate additional information or
important notes.
2. Overview
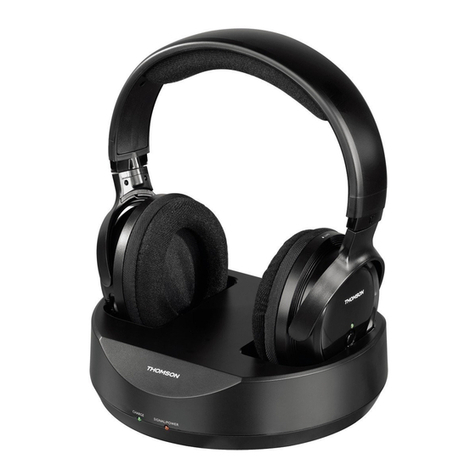
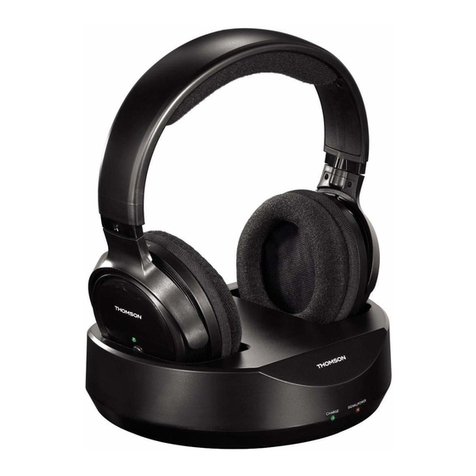
Receiver/headphones –Fig. 1
1. On/off switch
2. LED signal indicator (operation, Bluetooth status or
battery indicator)
3. Volume control (0 =lowest volume, 10 =maximum volume)
4. Balance control (R =right, L=left)
Receiver/headphones –Fig. 2
5. Button for Play /Pause /Accept call /Hang up
6. Button for Microphone /Bluetooth pairing
7. Integrated microphone
8. Headphone charging contacts
9. Left side of headphones (grey) with ball joint
10. Right side of headphones (red) with ball joint
Charging station/transmitter –Fig. 3
11. Transmitter charging contacts
12. LED signal indicator (operation/Bluetooth status)
Charging station/transmitter rear view –Fig. 4
13.
Power supply connection (mains adapter with 5.5 V/550 mA)
14. “Pair” button for pairing (charging station with headphones)
15. “Audio IN” connection for analogue audio connection
(3.5-mm stereo minijack/RCAconnectors)
16. Input selector switch for audio connection
3. Package contents
•Headset receiver with built-in lithium polymer rechargeable battery
•Transmitter and charging station
•Plug-in power supply
•Analogue audio adapter cable (red/white) –
•2x RCAto3.5-mm stereo minijack
•Analogue audio cable (3.5-mm stereo minijack in blue on
both ends)
•Optical audio cable (Toslink/ODT) in black
•2pairs of earpads
4. Safety Notes
Warning
•This product was designed specically for persons with
impaired hearing. Therefore, it is capable of producing
unusually high volumes.
•Beforeusing this product, persons with normal hearing
should turn the volume of the playback device down to
the lowest level!
•This device transmits signals at afrequency of 2,400 MHz.
Since this product may interferewith the operation of
pacemakers, persons with pacemakers should consult a
doctor beforepurchasing this product.
•High sound pressurelevel!
•Thereisarisk of hearing damage.
•To prevent hearing loss, avoid listening at high volume
levels for long periods.
•Using this product limits your perception of ambient noise.
Forthis reason, do not operate any vehicles or machines
while using this product.
•Always keep the volume at areasonable
level. Loud volumes, even over short
periods, can cause hearing loss.
•Protect the product from dirt, moistureand overheating, and
only use it in adry environment.
•Do not use the product in the immediate vicinity of heaters
or other heat sources or in direct sunlight.
•Use the item only in moderate climatic conditions.
•Keep this product, as all electrical products, out of the reach
of children!
•Do not operate the product outside the power limits given in
the specications.
•Do not use the product in moist environments and avoid splashes.
•Do not place any containers lled with liquid, such as vases,
on top of the product or in its immediate vicinity.The con-
tainer may tip over and the liquid spilled may compromise
electrical safety.
•Keep the packaging material out of the reach of children
due to the risk of suffocation.
•The battery is integrated and cannot be removed.
•Never open, damage or swallow batteries or allow them to
enter the environment. They can contain toxic, environmen-
tally unfriendly heavy metals.
•Do not tamper with or damage/heat/disassemble the batter-
ies/rechargeable batteries.
•Do not throw the battery or the product into re.
•The product is intended for private, non-commercial use only.
•Use the product for its intended purpose only.
•Children should be supervised to ensurethat they do not
play with the device.
•Do not use the product in areas wherethe use of electronic

3
devices is not permitted.
•Lay all cables so that they do not pose atripping hazard.
•Do not bend or crush the cable.
•Do not drop the product and do not expose it to any major shocks.
•Dispose of packaging material immediately according to
locally applicable regulations.
•Do not modify the product in any way.Doing so voids the warranty.
•Do not throw the battery or the product into re.
Risk of electric shock
•Do not open the device or continue to operate it if it
becomes damaged.
•Do not use the product if the AC adapter,adapter cable or
power cable is damaged.
•Do not attempt to service or repair the product yourself.
Leave any and all service work to qualied experts.
5. Introduction
These DIGITAL WIRELESS STETHOSET HEADPHONES
operate using the latest wireless Bluetooth technology and also
enable older people to enjoy clean, crystal-clear sound while
watching TV and listening to music at home. At the same time,
they provide the option of also connecting asmartphone or
tablet (multipoint =two devices can be connected with the
headphones simultaneously).
Simply connect the transmitter with the desired
audio source: aDVD player,CDplayer,TVset, hi-system,
smartphone or tablet. You’ll be enjoying vivid, mind-blowing
sound in minutes through extremely simple plug/pair &play
setup –nocomplicated wiring or installation required. It
doesn’t matter whether you connect the headphones using an
analogue connector (RCAorstereo minijack), digital (optical)
connector,oradirect wireless connection (via Bluetooth).
6. General functioning
•2.4-GHz wireless Bluetooth technology
•Charging station with LED display
•Product automatically powers off (when the headphones areplaced
on the charging station) when connected directly via Bluetooth.
•Mute featurefor speech capturewith an internal micro-
phone, or automatic switching to the smartphone/tablet
when multi-paired and accepting acall
•Quick-charging system (headphones fully charged in approx.
2to3hours).
•With individual volume control
•Left/right balance adjustment
•Play/Pause and Accept call button on the chin bar to pause
sound or switch to smartphone/tablet
•LED status indicator for operating/battery indicator and for
showing the status of the Bluetooth connection/pairing
•Selector switch for the analogue or digital connection to the
audio source on the transmitter/charging station
•Ear pads in two different sizes for custom t
•When connected to asmartphone/tablet: Battery charge
indicator (depending on smartphone/tablet function)
7. Technical specications
Transmitting mode wireless Bluetooth
technology
Carrier frequency 2.4 GHz
Operating voltage of
transmitter 5V,550 mA
Operating voltage of
receiver 3.7 V, 380 mA lithium
polymer rechargeable battery
Frequency range 20 Hz –20kHz
Distortion <1%
Signal-to-noise ratio >70dB
Range 10 m
Talking time/music
Max. volume: 5h
Medium volume: 6h
Min. volume: 8h (with fully
charged battery)
Standby 250 h
Bluetooth technology Bluetooth V4.1
Bluetooth prole HSP,HFP,A2DP,AVRCP,SPP
Battery Integrated lithium polymer
rechargeable battery 3.7 V
Battery capacity 380 mA
Frequency band /frequency
bands 2,402 –2,480 MHz
Maximum emitted
transmitting power 3.59 dBm
Specications in accordance with
Regulation (EU) 2019/1782
Manufacturer’sname or trade
mark, commercial registration
number and address
Thomson, HRA12159,
Dresdner Str. 9,
86653 Monheim
Model identier YLJXA-E050055
Input voltage 100-240 V
Input AC frequency 50/60 Hz
Output voltage/
Output current/
Output power
5.0 VDC/0.55 A/
2.75 W
Average active eciency 71.3 %
Eciency at low load (10 %) 58.9 %
No-load power consumption 0.05 W

4
8. Transmitter installation, g. 4+5+6
Warning
•Only connect the product to asocket that has been
approved for the device. The socket must be installed
close to the product and easily accessible.
•Disconnect the product from the network using the power
button –ifthis is not available, unplug the power cord
from the socket.
•When using amulti-socket power strip, make surethat
the sum power draw of all the connected devices does not
exceed its maximum throughput rating.
•If you will not be using the product for along period of
time, disconnect it from mains power.
•Connect the power supply to the power socket on the rear
side of the transmitter (g. 5). To aid in nding the correct
socket on the charging station, it is coloured yellow to
match. It is connected to the power supply in alater step.
Younow have 3options for connecting:
A) Analogue audio connection, e.g. of aTV/hi-via 3.5-mm
stereo minijack or an RCAadapter cable
B) Optical digital connection of e.g. aTV/hi-/soundbar via
Toslink cable
C) Direct Bluetooth connection of aTV/hi-/soundbar to the
stethoset headphones
Attach cables according to the type of connection you wish to use.
8.1 Wired connection options
8.1.1 Analogue audio connection via stereo minijack or
RCAconnector (g. 4+6)
•The stereo minijack is often used to connect the headphones
to aTV/hi-set. Simply connect one end of the stereo mini-
jack cable to the headphone output of the TV set and the
other end to the socket on the transmitter/charging station.
To aid in nding the correct socket on the charging station
(labelled no. 5ing. 4), it is coloured blue to match.
•RCAcables areoften used for external audio outputs of
e.g. set-top boxes, hi-or TV sets to provide adirect audio
signal (usually indicated by sockets coloured white and red).
Connect the stereo minijack cable (blue plug) and the RCA
adapter cable (red/white plugs): Insert the RCAplugs into
the corresponding audio source (e.g. hi-,set-top box or TV).
The colours indicate the right and left channels. Red always
indicates the right channel. Connect the other end (blue ste-
reominijack cable) to the socket of the transmitter/charging
station. To aid in nding the correct socket on the charging
station, it is coloured blue to match (socket no. 5ing. 4).
8.1.2 Digital audio connection via Toslink/ODTcable:
Connection by digital optical audio cable provides the highest
sound quality of any cable connection (with no delay between
the image and the sound). Remove the dust protector caps
from both ends of the cable. Then connect one end to the TV/
hi-/soundbar and the other end to the transmitter/charging
station. Please note that the plugs have guides. To aid in
nding the correct socket on the charging station (labelled no.
7ing. 4), it is coloured black to match.
If using awired connection (section 8.1.1 or 8.1.2) to the
transmitter/charging station, please now select your desired
input source (switch no. 6ing. 4).
8.1.3 First-time setup of headphones with the trans-
mitter/charging station
Warning –Battery (Akku)
•Only use suitable charging devices or USB connections for
charging.
•As arule, do not charge devices or USB connections that
aredefective and do not try to repair them yourself.
•Do not overcharge the product or allow the battery to
completely discharge.
•Avoid storing, charging or using the device in extreme
temperatures and extremely low atmospheric pressure(for
example, at high altitudes).
•When stored over along period of time, batteries should
be charged regularly (at least every three months).
Note
Depending on your TV set, it may be muted
when using the 3.5-mm audio headphone jack.
Youmay need to adjust the headphone output
volume in the conguration menu of the TV (for
use with the wireless headphone system, we
recommend setting the headphone volume to
approx. 80 to 90 percent). The speaker volume
of the TV usually remains unaffected by this
setting. If not, it may need to be adjusted.
Note
Beforeusing the headphones for the rst time, make sure
that the battery is fully charged. Charge the battery for
at least 3hours beforethe rst use. Make surethat the
headphones areswitched off during charging.
8.1.3.1 Enabling and connecting paired devices (trans-
mitter/charging station to stethoset headphones)
Ensurethat when using the headphones for the rst time, they
arenot connected to the charging station!
Both the transmitter/charging station and the headphones
arealready paired/synchronised when delivered. Now switch
the stethoset headphones ON (switch labelled no. 1ing.
1). The LED on the stethoset headphones (g. 1, no. 2) starts
ashing blue slowly.Now connect the mains adapter to the
mains socket (g. 5). The transmitter/charging station rst
ashes quickly (g. 3, LED no. 2). Then the ashing slows and
eventually remains steadily lit once the connection has been
successfully established.
Beforeputting on the headphones for the rst time, rst turn
the volume down. Now you can enjoy your analogue audio
source (TV/hi-or other).
5
8.1.3.2 Pairing the transmitter and receiver (charging
station and stethoset headset)
If your transmitter and receiver arrive unpaired (with both LEDs
on the charging station and the chin bar ashing), then manual
pairing is required.
•To do this, rst insert the network cable into the socket on
the charging station (g. 4, socket no. 3inyellow).
•Make surethat the headphones areswitched off (g. 1,
switch no. 1set to OFF).
•Now switch the headphones on (g. 1, switch no. 1set to ON).
•Press the microphone/pairing button (g. 2, button no. 6) for
approx. 7seconds. The LED begins to ash BLUE quickly.
Note
If the LED is lit green, it indicates that you did not press the
button for long enough. Repeat the procedure.
•Now insert the mains cable of the transmitter into the socket of
the charging station (g. 4, socket no. 3inyellow) and press the
PAIR button (g. 4, button no. 4) for approx. 1second.
•Wait for afew seconds (up to 15 seconds) until the transmit-
ter and receiver have been synchronised and paired. When
pairing has succeeded, both LEDs remain steadily lit in BLUE.
•Now you can enjoy your analogue audio source (as described
in section 8.1.3.1).
Note
•Please note that the system shuts off automatically if the
transmitter and headphones arenot paired within two
minutes.
•The transmitter stops transmitting automatically when
the headphones areplaced in the transmitter/charging
station cradle. To reconnect, the headphones must be
disconnected from the station and the on/off switch
must be switched off or switched back on (coupling now
proceeds automatically).
8.2 Wireless connection options (via Bluetooth)
Youhave the option to connect the headphones directly to your
TV/hi-/soundbar or smartphone/tablet via Bluetooth (provided
your device is equipped with Bluetooth technology).
Only this method permits the additional featureofmaking calls
using the accept/end call function.
8.2.1.1 Bluetooth initial pairing
Note: Pairing
•Make surethat your Bluetooth-capable terminal device is
on and Bluetooth is activated.
•Make surethat your Bluetooth-capable terminal device is
visible for other Bluetooth devices.
•Formoreinformation, please refer to the operating
instructions of your terminal device.
Note: Bluetooth connection with TV/hi-/
soundbar or smartphone/tablet
•Ensurethat your device (TV/hi-/soundbar/smartphone
or other) is compatible with the Bluetooth stethoset
headphones.
•Check whether you must carry out the pairing procedure
using the Sound/Audio menu or using the Connection
menu. Aconnection to other accessories, such as key-
boards, is thus prevented.
•Formoreinformation, please refer to your television’s
operating instructions. Your terminal device must also
support the individual functions (in particular,itmust
support Bluetooth proles).
•The headphones and the terminal device should be no
further than one metreapart. The shorter the distance,
the better.Your terminal device must also support the in-
dividual functions (in particular,itmust support Bluetooth
proles).
•Make surethat the headphones arecharged.
•First ensurethat the transmitter/charging station is discon-
nected from the mains (g. 4, socket no. 3inyellow).
•Make surethat the headphones areswitched off (g. 1,
switch no. 1set to OFF).
•Now switch the headphones back on (g. 1, switch no. 1set
to ON).
•Press the microphone/pairing button (g. 2, button no. 6) for
approx. 7seconds. The LED begins to ash BLUE quickly.The
headphones aresearching for aBluetooth connection.
Note
If the LED is lit green, it indicates that you did not press the
button for long enough. Repeat the procedure.
•Now open the Bluetooth settings on your terminal device
(TV,hi-,smartphone or other) and search for devices until
“WHP6309BT” appears in the list.
•Select “WHP6309BT” and wait until the headphones are
listed as connected in the Bluetooth settings on your terminal
device. The LED on the headphones ashes slowly in green
when no sound is playing or steadily in blue during playback.
•Youcan now use the headphones.
•Please remember to adjust the volume of apaired Bluetooth
device on the device itself.First reduce the volume of the
terminal device (e.g. TV/smartphone) to one thirdofthe
maximum volume (to avoid hearing damage), and then turn
the volume on the headphones up to maximum.
Note –Bluetooth password
Some terminal devices requireapasswordinorder to
connect to another Bluetooth device.
•If your terminal device requests apasswordfor connection
to the headphones, enter 0000.
8.2.1.2 Automatic Bluetooth connection (after success-
ful pairing)
The stethoset headphones connect to previously paired devices
automatically when switched on (g. 1, switch no. 1set to ON)

6
8.3 Multi-point pairing (wired connection in combina-
tion with wireless Bluetooth connection)
In addition to connecting the stethoset headphones to aTV
or hi-with acable, you can also connect them wirelessly.For
example, thisallows you to accept calls via your smartphone
while watching TV.
Note
To enable this, the wireless headphone system WHP6309BT
must already have an active wireless (Bluetooth) connection
as described in section 8.2 to aterminal device (e.g. a
smartphone).
•Now switch off the wireless connection on the terminal
device (Bluetooth set to OFF e.g. on the smartphone).
•Disconnect the mains cable from the socket on the charging
station (g. 4, socket no. 3inyellow).
•Make surethat the headphones areswitched off (g. 1,
switch no. 1set to OFF).
•Now switch the headphones on (g. 1, switch no. 1set to
ON).
•Press the microphone/pairing button on the chin bar (g. 2,
button no. 6) for approx. 7seconds. The LED begins to ash
BLUE quickly.
Note
If the LED is lit green, it indicates that you did not press the
button for long enough. Repeat the procedure.
•Now insert the mains cable of the transmitter back into the
socket of the charging station (g. 4, socket no. 3inyellow)
and press the PAIR button once (g. 4, button no. 4). The
LED on the charging station ashing quickly in BLUE.
•Wait for afew seconds (up to 15 seconds) until the transmit-
ter and receiver have been synchronised and paired. When
pairing has succeeded, both LEDs remain steadily lit in BLUE.
•Please note that the system shuts off automatically if the
transmitter and headphones arenot paired within two min-
utes. Now make surethe connection is active by starting
playback on the audio source (TV/hi-).
•Next, activate Bluetooth on the terminal device (e.g. smart-
phone Bluetooth ON) and select the previously paired
Bluetooth connection “WHP6309BT”.
•Now both the wired connection and the wireless Bluetooth
connection areestablished (similarly to multi-pairing).
•Calls can be accepted while e.g. watching TV.
8.4 Charging, g. 7
Beforerecharging, make surethat the headphones are
switched off (g. 1, switch no. 1set to OFF).
Place the headphones on the transmitter station and make
surethat the charging contacts aretouching the charging
pins. Charging begins automatically.The LED indicator ashes
slowly in GREEN (g. 1, LED no. 2) during charging. When the
battery is fully charged, the status LED remains steadily lit in
GREEN. Afully charging process takes approx. 2hours.
Note
To prevent damage to the batteries, always switch off the
headphones when they arenot in use. Beforeusing them
for the rst time, the batteries should be fully charged.
To guarantee an acceptable charge, the batteries should
initially be charged for 3hours. Make surethat the stethoset
headphones areswitched off during charging.
8.5 Additional functions
8.5.1.1 Using the microphone and general notes on
pausing (g. 2, button no. 6) +LED (g. 1, LED no. 2)
Thanks to an integrated microphone, you have the option of
having ambient sounds (e.g. the doorbell or conversations) re-
produced over the headphones (LED lit GREEN) while listening
to an audio source (TV/hi-).
Note
Please note that the microphone is very sensitive.
Be careful to avoid hearing damage!
Pressing the Play/Pause button at any time pauses the audio
(g. 2, button no. 5). Please note that the LED on the head-
phones starts ashing slowly in GREEN (during playback, it
remains steadily lit in BLUE).
8.5.1.2 Using the microphone for phone calls (Blue-
tooth with smartphone/tablet, g. 2,
button no. 5) +LED (g. 1, LED no. 2)
With an active wireless Bluetooth connection to asmartphone
or tablet, you can press the Play/Pause button (g. 2, button
no. 5) to accept calls and speak through the microphone
(provided this is supported by the terminal device). When a
callcomes in, the LED ashes green/blue, and during acall, it
remains lit blue. Any running audio playback is paused until
the conversation is ended.
8.5.1.3 Balance control (g. 1, control no. 4)
Using the controller,you can balance out ahearing sensitivity
difference between the right and left.
8.5.1.4 Note on battery charge level (stethoset head-
phones)
When the battery charge level of the stethoset headphones is
low,the LED (g. 1, LED no. 2) starts ashing slowly in BLUE.
8.6 Troubleshooting
8.6.1 No sound
•Check that the power supply plug is fully inserted into the
mains socket and the other end is properly connected to the
power supply socket on the transmitter.
•Make surethat the power on/off switches on both the trans-
mitter and the headphones areinthe ON position.
•The battery in the headphones may have insucient remain-

7
ing charge. Charge the battery.
•Check that your TV,hi-system or audio source is switched on
and achannel is correctly congured to send an audio signal.
•The output volume of the audio source may be too low.
Adjust the volume accordingly.
•Increase the volume using the control on the headphones.
•Is the Pause button on the headphones activated (LED on the
headphones ashing slowly in GREEN)?
•The connected audio/video device may not be in playback
mode. Please start playback.
9. Careand Maintenance
Note
Disconnect the device from the power supply beforecleaning
it or if it is not going to be used for along period of time.
•Only clean this product with aslightly damp, lint-free cloth
and do not use aggressive cleaning agents.
•Forhygienic reasons, clean the earpads regularly.Donot use
alcohol-based agents.
7. Warranty Disclaimer
Hama GmbH &CoKGassumes no liability and provides no
warranty for damage resulting from improper installation/
mounting, improper use of the product or from failureto
observe the operating instructions and/or safety notes.
8. Service and Support
Please contact Hama Product Consulting if you have any
questions about this product.
Hotline: +49 9091 502-115 (German/English)
Further support information can be found here:
www.hama.com
9. Recycling Information
Note on environmental protection:
After the implementation of the European Directive
2012/19/EU and 2006/66/EU in the national legal
system, the following applies: Electric and electronic
devices as well as batteries must not be disposed of
with household waste. Consumers areobliged by law to return
electrical and electronic devices as well as batteries at the end
of their service lives to the public collecting points set up for
this purpose or point of sale. Details to this aredened by the
national law of the respective country.This symbol on the
product, the instruction manual or the package indicates that a
product is subject to these regulations. By recycling, reusing the
materials or other forms of utilising old devices/batteries, you
aremaking an important contribution to protecting our
environment.
10. Declaration of Conformity
Hereby,Hama GmbH &CoKGdeclares that the radio
equipment type [00131991] is in compliance with
Directive 2014/53/EU.The full text of the EU
declaration of conformity is available at the following internet
address: www.hama.com->00131991->Downloads.

8
FMode d‘emploi
Nous vous remercions d’avoir choisi un produit Thomson.
Veuillez prendreletemps de lirel‘ensemble des remarques et
consignes suivantes. Veuillez conserver ce mode d‘emploi àportée
de main andepouvoir le consulter en cas de besoin. Transmet-
tez-le au nouveau propriétaireavec l’appareil le cas échéant.
1. Explication des symboles d‘avertissement et des
remarques
Risque d’électrocution
Ce symbole indique un risque de contact avec des parties
non isolées du produit susceptibles de conduireuncourant
électrique capable de provoquer un risque d‘électrocution.
Avertissement
Ce symbole est utilisé pour indiquer des consignes de
sécurité ou pour attirer votreattention sur des dangers et
risques particuliers.
Remarque
Ce symbole est utilisé pour indiquer des informations
supplémentaires ou des remarques importantes.
2. Aperçu
Récepteur /casque g. 1
1. Interrupteur de mise sous/hors tension
2. LED d’achage de signal (fonctionnement, état Bluetooth
ou témoin de batterie)
3. Réglage du volume (0 =volume minimum, 10 =volume
maximum)
4. Réglage de la balance (R =droite /L=gauche)
Récepteur /casque - g. 2
5. Touche de lecture(Play) /pause /prise d’appel / nd’appel
6. Touche pour le microphone /lecouplage Bluetooth
7. Microphone intégré
8. Contacts de charge du casque
9. Côté gauche du casque (gris) avec articulation àrotule
10. Côté droit du casque (rouge) avec articulation àrotule
Station de recharge /émetteur - g. 3
11. Contacts de recharge de l’émetteur
12. LED d’achage de signal (fonctionnement et Bluetooth)
Face arrièredelastation de recharge /del’émetteur - g. 4
13. Connexion électrique /dubloc secteur (bloc secteur de
5,5 V–550 mA)
14. Touche “Pair” pour le couplage (station de recharge avec
le casque)
15. Port “Audio-In” pour connexion audio analogique (jack de
3,5 mm ou via adaptateur RCA)
16. Sélecteur d’entrée pour connexion audio
3. Contenu de l’emballage
•Casque /récepteur avec batterie lithium polymèreintégrée
•Émetteur /station de recharge
•Bloc secteur
•Câble adaptateur audio analogique (rouge/blanc) –
•2connecteurs RCAvers jack femelle stéréo de 3,5 mm
•Câble audio analogique (jack mâle stéréo 3,5 mm, les deux
extrémités sont bleues)
•Câble audio à breoptique (Toslink/ODT), noir
•2paires de coussinets
4. Consignes de sécurité
Avertissement
•Ce produit est spécialement conçu pour les personnes
dont les capacités auditives sont entreautres limitées. Il
est par conséquent en mesuredegénérer des volumes
sonores inhabituellement élevés.
•Avant d’utiliser ce produit, les personnes présentant une
audition normale doivent régler le volume de l’appareil de
lectureauniveau le plus bas !
•Cet appareil transmet des signaux sur une fréquence de
2400 MHz. Avant d’acheter ce produit, toute personne
portant un stimulateur cardiaque doit se faireconseiller
par un médecin car cet article, lorsqu’il fonctionne, peut
affecter le fonctionnement des stimulateurs cardiaques.
•Forte pression acoustique.
•Risque de traumatisme auditif.
•Pour éviter toute perte auditive, abstenez-vous d’écouter
des chiers audio àunniveau sonoreélevé pendant de
longues périodes.
•L‘utilisation du produit limite votreperception des bruits
ambiants. N‘utilisez donc pas le produit lorsque vous
conduisez un véhicule ou faites fonctionner une machine.
•Maintenez en permanence un niveau de
volume raisonnable. Un volume excessif -
même àcourte durée -est susceptible
d‘endommager votreouïe.
•Protégez le produit de toute saleté, humidité, surchauffe et
utilisez-le uniquement dans des locaux secs.
•N’utilisez pas le produit àproximité immédiate d‘un chauffage,
d’autres sources de chaleur ou exposé aux rayons directs du soleil.
•Utilisez l’article uniquement dans des conditions climatiques
modérées.
•Cet appareil, comme tout appareil électrique, doit êtregardé
hors de portée des enfants !
•N‘utilisez pas le produit en dehors des limites de puissance
indiquées dans les caractéristiques techniques.
•N‘utilisez pas le produit dans un environnement humide et
évitez toute projection d‘eau.
•Ne posez pas de récipients remplis de liquides, comme des
vases, sur le produit ou àproximité de ce dernier.Lerécipient
pourrait se renverser et le liquide pourrait compromettrela
sécurité électrique.
•Tenez les emballages d‘appareils hors de portée des enfants,
risque d‘étouffement.
•La batterie est installée de façon permanente et ne peut pas
êtreretirée.

9
•Ne tentez pas d‘ouvrir les piles ou les batteries, faites attention
àceque des petits enfants ne les avalent pas et ne les jetez
pas avec les ordures domestiques. Elles sont susceptibles de
contenir métaux lourds toxiques et nocifs pour l‘environnement.
•Ne modiez pas et/ou ne déformez/chauffez/désassemblez
pas les batteries/piles.
•Ne jetez pas le produit ni aucune batterie dans un feu.
•Ce produit est destiné àune installation domestique non
commerciale.
•Utilisez le produit exclusivement conformément àsadestination.
•Les enfants doivent êtresurveillés ndegarantir qu‘ils ne
jouent pas avec le produit.
•N‘utilisez pas le produit dans les zones dans lesquelles
l‘utilisation d‘appareils électroniques est interdite.
•Posez tous les câbles de telle sorte qu’ils ne présentent
aucun risque de chute.
•Faites attention ànepas plier ni coincer le câble.
•Protégez le produit des secousses violentes et évitez tout
choc ou toute chute.
•Recyclez les matériaux d’emballage conformément aux
prescriptions locales en vigueur.
•N’apportez aucune modication àl’appareil. Des modica-
tions vous feraient perdrevos droits de garantie.
•Ne jetez pas le produit ni aucune batterie dans un feu.
Risque d’électrocution
•Ne tentez pas d‘ouvrir le produit en cas de détérioration et
cessez de l’utiliser.
•Cessez d‘utiliser le produit si l‘adaptateur CA,lecâble
adaptateur ou le câble d‘alimentation est endommagé.
•Ne tentez pas de réparer l’appareil vous-même ni
d’effectuer des travaux d’entretien. Déléguez tous travaux
d‘entretien àdes techniciens qualiés.
5. Introduction
Ce CASQUE STÉTHOSCOPIQUE NUMÉRIQUE SANS FIL
fonctionne avec la technologie Bluetooth sans ldernière
génération et permet même aux personnes âgées de proter d’un
son clair et net en regardant la télévision ou en écoutant de la
musique àlamaison. Un smartphone ou une tablette peuvent
par ailleurs yêtreconnectés simultanément (Multipoint =deux
appareils peuvent êtreconnectés simultanément àcecasque).
Connectez l’émetteur àlasource audio souhaitée :lecteur DVD,
lecteur CD, téléviseur,chaîne Hi-Fi, smartphone ou tablette.
Vous pouvez proter d’un son vivant et entraînant en seulement
quelques minutes, sans câblage compliqué et après une installa-
tion très simple permettant une utilisation immédiate. Le type de
connexion utilisée ne jour aucun rôle ;peu importe si vous utilisez
une connexion analogique (RCAoujack), numérique (optique) ou
si vous établissez une connexion sans ldirecte (via Bluetooth).
6. Fonctions générales
•Technologie Bluetooth sans lde2.4 GHz
•Station de recharge avec voyant LED
•Désactivation automatique du produit en cas de connexion
Bluetooth directe (lorsque l’oreillette est insérée dans la
station de recharge)
•Mise en sourdine pour la prise d’un appel via le microphone
interne ou commutation automatique sur votresmartphone /
votretablette grâce àlafonction Multipairing /deprise d’appel
•Système de recharge rapide (durée de la charge complète du
casque :env.2-3 h)
•Réglage du volume pour un ajustement individuel
•Réglage de balance gauche/droite
•Play/Pause ou prise d’appel, arrêt du son sur le casque
stéthoscopique, fonction smartphone/tablette
•LED d’achage d’état de fonctionnement /témoin de batte-
rie ou pour l’achage de l’état de la connexion Bluetooth /
du couplage
•Sélecteur pour la connexion analogique ou numérique de la
source audio sur la station d’émission /lastation de recharge
•2coussinets de taille différente pour un ajustement individuel
•Lorsqu’un smartphone /une tablette est connecté(e) :
achage du niveau de batterie du casque (selon la fonction
smartphone/tablette)
7. Caractéristiques techniques
Mode d’émission technologie Bluetooth
sans l
Fréquence porteuse 2,4 GHz
Tension de service de
l’émetteur 5V,550 mA
Tension de service du
récepteur 3,7 V, 380 mAh avec
batterie lithium polymère
Plage de fréquence 20 Hz –20kHz
Distorsion <1%
Rapport bruit >70dB
Portée 10 m
Temps de conversation /
musique
àvolume maximum :5h
àvolume moyen :6h
àvolume minimum :
8havec une batterie
entièrement chargée
Veille 250 h
Technologie Bluetooth Bluetooth V4.1
ProlBluetooth HSP,HFP,A2DP,AVRCP,SPP
Batterie batterie lithium polymère
intégrée 3,7 V
Capacité de la batterie 380 mA
Gamme(s) de fréquences 2402 –2480 MHz
Puissance d’émission
maximale 3,59 dBm

10
Indications prévues par le règlement (CE)
2019/1782
Raison sociale ou marque dé
posée, numérod’enregistre
ment au registreducommerce
et adresse du fabricant
Thomson, HRA12159,
Dresdner Str. 9,
86653 Monheim
Référence du modèle YLJXA-E050055
Tension d’entrée 100-240 V
Fréquence du CA d’entrée 50/60 Hz
Tension de sortie/
Courant de sortie/
Puissance de sortie
5.0 VDC/0.55 A/
2.75 W
Rendement moyen en mode
actif 71.3 %
Rendement àfaible charge
(10 %) 58.9 %
Consommation électrique hors
charge 0.05 W
8. Installation de l’émetteur g. 4+5+6
Avertissement
•Utilisez l‘appareil exclusivement branché àune prise de
courant appropriée. La prise de courant doit êtresituée à
proximité du produit et doit êtrefacilement accessible.
•Coupez le produit du secteur àl‘aide de l‘interrup-
teur -débranchez la prise de courant en cas d‘absence
d‘interrupteur.
•En casdeprises multiples, veillez àceque les appareils
consommateurs branchés ne dépassent pas la puissance
absorbée totale admissible.
•Débranchez l’appareil si vous ne comptez pas l’utiliser
pendant un certain temps.
•Branchez le bloc secteur àlaprise située sur la face arrièrede
l’émetteur (g. 5). Aide de branchement :lacouleur (jaune)
doit coïncider sur la station de recharge. Le raccordement à
la prise électrique s’effectueraplus tard.
3type de connexions possibles :
A) Connexion audio analogique (pour TV /Hi-Fi, etc.) via un
câble jack de 3,5 mm ou un câble adaptateur RCA
B) Connexion numérique optique (pour TV /Hi-Fi /barrede
son, etc.) via un câble Toslink
C) Connexion Bluetooth directe (pour TV /Hi-Fi /barredeson,
etc.) au casque stéthoscopique
Les raccordements correspondants au type de connexion
doivent êtreréalisés.
8.1 Possibilités de connexion par câble
8.1.1 Connexion audio analogique avec un câble jack
ou RCA(g. 4+6)
•Le câble jack est fréquemment utilisé pour la connexion
casque du téléviseur /delachaîne Hi-Fi. Connectez une pre-
mièreextrémité du câble jack àlasortie casque du téléviseur
et l’autreextrémité àlaprise de l’émetteur /delastation de
recharge. La couleur (bleu) doit coïncider sur la station de
recharge (prise n° 5, voir g. 4) .
•Le câble RCAest fréquemment utilisé pour les sorties audio
externes (sortie d’un décodeur,d’une chaîne Hi-Fi ou d’un
téléviseur,etc.) et offreunsignal audio direct (les prises
sont souvent blanches et rouges). Branchez le câble jack
(connecteurs bleus) et le câble adaptateur RCA(connecteurs
rouges/blancs) :insérez les connecteurs RCAenfonction de
la source audio (Hi-Fi /STB, TV,etc). Les couleurs servent de
marquage droite/gauche, le rouge représentant toujours le
côté droit. Branchez désormais l’autreextrémité (connecteur
jack bleu) àlaprise de l’émetteur /delastation de recharge.
La couleur (bleu) doit coïncider sur la station de recharge
(prise n° 5, voir g. 4).
8.1.2 Connexion audio numérique avec le câble Toslink/ODT:
La connexion audio optique numérique est la meilleure
connexion par câble possible (pas de décalages entrel’image
et le son). Desserrez les capuchons anti-poussièredes deux ex-
trémités du câble et branchez un côté au téléviseur,àlachaîne
Hi-Fi ou àlabarredeson et l’autrecôté àlastation d’émission
ou àlastation de recharge. Veuillez noter que les connecteurs
ont des guides. La couleur (noir) doit coïncider sur la station
de recharge (prise n° 7, voir g. 4).
Si vous avez opté pour une connexion par câble sur l’émetteur /
la station de recharge (point 8.1.1 ou 8.1.2), choisissez désor-
mais votresource d’entrée (commutateur n° 6, voir g. 4).
8.1.3 Mise en service du casque avec l’émetteur /la
station de recharge
Avertissement –Batterie
•Utilisez exclusivement un chargeur approprié ou une
connexion USB pour la recharge.
•Cessez d‘utiliser tout chargeur ou toute connexion USB
défectueux et ne tentez pas de réparer ces derniers.
•Ne surchargez ou ne déchargez pas totalement le produit.
•Évitez de stocker,charger et utiliser le produit àdes
températures extrêmes et àune pression atmosphérique
extrêmement basse (à haute altitude, par exemple).
•Rechargez régulièrement le produit (au moins une fois par
trimestre) en cas de stockage prolongé.

11
Remarque
En fonction du téléviseur,celui-ci est mis
en sourdine si vous utilisez la sortie casque
audio 3,5 mm –lecas échéant, vous devrez
ajuster le volume du casque dans le menu du
téléviseur (nous recommandons de régler le
volume du casque àenv.80%-90%lors de
l’utilisation du système de casque sans l).
Le réglage du haut-parleur du téléviseur n’en
est généralement pas affecté. Dans le cas
contraire, vous devrez l’ajuster.
Remarque
Avant la premièreutilisation, veillez àceque la batterie soit
entièrement chargée. Veuillez charger la batterie pendant au
moins 3heures avant la premièreutilisation. Assurez-vous
que le casque est éteint et hors service pendant la recharge.
8.1.3.1 Activation et connexion d’appareils couplés
(connexion de l’émetteur /delastation de recharge au
casque stéthoscopique)
Veillez àceque le casque ne soit pas inséré dans la station de
recharge lors de la premièremise en service.
L’émetteur /lastation de recharge et le casque stéthoscopique
sont déjà couplés/synchronisés par défaut. Mettez le casque
stéthoscopique sur “ON” (g. 1avec commutateur n° 1). La
LED du casque stéthoscopique (g. 1n°2)clignote lentement
en BLEU.Insérez le bloc secteur dans la prise de courant
prévue àcet effet (g. 5). Le témoin de l’émetteur /dela
station de recharge clignote d’abordrapidement (g. 3, LED
n° 2), puis lentement et reste ensuite allumé en BLEU en cas
de connexion conforme.
Commencez par régler le volume du casque àunniveau faible
avant la premièreutilisation. Vous pouvez alors proter de
votresource audio analogique (TV /Hi-Fi ou autre).
8.1.3.2 Couplage entrel’émetteur et le récepteur (entre
la station de recharge et le casque stéthoscopique)
Vous devez effectuer un couplage manuel si l’émetteur et
le récepteur ne sont pas couplés par défaut (les LED de la
station de recharge et du casque stéthoscopique clignotent en
permanence).
•Commencez par brancher le câble d’alimentation àlaprise
de la station de recharge (g. 4, prise n° 3/jaune).
•Vériez que le casque stéthoscopique est bien hors tension
(g. 1, commutateur n° 1sur “OFF”).
•Mettez le casque stéthoscopique sous tension (g. 1,
commutateur n° 1sur “ON”).
•Appuyez sur la touche du microphone /touche de couplage
(g. 2, touche n° 6) pendant env.7secondes. La LED se met
àclignoter rapidement en BLEU.
Remarque
L’allumage VERT de la LED signieque vous n’avez pas appuyé
susamment longtemps sur la touche. Répétez la procédure.
•Branchez le câble d’alimentation de la station d’émission
dans la prise de la station de recharge (g. 4, prise n° 3/
jaune) et appuyez sur la touche “PAIR” (g. 4, touche n° 4)
pendant env.1seconde.
•Patientez quelques secondes (15 secondes maxi) jusqu’à
obtenir la synchronisation/le couplage de l’émetteur avec le
récepteur.Les deux LED s’allument en BLEU en permanence
en cas de couplage conforme.
•Vous pouvez commencer àutiliser votresource audio analo-
gique, comme décrit au point 8.1.3.1.
Remarque
Veuillez noter que le système s’éteint automatiquement
lorsque l’émetteur et le casque stéthoscopique ne sont pas
couplés dans un délai de 2minutes.
La transmission de l’émetteur est automatiquement désac-
tivée lorsque le casque stéthoscopique est inséré dans la
station d’émission /lastation de recharge (recharge). Pour
rétablir la connexion, le casque stéthoscopique doit être
déconnecté de la station et le bouton de mise sous/hors
tension mis sur “OFF”, voireremis sur “ON” (le couplage
s’effectue alors automatiquement).
8.2 Possibilités de connexion sans l(via Bluetooth)
Vous pouvez établir une connexion Bluetooth directe entreun
téléviseur /une chaîne Hi-Fi /une barredeson ou un smart-
phone /une tablette (à condition qu’ils soient compatibles
Bluetooth) et le casque stéthoscopique.
La fonction de téléphonie (permettant de prendreoudetermi-
ner un appel) est disponible en supplément avec notreproduit.
8.2.1.1 Premièreconnexion Bluetooth (couplage)
Remarque :Couplage
•Assurez-vous que votreappareil Bluetooth est bien sous
tension et que sa fonction Bluetooth est bien activée.
•Assurez-vous également que votreappareil Bluetooth est
bien détectable par d‘autres appareils Bluetooth.
•Veuillez consulter le mode d’emploi de votreappareil àcesujet.
Remarque :Connexion Bluetooth àun
téléviseur /àune chaîne Hi-Fi /àune barrede
son ou àunsmartphone /àune tablette
•Assurez-vous que votreappareil (téléviseur /chaîne Hi-Fi /
barredeson /smartphone, etc.) est bien compatible avec
le casque stéthoscopique Bluetooth.
•Vériez si vous devez effectuer le couplage via le menu Son/
Audio ou via le menu de connexion ;vous écarterez ainsi toute
connexion avec un accessoire, tel qu’un clavier de saisie.
•Veuillez également consulter le mode d’emploi de votre
téléviseur àcesujet. Ces différentes fonctions doivent
également êtreprises en charge par votreappareil (les
prols Bluetooth doivent êtrepris en charge).
•La distance entrelecasque et votreappareil ne doit pas
excéder 1mètre. Plus la distance est courte, meilleuresera
la connexion. Ces différentes fonctions doivent également
êtreprises en charge par votreappareil (les prols Blue-
tooth doivent êtrepris en charge).

12
•Assurez-vous que le casque est chargé.
•Assurez-vous que la station d’émission /lastation de
recharge est d’aborddébranchée (g. 4, prise n° 3/jaune).
•Vériez que le casque stéthoscopique est bien hors tension
(g. 1, commutateur n° 1sur “OFF”).
•Remettez désormais le casque stéthoscopique sous tension
(g. 1, commutateur n° 1sur “ON”).
•Appuyez sur la touche du microphone /decouplage (g.
2, touche n° 6) pendant env.7secondes. La LED se met
àclignoter rapidement en BLEU.Lecasque recherche une
connexion Bluetooth.
Remarque
L’allumage VERT de la LED signieque vous n’avez pas appuyé
susamment longtemps sur la touche. Répétez la procédure.
•Ouvrez désormais les réglages Bluetooth de votreappareil
(sur votretéléviseur,chaîne Hi-Fi, smartphone, etc.)
pour rechercher un appareil et patientez jusqu’à ce que
“WHP6309BT” apparaisse dans la liste.
•Sélectionnez l’appareil “WHP6309BT”, puis patientez jusqu’à ce
que le casque stéthoscopique apparaisse en tant que “Connec-
té” (connected) dans les réglages Bluetooth de votreappareil. La
LED de l’oreillette clignote lentement en vert lorsque le son est
arrêté ou reste allumée en bleu lors de la lecture.
•Votrecasque est maintenant prêt àl’emploi.
•Veuillez noter que, en présence d’appareils couplés avec
Bluetooth, vous devrez àrégler le volume sur ces derniers.
Réduisez d’abordlevolume de votreappareil (téléviseur,
smartphone, etc.) à1/3 du volume sonoremaximal (an
d’éviter tout endommagement de l’ouïe) ;réglez ensuite le
volume sonoremaximal sur le casque stéthoscopique.
Remarque concernant le mot de passe Bluetooth
Certains appareils requièrent un mot de passe pour
l‘établissement de la connexion avec un appareil Bluetooth.
•Saisissez 0000 pour la connexion avec le casque si votre
appareil exige la saisie d‘un mot de passe.
8.2.1.2 Connexion Bluetooth automatique (après un
premier couplage conforme)
Lors de sa mise sous tension, le casque stéthoscopique se
connecte automatiquement aux appareils déjà couplés (g. 1,
commutateur n° 1sur “ON”).
8.3 Couplage Multipoint (connexion par câble combinée
àune connexion sans l(Bluetooth))
Outreune connexion par câble (depuis un téléviseur,une
chaîne Hi-Fi, etc.), vous pouvez également établir une
connexion sans laucasque stéthoscopique. Vous pouvez, par
exemple, recevoir des appels via votresmartphone pendant
que vous regardez la télévision.
Remarque
Pour pouvoir recevoir des appels, le système de casque sans
lWHP6309BT doit disposer d’une connexion sans lactive
(Bluetooth), conformément au chapitre8.2, (smartphone,
par exemple).
•Désactivez la connexion sans lsur votreappareil (connexion
Bluetooth du smartphone sur “OFF”, par exemple)
•Retirez le câble d’alimentation de la prise de la station de
recharge (g. 4, prise n° 3/jaune).
•Vériez que le casque stéthoscopique est bien hors tension
(g. 1, commutateur n° 1sur “OFF”).
•Mettez le casque stéthoscopique sous tension (g. 1, com-
mutateur n° 1sur “ON”).
•Appuyez sur la touche du microphone /decouplage située sur
le casque stéthoscopique (g. 2, touche n° 6) pendant env.7
secondes. La LED se met àclignoter rapidement en BLEU.
Remarque
L’allumage VERT de la LED signieque vous n’avez pas appuyé
susamment longtemps sur la touche. Répétez la procédure.
•Branchez ànouveau le câble d’alimentation de la station
d’émission dans la prise de la station de recharge (g. 4,
prise n° 3/jaune) et appuyez 1fois sur la touche “PAIR” (g.
4, touche n° 4). La LED de la station de recharge clignote
rapidement en BLEU.
•Patientez quelques secondes (15 secondes maxi) jusqu’à
obtenir la synchronisation/le couplage de l’émetteur avec le
récepteur.Les deux LED s’allument en BLEU en permanence
en cas de couplage conforme.
•Veuillez noter que le système s’éteint automatiquement
lorsque l’émetteur et le casque stéthoscopique ne sont pas
couplés dans un délai de 2minutes. Faite un essai de lecture
de la source audio (téléviseur,chaîne Hi-Fi) pour vous assurer
que la connexion est bien activée.
•Activez Bluetooth sur votreappareil (fonction Bluetooth du
smartphone sur “ON”, par exemple), puis sélectionnez la
connexion Bluetooth “WHP6309BT”déjà couplée.
•L’alternative de connexion par câble ainsi que l’alternative de
connexion sans lBluetooth sont alors couplées entreelles
(procéduresimilaireàMultipairing).
•Vous pouvez alors recevoir des appels lorsque vous regardez
la télévision, par exemple.
8.4 Recharge (g. 7)
Vériez que le casque stéthoscopique est bien hors tension avant de
le recharger (g. 1, commutateur n° 1sur “OFF”).
Placez le casque sur la station d’émission et assurez-vous que
les contacts de charge touchent bien les broches de charge de
l’émetteur.Lacharge commence automatiquement. Le voyant LED
clignote lentement en VERT (g. 1, LED n° 2) pendant la recharge.
La LED s’allume en permanence en VERT lorsque la batterie est
entièrement chargée. Une charge complète dureenviron 2heures.
Remarque
And’éviter tout endommagement de la batterie, veuillez
éteindrelecasque lorsqu’il n’est pas utilisé. La batterie doit
êtreentièrement chargée avant la premièreutilisation. Une
charge initiale de trois heures est nécessairepour garantir
une bonne durée de vie de la batterie. Assurez-vous que le
casque stéthoscopique est éteint pendant la recharge.

13
8.5 Autres fonctions
8.5.1.1 Généralités sur l’utilisation du microphone et
la fonction de pause (g. 2, touche n° 6) +LED (g. 1,
LED n° 2)
Pendant que vous regardez la télévision ou écoutez de la mu-
sique, vous pouvez utiliser le microphone intégré pour mieux
percevoir votreenvironnement (sonnette de porte, conversa-
tion, etc.) ;laLED s’allume en VERT après l’activation.
Remarque
Veuillez noter que le microphone est alors très
sensible (risque de troubles auditifs).
La touche Play/Pause vous permet de mettreleson sur pause
àtout moment (g. 2, touche n° 5). Veuillez noter que,
pendant la pause, la LED clignote lentement en VERT sur
l’oreillette (elle reste allumée en BLEU lors de la lecture).
8.5.1.2 Utilisation du microphone pour des appels télé-
phoniques (fonction Bluetooth avec le smartphone /la
tablette) (g. 2, touche n° 5) +LED (g. 1, LED n° 2)
Avec une connexion Bluetooth sans lactive vers un smart-
phone /une tablette, vous pouvez vous servir de la touche
Play/Pause (g. 2, touche n° 5) pour recevoir des appels
et parler dans le microphone (si compatible avec l’appareil
utilisé). La LED clignote en vert/bleu pendant la sonnerie et
reste allumée en bleu pendant l’appel. Une lectureaudio en
cours serainterrompue jusqu’à la ndel’appel.
8.5.1.3 Réglage de la balance (g. 1, régulateur n° 4)
Le régulateur vous permet de compenser les inégalités sonores
entrelecôté droit et le côté gauche.
8.5.1.4 Information sur l’état de la batterie (casque
stéthoscopique)
La LED (g. 1, LED n° 2) se met àclignoter lentement en BLEU
lorsque le niveau de la batterie du casque stéthoscopique est faible.
8.6 Recherche des pannes
8.6.1 Aucun son
•Vériez si le bloc secteur est, sur une extrémité, bien inséré
dans la prise et, àl’autreextrémité, correctement connecté
àlaprise d’entrée de bloc secteur de l’émetteur.
•Assurez-vous que la touche de mise sous/hors tension soit
sur “ON”, aussi bien sur l’émetteur que sur le casque.
•Il est possible que le niveau de charge de la batterie du
casque soit trop faible. Rechargez la batterie.
•Vériez que votretéléviseur,votrechaîne Hi-Fi ou un autre
composant audio est bien sous tension et qu’un canal de
transmission de signal audio est bien sélectionné.
•Il est possible que le niveau de sortie (volume sonore) de la
source audio soit trop faible. Réglez le volume conformément.
•Augmentez le volume àl’aide du régulateur situé sur le casque.
•La touche d’arrêt du son du casque est-elle activée (la LED
de l’oreillette clignote lentement en VERT) ?
•L’appareil audio/vidéo connecté n’est peut-êtrepas en mode
de lecture. Activez-le.
9. Soins et entretien
Remarque
Débranchez l‘appareil avant de procéder àson nettoyage et
en cas de non-utilisation prolongée.
•Nettoyez le produit uniquement àl’aide d’un chiffon non
breux légèrement humide ;évitez tout détergent agressif.
•Pour des raisons d’hygiène, nettoyez régulièrement les
coussinets avec un produit un sans alcool.
7. Exclusion de garantie
La société Hama GmbH &CoKGdécline toute responsabilité
en cas de dommages provoqués par une installation, un
montage ou une utilisation non conformes du produit ou
encoreprovoqués par un non respect des consignes du mode
d‘emploi et/ou des consignes de sécurité.
8. Service et assistance
En cas de question concernant le produit, veuillez vous adres-
ser au service de conseil produits de Hama.
Ligne téléphonique directe :+49 9091 502-115
(allemand/anglais)
Vous trouverez ici de plus amples informations concernant
l‘assistance :www.hama.com
9. Consignes de recyclage
Remarques concernant la protection de l’environne-
ment: Conformément àladirective européenne 2012/19/EU
et 2006/66/CE, et and‘atteindreuncertain nombre
d‘objectifs en matièredeprotection de l‘environne-
ment, les règles suivantes doivent êtreappliquées:
Les appareils électriques et électroniques ainsi que les
batteries ne doivent pas êtreéliminés avec les déchets
ménagers. Le pictogramme “picto” présent sur le produit, son
manuel d‘utilisation ou son emballage indique que le produit
est soumis àcette réglementation. Le consommateur doit
retourner le produit/la batterie usager aux points de collecte
prévus àcet effet. Il peut aussi le remettreàunrevendeur.En
permettant ennlerecyclage des produits ainsi que les
batteries, le consommateur contribueraàlaprotection de
notreenvironnement. C‘est un acte écologique.
10. Déclaration de conformité
Le soussigné, Hama GmbH &CoKG, déclareque
l‘équipement radioélectrique du type [00131991] est
conforme àladirective 2014/53/UE. Le texte complet
de la déclaration UE de conformité est disponible àl‘adresse
internet suivante:
www.hama.com -> 00131991 -> Downloads.

14
DBedienungsanleitung
Vielen Dank, dass Sie sich für ein Thomson Produkt entschieden haben!
Nehmen Sie sich Zeit und lesen Sie die folgenden Anweisun-
gen und Hinweise zunächst ganz durch. Bewahren Sie diese
Bedienungsanleitung anschließend an einem sicheren Ort auf,
um bei Bedarf darin nachschlagen zu können. Sollten Sie das
Gerät veräußern, geben Sie diese Bedienungsanleitung an den
neuen Eigentümer weiter.
1. Erklärung von Warnsymbolen und Hinweisen
Gefahr eines elektrischen Schlages
Dieses Symbol weist auf eine Berührungsgefahr mit nicht
isolierten Teilen des Produktes hin, die möglicherweise eine
gefährliche Spannung von solcher Höhe führen, dass die
Gefahr eines elektrischen Schlags besteht.
Warnung
Wirdverwendet, um Sicherheitshinweise zu kennzeichnen
oder um Aufmerksamkeit auf besondereGefahren und
Risiken zu lenken.
Hinweis
Wirdverwendet, um zusätzlich Informationen oder wichtige
Hinweise zu kennzeichnen.
2. Übersicht
Empfänger /Kopfhörer-Pic. 1
1. Ein/ Aus-Schalter
2. LED-Signalanzeige (Betrieb, Bluetooth-Status oder Batte-
rieanzeige)
3. Lautstärkeregler (0= geringste Lautstärke, 10= maximale
Lautstärke)
4. Balance Regler (R =Rechts/ L= Links)
Empfänger /Kopfhörer–Pic. 2
5. Taste für Wiedergabe (Play) /Pause /Anrufannahme /
Auegen
6. Taste für Mikrofon /Bluetooth Pairing (Kopplung)
7. Eingebautes Mikrofon
8. Ladekontakte Kopfhörer
9. Linke Kopfhörerseite (Grau) mit Kugelgelenk
10. Rechte Kopfhörerseite (Rot) mit Kugelgelenk
Ladestation/Sender –Pic. 3
11. Ladekontakte Sender
12. LED Signalanzeige (Betrieb bzw.Bluetooth Status)
Ladestation/Sender Rückseite –Pic. 4
13. Strom/Netzteil -Anschluss (Netzteil mit 5,5V –550mA)
14. „Pair“ Taste für Pairing/Kopplung (Ladestation zu Kopfhö-
rer)
15. „Audio-In“ Anschluss für analoge Audio Verbindung
(3,5mm Klinke bzw.über Cinch Adapter)
16. Eingangswahlschalter für Audioverbindung
3. Packungsinhalt
•Kopfhörer/Empfänger mit integriertem Lithium Polymer Akku
•Sender/Ladestation
•Steckernetzteil
•Analoges Audio-Adapterkabel (Rot/Weiß) –
2x Cinch auf 3,5 mm Stereo-Klinkenkupplung
•Analoges Audiokabel (3,5 mm Stereo-Klinkenstecker an
beiden Enden in Blau)
•Optisches Audio Lichtleiterkabel (Toslink/ODT) in schwarz
•2PaarOhrpolster
4. Sicherheitshinweise
Warnung
•Dieses Produkt ist speziellfür Personen entwickelt, deren
Hörfähigkeit unter anderem eingeschränkt ist. Es ist
daher in der Lage, ungewöhnlich hohe Lautstärken zu
erzeugen.
•Normal hörende sollten dieses Produkt vor der Benutzung
die Lautstärke des angeschlossenen Wiedergabegerätes
auf das niedrigste Niveau einstellen!
•Dieses Gerät überträgt Signale auf einer Frequenz von
2400 MHz. Personen mit Herzschrittmachern sollten vor
dem Kauf dieses Produktes einen Arzt zu Rate ziehen,
da durch den Betrieb dieses Artikels die Funktion von
Herzschrittmachern beeinträchtigt werden kann.
•Hoher Schalldruck!
•Es besteht das Risiko eines Gehörschadens.
•Um einen Verlust des Hörsinns zu verhindern, vermei-
den Sie das Hören bei großem Lautstärkepegel über
lange Zeiträume.
•Die Benutzung des Produktes schränkt Sie in der Wahr-
nehmung von Umgebungsgeräuschen ein. Bedienen Sie
daher während der Benutzung keine Fahrzeuge oder
Maschinen.
•Halten Sie die Lautstärke immer auf einem
vernünftigen Niveau. Hohe Lautstärken können
-selbst bei kurzer Dauer –zuHörschäden
führen.
•Schützen Sie das Produkt vor Schmutz, Feuchtigkeit und
Überhitzung und verwenden Sie es nur in trockenen Räumen.
•Betreiben Sie das Produkt nicht in unmittelbarer Nähe
der Heizung, anderer Hitzequellen oder in direkter
Sonneneinstrahlung.
•Verwenden Sie den Artikel nur unter moderaten klimatischen
Bedingungen.
•Dieses Produkt gehört, wie alle elektrischen Produkte, nicht
in Kinderhände!
•Betreiben Sie das Produkt nicht außerhalb seiner in den
technischen Daten angegebenen Leistungsgrenzen.
•Verwenden Sie das Produkt nicht in einer feuchten
Umgebung und vermeiden Sie Spritzwasser.

15
•Stellen Sie keine mit Flüssigkeiten gefüllten Gefäße, wie
z.B. Blumenvasen, auf oder in die nähereUmgebung des
Produktes. Das Gefäß kann umkippen und die Flüssigkeit
kann die elektrische Sicherheit beeinträchtigen.
•Halten Sie Kinder unbedingt von dem Verpackungsmaterial
fern, es besteht Erstickungsgefahr.
•Der Akku ist fest eingebaut und kann nicht entfernt werden.
•Akkus und Batterien nie öffnen, beschädigen, verschlucken
oder in die Umwelt gelangen lassen. Sie können giftige und
umweltschädliche Schwermetalle enthalten.
•Verändern und/oder deformieren/erhitzen/zerlegen Sie
Akkus/Batterien nicht.
•Werfen Sie den Akku bzw.das Produkt nicht ins Feuer.
•Das Produkt ist für den privaten, nicht-gewerblichen Haus-
haltsgebrauch vorgesehen.
•Verwenden Sie das Produkt ausschließlich für den dazu
vorgesehenen Zweck.
•Kinder sollten beaufsichtigt werden, um sicher zu stellen,
dass sie nicht mit dem Produkt spielen.
•Benutzen Sie das Produkt nicht in Bereichen, in denen
elektronische Geräte nicht erlaubt sind.
•Verlegen Sie alle Kabel so, dass sie keine Stolpergefahr darstellen.
•Knicken und quetschen Sie das Kabel nicht.
•Lassen Sie das Produkt nicht fallen und setzen Sie es keinen
heftigen Erschütterungen aus.
•Entsorgen Sie das Verpackungsmaterial sofort gemäß den
örtlich gültigen Entsorgungsvorschriften.
•Nehmen Sie keine Veränderungen am Produkt vor.Dadurch
verlieren sie jegliche Gewährleistungsansprüche.
•Werfen Sie den Akku bzw.das Produkt nicht ins Feuer
Gefahr eines elektrischen Schlages
•Öffnen Sie das Produkt nicht und betreiben Sie es bei
Beschädigungen nicht weiter.
•Verwenden Sie das Produkt nicht, wenn der AC-Adapter,
das Adapterkabel oder die Netzleitung beschädigt sind.
•Versuchen Sie nicht, das Gerät selbst zu warten oder zu
reparieren. Überlassen Sie jegliche Wartungsarbeit dem
zuständigen Fachpersonal
5. Einführung
Dieser DIGITALE DRAHTLOSE KINNBÜGEL-KOPFHÖRER
arbeitet mit der neuesten schnurlosen Bluetooth-Technologie und
ermöglicht es, dass auch ältereMenschen beim Fernsehen und
Musikhören zu Hause reinen, kristallklaren Klang genießen können.
Zugleich bietet er auch die Möglichkeit ein Smartphone oder Tablet
gleichzeitig hinzu zu verbinden (Multipoint =zwei Geräte gleichzei-
tig können gleichzeitig mit diesem Kopfhörer verbunden werden).
Verbinden Sie den Sender einfach mit der gewünschten
Audioquelle: DVD-Player,CD-Player,TV-Gerät, Hi-Fi-Anlage,
Smartphone oder Tablet. Ganz ohne komplizierte Verkabelung und
durch einfachstes Plug/Pair &Play-Installation können Sie in Minu-
tenschnelle mitreißenden und lebendigen Sound genießen. Hierbei
spielt es keine Rolle ob Sie die Konnektivität über analoge Anschlüs-
se (Cinch oder Klinke), digitale Anschlüsse (Optisch) verwenden oder
über direkter schnurloser Verbindung (über Bluetooth) herstellen.
6. Allgemeine Funktion
•2.4GHz schnurlose Bluetooth-Technologie
•Ladestation mit LED-Anzeige
•Automatisches Abschalten des Produktes bei Bluetooth-Direkt-
verbindung (wenn der Hörer in die Ladestation gesteckt wird)
•Stummschaltung für Gesprächsaufnahme durch internes
Mikrofon bzw.automatische Umschaltung auf das Smart-
phone/Tablet bei Multipairing/Gesprächsannahme
•Schnellladesystem (in ca. 2-3 Stunden bis zur vollständigen
Ladung des Kopfhörers)
•Lautstärkeregulierung zur individuellen Anpasung
•Balance-Regelung Links/Rechts
Play/Pause bzw.Rufannahme Taste am Kinnbügel für Ton
Pause bzw.Smartphone/Tablet-Funktion
•LED-Statusanzeige für Betrieb-/Batterieanzeige bzw.zur
Statusanzeige Bluetooth Verbindung/Koppelung
•Wahlschalter für die analoge oder digitale Verbindung der
Audioquelle an der Sende-/Ladestation
•2Größen an Ohrpolstern zur individuellen Anpassung
•Im verbundenen Smartphone/Tablet-Zustand: Akkuanzeige
des Kopfhörers (abhängig vom Smartphone/Tablet Funktion)
7. Technische Daten
Sendemodus schnurlose Bluetooth
Technologie
Trägerfrequenz 2,4 GHz
Betriebsspannung Sender 5V,550 mA
Betriebsspannung Receiver 3,7 V, 380 mAh über
Lithium Polymer Akku
Frequenzbereich 20 Hz –20kHz
Verzerrung <1%
Rauschabstand >70dB
Reichweite 10 m
Sprechzeit/Musik
Max. volume: 5h
Mid Volume: 6h
Min. Volume: 8h bei
vollgeladenem Akku
Standby 250 h
Bluetooth-Technologie Bluetooth V4.1
Bluetooth-ProlHSP,HFP,A2DP,AVRCP,SPP
Akku Integrated Lithium Poliymer
Akku 3,7V
Akkukapazität 380 mA
Frequenzband/
Frequenzbänder 2402 –2480 MHz
Abgestrahlte maximale
Sendeleistung 3,59 dBm

16
Angaben nach Verordnung (EU) 2019/1782
Handelsmarke,
Handelsregisternummer,
Anschrift
Thomson, HRA12159,
Dresdner Str. 9,
86653 Monheim
Modellkennung YLJXA-E050055
Eingangsspannung 100-240 V
Eingangswechselstrom-
frequenz 50/60 Hz
Ausgangsspannung/
Ausgangsstrom/
Ausgangsleistung
5.0 VDC/0.55 A/
2.75 W
Durchschnittliche Ezienz im
Betrieb 71.3 %
Ezienz bei geringer Last
(10 %) 58.9 %
Leistungsaufnahme bei Nulllast 0.05 W
8. Installation Sender Pic. 4+5+6
Warnung
•Betreiben Sie das Produkt nur an einer dafür zugelassenen
Steckdose. Die Steckdose muss in der Nähe des Produktes
angebracht und leicht zugänglich sein.
•Trennen Sie das Produkt mittels des Ein-/Ausschalters vom
Netz –wenn dieser nicht vorhanden ist, ziehen Sie die
Netzleitung aus der Steckdose.
•Achten Sie bei Mehrfachsteckdosen darauf,dass die
angeschlossenen Verbraucher die zulässige Gesamtleis-
tungsaufnahme nicht überschreiten.
•Trennen Sie das Produkt vom Netz, wenn Sie es längere
Zeit nicht benutzen.
•Verbinden Sie das Netzteil mit der Anschlussbuchse auf der
Rückseite des Senders (Pic. 5). Als Hilfe dient die Farbüber-
einstimmung (Gelb) an der Ladestation. Die Verbindung zum
Stromanschluss erfolgt im späteren Schritt.
Es sind nun 3Anschlussmöglichkeiten gegeben:
A) Analoge Audio Verbindung von z.B. TV/HiFi über 3,5mm
Klinke- oder Cinch-Adapterkabel
B) Optische digitale Verbindung von z.B. TV/HiFi/Soundbar
über Toslinkkabel
C) Direkte Bluetooth Verbindung von TV/HiFi/Soundbar zum
Kinnbügelkopfhörer direkt
Je nach der Anschlussart sind bitte entsprechend die Verbin-
dungen vorzunehmen.
8.1 Kabelgebundene Anschlussmöglichkeiten
8.1.1 Analoge Audio-Verbindung mittels Klinke- oder
Cinch-Anschluss (Pic. 4+6)
•Das Klinkenkabel wirdhäugfür den Kopfhöreranschluss von
TV/HiFi verwendet.Hierbei verbinden Sie das eine Ende des
Klinkenkabels mit dem Kopfhöreranschluss des TV-Gerätes
und das andereEnde mit der Buchse des Senders/Ladesta-
tion. Als Hilfe dient die Farbübereinstimmung (Blau) an der
Ladestation (Buchse Nr.5aus Pic. 4) .
•Das Cinchkabel wirdhäugfür externe Audioausgänge von
z.B. SET-TOP-BOX /HiFi oder TV verwendet, um ein direktes
Audiosignal anzubieten (oft farblich markiert durch weiße
und rote Anschlussbuchsen). Hierbei verbinden Sie das Klin-
kenkabel (blaue Stecker) und das Cinch-Adapterkabel (rot/
weiße Stecker): Stecken Sie die Cinch-Stecker entsprechend
der Audioausgangsquelle ein (z.B. HiFi/STB oder TV). Als
Rechts/Links Markierung gelten die Farben. Wobei Rot immer
für Rechts steht. Bitte das andereEnde (Klinkenstecker blau)
mit der Buchse des Senders/Ladestation verbinden. Als Hilfe
dient die Farbübereinstimmung (Blau) an der Ladestation.
(Buchse Nr.5aus Pic. 4) .
8.1.2 Digitale Audioverbindung mittels Toslink/ODT
Kabel:
Die digitale optische Audioverbindung ist die qualitativ beste
kabelgebundene Verbindung (keine Zeitverzögerungen zwi-
schen Bild und Ton), die hierbei hergestellt werden kann. Lösen
Sie die Staubschutzkappen des Kabels auf beiden Seiten und
verbinden Sie diese mit TV/HiFi/Soundbar einerseits und mit
Sende-/Ladestation andererseits. Bitte beachten Sie, dass die
Stecker Führungen haben! Als Hilfe dient die Farbübereinstim-
mung (Schwarz) an der Ladestation (Buchse Nr.7aus Pic. 4).
Bitte wählen bei kabelgebundener Verbindung (Punkt 8.1.1
oder 8.1.2) zum Sender/Ladestation nun entsprechend Ihre
Eingangsquelle aus (Schalter Nr.6aus Pic. 4).
8.1.3 Inbetriebnahme Kopfhörer mit Sender/Ladestation
Warnung -Akku
•Verwenden Sie nur geeignete Ladegeräte oder USB-
Anschlüsse zum Auaden.
•Verwenden Sie defekte Ladegeräte oder USB-Anschlüsse
generell nicht mehr und versuchen Sie nicht, diese zu
reparieren.
•Überladen oder tiefentladen Sie das Produkt nicht.
•Vermeiden Sie Lagerung, Laden und Benutzung bei
extremen Temperaturen und extrem niedrigem Luftdruck
(wie z.B. in großen Höhen).
•Laden Sie bei längerer Lagerung regelmäßig (mind.
vierteljährig) nach.

17
Hinweis
Je nach TV-Gerät wirdbei der Benutzung des 3,5 mm Audio-
Kopfhöreranschluss der Fernseher auf Stumm geschalten –
Ggf.müssen Sie u.a. am TV-Gerät die Kopfhörerlautstärke im
Menü anpassen (Empfehlung für die Verwendung des
Schnurlos-Kopfhörer-Systems ist hierbei
bei ca. 80%-90% Kopfhörerlautstärke
einzustellen). Die Lautsprechereinstellung des
TV bleibt davon häugunberührt bzw.muss
entsprechend angepasst werden
Hinweis
Stellen Sie vor dem ersten Gebrauch sicher,dass der Akku
vollständig geladen ist. Bitte laden Sie den Akku vor der
ersten Verwendung für mindestens 3Stunden. Stellen Sie
sicher,dass der Kopfhörer während des Ladevorgangs
ausgeschaltet und nicht in Betrieb ist.
8.1.3.1 Aktivieren und Verbinden von gekoppelten
Geräten (Sender/Ladestation zu Kinnbügelkopfhörer)
Achten Sie darauf,dass für die erstmalige Inbetriebnahme der
Kopfhörer nicht in der Ladestation steckt!
Im Auslieferungszustand sind sowohl Sender/Ladestation als
auch Kinnbügelkopfhörer bereits gekoppelt/synchronisiert.
Schalten Sie nun den Kinnbügelkopfhörer auf „ON“ (Pic.1 mit
Schalter Nr.1). Die LED am Kinnbügelkopfhörer (Pic. 1Nr. 2)
blinkt langsam BLAU.Stecken Sie nun das Netzteil in die dafür
vorgesehene Stromsteckdose (Pic. 5). Sender/Ladestation blinkt
zunächst schnell (Pic. 3LED Nr.2), dann langsamer und bleibt
konstant BLAU leuchtend bei erfolgreicher Verbindung.
Stellen Sie zunächst die Lautstärke des Kopfhörers auf geringe
Lautstärke bevor Sie diesen erstmalig aufsetzten. Nun können
Sie Ihreanaloge Audioquelle (TV/HiFi oder ähnliches) genießen.
8.1.3.2 Koppeln/Pairing zwischen Sender und Empfän-
ger (Ladestation zu Kinnbügelkopfhörer).
Sollte das Koppeln/Pairing zwischen Sender und Empfänger im
Auslieferungszustand nicht gegeben sein (beide LEDs an der
Ladestation und dem Kinnbügel blinken laufend), so ist ein
manuelles Koppeln/Pairen nötig.
•Hierzu stecken Sie zunächst das Netzkabel in die Buchse an
der Ladestation (Pic. 4Buchse Nr.3/Gelb).
•Stellen Sie sicher,dass der Kinnbügel ausgeschaltet ist (Pic. 1
Schalter Nr.1auf „OFF“).
•Schalten Sie nun den Kinnbügel ein (Pic. 1Schalter Nr.1auf
„ON“).
•Drücken Sie die Mikrofon-/Pairingtaste (Pic. 2TasteNr. 6)
für etwa 7Sekunden. Die LED beginnt in BLAU schnell zu
blinken.
Hinweis
Sollte die LED GRÜN leuchten, so haben Sie die Taste nicht
lange genug gedrückt. Wiederholen Sie den Vorgang.
•Stecken Sie nun das Netzkabel der Sendestation in die Buch-
se der Ladestation (Pic. 4Buchse Nr.3/Gelb) und drücken
Sie die Taste „PAIR“ (Pic. 4TasteNr. 4) für etwa 1Sekunde.
•Warten sie ein paar Sekunden (bis zu 15 Sekunden) bis sich
Sender und Empfänger synchronisiert/gekoppelt haben. Bei
erfolgreicher Koppelung leuchten beide LED´s nun konstant
BLAU.
•Sie können wie in Punkt 8.1.3.1 beschrieben nun Ihreanalo-
ge Audioquelle genießen.
Hinweis
•Bitte beachten Sie, dass das System sich automatisch
abschaltet, wenn Sender und Kinnbügel nicht innerhalb
von 2Minuten gekoppelt sind/werden!
•Die Übertragung des Senders wirdautomatisch abge-
schaltet, wenn der Kinnbügelkopfhörer in die Sende-/
Ladestation eingesteckt wird(Ladevorgang). Zur Wieder-
verbindung muss der Kinnbügelkopfhörer von der Station
getrennt werden und der Ein/Ausschalter ausgeschaltet
sein bzw.wieder eingeschaltet werden (die Koppelung
erfolgt nun automatisch).
8.2 Kabellose Anschlussmöglichkeiten (über Bluetooth)
Sie haben die Möglichkeit die direkte Bluetooth-Verbindung
zwischen TV/HiFi/Soundbar oder Smartphone/Tablet (Bluetooth
Technologie vorausgesetzt) und Kinnbügelkopfhörer vorzuneh-
men.
Hierbei ist nur die zusätzliche Funktion des Telefonierens mit
der Gesprächsannahme oder Gesprächsbeendigung möglich.
8.2.1.1 Bluetooth Erstverbindung (Pairing)
Hinweis: Pairing
•Stellen Sie sicher,dass Ihr Bluetooth-fähiges Endgerät
eingeschaltet ist und dass Bluetooth aktiviert ist.
•Stellen Sie sicher,dass Ihr Bluetooth-fähiges Endgerät für
andereBluetooth Geräte sichtbar ist.
•Beachten Sie hierzu die Bedienungsanleitung Ihres
Endgerätes.
Hinweis: Bluetooth Verbindung mit Fernseh-
gerät/HiFi/Soundbar oder Smartphone/Tablet
•Stellen Sie sicher,dass Ihr Gerät (TV/HiFi/Soundbar/Smartpho-
ne etc.) mit dem Bluetooth-Kinnbügelkopfhörer kompatibel ist.
•Prüfen Sie, ob Sie das Pairing über das Ton/Audio-Menü
oder über das Verbindungsmenü vornehmen müssen.
Somit wirdeine Verbindung mit sonstigem Zubehör wie
z.B. Tastaturen ausgeschlossen.
•Beachten Sie hierzu die Bedienungsanleitung Ihres
Fernsehers. Zudem müssen die einzelnen Funktionen von
Ihrem Endgerät unterstützt werden (Bluetooth-Prole
müssen unterstützt werden).
•Der Kopfhörer und das Endgerät sollten nicht weiter als 1
Meter voneinander entfernt sein. Je geringer der Abstand
desto besser.Zudem müssen die einzelnen Funktionen
von Ihrem Endgerät unterstützt werden (Bluetooth-Prole
müssen unterstützt werden).
•Vergewissern Sie sich, dass der Kopfhörer geladen ist.
•Stellen Sie sicher,dass zunächst die Sende-/Ladestation vom
Netz getrennt ist (Pic. 4Buchse Nr.3/Gelb).

18
•Stellen Sie sicher,dass der Kinnbügel ausgeschaltet ist (Pic. 1
Schalter Nr.1auf „OFF“).
•Schalten Sie nun den Kinnbügel wieder ein (Pic. 1Schalter
Nr.1auf „ON“).
•Drücken Sie die Mikrofon-/Pairingtaste (Pic. 2TasteNr. 6) für
etwa 7Sekunden. Es beginnt die LED in BLAU schnellzublin-
ken. Der Kopfhörer sucht nun nach einer Bluetooth-Verbindung.
Hinweis
Sollte die LED GRÜN leuchten, so haben Sie die Taste nicht
lange genug gedrückt. Wiederholen Sie den Vorgang.
•Öffnen Sie nun auf Ihrem Endgerät (z.B. TV/HiFi oder Smart-
phone) die Bluetooth-Einstellungen zur Suche von Geräten
und warten Sie bis in der Liste „WHP6309BT“ angezeigt wird.
•Wählen Sie „WHP6309BT“ aus und warten Sie bis der
Kinnbügel-Kopfhörer als „Verbunden“ (connected) in den
Bluetooth-Einstellungen Ihres Endgerätes angezeigt wird.
Die LED am Hörer blinkt langsam grün bei Tonpause oder
konstant blau bei Wiedergabe.
•Sie können den Kopfhörer nun verwenden.
•Bitte achten Sie darauf die Lautstärke bei Bluetooth gekoppel-
ten Geräten über diese zu steuern! Reduzieren sie zunächst
die Lautstärke des Gerätes (z.B. TV/Smartphone) auf 1/3 der
maximalen Lautstärke (Vermeidung von Hörschäden), um dann
die maximale Lautstärke am Kinnbügelkopfhörer einzustellen.
Hinweis –Bluetooth Passwort
Manche Endgeräte benötigen für die Einrichtung der Verbin-
dung mit einem anderen Bluetooth Gerät ein Passwort.
•Geben Sie für die Verbindung mit dem Kopfhörer das
Passwort 0000 ein, wenn Sie zur Eingabe von Ihrem
Endgerät aufgefordert werden.
8.2.1.2 Automatische Bluetooth-Verbindung (nach
bereits erfolgtem Pairing)
Der Kinnbügelkopfhörer verbindet sich automatisch beim
Einschalten (Pic. 1Schalter Nr.1auf „ON“)
mit bereits gekoppelten/gepairten Geräten.
8.3 Multipoint Pairing (kabelgebundener Anschluss
kombiniert mit kabellosem Anschluss (Bluetooth))
Zusätzlich können Sie neben der kabelgebunden Verbindung
(z.B. vom TV/HiFi) auch noch eine kabellose Verbindung zu
dem Kinnbügelkopfhörer herstellen. Dadurch haben Sie z.B.
die Möglichkeit neben dem Fernsehen, gleichzeitig über das
Smartphone Gespräche (Anruf) anzunehmen.
Hinweis
Hierzu sollte das schnurlose Kopfhörersystem WHP6309BT
bereits über eine aktive kabellose Verbindung (Bluetooth)
gemäß Kapitel 8.2 verfügen (z.B. Smartphone).
•Schalten Sie nun die kabellose Verbindung am Gerät aus (z.B.
Bluetooth am Smartphone auf „AUS“)
•Ziehen Sie das Netzkabel aus der Buchse an der Ladestation
(Pic. 4Buchse Nr.3/Gelb)
•Stellen Sie sicher,dass der Kinnbügel ausgeschaltet ist (Pic. 1
Schalter Nr.1auf „OFF“).
•Schalten Sie nun den Kinnbügel ein (Pic. 1Schalter Nr.1auf
„ON“).
•Drücken Sie die Mikrofon-/Pairingtaste am Kinnbügel (Pic.
2Taste Nr.6)für etwa 7Sekunden. Die LED beginnt schnell
BLAU zu blinken.
Hinweis
Sollte die LED GRÜN leuchten, so haben Sie die Taste nicht
lange genug gedrückt. Wiederholen Sie den Vorgang.
•Stecken Sie nun das Netzkabel der Sendestation wieder in
die Buchse der Ladestation (Pic. 4Buchse Nr.3/Gelb) und
drücken Sie 1xdie Taste „PAIR“ (Pic. 4TasteNr. 4). Die LED
an der Ladestation blinkt schnell BLAU.
•Warten sie ein paar Sekunden (bis zu 15 Sekunden) bis sich
Sender und Empfänger synchronisiert/gekoppelt haben. Bei
erfolgreicher Koppelung leuchten beide LED´s nun konstant
BLAU.
•Bitte beachten Sie, dass das System sich automatisch ab-
schaltet, wenn Sender und Kinnbügel nicht innerhalb von 2
Minuten gekoppelt sind/werden! Am besten spielen Sie nun
die Audioquelle ab (TV /HiFi ), um sicher zu gehen, dass die
Verbindung aktiv ist.
•Aktivieren Sie nun Bluetooth am Gerät (z.B. Smartphone Blu-
etooth auf „Ein“) und wählen Sie die bereits gekoppelte/
gepairte Bluetooth-Verbindung „WHP6309BT“ aus.
•Nun sind sowohl die kabelgebundene Anschlussvariante als
auch die kabellose Bluetooth-Anschlussvariante zusammen
gekoppelt (ähnlich Multipairing).
•Es können z.B. beim Fernsehen nun auch Telefonate ange-
nommen werden.
8.4 Ladevorgang Pic.7
Stellen Sie sicher,dass der Kinnbügel vor dem Ladevorgang
ausgeschaltet ist (Pic. 1Schalter Nr.1auf „OFF“).
Platzieren Sie den Kopfhörer auf der Sendestation und
stellen Sie dabei sicher,dass die Ladekontakte die Ladepins
am Sender berühren. Der Ladevorgang startet automatisch.
Die LED-Anzeige blinkt langsam GRÜN (Pic. 1LED Nr.2)im
Ladevorgang. Ist der Akku vollständig geladen leuchtet die LED
dauerhaft GRÜN. Ladedauer für die vollständige Ladung liegt
bei ca. 2Stunden.
Hinweis
Um Beschädigungen der Batterien zu vermeiden, schalten
Sie die Kopfhörer bitte immer aus, wenn sie nicht in Ge-
brauch sind. Vordem ersten Gebrauch müssen die Batterien
vollständig aufgeladen sein. Eine dreistündige Initialladung
ist nötig, um eine akzeptable Lebensdauer der Batterien zu
garantieren. Stellen Sie sicher,dass der Kinnbügelkopfhörer
während des Ladevorgangs ausgeschaltet ist.
8.5 WeitereFunktionen
8.5.1.1 Mikrofonnutzung und Tonpause allgemein (Pic.
2Taste Nr.6)+LED (Pic. 1LED Nr.2)
Sie haben die Möglichkeit, mittels eines integrierten Mikrofon
auch während des Hörbetriebes (TV/HiFi) das Mikrofon zur
Table of contents
Languages:
Other THOMSON Wireless Headphones manuals

THOMSON
THOMSON 00131957 User manual

THOMSON
THOMSON WHP3001BK User manual

THOMSON
THOMSON WEAR7811 User manual

THOMSON
THOMSON WHP1211 User manual

THOMSON
THOMSON WEAR77032 User manual

THOMSON
THOMSON YLS0056A-E080040 User manual

THOMSON
THOMSON YLS0056A-E080040 User manual

THOMSON
THOMSON WEAR7701 User manual

THOMSON
THOMSON WEAR7701 User manual

THOMSON
THOMSON WEAR7701BK User manual
Popular Wireless Headphones manuals by other brands

Harman
Harman JBL CLUB ONE quick start guide

Hamilton/Buhl
Hamilton/Buhl W900-MULTI instruction manual

Master&Dynamic
Master&Dynamic MH40 quick start guide

Silvercrest
Silvercrest MUSIC TO GO SKHL 40 A2 Operation and safety notes

Master&Dynamic
Master&Dynamic MH40 quick start guide

T'nB
T'nB CSHOMESF1 instructions