Tiiwee PIR User manual

ENGLISH
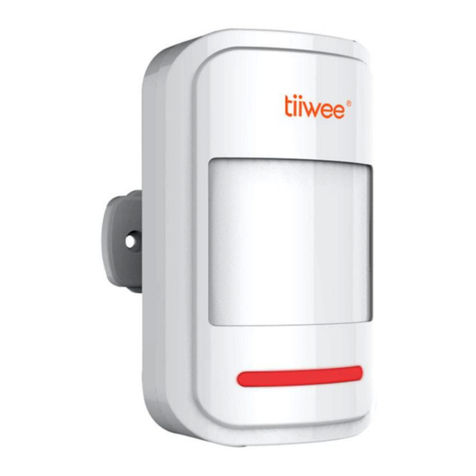
Tiiwee PIR Motion Sensor (For indoor use only)
For Tiiwee Home Alarm System
Introduction
Congratulations with your Tiiwee passive infrared detector. It is intended to be used in combination with
the components of the Tiiwee Home Alarm System and can be wirelessly connected to either the Tiiwee
A2 PIR Siren Alarm or the Tiiwee A1 Alarm Unit (available separately).
This sensor applies digital dual-core fuzzy logic control processing technology and intelligent analysis
algorithms to prevent false alarms. It also features various settings to adjust the PIR sensor to your
personal situation.
Important: This sensor has been programmed to respect a 5 second delay between 2 signals. This is
intentional to save battery power.
Box contents
1 x Tiiwee PIR sensor for Tiiwee Home Alarm System
2 x batteries, 1.5V AAA-type, alkaline
1 x ball-joint mount
2 x screws
1 x double sided mounting tape
1 x instructions for use
Product Overview and activation
To insert the batteries slide off the back panel downwards. Insert the batteries respecting the correct
polarity. Now, slide the back panel in place again. Slide the ball joint in place until it locks in place and
attach the wall mount on the ball joint. Your PIR sensor is now ready to be installed on the mount.
General installation guidelines
Avoid positions that are close to a window, air conditioners, fluorescent lights, heaters, refrigerators,
stoves, and direct sunlight and other places where temperature would change rapidly and air flow is
high. If there are two detectors in the same detecting range, please adjust the position to avoid

interference and false alarms.
Attach the detector to the bracket, and change the detecting angel and distance by adjusting the
installation height and the bracket. It is advised to install the device at a height of approximately 2
meters.
IMPORTANT: The Infrared detector is sensitive to a human’s vertical movement, and less sensitive
to horizontal movements, so it’s best to be aim the device at a 90 degrees’ angle to a person’s
walking direction.
Test
1. After the installation, turn the switch to ON, and move in front of the PIR sensor at a distance
between 3 and 6 meters.
2. The Indicator window should light up once.
3. If needed, adjust the detector angle to get the desired detection range
When the detector indicator flashes
•LED flashes once: A signal is detected and the detector sends a signal to the A2 PIR Alarm or
A1 Alarm unit.
•LED flashes once every 3 seconds:Low-voltage indication, please change to the battery as
soon as possible.
Connecting the PIR sensors to an alarm siren
This PIR sensor is compatible with the Tiiwee Home Alarm System. Connect it wirelessly with the A1
Alarm Unit or the A2 PIR Motion Sensor Alarm. The instructions for pairing the PIR sensor with the
Tiiwee Home Alarm System are included with the Alarm unit or the PIR Alarm sensor or can be
downloaded on our website www.tiiwee.com .
Advanced features

The Tiiwee PIR sensor is equipped with some additional features to allow you to adjust the device to
your specific needs. Remove the back panel and the batteries for access to these settings. In the
battery compartment, there are 3 switches and one tamper sensor to adjust the settings of your PIR
sensor.
1. In armed mode the Anti-tamper switch automatically triggers the alarm if the back panel is
removed. This means that the unit cannot be deactivated through the On/Off switch without
triggering an alarm.
2. An On/Off Switch can be used to permanently inactivate the PIR sensor
3. The Indicator light can be switched off to save battery power (“LED OFF position). Off course,
in this mode an alarm signal will still be sent to the Alarm Unit or the PIR Motion Sensor
Alarm. However, please note that the low battery indication (LED flashing every 3 seconds)
is switched off in this setting.
4. A waiting time of 5 minutes between detections can be set saving battery power (“5 Min” vs
“5s” switch). The 5-minute waiting period can be used when your PIR sensor is meant to
result in a strong Siren alarm. This mode however is not advised when you selected a Chime
sound setting on your Alarm unit.
Low-voltage Reminder Function: When the voltage of the PIR is lower than 2.4V, the indicator light
will flash once every 3 seconds unless its lights have been switched off by setting the internal
switches.
Anti-tamper Function: The PIR sensor is equipped with an anti-tamper switch. When someone tries to
remove the back plate from the detector (to remove the batteries and disable the PIR sensor) a signal
will be sent to the Alarm unit.
Mode Setting
The factory settings are “5s” and “Led On”. This means that the sensor will respect a 5-seconds waiting
time between 2 signals and that the LED indicator light will always flash if movement is detected. These
are the most commonly used settings.
1. If both switches are set to the ON position as shown in picture 1, the LED will flash each time a
movement is detected. After each signal, a 5 second waiting time is set as a standard to allow a
person to pass without triggering a signal continuously.
2. If the top switch is set to Off the detector will respect a 5-minute delay before it will become
active again. This is a power saving mode. This setting can perfectly be used with a loud alarm
(which will sound continuously and loud). A Chime setting on the Alarm unit is not advised with

this delay.
3. If the lower switch is set to Off, the Led light will not flash each time a signal is detected. This can
be convenient for saving battery power.
4. If both switches are in the Off position as shown in Figure 2, the PIR sensor will respect a 5-
minute interval between 2 different signals nor will the LED window flash.
Detection Range characteristics
Technical Features
Power: The PIR sensor is powered through 2 x AAA 1.5V alkaline batteries or an external 5V DC power
supply connected through the micro-USB port. It is advised to remove the batteries from the device if
it is powered through an adapter. The power adpator is not included in the product.
Standby Current: <50uA
Working Current:<25MA
Detecting Range: 4-8 m/90 degrees angle
Wireless Distance: 100m ( Open Area )
Wireless Frequency: 433MHz
Housing Material: ABS
Working Humidity: <80%
Detector Size: 58*58*89mm

DEUTSCH
Tiiwee PIR Bewegungsmelder (für den inneren Gebrauch)
For Tiiwee Home Alarm System
Einführung
Wir beglückwünschen Sie zum Kauf des Tiiwee PIR (Passiv Infrarot) Bewegungsmelders. Der Sensor ist
ein Teil des Tiiwee Home Alarm Systems und kompatibel mit dem Tiiwee Hausalarm Starter Set, der
Tiiwee A1 Alarmeinheit und dem Tiiwee A2 PIR Bewegungsmelder Alarm (separat verfügbar).
Der Sensor nutzt die sogenannte "Dual-Core Fuzzy Logic Control Technologie" und intelligente Analyse-
Algorithmen, um Falschalarme zu vermeiden. Der Sensor hat darüberhinaus verschiedene
Einstellmöglichkeiten, um ihn an persönliche Situationen anzupassen.
WICHTIG: Der Sensor ist mit eine 5 Sekunden Pause zwischen zwei Signalen programmiert. Dies ist
gewollt und dient dem Sparen von Batterie-Leistung.
Was wird geliefert?
1 x Tiiwee PIR Bewegungsmelder für das Tiiwee Home Alarm System
2 x Batterien, 1.5V AAA, alkalisch
1 x Kugelgelenk-Montageplatte
2 x Schrauben
1 x Klebepads für schraubenlose Montage
1 x Gebrauchsanleitung
Produktübersicht und Aktivierung
Öffnen Sie den Bewegungsmelder durch Aufschieben der Abdeckung und setzen Sie die Batterien ein.
Achten Sie auf die korrekte Polarität. Setzen Sie die Abdeckplatte wieder auf und setzen Sie die Kugel in
das Kugelgelenk ein. Ihr PIR Bewegungsmelder ist nun fertig für die Montage.
Installationshinweise
Vermeiden Sie Positionen in der Nähe von Fenstern, Klimaanlagen, fluoreszierendem Licht, Heizungen
und anderen Wärmequellen, Kühlschränken, Kochfeldern und direktem Sonnenlicht - Stellen, an

denen plötzliche Temperaturschwankungen und hohe Luftströme auftreten können. Falls Sie zwei PIR
Bewegungsmelder im gleichen Bereich installiert haben, achten Sie bitte auf deren Ausrichtung, um
Interferenzen und Falschalarme zu vermeiden.
Setzen Sie den Bewegungsmelder in die Montageeinheit ein und stellen Sie den Winkel entsprechend
ein. Es wird empfohlen, den Bewegungsmelder in einer Höhe von ca. 2m zu installieren.
WICHTIG: Der PIR Bewegungsmelder ist sensitiv gegenüber vertikalen Bewegungen und weniger
sensitiv gegenüber horizontalen Bewegungen. Es ist daher empfohlen, den Bewegungsmelder so zu
installieren, dass eine herankommende Person erfasst wird und nicht eine Vorbeigehende.
Test
1. Schalten Sie den Bewegungsmelder auf "On". Begeben Sie sich nun vor den Melder in
einem Abstand von 3 - 6m.
2. Die Detektionsfläche leuchtet einmal rot auf.
3. Wenn nötig, ändern Sie den Winkel, um den Melderbereich zu ändern.
4. Der Bewegungsmelder ist nun korrekt installiert.
Wenn die Detektionsfläche (eingebautes Kontrolllicht) leuchtet
•Einmaliges Leuchten: eine Bewegung wurde erfasst und der Melder sendet ein Signal an die
entsprechende Alarmeinheit (A2 PIR Alarmeinheit oder A1 Alarmeinheit).
•Ein Leuchten all 3 Sekunden:Dies zeigt an, dass die Batterien ausgetauscht werden müssen.
Bitte wechseln Sie die Batterien sobald als möglich.
Verbinden des Bewegungsmelders mit einer Alarmeinheit
Der Tiiwee PIR Bewegungsmelder ist kompatibel mit dem Tiiwee Home Alarm System und verbindet
sich drahtlos mit der Tiiwee A1 Alarmeinheit oder dem Tiiwee A2 PIR Bewegungsmelder Alarm.
Die Anleitung zum Verbinden des PIR Bewegungsmelders mit dem Tiiwee Home Alarm System
finden Sie in den entsprechenden Anleitungen des Tiiwee Hausalarm Starter Sets, der Tiiwee A1
Alarmeinheit und des Tiiwee A2 PIR Bewegungsmelder Alarms. Alternativ können diese auch von
unserer Webseite www.tiiwee.com heruntergeladen werden.

Erweiterte Einstellungen
Der Tiiwee PIR Bewegungsmelder ist mit zusätzlichen Funktionen ausgestattet. Dies erlaubt Ihnen,
den Melder auf Ihre Bedürfnisse einzustellen. Entfernen Sie die Abdeckung auf der Rückseite und
ebenfalls die Batterien. Im Batteriefach befinden sich 3 Einstellknöpfe und ein sogenannter "Anti-
Tamper Sensor".
1. Im geschärften Modus löst der Anti-Tamper Sensor automatisch einen Alarm aus, wenn
jemand die Abdeckung öffnet, um den Melder auszuschalten.
2. Der Ein/Aus-Schalter schaltet den Melder aus.
3. Das LED Kontrolllicht kann ausgeschaltet werden, um Batteriestrom zu sparen. Dies hat
keinerlei Einfluss auf die Funktion des Melders. Allerdings ist in diesem Fall die Batterie-
Zustandskontrolle auch ausgeschaltet.
4. Sie können eine Wartezeit von 5 Minuten (gegenüber 5 Sekunden) zwischen 2
Detektionssignalen einstellen. Dies hilft ebenfalls Batteriestrom zu sparen. Diese Einstellung
kann genutzt werden, wenn der Melder einen lauten Alarm an der Alarmeinheit auslösen
soll. Im Benachrichtigungsmodus empfehlen wir die 5 Sekunden-Einstellung.
Batteriezustands-Anzeige: Geht die Batteriespannung unter 2,4V erscheint das rote Kontrolllicht alle 3
Sekunden. Bitte beachten Sie, dass dazu das Kontrolllicht im Melder eingeschaltet sein muss (Punkt 3
der erweiterten Einstellungen).
Anti-Tamper Funktion: Der Anti-Tamper Sensor löst automatisch einen Alarm aus, wenn jemand die
Abdeckung öffnet, um den Melder auszuschalten oder die Batterien zu entfernen.
Einstellungsmöglichkeiten
Werksseitig ist der Bewegungsmelder auf "5 Sekunden Wartezeit" und "LED Kontroll-licht ein"
eingestellt. Das heißt, es besteht eine 5 Sekunden Wartezeit zwischen 2 Signalen und das LED
Kontrolllicht leuchtet, wenn eine Bewegung wahrgenommen wird. Dies sind die am meist genutzten
Einstellungen.
1. Beide Schalter sind auf der "ON"-Position, wie auf Bild 1 zu sehen. Das LED Kontrolllicht leuchtet
immer auf, wenn eine Bewegung wahrgenommen wird. Nach jeder wahrgenommenen Bewegung
besteht eine 5 Sekunden Wartezeit bis wieder eine Bewegung wahrgenommen werden kann. Dies
ist die Standardeinstellung und dient dazu, dass die Person den Bereich passieren kann, ohne
wieder ein Signal auszulösen.

2. Der obere Schalter ist in der "OFF"-Position (1). Nach jeder wahrgenommenen Bewegung besteht
eine 5 Minuten Wartezeit bis wieder eine Bewegung wahrgenommen werden kann. Dies spart
Batteriestrom. Diese Einstellung kann genutzt werden, wenn der Melder einen lauten Alarm an
der Alarmeinheit auslösen soll. Im Benachrichtigungsmodus empfehlen wir die 5 Sekunden-
Einstellung.
3. Der untere Schalter ist in der "OFF"-Position (2). Das LED Kontrolllicht ist ausgeschaltet. Dies spart
Batteriestrom.
4. Beide Schalter in der "OFF"-Position (wie im Bild 2 zusehen). Es besteht eine 5 Minuten Wartezeit
zwischen 2 Bewegungswahrnehmungen. Das LED Kontrolllicht ist ausgeschaltet.
Detektionsbereich
Technische Spezifikationen
Stromversorgung: Der PIR Bewegungsmelder wird durch 2 x AAA 1.5V alkalische Batterien oder durch
einen externen Stromadaptor (5V) am micro-USB Port mit Strom versorgt. Falls die Stromversorgung
durch einen Stromadaptor erfolgt, empfehlen wir, die Batterien zu entnehmen. Der externe
Stromadaptor ist nicht im Lieferumfang enthalten.
Standby Stromaufnahme: <50uA
Funktionsstromaufnahme:<25MA

Detektionsbereich: 4-8 m/90 Grad Winkel
Transmission Distanz: 100m (freies Feld)
Transmission Frequenz: 433MHz
Material: ABS
Umgebungsluftfeuchtigkeit: <80%
Grösse: 58*58*89mm

ITALIANO
Tiiwee PIR Motion Sensor (Solo per uso interno)
Per Tiiwee Home Alarm System
Introduzione
Congratulazioni per il vostro rivelatore ad infrarossi passivi Tiiwee. È destinato ad essere utilizzato in
combinazione con i componenti del Tiiwee Home Alarm System e può essere collegato in modalità
wireless a Tiiwee A2 PIR Siren Alarm o al Tiiwee A1 Alarm Unit (disponibili separatamente).
Questo sensore ha caratteristiche di tecnologia di alta elaborazione logica e algoritmi di analisi
intelligenti per evitare i falsi allarmi. Dispone inoltre di varie impostazioni per regolare il sensore PIR in
base alle vostre esigenze personali.
Importante: Questo sensore è stato programmato per rispettare un ritardo di 5 secondi tra 2 segnali.
Questo è stato pensato appositamente per risparmiare la batteria.
Contenuto della confezione
1 Tiiwee PIR sensor per Tiiwee Home Alarm System
2 batterie, tipo 1.5V AAA, alcaline
1 supporto con snodo a sfera
2 viti
1 set di nastro biadesivo per il montaggio
1 istruzioni per l’uso
Panoramica sul prodotto e sull’attivazione
Per inserire le batterie, sfilare il pannello posteriore, sfilare il pannello posteriore verso il basso. Inserire
le batterie rispettando la corretta polarità. Ora, far scorrere il pannello posteriore in posizione
nuovamente. Far scorrere il giunto a sfera sul posto fino a bloccarlo in posizione e fissare il supporto a
parete il giunto a sfera... Il vostro sensore PIR è ora pronto per essere installato sul supporto.

Norme generali di installazione
Evitare posizioni che siano vicino a una finestra, a condizionatori d'aria, a luci fluorescenti, a
riscaldatori, a frigoriferi, a stufe e alla luce solare diretta e altri posti dove la temperatura potrebbe
cambiare rapidamente e vi possa essere un elevato flusso d'aria. Se ci sono due rivelatori nella stessa
gamma di rilevazione, si prega di regolare la posizione per evitare interferenze e falsi allarmi.
Collegare il rilevatore alla staffa e cambiare l'angelo e la distanza di rilevazione regolando l'altezza di
installazione e la staffa. Si consiglia di installare il dispositivo ad un'altezza di circa 2 metri.
IMPORTANTE: Il sensore a infrarossi è sensibile al movimento verticale di un essere umano, e meno
sensibile ai movimenti orizzontali, quindi è meglio puntare il dispositivo di 90 gradi verso la
direzione di marcia di una persona.
Test
1. Dopo l'installazione, posizionare l'interruttore su ON e passare davanti al sensore PIR ad distanza
tra i 3 e i 6 metri.
2. L’Indicatore finestra si illumina una volta.
3. Se necessario, regolare l'angolo del rivelatore per ottenere il livello desiderato
Quando il rivelatore lampeggia
•Il LED lampeggia una volta: un segnale viene rilevato e il rilevatore invia un segnale all'unità di
allarme PIR A2 o A1.
•Il LED lampeggia una volta ogni 3 secondi: indicazione di poca energia, si prega di cambiare la
batteria appena possibile.
Collegamento dei sensori PIR ad una sirena d'allarme
Questo sensore PIR è compatibile con il Tiiwee Home Alarm System. Collegarlo in modalità wireless
con l’Alarm Unit o il PIR Alarm sensor. Le istruzioni per l'abbinamento del sensore PIR con il Tiiwee
Home Alarm System sono incluse con l'unità d'allarme o il sensore di allarme PIR o possono essere
scaricate sul nostro sito web www.tiiwee.com .

Funzioni avanzate
Il sensore PIR Tiiwee è dotato di alcune funzionalità aggiuntive che consentono di regolare il
dispositivo in base alle vostre specifiche esigenze. Rimuovere il pannello posteriore e le batterie per
l'accesso a queste impostazioni. Nel vano batterie, ci sono 3 interruttori e un sensore manovrabile per
regolare le impostazioni del vostro sensore PIR.
1. L'interruttore antisabotaggio attiva automaticamente l'allarme se viene rimosso il pannello
posteriore. Ciò significa che l'unità non può essere disattivato tramite l'interruttore On/Off senza
far scattare un allarme.
2. Un interruttore On/Off può essere utilizzato per disattivare definitivamente il sensore PIR
3. La spia può essere spenta per risparmiare batteria ("LED in posizione OFF). Ovviamente, in questo
modo un segnale di allarme sarà ancora inviato all’Alarm Unit o al PIR Motion Sensor Alarm.
Tuttavia, si prega di notare che l'indicazione di batteria scarica (LED lampeggiante ogni 3
secondi) è spento in questa impostazione.
4. Tempi di attesa di 5 minuti tra i rilevamenti possono essere impostati per un risparmio della
batteria (passare da "5 Min" vs "5s"). Il periodo di attesa di 5 minuti può essere utilizzato quando
il sensore PIR è destinato a provocare un forte Sirena di allarme. Questa modalità non è tuttavia
consigliata quando è selezionata un'impostazione audio suoneria sulla vostra unità di Allarme.
Funzione di promemoria poca energia residua: Quando la tensione del PIR è inferiore a 2,4 v,
l'indicatore luminoso lampeggia una volta ogni 3 secondi a meno che le sue luci non siano state spente
impostando le opzioni interne.
Funzione antisabotaggio: Il sensore PIR è dotato di un interruttore antisabotaggio. Quando qualcuno
cerca di rimuovere la piastra posteriore del rivelatore (per rimuovere le batterie e disabilitare il
sensore PIR) verrà inviato un segnale all'unità di Allarme.
Impostazione della modalità
1. Le impostazioni di fabbrica sono "5s" e "Led On". Questo significa che il sensore rispetterà un
tempo di 5 secondi in attesa tra 2 segnali e che la spia LED lampeggia sempre se viene
rilevato un movimento. Queste sono le impostazioni più comunemente utilizzate.
2. Se entrambe le opzioni sono impostate in posizione come mostrato nella figura 1, il LED
lampeggia ogni volta che viene rilevato un movimento. Dopo ogni segnale, un tempo di
attesa di 5 secondi è impostato come standard per consentire ad una persona di passare
senza attivare un segnale continuo.

3. Se l'interruttore superiore è impostato su Off il rilevatore rispetterà un ritardo di 5 minuti
prima di diventare nuovamente attivo. Si tratta di una modalità di risparmio energetico.
Questa impostazione può essere utilizzata perfettamente con un forte allarme (che suonerà
continuamente e ad alta voce). Un'impostazione di Campanello sull'unità di allarme non è
consigliata con questo ritardo.
4. Se l'interruttore inferiore è impostato su Off, la luce del Led non lampeggia ogni volta che
viene rilevato un segnale. Questo può essere conveniente per il risparmio energetico della
batteria.
5. Se entrambi gli interruttori sono in posizione Off, come mostrato nella figura 2, il sensore
PIR rispetterà un intervallo di 5 minuti tra 2 differenti segnali né il LED finestra lampeggerà.
Caratteristiche livello rilevamento
Caratteristiche Tecniche
Alimentazione: Il sensore PIR è alimentato attraverso 2 batterie AAA 1.5 v alcaline o con un
rifornimento di corrente continua esterna 5V collegato attraverso la porta micro-USB. Si consiglia di
rimuovere le batterie dal dispositivo se questo è alimentato tramite un adattatore.
Corrente Standby: < 50uA
Corrente Funzionamento: < 25MA
Gamma Rilevamento: angolo 4-8m/gradi 90
Distanza Wireless: 100 metri (spazio aperto)
Frequenza Wireless: 433MHz
Materiale Alloggiamento: ABS
Umidità di Lavoro: <80%
Dimensioni Rivelatore: 58x58x89mm

ESPANOL
Sensor de movimiento PIR Tiiwee (sólo para uso en interiores)
Para el Sistema de Alarma Hogareño de Tiiwee
Introducción
Felicitaciones por su detector infrarrojo pasivo Tiiwee. Está diseñado para ser utilizado en
combinación con los componentes del Sistema de Alarma Hogareño de Tiiwee y puede conectarse
de forma inalámbrica a la alarma de sirena PIR Tiiwee A2 o a la unidad de alarma Tiiwee A1
(disponible por separado).
Este sensor aplica tecnología digital de procesamiento de control de lógica difusa de doble núcleo
y algoritmos de análisis inteligentes para prevenir falsas alarmas. También cuenta con varios ajustes
para ajustar el sensor PIR a su situación personal.
Importante: Este sensor ha sido programado para respetar un retardo de 5 segundos entre 2
señales. Esto es intencional para ahorrar energía de la batería.
Contenido de la caja
1 x Tiiwee sensor PIR para el Sistema de Alarma Hogareño Tiiwee
2 x pilas tipo AAA de 1.5V, alcalinas
1 x montaje de rótula
2 x tornillos
1 x cinta de montaje doble faz
1 x instrucciones de uso
Descripción general del producto y activación
Para insertar las baterías, deslice el panel trasero hacia abajo. Inserte las baterías respetando la
polaridad correcta. Ahora, deslice el panel trasero de nuevo. Deslice la rótula hasta que encaje en
su lugar y coloque el soporte de pared en la rótula. Su sensor PIR ya está listo para ser instalado en
el soporte.

Instrucciones generales de instalación
Evite las posiciones que estén cerca de una ventana, aire acondicionado, luces fluorescentes,
calentadores, refrigeradores, estufas y luz solar directa y otros lugares donde la temperatura
cambie rápidamente y el flujo de aire sea alto. Si hay dos detectores en el mismo rango de
detección, ajuste la posición para evitar interferencias y falsas alarmas.
Coloque el detector en el soporte y cambie el ángulo de detección y la distancia ajustando la altura
de instalación y el soporte. Se aconseja instalar el dispositivo a una altura de aproximadamente 2
metros.
IMPORTANTE: El detector de infrarrojos es sensible al movimiento vertical de un ser humano y
menos sensible a los movimientos horizontales, por lo que es mejor orientar el dispositivo en un
ángulo de 90 grados en relación a dirección de la persona.
Prueba
1. Después de la instalación, gire el interruptor a ON y muévalo delante del sensor PIR a
una distancia de entre 3 y 6 metros.
2. La ventana del indicador se iluminará una vez.
3. Si es necesario, ajuste el ángulo del detector para obtener el rango de detección
deseado.
4. El sensor de movimiento está correctamente instalado.
Cuando el indicador del detector parpadea
•El LED parpadea una vez: Se detecta una señal y el detector envía una señal a la alarma PIR
A2 o a la unidad A1 de alarma.
•El LED parpadea una vez cada 3 segundos: Indicación de baja tensión, cambie la batería tan
pronto como sea posible.
Conexión de los sensores PIR a una sirena de alarma

Este sensor PIR es compatible con el Sistema de Alarma Hogareño de Tiiwee. Conéctelo de forma
inalámbrica con la unidad de alarma o el sensor de alarma PIR. Las instrucciones para sincronizar
el sensor PIR con el sistema de alarma de casa Tiiwee se incluyen con la unidad de alarma o el
sensor de alarma PIR o se pueden descargar desde nuestro sitio web www.tiiwee.com.
Características avanzadas
El sensor PIR de Tiiwee está equipado con algunas características adicionales que le permiten
ajustar el dispositivo a sus necesidades específicas. Retire el panel posterior y las baterías para
acceder a estos ajustes. En el compartimiento de la batería, hay 3 interruptores y un sensor de
manipulación para ajustar la configuración de su sensor PIR.
1. El interruptor Anti-sabotaje activa automáticamente la alarma si se quita el panel
posterior. Esto significa que la unidad no se puede desactivar a través del interruptor de
encendido / apagado sin activar una alarma.
2. Se puede utilizar un interruptor On / Off para desactivar permanentemente el sensor PIR
3. La luz indicadora se puede apagar para ahorrar batería ("LED OFF"). Por supuesto, en
este modo se enviará una señal de alarma a la unidad de alarma o a la alarma del sensor
de movimiento PIR. Sin embargo, tenga en cuenta que la indicación de batería baja (LED
parpadeando cada 3 segundos) está desactivada en este ajuste.
4. Un tiempo de espera de 5 minutos entre las detecciones se puede establecer ahorrando
energía de la batería ("5 Min" vs "5s" interruptor). El período de espera de 5 minutos se
puede utilizar cuando su sensor PIR está destinado a dar lugar a una alarma de sirena
fuerte. Sin embargo, este modo no se recomienda cuando se selecciona un ajuste de
sonido de timbre en la unidad de alarma.
Función de aviso de baja tensión: Cuando la tensión del PIR sea inferior a 2,4 V, la luz indicadora
parpadeará una vez cada 3 segundos a menos que se hayan apagado las luces ajustando los
interruptores internos.
Función anti-sabotaje: El sensor PIR está equipado con un interruptor anti-sabotaje. Cuando
alguien intente quitar la placa trasera del detector (para quitar las baterías y desactivar el sensor
PIR) se enviará una señal a la unidad de alarma.
Configuración del modo
Los ajustes de fábrica son "5s" y "Led On". Esto significa que el sensor respetará un tiempo de

espera de 5 segundos entre 2 señales y que la luz indicadora LED parpadeará siempre si se detecta
movimiento. Estas son las configuraciones más usadas.
1. Si ambos interruptores están en la posición ON como se muestra en la imagen 1, el LED
parpadeará cada vez que se detecte un movimiento. Después de cada señal, se establece
un tiempo de espera de 5 segundos como estándar para permitir que una persona pase
sin activar una señal continuamente.
2. Si el interruptor superior está ajustado en Apagado, el detector respetará un retraso de 5
minutos antes de volver a activarse. Este es un modo de ahorro de energía. Este ajuste se
puede utilizar perfectamente con una alarma fuerte (que sonará continuamente y
ruidosamente). No se aconseja un ajuste de Campanilla en la unidad de alarma con este
retardo.
3. Si el interruptor inferior está ajustado en Off, la luz Led no parpadeará cada vez que se
detecte una señal. Esto puede ser conveniente para ahorrar energía de la batería.
4. Si ambos interruptores están en la posición de apagado, como se muestra en la figura 2,
el sensor PIR respetará un intervalo de 5 minutos entre 2 señales diferentes y la luz LED
no parpadeará.
Detección de las características de Rango

Características técnicas
Energía: El sensor PIR es alimentado a través de 2 baterías alcalinas AAA de 1,5 V x o una fuente de
alimentación externa de 5V DC conectada a través del puerto micro-USB. Se aconseja retirar las
baterías del dispositivo si está siendo alimentado a través de un adaptador.
Corriente en espera: <50uA
Corriente de trabajo: <25MA
Alcance de detección: ángulo de 4-8 m / 90 grados
Distancia inalámbrica: 100m (Área abierta)
Frecuencia inalámbrica: 433MHz
Material de la carcasa: ABS
Humedad de trabajo: <80%
Tamaño del detector: 58 * 58 * 89m m

FRANÇAIS
Détecteur de mouvement PIR Tiiwee (Pour utilisation intérieure seulement)
Pour le système d’alarme à domicile Tiiwee
Introduction
Félicitations pour votre détecteur infrarouge passif Tiiwee. Il est destiné à être utilisé en combinaison
avec les composants du système d'alarme domestique Tiiwee et peut être connecté sans fil à l'alarme
de sirène PIR Tiiwee A2 ou à l'unité d'alarme Tiiwee A1 (disponible séparément).
Ce capteur applique la technologie numérique de traitement de commande de logique floue dual-core
et des algorithmes d'analyse intelligents pour prévenir de fausses alarmes. Il comporte également divers
réglages pour ajuster le capteur PIR à votre situation personnelle.
Important : Ce capteur a été programmé pour respecter un délai de 5 secondes entre 2 signaux. Ceci
est intentionnel pour économiser la batterie.
Contenu de la boîte
1 x Capteur PIR Tiiwee pour le Système d’alarme à domicile Tiiwee
2 x piles, 1.5V type AAA, alcaline
1 x Montage à rotule
2 x Vis
1 x Ruban adhésif double face
1 x instructions pour utilisation
Aperçu du produit et activation
Pour insérer les piles, faites glisser le panneau arrière, faites glisser le panneau arrière vers le bas.
Insérez les piles en respectant la polarité. Maintenant, faites glisser le panneau arrière en place à
nouveau. Glissez le joint à rotule en place jusqu'à ce qu'il s'enclenche et fixez le support mural sur le
joint à rotule. Votre capteur PIR est maintenant prêt à être installé sur le support.
Directives générales d'installation
Évitez les positions proches de la fenêtre, les climatiseurs, les lumières fluorescentes, les appareils de
chauffage, les réfrigérateurs, les poêles et la lumière directe du soleil, ainsi que d'autres endroits où la
température changerait rapidement et où le débit d'air serait élevé. S'il y a deux détecteurs dans la
même plage de détection, ajustez la position pour éviter les interférences et les fausses alarmes.

Fixez le détecteur au support et changez l'angle de détection et la distance en ajustant la hauteur
d'installation et le support. Il est conseillé d'installer l'appareil à une hauteur d'environ 2 mètres.
IMPORTANT : Le détecteur infrarouge est sensible au mouvement vertical de l'homme, et moins
sensible aux mouvements horizontaux, il est donc préférable que l'appareil possède un angle de 90
degrés par rapport à la direction de marche d'une personne.
Test
1. Après l'installation, passez l’interrupteur sur ON et déplacez-vous devant le capteur PIR à une
distance comprise entre 3 et 6 mètres.
2. La fenêtre Indicateur doit s'allumer une fois.
3. Si nécessaire, ajustez l'angle du détecteur pour obtenir la plage de détection souhaitée
Détection des caractéristiques de la plage
•La DEL clignote une fois : Un signal est détecté et le détecteur envoie un signal à l'Alarme PIR A2
ou à l'Alarme A1.
•La DEL clignote une fois toutes les 3 secondes :Indication de basse tension, veuillez changer à
la batterie le plus tôt possible.
Connexion des capteurs PIR sur une sirène d’alarme
Ce capteur PIR est compatible avec le système d'alarme domestique Tiiwee. Connectez-le sans fil avec
l'unité d'alarme ou le capteur d'alarme PIR. Les instructions pour coupler le capteur PIR avec le système
d'alarme maison Tiiwee sont fournies avec l'alarme ou le capteur d'alarme PIR ou peuvent être
téléchargées sur notre site Web www.tiiwee.com.
Caractéristiques avancées
Table of contents
Languages:
Other Tiiwee Security Sensor manuals
Popular Security Sensor manuals by other brands
ABB
ABB 2CSYD0201B installation manual
CP
CP EBMPIR Product guide

Kee safety
Kee safety Easi-Dec Anchor-Fix Assembly instructions

B.E.G.
B.E.G. LUXOMAT 180-SC Operating and mounting instructions
Lehmann electronic
Lehmann electronic MEDISWITCH VarioFon instruction manual

Baumer
Baumer 10P66Y0/S35A Mounting instructions
