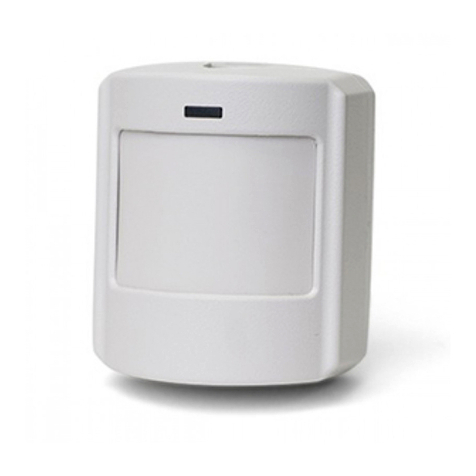
Tiiwee TWPIR02 User manual

Copyright © 2019 Tiiwee. All rights reserved. This manual or any portion thereof may not be reproduced or used in any manner whatsoever.
Tiiwee PIR Motion Sensor TWPIR02
User Manual

Copyright © 2019 Tiiwee. All rights reserved. This manual or any portion thereof may not be reproduced or used in any manner whatsoever.
ENGLISH
Tiiwee PIR Motion Sensor TWPIR02
(For indoor use only)
For Tiiwee Home Alarm System
Introduction
Congratulations with your Tiiwee passive infrared detector (PIR). It is compatible
with the components of the Tiiwee Home Alarm System and can be wirelessly
connected to all Tiiwee 433 MHz Alarm Units (available separately).
This sensor applies digital dual-core fuzzy logic control processing technology and
intelligent analysis algorithms to prevent false alarms. It also features various
settings to adjust the PIR sensor to your personal situation.
Important: This sensor has been programmed to respect a 5 second delay
between 2 signals. This is intentional and will save battery power.
contents
1 x Tiiwee PIR sensor TWPIR02 for Tiiwee Home Alarm System
3 x batteries, 1.5V AAA-type, alkaline
1 x ball-joint mount
2 x screws
1 x instructions for use

Copyright © 2019 Tiiwee. All rights reserved. This manual or any portion thereof may not be reproduced or used in any manner whatsoever.
Product Overview and activation
Open the back panel to insert the batteries. Please respect the correct
polarity. Now, close the back panel again. Slide the ball joint in place until it
locks in place and attach the wall mount on the ball joint. Your PIR sensor is
now ready to be installed on the mount.
General installation guidelines
Avoid positions that are close to a window, air conditioners, fluorescent
lights, heaters, refrigerators, stoves, and direct sunlight and other places
where temperature would change rapidly and air flow is high. If there are
two detectors in the same detecting range, please adjust the position to
avoid interference and false alarms.

Copyright © 2019 Tiiwee. All rights reserved. This manual or any portion thereof may not be reproduced or used in any manner whatsoever.
Attach the detector to the bracket, and change the detecting angle and
distance by adjusting the installation height and the bracket. It is advised
to install the device at a height of approximately 2 meters.
IMPORTANT: The Infrared detector is sensitive to a human’s vertical
movement. It is less sensitive to horizontal movements. Therefore, it is
advised to aim the device at a 90 degrees’ angle to a person’s walking
direction.
Test
1. After the installation, turn the switch to ON. Now, walk or move in front
of the PIR sensor at a distance between 3 and 6 meters.

Copyright © 2019 Tiiwee. All rights reserved. This manual or any portion thereof may not be reproduced or used in any manner whatsoever.
2. The Indicator light should light up once. Note the 5 second delay
between 2 signals. This is normal and intentional to save battery power.
3. If needed, adjust the detector angle to get the desired detection range.
When the detector indicator flashes
•LED flashes once: A signal is detected and the detector sends a
signal to the Alarm unit.
•LED continuously on: Low-voltage indication, please change the
battery as soon as possible.
Connecting the PIR Sensors to an Alarm Siren
This PIR sensor is compatible with the Tiiwee Home Alarm System.
Connect it wirelessly with one of the 433 MHz Alarm Units.
IMPORTANT: The instructions for pairing the PIR sensor with the Tiiwee
Home Alarm System are included with the Alarm units or can be
consulted on our website www.tiiwee.com or one of our Youtube
channels.
Advanced features
The Tiiwee PIR sensor is equipped with some additional features to allow
you to adjust the device to your specific needs. In order to access these
functions, remove the screw at the top of the sensor. Then separate the 2
parts (front and back part) by using an appropriate device (screw driver
i.e.). Now you can see the circuit board with the 2 switches.

Copyright © 2019 Tiiwee. All rights reserved. This manual or any portion thereof may not be reproduced or used in any manner whatsoever.
1. The Indicator light can be switched off to save battery power (“LED
OFF position). Off course, in this mode an alarm signal will still be
sent to the Alarm Unit or the PIR Motion Sensor Alarm. However,
please note that the low battery indication is switched off in this
setting.
2. A waiting time of 5 minutes between detections can be set saving
battery power (“5 Min” vs “5s” switch). The 5-minute waiting
period can be used when your PIR sensor is meant to result in a
strong Siren alarm. This mode however is not advised when you
selected a Chime sound setting on your Alarm unit.
Mode Setting
The factory settings are “5s” and “Led On”. This means that the sensor will
respect a 5-seconds waiting time between 2 signals and that the LED

Copyright © 2019 Tiiwee. All rights reserved. This manual or any portion thereof may not be reproduced or used in any manner whatsoever.
indicator light will always flash if movement is detected. These are the most
commonly used settings.
1. If both switches are set to the ON position as shown in picture 1, the
LED will flash each time a movement is detected. After each signal, a 5
second waiting time is set as a standard to allow a person to pass
without triggering a signal continuously.
2. If the top switch is set to Off the detector will respect a 5-minute delay
before it will become active again. This is a power saving mode. This
setting can perfectly be used with a loud alarm (which will sound
continuously and loud). A Chime setting on the Alarm unit is not advised
with this delay.
3. If the lower switch is set to Off, the Led light will not flash each time a
signal is detected. This can be convenient for saving battery power.
4. If both switches are in the Off position as shown in Figure 2, the PIR
sensor will respect a 5-minute interval between 2 different signals nor will
the LED window flash.
Low-voltage Reminder Function: The indicator light will be continuously
on when the voltage of the PIR is lower than 2.4V unless its light has been
switched off by setting the internal switches.

Copyright © 2019 Tiiwee. All rights reserved. This manual or any portion thereof may not be reproduced or used in any manner whatsoever.
Detection Range Characteristics
Technical Features
Power: The PIR sensor is powered through 3 x AAA 1.5V alkaline batteries
or by an external 5V/1A DC power supply connected through the micro-
USB port. The batteries can stay inside the sensor whilst the external
power supply is connected and in use. They will work as a power backup in
case of 220V power failure. The power adaptor is not included in the
product.
Specifications
Standby Current: <50uA
Working Current:<20mA
Detecting Range: 4-8 m/110 degrees angle
Wireless Distance: 100m ( Open Area )
Wireless Frequency: 433MHz
Housing Material: ABS
Working Humidity: <80%
Detector Size: 106x67x45mm

Copyright © 2019 Tiiwee. All rights reserved. This manual or any portion thereof may not be reproduced or used in any manner whatsoever.
DEUTSCH
Tiiwee PIR Bewegungsmelder TWPIR02
(Für den inneren Gebrauch)
For Tiiwee Home Alarm System
Einführung
Wir beglückwünschen Sie zum Kauf des Tiiwee PIR (Passiv Infrarot)
Bewegungsmelders. Der Sensor ist ein Teil des Tiiwee Home Alarm Systems und
kompatibel mit allen Tiiwee 433 MHz Alarmeinheiten (separat verfügbar).
Der Sensor nutzt die sogenannte "Dual-Core Fuzzy Logic Control Technologie" und
intelligente Analyse-Algorithmen, um Falschalarme zu vermeiden. Der Sensor hat
darüberhinaus verschiedene Einstellmöglichkeiten, um ihn an persönliche
Situationen anzupassen.
WICHTIG: Der Sensor ist mit einer 5 Sekunden Pause zwischen zwei Signalen
programmiert. Dies ist gewollt und dient dem Sparen von Batterie-Leistung.
Was wird geliefert?
1 x Tiiwee PIR Bewegungsmelder TWPIR02 für das Tiiwee Home Alarm System
3 x Batterien, 1.5V AAA, alkalisch
1 x Kugelgelenk-Montageplatte
2 x Schrauben
1 x Gebrauchsanleitung

Copyright © 2019 Tiiwee. All rights reserved. This manual or any portion thereof may not be reproduced or used in any manner whatsoever.
Produktübersicht und Aktivierung
Öffnen Sie den Bewegungsmelder auf der Rückseite und setzen Sie die Batterien
ein. Achten Sie auf die korrekte Polarität. Setzen Sie die Abdeckplatte wieder auf
und verbinden Sie den Sensor mit den Montagekomponenten. Ihr PIR Bewegungs-
melder ist nun fertig für die Montage.
Installationshinweise
Vermeiden Sie Positionen in der Nähe von Fenstern, Klimaanlagen,
fluoreszierendem Licht, Heizungen und anderen Wärmequellen, Kühlschränken,
Kochfeldern und direktem Sonnenlicht - Stellen, an denen plötzliche
Temperaturschwankungen und hohe Luftströme auftreten können. Falls Sie zwei
PIR Bewegungsmelder im gleichen Bereich installiert haben, achten Sie bitte auf
deren Ausrichtung, um Interferenzen und Falschalarme zu vermeiden.

Copyright © 2019 Tiiwee. All rights reserved. This manual or any portion thereof may not be reproduced or used in any manner whatsoever.
Setzen Sie den Bewegungsmelder in die Montageeinheit ein und stellen Sie den
Winkel entsprechend ein. Es wird empfohlen, den Bewegungsmelder in einer
Höhe von ca. 2m zu installieren.
WICHTIG: Der PIR Bewegungsmelder ist sensitiv gegenüber vertikalen
Bewegungen und weniger sensitiv gegenüber horizontalen Bewegungen. Es ist
daher empfohlen, den Bewegungsmelder so zu installieren, dass eine heran-
kommende Person erfasst wird und nicht eine Vorbeigehende.
Test
1. Schalten Sie den Bewegungsmelder auf "On". Begeben Sie sich nun vor den

Copyright © 2019 Tiiwee. All rights reserved. This manual or any portion thereof may not be reproduced or used in any manner whatsoever.
Melder in einem Abstand von 3 - 6m.
2. Die Detektionsfläche leuchtet einmal rot auf. Bitte beachten Sie: Der Sensor
ist mit einer 5 Sekunden Pause zwischen zwei Signalen programmiert. Dies
ist gewollt und dient dem Sparen von Batterie-Leistung.
3. Wenn nötig, ändern Sie den Winkel, um den Melderbereich zu ändern.
4. Der Bewegungsmelder ist nun korrekt installiert.
Wenn die Detektionsfläche (eingebautes Kontrolllicht) leuchtet
•Einmaliges Leuchten: eine Bewegung wurde erfasst und der Melder sendet
ein Signal an die entsprechende Alarmeinheit.
•Das Kontrolllicht ist dauerhaft an: Dies zeigt an, dass die Batterien
ausgetauscht werden müssen. Bitte wechseln Sie die Batterien sobald als
möglich.
Verbinden des Bewegungsmelders mit einer Alarmeinheit
Der Tiiwee PIR Bewegungsmelder ist kompatibel mit dem Tiiwee Home Alarm
System und verbindet sich drahtlos mit allen 433 MHz Alarmeinheiten.
WICHTIG: Die Anleitung zum Verbinden des PIR Bewegungsmelders mit dem
Tiiwee Home Alarm System finden Sie in den entsprechenden Anleitungen der
Tiiwee Alarmeinheiten. Alternativ können diese auch von unserer Webseite
www.tiiwee.com heruntergeladen werden. Bitte besuchen Sie auch regelmässig
unseren Youtube-Kanal.
Erweiterte Einstellungen
Der Tiiwee PIR Bewegungsmelder ist mit zusätzlichen Funktionen ausgestattet.
Dies erlaubt Ihnen, den Melder auf Ihre Bedürfnisse einzustellen. Um zu diesen

Copyright © 2019 Tiiwee. All rights reserved. This manual or any portion thereof may not be reproduced or used in any manner whatsoever.
Einstellungen zu gelangen, entfernen Sie bitte die Schraube auf der Oberseite des
Sensors. Trennen Sie dann die Vorder- und Rückseite mithilfe eines Messers (oder
kleiner Schraubenzieher). Sie sehen nun die Platine mit den beiden
Einstellknöpfen.
1. Das Kontrolllicht kann ausgeschaltet werden, um im Batterie-Modus
Strom zu sparen (“LED OFF position). Dies beeinflusst natürlich nicht die
korrekte Funktion als PIR Sensor. Bitte beachten Sie aber, dass in diesem
Fall die Geringe-Batterie-Anzeige ausgeschaltet ist.
2. Eine Wartezeit von 5 Minuten kann gewählt werden. In dieser Einstellung
besteht nach jeder wahrgenommenen Bewegung eine 5 Minuten
Wartezeit bis wieder eine Bewegung wahrgenommen werden kann. Dies
spart Batteriestrom. Diese Einstellung kann genutzt werden, wenn der
Melder einen lauten Alarm an der Alarmeinheit auslösen soll. Im

Copyright © 2019 Tiiwee. All rights reserved. This manual or any portion thereof may not be reproduced or used in any manner whatsoever.
Benachrichtigungsmodus empfehlen wir die 5 Sekunden-Einstellung.
Einstellungsmöglichkeiten
Werksseitig ist der Bewegungsmelder auf "5 Sekunden Wartezeit" und "LED
Kontroll-licht ein" eingestellt. Das heißt, es besteht eine 5 Sekunden Wartezeit
zwischen 2 Signalen und das LED Kontrolllicht leuchtet, wenn eine Bewegung
wahrgenommen wird. Dies sind die an den meist genutzten Einstellungen.
1. Beide Schalter sind auf der "ON"-Position, wie auf Bild 1 zu sehen. Das LED
Kontrolllicht leuchtet immer auf, wenn eine Bewegung wahrgenommen wird.
Nach jeder wahrgenommenen Bewegung besteht eine 5 Sekunden Wartezeit
bis wieder eine Bewegung wahrgenommen werden kann. Dies ist die
Standardeinstellung und dient dazu, dass die Person den Bereich passieren
kann, ohne wieder ein Signal auszulösen.
2. Der obere Schalter ist in der "OFF"-Position (1). Nach jeder wahrgenommenen
Bewegung besteht eine 5 Minuten Wartezeit bis wieder eine Bewegung
wahrgenommen werden kann. Dies spart Batteriestrom. Diese Einstellung
kann genutzt werden, wenn der Melder einen lauten Alarm an der
Alarmeinheit auslösen soll. Im Benachrichtigungsmodus empfehlen wir die 5
Sekunden-Einstellung.
3. Der untere Schalter ist in der "OFF"-Position (2). Das LED Kontrolllicht ist
ausgeschaltet. Dies spart Batteriestrom.
4. Beide Schalter in der "OFF"-Position (wie im Bild 2 zusehen). Es besteht eine 5
Minuten Wartezeit zwischen 2 Bewegungswahrnehmungen. Das LED
Kontrolllicht ist ausgeschaltet.

Copyright © 2019 Tiiwee. All rights reserved. This manual or any portion thereof may not be reproduced or used in any manner whatsoever.
Geringe Batterie Anzeige
Sollte das Kontrolllicht dauerhaft leuchten, müssen die Batterien ersetzt werden.
Bitte beachten Sie, dass diese Funktion deaktiviert ist, wenn Sie das Kontrolllicht in
den erweiterten Einstellungen deaktiviert haben.
Detektionsbereich
Technische Spezifikationen
Stromversorgung: Der PIR Bewegungsmelder wird durch 3 x AAA 1.5V alkalische
Batterien oder durch einen externen Stromadaptor (5V) am micro-USB Port mit
Strom versorgt. Im Falles des Stromadaptors können die Batterien im Gerät
verbleiben. Sie dienen als Backup im Falle eines Stromausfalls. Der externe
Stromadaptor ist nicht im Lieferumfang enthalten.
Standby Stromaufnahme: <50uA
Arbeitsstrom:<20mA
Detektionsbereich: 4-8 m/110 Grad Winkel
Reichweite: 100m ( Open Area )

Copyright © 2019 Tiiwee. All rights reserved. This manual or any portion thereof may not be reproduced or used in any manner whatsoever.
Transmission Frequenz: 433MHz
Material: ABS
Umgebungsluftfeuchtigkeit: <80%
Grössenangaben: 106x67x45mm

Copyright © 2019 Tiiwee. All rights reserved. This manual or any portion thereof may not be reproduced or used in any manner whatsoever.
ITALIANO
Tiiwee Sensore di Movimento PIR TWPIR02
(Solo per uso interno)
Per il Tiiwee Home Alarm System
Introduzione
Congratulazioni per il tuo rivelatore passivo ad infrarossi (PIR) della Tiiwee. È
compatibile con i componenti del Tiiwee Home Alarm System e può essere
collegato in modalità wireless a tutte le Unità di Allarme Tiiwee 433 MHz (disponibili
separatamente).
Questo sensore applica la tecnologia di elaborazione del controllo a logica fuzzy
dual-core digitale e algoritmi di analisi intelligenti per evitare falsi allarmi. È, inoltre,
dotato di varie impostazioni per regolare il sensore PIR in base alle esigenze
personali.
Importante: questo sensore è stato programmato per rispettare un ritardo di 5
secondi tra 2 segnali. Questo è intenzionale e risparmierà la potenza della batteria.
Contenuto della confezione
1 Tiiwee sensore PIR TWPIR02 per il Tiiwee Home Alarm System
3 batterie, 1.5V tipo AAA, alcaline
1 attacco a sfera
2 viti
1 manuale d’istruzioni per l'uso

Copyright © 2019 Tiiwee. All rights reserved. This manual or any portion thereof may not be reproduced or used in any manner whatsoever.
Panoramica sul prodotto e attivazione
Aprire il pannello posteriore per inserire le batterie. Si prega di rispettare la
corretta polarità. Adesso, richiudere il pannello posteriore. Far scorrere il
giunto sferico in posizione finché non si blocca in posizione e fissare il
supporto a parete sul giunto sferico. Il sensore PIR è ora pronto per essere
installato sul supporto.
Linee guida generali per l’installazione
Evitare luoghi che siano vicini a una finestra, ai condizionatori d'aria, alle
lampade fluorescenti, ai caloriferi, ai frigoriferi, alle stufe e la luce solare
diretta e in altri luoghi dove la temperatura potrebbe cambiare
rapidamente e il flusso d'aria è elevato. Se ci sono due rilevatori nella
stessa gamma di rilevazione, si prega di regolarne la posizione per evitare
interferenze e falsi allarmi.

Copyright © 2019 Tiiwee. All rights reserved. This manual or any portion thereof may not be reproduced or used in any manner whatsoever.
Attaccare il rilevatore alla staffa e modificare l'angolo e la distanza di
rilevamento regolando l'altezza d’installazione e la staffa. Si consiglia di
installare il dispositivo ad un'altezza di circa 2 metri.
IMPORTANTE: Il rilevatore ad infrarossi è sensibile al movimento
verticale di un essere umano. È meno sensibile ai movimenti orizzontali.
Pertanto, si consiglia di puntare il dispositivo a un angolo di 90 gradi
rispetto alla direzione di una persona.
Test
1. Dopo l'installazione, porre l'interruttore su ON. Ora, camminare o
muoversi davanti al sensore PIR ad una distanza compresa tra i 3 e i 6

Copyright © 2019 Tiiwee. All rights reserved. This manual or any portion thereof may not be reproduced or used in any manner whatsoever.
metri.
2. La spia luminosa dovrebbe accendersi una volta. Notare il ritardo di 5
secondi tra 2 segnali. Questo è normale e intenzionale per risparmiare
la carica della batteria.
3. Se necessario, regolare l'angolo del rilevatore per ottenere l'intervallo
di rilevamento desiderato.
Quando l'indicatore del rilevatore lampeggia
•Il LED lampeggia una volta: viene rilevato un segnale e il rilevatore
invia un segnale all'Unità di Allarme.
•Il LED resta continuamente acceso: indicazione di scarsa energia,
si prega di cambiare la batteria il prima possibile.
Collegamento dei Sensori PIR ad una Sirena di Allarme
Questo sensore PIR è compatibile con il Tiiwee Home Alarm System.
Collegarlo in modalità wireless con una delle Unità di Allarme 433 MHz.
IMPORTANTE: Le istruzioni per l'accoppiamento del sensore PIR con il
Tiiwee Home Alarm System sono incluse nelle Unità di Allarme oppure
possono essere consultate sul nostro sito web www.tiiwee.com o su uno
dei nostri canali YouTube.
Funzioni avanzate
Il sensore PIR ella Tiiwee è dotato di alcune funzioni aggiuntive per
consentire di regolare il dispositivo per le proprie specifiche esigenze. Per
accedere a queste funzioni, rimuovere la vite nella parte superiore del
sensore. Quindi separare le 2 parti (parte anteriore e posteriore) usando
un dispositivo appropriato (ad esempio, un cacciavite). Ora si può vedere la
scheda con i 2 interruttori.
Table of contents
Languages:
Other Tiiwee Security Sensor manuals
Popular Security Sensor manuals by other brands
Leviton
Leviton ODC Series installation instructions
Guardian
Guardian EyeSafe G1200 Installation, operation and maintenance
Hilti
Hilti PS 30 operating instructions

GST
GST I-9602LW Installation and operation manual

Metrohm
Metrohm 945 Professional Detector Vario manual

Du Pont
Du Pont Tychem 6000 FR Cat.III ThermoPro TP275T Instructions for use
