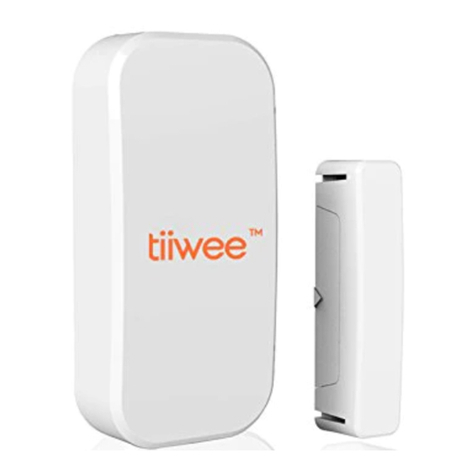
Tiiwee TWWS02 User manual

Copyright © 2019 Tiiwee. All rights reserved. This manual or any portion thereof may not be reproduced or used in any manner whatsoever.

Copyright © 2019 Tiiwee. All rights reserved. This manual or any portion thereof may not be reproduced or used in any manner whatsoever.
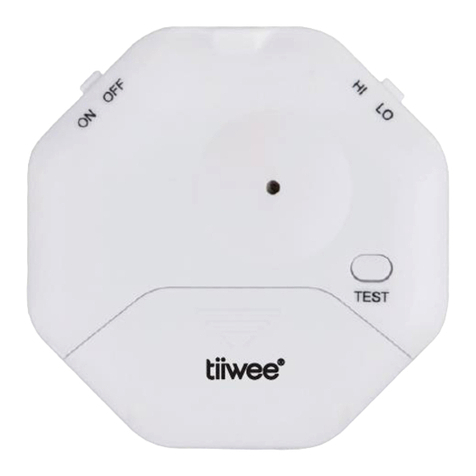
Tiiwee Door & Window Sensor TWWS02
(For indoor use only)
For the Tiiwee Home Alarm System
Introduction
Congratulations with your Tiiwee Door & Window sensor. It is intended to be used
in combination with the components of the Tiiwee Home Alarm System and can
be wirelessly connected to all Tiiwee 433 MHz Alarm Units.
Product Overview and Operation
The Door & window sensor consists of a magnet and a sensor which contains a
detector for changes in magnetic fields (‘flux’). When the magnet is moved away
from the sensor, the detector will detect that motion and will send a wireless
signal to the Tiiwee Alarm unit. The Tiiwee Alarm unit will now emit a strong
alarm sound or a chime depending on the settings of the Alarm unit.
Connecting the Door & Window sensor to an Alarm Siren
This door & window sensor is compatible with the Tiiwee Home Alarm System.
Connect it wirelessly with one of the 433 MHz Tiiwee Alarm Units.
The instructions for pairing the Door & Window sensor with the Tiiwee Home
Alarm System are included with the Tiiwee Alarm units, or can be found on our
website www.tiiwee.com or one of our Youtube channels.

Copyright © 2019 Tiiwee. All rights reserved. This manual or any portion thereof may not be reproduced or used in any manner whatsoever.
General Installation Guidelines
GENERAL GUIDELINES:
•Do not install the Door/Window sensors on breakable material, but
choose instead the frame of a window to attach your Door/window
sensor.
•Do not install on instable parts.
•Do not install the sensor near magnetic parts - that might trigger the
alarm by accident.
•Clean the surface before installation if the tape will be used for
attachment.
•It is important that the sensor and the magnet are placed on the door
and frame respectively to allow an alarm to be triggered when sensor
and magnet are separated.
Installation of the Door & Window Sensor
IMPORTANT - PLEASE NOTE:
•It is important that the sensor and magnet are aligned correctly. Align
the small triangle markers at the sides of the sensor and magnet for
perfect operation
•The distance between the sensor and the magnet should not exceed
8mm.
Installation examples
Various installation examples are shown at the first page of this manual.

Copyright © 2019 Tiiwee. All rights reserved. This manual or any portion thereof may not be reproduced or used in any manner whatsoever.
Image 1: Door and doorpost are at the same level. Sensor and magnet are
positioned next to each other and the triangle markers are aligned.
Image 2: The door or doorpost are at uneven levels with the door
protruding relative to the doorpost. Mount the magnet sideways on the
top of the door and position the sensor with a few millimetres distance on
the doorpost aligning the triangle markers on the sides of the sensor and
magnet.
Image 3: The door or doorpost are at uneven levels with the doorpost
protruding relative to the door. Mount the sensor sideways to the
doorpost and then position the magnet on the door with a few millimetres
distance aligning the triangle markers on the sides of the sensor and
magnet.
Installation
•Make sure that both the installation surfaces are clean and free from
grease and dust.
Magnet:
•Installation with screws: Using a small screwdriver or the tip of a small
knife, remove the cover from the magnet by lifting the cover at the top
of the magnet. Then, position the magnet at the desired position. Now,
reposition the cover carefully on the magnet making sure not to damage
the small clips.
•Installation with double sided tape: peel off the protective foil from one
side and stick the tape onto the magnet. Then, peel off the other part of
protective foil and stick the magnet onto the door or doorpost.
Sensor:
Before installing the sensor, please assure that both the magnet and
sensor will be aligned as described above.
•Installation with screws: Using a small screwdriver or the tip of a small

Copyright © 2019 Tiiwee. All rights reserved. This manual or any portion thereof may not be reproduced or used in any manner whatsoever.
knife, remove the cover from the sensor by lifting the cover at the top of
the sensor. Then, position the sensor at the desired position. Now,
reposition the cover carefully on the sensor making sure not to damage
the clips.
•Installation with double sided tape: Peel off the protective foil from one
side of the tape and stick the tape onto the sensor. Then, peel off the
other part of protective foil and stick the sensor onto the door or
doorpost.
Test your door sensor
1. After the installation, open the window or door.
2. The red indicator light on the front of the sensor will flash once.
3. The sensor is now properly setup.
Low battery indicator
If the red control light on the sensor flashes every 3 seconds the battery needs to
be replaced.
Replacing the Battery
•Place a screwdriver or knife in the opening at the bottom and use it as a
lever to lift the case from the back plate.
•Take out the old battery and replace it with a fresh 12V/23A alkaline
battery - please note the correct polarity
•Put the battery cover back in place and push it until you hear a click

Copyright © 2019 Tiiwee. All rights reserved. This manual or any portion thereof may not be reproduced or used in any manner whatsoever.
Technical Specifications
Model No.: TWWS02
Transmission Distance: 100m (Open Area)
Transmission Frequency: 433MHz
Operating Voltage: 12V
Size:72×21×15mm
Magnet Size:40×11×13mm

Copyright © 2019 Tiiwee. All rights reserved. This manual or any portion thereof may not be reproduced or used in any manner whatsoever.
Tiiwee Tür & Fenster Sensor TWWS02
(für den inneren Gebrauch)
Für Tiiwee Home Alarm System
Einführung
Wir beglückwünschen Sie zum Kauf des Tiiwee Tür & Fenster Sensors. Der Sensor
ist ein Teil des Tiiwee Home Alarm Systems und kompatibel mit allen Tiiwee 433
MHz Alarmeinheiten.
Produktübersicht und Gebrauch
Der Tür & Fenster Sensor besteht aus dem Magneten und dem Sensor, welcher
Änderungen in der magnetischen Feldstärke misst. Wenn der Magnet und der
Sensor voneinander getrennt werden, wird dies durch den Sensor
wahrgenommen und ein drahtloses Signal wird an die verbundene Alarmeinheit
gesendet. Die Alarmeinheit wird dann entweder einen lauten Alarm oder einen
Benachrichtigungston abgeben - je nach den vorgenommenen Einstellungen.
Verbinden des Tür & Fenster Sensors mit einer Alarmeinheit
Der Tiiwee Tür & Fenster Sensor ist kompatibel mit dem Tiiwee Home Alarm
System und verbindet sich drahtlos mit den Tiiwee 433 MHz Alarmeinheiten.
Die Anleitung zum Verbinden des Tür & Fenster Sensors mit dem Tiiwee Home
Alarm System finden Sie in den entsprechenden Anleitungen der Tiiwee

Copyright © 2019 Tiiwee. All rights reserved. This manual or any portion thereof may not be reproduced or used in any manner whatsoever.
Alarmeinheiten. Alternativ können diese auch von unserer Webseite
www.tiiwee.com heruntergeladen werden. Sie finden ebenfalls Information in
unserem Youtube-Kanal.
Installation des Tür & Fenster Sensors
ALLGEMEINE RICHTLINIEN:
•Installieren Sie den Tür & Fenster Sensor nicht auf leicht brechbarem
Untergrund - ein solider Untergrund wie beispielsweise ein Fenster- oder
Türrahmen sind empfohlen.
•Installieren Sie den Tür & Fenster Sensor nicht auf instabilen Untergründen.
•Installieren Sie den Tür & Fenster Sensor nicht in der Nähe von
magnetischen Teilen, da dies zu einer Fehlauslösung führen könnte.
•Reinigen Sie die Installationsfläche bitte gründlich, wenn Sie das
mitgelieferte Klebeband verwenden möchten.
•Eine korrekte Installation des Sensors und des Magneten an der Tür und
dem Türrahmen sind von entscheidender Bedeutung für eine korrekte
Funktion.
Installation des Tür- und Fenstersensors
WICHTIG - BITTE BEACHTEN SIE:
•Es ist wichtig, dass Sensor und Magnet korrekt ausgerichtet sind.
Richten Sie die kleinen Dreiecksmarkierungen an den Seiten von Sensor
und Magnet für einen einwandfreien Betrieb aus.
•Der Abstand zwischen Sensor und Magnet darf 8 mm nicht
überschreiten.

Copyright © 2019 Tiiwee. All rights reserved. This manual or any portion thereof may not be reproduced or used in any manner whatsoever.
Installationsbeispiele
Auf der ersten Seite dieses Handbuchs sind verschiedene
Installationsbeispiele aufgeführt.
Bild 1: Tür und Türpfosten befinden sich auf gleicher Ebene. Sensor und
Magnet sind nebeneinander positioniert und die Dreiecksmarker sind
ausgerichtet.
Bild 2: Die Tür und der Türpfosten sind nicht auf der gleichen Ebene,
wobei die Tür in Bezug auf den Türpfosten vorsteht. Montieren Sie den
Magneten seitlich auf der Oberseite der Tür und positionieren Sie den
Sensor mit einigen Millimetern Abstand auf dem Türpfosten, indem Sie die
Dreiecksmarkierungen an den Seiten von Sensor und Magnet ausrichten.
Bild 3: Die Tür und der Türpfosten sind nicht auf der gleichen Ebene,
wobei der Türpfosten in Bezug auf die Tür vorsteht. Montieren Sie den
Sensor seitlich am Türpfosten und positionieren Sie dann den Magneten
mit einigen Millimetern Abstand auf der Tür, wobei Sie die
Dreiecksmarkierungen an den Seiten von Sensor und Magnet ausrichten.
Installation
•Achten Sie darauf, dass beide Montageflächen sauber, fett- und staubfrei
sind.
Magnet:
•Montage mit Schrauben: Entfernen Sie die Abdeckung vom Magneten
mit einem kleinen Schraubendreher oder der Spitze eines kleinen
Messers, indem Sie die Abdeckung an der Oberseite des Magneten
anheben. Montieren Sie dann den Magneten an der gewünschten
Position. Positionieren Sie nun die Abdeckung vorsichtig auf dem
Magneten und achten Sie darauf, dass die kleinen Clips nicht beschädigt
werden.
•Montage mit doppelseitigem Klebeband: Ziehen Sie die Schutzfolie von
einer Seite ab und kleben Sie das Klebeband auf den Magneten. Dann

Copyright © 2019 Tiiwee. All rights reserved. This manual or any portion thereof may not be reproduced or used in any manner whatsoever.
ziehen Sie den anderen Teil der Schutzfolie ab und kleben den Magneten
auf die Tür oder den Türpfosten.
Sensor:
Bevor Sie den Sensor installieren, stellen Sie bitte sicher, dass sowohl der
Magnet als auch der Sensor wie oben beschrieben ausgerichtet sind.
•Montage mit Schrauben: Entfernen Sie mit einem kleinen
Schraubendreher oder der Spitze eines kleinen Messers die Abdeckung
vom Sensor, indem Sie die Abdeckung an der Oberseite des Sensors
anheben. Montieren Sie dann den Sensor an der gewünschten Position.
Setzen Sie nun die Abdeckung vorsichtig wieder auf den Sensor und
achten Sie darauf, dass die Clips nicht beschädigt werden.
•Montage mit doppelseitigem Klebeband: Ziehen Sie die Schutzfolie von
einer Seite ab und kleben Sie das Band auf den Sensor. Ziehen Sie dann
den anderen Teil der Schutzfolie ab und kleben Sie den Sensor auf die Tür
oder den Türpfosten.
Testen Sie Ihren Türsensor
1. Öffnen Sie nach der Installation das Fenster oder die Tür.
2. Die rote Kontrollleuchte an der Vorderseite des Sensors blinkt einmalig.
3. Der Sensor ist nun richtig eingestellt.
Batterie-Kontrollanzeige
Die Batterie muss ersetzt werden, wenn die rote Kontrollleuchte alle 3 Sekunden
aufleuchtet.
Austauschen der Batterie
•Platzieren Sie einen kleinen Schraubenzieher oder ein Messer an der
Öffnung am unteren Teil des Sensors und trennen Sie vorsichtig das
Sensorgehäuse von der Montageplatte.
•Ersetzen Sie die Batterie durch eine neue 23A/12V Batterie - achten Sie auf
die korrekte Polarität.

Copyright © 2019 Tiiwee. All rights reserved. This manual or any portion thereof may not be reproduced or used in any manner whatsoever.
•Setzen Sie das Sensorgehäuse wieder auf die Montageplatte und drücken
Sie vorsichtig bis Sie ein deutliches "Klick" hören.
Technical Specifications
Model Nr.: TWWS02
Transmission Distanz: 100m (freies Feld)
Transmission Frequenz: 433MHz
Arbeitsspannung: 12V
Size:72×21×15mm
Magnet Size:40×11×13mm

Copyright © 2019 Tiiwee. All rights reserved. This manual or any portion thereof may not be reproduced or used in any manner whatsoever.
Tiiwee Sensore Porta & Finestra TWWS02
(Solo per uso interno)
Per il Tiiwee Home Alarm System
Introduzione
Congratulazioni per il tuo Tiiwee Door & Window Sensor (Sensore Porta &
Finestra). È destinato ad essere utilizzato in combinazione con i componenti del
Tiiwee Home Alarm System e può essere collegato in modalità wireless a tutte le
Unità di Allarme Tiiwee 433 MHz.
Panoramica sul Prodotto e Funzionamento
Il sensore Porta & Finestra è costituito da un magnete e da un sensore che
contiene un rivelatore per i cambiamenti nei campi magnetici ('flux'). Quando il
magnete viene allontanato dal sensore, il rilevatore rileverà tale movimento e
invierà un segnale wireless all'Unità di Allarme Tiiwee. L'Unità di Allarme Tiiwee
emetterà ora un forte suono di allarme o una soneria a seconda delle
impostazioni dell'Unità di Allarme.
Collegamento del sensore Porta & Finestra ad una Sirena di Allarme
Questo sensore di porta & finestra è compatibile con il Tiiwee Home Alarm
System. Collegarlo in modalità wireless ad una delle Unità di Allarme Tiiwee 433
MHz.

Copyright © 2019 Tiiwee. All rights reserved. This manual or any portion thereof may not be reproduced or used in any manner whatsoever.
Le istruzioni per l'accoppiamento del sensore Porta & Finestra con il Tiiwee
Home Alarm System sono incluse nelle Unità di Allarme Tiiwee oppure possono
essere trovate sul nostro sito web www.tiiwee.com o su uno dei nostri canali
YouTube.
Linee Guida Generali per l’Installazione
LINEE GUIDA GENERALI:
•Non installare i sensori della Porta/Finestra su del materiale infrangibile;
scegliere piuttosto il telaio di una finestra per collegare il tuo sensore
Porta/Finestra.
•Non installare su parti instabili.
•Non installare il sensore vicino a parti magnetiche che potrebbero
accidentalmente far partire l'allarme.
•Pulire la superficie prima dell'installazione se per attaccare viene
adoperato il nastro.
•È importante che sia il sensore sia il magnete siano posizionati
rispettivamente sulla porta e sul telaio per consentire l'attivazione di un
allarme quando il sensore e il magnete vengono separati.
Installazione del Sensore Porta & Finestra
IMPORTANTE - SI PREGA DI NOTARE:
•È importante che il sensore e il magnete siano allineati correttamente.
Allineare i piccoli marcatori triangolari ai lati del sensore e del magnete
per un perfetto funzionamento.

Copyright © 2019 Tiiwee. All rights reserved. This manual or any portion thereof may not be reproduced or used in any manner whatsoever.
•La distanza tra il sensore e il magnete non deve superare gli 8 mm.
Esempi di installazione
Nella prima pagina di questo manuale sono riportati diversi esempi di
installazione.
Immagine 1: Porta e stipite sono allo stesso livello. Il sensore e il magnete
sono posizionati uno accanto all'altro e i contrassegni triangolari sono
allineati.
Immagine 2: La porta o il montante della porta sono a livelli non uniformi
con la porta sporgente rispetto al montante della porta. Montare il
magnete lateralmente sulla parte superiore della porta e posizionare il
sensore con una distanza di pochi millimetri sul montante della porta
allineando i contrassegni del triangolo sui lati del sensore e del magnete.
Immagine 3: La porta o il montante della porta sono a livelli irregolari con
il montante sporgente rispetto alla porta. Montare il sensore lateralmente
al montante della porta e quindi posizionare il magnete sulla porta con
una distanza di pochi millimetri allineando i marcatori triangolari sui lati
del sensore e del magnete.
Installazione
Assicurarsi che entrambe le superfici di installazione siano pulite e prive di
grasso e polvere.
Magnete:
•Installazione con viti: Utilizzando un piccolo cacciavite o la punta di un
piccolo coltello, rimuovere il coperchio dal magnete sollevando il
coperchio nella parte superiore del magnete. Quindi, posizionare il
magnete nella posizione desiderata. Ora, riposizionare con attenzione il
coperchio sul magnete facendo attenzione a non danneggiare le piccole
clip.
•Installazione con nastro biadesivo: staccare la pellicola protettiva da un

Copyright © 2019 Tiiwee. All rights reserved. This manual or any portion thereof may not be reproduced or used in any manner whatsoever.
lato e incollare il nastro sul magnete. Quindi, staccare l'altra parte della
pellicola protettiva e incollare il magnete sulla porta o sul montante della
porta.
Sensore:
Prima di installare il sensore, assicurarsi che sia il magnete che il sensore
siano allineati come descritto sopra.
•Installazione con viti: Utilizzando un piccolo cacciavite o la punta di un
piccolo coltello, rimuovere il coperchio del sensore sollevando il
coperchio nella parte superiore del sensore. Quindi, posizionare il
sensore nella posizione desiderata. Ora, riposizionare con cura il
coperchio sul sensore facendo attenzione a non danneggiare le clip.
•Installazione con nastro biadesivo: Staccare la pellicola protettiva da un
lato del nastro e incollare il nastro sul sensore. Quindi, staccare l'altra
parte della pellicola protettiva e incollare il sensore sulla porta o sul
montante della porta.
Testare il sensore della porta
1. Dopo l'installazione, aprire la finestra o la porta.
2. La spia rossa sulla parte anteriore del sensore lampeggia una volta.
3. Il sensore è ora configurato correttamente.
Indicatore di batteria scarica
Se la spia rossa di controllo sul sensore lampeggia ogni 3 secondi, la batteria deve
essere sostituita.
Sostituzione della Batteria
•Infilare un cacciavite o un coltello nell'apertura in basso e utilizzarlo come
leva per sollevare la custodia dalla piastra posteriore
•Estrarre la vecchia batteria e sostituirla con una nuova batteria alcalina
12V/23A - si prega prestare attenzione alla corretta polarità
•Riposizionare il coperchio della batteria e spingerlo fino a quando si sente

Copyright © 2019 Tiiwee. All rights reserved. This manual or any portion thereof may not be reproduced or used in any manner whatsoever.
un clic
Specifiche Tecniche
Modello n.: TWWS02
Distanza di Trasmissione: 100m (Spazio Aperto)
Frequenza di Trasmissione: 433MHz
Tensione di Funzionamento: 12V
Dimensioni: 72 × 21 × 15 mm
Dimensione del: 40 × 11 × 13 mm

Copyright © 2019 Tiiwee. All rights reserved. This manual or any portion thereof may not be reproduced or used in any manner whatsoever.
Capteur de porte et fenêtre Tiiwee TWWS02
(Pour usage intérieur seulement)
Pour le système d'alarme domestique Tiiwee
Introduction
Félicitations avec votre détecteur de portes et fenêtres Tiiwee. Il est destiné à être
utilisé en combinaison avec les composants du système d'alarme domestique
Tiiwee et peut être connecté sans fil à toutes les unités d'alarme Tiiwee 433 MHz.
Vue d'ensemble du produit et fonctionnement
Le capteur de porte et fenêtre se compose d'un aimant et d'un capteur qui
contient un détecteur pour les changements de champs magnétiques ("flux").
Lorsque l'aimant est éloigné du capteur, le détecteur détecte ce mouvement et
envoie un signal sans fil à l'alarme Tiiwee. L'unité d'alarme Tiiwee émet
maintenant un son d'alarme puissant ou un carillon selon les réglages de l'unité
d'alarme.
Connexion du capteur de porte et fenêtre à une sirène d'alarme
Ce capteur de porte et fenêtre est compatible avec le système d'alarme
domestique Tiiwee. Connectez-le sans fil avec l'une des unités d'alarme Tiiwee
433 MHz.
Les instructions pour l'appariement du détecteur de portes et fenêtres avec le
système d'alarme Tiiwee Home Alarm System sont incluses avec les unités

Copyright © 2019 Tiiwee. All rights reserved. This manual or any portion thereof may not be reproduced or used in any manner whatsoever.
d'alarme Tiiwee, ou peuvent être trouvées sur notre site Web www.tiiwee.com
ou sur l'une de nos chaînes Youtube.
Directives générales d'installation
LIGNES DIRECTRICES GÉNÉRALES :
•N'installez pas les détecteurs de porte/fenêtre sur un matériau cassable,
mais choisissez plutôt le cadre d'une fenêtre pour fixer votre détecteur de
porte/fenêtre.
•Ne pas installer sur des pièces instables.
•Ne pas installer le capteur à proximité de pièces magnétiques qui
pourraient déclencher l'alarme par accident.
•Nettoyer la surface avant l'installation si le ruban adhésif doit être utilisé
pour la fixation.
•Il est important que le capteur et l'aimant soient placés respectivement
sur la porte et le cadre pour permettre le déclenchement d'une alarme
lorsque le capteur et l'aimant sont séparés.
Installation du capteur de porte et fenêtre
IMPORTANT - VEUILLEZ NOTER :
•Il est important que le capteur et l'aimant soient correctement alignés.
Alignez les petits repères triangulaires sur les côtés du capteur et de
l'aimant pour un fonctionnement parfait.
•La distance entre le capteur et l'aimant ne doit pas dépasser 8 mm.
Exemples d'installation

Copyright © 2019 Tiiwee. All rights reserved. This manual or any portion thereof may not be reproduced or used in any manner whatsoever.
Différents exemples d'installation sont présentés à la première page de ce
manuel.
Image 1 : La porte et le montant de porte sont au même niveau. Le
capteur et l'aimant sont placés l'un à côté de l'autre et les repères
triangulaires sont alignés.
Image 2 : La porte ou le montant de porte sont à des niveaux inégaux, la
porte faisant saillie par rapport au montant de porte. Montez l'aimant
latéralement sur le dessus de la porte et positionnez le capteur à quelques
millimètres de distance sur le montant de porte en alignant les repères
triangulaires sur les côtés du capteur et de l'aimant.
Image 3 : La porte ou le montant de porte sont à des niveaux inégaux, le
montant de porte faisant saillie par rapport à la porte. Montez le capteur
latéralement sur le montant de la porte, puis positionnez l'aimant sur la
porte à une distance de quelques millimètres en alignant les repères
triangulaires sur les côtés du capteur et de l'aimant.
Installation
•Veillez à ce que les deux surfaces de montage soient propres et exemptes
de graisse et de poussière.
Aimant :
•Montage avec vis : l'aide d'un petit tournevis ou de la pointe d'un petit
couteau, retirer le couvercle de l'aimant en soulevant le couvercle en
haut de l'aimant. Ensuite, positionner l'aimant à la position désirée.
Maintenant, repositionnez soigneusement le couvercle sur l'aimant en
veillant à ne pas endommager les petits clips.
•Installation avec du ruban adhésif double face : décoller la feuille de
protection d'un côté et coller le ruban adhésif sur l'aimant. Ensuite,
enlevez l'autre partie du film de protection et collez l'aimant sur la porte
ou le montant de porte.

Copyright © 2019 Tiiwee. All rights reserved. This manual or any portion thereof may not be reproduced or used in any manner whatsoever.
Capteur :
Avant d'installer le capteur, assurez-vous que l'aimant et le capteur sont
alignés comme décrit ci-dessus.
•Montage avec vis : l'aide d'un petit tournevis ou de la pointe d'un petit
couteau, retirez le couvercle du capteur en le soulevant par le haut.
Positionnez ensuite le capteur à la position souhaitée. Maintenant,
repositionnez soigneusement le couvercle sur le capteur en veillant à ne
pas endommager les clips.
•Installation avec ruban adhésif double face : Enlevez la feuille de
protection d'un côté de la bande et collez la bande sur le capteur. Retirez
ensuite l'autre partie du film de protection et collez le capteur sur la
porte ou le montant de porte.
Testez votre capteur de porte
1. Après l'installation, ouvrez la fenêtre ou la porte.
2. Le voyant lumineux rouge à l'avant du capteur clignote une fois.
3. Le capteur est maintenant correctement configuré.
Indicateur de batterie faible
Si le témoin de contrôle rouge du capteur clignote toutes les 3 secondes, la pile
doit être remplacée.
Remplacement de la batterie
•Placez un tournevis ou un couteau dans l'ouverture du bas et utilisez-le
comme levier pour soulever le boîtier de la plaque arrière.
•Retirez la pile usagée et remplacez-la par une pile alcaline 12V/23A neuve.
•Remettez le couvercle de la batterie en place et poussez-le jusqu' à ce que
vous entendiez un déclic.
Table of contents
Languages:
Other Tiiwee Security Sensor manuals
