Timago TIMgym User manual

TIMgym
EN INSTRUCTIONS FOR USE
PL INSTRUKCJA OBSŁUGI

3
INSTRUCTIONS FOR USE
Pedal exerciser
Product code: TIMgym
1.Characteristics
The lower limb pedal exerciser is made of a powder-coated steel
frame. It is equipped with resistance mechanism, four anti-slip pads
and foot straps. It has a rotary knob with a wide range of resistance
adjustment, making it suitable for various patient groups. It can be
used in hospitals, hospices and at home as a rehabilitation and
personal recreation device.
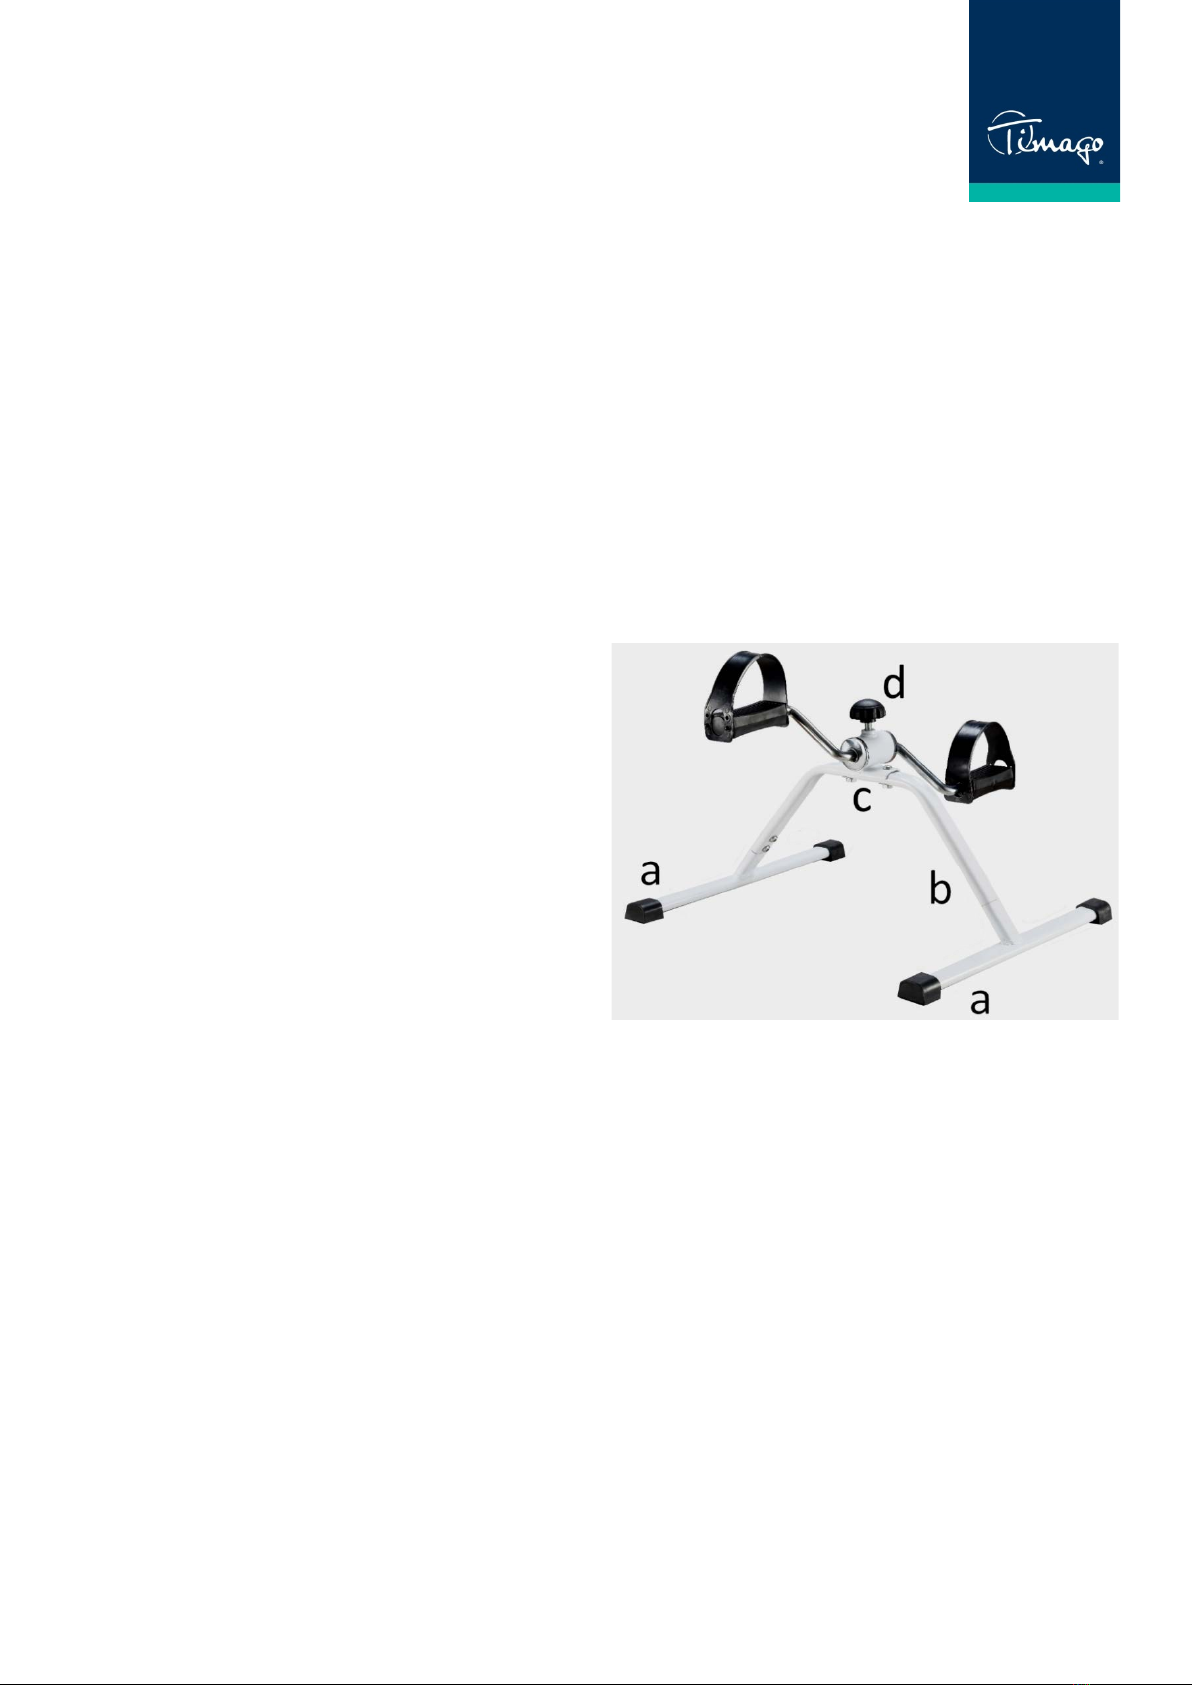
Elements of the pedal exerciser:
a. Pedal exerciser legs (2 pcs.)
b. Pedal exerciser frame (1 pc.)
c. Excerciser main mechanism (1 pc.)
d. Adjustment knob (1 pc.)
e. Screw with nuts type A
(length 20 mm, 2 pcs.)
f. Screws type B (length 10 mm,
4 pcs.)
g. Screws washers (6 pcs.)
2. Application
The pedal exerciser is designed for patients with contracture or
muscular atrophy caused by long-term immobilisation due to a plaster
bandage or surgery, as well as for patients who need to restore motor
functions and re-learn the correct movement pattern due to damage
to the neurological system. It is possible to adjust the exerciser to the
state of limb fitness and to the progress in rehabilitation owing to
resistance adjustment.

4
3. Assembly and adjustment
•Insert the pedal exerciser leg into the frame and screw it with 2x
B-type screws (placing washers beforehand). Screw the other
pedal exerciser leg in a similar way.
ATTENTION: do not tighten the screws all the way.
•Once the legs are mounted to the frame, lightly press the frame to
the ground and tighten all 4 mounting screws firmly. This will
allow the pedal exerciser legs to level properly.
•Place the main mechanism on the pedal exerciser frame and
fasten it with 2x screws and A-type nuts (placing washers
beforehand).
•Screw the adjustment knob into the main mechanism.
Resistance adjustment
In order to increase fitness levels and improve muscle work and muscle
strength gains, the training intensity and/or duration of exercise should
be gradually increased.
•To increase the resistance, turn the adjustment knob clockwise.
•To reduce the resistance, turn the adjustment knob anticlockwise.
•When performing low impact exercises, the adjustment knob
should be completely unscrewed, whereas when performing
resistance exercises, the adjustment knob should be tightened to
the desired load.
Usage
•Place the pedal exerciser on the floor and make sure the anti-slip
pads are firmly in place to prevent the pedal exerciser from
moving.
•Exercises should be carried out in a seated position, the pedal
exerciser should be positioned exactly in front of the user so that
the hip joint is bent at an angle of no less than 90°.

5
•Place feet on the pedals and adjust the strap to foot
circumference, this will prevent the foot from slipping off the
pedal during exercise.
•Set the resistance using the adjustment knob.
4. Technical data
Base dimensions
40 cm x 50 cm
Base height from the ground
27 cm
Weight
2,35 kg
Maximum capacity
120 kg
Frame colour
black
5. Notes
Timago International Group does not bear responsibility of improper
use of the pedal exerciser, failure to comply safety regulations and
misuse.
6. Maintenance
Carry out regular maintenance of the technical condition of the pedal
exerciser:
•It is recommended to clean the pedal exerciser regularly with a
soft cloth and soapy water. After cleaning, dry the pedal exerciser
thoroughly with soft cloth.
•Do not use strong polishing agents for cleaning as it may cause
damage to the protective coatings.
•Remove impurities from moving elements of the exerciser on an
ongoing basis.
7. Storage and transport conditions
Device should not be exposed to direct sunlight, water or moisture.
6
8. Warranty information
All products distributed by our company are covered by a warranty, the
terms of which are described in the warranty card available on our
website. Please contact the retailer from whom you purchased the
product. Please, keep in mind that for warranty purposes, the proof of
purchase (receipt or invoice) should be retained.
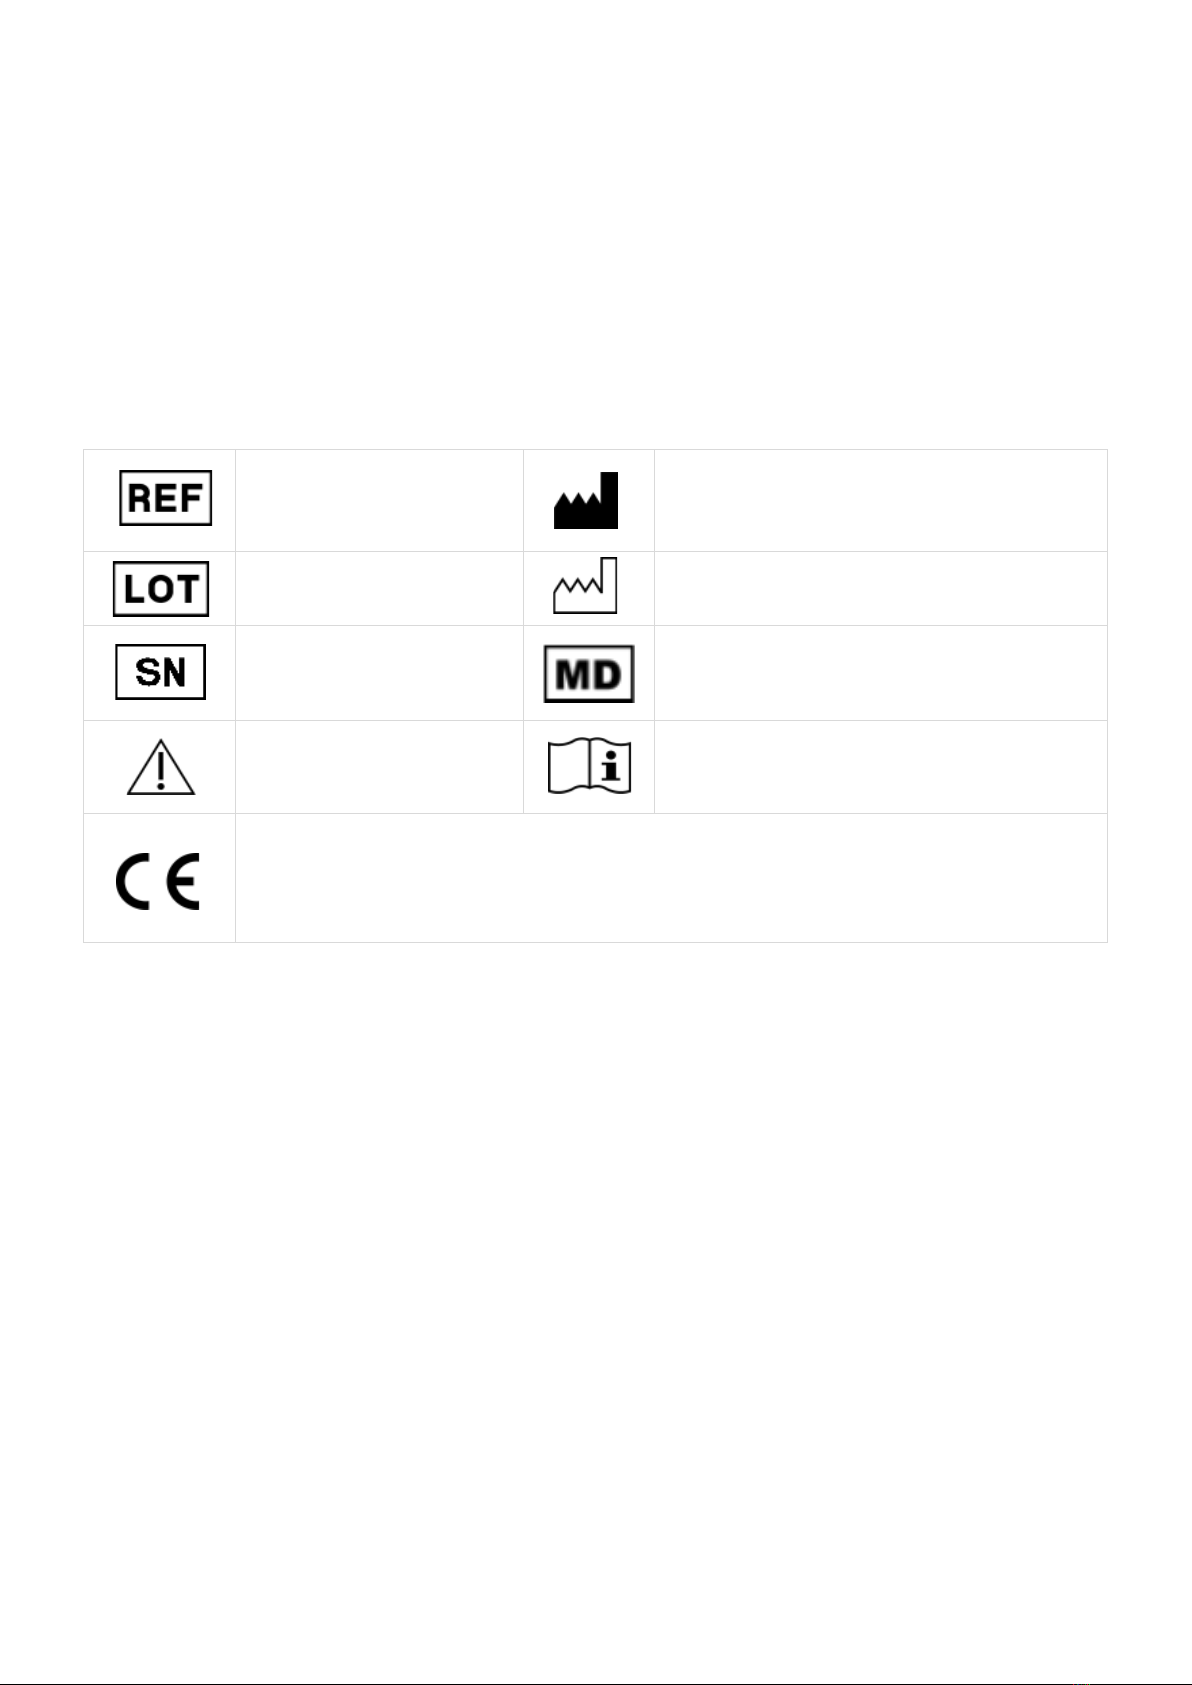
9. Labels
Reference
number Manufacturer
LOT number Manufacture date
Serial number Medical device
Note
Please read the
instruction
The manufacturer checked for compliance with
essential medical devices requirements.
7
INSTRUKCJA OBSŁUGI
Rotor rehabilitacyjny
Kod produktu: TIMgym
1.Wykonanie
Rotor rehabilitacyjny kończyn dolnych wykonany jest ze stalowej ramy
malowanej proszkowo. Wyposażony jest w paskowy mechanizm
oporowy, cztery nasadki antypoślizgowe oraz opaski na stopy. Posiada
obrotowe pokrętło z szerokim zakresem regulacji oporu, dzięki czemu
nadaje się dla różnych grup pacjentów. Może być wykorzystywany w
szpitalach, hospicjach oraz w domu jako urządzenie do rehabilitacji i
rekreacji indywidualnej.
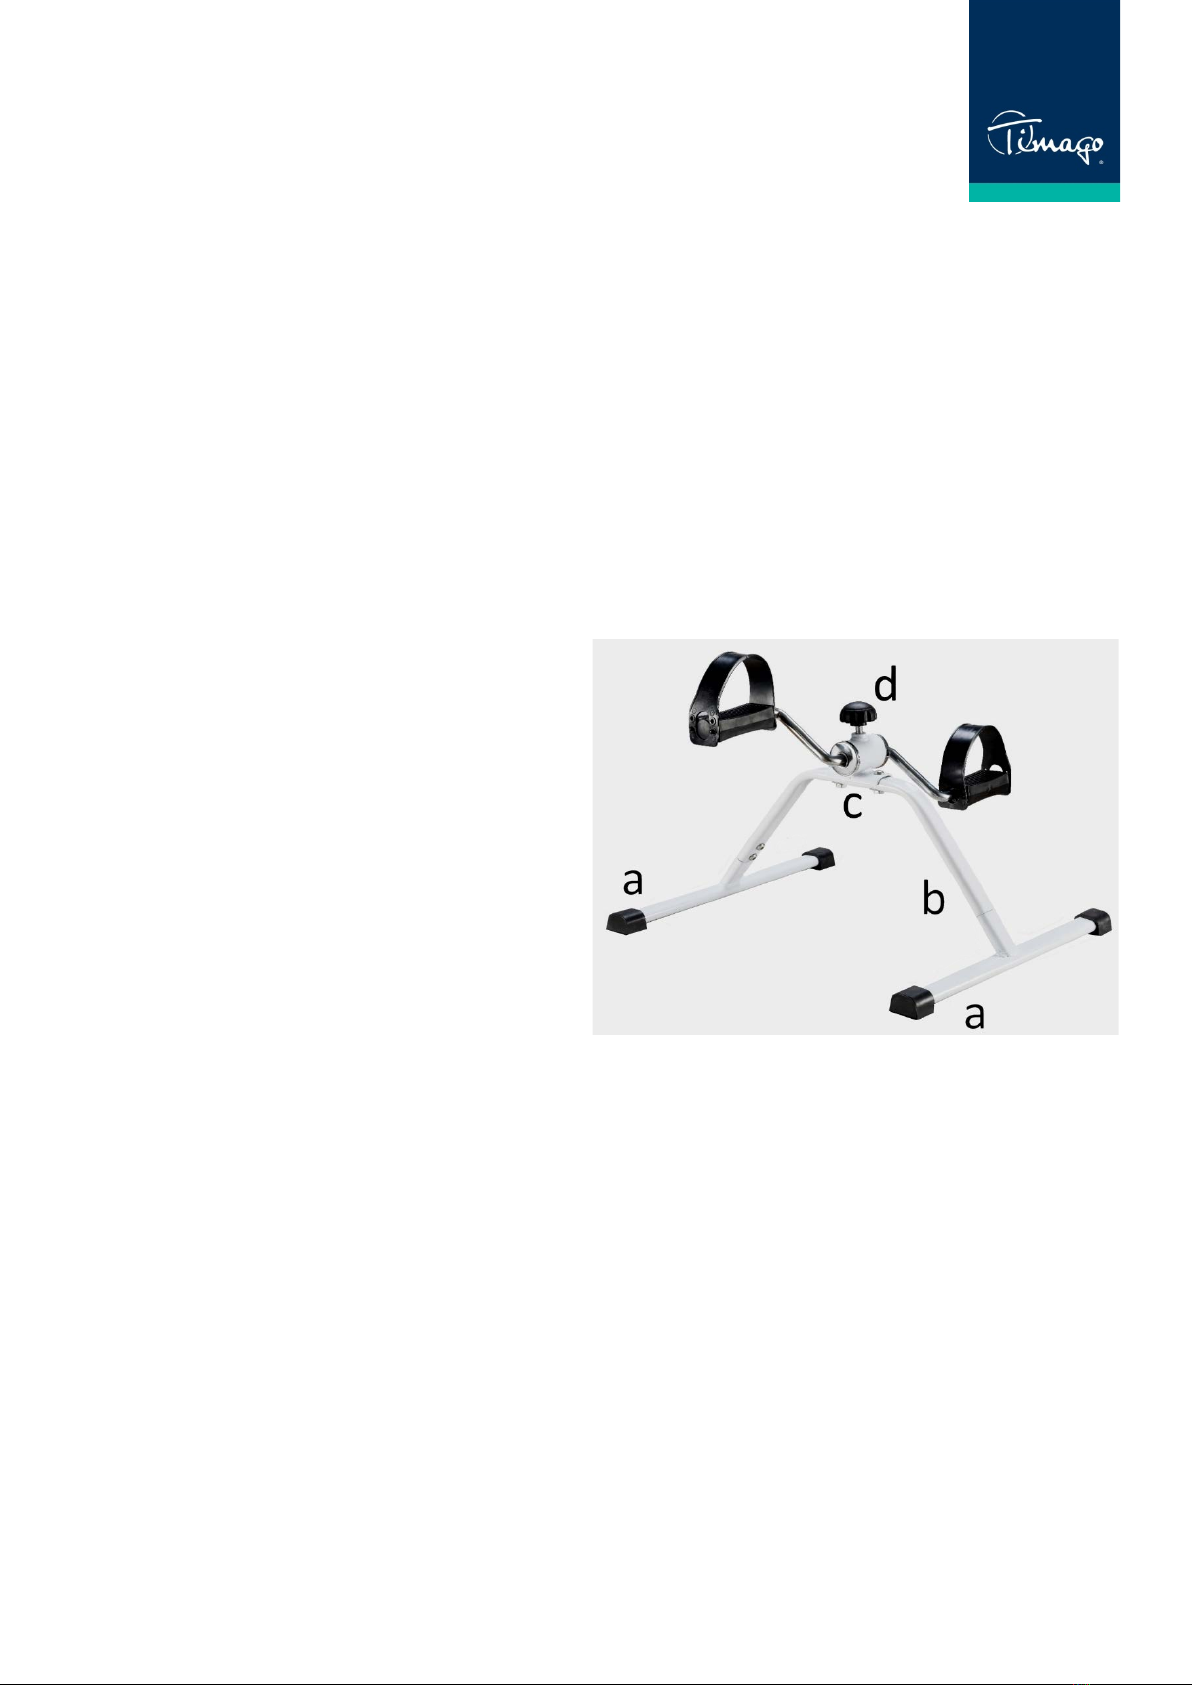
Elementy rotora:
h. Nóżki rotora (2 szt.)
i. Rama rotora (1 szt.)
j. Mechanizm główny rotora (1 szt.)
k. Pokrętło regulacji (1 szt.)
l. Śruby z nakrętkami typu A
(dł. 20 mm, 2 szt.)
m.Śruby typu B (dł. 10 mm, 4 szt.)
n. Podkładki do śrub (6 szt.)
2. Zastosowanie
Rotor rehabilitacyjny stosowany jest u pacjentów, u których nastąpił
przykurcz lub zanik mięśniowy spowodowany długotrwałym
usztywnieniem poprzez opatrunek gipsowy, zabieg operacyjny, jak
również u pacjentów, u których potrzebne jest przywrócenie funkcji
motorycznych oraz ponowne nauczenie prawidłowego wzorca
ruchowego, spowodowanego uszkodzeniem układu neurologicznego.
Rotor posiada regulację obciążenia, dzięki czemu możliwe jest
dostosowywanie do stanu sprawności kończyn oraz postępów w
rehabilitacji.

8
3. Montaż i regulacja
•Do ramy rotora włożyć nóżkę i przykręcić ją 2 śrubami typu B
(wcześniej umieszczając podkładki). W podobny sposób przykręcić
drugą nóżkę rotora.
UWAGA: nie dokręcać śrub do końca.
•Po zamontowaniu nóżek do ramy, należy lekko docisnąć ramę do
podłoża i dokręcić mocno wszystkie 4 śruby montażowe. Pozwoli to
właściwie wypoziomować nóżki rotora.
•Na ramę rotora nałożyć mechanizm główny i przykręcić go 2 śrubami
z nakrętkami typu A (wcześniej umieszczając podkładki).
•Do mechanizmu głównego wkręcić pokrętło regulacji.
Regulacja obciążenia
Aby podnieść stopień sprawności fizycznej oraz poprawić pracę mięśni i
wzrost siły mięśniowej, należy stopniowo zwiększać obciążenie
treningowe oraz intensywność i/lub czas trwania ćwiczeń.
•Aby zwiększyć opór, należy przekręcić pokrętło regulacji zgodnie z
ruchem wskazówek zegara.
•Aby zmniejszyć opór, należy przekręcić pokrętło regulacji w kierunku
przeciwnym do ruchu wskazówek zegara.
•W przypadku wykonywania ćwiczeń wolnych pokrętło regulacji
powinno być całkowicie odkręcone, natomiast w przypadku
wykonywania ćwiczeń oporowych pokrętło regulacji należy dokręcić
do żądanego obciążenia.
Użytkowanie
•Rotor należy umieścić na podłodze i upewnić się, że nasadki
antypoślizgowe dobrze przylegają do podłoża, aby zapobiec
przemieszczaniu się rotora.
•Ćwiczenia należy przeprowadzać w pozycji siedzącej, rotor
powinien być ustawiony dokładnie na wprost, tak aby staw
biodrowy był zgięty pod kątem nie mniejszym niż 90°.

9
•Należy umieścić stopę na pedałach wewnątrz opasek, co
uniemożliwi ześlizgnięcie się stopy z pedała w trakcie
wykonywania ćwiczeń.
•Za pomocą pokrętła należy dostosować pożądane obciążenie.
4. Specyfikacja techniczna
Wymiary podstawy
40 cm x 50 cm
Wysokość podstawy od podłoża
27 cm
Waga
2,35 kg
Maks. obciążenie
120 kg
Kolor ramy
czarny
5. Uwagi i zalecenia
Timago International Group nie ponosi odpowiedzialności za
niewłaściwe korzystanie z rotora, nieprzestrzeganie zasad
bezpieczeństwa oraz za korzystanie niezgodne z przeznaczeniem.
6. Konserwacja
Należy systematycznie dokonywać samodzielnej kontroli stanu
technicznego rotora:
•Zaleca się regularne czyszczenie rotora miękką szmatką i wodą z
mydłem. Rotor po wyczyszczeniu należy osuszyć miękką szmatką.
•Nie należy używać ostrych środków polerskich, gdyż grozi to
zniszczeniem powłok zabezpieczających.
•Należy na bieżąco usuwać zanieczyszczenia z ruchomych elementów
rotora.
7. Warunki przechowywania i transportu
Nie należy narażać wyrobu na bezpośrednie działanie promieni
słonecznych, wody i wilgoci.
10
8. Dane dotyczące gwarancji
Produkt objęty jest gwarancją, której warunki zostały opisane w
otrzymanej przez Państwa karcie gwarancyjnej. Do celów
gwarancyjnych należy zachować dowód zakupu (paragon lub fakturę).
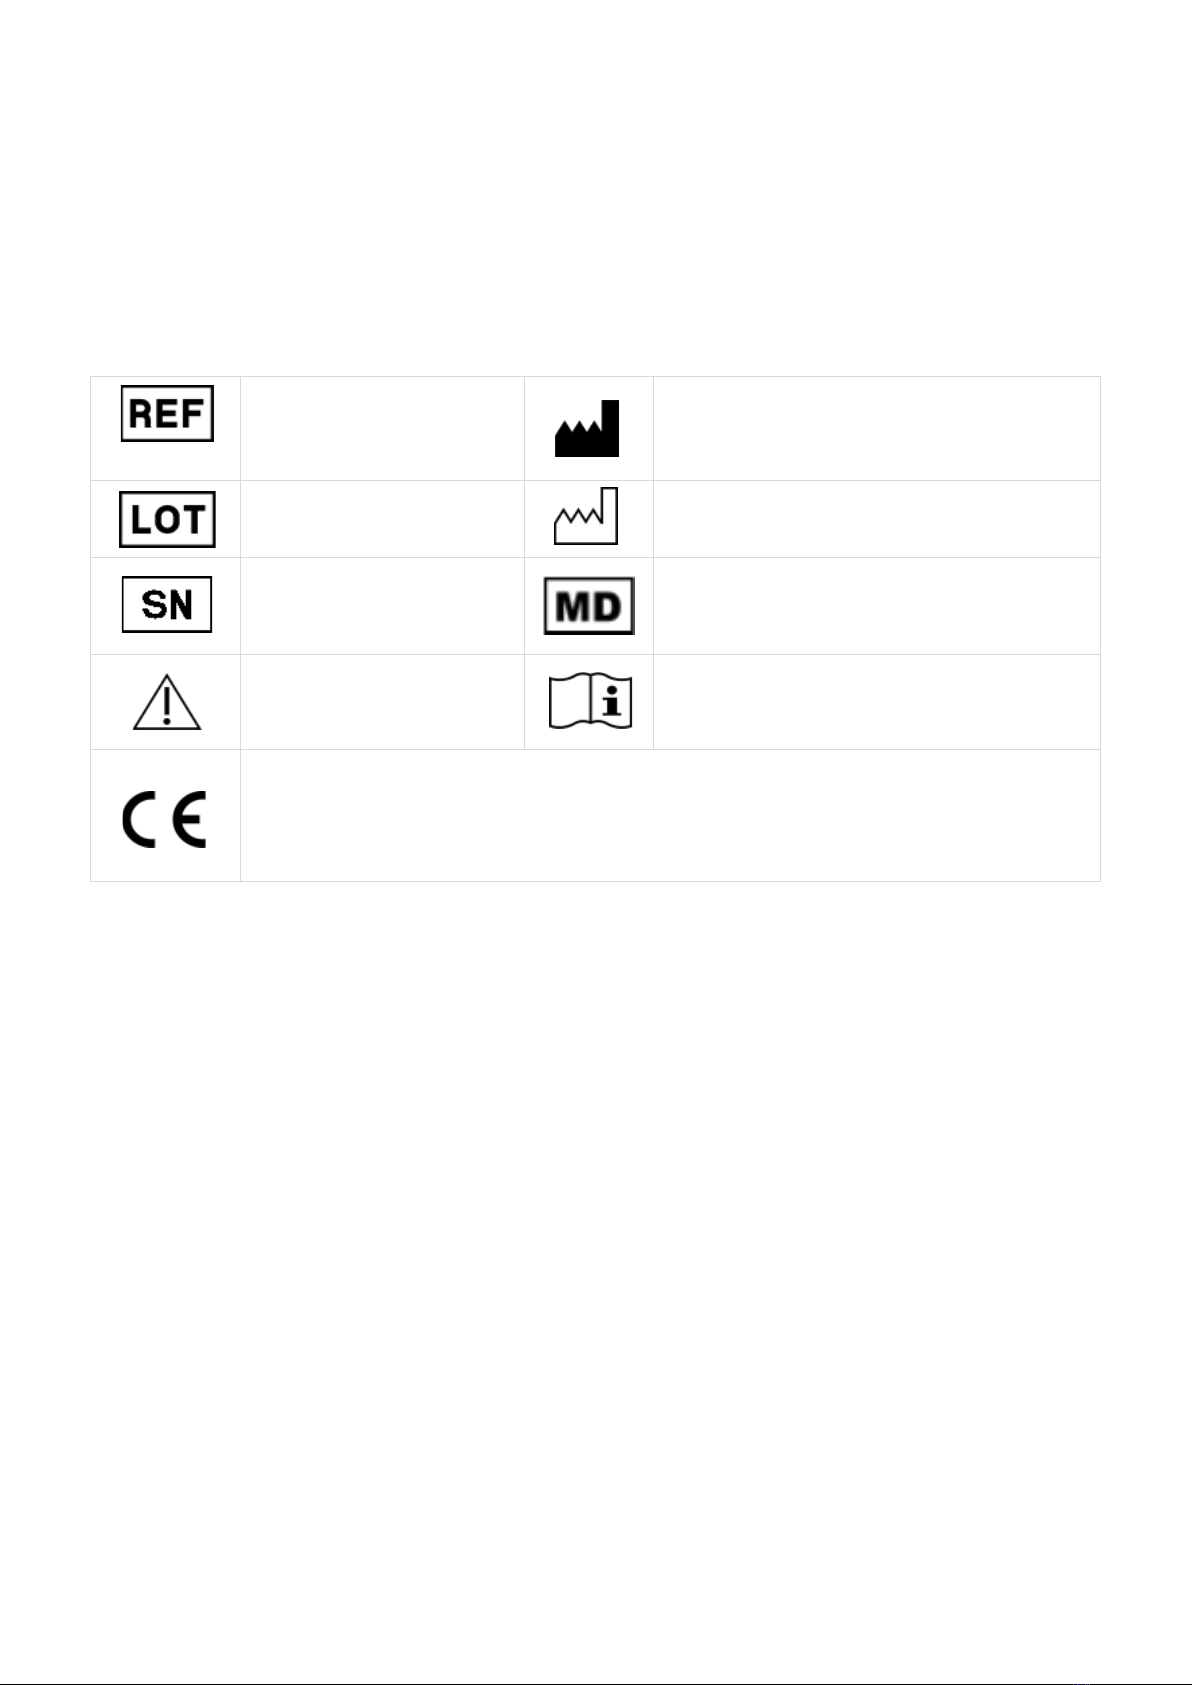
9. Oznaczenia
Numer
referencyjny Producent
Numer serii Data produkcji
Numer seryjny Wyrób medyczny
Uwaga Zapoznaj się z instrukcją
Producent dokonał oceny zgodności z wymogami
zasadniczymi dotyczącymi wyrobów medycznych.


Timago International Group
Spółka z o.o. i Spółka – Spółka komandytowa
ul. Karpacka 24/12
43-316 Bielsko-Biała, Poland
T.: +48 33 499 50 00
F.: +48 33 499 50 11
E.: info@timago.com
02/2023(I)
Table of contents
Languages:
Other Timago Personal Care Product manuals

Timago
Timago ManuTim User manual

Timago
Timago ABD User manual

Timago
Timago TGO-C OB 304 User manual

Timago
Timago TGO-R SLK 702 User manual

Timago
Timago ROM walker 17 User manual

Timago
Timago BUBBLE EVERYDAY User manual

Timago
Timago TGO-R SLKP 703 User manual

Timago
Timago R-GOFF User manual

Timago
Timago TGO-R WSLK-R 704 User manual

Timago
Timago LumboTim User manual


