Timex IronmanW-276 User manual

V.16

TABLE OF CONTENTS
Introduction..............................................................................................................................3
Features Overview...................................................................................................................3
Charge Your Run Trainer™Watch...........................................................................................4
Get the Latest Firmware..........................................................................................................4
Create a Free Timex Online Account.....................................................................................4
Congure the Watch ...............................................................................................................4
Pairing ANT+™Sensors with Your Watch..............................................................................6
Select GPS and ANT+™Sensors for Your Workout .............................................................. 6
Calibrate the Foot Pod Sensor...............................................................................................7
Acquire the GPS Signal and Connect to ANT+™Sensors ................................................... 7
Chrono Mode ...........................................................................................................................8
Start a Workout........................................................................................................................9
Automate a Workout .............................................................................................................10
Navigate to the Hands-Free Menu........................................................................................10
Congure the Chronograph ................................................................................................. 11
Interval Timer Mode...............................................................................................................12
Set Up a Workout...................................................................................................................13
Customize Intervals...............................................................................................................14
Time an Interval Workout .....................................................................................................15
Select the Interval Timer Display .........................................................................................16
Timer Mode ............................................................................................................................ 16
Congure the Timer ..............................................................................................................17
Start the Timer .......................................................................................................................18
Stop the Timer and Save the Workout................................................................................. 18
Recovery Mode......................................................................................................................19
Review Mode..........................................................................................................................20
Download Data Using Computer Software .........................................................................21
Alarm Mode............................................................................................................................22
Turn an Alarm On or Off........................................................................................................22
Congure the Alarm .............................................................................................................. 22
Congure Mode .....................................................................................................................22
Congure Zones Settings.....................................................................................................23
Congure Goals Settings .....................................................................................................24
Congure Units Settings ......................................................................................................24
Congure User Settings .......................................................................................................25
Congure Watch Settings.....................................................................................................25
Congure Recording Settings..............................................................................................26
Congure Smoothing Settings.............................................................................................26
Congure Contrast Settings.................................................................................................26
Care and Maintenance ..........................................................................................................26
Water Resistance...................................................................................................................26
Warranty & Service................................................................................................................27
Declaration of Conformity ....................................................................................................28

3
INTRODUCTION
Congratulations on your purchase of the Timex®Ironman®Run Trainer™GPS watch. For first use, please follow
these six easy steps:
1. Charge the watch
2. Load the latest firmware
3. Configure the settings
4. Acquire the GPS signal
5. Record your workout
6. Review your performance
For your convenience, we have posted the Run Trainer™Quick Start Guide at:
http://www.timex.com/manuals
Instructional videos are posted at: http://www.YouTube.com/TimexUSA
FEATURES OVERVIEW
• GPS–SiRFstarIV™technology tracks pace, speed, distance, and altitude.
• WirelessANT+™Radio–WirelesscapabilityenablestheRunTrainer™watch to connect to a Heart Rate
and/or Foot Pod sensor.
• HeartRate(HR)Sensor–Whenconnectedtoaheartratesensor,monitoryourheartratetomaintaina
level of activity that matches your personalized workout requirements.
• FootPodSensor–WhenconnectedtoaFootPodsensor,trackmultiplevaluesinyourworkoutincluding
pace, speed, distance, and cadence.
• TheINDIGLO®night-light–IlluminatesthedisplaywiththepressoftheINDIGLO®button.TheNight-Mode®
featureilluminatesthedisplaywithanybuttonpress.WhenConstantOnisactive,thedisplayremains
illuminateduntiltheINDIGLO®buttonispressedagain.
OPERATIONAL BUTTONS
INDIGLO®night-light
PresstheINDIGLO®buttonatanytimetoactivatetheINDIGLO®night-light for a few seconds. Hold it to turn on
Night-Mode®feature or constant-on lighting.
Radio/Back
PressRADIOtobeginsearchingforaGPSsignal.Inamenu,pressBACKtogobacktothepreviousitem.When
settingparameterssuchastime,pressthisbuttontomovefromrighttoleftthroughtheelds.
InanyworkoutmodeorTimeofDaymode,holdRADIOtoopentheSENSORmenu.
Mode/Exit/Done
Whenintimeofdaymode,pressMODEtocyclethroughtheoperationalmodes.
Whendonewithselectinganoptioninamenuorsubmenu,pressDONEtogobacktothemenucontaining
the option.
Start/Split/Down
Inamenu,pressDOWNtoselecttheitembelowthecurrentone.
In Chrono, Interval Timer, or Timer modes, press START to start the workout. Press SPLIT to take a split while a
Chrono workout is running.
Stop/Reset/Up
Inamenu,pressUPtoselecttheitemabovethecurrentlyselectedone.
Whenthechronographrunning,pressSTOPtostoporpausethechronograph.
Ifthechronographisstopped(orpaused),holdRESETtoresetthechronograph.
Set/Menu/Select/Next
Inamenu,pressSETtoselectthecurrentoption.Thismayopenasubmenuorselecttheitemwith
a check mark.
INDIGLO®Button Stop/Reset (p)
() Radio/Back Set/Menu/Select/Next ( )
Mode/Exit/Done Start/Split/Down (q)

4
PressNEXTtoselectthenextsetofoptionsormovetothenextdataeld.
STATUS BAR ICONS
Batteryicon Showstheapproximatechargeofthebattery.Moredarksegmentsindicateahigher
charge.Batterysegmentsblinkduringcharginguntilthewatchisfullycharged.
Alarm icon DisplaysinTimeofDayandAlarmmodeswhenalarmisset.
NAlert icon DisplaysinTimeofDaymodewhenthewatchissettobeepeachhour.
Heart icon Solid: Heart rate sensor is communicating properly.
Blinking: Watchissearchingforheartratesensor.
None: Heart rate sensor is not selected or Radio is off.
Shoe icon Solid: Foot Pod sensor is communicating properly.
Blinking:WatchissearchingforFootPodsensor.
None: Foot Pod sensor is not selected or Radio is off.
Satellite
icon
Solid: GPS has a satellite fix and is communicating properly.
Blinking: GPS is seeking a satellite fix.
None: GPS cannot acquire a satellite fix, is not selected,or Radio is off.
CHARGE YOUR RUN TRAINER™WATCH
Beforeyouusethewatchforthersttime,chargethebatteryforatleast4hourstoinsurecompletecharging.
Inordertomaximizetherechargeablebatterylife:
• Depletethebatteryuntilthelastbatteryindicatorsegmentdisappearsandtheemptyindicatorbegins
toash.Ifthewatchdisplaygoesblank,youcanstillproceedaslongasithasbeeninthatstateforno
more than 1-2 days.
• Fullychargethewatchbatteryforatleast4hoursuntilallfoursegmentsinthebatterylevelindicator
arenolongerblinking.
• Repeatthisdischarge/rechargeproceduretwomoretimes.
NOTE: You should repeat this procedure every two months if the watch is not used or recharged regularly.
Chargewithinatemperaturerangeof32°F-113°F(0°C-45°C).
ThechargingcablehasaclipononeendandastandardUSBconnectorontheotherend.
1. Attachthecliptothewatchsothefourpinsontheclipalignwiththefourmetalcontactsonthebackof
thewatch.Thecliphastwoblackpinsthataligntheclipintothewatchcaseback.
2. InserttheotherendofthecableintoapoweredUSBportonyourcomputer.Theblinkingbatterylevelicon
confirms that the watch is charging.
GET THE LATEST FIRMWARE
UsetheDeviceAgenttoconnecttheRunTrainer™watch to your computer and get the latest updates.
1. DownloadtheTimexDeviceAgentat:http://timexironman.com/deviceagent
2. ConnectthewatchtoyourcomputerusingtheUSBcable,andthendouble-clicktheDeviceAgenticonon
your computer desktop.
3. IfpromptedbytheDeviceAgent,followtheonscreeninstructionstodownloadthelatestwatchrmware.
CREATE A FREE TIMEX ONLINE ACCOUNT
TodownloaddatafromthewatchtothefreeonlinelogpoweredbyTrainingPeaks™, go to:
http://timexironman.com/deviceagent
CONFIGURE THE WATCH
SET THE TIME AND DATE
Youcansetupto3timezones—manually,throughthecomputerDeviceAgent,orbyusingtheGPSsignal.
NOTE:TheGPSautomaticallysetsthetimetoUTC(CoordinatedUniversalTime).Whenyousetonlythehours
to the local time, the watch will automatically correct the minutes and seconds. You will need to set the
correct date.
1. PressSET.TheSETmenudisplays.
2. PressDOWNtoselectTIME1,TIME2,orTIME3,andthenpressSELECT.
3. PressSELECTtoopentheTIME/DATEsettingscreen.
4. PressUPorDOWNtochangetheblinkingvalue.PressNEXTtomovetothenextvalue.
d
g

5
CHOOSE THE PRIMARY TIME ZONE
To select the primary time zone:
1. PressSET.
2. PressDOWNtoselectPRIMARY,andthenpressSELECT.
3. PressUPandDOWNtoselectthetimezoneyouwanttosetasprimary,andthenpressSELECT.
4. PressDONE.
VIEW THE ALTERNATIVE TIME ZONES OR SWITCH ONE TO PRIMARY
FromtheTimeofDaydisplay:
1. PressDOWNtovieweachalternativetimezone.Thesecondsvaluechangestoidentifythetimezone
(T1,T2,orT3)beingtemporarilydisplayed.
2. PressandholdDOWNtomakethattimezonetheprimarytimezone.Amessagepromptsyoutoholdthe
buttonuntilthetimezoneischanged.
CUSTOMIZE THE DISPLAY VIEWS
InTimeofDay,Chrono,IntervalTimer,andTimermodes,youcansetuptheRUN,CUSTOM1andCUSTOM2
displaystoshowvariousstatisticaldatawhenGPSorANT+™sensors are active.
NOTE:Whilethesedisplayshavethesamenameineachmode,theyareindependentfrommodetomode.
InEACHofthesemodes:
1.PressSET.
2.PressSELECTtoopentheDISPLAYmenu.
3.PressUPorDOWNtoselectthedisplayviewtocustomize(RUN,CUSTOM1,CUSTOM2),andthen
pressSELECT.
4.PressUPorDOWNtochoose3-Lineor4-Line.PressSELECTtocheckthedisplay(3or4line)touse
for the view.
5.PressDOWNtoselectSETUP,andthenpressSELECT.
6.PressUPorDOWNtoselect3-or4-LINEtocustomize,andthenpressSELECT.
7.PressUPorDOWNtoselectthelineforwhichyouwanttochooseadisplayitem,andthenpressSELECT.
8.PressUPorDOWNtochoosethedatathatwilldisplayintheline,andthenpressSELECT.
A check mark appears.
9.PressBACKtoreturntothe3-or4-LINEmenu.
10.Repeatsteps7through9untilyouhavechosenadisplayvalueforeachline.
NOTE:Thesestepswillsetupeachdisplay,buttoselectthedisplayforeachmode,youneedtobeinthat
modewithatleastGPSoroneANT+™sensor active.
SELECT THE DISPLAY VIEWS
InTimeofDay,Chrono,IntervalTimerandTimermodes,YoucanselecttheDEFAULTdisplayoranyofthethree
customizabledisplays(RUN,CUSTOM1,andCUSTOM2).
1. PressRADIOtoturnontheGPSand/orANT+™ sensors–theiconswillblink.
2. PressRADIOtocyclethroughthedisplayviews.
Values that can be Displayed in Time of Day Mode
Data Units
Altitude FeetorMeters
Cadence & Average Cadence StepsperMinute
Calories KiloCalories
Date DD-MMorMM-DDformat
Day DayofWeek
Distance&SegmentDistance MilesorKilometers/FeetorMeters

6
HeartRate(HR)&AverageHR BeatsperMinute/%ofMax
Odometer MilesorKilometers
Pace, Average Pace & Segment Pace MinutesandSecondsperMile/Kilometer
Speed & Average Speed MilesorKilometersperHour
TimeofDay 12-hour or 24-hour format
None
NOTE:WhenAveragedataisshown,the“A”characterisshownontheleftsideofthedisplay.
PAIRING ANT+™SENSORS WITH YOUR WATCH
Your Run Trainer™watchiscapableofreceivingsignalsfromanANT+™Heart Rate and/or a Foot Pod sensor to
enhance your training experience. To insure proper reception, especially in crowded environments, we recom-
mend pairing the watch to your sensors.
NOTE:Makesuretodothisatleast30feet/10metersawayfromothersourcesofsensordata.
TopairwiththeHeartRatesensor,wetthesensorpads,andplacethesensoraroundthechestwiththeTIMEX
logoonthetransmitterfacingup.InTimeofDay,Chrono,IntervalTimerorTimermode:
1. HoldRADIOtogototheSensorMenu.
2. PressDOWNtohighlightSEARCH,andpressSELECT.
3. HighlightHRandpressSELECT.
4. ThewatchwilldisplaySEARCHINGFORHEARTRATE,andashthehearticon.
5. Ifsuccessful,itwilldisplayFOUNDHR.
6. Ifunsuccessful,itwilldisplayHRSENSORNOTFOUND.Repeattheaboveprocedure,andrepositionthe
chestsensororreplacethesensorbatteryiffurthereffortsareunsuccessful.
TopairwiththeFootPodsensor,lightlyshakethesensortoactivateit.InTimeofDay,Chrono,IntervalTimer
or Timer mode:
1. HoldRADIOtogototheSensorMenu.
2. PressDOWNtohighlightSEARCH,andpressSELECT.
3. HighlightFOOTPODandpressSELECT.
4. ThewatchwilldisplaySEARCHINGFORFOOTPOD,andashtheshoeicon.
5. Ifsuccessful,itwilldisplayFOUNDFOOTPOD.
6. Ifunsuccessful,itwilldisplayFOOTPODSENSORNOTFOUND.Repeattheaboveprocedure,andreplacethe
sensorbatteryiffurthereffortsareunsuccessful.
NOTE:PairingisonlynecessarywhenanewHeartRateand/orFootPodsensorisadded,orwhenabatteryis
replaced on a previously paired sensor.
NOTE:Thepairingsettingsarerememberedbythewatch,sore-pairingisnotnecessarywhenpreviously
pairedANT+™sensorsareselectedorde-selectedforyourworkouts(see next section).
NOTE:Thesearch/pairingprocesswillactivatetheGPSsensor(ifselectedintheSensorMenu).Turnoffthe
SensorMenutopreservethebattery–HoldRADIO,highlightPOWEROFF,andpressSELECT.
SELECT GPS AND ANT+™SENSORS FOR YOUR WORKOUT
Dependingontheparticularworkout,theRunTrainer™watchworkswiththeGPSsystem,anANT+™Heart
Ratesensor(availableinsomepackagesorsoldseparately),and/oranANT+™FootPodsensor(available
separately).
InTimeofDay,Chrono,IntervalTimerorTimermode:
1. HoldRADIOtogototheSensorMenu.
2. PressDOWNtohighlighteachsensor(GPS,HR,and/orFootPod)
3. PressSELECT(tocheckoruncheckit).
4. PressBACKtoreturntothemode’sdisplay.
NOTE:AnychangestotheSensorMenuaffectallmodes’usageofGPSandANT+™sensors.

7
CALIBRATE THE FOOT POD SENSOR
Toensureaccuratemeasurementsbyafootpod,youcancalibratethe(optional)footpodeitherautomatically
overaknowndistance,oryoucanmanuallyenterthecalibrationfactor.
CALIBRATE THE FOOT POD AUTOMATICALLY
Yourunaknowndistancewiththefootpodenabled,whilethefootpodmeasuresyourprogress.Onceyou
haveprogressedmorethan0.2miles/300meters,youentertheactualdistanceyoutraveledintotheRun
Trainer.Thewatchthencalculatesthecalibrationfactorofthefootpodbycomparingthedistancemeasured
with the actual distance you traveled.
1. InTimeofDay,Chrono,IntervalTimer,orTimermode,holdRADIOuntilHOLDFORSENSORMENUdisplays.
2. PressDOWNtoselectCALIBRATE,andthenpressSELECT.
3. PressSELECTtoopentheFOOTPODcalibrationscreen.
NOTE: Thefootpodmustbesynchedwiththewatchinordertocalibrate.IfNOFOOTPODDATAdisplayson
the watch, make sure the foot pod is synched, and then try again. SeetheinstructionstoSelectANT+™
SensorsforYourWorkoutthatprecededthissection.
4. Beginrunningaknowndistance.Thedistancemustbeatleast0.2miles/300meterstogivethefootpod
enoughdatatocalibrate.
5. Whenyouhavereachedtheknowndistance,stoprunning,andthenpressSTOP.TheACTUALDISTANCE
screen opens.
NOTE:IfNEEDMOREDATAdisplays,thefootpodhasnotmeasuredatleast0.2Miles/300meters.Continue
runninguntilyoureachaminimumof0.2miles/300meters.
6. PressUPorDOWNtochangetheblinkingvalue,andpressNEXTtomovetothenextvalue.Continuedoing
this until the actual distance you ran is entered.
7. PressDONE.Thewatchcomparesthemeasureddistancewiththedistanceyouenteredandassignsa
calibrationfactor.
NOTE:Ifinsufcientornodatahasbeengathered,thecalibrationisCANCELED.
ENTER A CALIBRATION FACTOR
Ifyouhavepreviouslycalibratedafootpodandarere-synchingitwiththewatch,youcanenterthecalibra-
tion factor the foot pod used the last time it was synched with the watch to avoid going through the auto-
maticcalibrationprocessagain.
NOTE:Thefootpodmustbesynchedwiththewatchinordertoeditthecalibrationfactormanually.
1. InTimeofDay,Chrono,IntervalTimer,orTimermode,holdRADIOuntilHOLDFORSENSORMENUdisplays.
2. PressDOWNtoselectCALIBRATE,andthenpressSELECT.
3. PressDOWNtoselectFACTOR,andthenpressSELECT.
4. PressUPorDOWNtochangetheblinkingvalue,andpressNEXTtomovetothenextvalue.Continuedoing
thisuntilthedesiredcalibrationfactorisenteredfrom0.1%to199.9%.
NOTE:TheCalibrationFactorisdeterminedbytakingtheKNOWNdistanceanddividingitbytheREPORTED
distance(bytheFootPod).
5. PressDONE.
ACQUIRE THE GPS SIGNAL AND CONNECT TO ANT+™SENSORS
NOTE:MakesuretosetthetimeanddatebeforeturningonreceptionoftheGPS,HR,orFootPodsensorsto
ensurethattheworkoutdatawillbecapturedcorrectly.
• GPS: Gooutsidewithaclearviewoftheskyawayfrombuildingsor
obstructions.
• Heart Rate: Makesurethatthechestsensorpadsarewet,thestrap
tssnugaroundthechest,andtheTIMEXlogoonthetransmitteris
face up and centered over the sternum.
NOTE:Makesuretoremovethesnap-onheartratetransmitterandhand
washthestrapincoolwatertomaintainitsheartrate-sensingcapability.
•Foot Pod: Install the sensor on the laces or underneath the insole
accordingly to its included directions.
NOTE:PleaseremoveyourFootPodduringbicyclingtoallowtheGPSsensor
to provide live speed and distance data.
NOTE:RemembertoremovetheFootPodbetweenworkoutsouttoprolongitsbatterylife.
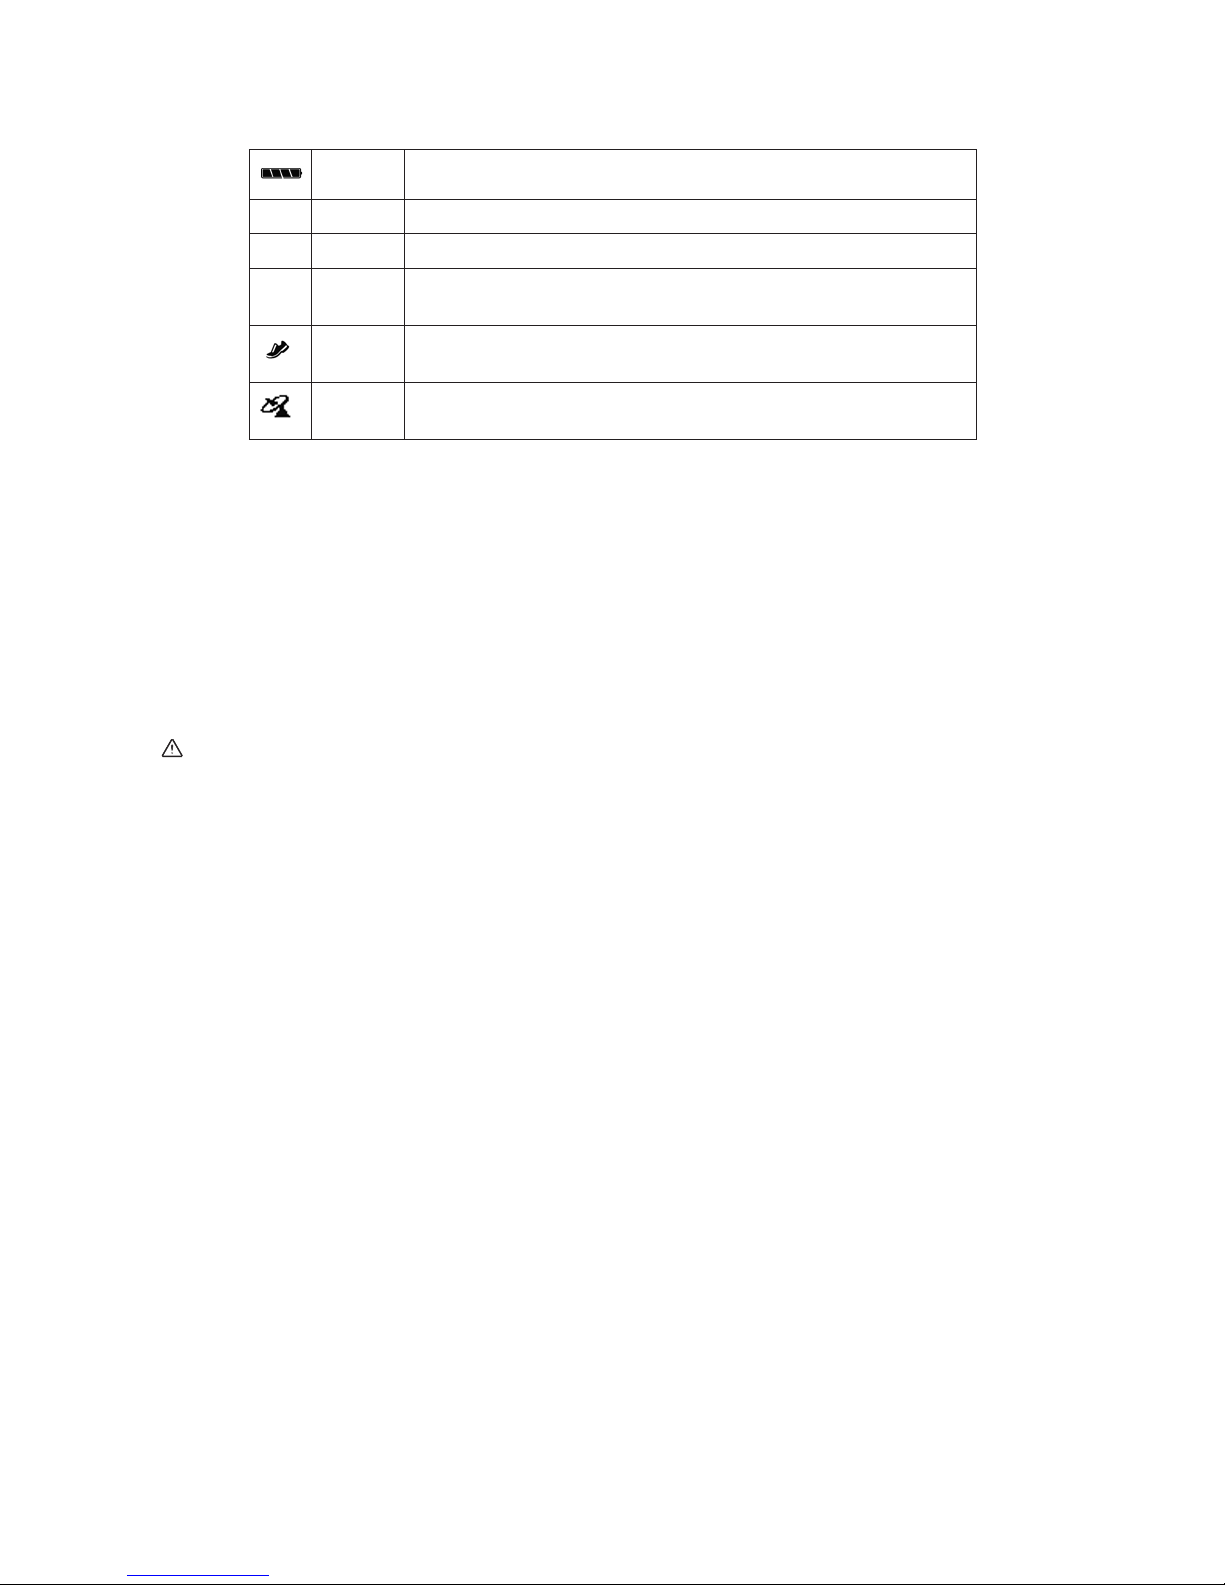
PressRADIOtoturnonwatch’ssensorreception.ItwilllookforthesignalsselectedintheSensorMenu,and
ashtheappropriateiconsatthebottomofthewatchdisplay.

8
If you selected GPS:
1. AmessageappearsthattheGPSisbeingpoweredon.
2. ThewatchsearchesforsatellitesandamessageWAITINGFORGPSwithastatusbarshowonthedisplay.
3. GPSREADYdisplayswhenthewatchobtainsastrongsatellitex.
NOTE:Ifyoufailtostartyourworkout(throughChrono,IntervalTimerorTimerMode)within30minutes,theGPS
radiowillshutdown.ThisisdonetopreservewatchbatterylifeincasetheGPSradioisaccidentallyactivated.
HINT:EventhoughthewatchhasveryfastGPSacquisition,someathleteswanttheGPSsignallockedbefore
startingaraceorportionofatriathlon.Simplystartthechronographandpauseit(afterasecondortwo),
andthe30-minuteGPSauto-offfeature(describedabove)willbedisabled.Allofthedata,except“RestTime”
reportedinReviewModewillbeaccurate.
If the watch fails to get a strong GPS signal after 5 minutes, a message displays asking if you are indoors.
• SelectYEStoturntheGPSoff.
• SelectNOtocontinuetosearchforGPSsatellitesindenitely.
NOTE:Ifyoudonotrespondwithin30seconds,thewatchassumesyouareindoorsandturnsofftheGPS
search.
If you selected the Heart Rate and/or Foot Pod Sensor:
1. Thewatchtriesfor10secondstodetectasignalfromoneorbothofthespeciedANT+™sensors.
2. Ifnosignalisdetected,thewatchstopssearchingforthesensor,andtheapplicableiconisturnedoff.
3. Whenthesensorissuccessfullyconnected,theheartrateorshoeiconissteadilylit.
NOTE:Sensorsmustbewithin3feetofthewatchtoconnect.YoumayneedtorepositionyourHRchestsen-
sor to initiate a signal. You may need to slightly move your shoe to initiate a signal from the Foot Pod sensor.
NOTE:IfyoudonotseethewatchtryingtoconnectwiththedesiredGPSand/orANT+™ sensor,holdRADIOto
bringuptheSensorMenutoconrmyoursensorsettings.
CHRONO MODE
TheChronoModeisusedasastopwatchtotimeyourworkoutsegments,suchasLapsandSplits,andoffers
the following features:
• Storeupto15workoutstotal(includingIntervalTimerandTimerworkouts)and100lapsperworkout
• Threecustomizabledisplayformats(whentheGPS,HR,orFootPodsensorareactive)
• Hands-freesettingsincludingautosplit,autostart,andautostop
• Optionalheartraterecoverytimerwhenthechronographisstopped
• DrinkandEattimerstoremindyouwhentohydrateandconsumecalories
The following data are always tracked in Chrono mode:
• Totaltime
• Timeperlap
• Resttime(whentheChronomodeispaused,buttheworkoutisactive)
WHAT ARE LAP AND SPLIT TIMES?
Lap time is the length of an individual segment of your workout activity. Split time is the time elapsed from the
beginningofyourworkoutthroughthecurrentsegment.
Whenyou“takeasplit”,youhavecompletedtimingonesegment(suchasonelap)oftheworkoutandare
now timing the next segment.
Thegraphbelowrepresentsthelapandsplittimesforaworkoutinwhich4lapsweretaken.

9
WhentheGPS,HeartRateand/orFootPodsensorsareactive,thewatchkeepstrackofthefollowingdata
inChronomodeandreportsitinReviewMode:
Data GPS Heart Rate (HR) Sensor Foot Pod Sensor
CalorieExpenditure • • •
CalorieExpenditureperlap • • •
Average speed • •
Average speed per lap • •
Maximumspeed • •
Average pace • •
Average pace per lap • •
Minimumpace • •
Distance • •
Distanceperlap • •
Elevation •
Elevationperlap •
Maximumaltitude •
Minimumaltitude •
Total ascent •
Total descent •
Heart rate •
Minimumheartrate •
Average heart rate •
Average heart rate per lap •
Peak heart rate •
Recovery heart rate •
HR within a HR target zone •
Average cadence •
Average cadence per lap •
Maximumfootcadence •
START A WORKOUT
1. PressMODEuntilCHRONOdisplays.
2. PressSTARTtostarttherstsplitofyourworkout.Bydefault,theSplittimeisshowninthebottomline
of the display.
NOTE:
• Onlytherst100splitsareretainedinmemory.
• Alowmemorywarningoramemoryfullmessagemaybeshownifthewatchhasalreadybeenconnect-
edtotheDeviceAgent.ThedatashouldbedownloadedtotheDeviceAgentanderasedfromthewatch
if these messages occur.
• Ifthewatchisconnectedtoanyofthesensors,thesensoriconswillbedisplayedinthestatusbar.

10
TAKE A SPLIT/LAP
1. PressSPLITtostartthesecondsplit,andanysuccessivesplits,ofyourworkout.Inthegraphicbelow,the
LAP # is shown on the top line, the lap time is on the second line, and the split time is on the third. The data
displayed varies depending on the display setup.
NOTE:AnyliveGPS/sensordatawillbereportedforthatlap,andPace/Speed,HeartRate,and/orCadencewill
haveitsaveragedatawithinthelapreported(asdesignatedbyan“A”totheleftofthedata).
STOP AND SAVE A WORKOUT / TURN OFF SENSORS
1. PressSTOPtostop/pausetheworkout.
NOTE: If you are wearing a Heart Rate Sensor and have the Heart Rate Recovery feature activated, wait until
therecoveryiscompletedbeforeproceedingtoStep2tosavetheworkout.
2. PressandholdRESETuntilSAVEWORKOUTdisplays.
3. PressUPorDOWNtoselectYES,andthenpressSELECT.
NOTE:TheSAVEWORKOUTYES/NOmessageisdisplayedifonlyoneworkoutisrunning.Ifmultipleworkouts
(acrosstheChrono,IntervalTimer,andTimermodes)areactive,youdonothavetheoptiontoresetwithout
saving.TheworkoutisautomaticallysavedwhentheRESETbuttonispressedandheld.
4. Topreservebatterylife,thewatchwillasktoturnoffallsensorsaftertheworkoutisreset.PressUPor
DOWNtoselectYEStotheTURNOFFSENSORSmessageandpressSELECT.IfneitherYESorNOisselected,
thesensorswillturnoffafter30seconds.
NOTE:Ifaheartraterecoveryisin-progress,turningoffthesensorswillinterruptHRMdataandprovide“--“as
aresult.Instead,selectNOandwaituntilyourrecoveryhasended.Aftertherecovery,pressandholdRADIO
todisplaytheSensorMenu.Theindicatorshouldappearnextto“POWEROFF”.Ifnot,pressUPorDOWNto
adjust,andpressSELECTtoturnoffthewatchsensors.
AUTOMATE A WORKOUT
Automate your workout using the Hands-Free features of your watch.
Onceset,HandsFreesettingsactivateautomaticallyinChronomode.
•Automaticsplit–TheAUTOSPLITsettingcanbeenabledfortimeordistanceoptions.Thewatchauto-
matically takes a split when you reach the distance or time threshold.
NOTE:Amanualsplitdoesnotresetthedistanceorthetime“counter”.
• Automaticstart–TheAUTOSTARTsettingstarts/re-startsyourworkoutwhenthespeedisequaltoor
abovethespeedthreshold.
• Automaticstop–TheAUTOSTOPsettingpausesyourworkoutwhenthespeedisbelowthespeed
threshold.
• Speedthreshold–TheTHRESHOLDsettingisthespeedvaluethattriggersyourAutoStartandAutoStop
settings.
NOTE: IfboththeGPSandFootPodsensorsaresupplyingdistanceandspeeddata,theFootPodtakespriority
for Hands Free operations.
NAVIGATE TO THE HANDS-FREE MENU
1. PressMODEuntilCHRONOdisplays.
2. If the chrono is running, stop and reset it.
3. PressMENU.
4. PressDOWNtoselectHANDS-FREE,andthenpressSELECT.TheHANDS-FREEmenudisplays.
AUTO SPLIT
1. FromtheHANDS-FREEmenu,pressSELECTtoopentheSPLITsettingscreen.
2. TonavigatethroughtheAUTO-SPLITmenu:
a. PressUPorDOWNtoswitchtothenextauto-splittype(OFF,TIME,orDISTANCE).
b. PressSELECTtobeginchangingnumericvaluesfortimeordistance.
c. PressUPorDOWNtochangetheblinkingvalue,andpressNEXTtomovetothenextvalue.
d. PressDONEwhenyouhavenishedsettingthetimeordistance.

11
AUTO START
1. FromtheHANDS-FREEmenu,pressDOWNtoselectSTART-STOP,andthenpressSELECT.TheSTART-STOP
menu displays.
2. PressSELECTtoopentheAUTOSTARTsettingscreen.
3. PressDOWNtoselectONandthenpressSELECT.Acheckmarkappears.
AUTO STOP
1. FromtheHANDS-FREEmenu,pressDOWNtoselectSTART-STOP,andthenpressSELECT.TheSTART-STOP
menu displays.
2. PressDOWNtoselectAUTOSTOP,andthenpressSELECT.
3. PressDOWNtoselectONandthenpressSELECT.Acheckmarkappears.
THRESHOLD
1. FromtheHANDS-FREEmenu,pressDOWNtoselectSTART-STOP,andthenpressSELECT.TheSTART-STOP
menu displays.
2. PressDOWNtoselectTHRESHOLD,andthenpressSELECT.
3. PressUPorDOWNtochangetheblinkingvalue,andthenpressNEXTtomovetothenextvalue.
4. PressDONE.
CONFIGURE THE CHRONOGRAPH
YoucancustomizethedisplayformatandsettheDrinktimerandtheEattimer.
CHOOSE THE CHRONO DISPLAY FORMAT WITHOUT SENSORS
YoucanchoosefromtwoformatswhenGPSorANT+™sensorsareNOTused.LAPSPLITputsthelaptimeon
thetoplineandthesplittimeonthebottomline.SPLITLAPputsthesplittimeonthetoplineandthelaptime
onthebottom.
NOTE:Youmuststopandresetthechronobeforeyoucancongureit.
1. PressMODEuntilCHRONOdisplays.
2. PressSET.
3. PressDOWNtoselectFORMAT,andthenpressSELECT.
4. PressDOWNtochoosetheformat,andthenpressSELECT.
NOTE:ThisdisplaybecomestheDEFAULTdisplay.
CHOOSE THE CHRONO DISPLAY FORMAT WITH SENSORS
Youcanselectoneofthefourdisplays(RUN,CUSTOM1,CUSTOM2,orDEFAULT).
1. PressRADIOtoturnontheGPSand/orANT+™sensors–theiconswillblink.
2. PressRADIOtocyclethroughthedisplayviews.
Values that can be Displayed in Chrono Mode
Data Units
Altitude FeetorMeters
Cadence & Average Cadence StepsperMinute
Calories KiloCalories
Distance&LapDistance MilesorKilometers/FeetorMeters
HeartRate(HR)&AverageHR BeatsperMinute/%ofMax
LapNumber Anumber
Lap Time Minutes.Seconds.HundredthsorHours:Minute.Seconds
Odometer MilesorKilometers
Pace,AveragePace&Lap(Avg.)Pace MinutesandSecondsperMile/Kilometer
Speed & Average Speed KilometersorMilesperHour
Split Time Minutes.Seconds.HundredthsorHours:Minute.Seconds
TimeDay 12-hour or 24-hour format
None Thelinewillremainblank

12
DRINK TIMER
1. PressMODEuntilCHRONOdisplays.
2. PressSET.
3. PressDOWNtoselectDRINK,andthenpressSELECT.
4. PressUPorDOWNtoselectON,andthenpressSELECT.
5. PressUPorDOWNtochangetheblinkingvalue,andthenpressNEXTtomovetothenextvalue.
6. PressDONE.
ADRINKmessagewillrepeatedlydisplayeveryselectedtimeinterval.
NOTE:IfboththeDrinkandEattimershavebeensettodisplayatthesametime,theDrinkmessage
displays first.
7. Pressanybuttontoacknowledgethemessageandgobacktothepreviousscreen.
EAT TIMER
1. PressMODEuntilCHRONOdisplays.
2. PressSET.
3. PressDOWNtoselectEAT,andthenpressSELECT.
4. PressUPorDOWNtoselectON,andthenpressSELECT.
5. PressUPorDOWNtochangetheblinkingvalue,andthenpressNEXTtomovetothenextvalue.
6. PressDONE.AnEATmessagewillrepeatedlydisplayeveryselectedtimeinterval.
NOTE:IfboththeDrinkandEattimershavebeensettodisplayatthesametime,theDrinkmessage
displays first.
7. Pressanybuttontoacknowledgethemessageandgobacktothepreviousscreen.
INTERVAL TIMER MODE
An interval is a time period of the workout customized for speed/pace zone, optional heart rate intensity, or
optionalcadencezone.Arepetition(rep)isaseriesofintervalsthatisrepeatedduringaworkout.
The following features are offered in the Interval Timer mode:
• Storeupto15workoutstotal(includingChronoandTimerworkouts)
• Fiveintervalworkoutswithuptoveintervalseach
• Customizableintervalname
• Optionalwarmupandcooldownatthebeginningorendofeachworkout
• Setupto99repetitions
• Threecustomizabledisplayformats(whenGPS,HR,orFootPodsensorsareactive)
The following data are always tracked in Interval Timer mode:
• Totaltime
• Timeforeachcompletedinterval
• Resttime(whentheIntervalTimermodestops)

13
WhentheGPS,HeartRateand/orFootPodsensorsareactive,thewatchkeepstrackofthefollowingdatain
IntervalTimermodeandreportsitinReviewMode:
GPS Heart Rate (HR) Sensor Foot Pod Sensor
CalorieExpenditure • • •
Calories per interval • • •
Average speed • •
Average speed per interval • •
Maximumspeed • •
Average pace • •
Average pace per interval • •
Minimum(orbest)pace • •
Distance • •
Distanceperinterval • •
Elevation •
Elevationperinterval •
Maximumaltitude •
Minimumaltitude •
Total ascent •
Total descent •
Amountoftimetheuser’s
heart rate was within the
heart rate zones
•
Minimumheartrate •
Average heart rate •
Average heart rate per
interval •
Peak heart rate •
HR within a HR target zone
per interval •
Average cadence •
Average cadence per
interval •
Maximumfootcadence •
SET UP A WORKOUT
Customizeaworkoutbygivingitanameupto7characters(suchasHills,Steady,orRepeats),andsetthe
numberofrepetitions,yourtargetHR,pace,cadence,andspeedzones.
NOTE:YoumuststopandresettheIntervalTimerbeforeyoucancongureit.
NAME THE WORKOUT
1. PressMODEuntilINTERVALTIMERdisplays.
2. PressSET.
3. PressDOWNtoselecttheworkouttorenameandthenpressSELECT.
4. PressDOWNtoselectRENAME,andthenpressSELECT.
5. PressUPorDOWNtochangetheblinkingletter,andthenpressNEXTtomovetothenextletter.
6. PressDONE.
NOTE:Iftheworkoutnameissettoallblankcharacters,thenameshallreverttothepreviousnameupon
exitingtheRENAMEscreen.
SET NUMBER OF REPETITIONS
1. InINTERVALTIMERmode,pressSET.
2. PressDOWNtoselecttheworkoutforwhichtosetreps,andthenpressSELECT.
3. PressDOWNtoselectREPCOUNT,andthenpressSELECT.

14
4. PressUPorDOWNtochangetheREPCOUNT.
5. PressDONE.
CUSTOMIZE INTERVALS
1. InINTERVALTIMERmode,pressSET.
2. PressDOWNtoselecttheworkoutforwhichtosetintervals,andthenpressSET.
3. PressSELECTtoopentheINTERVALSmenu.
4. PressUPorDOWNtoselecttheintervaltocustomize,andthenpressSET.Amenuwithalistofsetup
optionsfortheselectedintervaldisplays.Forexample,ifyouselectedtheINT3intervalworkout,thenthe
setupoptionsforcustomizingINT3displays.
Thesetupoptionsare:Time,Zones,andGoals.YouwillalsoseeaRENAMEoptionforallintervalsexcept
WARMUPandCOOLDOWN.Refertothefollowingsectionsforcustomizingtheintervalsetup:
SET INTERVAL TIME
Intervaltimeisthetotaltimethattheintervalwilllastbeforeyouarepromptedtoswitchtothenextactivity.
a) PressUPorDOWNtoselecttheintervaltoset,andthenpressSELECT.
b) PressSELECTtoopentheTIMEsettingscreen.
c) PressUPorDOWNtochangetheblinkingvalue,andthenpressNEXTtomovetothenextvalue.
d) PressDONE.
SET HR ZONES
HRzonesdescribeupperandlowerlimitsforyourheartrateduringthisinterval.Analertwillsoundifyour
heart rate moves outside of this range.
a) PressUPorDOWNtoselectZONES,andthenpressSET.
b) PressSELECTtoopentheHRsettingscreen.
c) PressUPorDOWNtoselecttheheartratezonethatyouwanttobeinduringthisinterval.
d) PressDONE.
FormoreaboutcustomizingHRzones,seetheCONFIGUREmode.
SET PACE AND SPEED
You can set the minimum and maximum pace or speed you want to maintain during the interval. An alert will
soundifyourspeedorpacefallsbelowtheminimumorrisesabovethemaximum.
a) FromtheZONESmenu,pressUPorDOWNtoselectPACE-SPEED,andthenpressSELECT.
b) PressUPorDOWNtoselectPACEorSPEED,andthenpressSELECT.Acheckmarkappears.
c) PressDOWNtoselectSETUP,andthenpressSELECT.
d) PressUPorDOWNtoselectPACEorSPEED,andthenpressSELECT.
e) PressUPorDOWNtochangetheblinkingvalue,andthenpressNEXTtomovetothenextvalue.
f) PressDONE.
SET CADENCE
You can se the maximum and minimum steps per minute you want to maintain during this interval. An alert
willsoundifyourcadencefallsbelowtheminimumorrisesabovethemaximum.
a) FromtheZONESmenu,pressDOWNtoselectCADENCE,andthenpressSELECT.
b) PressUPorDOWNtoselectON,andthenpressSELECT.
c) PressDOWNtoselectSETUP,andthenpressSELECT.
d) PressUPorDOWNtochangetheblinkingvalue,andthenpressNEXTtomovetothenextvalue.
e) PressDONE.
SET GOALS
You can set goals for the amount of distance or altitude you want to achieve during this interval. An alert
sounds when you have reached this goal.
a) FromtheINTERVALSmenu,pressUPorDOWNtoselectaninterval,andthenpressSELECT.
b) PressDOWNtoselectGOALS,andthenpressSELECT.
c) PressUPorDOWNtoselectDISTANCEorALTITUDE,andthenpressSELECT.
d) PressUPorDOWNtoselectON,andthenpressSELECT.

15
e) PressDOWNtoselectSETUP,andthenpressSELECT.
f) PressUPorDOWNtochangetheblinkingvalue,andthenpressNEXTtomovetothenextvalue.
g) PressDONE.
NAME THE INTERVAL
YoucanchangethenameofanyintervalwithintheworkoutexceptfortheWARMUPandCOOLDOWN
intervals.
a) FromtheINTERVALSmenu,pressUPorDOWNtoselectanyintervalexceptWARMUPorCOOLDOWN,and
thenpressSELECT.
b) PressDOWNtoselectRENAME,andthenpressSELECT.
c) PressUPorDOWNtochangetheblinkingletter,andthenpressNEXTtomovetothenextletter.
d) PressDONE.
NOTE:Iftheintervalnameissettoallblankcharacters,thenameshallreverttothepreviousnameupon
exitingtheRENAMEscreen.
5. Repeattheabovesectionsforsettingupeachintervalthatyouwanttoincludeinyourworkout.
6. PressDONE.
CLEAR ALL INTERVAL DATA
You can reset all interval times to their default values.
1. FromtheINTERVALSmenu,pressDOWNtoselectCLEARALL,andthenpressSELECT.
2. PressUPorDOWNtoselectYES,andthenpressSELECT.Alloftheintervaltimesinthisworkoutarecleared.
TIME AN INTERVAL WORKOUT
Thissectiondescribeshowtostart,stopandsaveworkoutsinINTERVALTIMERmode.
START A WORKOUT
1. PressMODEuntilINTERVALTIMERdisplays.
2. PressSTARTtostarttherstintervalofyourworkout.Bydefault,theIntervaltimeisshowninthesecond
lineofthedisplay.Inthegraphicbelow,theintervaltimehasbeensettodisplayinthepre-selectedtime
format in the middle of the three lines. The data displayed varies depending on the display setup.
Whenthetimehasrunoutontherstinterval,analertsoundsandthenextintervalbegins.Whenallintervals
arecompleteandmorethanonerepetitionhasbeenset,therstintervalbeginsagain.Thiscontinuesuntilall
repetitions are complete.
NOTE: Onlytherst100repetitionsareretainedinmemory.
SKIP AN INTERVAL
• HoldSTARTtostoptimingthecurrentintervalandbegintimingthenext.
STOP AND SAVE A WORKOUT
1. PressSTOP.
2. PressandholdRESETuntilSAVEWORKOUTdisplays.
3. PressUPorDOWNtoselectYES,andthenpressSELECT.
NOTE:TheSAVEWORKOUTYES/NOmessageisdisplayedifonlyoneworkoutisrunning.Ifmultipleworkouts
(acrosstheChrono,IntervalTimer,andTimermodes)areactive,youdonothavetheoptiontoresetwithout
saving.TheworkoutisautomaticallysavedwhentheRESETbuttonispressedandheld.
4. Topreservebatterylife,thewatchwillasktoturnoffallsensorsaftertheworkoutisreset.PressUPor
DOWNtoselectYEStotheTURNOFFSENSORSmessageandpressSELECT.IfneitherYESorNOisselected,
thesensorswillturnoffafter30seconds.
NOTE:Ifaheartraterecoveryisin-progress,turningoffthesensorswillinterruptHRMdataandprovide“--“as
aresult.Instead,selectNOandwaituntilyourrecoveryhasended.Aftertherecovery,pressandholdRADIO
todisplaytheSensorMenu.Theindicatorshouldappearnextto“POWEROFF”.Ifnot,pressUPorDOWNto
adjust,andpressSELECTtoturnoffthewatchsensors.

16
SELECT THE INTERVAL TIMER DISPLAY
YoucanselecttheDEFAULTdisplayoranyofthethreecustomizabledisplays(RUN,CUSTOM1,andCUSTOM2).
1. PressRADIOtoturnontheGPSand/orANT+™sensors–theiconswillblink.
2. PressRADIOtocyclethroughthedisplayviews.
CUSTOMIZE THE 3-LINE OR 4-LINE DISPLAY
The3-Lineor4-LineDisplaycanbecustomizedtodisplayparametersofyourchoice.
1. PressMODEuntilINTERVALTIMERdisplays.
2. Customizethedisplayasdescribedinthe“ConguretheWatch”sectionearlierintheUserGuide.
Values that can be Displayed in Interval Timer Mode
DATA UNITS
Altitude FeetorMeters
Cadence & Average Cadence StepsperMinute
Calories KiloCalories
Distance&IntervalDistance MilesorKilometers/FeetorMeters
HeartRate(HR)&AverageHR BeatsperMinute/%ofMax
IntervalName Namegiventointervalinsetup
IntervalNumber Sequentialnumberofcurrentinterval
Interval Reset Time Hours:Minutes.Seconds
Interval Time Hours:Minutes.Seconds
Odometer MilesorKilometers
Pace, Average Pace & Interval Pace MinutesandSecondsperMile/Kilometer
RepNumber Sequentialnumberofcurrentrepetition
Speed & Average Speed MilesorKilometersperHour
TimeDay 12-hour or 24-hour format
None Thelinewillremainblank
NOTE: WhenAveragedataisshown,the“A”characterisshownintheleftsideofthedisplay.
TIMER MODE
TheTimerisacountdownfromapresettimedurationandcanbeusedasaremindertobegin/endatask
orworkout.Arepetition(rep)isacountofthenumberoftimesthecountdownhasbeenrepeated
during a workout.
The following features are offered in Timer mode:
• Storeupto15workoutstotal(includingChronoandIntervalTimerworkouts)
• Countdowntimeupto59.59(Minutes.Seconds)
• Settimertostop,repeatorstartchronographwhentimerunsout
• Countsupto99timerrepetitions
• Halfwayreminderalert
• Threecustomizabledisplayformats(whenGPS,HRorFootPodsensorareactive)
The following data are always tracked in Timer mode:
• Totaltime
• Timeforeachcompletedrepetition
• Resttime(whentheTimerisstopped)

17
WhentheGPS,HeartRateand/orFootPodsensorsareactive,thewatchkeepstrackofthefollowingdatain
TimermodeandreportsitinReviewMode:
GPS Heart Rate (HR) Sensor Foot Pod Sensor
CalorieExpenditure • • •
Calories per repetition • • •
Average speed • •
Average speed per repetition • •
Maximumspeed • •
Average pace • •
Average pace per repetition • •
Minimum(orbest)pace • •
Distance • •
Distanceperrepetition • •
Elevation •
Elevationperrepetition •
Maximumaltitude •
Minimumaltitude •
Total ascent •
Total descent •
Amountoftimetheuser’sheartrate
was within the heart rate zones •
Minimumheartrate •
Average heart rate •
Average heart rate per interval •
Peak heart rate •
HR within a HR target zone per interval •
Average cadence •
Average cadence per interval •
Maximumfootcadence •
CONFIGURE THE TIMER
Set the length of the timer, what happens when the timer runs out, and whether or not to alert you at the
halfway mark. You can also customize the display in Timer mode.
SET THE TIMER
1. PressMODEuntilTIMERdisplays.
2. PressSET.
3. PressDOWNtoselectTIME,andthenpressSELECT.
4. PressUPorDOWNtochangetheblinkingvalue,andthenpressNEXTtomovetothenextvalue.
5. PressDONE.
SET TIMEOUT ACTION
YoucansetthetimertostarttheCHRONOmodewhenitrunsout.YoucanalsosetittoSTOP,ortoREPEAT
until you stop it manually.
1. FromTIMERmode,pressSET.
2. PressDOWNtoselectATEND,andthenpressSELECT.
3. PressUPorDOWNtoselectCHRONO,REPEAT,orSTOP,andthenpressSELECT.
4. PressDONE.
SET HALFWAY ALERT
You can set the timer to sound an alert when half of the set time is expended.
1. FromTIMERmode,pressSET.
2. PressDOWNtoselectHALFWAY,andthenpressSELECT.

18
3. PressUPorDOWNtoselectALERTONorALERTOFF.
4. PressDONE.
CUSTOMIZE THE 3-LINE OR 4-LINE DISPLAY
The3-Lineor4-LineDisplaycanbecustomizedtodisplayparametersofyourchoice.
1. PressMODEuntilTIMERdisplays.
2. Customizethedisplayasdescribedinthe“ConguretheWatch”sectionearlierintheUserGuide.
Values that can be Displayed in Timer Mode
Data Units
Altitude FeetorMeters
Cadence & Average Cadence StepsperMinute
Calories KiloCalories
Distance&RepDistance MilesorKilometers/FeetorMeters
Heartrate(HR)&AverageHR BeatsperMinute/%ofMax
Odometer MilesorKilometers
Pace, Average Pace & Rep Pace MinutesandSecondsperMile/Kilometer
RepNumber The current repetition of the timer
Speed & Average Speed Miles/KilometersperHour
TimeDay 12-hour or 24-hour format
TimerTime(active) Hours:Minutes.Seconds
TimerTime(reset) Hours:Minutes.Seconds
None Thelinewillremainblank
NOTE: WhenAveragedataisshown,the“A”characterisshownintheleftsideofthedisplay.
START THE TIMER
To start the timer once it is set up:
1. PressMODEuntilTIMERdisplays.
2. Press START.
If selected, the Timer alerts at the halfway point.
Attheendofthecountdown,theTimerperformsthetaskselectedfortheATENDoptionintheTIMERmenu.
STOP THE TIMER AND SAVE THE WORKOUT
Tostopthetimeroncethetimerhasbeenstarted:
1. SelectSTOP.
2. PressandholdSTOPuntilSAVEWORKOUTdisplays.
3. PressUPorDOWNtoselectYES,andthenpressSELECT.
NOTE:TheSAVEWORKOUTYES/NOmessageisdisplayedifonlyoneworkoutisrunning.Ifmultipleworkouts
(acrosstheChrono,IntervalTimer,andTimermodes)areactive,youdonothavetheoptiontoresetwithout
saving.TheworkoutisautomaticallysavedwhentheRESETbuttonispressedandheld.
4. Topreservebatterylife,thewatchwillasktoturnoffallsensorsaftertheworkoutisreset.PressUPor
DOWNtoselectYEStotheTURNOFFSENSORSmessageandpressSELECT.IfneitherYESorNOisselected,
thesensorswillturnoffafter30seconds.
NOTE:Ifaheartraterecoveryisin-progress,turningoffthesensorswillinterruptHRMdataandprovide“--“as
aresult.Instead,selectNOandwaituntilyourrecoveryhasended.Aftertherecovery,pressandholdRADIO
todisplaytheSensorMenu.Theindicatorshouldappearnextto“POWEROFF”.Ifnot,pressUPorDOWNto
adjust,andpressSELECTtoturnoffthewatchsensors.

19
RECOVERY MODE
Recovery mode lets you track the change in your heart rate over a user-set period. This change in heart rate,
ordelta(∆),canbecomparedbetweenworkoutstoseehowyourcardiotnessimprovesovertime.
The following features are offered in Recovery mode:
• Setrecoverytimeupto59.59(Minutes.Seconds)
• Startrecoverytimerautomatically,ormanuallystarttherecoverytimerinrecoverymode
• Displaybeginningandinstantaneousheartratesduringrecoveryperiod
• Displayrecoveryanddelta(∆)heartrateswhenrecoverytimerrunsout
RECOVERY TIMER START CONDITIONS
The recovery timer is automatically reset and started when the following conditions are met:
• AChrono/IntervalTimer/Timerworkoutisstoppedorhasruntocompletionandthewatchwas
connected to a heart rate sensor.
• Thereisnoon-goingRecoveryTimercountdownthatwasmanuallystartedfromresetthrough
this mode.
NOTE: The recovery timer does not start automatically when connected to a computer.
SET UP RECOVERY TIME
To set up the recovery time:
1. PressMODEuntilRECOVERYdisplays.
2. PressSET.
3. PressSELECTtoturnrecoverytimeON.Acheckmarkappears.
4. PressDOWNtoselectTIME,andthenpressSELECT.
5. PressUPorDOWNtochangetheblinkingvalue,andthenpressNEXTtomovetothenextvalue
6. PressDONE.
Onceset,whenthestartconditionsabovearemet,theRecoveryTimeractivates,andamessagedisplaysas
showninthegraphicbelow.
ThestartingheartratedisplaysintheFROMeldandtherecoveryheartrateisdisplayedintheTOeld.
• PressSTARTwhiletheRecoveryTimeriscountingdowntogetaninstantrecoveryvalueshownonthe
bottomlineofthedisplay.Thisinstantrecoveryvalueshowsthedifferencebetweenthestartingheart
rate and the instantaneous or recovery heart rate.
• HoldSTARTtoendtheRecoveryTimerbeforeitssetrecoverytime,andcapturetheaccumulateddatain
memory.
• PressSTOPtoendtheRecoveryTimerbeforethespeciedtime.
• HoldSTOPtoresettheRecoveryTimer.
Whenthetimerrunsout,startingheartrate,recoveryheartrate,andrecoverytimeareallstoredinthework-
out data.
NOTE:Ifthevaluedisplaysasdoubledashes(--),therecoveryheartrateisgreaterthanthestartingheartrate
or no heart rate reading is present.
RECOVERY STATES
The following states exist in Recovery mode depending on your inputs and the wireless connections:
• Ifthewatchisnotconnectedtoaheartrate(HR)sensor,HRSENSOROFFdisplays.
• IfthewatchisunabletoretrieveHRdata,HRDATANOTFOUNDdisplays.
• TobeginanewRecoveryTimercycle,holdRESETfor2secondstoresetRecoverymode,andthenpress
START to restart the Recovery Timer.
Starting heart rate
Instantaneous or recovery heart rate
Recovery Timer

20
REVIEW MODE
Review mode allows you to view stored Chrono, Interval Timer and/or Timer workout data. The following
features are offered in Review mode:
• Storeupto15workouts
• Viewtotaldistancetraveled(odometer)
• Storeallworkoutsbydate,arrangedinreversechronologicalorder
• Lockorunlockworkouts
• Recalldatawhiletheworkoutisrunning
• Viewsummarydataforeachworkout
• ReviewLaps,Intervals,andRepetitionsforChrono,IntervalTimer,andTimerworkouts
CHOOSE WORKOUT TO REVIEW
1. PressMODEuntilREVIEWdisplays.
Thewatchdisplaysthenumberofstoredworkoutsavailableforreview.Ifnoworkoutshavebeensaved,NO
WORKOUTdisplays.
2. IftheOdometerisdisplayed,pressUPorDOWN.
3. PressMENU.TheWORKOUTSmenudisplayswithalistofdatesthathadworkoutssaved.
4. PressUPorDOWNtoselectthedate,andthenpressSELECT.Alistofworkout(s)withtheworkouttimeand
type(CHRforChrono,INTforIntervalTimer,andTMRforTimer)fortheselecteddatedisplays.Thegraphic
belowdisplaysthelistofworkoutsforTODAY.
5. PressUPorDOWNtoselecttheworkout,andthenpressSELECT.
CHOOSE DATA TO REVIEW
Onceyouhavethespecicworkoutselectedforreview,youcanrevieweitheraSummaryoftheentire
workout, or data for individual laps, intervals, or reps.
Summary:
1. PressUPtoselectSUMMARY,andthenpressSELECT.
2. PressUPorDOWNtoscrollthroughtheworkoutdata.
Thebestlapdisplaytogglesevery2secondsbetweenthebestlaptimeandthecorrespondingbest
lapnumber.
Laps/Intervals/Reps:
1. PressUPorDOWNtoselect:
• LAPStoviewdataforlapsinaChronoworkout
• INTERVALStoviewintervalsinanIntervalTimerworkout
• REPStoviewrepsinaTimerworkout
NOTE:Ifnolaphasbeentakenyet,ornointervalorrephasexpired,amessagedisplaysthatnolapdatahas
beensavedyet.
2. PressUPorDOWNtoscrollthroughthelap/interval/repdata.
3. PressBACKorNEXTtoviewdataforanotherlap,interval,orrep.
Table of contents
Languages:
Other Timex Watch manuals

Timex
Timex INTELLIGENT QUARTZ User manual

Timex
Timex W-207 User manual

Timex
Timex 157-095000 NA User manual

Timex
Timex 333-095002 User manual

Timex
Timex W-34-US User manual

Timex
Timex DGTL MAKO User manual

Timex
Timex W206 User manual

Timex
Timex W-163-US User manual

Timex
Timex W39 User manual

Timex
Timex W-179-US User manual

Timex
Timex W-91 User manual

Timex
Timex EXPEDITION NORTH SLACK TIDE User manual

Timex
Timex IRONMAN Classic 50 Move+ User manual

Timex
Timex W-137-US User manual

Timex
Timex W-195 User manual

Timex
Timex Expedition WS4 User manual

Timex
Timex W223 NA User manual

Timex
Timex 22 User manual

Timex
Timex IronMan Run x50+ User manual

Timex
Timex 143-095004 User manual