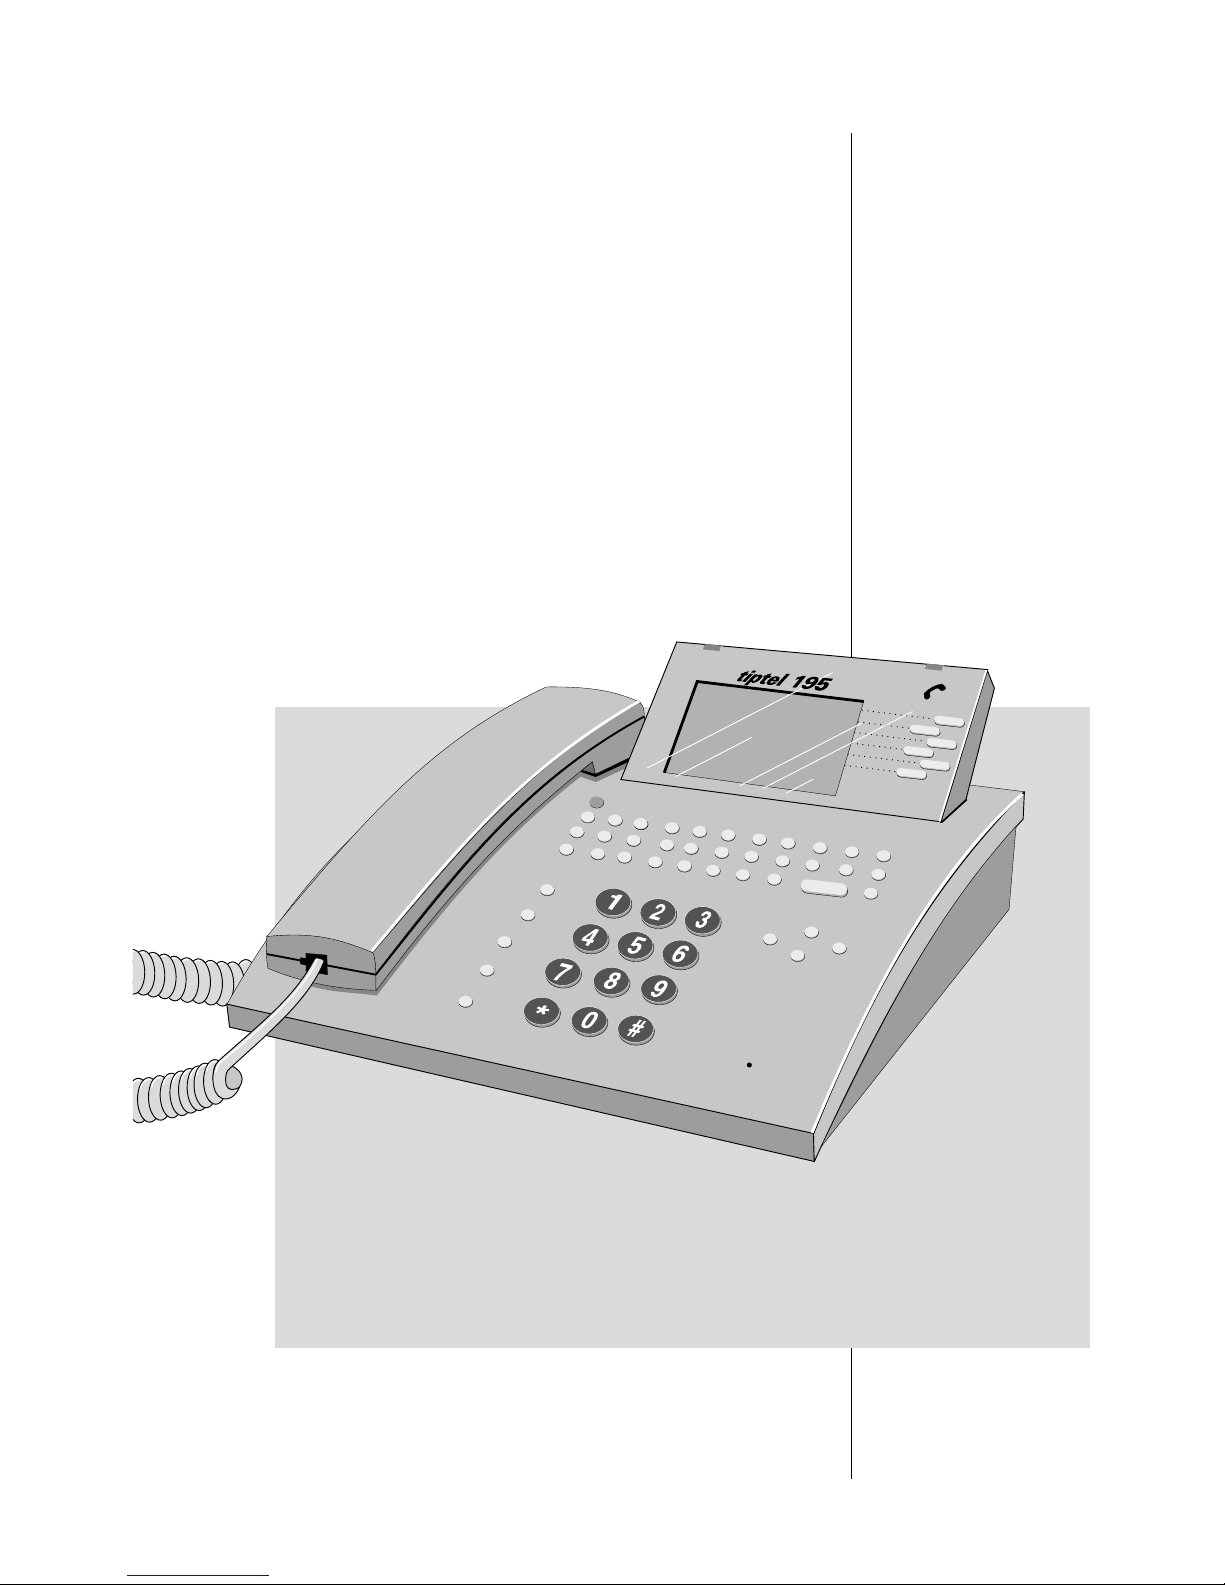
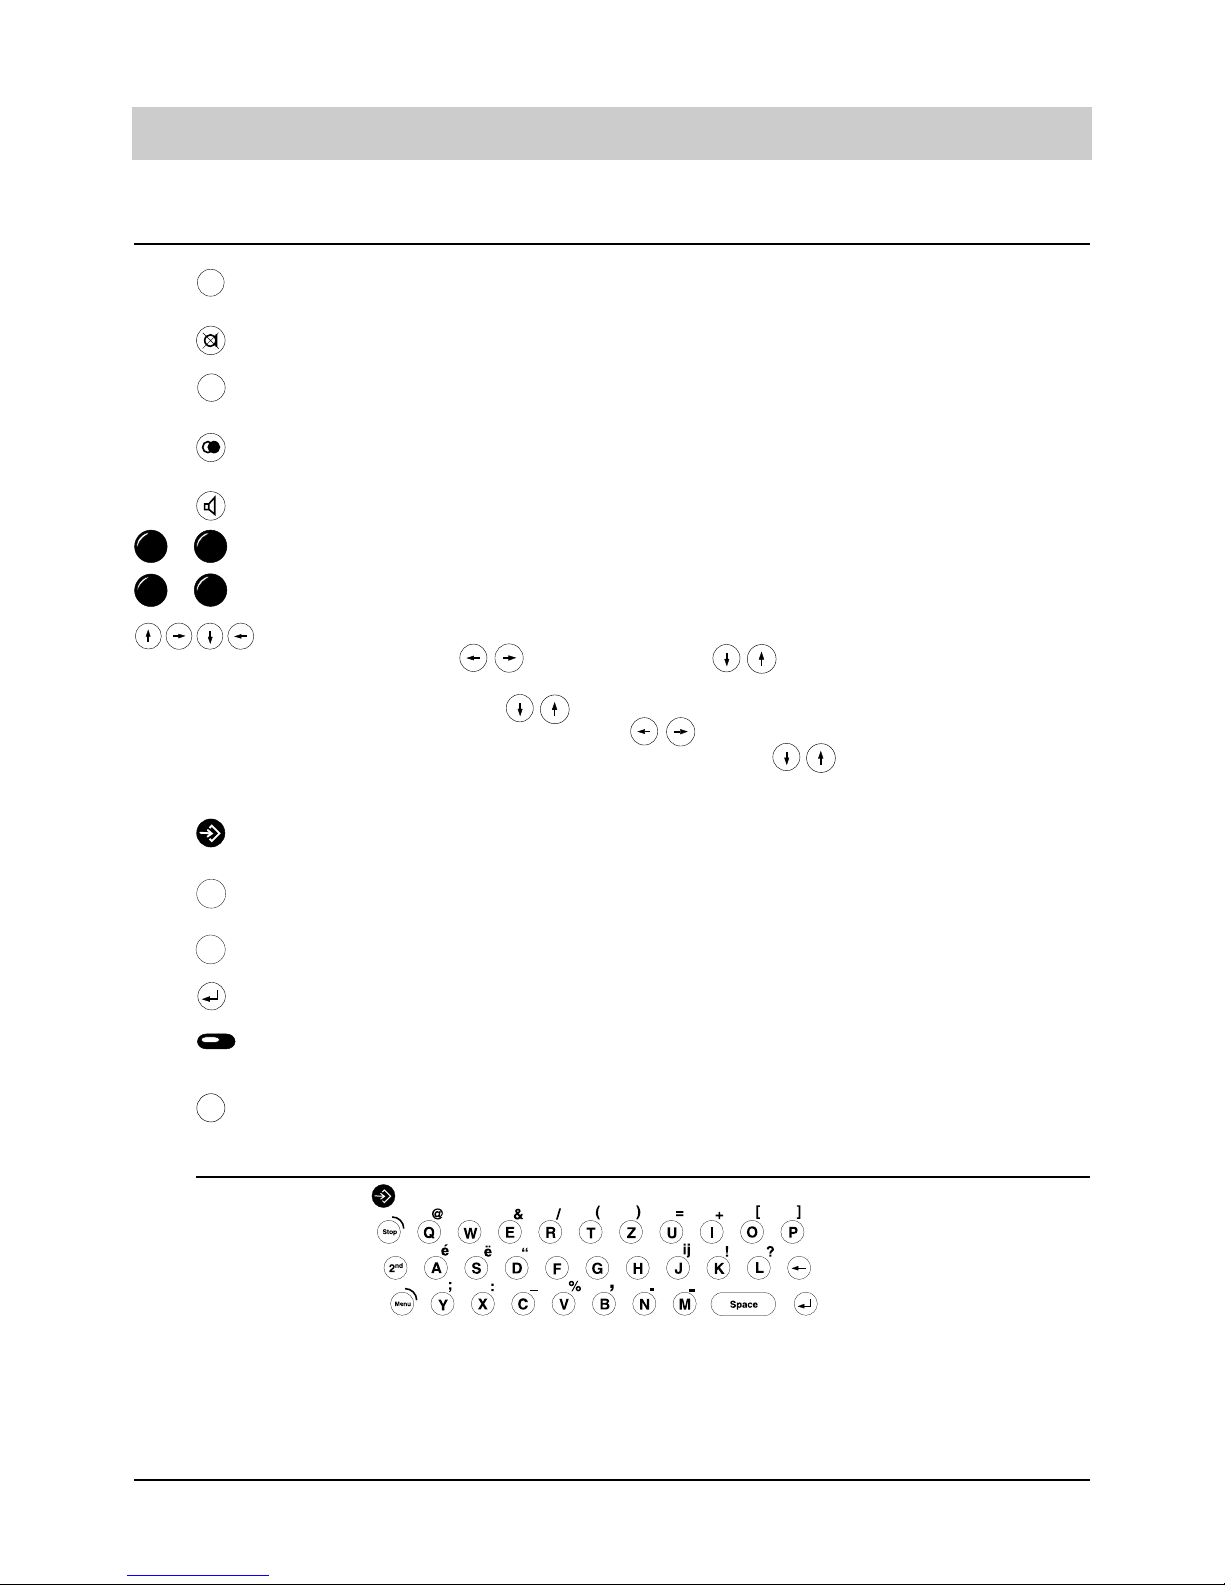
TIPTEL 195 User manual

Operating instructions (UK)
ISDN feature phone
with integrated fully
digital answering
machine and electronic
telephone book
tiptel 195
tiptel

2
Table of contents
Illustrations
Upper housing 3
Lower housing 4
Initial operation
Scope of supply/special accessories 5
Connection 5-6
Insert/exchange batteries 7
Emergency operation in the case of a
power failure 7
ISDN connection 8
PC connection/tipcom 8
Factory pre-set 9
Operational hints
Button functions/ special characters 10
Special functions 11
Initial state 12
Symbols and short descriptions 13
Battery check 14
Volume adjustment 14
Setting handset's volume 14
User interface / Main menu 15
Telephone calls
Call counter 16
Direct manual call 16-17
Off-line call preparation (indirect call) 17
Sending short messages 18
Dialling from the electronic
telephone book 19
Redialling 19-20
Automatic redialling 21
Loudspeaker 22
Hands-free conversation 23
Switch between handset and
hands-free mode 23
Mute function 24
Two-way conversation recording 24
Call tracing 25
Placing conversation on hold /interrupting
conversation /terminating a call 2-line 25
Operation with hold/three party conference 26
Call transfer 27
Call parking /call waiting 28-29
Call list 29-30
Answering incoming calls 31-32
Keypad / sub-addressing 32
Electronic telephone book
General information 33
Storing telephone numbers 33
Settings 33
Individual charge counter 34
Filter 34
Individual outgoing message 34
Multiple subscriber number (MSN) 35
Ringing tone 35
Enter additional information 35
Edit entries 36
Settings
Time / date 36-37
Ringing tone 37-38
Do not disturb function 38
Code lock / direct dialling 39
Setting call waiting 40
PABX parameters 40-41
Charging informations 41
SMS settings (short message service) 42
Entering the MSN 43
Call forwarding 44-45
CLIP 45
Changing the PIN code 46
Headset 47
Call blocking 47-49
Call transfer 49
Call diversion 50
Paging calls
General information on paging calls 51
Store pager message 51
Outgoing paging calls 52
Appointments
General information on appointments 53
Entering appointments 53-54
Editing appointments 55
Reminder for appointments 55-56
General information on time control 56
Entering time control data 57-58
Editing switching times 59
Information
Charge counter 60
Charges for the entire connection 60-61
Memory 61
Calls 62
LCR
Selection of telecommunication providers 63
Entering the provider data 64
Entering the switching times 65
Entering the public holidays 66
Entering the tariff zones 67
Assigning tariff zones to different providers 67-68
Answering machine
Outgoing messages (OGM) 68-70
Recording/testing/erasing OGMs 68-70
Answering machine settings 71
Answering mode settings 72-73
Playing back/erasing incoming messages 72-73
Dictate / information 75
Message transfer 75-76
Message transfer settings 76-77
Remote control
Performing a remote interrogation 78
Feature functions 78-79
Remote control functions 79-81
Remote control settings 82-83
iscellaneous
Important information 84
Troubleshooting / warranty 85
Index 86
Technical data 87

3
Illustration (upper housing, keypad)

4
Illustration (lower housing)

5
Initial operation
Scope of supply
The tiptel 195 is supplied complete with:
m a power supply unit
m a telephone cord
m a curled cable
m an ISDN connecting cable
m five batteries
m an operating instruction manual
m an interface cable RS 232
m the software "tipkom"
The following special accessories are available:
mHeadset
Your tiptel 195 allows the connection of a headset in the factory pre-set This accessory (order
number 4876215) enables you to call hands-free
mRemote beeper (tone pad)
The remote beeper allows you to perform a remote interrogation of your answering machine
by telephones that do not support tone dialling
Connection
Your tiptel 195 is designated as terminal equipment for the connection at a Euro ISDN point-to-
multipoint connection Before operating the device, all required connecting cables have to be
connected Turn the device so that the lower housing is easily accessible:
- Plug the long end of the curled handset cord in the jack The small end of the cord has
to be plugged in the corresponding receptacle of the handset
- Only use the original tiptel AC adapter supplied (article number 45691760)
- Plug the small plug of the AC adapter into the "POWER" and plug the AC adapter into a 230V
AC power outlet
- The plugs of the telephone connecting cable have to be plugged in the "LINE" jack and in to
an ISDN telephone wall socket

6
Initial operation
Connection (continued)
If you want to connect your PC:
Plug the small plug of the interface cable in the RS 232 receptacle and the other end (D-SUB, 9
pins) in a serial port of your PC (COM )
If you want to connect a headset:
Plug the small plug of the headset (which is available as special accessory) in the jack
Use the cable channels for all connecting cables

7
Initial operation
Insert/exchange batteries
The batteries prevent your tiptel 195 from a loss of data in the case of a power failure The bat-
tery compartment provides a subdivision:
- Two batteries are for the "text memory" supply power for the electronic telephone book, i e
telephone numbers, addresses, appointments, time control and settings
- Three additional batteries in addition to the two "text memory" batteries allow you to hold tele-
phone conversations even in the case of a power failure
1 Press the two clamps to open the battery compartment
2 Ensure the correct polarity when inserting the batteries (type "AAA" = microcells 1 5V)
3 Close the battery compartment
4 When pressing the buttons and , the telephone will check the batteries The battery
symbol in the display informs you about the current battery charge status
The battery symbol in the display will blink in time when the batteries are nearly discharged and
need to be exchanged In this case, exchange the batteries as described under point 1 – 4 with-
out unplugging the 230 V AC adapter As long as the telephone is connected to the power sup-
ply, your data will be retained The content of the text memory will only be lost if the device is
without any power supply for about 1 minute
Please observe that:
1 Discharged batteries may be subject to leakage and thus damage your telephone The batte-
ries should be exchanged in time and then disposed of environmentally We recommend alka-
line-manganese batteries
2 Battery lifecycle:
- If only the two batteries for the text memory are inserted, the data retention period after a
power failure is 5 years
- If all five batteries are inserted, the telephone emergency operation is possible for about 24
hours In addition, the text memory will be retained for about 2 weeks
3 When the display indicates the low battery capacity, all batteries should be exchanged at once
Emergency operation in the case of a power failure
If the device is operated without power supply, the following functions remain activated:
- manual off-hook dialling (the display is turned off)
- ringing signal for incoming calls
The tiptel 195 remains fully functional in the event of a power failure only if all 5 batteries have
been inserted
B
2nd

8
Initial operation
ISDN connection
Your tiptel 195 supports a variety of ISDN features Some ISDN features are subject to additio-
nal charges and a registration with your local telecommunications company might be necessary
prior to usage Your local telecommunications company will provide several telephone numbers
under which you can be called These telephone numbers, i e multiple subscriber numbers
(MSN) must be entered in the menu MSN before you can receive incoming calls All further set-
tings for the telephone as well as for the integrated answering machine can be set individually
for each MSN
PC connection / tipkom
The software "tipkom for Windows" offers you many sophisticated functions, e g
mLoading and saving the text memory
mLoading and saving the voice memory
mCall data management
mChanging the settings
Installation
- Connect your tiptel 195 to any serial PC interface Should you only have a free 25-pin port,
you can use a corresponding adapter (9-pin <> 25-pin)
- Insert the tipkom floppy disk and start the "SETUP" program Follow the given instructions
Further information
The operation and the scope of functions can be taken from the detailed software documentati-
on on the floppy disk You just need to start the help function in the program TT195 to access it
The data records stored in the tiptel 195 memory can be converted and transferred
System requirements: - 486/DX 66 or higher
- 4 MB RAM
- VGA monitor
- mouse
- sound card (optional)
- Windows ® 95, Windows ® 3 1x
Windows is a registered trademark of the Microsoft Corporation
Dialling via AT command (hint for PC specialists)
Configuration of the PC-interface: 9600, 8, N, 1 without data flow control
Command: ATD telephone number <CR> Establish connection
ATH <CR> Disconnect connection
ATA <CR> Answer call

9
Factory pre-set
Answering machine
Outgoing message with recording: 7
Delay until pick-up: 6 seconds
Ringing tone/call screening: on
Recording capacity: 2 minutes
Answering mode (pre-set): on
Telephone settings
MSN: none
Access number to public exchange: none
Prefix: none
Headset: off
Remote interrogation
Remote answering mode: off
Remote erasing: off
Remote pre-interrogation: off
Remote control code: no default value
VIP code: no default value
Message code: no default value
essage transfer
Destination number: no default value
Paging information: no default value
Identification: first MSN
Collective call: 1
Message transfer: off
Time control none
Appointments none
Ringing tone
Melody: 3 tone melody
Incremental volume: off
Volume: medium
PIN 000
Restricted numbers none
Call waiting on
CLIP on
Charge rate 0 12
Short message service setting none

Special characters
Initial state: letters - lower case
2nd à character letters - upper case
Menu à character: special character
2nd à menu character: special character, capitalised
2nd à space insert
10
Operational hints
The "internal" button serves to suppress the access to the public exchange within
PABX operation
The "mute" button switches the microphone on/off
The "recall" button is used to place a conversation on hold and to have a 2 line ope-
ration with hold
The "redial" button allows access to enables you to hold a conversation a list of the
last dialled 100 telephone numbers
The "loudspeaker" button enables you to hold a conversation without lifting the handset
Numeric buttons to enter the telephone numbers
Star and hatch buttons
The "arrow" buttons have different functions
In the initial state: display contrast, access to the telephone book
In the entry state: The cursor is positioned correspondingly
In the telephone book: scrolling
When the loudspeakers are active: decrease/increase
When the ringing tone melodies are played back: switch to the next/earlier
melody
The "enter" button allows you to add entries to the telephone book and stores the
entries for the telephone book, the time control and appointments,
The "stop" button terminates a running function or brings you back to the main
menu item
The "menu" button is necessary to access and quit the main menu
The "enter" button completes the entry and stores the text or number entered
The six speed dialling stations positioned on the right side of the display serve for
menu selections and to dial the telephone number displayed
You can access special functions by pressing the "secondary function" button com-
bined with a second button for a specific function
Int
R
9
0...
*#
...
Menu
Stop
2nd
Button functions

11
Operational hints
Button functions/Special functions
Operation mode Button Function
Text entry , character Capital letters
, character Special characters,
lower case (small letters)
, , character Upper case (capital letters)
, Insert space (on/off
when entering information)
In the initial state , Lock
, Voice time stamp
, Voice indication of remai-
ning recording capacity
, Last call
, speed dialling station 1 Menu "Answer mode"
, speed dialling station 2 Menu "Call forwarding"
, speed dialling station 4 Erase all recordings
, speed dialling station 6 Reconnecting a parked call
, 1 6 Outgoing MSN
for telephone numbers Keypad function on/off
The line is disconnected
after the target number has
been reached
Sub-addressing on
, Wait for end of outgoing
message
Internal dialling
(no exchange line)
3 sec pause
for menu entries Calls a help text after a
wrong entry
2nd
Menu
2nd
2nd
Space
Menu
2nd
2nd
2nd
2nd
2nd
G
2nd
Int
K
W
2nd
H
S
S
Z
R
2nd
2nd
2nd
2nd

12
Operational hints
Initial state

13
Operational hints
Recording
Play-back
Erase
Repeat
Forward
Backward
Stop
Loudspeaker active
Hands free active
Send/receive short message
Take over a parked call
Access call list
Call restriction
Information recorded
Telephone locked
Battery capacity symbol
Remaining recording capacity
Menu level (=> 2 levels)
Answer mode on/off
Setting the call forwarding function
Automatic call-back on busy
Message transfer activated
ii
Symbols and short descriptions

14
Operational hints
1. Use the buttons or change
of the volume gradually.
When the handset is picked up
1. Press
or
volume is decreased
volume is increased.
handset volume is decreased
handset volume is increased.
Battery check
The status of the batteries is checked at regular intervals The current battery status can be
taken from the battery symbol
Battery symbol filled Full battery capacity
Battery symbol not filled Weak battery capacity, batteries to be exchanged
Battery symbol blinks Battery discharged or no batteries inserted
Loss of data in the case of a power failure
Volume adjustment
You can set the volume from all functions where the loudspeaker is activated The selected level
is displayed
Setting handset volume
The handset volume can be adjusted when holding a conversation
Vol

15
Operational hints
User interface
A structured menu helps you to operate your tiptel 195 Starting from the main menu ( but-
ton) you are led to the desired function through further sub menus In addition, the button com-
bination and allows you to select menus directly via a list of functions
The following is generally valid:
- In the initial state, the handset is replaced and the display shows date and time
- The menu button brings you to the main menu If you press the menu button while you
are positioned in a sub menu, you are brought back to the initial state
- The speed dialling stations on the right side of the display serve to branch to the next
sub menu – always one level deeper
- Any time you press the stop button , you go back to the corresponding last function level
If you press the stop button after having changed some information, it is not stored!
- Pressing the button completes the entry of a number and the changed numbers are sto-
red
- For a better orientation, the last line of the display shows the current function level (<< ) If
you are on a deep level, this is indicated by a corresponding number
- Wrong entries are indicated by a "?" A help function is available when pressing ,
ain menu
The main menu is the starting point for any function
- Press the menu button
- Select the desired function by pressing the assigned speed dialling station
Answering machine This sub menu serves to set-up the answering machine
Incoming messages This menu item allows to play back or erase messages
Appointments/time control Within this sub menu, you can control and change appointments
as well as time control
Settings . By this menu, you can program the different desired device
settings according to your personal need
Information gives you information on various statistical functions
Menu
Stop
Menu
2nd
Menu
answering machine..................................
messages...................................................
appointm./time ctrl....................................
settings......................................................
information................................................
main menu
2nd
H

16
Telephone calls
Call counter
Your tiptel 195 provides an integrated call counter informing you of the number of incoming
and outgoing calls – even if the answering machine is switched off
The call counter is automatically reset when:
- the handset is picked up - when the answer mode is switched on
- when the line is occupied ( button) - when the call list is queried
Direct manual call
In the case of a direct manual call, the line is occupied first Then, you enter the telephone
number while the dialling process is started at the same time After having entered the last
number of the target telephone number, all further numbers are sent as DTMF signals By this,
you have the possibility to control terminal equipment remotely
1. Pick up handset or activate hands-
free function by pressing .
2. Dial the telephone number via the
keypad.
After dialling:
3. Pick up the handset or hold a hands
free conversation.
If the hands-free mode is selected, the sym-
bols are displayed.
The numbers are displayed and the telepho-
ne starts dialling.
The stop-watch is displayed and shows the
duration of the telephone call. The charging
information is given as soon as they are
received.
02101 4711
0:09:2
1.32

17
Telephone calls
1. Press the speed dialling station next
to the line where CLIP is displayed
The display changes between on and off.
Calling line identification presentation (CLIP)
You can either switch the calling line identification presentation on or off CLIP is resumed after
replacing the handset
Off-line call preparation
The off-line call preparation is initiated when dialling any number button starting from the initial
state You can now dial the target telephone number or open the electronic telephone book by
pressing an arrow button After having entered the target telephone number you can trigger off
further functions via the speed dialling stations
After finishing the conversation:
4. Replace handset or terminate the
hands-free mode by pressing the
button .
For a few seconds, the display shows the
data of the last conversation:
1. dialled telephone number or subscriber
2. call duration
. charges incurred
4. MSN initiating the call.
The incurred charges are added to the char-
ge memory. Afterwards, the device returns to
the initial state. The current data on the call
can be displayed again via the redialling fun-
ction or the call list.

18
Telephone calls
Sending short messages
If the target extension offers the option to receive text messages (to be released by the local tel-
ecommunications company), you can send a short message, i e a message which is transfer-
red when the target extension is dialled You can either make your choice from three pre-edited
messages or enter a message exclusively for the call in question
a) Entering information
1. Press the speed dialling station dis-
played next to the line "temp. info".
2. Press the stop button to store
the entry.
b) Selecting pre-edited information:
1. Press the speed dialling station dis-
played next to "S S".
Start dialling
1. Pick up handset or press button.
A message entry screen is provided. Enter
your text which is restricted to 100 characters
as a maximum. Press after having finis-
hed the editing.
The entry is completed and the display swit-
ches to the earlier menu.
Each time you press the speed dialling stati-
on, the display switches between:
off = No information is sent.
N1 = The pre-edited information number 1
is sent.
N2 = The pre-edited information number 2
is sent.
N = The pre-edited information number
is sent.
tmp. = If a temporary message was edited,
this message will be sent.
The telephone is activated.
The telephone number is dialled.
Stop

19
Redialling
The 100 last dialled numbers will automatically be stored including the time and date of the cor-
responding call Via the function "Edit redial memory", the call duration and the incurred charges
can be displayed From the initial state, press the button to initiate the function Use the
and button to scroll the redial memory If you do not wish to call a number from the
memory but redial the last dialled number, just pick up the handset and press the button
afterwards
Note: During a telephone conversation you can check the complete information stored for the
entry in the electronic telephone book by pressing the button
Telephone calls
1. Enter first character of the desired
entry
or
use or button.
2. Press or button to scroll.
3. Start dialling:
Press the speed dialling station next
to the displayed target entry.
The display shows the entries beginning
with the entered character.
The button brings you to the first entry
of the telephone book. The button brings
you to the last entry of the electronic telepho-
ne book.
You can browse through the electronic tele-
phone book to find the desired entry.
The telephone starts dialling the destination
number.
Dialling from the electronic telephone book
Menu

20
Telephone calls
Dialling from the redial memory
1. Press or button.
2. Press the speed dialling station next
to the displayed telephone number or
the name.
Edit redial memory
1. Press the speed dialling station next
to the displayed time/date line.
Copying telephone numbers
1. Press the speed dialling station next
to the line “copy tel. number”.
Erase entry
1. Press the speed dialling station next
to the line "erase entry".
Delete call list
1. Press the speed dialling station next
to the line "erase list".
Using these buttons, you can scroll the redial
memory until the required telephone number
is displayed.
The device starts dialling the selected tele-
phone number.
The display offers a selection. In addition, the
duration of the corresponding calls as well as
the charging information are displayed.
The telephone book entry field is shown in
the display. The telephone number is already
entered. You can now add the name of the
corresponding subscriber and conclude the
entry.
The current entry is erased. The display swit-
ches to the earlier status.
All existing entries as well as the entry cur-
rently edited will be erased. The display swit-
ches to the earlier status.
You have the option to copy a telephone number from the call list to your electronic telephone
book
Table of contents
Other TIPTEL Telephone manuals

TIPTEL
TIPTEL 82 IP 8 User manual

TIPTEL
TIPTEL 172 User manual

TIPTEL
TIPTEL VP 28 User manual

TIPTEL
TIPTEL IP 286 User manual

TIPTEL
TIPTEL 410 User manual

TIPTEL
TIPTEL 6180 User manual

TIPTEL
TIPTEL 3022 office User manual

TIPTEL
TIPTEL 124 User manual

TIPTEL
TIPTEL VP 28 User manual

TIPTEL
TIPTEL 218 User manual

TIPTEL
TIPTEL 140 User manual

TIPTEL
TIPTEL 160 User manual

TIPTEL
TIPTEL 85 System S0 User manual

TIPTEL
TIPTEL 114 User manual

TIPTEL
TIPTEL 275 User manual

TIPTEL
TIPTEL 114 User manual

TIPTEL
TIPTEL 6120 User manual

TIPTEL
TIPTEL Ergophone 1300 User manual

TIPTEL
TIPTEL 116 cyberphone User manual

TIPTEL
TIPTEL ergophone 6170 User manual