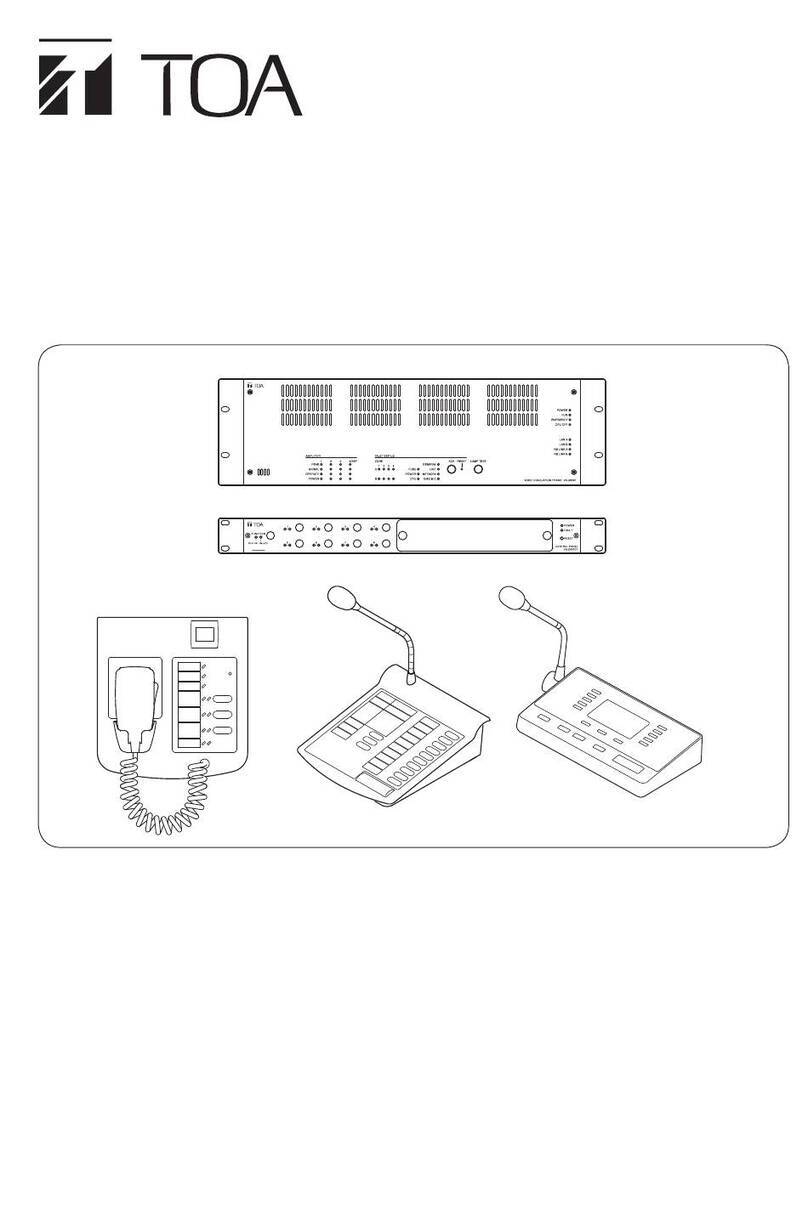
Toa VX-3308WM User manual

INSTALLATION MANUAL
VOICE EVACUATION WALL MOUNT
VX-3308WM
Thank you for purchasing TOA’s Voice Evacuation Wall Mount.
Please carefully follow the instructions in this manual to ensure long, trouble-free use of your equipment.
TOA corporation
1134
TOA Electronics Europe GmbH
Suederstrasse 282, 20537 Hamburg, Germany
1134-CPR-195
18
DOP 18-002
EN 54-4:1997/AC:1999+ A1:2002+ A2:2006
EN 54-16:2008
Fire Detection and tire alarm systems: Voice alarm control and indication
system for fire detection and fire alarm systems for buildings
Options:
manual silencing of voice alarm condition
manual reset of voice alarm condition
voice alarm condition output
indication of a fauil related to voice alarm zones
voice alarm manual control
emergency microphones
power amplifiers
battery box
When an EN 54-4 and EN 54-16 compliant VX-3000 system has to be installed, then carefully read he separatet
manual titled "APPENDIX: ADDITIONAL INSTALLATION INSTRUCTIONS FOR AN EN 54-4 AND EN 54-16
COMPLIANT SYSTEM" and follow up the installation and configuration requirements explained therein. This
APPENDIX contains the basic description of settings and installations, so please refer to the general instruction
sections in this document for more details.

2
TABLE OF CONTENTS
Chapter 1 : NOTE
1.
SAFETY PRECAUTIONS
························································· 1-2
2. GENERAL DESCRIPTION
··························································· 1-4
3. SYSTEM FEATURES
······································································· 1-4
4. SYSTEM EXAMPLE
········································································· 1-4
Chapter 2 : NOMENCLATURE AND FUNCTIONS
1. VX-3308WM Voice Evacuation Wall Mount
1.1 Front Panel ································································································· 2-2
1.2 Font rear Panel ··························································································· 2-4
1.3 Inside View ································································································· 2-5
2. VX-030DA DIGITAL POWE AMPLIFIE
································· 2-8
3. M-200SF FI EMAN’S MIC OPHONE
···································· 2-10
3.1 Front ·········································································································· 2-10
3.2 Side ··········································································································· 2-11
3.3 Rear ··········································································································· 2-12
4. M-320F FI EMAN'S MIC OPHONE EXTENSION
········· 2-10
5. M-300X EMOTE MIC OPHONE
········································ 2-14
5.1 Top ············································································································ 2-14
5.2 Side ··········································································································· 2-15
5.3 Rear ··········································································································· 2-16
6. M-210F EMOTE MIC OPHONE EXTENSION
·············· 2-1
6.1 Top ············································································································ 2-1
6.2 Side ··········································································································· 2-1
7. M-200 J TE MINAL UNIT
····························································· 2-18
8. VM-300SV END OF LINE UNIT
······················································ 2-19
Chapter 3 : INSTALLATION AND SETTING PROCEDURES
(HARDWARE)
1. VX-3308WM Voice Evacuation Wall Mount
····························· 3-2
1.1 Installing The VA System On a Wall ··························································· 3-2
1.2 Installing of an Amplifier Module ···························································· 3-4
1.3 Access to Dip Switch Settings ···································································· 3-6
1.4 Zone Allocation Setting ··············································································· 3-
1.5 ID Number Setting ·················································································· 3-8
1.6 Setting The IP Address ············································································ 3-9

3
2. VX-3065BB BATTERY BOX
······························································ 3-9
2.1 Installing Battery ·························································································· 3-9
2.2 Installing a Te perature Sensor
····························································· 3-12
3. RM-200SF AND RM-300X MICROPHONES
························ 3-13
3.1 The ID Nu ber Settings ············································································ 3-13
3.2 Adjusting Microphone Sensitivity ······························································ 3-15
3.3 CPU Off Function (All-Zone E ergency Broadcast) Settings ··················· 3-17
3.4 Ter ination Setting ··················································································· 3-18
3.5 Using an External Microphone (RM-300X Only) ······································· 3-19
3.6 Using an Auxiliary Input (RM-300X Only) ················································· 3-21
3.7 Co pressor Function Setting ···································································· 3-23
3.8 Microphone Fault Detection Function Setting (RM-300X Only) ················ 3-25
3.9 Installing the RM-200SF on a Wall ···························································· 3-26
3.10 Installing the RM-320F on a Wall (RM-200SF only) ································ 3-30
3.11 RM-300X Extension with the Addition of the RM-210F ··························· 3-32
3.12 Installing the RM-300X on a Wall ···························································· 3-33
3.13 Installing the RM-210F on a Wall (RM-300X Only) ································· 3-34
3.14 Creating Re ote Microphone Na e Labels ··········································· 3-36
3.15 Affixing Declaration of Co pliance (EN54-4 and EN54-16 Standard) ···· 3-39
4. CONNECTIONS
······················································································ 3-40
4.1 Re ovable Ter inal Plug Connection ······················································ 3-40
4.2 Input Equip ent Connections ··································································· 3-41
4.3 Speaker Connection ·················································································· 3-57
4.4 Control Output Ter inal Connections ATT Out ··································· 3-60
4.5 Control Input Ter inal Connections ·························································· 3-61
4.6 E ergency Control Input Ter inal Connections ······································ 3-62
5. VX-3000 CONNECTION
···································································· 3-63
5.1 LAN Link Connector Connections ····························································· 3-63
6. SPEAKER LINE INITIAL SETTING
············································· 3-69
6.1 Setting Ite s ····························································································· 3-69
6.2 OPEN/SHORT Criterion by Co paring the Current Value
with the Initial Value ··················································································· 3-69
7. FAN REPLACEMENT
·········································································· 3-70
8. POWER CORD CONNECTIONS
················································· 3-71
9. APPENDIX:RECOMMENDATIONS TO BATTERY
INSTALLATION
··························································································· 3-72

Chapter 1 NOTE
Chapter 1
NOTE

Chapter 1 NOTE
1. SAFETY PRECAUTIONS
• Before installation or use, be sure to carefully read all the instructions in this section for correct and safe
operation.
• Be sure to follow all the precautionary instructions in this section, which contain important warnings and/or
cautions regarding safety.
• After reading, keep this manual handy for future reference.
• This equipment is not suitable for use in locations where children are likely to be present.
• An equipment installer and the person in charge of maintenance are required to fully understand the functions
and structure of this unit, then be aware of electrical and mechanical risks before work.
Before starting work, he or she should take possible measures to prevent occurrence of such risks.
Be sure to contact your nearest TOA dealer if you need to confirm unclear points about risk sources of this
unit.
Safety Symbol and Message Conventions
Safety symbols and messages described below are used in this manual to prevent bodily injury and property
damage which could result from mishandling. Before operating your product, read this manual first and
understand the safety symbols and messages so you are thoroughly aware of the potential safety hazards.
When Installing the Unit
• Do not expose the unit to rain or an environment where it may be splashed by water or other liquids, as doing
so may result in fire or electric shock.
• Since the unit is designed for indoor use, do not install it outdoors. If installed outdoors, the aging of parts
causes the unit to fall off, resulting in personal injury. Also, when it gets wet with rain, there is a danger of
electric shock.
• Use the unit only with the voltage specified on the unit. Using a voltage higher than that which is specified may
result in fire or electric shock.
• Do not cut, kink, otherwise damage nor modify the power supply cord. In addition, avoid using the power cord
in close proximity to heaters, and never place heavy objects -- including the unit itself -- on the power cord, as
doing so may result in fire or electric shock.
• (Applicable to RM-200SF, RM-300X, RM-320F, and RM-210F only)
Avoid installing or mounting the unit in unstable locations, such as on a rickety table or a slanted surface.
Doing so may result in the unit falling down and causing personal injury and/or property damage.
• (Applicable to RM-200SF, RM-300X, RM-320F, and RM-210F only)
Install the unit only in a location that can structurally support the weight of the unit and the mounting bracket.
Doing otherwise may result in the unit falling down and causing personal injury and/or property damage.
When the Unit is in Use
• Should the following irregularity be found during use, immediately switch off the power, disconnect the power
supply plug from the Ac outlet and contact your nearest TOA dealer. make no further attempt to operate the
unit in this condition as this may cause fire or electric shock.
· If you detect smoke or a strange smell coming from the unit
· If water or any metallic object gets into the unit
· If the unit falls, or the unit case breaks
· If it is malfunctioning (no tone sounds)
•To prevent a fire or electric shock, never open nor remove the unit case as there are high voltage components
inside the unit.
(Applicable to RM-200SF and RM-300X only)
Refer all servicing to qualified service personnel.
Idicates a potetiall hazardous situatio which, if ishadled, could
result i death or serious persoal ijur.
ARNING
G
1-2
W

Chapter 1 NOTE
•Do not place cups, bowls, or other containers of liquid or metallic objects on top of the unit. If they accidentally
spill into the unit, this may cause a fire or electric shock.
•Do not insert nor drop metallic objects or flammable materials in the ventilation slots of the unit’s cover, as this
may result in fire or electric shock.
•When replacing the fuse, be sure to use the supplied one. Using any other fuse than supplied may cause fire
or electric shock.
VX-030DA : Blade 20 A
VX-3308WM: 250V T8A H, Blade 30 A and Blade 7.5 A
•Be sure to switch off the unit when replacing the fuse.
Inserting or removing the fuse with the amplifier's power on may cause personal injury.
•Handle or use the batteries properly.
Doing otherwise may cause leakage or explosion of the batteries, resulting in a fire, personal injury, damage
to peripheral equipment, or contamination of environment.
When Installing the Unit
•Do not block the ventilation slots in the unit’s cover. Doing so may cause heat to build up inside the unit and
result in fire. Also, periodically clean the ventilation slots of dust.
•Avoid installing the unit in humid or dusty locations, in locations exposed to the direct sunlight, near the
heaters, or in locations generating sooty smoke or steam as doing otherwise may result in fire or electric
shock.
•Note correct polarity (positive and negative orientation) when connecting the power supply cord. Reversed
polarity connections will cause damage to the unit.
•To avoid electric shocks, be sure to switch off the VX-3308WM’s power when connecting the unit.
•When connecting multiple appliances to a single power socket through a multi-outlet power strip, a total
current consumption of the appliances must not exceed the allowable current capacity of the power socket.
Failure to observe this instruction may result in a fire or electric shock.
When the Unit is in Use
•Do not operate the unit for an extended period of time with the sound distorting. Doing so may cause the
connected speakers to heat, resulting in a fire.
•Use the specified AC adapter for the unit. Note that the use of other adapter may cause a fire.
•Contact your TOA dealer as to the cleaning. If dust is allowed to accumulate in the unit over a long period of
time, a fire or damage to the unit may result.
•Make sure to observe the following handling precautions so that a fire or personal injury does not result from
leakage or explosion of the battery.
· Do not short, disassemble, heat nor put the battery into a fire.
· Avoid using both new and old batteries together.
· Never charge batteries of the type which are not rechargeable.
· Do not solder a battery directly.
· Be sure to use the specified type of batteries.
· Note correct polarity (positive and negative orientation) when connecting a battery to the unit.
· Avoid locations exposed to the direct sunlight, high temperature and high humidity when storing batteries.
•(Applicable to RM-200SF, RM-300X, RM-320F, and RM-210F only)
Have the unit checked periodically by the shop from where it was purchased. Failure to do so may result in
corrosion or damage to the unit or its mounting bracket that could cause the unit to fall, possibly causing
personal injury.
Idicates a potetiall hazardous situatio which, if ishadled, could
result i oderate or ior persoal ijur, ad/or propert daage.
CAUTION
1-3

Chapter 1 NOTE
2. GENERAL DESCRIPTION
The TOA VX-3308WM Voice Evacuation Wall Mount is designed for both general and emergency purpose
broadcasts. It is comprised of the Voice Evacuation Frame, Digital Power Amplifier modules, Power Supply unit,
Emergency Power Supply, and a user-specified number of Remote Microphones.
The system complies with the EN54-4 and EN54-16 Standard and its failure detection circuitry operates
continuously to check components and speaker lines for any irregularities. If detected, failure warnings are
provided by way of an LED indicator and a buzzer.
The VX-3308WM allows 4 types of broadcasts to be made: General-purpose broadcast such as general paging
and BGM, Emergency warning broadcast that can be broadcast with priority over the Emergency broadcast,
Emergency broadcast that the emergency messages are to be broadcast by an automatic announcement
device or remote microphone, All-zone emergency broadcast that is to be made available even during system
malfunctions or failures.
Two patterns of the Emergency broadcast can be activated simultaneously.
The dedicated software is used to perform all necessary settings related to the entire system operation and
functions including system configurations, input-to-output signal routing, function assignment to the operation
keys, operation of the control terminals, and selection of the failure detection points.
3. SYSTEM FEATURES
•VX-3308WM is a voice evacuation system.
•Decentralized configuration is possible via network.
•VX-3308WM is constructed up to 256 zones as system.
•Speaker Selector function is implemented, then VX-3308WM is able to cover many zones.
•A general broadcast for a sound quality regulating function is possible to digitalize all sound.
•A general broadcasting is possible by latitude setting of control input/output and priorities.
4. SYSTEM EXAMPLE
VX-3308WM + VX-3065BB + RM-200SF etc. System Connection Diagram
BGM uit
RM-X RM-F
RM-SF RM-F
VX- Sste
VX- Sste
LAN
STANBY AMP
VX-DA
AMP
VX-DA
etesio
VX-8WM
VX-BB
1-4

Chapter 2 NOMENCLATURE AND FUNCTIONS
Chapter 2
NOMENCLATURE AND FUNCTIONS

Chapter 2 NOMENCLATURE AND FUNCTIONS
. VX-8WM VOICE EVACUATION WALL MOUNT
1.1 [Front ( Partial enlargement )]
1. LAN A indicator (Green)
Lights when the LAN link A connector (51) on the
LAN Connector Board is connected, and
flashes during LAN communications.
2. LAN B indicator (Green)
Lights when the LAN link B connector (51) on the
LAN Connector Board is connected, and
flashes during LAN communications.
3. RS LINK A indicator (Green)
Lights when the RS LINK A connector (48) on the
Connector Board is connected, and flashes while
communications are being performed via the RS
LINK A connector.
4. RS LINK B indicator (Green)
Lights when the RS LINK B connector (48) on the
Connector Board is connected, and flashes while
communications are being performed via the
RS LINK B connector.
5. Power indicator (Green)
Lights when the power is supplied.
6. RUN indicator (Green)
Normally flashes continuously. Goes off while in a
CPU off state (p. 3-13). Also goes off while in
standby state*1.
*1A state during power failures or a state that the
unit is internally initialized after power-on
7. Emergency indicator (Red)
Lights when the VX-3308WM is in an emergency
condition or while in a CPU off state (p. 3-13).
8. CPU off indicator (Red)
Lights while in a CPU off state (p. 3-13).
9. Battery indicator [BATTERY POWER]
Indicates the state of battery usage. Lights green
when the AC power supply is interrupted and
switched over to the backup batteries.
10. Battery connection indicator [BATTERY
CONNECT]
Lights green when the battery is connected.
11. Battery check indicator [BATTERY
CONDITION]
In the AC operated system, the internal
resistance value of the battery is measured
automatically or manually to check whether the
battery is faulty. The Battery check indicator
indicates the result.
• Before measurement:
Flashes green at 2-second intervals.
• During measurement:
Flashes green at 1-second intervals.
• Normal: Lightsgreen.
• Abnormal: Remains unlit.
In the battery-operated system, the battery
voltage is constantly monitored and its level is
indicated by the indicator as shown below
without pressing the Battery check button.
• Lights green: 25 V or more
• Flashes green: 20 – 25 V
• OFF: 20 V or less
2-2

Chapter 2 NOMENCLATURE AND FUNCTIONS
12. Charging indicator [CHARGING]
Indicates battery charging status. Flashes green
while charging, and continuously lights green
after charging completion.
13. Battery check button [BATTERY CHECK]
Pressing this button permits the
internal resistance measurement of
the backup batteries and also the
operation check of the built-in power supply unit
fan.
The Battery check indicator goes off if the
measured resistance exceeds the specified
value.
14. Shutdown button
Pressing this button forcibly shuts down this unit
irrespective of Switch 8 ON/OFF setting of the
DIP switch 1 (31).
15. Amplifier peak indicators (Red)
Show the input signal state to the power amplifier
when the power amplifier module is installed.
The indicator corresponding to the module slot
port will light if the input signal level exceeds +0.5
dBV.
It remains unlit when no power amplifier module
is installed.
16. Amplifier signal indicators (Green)
Show the input signal state to the power amplifier
when the power amplifier module is installed.
The indicator corresponding to the module slot
port will light if the input signal level exceeds -25
dBV.
It remains unlit when no power amplifier module
is installed.
17. Amplifier operate indicators (Green)
The indicator corresponding to the module slot
port will light or go off depending on the operation
state of the power amplifier when the power
amplifier module is installed.
Operating status Indicator status
In-use Lit
Standby
unlit
Dc fuse blowout unlit
Protection* activated
unlit
The built-in protection circuit operates if
some irregularities occur inside the amplifier
such as abnormal temperature rise or fan
failure.It remains unlit when no power amplifier
module is installed.
18. Amplifier power indicators (Green)
The indicator corresponding to the module slot
port will light or go off depending on the
operation state of the power amplifier when the
power amplifier module is installed.
Operating status Indicator status
In-use Lit
Standby Lit
Dc fuse blowout unlit
Protection* activated Lit
* The built-in protection circuit operates if some
irregularities occur inside the amplifier such as
abnormal temperature rise or fan failure.
It remains unlit when no power amplifier module
is installed.
19. Lamp test key
Used to test each indicator on the front panel of
the VX-3308WM Voice Evacuation Wall Mount.
All indicators remain lit and the buzzer sounds as
long as this key is pressed (does not include AC
power in and battery LED indicators).
20. Zone fault indicators (Yellow)
Lights or flashes when the speaker line
surveillance function detects any of the 3 failures
types : poor insulation (ground fault), overload
(line short), and cable disconnection.
2-3

21. Fault ACK key
The buzzer will sound and the fault indicator will
flash when a failure is detected in the system.
Press this key to stop the buzzer and change the
Fault indicator from flashing to steady on.
22. Fault reset key
Pressing this key resets the failure information
(the buzzer and fault indicators) of the system.
23. General fault indicator (Yellow)
Lights while in a CPU off state (p. 3-13) Lights or
flashes when a failure is detected in the system.
24. Unit fault indicator (Yellow)
Lights or flashes when a failure is detected in the
unit
25. Network fault indicator (Yellow)
Lights or flashes when failures are detected in
communications with the other VX-3000F or
VX-3308WM
It also flashes or lights at network setting and
when a configuration error occurs.
Chapter 2 NOMENCLATURE AND FUNCTIONS
26. Emergency microphone fault indicator(Yellow)
Lights or flashes when failures are detected in
Emergency microphone.
27. Fuse fault indicator (Yellow)
Lights or flashes when a DC fuse blowout
is detected.
28. Power fault indicator (Yellow)
Lights or flashes when failures are detected in
Power Supply manager.
29. CPU fault indicator (Yellow)
Lights when the VX-3000 system is in CPU off
state (p. 3-13) or when a failure is detected in the
VX-3308WM.
30. Door Lock
It is used to lock the VX-3308WM to prevent
opening the case door by unauthorized per-
sonnel.
. [Back of the Font Panel]
31. DIP switch 1:Power Supply Settings
• Switches 1 and 2 are not used.
Be sure to leave both switches OFF.
• Switches 3 – 8 are factory-preset as shown
below.
Switches 3 and 5: ON
Switches 4 and 6 – 8: OFF
Each switch function is described as follows.
• Switches 3 is not used.
Be sure to leave the switches ON.
• Switches 4 and 5
Set the upper limit value of the internal battery
resistance and battery connection cable
resistance to be monitored for fault detection.
Setting switch combination of 4 and 5 is as
follows.
5
ON
OFF
4
ON 25 mΩ 100 mΩ
OFF 50 mΩ* DISABLE
• Switch 6
Sets the battery charging current.
ON: 11 A (100 to 200 Ah)
OFF*: 5.5 A (under 100 Ah)
Be sure to leave the switches OFF when the
battery is 65Ah.
[Space]
* Settings compliant with EN 54-4
• Switches 7 is not used.
Be sure to leave the switches OFF
2-4

• Switch 8
Places the unit in AC operation mode or battery
mode.
ON: All power outputs are shut down when AC
power fails even if backup batteries are
connected. (AC operation mode).
OFF:Battery is used as backup power supply
when AC power fails. (Battery mode)
Be sure to set to OFF in normal operation.
32. DIP switch 2
• Switches 1 – 3
used to allocate speaker lines in cpu-off mode.
(See p. 3-6.)
• Switches 4 – 6
These switches are not used.
Chapter 2 NOMENCLATURE AND FUNCTIONS
• Switch
Used when confirming the firmware version.
• Switch 8
used to set the IP address. (See p. 3-8.)
Note
By default, switches 1 – 7 are set to Off, and
switch 8 to ON
33. Impedance initialize key
Press this key to acquire the initial value of the
speaker line impedance as failure detection is
executed on the basis of the impedance change.
34. Reset button
Pressing this button resets this power supply
unit.
. [Inside]
ALAN Connector Board
BATT Out Board
CVolume,ID Setting
DStand by Amplifier
EAmplifier Module,slot 2
FSlot for Amplifier Module,slot 1
GPower Switch
HSafety Ground Terminal
IDC out Board ( Fuse and DC outlet )
JConnector Board
35. Audio input volume controls
Adjust the input volume of each input channel.
rotating the control fully counterclockwise mutes
the input sound source connected to that channel.
36. CPU Reset key
Pressing this key reactivates the VX-3308WM.
37. ID switch
Sets the VX-3308WM's ID number (device
number).
38. DA control link connector
Connect this connector to the DA control link
connector of the installed digital power amplifier
module.
39. DA output link connector
Connect this connector to the DA output link
connector of the installed digital power amplifier
module.
40. Fuse
Use a blade fuse described below depending on
the power amplifier's rated output.
VX-015DA : 10 A
VX-030DA : 20 A
2-5
A
B
C
I
J
G
E
H
D
F
C :

Chapter 2 NOMENCLATURE AND FUNCTIONS
41. Amplifier DC power input terminal
When a power amplifier module is installed,
connect the power source here. (See p. 3-4.)
42. Audio input terminals
Electronically-balanced 47 kΩ, –20 dB*/–60 dB*,
Terminal connectors. LINE or MIC input can be
selected, and the phantom power supply turned
on and off. (See the separate Setting Software
Instructions, "Unit Configuration Setting.")
* 0 dB = 1 V
43. MAC address
This is the MAC address* for the unit. Since the
relationship of each unit location to its MAC
address is established when setting the network
attributes, keep track of this relationship for later
use.
* The unit’s MAC address consists of 12
hyphenated alphanumeric characters.
44. Speaker output terminals
connect speakers to these outputs.
45. Emergency control input terminal
Connect to an automatic fire alarm
system and activate emergency
broadcasts, play back/stop automatic
emergency announcements and reset
emergency broadcasts./
Two isolated voltage inputs which
activates when the polarity of the
applied voltage (24 V Dc is kept
applied to this terminal under normal
condition) is reversed.
46. Control output connectors
These 9 Pin connectors permit the
VX-3308WM to control other
connected external equipment.
47. Control input connectors
These 9 Pin connectors receive
activation signals from external
equipment to enable external VX-
3308WM control.
Alternatively, these connectors
become EOL inputs by setting.
48. RS LINK connectors
Connect the RM-200SF fireman's
microphone or RM-300X remote
microphone to these connectors.
Note
Only one RM-200SF can be
connected to each connector if the
system is required to comply with
EN54-16.
49. ATT/Control output terminals
These terminals permit the VX-3000
system to control other connected
external equipment.
Alternatively, these terminals become
attenuator control outputs by setting.
2-6
48
J :
B :
D :

Chapter 2 NOMENCLATURE AND FUNCTIONS
50. DC output terminal
Supplies DC power to power amplifier
modules or other DC-operated de-
vices.
(max. 33 VDC , max. 30 A)
51. DC FUSE
Blade fuse 30 A
52. LAN link connectors
The two LAN connectors (LAN A, LAN
B) can be connected directly to exter-
nal VX-3000F or VX-3308WM devices
or switching hubs via Cat5 (or higher)
cables.
Alternatively, you can replace this PCB
with an Ethernet switch of the IES-
2000 or IES-3000 series from ORing
Industrial Networking. To do so,
- remove the RJ45 plugs from the
PCB,
- remove the PCB from the rail
- mount the Ethernet switch
on the rail
- connect the RJ45 plugs to any of the
Ethernet switch's RJ45 jacks.
After connection completion, press the
Reset key to reactivate the VX-3000F.
For details refer to chapter 5. VX-3000
Connection on page 3-63, or contact
your TOA dealer for more information.
53. Air Break Switch
This switch is the AC-mains power
breaker of VX-3308WM as well as the
AC-mains terminal.
N
L
O-OFF
O-OFF
2-7
51
52
53
H :
I :
G :

Chapter 2 NOMENCLATURE AND FUNCTIONS
2. DIGITAL POWER AMPLIFIER MODULE
• The VX-3308WM comes with two pre-installed digital power amplifier modules VX-030DA. Alternatively
the power amplifier modules VX-015DA can be used.
• They are module types with 1 channel of class-D digital power amplifier, which contributes to
energy-saving and light weight design.
• One power amplifier module can be used as a standby amplifier.
. [Frot]
1. DA control link connector
Connect this connector to the DA control link
connector of the VX-3308WM to which this
module is installed using the supplied harness.
2. Fixing screw
Fixes the module to the VX-3308WM.
3. Model number indication
4. DA output link connector
Connect this connector to the DA output link
connector of the VX-3308WM to which this
module is installed using the supplied harness.
5. Filter
Before installing the power amplifier into
VX-3308WM, please remove the filter .
2-8
1
234
Appearance with
a filter detached
Appearance with
a filter attached
5
This is an electric hazard mark.
There is the possibility of an electric shock when
connecting cables.
Make connections when power is not supplied to the
digital power amplifier modules .

Chapter 2 NOMENCLATURE AND FUNCTIONS
. [Rear]
6. Fuse
Use a blade fuse described below depending on
the power amplifier's rated output.
VX-015DA : 10 A
VX-030DA : 20 A
7. DC power input terminal
Connect VX-3308WM DC power supply to this
terminal.
. [Left Side]
8.Output voltage selection switch
Used to select power amplifier's rated output
voltage.
2-9

Chapter 2 NOMENCLATURE AND FUNCTIONS
3.RM-200SF FIREMAN'S MICROPHONE
• The RM-200SF Fireman’s Microphone features 3 function keys, 1 emergency key, 1 talk key, and the indicator
lamps associated with these keys. Functions are assigned to the function keys using the VX-3000 Setting
Software.
• Specially designed for both emergency and general purpose broadcast applications, the Fireman’s Microphone
can be used for push-button zone selection and microphone broadcasts.
•
VX-3000setting software permitsdesiredfunctions to be assigned to individualFunction keys(equippedwith
2 LED indicators).
• Up to 4 RM-320F Remote Microphone Extension units can be used with each RM-200SF Remote Microphone.
• Up to 2 RM-200SF Fireman’s Microphones can be connected within a VX-3308WM.
• The CPU switch enables all-zone emergency broadcasts from the RM-200SF Fireman’s Microphone, even
when the CPU malfunctions.
• Failures of Emergency buttons and signal (both control and audio) path between the microphone (including
the internal microphone element) and the VX-3308WM are automatically detected.
.
1. Power indicator (Green)
Lights when the power is turned on.
2. Emergency key
Assign the function concerning the emergency
broadcast to this key using the VX-3000 Setting
Software.
This key lights or flashes depending on the
assigned function.
3. Monitor speaker
Used to monitor current broadcasts.
4. Monitor speaker volume control
Adjusts the volume of the built-in monitorspeaker
(3).
5. Microphone volume control
Adjusts the input sensitivity of the Hand-held
microphone.
6.Microphone hanger
Used to hold the unit's Hand-held microphone.
7.CPU switch
Normally set to ON. (factory-preset: ON)
Setting this switch to OFF in
combination with the DIP switch (20) setting on
the bottom surface allows the all-zone
emergency broadcast to be made using a
hand-held microphone by way of analog
transmission not via the CPU control.
8.Indication label insert slot
The label can be printed using the VX-3000
Setting Software. (See the separate Setting
Software Instructions, "PRINTING LABELS
FOR REMOTE MICROPHONES.")
2-10

Chapter 2 NOMENCLATURE AND FUNCTIONS
9. Failure indicator (Yellow/Red)
Flashes yellow if some problem within the system
is detected.
This indicator will light yellow if the signal to the
VX-3308WM to which the RM-200SF is
connected is interrupted for 5 seconds or more.
Lights red when the unit is placed in reset state by
pressing the Reset Switch (11).
10. CPU indicator (Red)
Lights red when any one of the CPU
switches on the RM-200SFS connected within
the system is set to OFF or when the
all-zone emergency broadcasts is being made
by any one of the RM- 300XS
connected within
the system.
11. Reset switch
u
sed to reactivate the RM-200SF unit.
Holding down both this switch and the
R3 key of the Function keys (14) for 2 seconds
or more causes the Failure Indicator (9)
to light red, placing the RM-200SF in reset
state.
12. Status indicators (Red/Yellow/Green)
Light, flash, or go off depending on the current
operation state of function keys, failure state or
emergency state. (See the separate Operating
Instructions, "INDICATOR STATUS OF
REMOTE MICROPHONES
.")
13.Selection indicators (Green)
Light or go off depending on the current
operation state of function keys. (See the
separate Operating Instructions, "INDICATOR
STATUS OF REMOTE MICROPHONES
.")
14.Function keys (R1 – R3)
Positioned in top-down order (R1, R2, R3).
Pressing a specific function key executes the
function that has been assigned to that key by
the VX-3000 Setting Software. Assignment of
functions to specific keys is done using the VX-
3000 Setting Software. (See the separate
Setting Software Instructions, "RM Event
Settings.")
15.Microphone indicator (Green)
Lights or goes off depending on the current
operation state of the Talk key.
16.Broadcast Status Indicator (Yellow/Green)
Lights, flashes, or goes off depending on the
current operation state of the Talk key.
17.Talk key
Press this key to broadcast a voice announcement.
It must be pressed continuously for the duration
of the broadcast.
The talk key operation method is fixed to "PTT,"
and can not be changed.
18.Microphone
Used for voice announcements.
3.2 [Side] 19. RM-320F connection terminal
Connect the RM-320F Remote Microphone
Extension unit
to this terminal. (See p. 2-13.)
2-11

Chapter 2 NOMENCLATURE AND FUNCTIONS
3.3 [Rear]
[wall mount bracket unit (Accessory)]
20. DIP switch
Used for setting the RM-200SF unit.
• Switches 1 – 3 [UNIT ID]
Set the RM-200SF's device number (ID number).
(See p. 3-9.)
• Switch 4 [COMMUNICATION]
Not used. Normally set to OFF.
• Switch 5 [LEVEL METER]
Changes a broadcast status indicator (12) into
an output signal level indicator. (See p. 3-15.)
• Switch 6 [CPU off]
Sets whether the CPU off function (all-zone
emergency broadcasts) is enabled or disabled.
(See p. 3-17.)
• Switch 7
Not used. Normally set to OFF .
• Switch 8 [TERMINATION]
Sets the termination of the RM communication
line (control communication lines between
the
VX-3308WM and the RM-200SF). Normally
set to OFF.(See p. 3-18.)
Note
By default, switches 1 – 5 and 7 are set to OFF,
and switches 6 and 8 to ON.
21. USB terminal
Not used.
22. Extension connector
Connect this connector to the extension
connector(23) of the Wall mount
Bracket unit (accessory). (See p. 3-25.)
23.Extension connector
Connect the cable extending from the
RM-200SF to this connector. (See p. 3-25.)
24.Screw terminal block
• Audio monitor line [MONITOR IN]
connect the audio monitor input line from the
VX-3308WM to the RM-200SF.
• RM communication line [DATA]
Connect the control communication line between
the VX-3308WM and the RM-200SF.
• Audio output line [AUDIO OUT]
Connect the audio signal output line from the
RM-200SF to the VX-3308WM.
• DC power input [DC IN 24 V]
Used to supply D
c
power from the VX-3308WM
to the RM-200SF.
• Shield [SHIELD]
Used for the control line through which the
VX-3308WM confirms the RM-200SF's
connection.
Be sure to connect at least one of two terminals
to the VX-3308WM.
2-12

Chapter 2 NOMENCLATURE AND FUNCTIONS
4.RM-320F FIREMAN'S MICROPHONE EXTENSION
Each connected RM-320F Extension unit adds 20 function keys to the base RM-200SF.
[Frot]
[Side]
1.Connection cable
Used for connection to the RM-200SF or other
RM-320F.
2.Indication label insert slot
The label can be printed using the VX-3000
Setting Software. (See the separate Setting
Software
Instructions, "PRINTING LABELS
FOR REMOTE MICROPHONES
.")
3.Status indicators (Red/Yellow/Green)
Light, flash, or go off depending on the current
operation state of function keys.
4.Selection indicators (Green)
Light or go off depending on the current operation
state of function keys.
5.Function keys (1 – 20)
Keys are numbered from 1 to 10 from upper left
to bottom and from 11 to 20 from upper right to
bottom.
Pressing a specific function key executes the
function that has been assigned to that key by
the VX-3000 Setting Software. Assignment of
functions to specific keys is done using the
VX-3000 Setting Software.
(See the separate Setting Software
Instructions,
"RM Event Settings.")
6.RM connection terminal [EXTENSION]
Connect the other RM-320F to this terminal.
2-13
Other manuals for VX-3308WM
2
Table of contents
Other Toa Security System manuals

Toa
Toa VS-900 User manual

Toa
Toa ALARM INPUT UNIT C-AL80(H) User manual

Toa
Toa SX-2000AI User manual

Toa
Toa VM-3000 Series User manual

Toa
Toa VX-2000 Series Guide

Toa
Toa VM-3000 Series User manual

Toa
Toa VM-3000 Series User manual

Toa
Toa Netcansee N-CC2360 User manual

Toa
Toa RS-150 User manual

Toa
Toa VX-2000 Series User manual