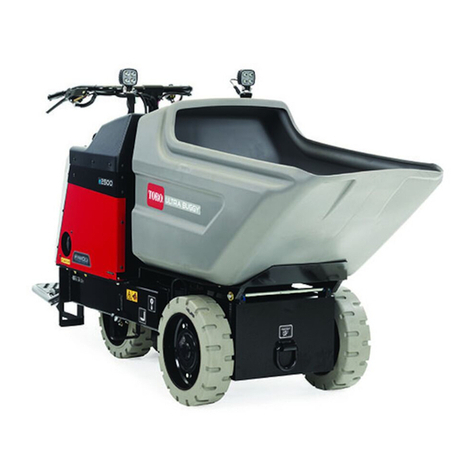
Toro 68038 User manual

FormNo.3429-732RevB
MB-1600MudBuggy
ModelNo.68038—SerialNo.404320000andUp
ModelNo.68038G—SerialNo.404320000andUp
Registeratwww.Toro.com.
OriginalInstructions(EN)*3429-732*B

Becauseinsomeareastherearelocal,state,or
federalregulationsrequiringthatasparkarresterbe
usedontheengineofthismachine,asparkarresteris
availableasanoption.Ifyourequireasparkarrester,
contactyourAuthorizedServiceDealer.
GenuineT orosparkarrestersareapprovedbythe
USDAForestryService.
ItisaviolationofCaliforniaPublicResourceCode
Section4442touseoroperatetheengineonany
forest-covered,brush-covered,orgrass-covered
landwithoutasparkarrestermufermaintainedin
workingorder,ortheengineconstricted,equipped,
andmaintainedforthepreventionofre.Otherstates
orfederalareasmayhavesimilarlaws.
Theenclosedengineowner'smanualissupplied
forinformationregardingtheUSEnvironmental
ProtectionAgency(EPA)andtheCaliforniaEmission
ControlRegulationofemissionsystems,maintenance,
andwarranty.Replacementsmaybeorderedthrough
theenginemanufacturer.
WARNING
CALIFORNIA
Proposition65Warning
Theengineexhaustfromthisproduct
containschemicalsknowntotheStateof
Californiatocausecancer,birthdefects,
orotherreproductiveharm.
Useofthisproductmaycauseexposure
tochemicalsknowntotheStateof
Californiatocausecancer,birthdefects,
orotherreproductiveharm.
Introduction
Thismachineisintendedtobeusedbyprofessional,
hiredoperatorsincommercialapplications.This
machineisastable,reliable,andproductivemachine
forcarryingandmovingmaterialsforanyjobsite.Itis
primarilydesignedtomoveconcrete,mortar,gravel,
dirt,ordebrisaroundjobsites.Usingthisproduct
forpurposesotherthanitsintendedusecouldprove
dangeroustoyouandbystanders.
Readthisinformationcarefullytolearnhowtooperate
andmaintainyourproductproperlyandtoavoid
injuryandproductdamage.Youareresponsiblefor
operatingtheproductproperlyandsafely.
Visitwww.Toro.comforproductandaccessory
information,helpndingadealer,ortoregisteryour
product.
Wheneveryouneedservice,genuineT oroparts,or
additionalinformation,contactanAuthorizedService
DealerorToroCustomerServiceandhavethemodel
andserialnumbersofyourproductready.Figure1
identiesthelocationofthemodelandserialnumbers
ontheproduct.Writethenumbersinthespace
provided.
Important:Withyourmobiledevice,youcan
scantheQRcodeontheserialnumberdecal(if
equipped)toaccesswarranty,parts,andother
productinformation.
g241971
Figure1
1.Modelandserialnumberlocation
ModelNo.
SerialNo.
©2019—TheToro®Company
8111LyndaleAvenueSouth
Bloomington,MN554202
Contactusatwww.Toro.com.
PrintedintheUSA
AllRightsReserved

Thismanualidentiespotentialhazardsandhas
safetymessagesidentiedbythesafetyalertsymbol
(Figure2),whichsignalsahazardthatmaycause
seriousinjuryordeathifyoudonotfollowthe
recommendedprecautions.
g000502
Figure2
1.Safety-alertsymbol
Thismanualuses2wordstohighlightinformation.
Importantcallsattentiontospecialmechanical
informationandNoteemphasizesgeneralinformation
worthyofspecialattention.
Contents
Safety.......................................................................4
SafeOperatingPractices....................................4
SafetyandInstructionalDecals..........................7
ProductOverview...................................................10
Controls...........................................................10
Specications..................................................12
Operation................................................................12
AddingFuel......................................................12
CheckingtheMachine-FluidLevels..................14
StartingtheEngine...........................................14
ShuttingOfftheEngine.....................................14
OperatingtheMachine.....................................14
ParkingtheMachine.........................................16
MovingtheMachinewithoutEngine
Power............................................................16
TransportingtheMachine.................................17
LiftingtheMachine...........................................17
UsingtheQuick-ReleaseTireHubs..................18
Maintenance...........................................................19
RecommendedMaintenanceSchedule(s)...........19
Pre-MaintenanceProcedures..............................20
RemovingtheCowl...........................................20
Lubrication..........................................................21
GreasingtheMachine.......................................21
EngineMaintenance...........................................22
CheckingtheEngine-OilLevel..........................22
ServicingtheAirCleaner..................................22
ChangingtheEngineOil...................................24
ReplacingtheSparkPlug.................................24
FuelSystemMaintenance...................................25
CleaningtheSedimentCup..............................25
ChangingtheFuelFilter....................................26
DrainingtheFuelT ank......................................27
DriveSystemMaintenance..................................27
AdjustingtheTransmissionReturntoNeutral
Position.........................................................27
CheckingtheTiresandLugNuts......................28
ControlsSystemMaintenance.............................28
BrakeMaintenance...........................................28
HydraulicSystemMaintenance...........................30
CheckingtheHydraulic-FluidLevel...................30
ReplacingtheHydraulicFilter...........................31
ChangingtheHydraulicFluid............................32
CheckingtheHydraulicLines...........................33
Cleaning..............................................................33
RemovingDebrisfromtheMachine..................33
Storage...................................................................34
Troubleshooting......................................................35
3

Safety
Improperuseormaintenanceofthemachinecan
resultininjury.T oreducethepotentialforinjury,
complywiththesesafetyinstructionsandalwayspay
attentiontothesafetyalertsymbol,whichmeans:
Caution,Warning,orDanger—personalsafety
instruction.Failuretocomplywiththeinstructionmay
resultinpersonalinjuryordeath.
SafeOperatingPractices
WARNING
Engineexhaustcontainscarbonmonoxide,
anodorlessfuelthatislethalifinhaled.
Donotruntheengineindoorsorinan
enclosedarea.
Training
•ReadtheOperator'sManualandothertraining
material.Iftheoperator(s)ormechanic(s)cannot
readorunderstandtheinformation,itisthe
owner'sresponsibilitytoexplainthismaterialto
them.
•Becomefamiliarwiththesafeoperationofthe
equipment,operatorcontrols,andsafetysigns.
•Alloperatorsandmechanicsshouldbetrained.
Theownerisresponsiblefortrainingtheusers.
•Neverletchildrenoruntrainedpeopleoperateor
servicetheequipment.Localregulationsmay
restricttheageoftheoperator.
•Theowner/usercanpreventandisresponsible
foraccidentsorinjuriesoccurringtopeopleor
damagetoproperty.
Preparation
•Wearappropriateclothingincludinghardhat,eye
protection,longpants,substantial,slip-resistant
footwear,andhearingprotection.Tiebacklong
hair.Donotwearloosejewelry.
•Inspecttheareawheretheequipmentistobe
usedandensurethatallobjectsareremovedfrom
themachinebeforeuse.
•Useextremecareinhandlingfuel.Itisammable
anditsvaporsareexplosive.
–Extinguishallcigarettes,cigars,pipes,and
othersourcesofignition.
–Useonlyanapprovedcontainer.
–Donotremovethefuelcaporllthefueltank
whiletheengineisrunningorhot.
–Donotaddordrainthefuelinanenclosed
space.
–Donotstorethemachineorfuelcontainer
wherethereisanopename,spark,orpilot
light,suchasonawaterheaterorother
appliance.
–Ifyouspillfuel,donotattempttostartthe
engine;avoidcreatinganysourceofignition
untilthefuelvaporshavedissipated.
•Ensurethattheshieldsofthemachineare
attachedandfunctioningproperly.Donotoperate
themachineunlesstheyarefunctioningproperly.
Operation
•Useyourfullattentionwhileoperatingthe
machine.Donotengageinanyactivitythat
causesdistractions;otherwise,injuryorproperty
damagemayoccur.
•Neverrunanengineinanenclosedarea.
•Operatethemachineonlyingoodlight,keeping
awayfromholesandhiddenhazards.
•Ensurethatalldrivesareinneutralbefore
startingtheengine.Starttheengineonlyfromthe
operator'sposition.
•Donotoperatethemachinewiththeguards
notsecurelyinplace.Ensurethatallinterlocks
areattached,adjustedproperly,andfunctioning
properly.
•Donotchangetheenginegovernorsettingor
overspeedtheengine.
•Stopthemachineonlevelground,engagethe
parkingbrake,lowerthehopper,andshutoffthe
enginebeforeleavingtheoperator'spositionfor
anyreason.
•Nevercarrypassengersandkeeppetsand
bystandersaway.
•Slowdownandusecautionwhenmakingturns
andcrossingroadsandsidewalks.
•Donotoperatethemachinewhileill,tired,or
undertheinuenceofalcoholordrugs.
•Usecarewhenloadingorunloadingthemachine
intoatrailerortruck.
•Usecarewhenapproachingblindcorners,shrubs,
trees,orotherobjectsthatmayobscurevision.
•Ensurethattheareaisclearofotherpeoplebefore
operatingthemachine.Shutoffthemachineif
anyoneentersthearea.
•Neverleavearunningmachineunattended.
•Donotexceedtheratedoperatingcapacity,asthe
machinemaybecomeunstablewhichmayresult
inlossofcontrol.
•Neverjerkthecontrols;useasteadymotion.
•Watchfortrafcwhenoperatingnearorcrossing
roadways.
4

•Donottouchpartswhichmaybehotfrom
operation.Allowthemtocoolbeforeattemptingto
maintain,adjust,orservice.
•Checkforoverheadclearances(i.e.,branches,
doorways,electricalwires)beforedrivingunder
anyobjectsanddonotcontactthem.
•Ensurethatyouoperatethemachineinareas
wheretherearenoobstaclesclosetoyou.Failure
tomaintainadequatedistancefromtrees,walls,
andotherbarriersmayresultininjuryasthe
machinebacksupduringoperationifyouare
notattentivetothesurroundings.Operatethe
machineonlyinareaswherethereissufcient
clearanceforyoutosafelymaneuvertheproduct.
•Locatethepinchpointareasmarkedonthe
machineandkeephandsandfeetawayfrom
theseareas.
•Lightningcancausesevereinjuryordeath.If
lightningisseenorthunderisheardinthearea,do
notoperatethemachine;seekshelter.
•Donotoverloadthehopperandalwayskeepthe
loadlevelwhenoperatingthemachine.
SlopeOperation
•Slopesareamajorfactorrelatedtoloss-of-control
andtip-overaccidents,whichcanresultinsevere
injuryordeath.Theoperatorisresponsiblefor
safeslopeoperation.operatingthemachineon
anysloperequiresextracaution.Beforeusingthe
machineonaslope,youmust:
–Reviewandunderstandtheslopeinstructions
inthemanualandonthemachine.
–Evaluatethesiteconditionsofthedayto
determineiftheslopeissafeformachine
operation.Alwaysusecommonsense
andgoodjudgmentwhenperformingthis
evaluation.Changesintheterrain,suchas
moisture,canquicklyaffecttheoperationof
themachineonaslope.
•Raisingthehopperonaslopeaffectsthestability
ofthemachine.Keepthehopperinthelowered
positionwhenonslopes.
•Whenoperatingonaslope,foldtheplatformup
andwalkbehindthemachineuntilitisonat
ground.
•Operateupanddownslopeswiththeheavy
endofthemachineuphill.Weightdistribution
changeswithafullhopper.Afullhoppermakes
thefrontofthemachinetheheavyend,sowhen
ontravelingupordownslopeswithafullhopper,
walk-behindthemachinewiththefullhopperuphill.
•Identifyhazardsatthebaseoftheslope.Do
notoperatethemachineneardrop-offs,ditches,
embankments,waterorotherhazards.The
machinecouldsuddenlyrolloverifawheelortrack
goesovertheedgeortheedgecollapses.Keep
asafedistance(twicethewidthofthemachine)
betweenthemachineandanyhazard.
•Avoidstarting,stopping,orturningthemachineon
aslope.Avoidmakingsuddenchangesinspeed
ordirection;turnslowlyandgradually.
•Keepallmovementsonslopesslowandgradual.
Donotmakesuddenchangesinspeedor
direction.
•Donotoperatethemachineunderanyconditions
wheretraction,steering,orstabilityisinquestion.
Beawarethatoperatingthemachineonwetgrass,
acrossslopesordownhillmaycausethemachine
tolosetraction.Lossoftractiontothewheelsor
tracksmayresultinslidingandalossofbraking
andsteering.Themachinecanslideevenifthe
wheelsortracksarestopped.
•Removeormarkobstaclessuchasditches,holes,
ruts,bumps,rocksorotherhiddenhazards.Tall
grasscanhideobstacles.Uneventerraincould
overturnthemachine.
•Ifyoulosecontrolofthemachine,stepoffand
awayfromthedirectionoftravelofthemachine.
MaintenanceandStorage
•Lettheenginecoolbeforestoringanddonotstore
themachinenearanopename.
•Engagetheparkingbrake,shutofftheengine,
andwaitforallmovementtostopbeforeadjusting,
cleaning,orrepairingthemachine.
•Cleandebrisfromdrives,mufers,andtheengine
tohelppreventres.Cleanupoilorfuelspills.
•Donotstorefuelnearamesordrainindoors.
•Parkthemachineonlevelground.Neverallow
untrainedpersonneltoservicethemachine.
•Usejackstandstosupportcomponentswhen
required.
•Carefullyreleasepressurefromcomponentswith
storedenergy.
•Disconnectthebattery,negativeterminalrstand
positiveterminallast,beforemakinganyrepairs.
Connectthebatterypositiveterminalrstand
negativeterminallast.
•Keepyourhandsandfeetawayfrommoving
parts.Ifpossible,donotmakeadjustmentswith
theenginerunning.
•Chargebatteriesinanopen,well-ventilatedarea,
awayfromsparkandames.Unplugthecharger
beforeconnectingordisconnectingitfromthe
battery.Wearprotectiveclothinganduseinsulated
tools.
•Keepallpartsingoodworkingconditionandall
hardwaretightened.Replaceallwornordamaged
decals.
5
•Usethecylinderlocktosecurethehopperinthe
raisedposition.
•Keepnutsandboltstight.Keepequipmentin
goodcondition.
•Nevertamperwithsafetydevices.
•UseonlygenuineT ororeplacementpartsto
ensurethatoriginalstandardsaremaintained.
•Batteryacidispoisonousandcancauseburns.
Avoidcontactwithskin,eyes,andclothing.Protect
yourface,eyes,andclothingwhenworkingwitha
battery.
•Batterygasescanexplode.Keepcigarettes,
sparks,andamesawayfromthebattery.
•Keepyourbodyandhandsawayfrompinhole
leaksornozzlesthatejecthigh-pressurehydraulic
uid.Usecardboardorpapertondhydraulic
leaks;neveruseyourhands.Hydraulicuid
escapingunderpressurecanpenetrateskinand
causeinjury,requiringsurgerywithinafewhours
byaqualiedsurgeon;otherwise,gangrenemay
result.
6

SafetyandInstructionalDecals
Safetydecalsandinstructionsareeasilyvisibletotheoperatorandarelocatednearanyarea
ofpotentialdanger.Replaceanydecalthatisdamagedormissing.
125-4961
decal125-4961
125–4961
1.Reverse
decal125-4964
125–4964
1.ReadtheOperator’sManualforoilinformation.
decal125-4959
125–4959
1.Crushinghazard—neverplaceyourheadunderthedump
trailer.
125-4960
decal125-4960
125–4960
1.Forward
decal125-4962
125–4962
1.Engagetheparkingbrake2.Disengagetheparking
brake
7

decal125-4967
125-4967
1.Liftpoint
decal125-6694
125–6694
1.Tiedownlocation
decal127-2855
127–2855
1.Warning—readtheOperator’sManual;wearhearing
protection.
5.Tippinghazard—donotraisethedumptrailerwhilemoving;
moveforwardslowly;raisethedumptrailerslowly.
2.Warning—donotoperatethemachinewithoutpropertraining.6.Carbonmonoxidepoisonhazard—donotruntheengine
indoors.
3.Warning—stayawayfrommovingparts;keepallguardsand
shieldsinplace.
7.Explosionhazard—shutofftheengineandextinguishall
amesbeforerefueling.
4.Warning—keepbystandersawaywhileoperatingthe
machine;checkbehindyouwhenmovinginreverse.
8

decal130-2844
130-2844
1.Raisethepedaltolower
thehopper.
2.Lowerthepedaltoraise
thehopper.
decal125-4963
125-4963
1.Warning—donottouchhotsurfaces.
decal125-8190
125–8190
1.Pressdownonthepedal
toapplytheservicebrake
2.Releasethepedalto
releasetheservicebrake
decal133-8062
133-8062
decal125-4958
125–4958
1.ReadtheOperator’sManualforinformationonstartingthe
engine—1)Engagetheparkingbrake;2)Setthedriveto
neutral;3)Openthechoke;4)Turntheengineswitchon;5)
Engagethefuelswitch;6)Pulltherecoilstarterandsetthe
throttletofast;7)Closethechoke.
2.ReadtheOperator’sManualforinformationonshuttingoff
theengine—1)Setthethrottletoslow;2)Engagetheparking
brake;3)Setthedrivetoneutral;4)Turntheengineswitchto
stop;5)Disengagethefuelswitch.
9

ProductOverview
g019617
Figure3
1.Operatorplatform4.Drivetires7.Dumphandle/pedal10.Brakepedal
2.Steertires5.Handlebars8.Fueltank
3.Reverse-speed-control
lever
6.Forward-speed-control
lever
9.Parkingbrake
Controls
Becomefamiliarwithallthecontrols(Figure3)before
youstarttheengineandoperatethemachine.
BrakePedal
Applythefoot-operatedbrakepedaltostopthe
machine(Figure3).
Forward-Speed-ControlLever
Squeezetheforward-speed-controllever(Figure3)to
movethemachineforward.Themoreyousqueeze
thehandle,thefasterthemachinewilltravel.
Reverse-Speed-ControlLever
Squeezethereverse-speed-controllever(Figure3)to
reversethemovementofthemachine.Themoreyou
squeezethehandle,thefasterthemachinewilltravel.
DumpHandle/Pedal
Pullthedumphandlebackwardand/orpressonthe
frontofthepedaltodumpthehopper(Figure3).Push
thedumphandleforwardand/orpressontherearof
thepedaltolowerthehopper.
ParkingBrakeLever
Toengagetheparkingbrake,pulluponthelever.
(Figure3).
Toreleasetheparkingbrake,pressthebuttononthe
endofthebrakehandleandlowerthelever.
FuelGauge
Thefuelgaugeispartofthefuel-tankcap,andthe
gaugeindicatestheamountoffuelinthefueltank
(Figure3).
Fuel-TankShutoffValve
Thefuel-tankshutoffvalveislocatedatthebottomof
thefueltank.Theshutoffvalveisusedtocontrolthe
owoffuelfromthetankwhenyouareperforming
maintenanceorstoringthemachine(Figure4).
10

g025707
Figure4
1.Forward2.Shutoff-valveleverforthe
fueltank(OFFposition)
EngineControls
OilAlertSystem
Theoilalertsystemisdesignedtopreventengine
damagecausedbyaninsufcientamountofoilin
thecrankcase.Beforetheoillevelinthecrankcase
canfallbelowasafelimit,theoilalertsystemwill
automaticallyshutofftheengine(theengineswitch
willremainintheONposition).Iftheenginestops
andwillnotrestart,checktheengine-oillevelbefore
troubleshootinginotherareas.
ChokeLever
Thechokelever(Figure5)isrequiredwhenstartinga
coldengine.Beforepullingontherecoilstarthandle,
movethechokelevertotheCLOSEDposition.Once
theengineisrunning,movethechokelevertothe
OPENposition.Donotusethechokeiftheengineis
alreadywarmeduportheairtemperatureishigh.
g020538
Figure5
1.Recoilstarter4.Throttlelever
2.Fuelshut-offvalve5.On/Offswitch
3.Chokelever
ThrottleLever
Thethrottlelever(Figure5)controlsthespeed(rpm)
oftheengine.Itislocatednexttothechokelever.
Itsetstheenginerpmandthereforecanincrease
anddecreasethespeedofthemachine.Forbest
performance,setthethrottlelevertotheFASTposition.
11

Fuel-ShutoffValve
Thefuel-shutoffvalve(Figure5)controlstheowof
fuelfromthefueltanktothecarburetor.Thevalve
islocatedunderneaththechokelever.Movethe
shutoffvalvetotheOnpositionbeforeattemptingto
starttheengine.Onceyouhavenishedusingthe
machineandyouhaveturnedtheengineoff,move
thefuel-shutoffvalvetotheOffposition.
On/OffSwitch
TheOn/Offswitch(Figure5)allowstheenginetostart
andalsostopstheengine.Thisswitchislocatedon
thefrontoftheengine.TheOn/Offswitchismarked
asfollows:
•l(On)—theignitionsystemison.
•O(Off)—theignitionsystemisoff.
Note:Tostartthemachine,youmustrstmovethis
controltotheONposition.Whenyouwanttoshutoff
theengine,movethisswitchtotheOFFposition.
RecoilStarterHandle
Tostarttheengine,pullontherecoilstarterhandle
(Figure5)quicklytoturntheengineover.Theengine
controlsdescribedinFigure5mustallbesetcorrectly
fortheenginetostart.
Specications
Note:Specicationsanddesignaresubjectto
changewithoutnotice.
Width(singlewheel)86cm(34inches)
Width(doublewheel)117cm(46inches)
Length268cm(105.5inches)
Height114.3cm(45inches)
Weight621kg(1370lb)
Hoppercapacity.45m3(16cu.ft.)
Maximumload1136kg(2500lb)
Maximumload(single
wheel)
850kg(1875lb)
Wheelbase107cm(42inches)
DischargeHeight16.5cm(6.5inches)
Operation
Note:Determinetheleftandrightsidesofthe
machinefromthenormaloperatingposition.
Important:Beforeoperating,checkthefueland
oillevel,andremovedebrisfromthemachine.
Also,ensurethattheareaisclearofpeopleand
debris.Youshouldalsoknowandhavemarked
thelocationsofallutilitylines.
AddingFuel
•Forbestresults,useonlyclean,fresh(lessthan
30daysold),unleadedgasolinewithanoctane
ratingof87orhigher((R+M)/2ratingmethod).
•ETHANOL:Gasolinewithupto10%ethanol
(gasohol)or15%MTBE(methyltertiarybutyl
ether)byvolumeisacceptable.Ethanoland
MTBEarenotthesame.Gasolinewith15%
ethanol(E15)byvolumeisnotapprovedforuse.
Neverusegasolinethatcontainsmorethan10%
ethanolbyvolume,suchasE15(contains15%
ethanol),E20(contains20%ethanol),orE85
(containsupto85%ethanol).Usingunapproved
gasolinemaycauseperformanceproblemsand/or
enginedamagewhichmaynotbecoveredunder
warranty.
•Donotusegasolinecontainingmethanol.
•Donotstorefueleitherinthefueltankorfuel
containersoverthewinterunlessyouuseafuel
stabilizer.
•Donotaddoiltogasoline.
12

DANGER
Incertainconditions,fuelisextremely
ammableandhighlyexplosive.Areor
explosionfromfuelcanburnyouandothers
andcandamageproperty.
•Fillthefueltankoutdoors,inanopenarea,
whentheengineiscold.Wipeupanyfuel
thatspills.
•Neverllthefueltankinsideanenclosed
trailer.
•Donotllthefueltankcompletelyfull.
Addfueltothefueltankuntilthelevelis6
to13mm(1/4to1/2inch)belowthebottom
ofthellerneck.Thisemptyspaceinthe
tankallowsfueltoexpand.
•Neversmokewhenhandlingfuel,andstay
awayfromanopenameorwherefuel
fumesmaybeignitedbyaspark.
•Storefuelinanapprovedcontainerand
keepitoutofthereachofchildren.Donot
usefuelthathasbeenstoredformorethan
30days.
•Donotoperatewithouttheentireexhaust
systeminplaceandinproperworking
condition.
DANGER
Incertainconditionsduringfueling,static
electricitycanbereleasedcausingaspark
whichcanignitethefuelvapors.Areor
explosionfromfuelcanburnyouandothers
andcandamageproperty.
•Alwaysplacefuelcontainersontheground
awayfromyourvehiclebeforelling.
•Donotllfuelcontainersinsideavehicle
oronatruckortrailerbedbecauseinterior
carpetsorplastictruckbedlinersmay
insulatethecontainerandslowthelossof
anystaticcharge.
•Whenpractical,removefuel-powered
equipmentfromthetruckortrailerand
refueltheequipmentwithitswheelsonthe
ground.
•Ifthisisnotpossible,thenrefuelsuch
equipmentonatruckortrailerfroma
portablecontainer,ratherthanfromafuel
dispensernozzle.
•Ifafueldispensernozzlemustbeused,
keepthenozzleincontactwiththerimof
thefueltankorcontaineropeningatall
timesuntilfuelingiscomplete.
WARNING
fuelisharmfulorfatalifswallowed.
Long-termexposuretovaporscancause
seriousinjuryandillness.
•Avoidprolongedbreathingofvapors.
•Keepfaceawayfromnozzleandfueltank
orconditioneropening.
•Keepfuelawayfromeyesandskin.
UsingStabilizer/Conditioner
UseTorofuelstabilizer/conditionerinthemachineto
providethefollowingbenets:
•Keepsfuelfreshduringstorageof90daysorless.
Drainthefueltankforperiodsoflongerstorage.
•Eliminatesgum-likevarnishbuildupinthefuel
system,whichcauseshardstarting
Important:Donotusefueladditivescontaining
methanolorethanol.
Addthecorrectamountoffuelstabilizer/conditioner
tothefuel.
Note:Afuelstabilizer/conditionerismosteffective
whenmixedwithfreshfuel.Tominimizethechanceof
13

varnishdepositsinthefuelsystem,usefuelstabilizer
atalltimes.
FillingtheFuelTank
Fueltankcapacity:21.6L(5.7USgal).
1.Parkthemachineonalevelsurfaceandshutoff
theengine.Allowtheenginetocool.
2.Cleanaroundthefueltankcapandremoveit.
3.Addfueltothefueltankuntilthelevelisjust
belowthebottomofthellerneck.
Important:Thisspaceinthetankallows
fueltoexpand.Donotllthefueltank
completelyfull.
4.Installthefueltankcapsecurely,turningituntil
itclicks.
5.Wipeupanyfuelthatmayhavespilled.
CheckingtheMachine-Fluid
Levels
•Checktheengine-oillevel;refertoCheckingthe
Engine-OilLevel(page22)
•Checkthehydraulic-uidlevel;refertoChecking
theHydraulic-FluidLevel(page30).
StartingtheEngine
Note:Forillustrationsanddescriptionsoftheengine
controlsreferencedinthissection,refertoControls
(page10).
Note:Makesurethesparkplugwireisinstalledon
sparkplug.
1.SettheparkingbraketotheONposition;referto
ParkingBrakeLever(page10).
2.Makesuretheforward/reversespeedlevers
areintheneutral(released)position;referto
Forward-Speed-ControlLever(page10)and
Reverse-Speed-ControlLever(page10).
3.TurnthefueltankshutoffvalvetotheON
position;refertoFuel-T ankShutoffValve(page
10).
4.Movethefuel-shutoffvalveontheenginetothe
ONposition;refertoFuel-ShutoffValve(page
12).
5.MovethechokelevertotheONpositionwhen
startingacoldengine;refertoChokeLever
(page11).
Note:Thechokemaynotberequiredwhen
startingawarmengine.
6.MovethethrottleleverawayfromtheMIN
position,about1/3ofthewaytowardtheMAX
position;refertoThrottleLever(page11).
7.TurntheengineOn/OffswitchtotheONposition;
refertoOn/OffSwitch(page12).
8.Pulltherecoilstarterhandleoutuntilpositive
engagementresults,thenpullitvigorouslyto
starttheengine(RecoilStarterHandle(page
12)).
Important:Donotpulltherecoilropetoits
limitorletgoofthestarterhandlewhenthe
ropeispulledout;theropemaybreakorthe
recoilassemblymaybedamaged.
9.Whentheenginehasstartedandwarmsup,
pushthechokelevertotheOFFposition.
10.Movethethrottlelevertothedesiredsetting.
ShuttingOfftheEngine
1.MovethethrottlelevertotheMINposition;refer
toThrottleLever(page11).
2.Engagetheparkingbrake;refertoParking
BrakeLever(page10).
3.Ensurethattheforward/reversespeed
leversareintheNEUTRALposition;referto
Forward-Speed-ControlLever(page10)and
Reverse-Speed-ControlLever(page10).
4.TurntheengineOn/OffswitchtotheOFF
position;refertoOn/OffSwitch(page12).
5.Whentheenginestopsrunning,turnthe
fuel-shutoffvalveontheenginetotheOFF
position;refertoFuel-ShutoffValve(page12).
OperatingtheMachine
DANGER
Alwaysfaceforward,towardthehandlebar
andcontrolswhenoperatingthemachine.
Operatingthecontrolsinanyothermanner
mayresultinseriousinjuryordeath.
1.Alwaysusethe“3-point”contactwhenyou
mountthemachine.“3-pointcontact”refers
to3outof4arms/legsbeingincontactwith
themachinewhenyoumountordismountthe
machine.Alwaysfacethemachinewhenyou
mountordismountit.
2.Starttheengine;refertoStartingtheEngine
(page14).
3.Adjustthethrottlelevertothedesiredengine
rpm;refertoThrottleLever(page11).
14

4.Releasetheparkingbrakelever;refertoParking
BrakeLever(page10).
5.Tomovethemachineforward,squeezethe
speed-control-leverontherighthandlebar.
Tomovethemachinerearward,squeezethe
speed-controlleveronthelefthandlebar;refer
toForward-Speed-ControlLever(page10)and
Reverse-Speed-ControlLever(page10).
Note:Themoreyousqueezethehandle,the
fasterthemachinetravels.
6.Whenyoureleasethespeedcontrolhandle,the
machinestops.
Note:Ifthemachinedoesnotstopwhenthe
speedcontrolisreleased,havethemachine
inspectedbyanAuthorizedServiceDealer.
7.Useyourfoottopressthebrakepedal;referto
BrakePedal(page10).
8.Engagetheparkingbrakeleverbypullingupon
theparkingbrakelever;refertoParkingBrake
Lever(page10).
9.Shutofftheengine;refertoShuttingOffthe
Engine(page14).
OperatingtheHopper
Knowtheloadcapacitiesofyourmachineandnever
exceedthem.Themachineisnormallyoperatedon
uneven,unpaved,bumpy,and/orinclinedsurfaces.
Adjustyourloadaccordingly.
1.Positionthemachineintheareawhereyou
intendtodumptheload.
2.Dumpthehopperbypushingforwardthedump
handleorpressingdownontheforwardpartof
thedumppedal(Figure6).
g025722
Figure6
1.Dumphandle3.Hopperdumpposition
2.Dumppedal4.Hopperuprightposition
3.Movethehoppertotheuprightpositionby
pullingbackthedumphandleorpressingdown
ontherearpartofthedumppedal(Figure6).
15

ParkingtheMachine
ParkingonaGrade
Parkingthemachineonagradeshouldbeavoidedif
possible.Ifthemachinemustbeparkedonagrade,
parkitatarightangletotheslope,engagetheparking
brakeandblockthewheels,ifnecessary.
ParkingtheMachineforaLong
PeriodofTime
1.Parkthemachineoutofmaintrafcareasand
engagetheparkingbrake.
2.Whenthemachinewillbeoutofuseforalong
periodoftime,tiltthehopperupsowater,snow,
anddebriswillnotcollectinside.
3.Coverthedumpcylindershafttoprevent
corrosion.
MovingtheMachinewithout
EnginePower
Themachinecanbemovedashortdistanceifthe
enginedoesnotrun.Thetransmissionfeaturesa
bypassvalve(Figure7).
•Rotatethebypassvalvecounterclockwisetotow
themachine.
•Rotatethebypassvalveclockwisetooperatethe
machinenormally.
g019613
Figure7
1.Bypassvalve
16

TransportingtheMachine
Whentransportingthemachineonatrailer,always
usethefollowingprocedure:
Important:Donotoperateordrivethemachine
onroadways.
1.Shutofftheengineandengagetheparking
brake.
2.Whentransportingthemachine,observe
overallheightforproperclearanceofobstacles
overhead.
3.Ensurethatthehopperisloweredandlatched
down.
4.Securethemachinewiththeproperdevicesat
thetie-downloop.
g019603
Figure8
1.Tie-downloop
LiftingtheMachine
Hoistthemachineusing3liftpointsunderthehopper.
Tiltthehopperforwardtolocatethe3liftloopsand
attachachainorstrapsateachoftheloopsasshown
inFigure9.
Note:Takeuptheslackinthechainorstrapsto
properlybalancetheunit.
g019612
Figure9
1.Liftpoints(3)
Liftthemachinewithaforkliftfromthesideorfrom
thefront(Figure10andFigure11).Pullouton
theplatformreleasering(Figure12)andraisethe
standingplatformtoallowaccesstotheforkpockets.
17

g019610
Figure10
1.Rearforkpockets
g019611
Figure11
1.Sideforkpockets
g019606
Figure12
1.Platformreleasering
UsingtheQuick-Release
TireHubs
Thequick-releasetiresystemallowsquickremovalof
theoutermachinetires.Thequick-releasesystem
allowsthemachinetobeconvertedfroma117cm(46
inch)toa91cm(36inch)widemachinewithoutany
specialtoolsforhubremoval.
1.Positiontheinnerwheelofthemachineovera
2x4andengagetheparkingbrake.
2.Removethelargeteeboltinthecenterofthe
wheelwithacrowbar(Figure13).
g019624
Figure13
1.Teebolt
3.Removetheoutsidewheelwithquick-change
hubattached.
4.Repeattheabovestepsonoppositesideofthe
machine.
Important:Themaximumpayloadisreduced
to850kg(1875lb)whenoperatingthemachine
withoutthedualwheels.
18

Maintenance
Note:Determinetheleftandrightsidesofthemachinefromthenormaloperatingposition.
RecommendedMaintenanceSchedule(s)
MaintenanceService
IntervalMaintenanceProcedure
Aftertherst50hours•Changetheengineoil.
Beforeeachuseordaily
•Checktheengineoillevel.
•Checkservicebrakeoperation.
•Checkparkingbrakeoperation.
•Checkthehydraulicuidlevel.
•Removedebrisfromthemachine.
•Checkforloosefasteners.
Every40hours
•Checktheconditionofthetires.
•Checkthelugnuts.
•Checkthehydrauliclinesforleaks,loosettings,kinkedlines,loosemounting
supports,wear,anddeterioration.
Every50hours•Greaseandoilthemachine.
•Cleantheaircleaner.
Every100hours
•Changetheengineoil.
•Check/adjustthesparkplug.
•Cleanthesedimentcup.
•Replacethehydrauliclter.
Every200hours•Changethehydraulicuid.
Every300hours
•Replacethepaperelement.
•Replacethesparkplug.
•Changethefuellter.
Every1,000hours•Drainandushthefueltank.
Every1,500hours•Replaceallmovinghydraulichoses.
Yearly•Packwheelbearings.
Yearlyorbeforestorage•T ouchupchippedpaint
Important:Refertoyourengineowner'smanualforadditionalmaintenanceprocedures.
19

Pre-Maintenance
Procedures
RemovingtheCowl
Note:Dumpthehopperbeforeyouremovethecowl
byusingeitherthehydraulicsorbyremovingthepin
inthehydrauliccylinderandthehopperbase.
1.Beforeremovingthecowl(Figure14),shutoff
theengineandallowtheenginetocool.
g019788
Figure14
1.Cowl
2.Unhookthecowllatches(Figure15)andremove
thecowl.
g019604
Figure15
1.Cowllatch
3.Installthecowlandsecurethelatchesupon
completionofthetask.
20
This manual suits for next models
2
Table of contents
Other Toro Construction Equipment manuals

Toro
Toro MMX-655H-S User manual

Toro
Toro MM-650E-S User manual

Toro
Toro 68141 User manual

Toro
Toro CM Series User manual

Toro
Toro PT-36PP User manual

Toro
Toro 22322 User manual

Toro
Toro MMX-658H-P User manual

Toro
Toro Pro Sneak 365 User manual

Toro
Toro TX 525 Installation and operating manual

Toro
Toro 68004C User manual