3
InstallingtheSprings(for
2016andNewerMachines
Only)
Partsneededforthisprocedure:
2Spring
Procedure
UseanapprovedTorospring-compressiontoolto
removeandinstallspringsofthestrutassembly.
ContactyourauthorizedTorodistributor.
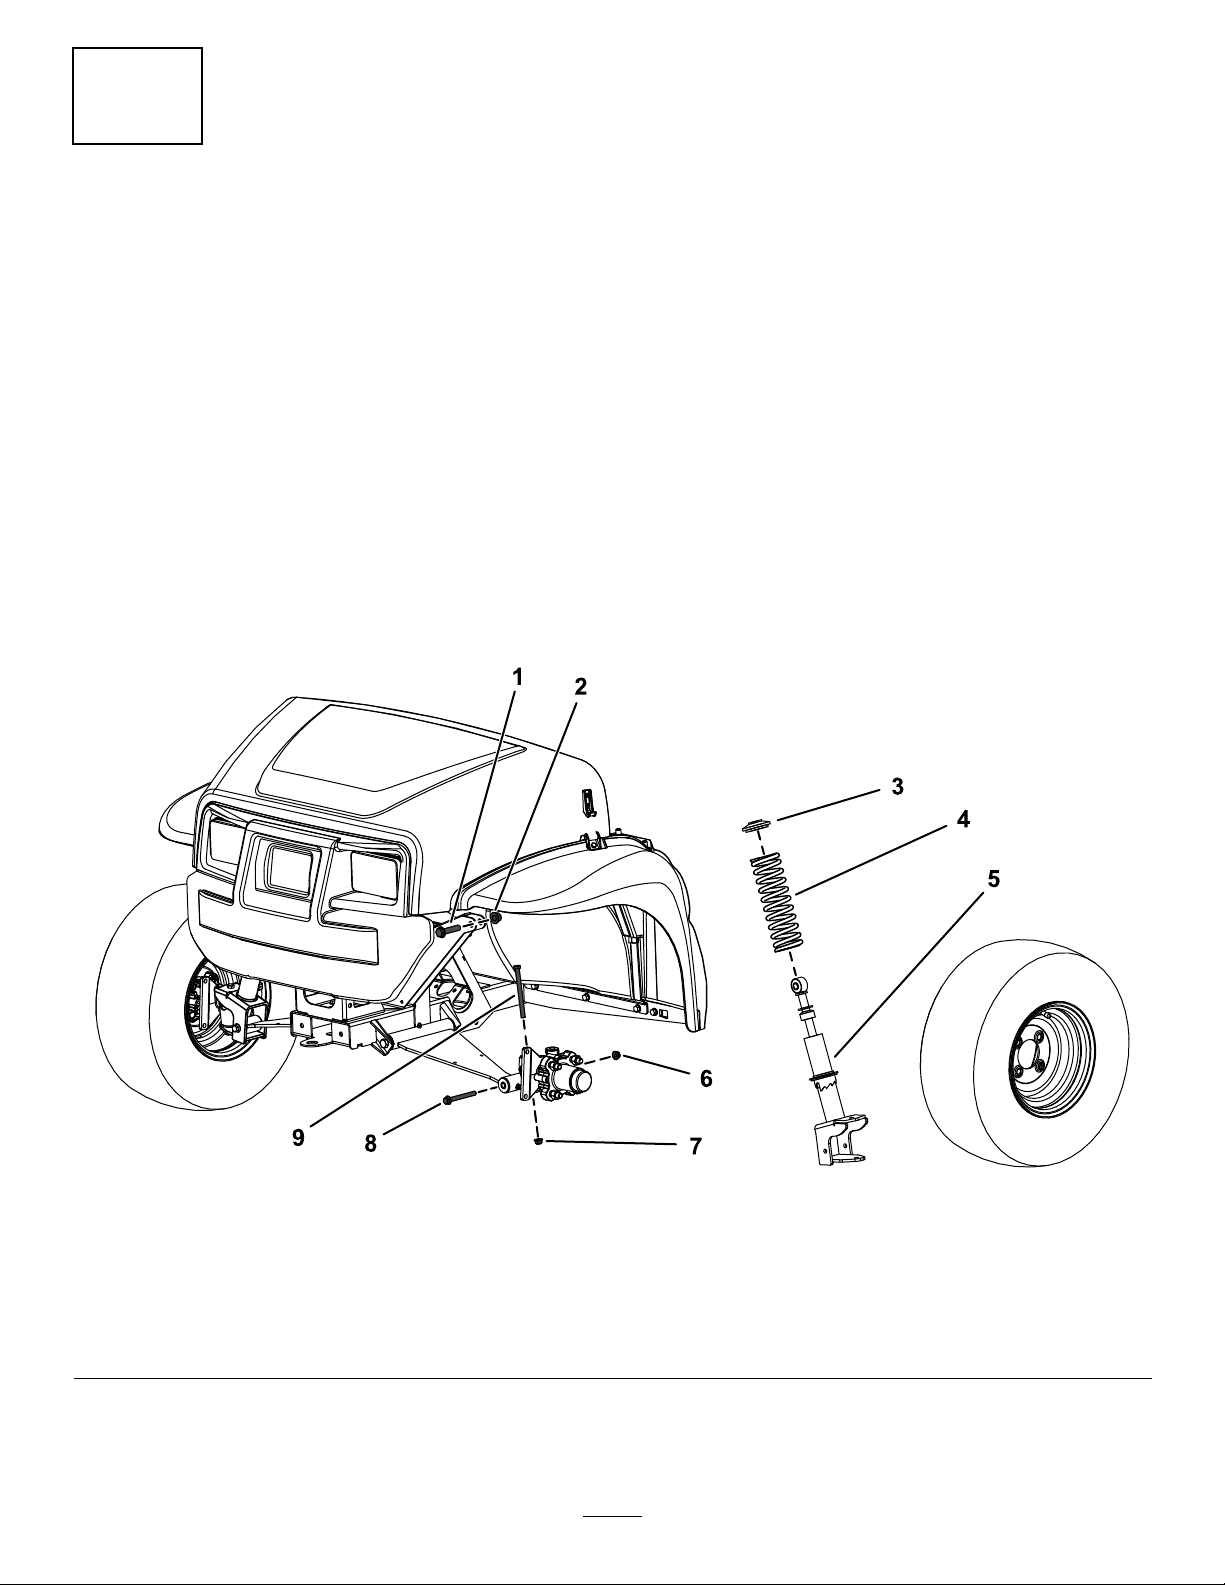
1.Placethestrutassemblyintothecompression
toolandusethetooltocompressthespring.
2.Whilethespringiscompressed,removethe
collar.
3.Removethespringfromthestrutassembly
(Figure1).
4.Installthenewspringovertheexistingstrut
assembly(Figure1).
5.UsingtheTorospring-compressiontool,
compressthespring.
6.Whilethespringiscompressed,installthecollar.
7.Carefullyreleasepressureonthespring,
allowingittoseatonthecollar.
8.Removethestrutassemblyfromthe
compressiontool.
Note:Repeatthisprocedurefortheothersideofthe
machine.
4
InstallingtheStrut
Assembly(for2016and
NewerMachinesOnly)
NoPartsRequired
Procedure
1.Installstrutassemblytothemachine.
2.Securetheupperportionofthestrutassembly
totheframeusingtheupper,hex-headbolt(1/2
x2-1/4inches)andlocknut(1/2inch)asshown
inFigure1.
3.Torquethehex-headbolt(1/2x2-1/4inches)to
91to113N∙m(67to83ft-lb).
4.Installthehex-headbolt(3/8x4-3/4inches)and
angenut(3/8inch)tothespindle(Figure1).
5.Torquethehex-headbolt(3/8x4-3/4inches)to
37to45N∙m(27to33ft-lb).
6.Securethelowerportionofthestrutassembly
tothecontrolarmusingthehex-headbolt(3/8x
3-1/2inches)andangenut(3/8inch)asshown
inFigure1.
7.Torquethehex-headbolt(3/8x3-1/2inches)to
37to45N∙m(27to33ft-lb).
8.Installthefrontwheel.
Note:Repeatthisprocedurefortheothersideofthe
machine.
5
InstallingtheCompression
Spring(for2015andOlder
MachinesOnly)
Partsneededforthisprocedure:
2Compressionspring
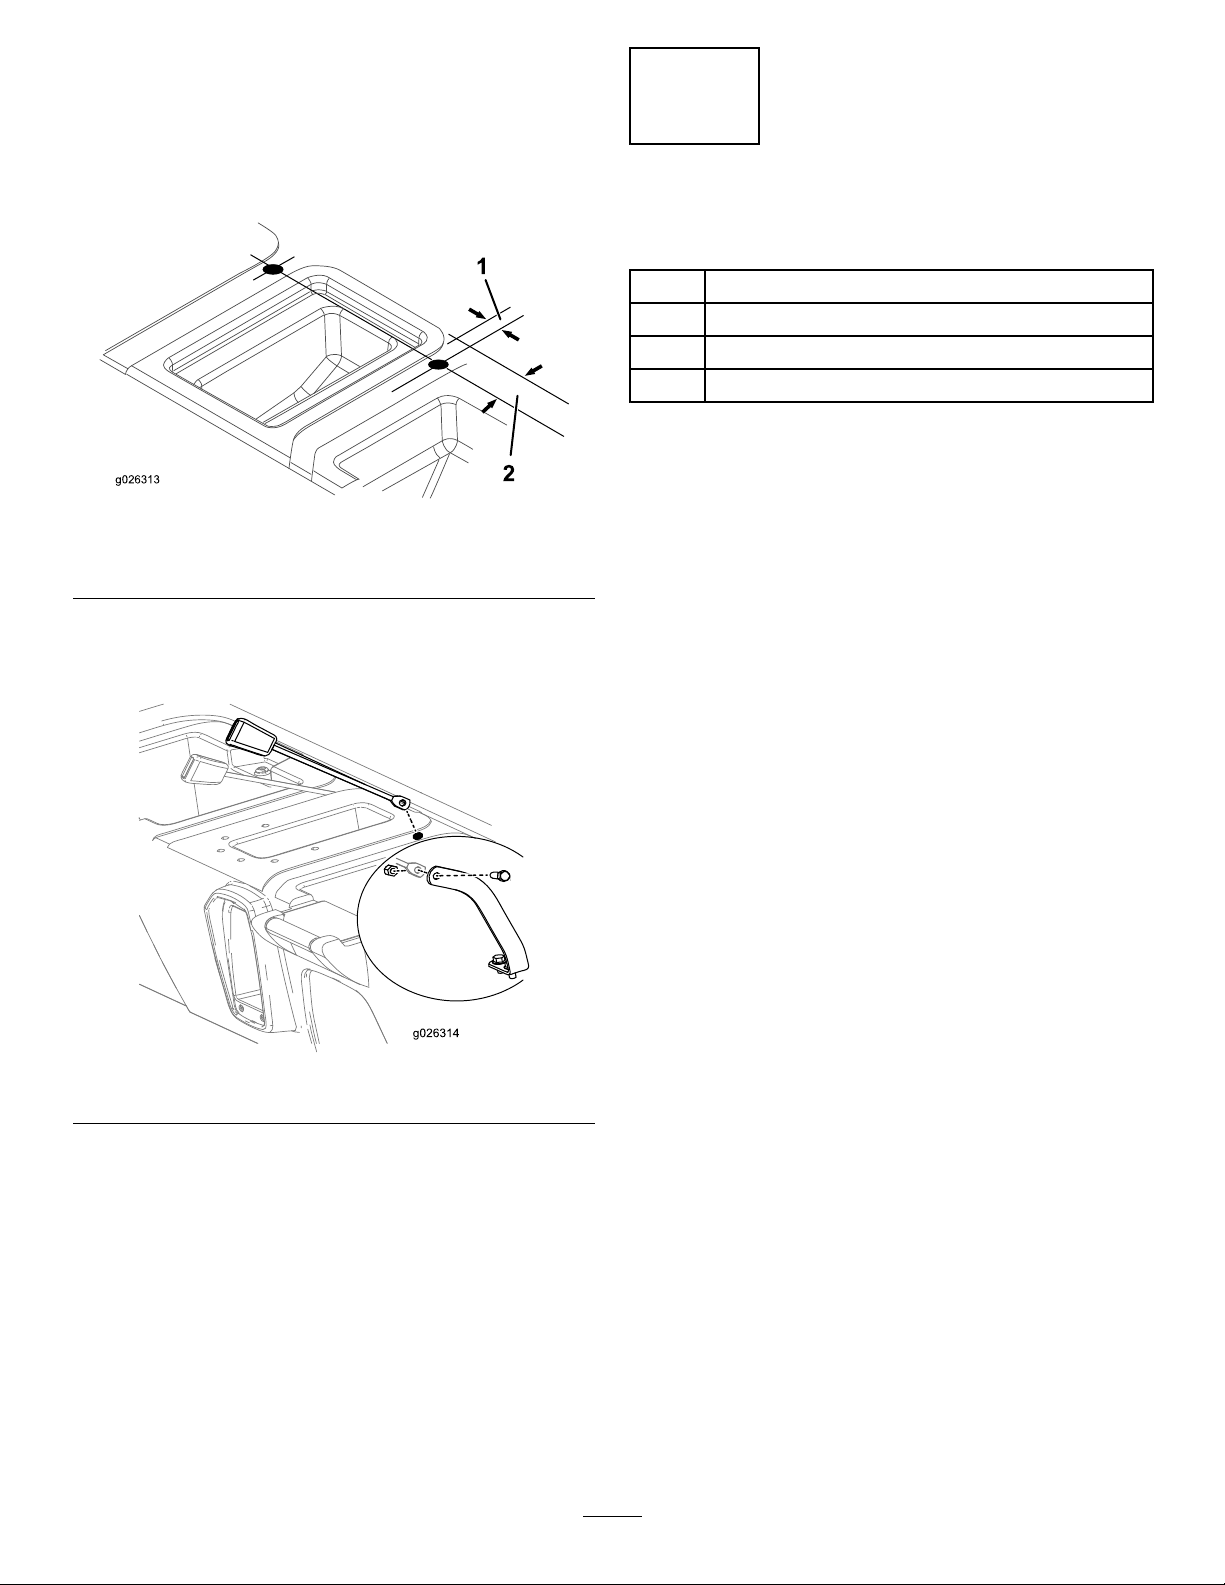
Procedure
UseanapprovedTorospring-compressiontoolto
removeandinstallspringsofthestrutassembly.
ContactyourauthorizedTorodistributor.
Important:For2015andoldermachines,discard
thespringsincludedinthiskitandorder2springs
(ToroPartNo.117-4847)fromyourauthorized
Torodistributor.
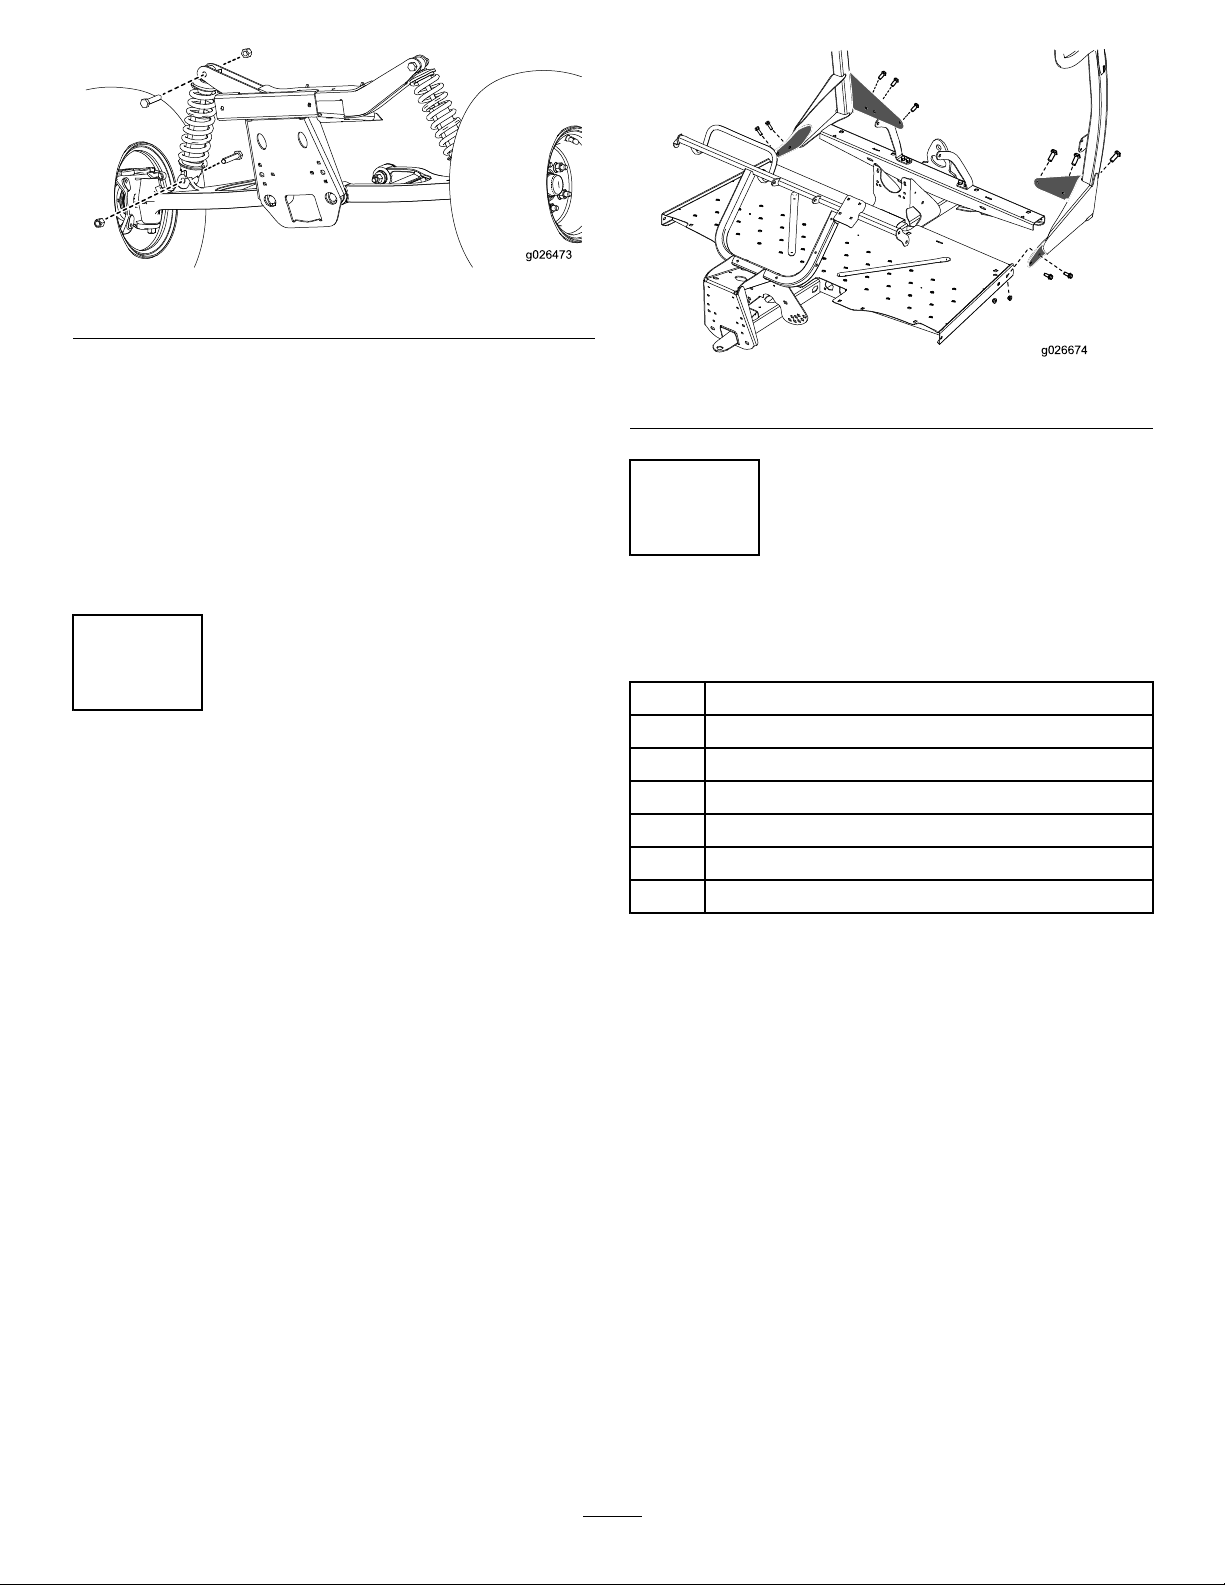
1.Raisethefrontofthemachineofftheground
andsupportitwithjackstands.
2.Removethecurrentshockassembliesasshown
inFigure2.
6