manuals.online logo
Brands
  1. Home
  2. •
  3. Brands
  4. •
  5. Toro
  6. •
  7. Lawn Mower Accessories
  8. •
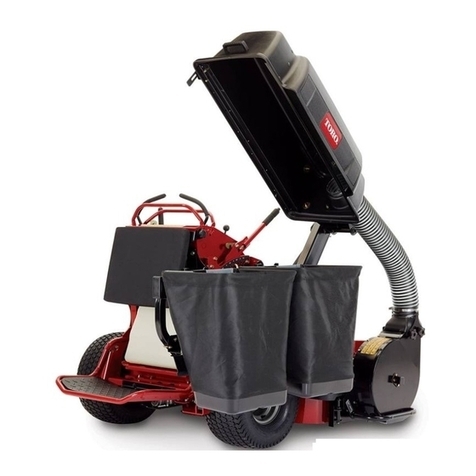
  9. Toro 108-2639 User manual

Toro 108-2639 User manual

This manual suits for next models

1

Other Toro Lawn Mower Accessories manuals

Toro 30669 User manual

Toro

Toro 30669 User manual

Toro 145-3495 User manual

Toro

Toro 145-3495 User manual

Toro 59226 User manual

Toro

Toro 59226 User manual

Toro 03698 User manual

Toro

Toro 03698 User manual

Toro 30653 User manual

Toro

Toro 30653 User manual

Toro 144-0389 User manual

Toro

Toro 144-0389 User manual

Toro 78537 User manual

Toro

Toro 78537 User manual

Toro 78555 User manual

Toro

Toro 78555 User manual

Toro 139-3235 User manual

Toro

Toro 139-3235 User manual

Toro TURBO FORCE User manual

Toro

Toro TURBO FORCE User manual

Toro TimeCutter 139-7478 User manual

Toro

Toro TimeCutter 139-7478 User manual

Toro 145-8319 User manual

Toro

Toro 145-8319 User manual

Toro 23126 User manual

Toro

Toro 23126 User manual

Toro Reelmaster 2000 Series User manual

Toro

Toro Reelmaster 2000 Series User manual

Toro Reelmaster 03657 User manual

Toro

Toro Reelmaster 03657 User manual

Toro 78562 User manual

Toro

Toro 78562 User manual

Toro Groundsmaster e3200 User manual

Toro

Toro Groundsmaster e3200 User manual

Toro 03484 User manual

Toro

Toro 03484 User manual

Toro 79174 User manual

Toro

Toro 79174 User manual

Toro 78490 User manual

Toro

Toro 78490 User manual

Toro 30622 User manual

Toro

Toro 30622 User manual

Toro 78534 User manual

Toro

Toro 78534 User manual

Toro 31232 User manual

Toro

Toro 31232 User manual

Toro 30215 User manual

Toro

Toro 30215 User manual

Popular Lawn Mower Accessories manuals by other brands

Ariens 891008 Operator's manual

Ariens

Ariens 891008 Operator's manual

Rover 108 - 109 owner's manual

Rover

Rover 108 - 109 owner's manual

Snapper 1690047 Operator's manual

Snapper

Snapper 1690047 Operator's manual

RHINO 800 Operator's manual

RHINO

RHINO 800 Operator's manual

Exmark Quest 126-7506 Operator's manual

Exmark

Exmark Quest 126-7506 Operator's manual

Snapper 1685167 installation instructions

Snapper

Snapper 1685167 installation instructions

Cub Cadet 19B70029100 installation manual

Cub Cadet

Cub Cadet 19B70029100 installation manual

Stihl AMK 043.1 instruction manual

Stihl

Stihl AMK 043.1 instruction manual

MTD 753-0873 Service kit manual

MTD

MTD 753-0873 Service kit manual

Bush Hog RG60 Operator's manual

Bush Hog

Bush Hog RG60 Operator's manual

Scag Power Equipment GC-F4 Operator's manual

Scag Power Equipment

Scag Power Equipment GC-F4 Operator's manual

Land Pride RCF2760 Operator's manual

Land Pride

Land Pride RCF2760 Operator's manual

Peco SPARTAN RZ Series Operator's manual

Peco

Peco SPARTAN RZ Series Operator's manual

Peco 28621206 Operator's manual

Peco

Peco 28621206 Operator's manual

Simplicity 367 Operator's manual

Simplicity

Simplicity 367 Operator's manual

Simplicity 211 Operator's manual

Simplicity

Simplicity 211 Operator's manual

Iseki SSM72 Operators & service manual

Iseki

Iseki SSM72 Operators & service manual

Simplicity 1690043 Operator's manual

Simplicity

Simplicity 1690043 Operator's manual

manuals.online logo
manuals.online logoBrands
  • About & Mission
  • Contact us
  • Privacy Policy
  • Terms and Conditions

Copyright 2025 Manuals.Online. All Rights Reserved.

Form No. 3353-411 Rev A
Blower Liner KitFor Z400 and Z500 Twin and Triple BaggersModel No. 108–2639
Model No. 108–2640
Installation Instructions
Installation
Loose PartsUse the chart below to verify that all parts have been shipped.
Step
Description
Qty.
Use
Blower liner
1
Fanged elevator bolt
5
Flat washer
51
Locknut
5
Replacing the Blower Liner
Step
1
Parts needed for this step:
1
Blower liner
5
Fanged elevator bolt
5
Flat washer
5
Locknut
Procedure
1. Diseng ag e the PTO , set the parking brak e , and
c hoc k or bloc k the dri v e wheels .
2. T ur n off the engine , remo v e the k ey , and w ait for all
mo ving par ts to stop before lea ving the operating
position.
3. R emo v e the fiv e bolts that hold the blo w er liner
to the blo w er ( Figure 1 and Figure 2 ). Discard the
hardw are .
4. Pull the liner out of the blo w er ( Figure 1 ).
Note: Do not use y our hands to remo v e the
debris .
5. R emo v e any debris from the blo w er .
6. Slide the new liner around the blo w er impeller .
T he new liner and f anged elev ator bolts
may ha v e shar p edges which could cut y our
hands or cause sli v er s. W ear g lo v es when
handling them.
7. Secure the liner to the rear of the blo w er with 3
fang ed elev ator bolts (5/16 x 1 inc h), flat w ashers
and loc kn uts (5/16 inc h) ( Figure 1 ).
Figure 1
1. Blower 4. Washer, 5/16 inch2. Liner
5. Locknut, 5/16 inch3. Fanged elevator bolt, 5/16x 1 inch
© 2005—The Toro® Company8111 Lyndale Avenue SouthBloomington, MN 55420
Register at www.Toro.com. Original Instructions (EN)Printed in the USA.All Rights Reserved
8. Install 2 fang ed elev ator bolts (5/16 x 1 inc h), flat
w ashers and loc kn uts (5/16 inc h) into the liner and
the blo w er ( Figure 2 ).
Figure 2
1. Blower 3. Nut, 5/16 inch2. Fanged elevator bolt, 5/16x 1 inch
4. Impeller
9. Using a bloc k of w ood, push the liner do wn to w ard
the front of blo w er , until the blo w er liner tightly
confor ms to the inside of the blo w er ( Figure 3 ).
T his will pro vide clearance betw een the impeller
and the liner .
10. W hile holding the liner , tighten the 2 top bolts in
the liner and the blo w er ( Figure 3 ).
11. R otate the blo w er pulley to v erify that the blo w er
fan does not hit the liner ( Figure 3 ). Adjust the
liner if necessar y .
Figure 3
1. Blower 3. Wood block2. Top bolt and nut
2