5.Removethe8boltsontheterminal-boxcover(Figure
4).
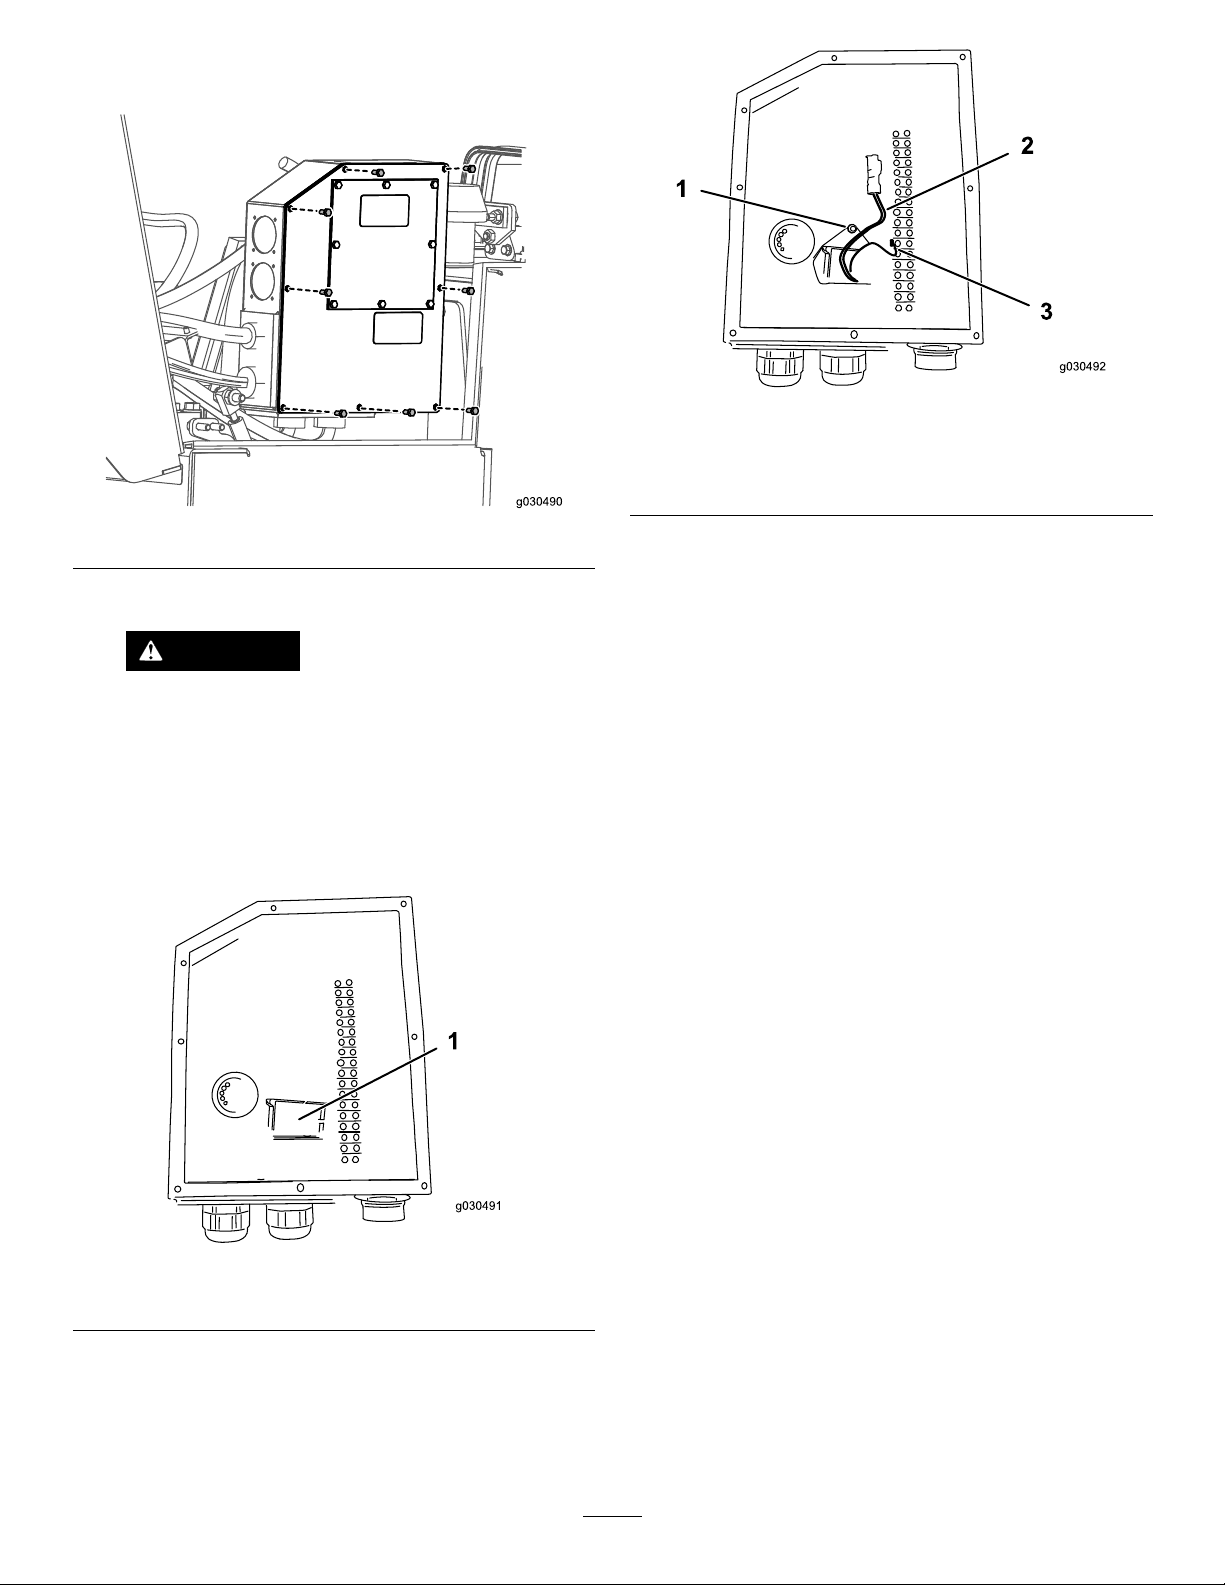
Figure4
6.Removetheexistingtipswitchandbracket.
DANGER
Thetipswitchforthemachinecontains
mercury.Intheeventyouneedtoreplace
thispart,contactyourhazardouswaste
facilityforproperdisposaloftheoldpart.To
ndyourlocalhazardouswastefacilitysee
http://earth911.comontheinternet.
Note:Donotdiscardthehardware.
Figure5
1.Existingtipswitch
7.Connectthegreenandblackwiresfromthenewswitch
tothewhiteconnector(Figure6).
Figure6
1.Bolt,washer,andstar
washer
3.Redwire
2.Greenandblackwires
8.Connecttheredwiretoposition15ontheterminal
strip(Figure6).
9.Connectthebatteryandenginewiringharness(Figure
3).
Important:Connectthepositiveterminalrst.
10.Securetheterminalboxtothepanel(Figure2).
11.Startthemachine.
12.SlowlytilttheswitchbyhanduntiltheTILTmessage
displaysontheLEDdisplay.
Note:Theengineshouldstopin3secondsorless
whentheTILTmessagedisplays.
Note:Iftheenginedoesnotstop,checkthewiring
schematictoensurethatthewiringiscorrect.
13.Mountthetipswitchtotheterminalboxusingthe
hardwareremovedinstep6andthewasherandstar
washerincludedinthiskit(Figure6).
14.Securetheterminalboxcovertotheterminalbox
(Figure4).
15.Installthebatterybracket(Figure1).
2


