LooseParts
Usethechartbelowtoverifythatallpartshavebeenshipped.
ProcedureDescriptionQty.Use
1Nopartsrequired–Preparethemachine.
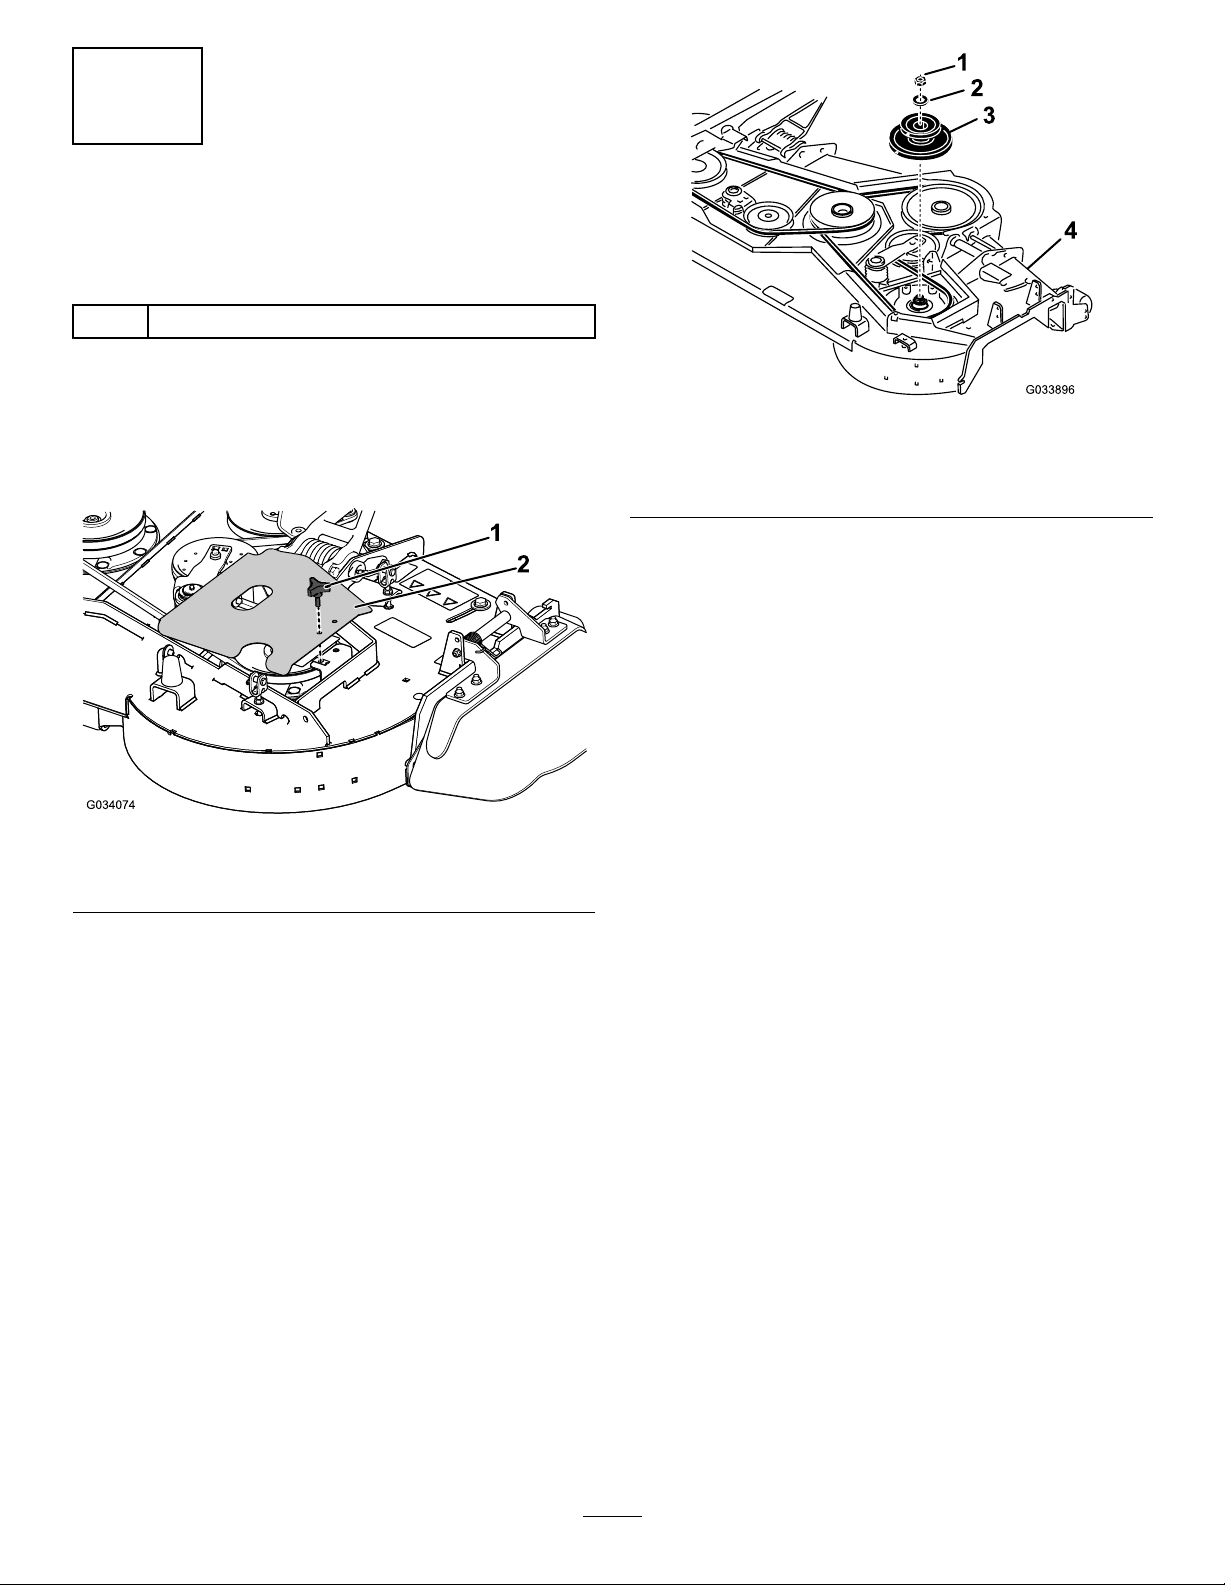
2Doublepulleyassembly1Installthepulleyassembly.
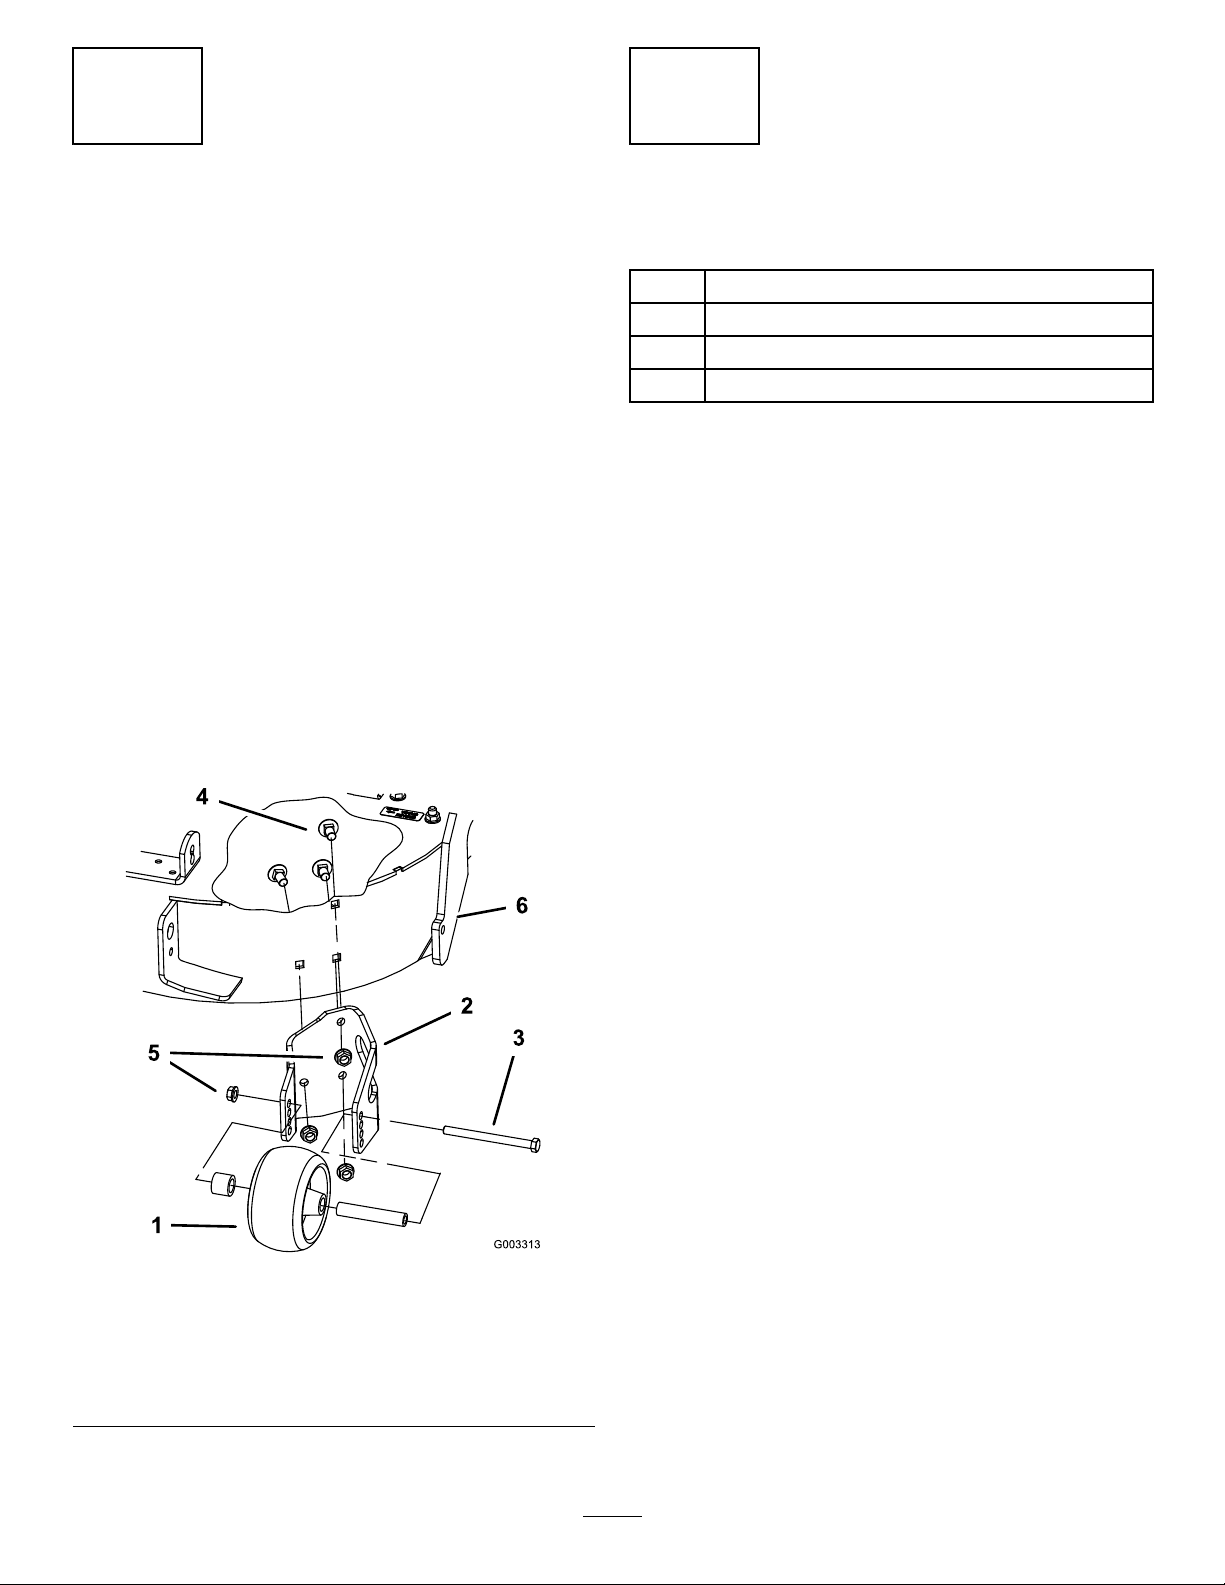
3Nopartsrequired–Removetheexistinganti-scalproller
andbracket(for60-inchdecksonly).
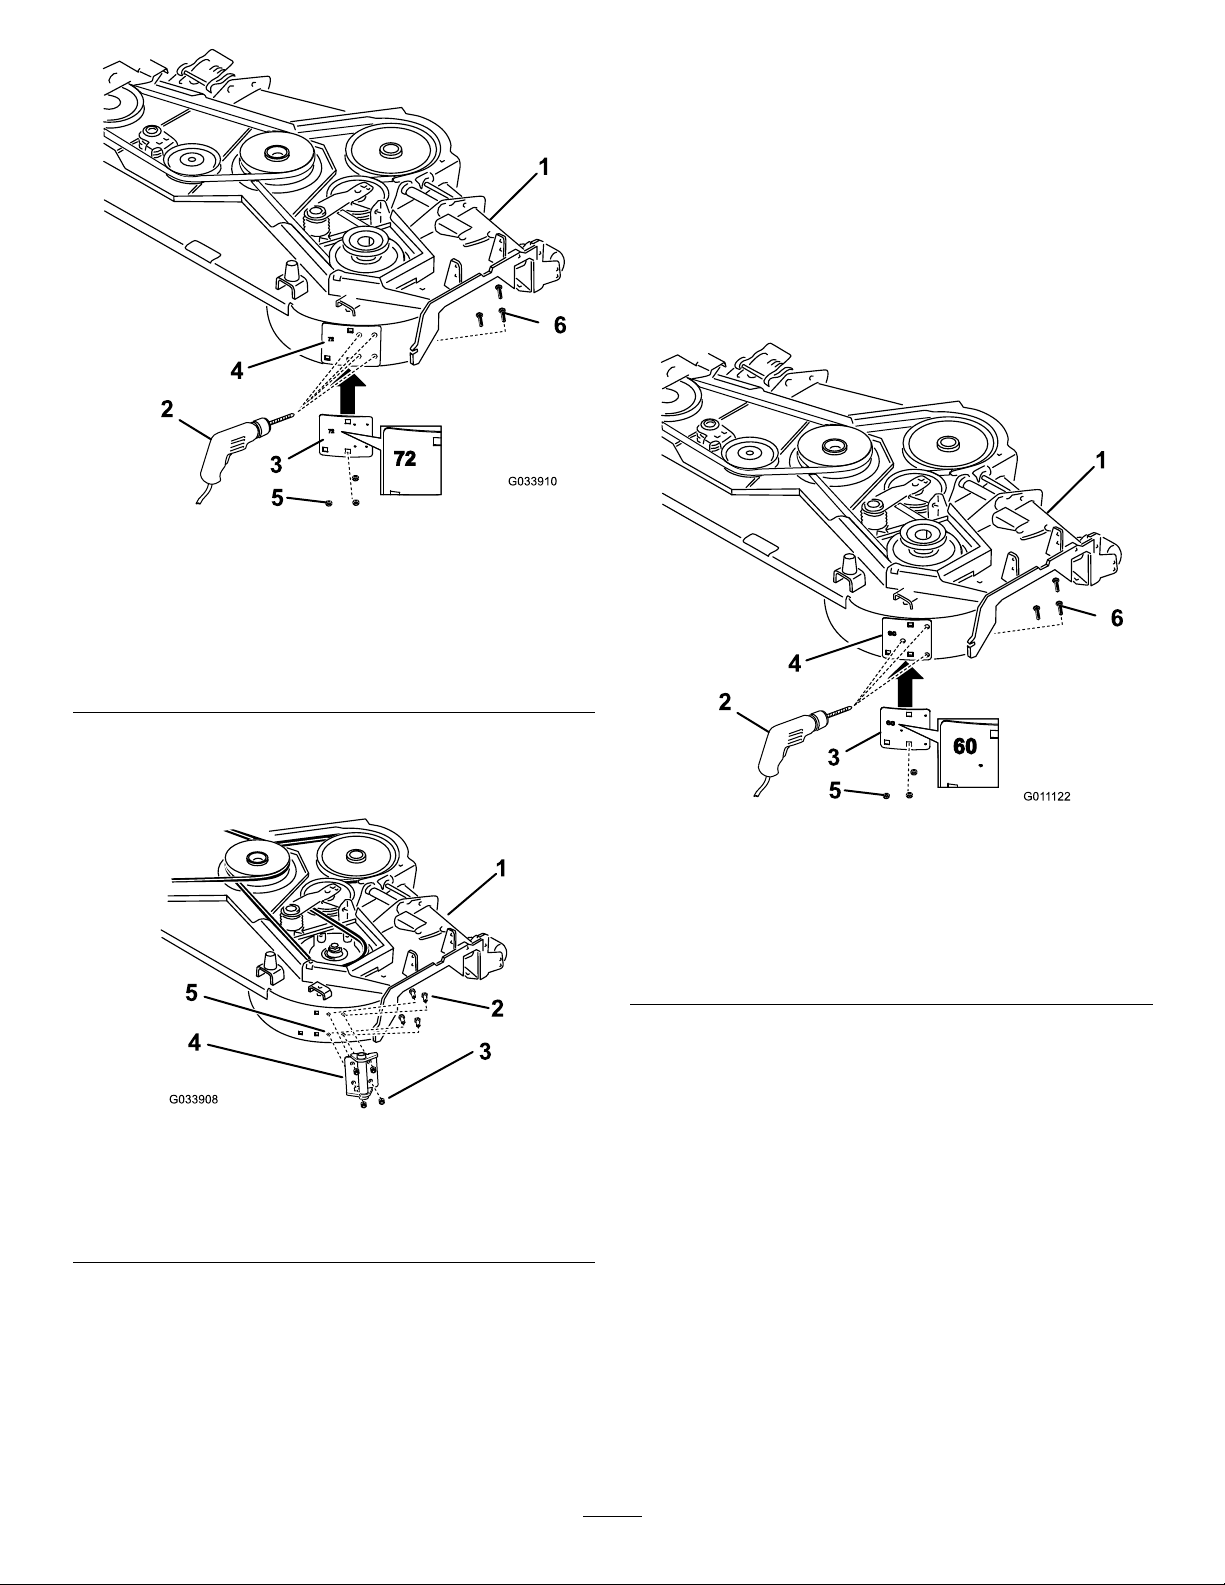
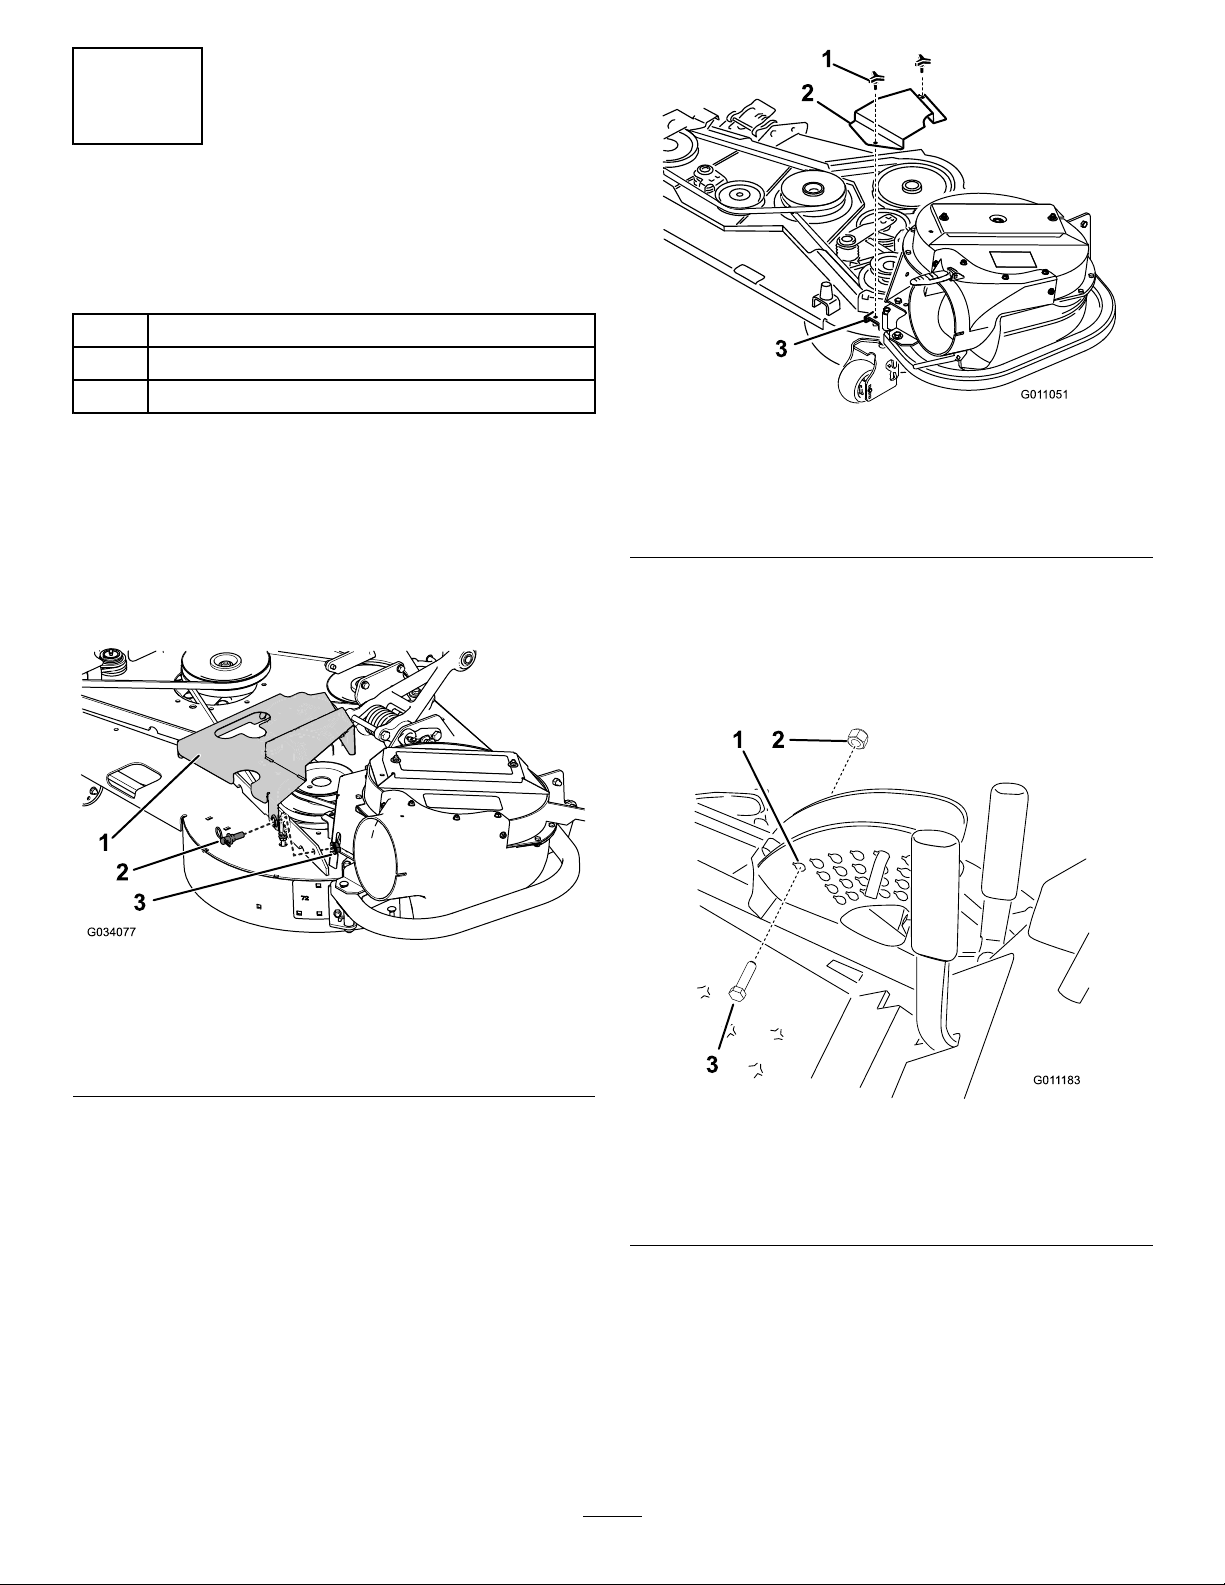
Blowerhinge1
Metaltemplate1
Bolt(3/8x1inch)3or4
4Locknut(3/8inch)3or4
Installtheblowerhinge.
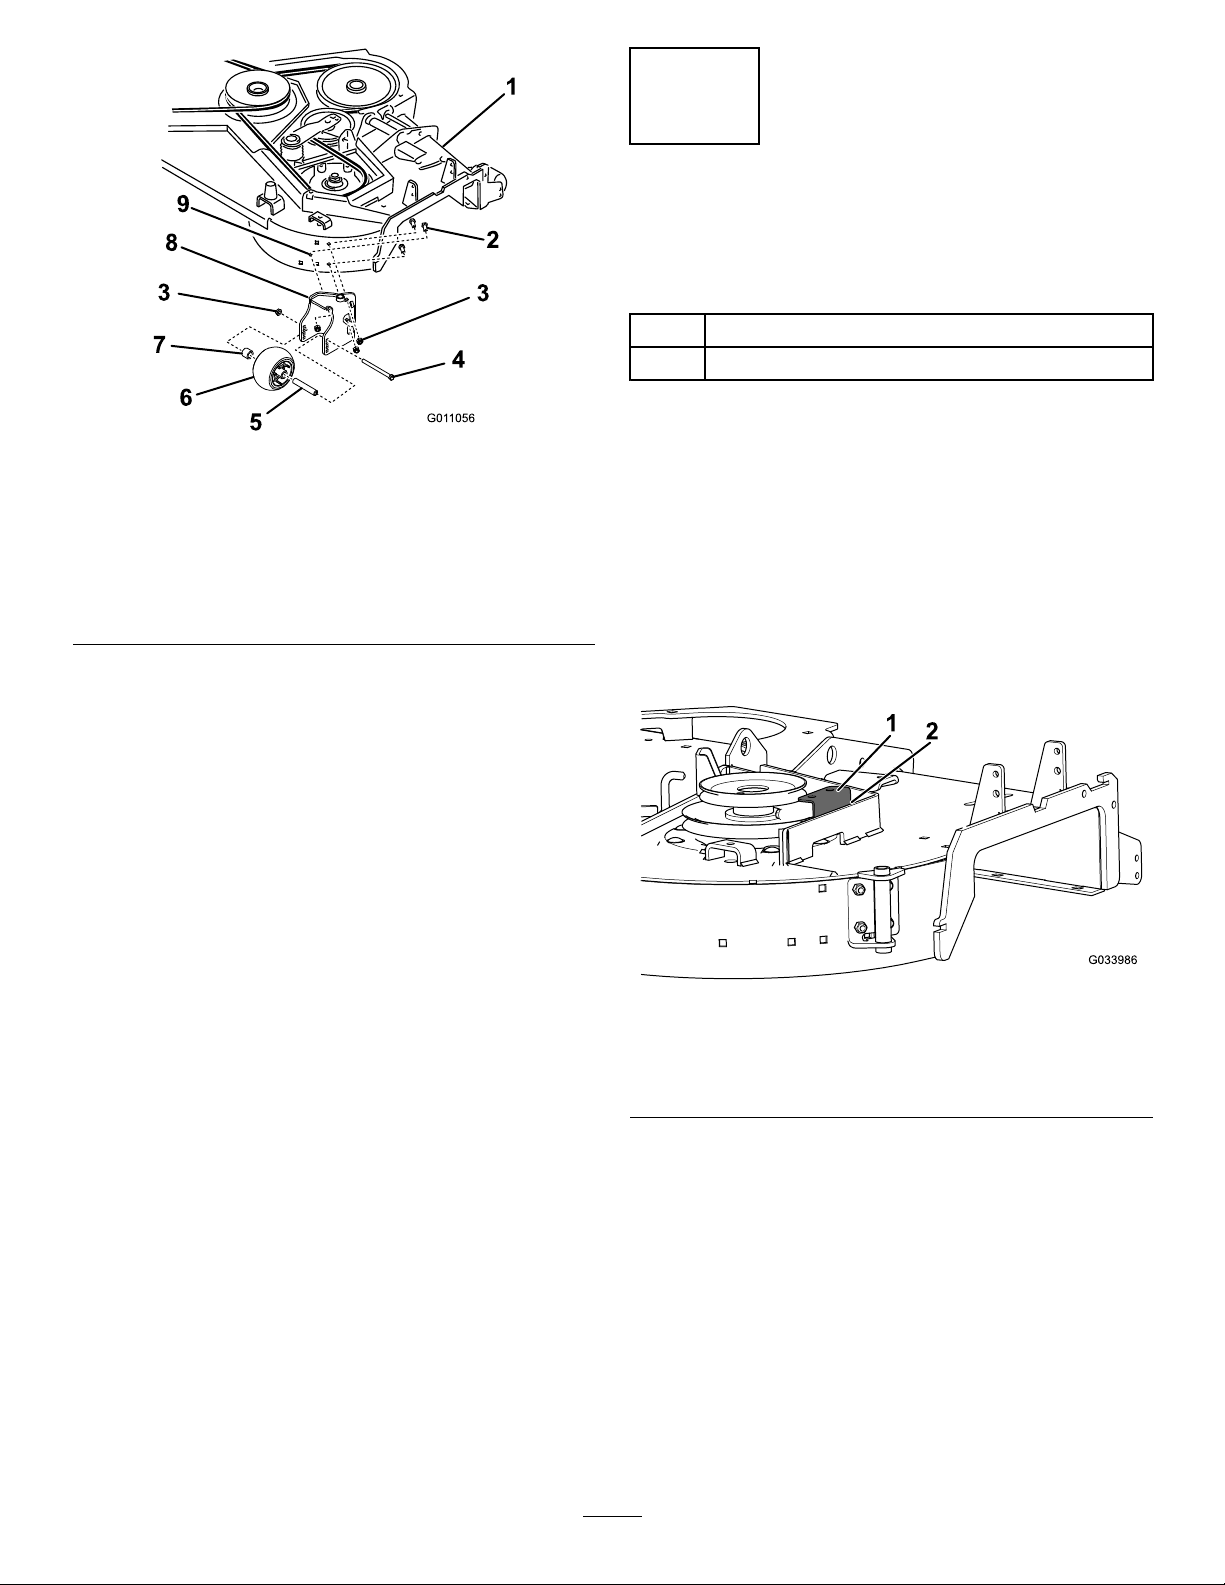
Blowerbelt1
5Spring1
Routetheblowerbeltintotheblower
assembly.
6Blowerassembly1Installtheblowerassembly.
Beltcover1
Bolt(1/2x2-1/2inches)1
7Nut(1/2inch)1
Installthebeltcoverandbolt.
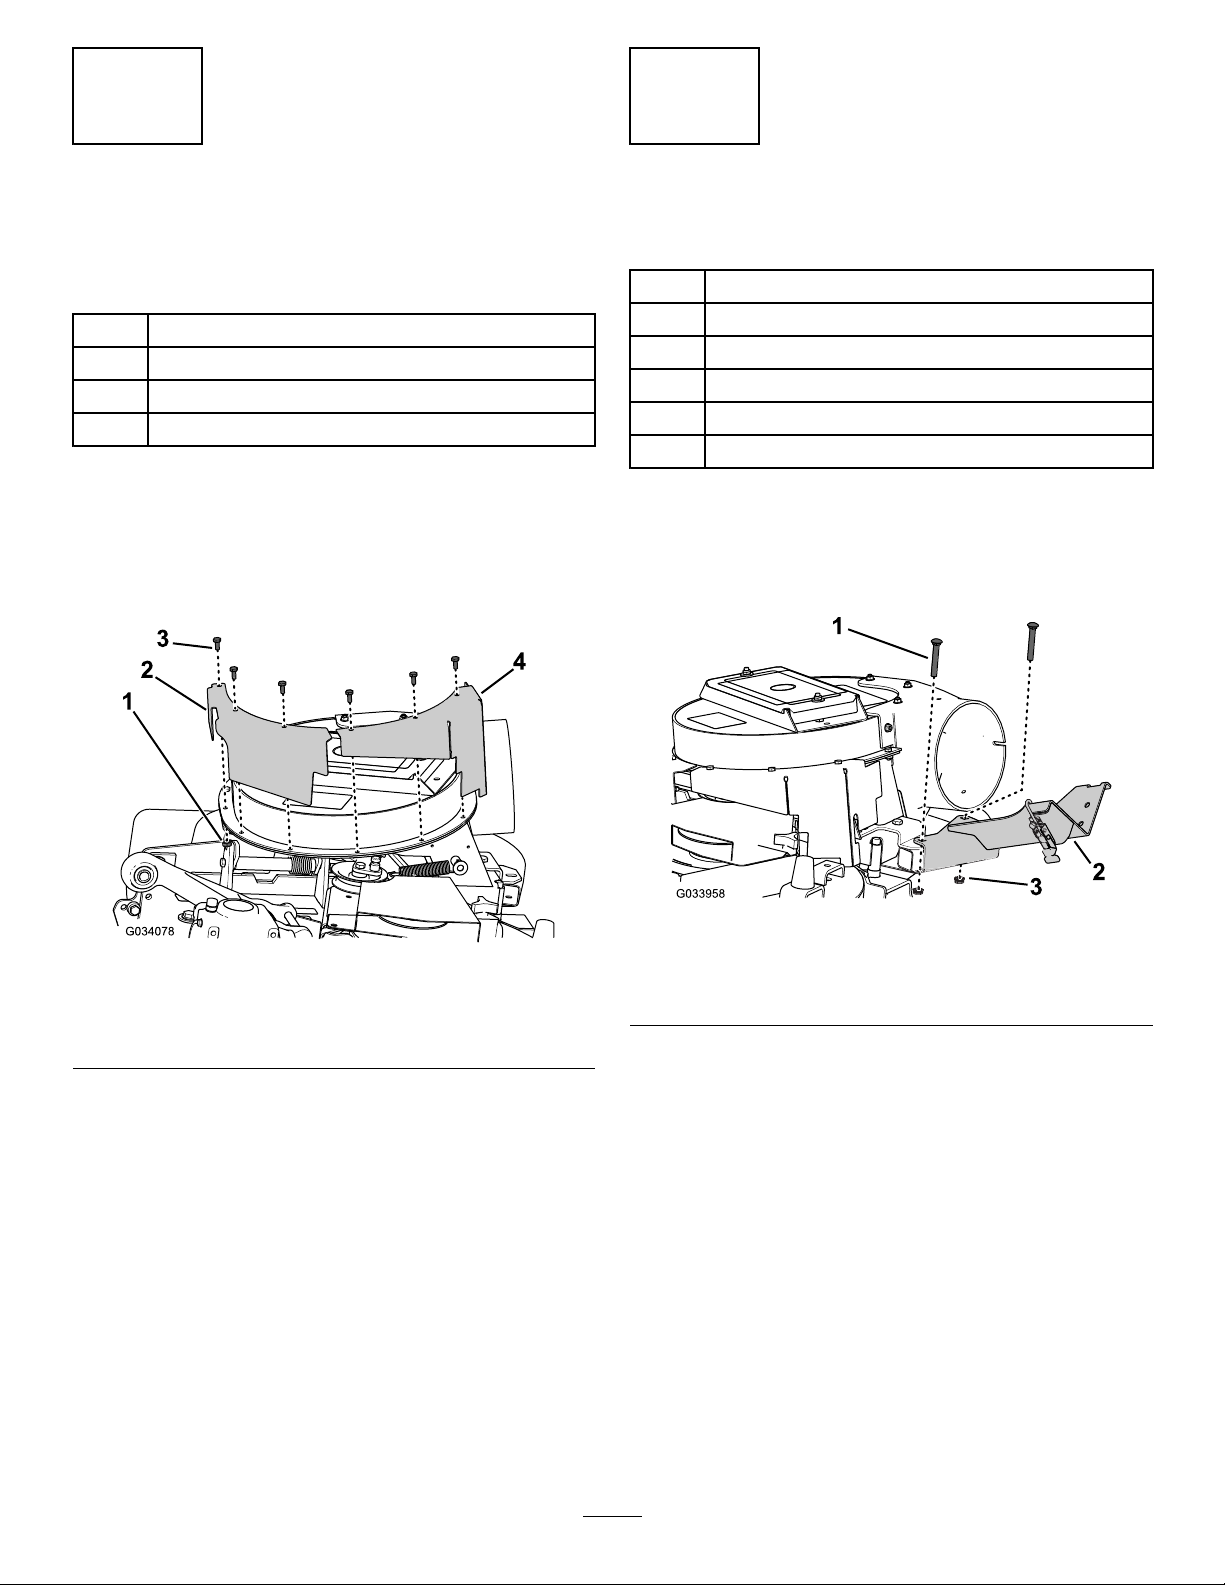
Frontguard1
Backguard1
Bolt(1/4x5/8inch)6
8Nut(1/4inch)1
Installtheblowerguards.
Latchbracketassembly1
Bolt(3/8x2-1/2inches)2
Nut(3/8inch)2
Latchbracketstrap1
Screw(#10x1/2inch)2
9
Nut(#10)2
Installthetubelatch.
Beltcoverbracket1
Carriagebolt(1/4x3/4inch)2
10Locknut(1/4inch)2
Installthenewbeltcoverbracketupon
removalofthekit(formodel31212
only).
11Throttlestop1Installthethrottlestop.
Note:Determinetheleftandrightsidesofthemachinefromthenormaloperatingposition.
1
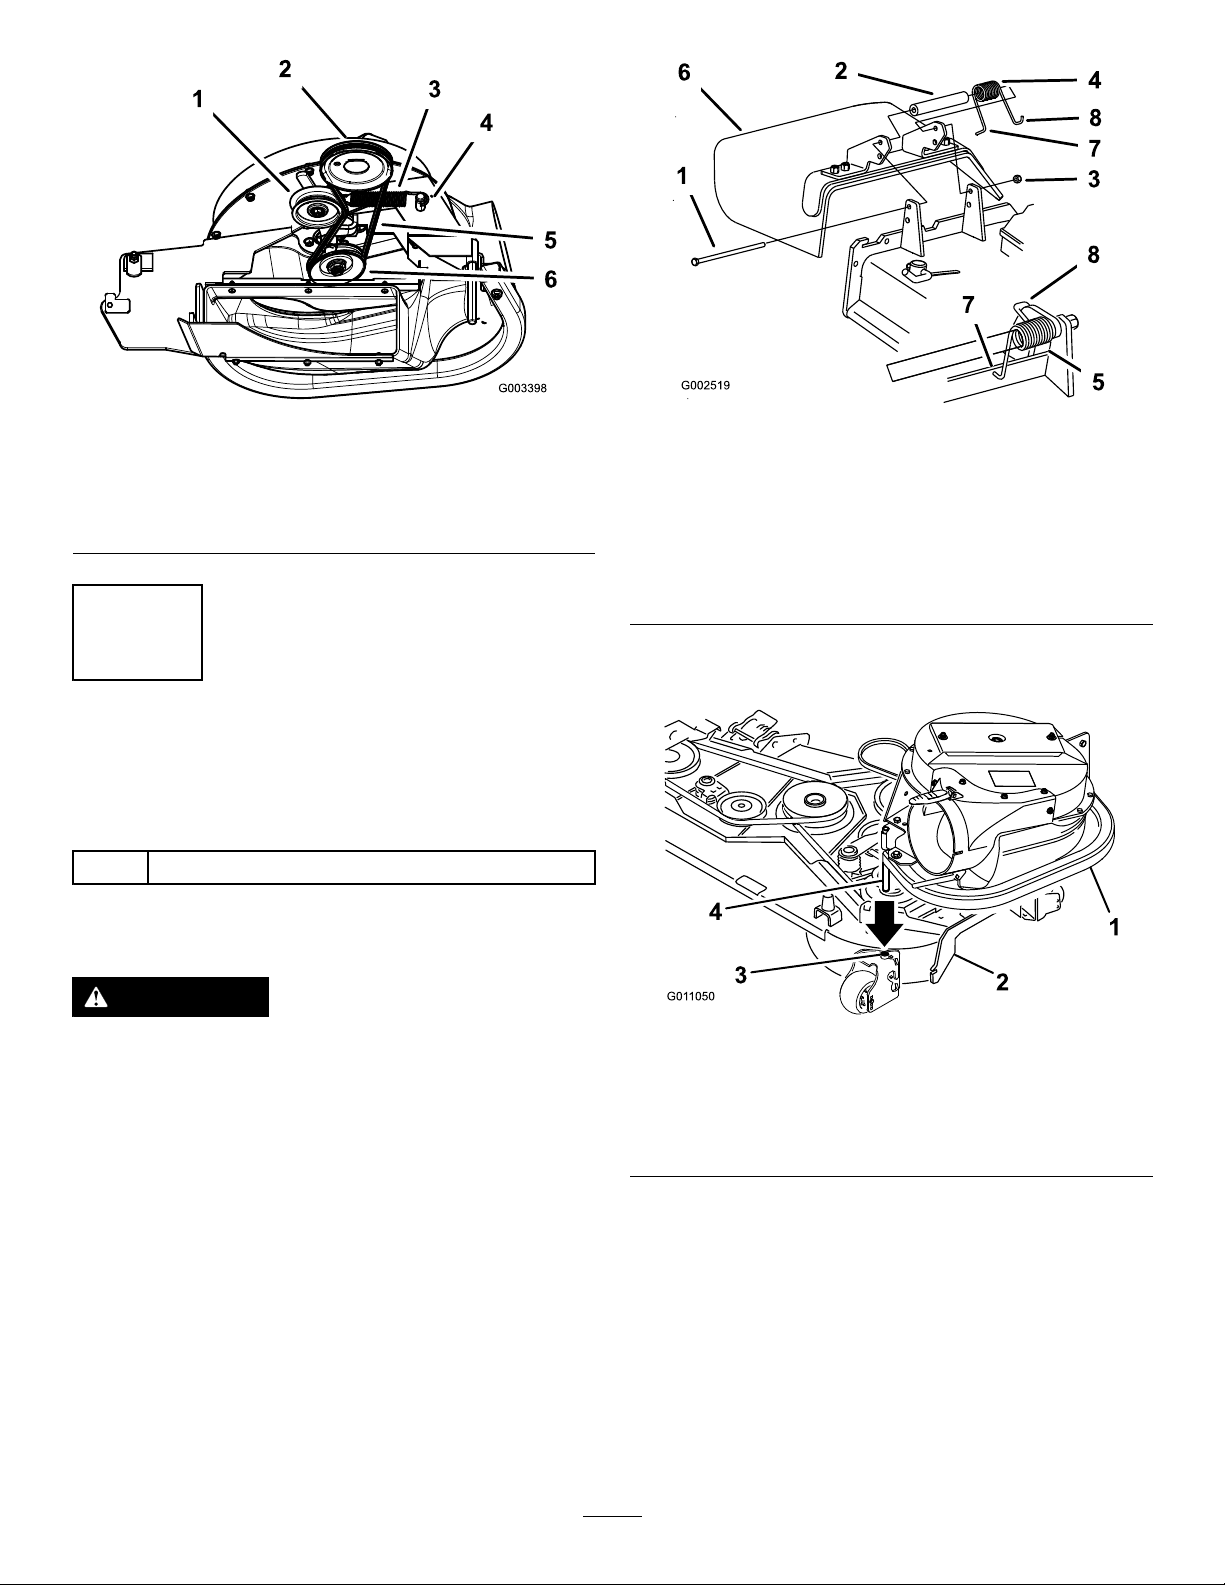
PreparingtheMachine
NoPartsRequired
Procedure
Performthefollowingproceduretopreparethemower
forattachingtheblowerandnishingkit.
1.Parkthemachineonalevelsurface,disengage
thePTO,movethemotion-controlleverstothe
NEUTRAL-LOCKposition,andengagetheparking
brake.
2.TurnthekeyswitchtotheOFFposition,remove
thekey,andwaitforallmovementtostopbefore
leavingtheoperatingposition.
3.Repairallbentordamagedareasonthemower
deckandreplaceanymissingparts.
4.Cleananydebrisoffthedeckorrearpartofthe
mowertoeaseinstallation.
2