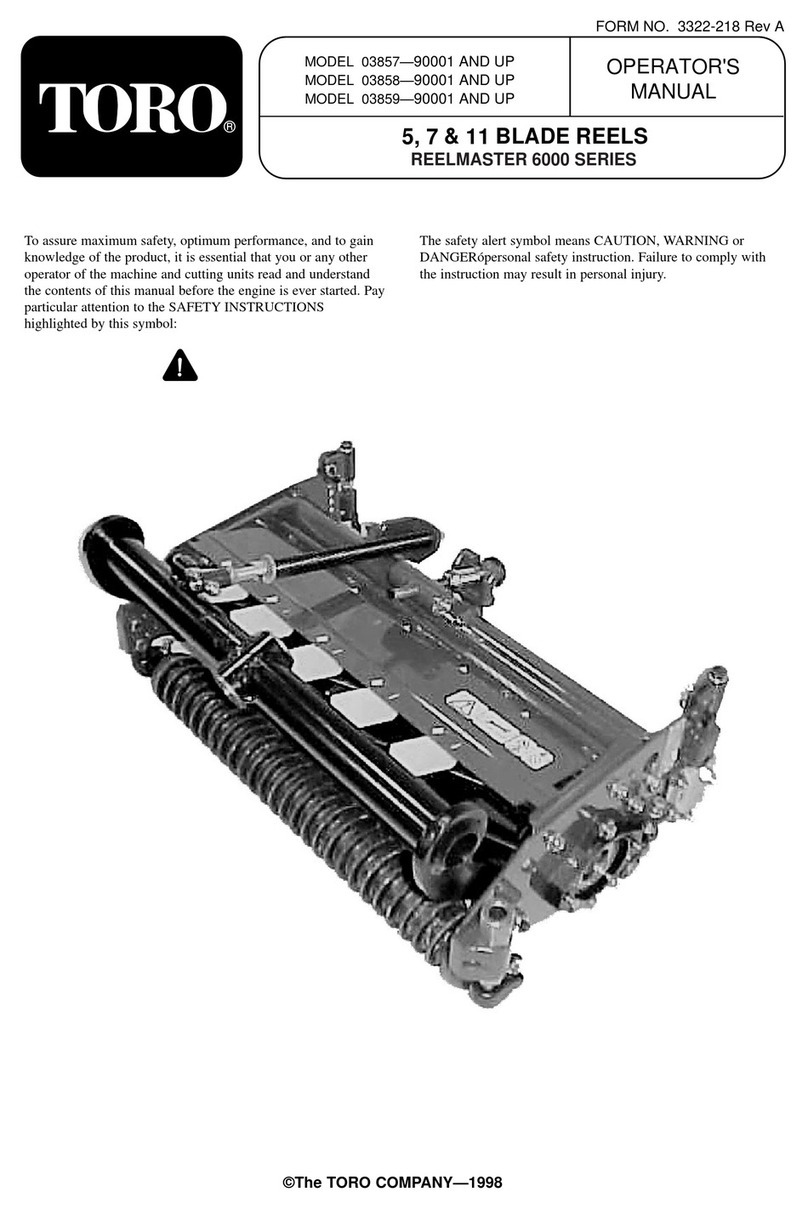
Toro 03240 User manual

FormNo.3422-142RevB
UniversalGroomerDriveKit
Reelmaster®3100-D27-inchEdgeSeriesCuttingUnits
ModelNo.03240—SerialNo.318000001andUp
InstallationInstructions
ThisproductcomplieswithallrelevantEuropeandirectives.Fordetails,pleaseseetheDeclarationof
Incorporation(DOI)atthebackofthispublication.
Introduction
Readthisinformationcarefullytolearnhowtooperate
andmaintainyourproductproperlyandtoavoid
injuryandproductdamage.Youareresponsiblefor
operatingtheproductproperlyandsafely.
YoumaycontactTorodirectlyatwww.Toro.comfor
productandaccessoryinformation,helpndinga
dealer,ortoregisteryourproduct.
Wheneveryouneedservice,genuineT oroparts,or
additionalinformation,contactanAuthorizedService
DealerorToroCustomerServiceandhavethemodel
andserialnumbersofyourproductready.Figure1
identiesthelocationofthemodelandserialnumbers
ontheproduct.Writethenumbersinthespace
provided.
g241111
Figure1
1.Modelandserialnumberlocation
ModelNo.
SerialNo.
©2019—TheToro®Company
8111LyndaleAvenueSouth
Bloomington,MN55420
Registeratwww.T oro.com.OriginalInstructions(EN)
PrintedintheUSA
AllRightsReserved*3422-142*B

LooseParts
Usethechartbelowtoverifythatallpartshavebeenshipped.
ProcedureDescriptionQty.Use
1Nopartsrequired–Preparethemachine.
2Nopartsrequired–Gatherthetoolsrequiredforsetup.
3Nopartsrequired–Determinewhichsidethegroomer
shouldbeinstalledon.
Extendedsplinedinsert(right-hand
threads)2
Extendedsplinedinsert(left-hand
threads)1
4
Flangelocknut(3/8inch)6
Preparethecuttingunit.
Weightbracket3
Hex-socket,button-headbolt(3/8x3/4
inch)6
Groomerdrivebox(leftdrive)2
5
Groomerdrivebox(rightdrive)1
Installtheweightbracketandgroomer
drivebox.
Hex-socketbolt(3/8x3/4inch)6
Pivothub3
O-ring3
Idlerassembly(left)1
Idlerassembly(right)2
6
Jamlocknut(3/8inch)6
Installtheidlerassembly.
Adjusterpin6
Cotterpin6
LeftHOCbracketassembly3
RightHOCbracketassembly3
7
Flangelocknut(3/8with5/8inchhex)6
InstalltheHOCbracketassembliesand
thefrontroller.
8Cap3
Installthegroomerdrivecap(For
universalgroomerassemblieswithno
rearrollerbrushkitinstalledonly).
Bolt(1/4x1-1/2inches)12
Jamnut12
9Shaftclamp12
Installthegroomerassembly(ordered
separately)andoptionalbroomerkit.
Carriagebolt(5/16x3-1/2inches)6
Spacer6
Flangenut(5/16inch)6
10Weight18
Installtheweights(groomeronly,with
orwithoutfrontgrassbasketsandrear
cuttingunitwithoutreargrassbasket).
Carriagebolt(5/16x3-1/2inches)6
Spacer6
Flangenut(5/16inch)6
11Weight12
Installtheweights(withgroomerand
rearrollerbrush).
2

ProcedureDescriptionQty.Use
Carriagebolt(5/16x2-1/4inches),Part
No.3230-7—soldseparately1
Carriagebolt(5/16x3-1/4inches),Part
No.3230-13—soldseparately1
Carriagebolt(5/16x4-1/2inches),Part
No.3230-30—soldseparately1
Spacer2
Flangenut(5/16inch)1
Locknut(5/16inch),PartNo.
3296-47—soldseparately2
Weight2
12
Smallweight(PartNo.
132-0734-03—soldseparately)6
Installtheweights(rearcuttingunitwith
groomeronly,withreargrassbasket).
1
PreparingtheMachine
NoPartsRequired
Procedure
1.Parkthemachineonalevelsurface.
2.Engagetheparkingbrake.
3.Shutofftheengineandremovethekey.
2
GatheringtheTools
RequiredforSetup
NoPartsRequired
Procedure
•T orquewrench—5.2to6.8N∙m(46to60in-lb)
•T orquewrench—115to129N∙m(85to95ft-lb)
•T orquewrench—135to150N∙m(100to110ft-lb)
•Reeldriveshafttool,PartNo.TOR4074(usedonly
on7-inchreels)
3
DeterminingtheSetup
NoPartsRequired
Procedure
Usethefollowingdiagramtodeterminethepositionof
thegroomerkitsandreelmotors.
g034633
Figure2
1.Cuttingunit14.Left-handgroomerkit
2.Cuttingunit25.Reelmotor
3.Cuttingunit36.Right-handgroomerkit
Note:Ifagroomerkitandarearroller-brushkitare
goingtobeinstalledonthecuttingunit,installthe
groomerkitrst.
3

4
PreparingtheCuttingUnit
Partsneededforthisprocedure:
2Extendedsplinedinsert(right-handthreads)
1Extendedsplinedinsert(left-handthreads)
6Flangelocknut(3/8inch)
Procedure
Note:Youmaydiscardallremovedpartsunless
otherwisestated.
1.Removeallcuttingunitsfromthetractionunit;
refertoyourOperator’sManual.
2.Removethecarriageboltsandlocknuts
securingtheheight-of-cut(HOC)bracketstothe
cutting-unitsideplates(Figure3).
Note:Savethecarriageboltstoinstallthenew
height-of-cutbrackets.
g192293
Figure3
1.Screw4.Carriagebolts
2.Locknut5.Frontroller
3.Height-of-cutbracket6.Threadedinserts
3.Loosenthescrewssecuringtheheight-of-cut
bracketstothefront-rollershaft(Figure3).
4.Removetheexistingheight-of-cutbracketsand
thefrontrollerfromthecutting-unitsideplates
(Figure3).
Note:Savethefrontrollerforlaterinstallation.
5.Restrainthereelforremoval;refertoRestraining
theReelforRemovingThreadedInserts(page
18).
6.Removeanddiscardtheexistingsplinedinsert
fromeachendofthereelshaftusingthereel
driveshafttool(PartNo.TOR4074forthe7-inch
reel).RefertoFigure3.
Important:Thesplinedinsertontheleft
sideofthecuttingunithasleft-handthreads.
Thesplinedinsertontherightsideofthe
cuttingunithasright-handthreads.
Important:Cleanthethreadsintheendof
thereelshaftofanydebrisorgreasebefore
installingthekitsplinedinsertandgroomer
box.
7.Restrainthereelforinstallation;referto
RestrainingtheReelInstallingThreadedInserts
(page19).
8.Applymedium-strengththread-locking
compound(suchasBlueLoctite®243)to
thethreadsofthenewlongersplinedinsert
(Figure4),andsecureittothereelshaftonthe
reel-motorsideonly.T orquetheinsertto115to
128N∙m(85to95ft-lb).
Important:Allowthethread-locking
compoundtocurefor15minutesbefore
continuingtheprocedure.
g221766
Figure4
Rightsideofcuttingunitshown
1.Extendedsplinedinsert(forreel-motorside)115to128
N∙m(85to95ft-lb)
2.Medium-strengththread-lockingcompound
4

9.Removethe2ange-headboltsandwashers
securingthesupportrod,andremovethe
supportrod(Figure5).
Note:Retaintheange-headbolts.
g192295
Figure5
1.Flange-headbolts(2)3.Washer(2)
2.Supportrod
10.Installthe2existingange-headboltsfromthe
insideofthecuttingunitandsecurethemwith
the3/8inchangelocknutsprovided.
g246824
Figure6
1.Flangelocknut(3/8inch)2.Flange-headbolt
5
InstallingtheWeight
BracketandtheGroomer
DriveBox
Partsneededforthisprocedure:
3Weightbracket
6Hex-socket,button-headbolt(3/8x3/4inch)
2Groomerdrivebox(leftdrive)
1Groomerdrivebox(rightdrive)
Procedure
1.Identifytheleftdrivegroomerdriveboxesand
theright-drivegroomerdriveboxes;referto
Figure7.
g037105
Figure7
1.Right(yellow)adapter3.Groomerdrivebox—right
drive
2.Left(green)adapter4.Groomerdrivebox—left
drive
2.Securetheweightbrackettothereelusing2
hex-socket,button-headbolts(3/8x3/4inch)
asshowninFigure8.
Note:Attachtheweightbrackettothesideof
thereelwhereyouintendtomountthegroomer
drivebox.
5

g228117
Figure8
1.Internalreel-shaft4.Groomerdrivebox(left
driveshown)
2.Weightbracket5.Hex-head(T orqueto135
to150N∙m(100to110
ft-lb))
3.Hex-socket,button-head
bolt—3/8x3/4inch(2)
3.Applymedium-strengththread-locking
compound(suchasBlueLoctite®243)tothe
threadsoftheinternalreel-shaft(Figure8).
4.Attachthegroomerdriveboxtothereelshaft
(Figure8)usingthehex-headonthegroomer
drivebox.
Important:Thereelthreadsontheleftside
ofthecuttingunitareleft-handed,andthe
reelthreadsontherightsideofthecutting
unitareright-handed.
5.Restrainthereelforinstallation;referto
RestrainingtheReelInstallingThreadedInserts
(page19).
6.Torquethehex-headto135to150N∙m(100to
110ft-lb).
Important:Youmustusea6-pointsocket
withheavywall.
Important:Donotuseanimpactwrenchfor
thisstep.
Important:Allowthethread-locking
compoundtocurefor15minutesbefore
continuingtheprocedure.
6
InstallingtheIdler
Assembly
Partsneededforthisprocedure:
6Hex-socketbolt(3/8x3/4inch)
3Pivothub
3O-ring
1Idlerassembly(left)
2Idlerassembly(right)
6Jamlocknut(3/8inch)
Procedure
1.Positiontheidlerassemblyontheoppositeside
ofthereelfromthegroomerdrivebox.
2.InstalltheO-ringontothepivot-hubassembly.
3.Applyanti-seizecompoundontheoutside
diameterofthepivot-hubassembly(Figure9).
g192297
Figure9
1.Jamlocknut—3/8inch(2)4.O-ring
2.Hex-socketbolt(3/8x3/4
inch)
5.Idlerassembly(rightside
shown)
3.Pivothub6.Applyanti-seize
compoundontheoutside
diameterofthehub.
4.Securethepivothubovertheidlerassemblyto
thereelusing2hex-socketbolts(3/8x3/4inch)
(Figure9).
5.Looselyinstallthe2locknutsonthepivothub
(Figure9).
6

7
InstallingtheHOCBracket
AssembliesandtheFront
Roller
Partsneededforthisprocedure:
6Adjusterpin
6Cotterpin
3LeftHOCbracketassembly
3RightHOCbracketassembly
6Flangelocknut(3/8with5/8inchhex)
Procedure
1.LooselyinstalltheleftandrightHOCbracket
assembliesandthefrontrollerassemblytothe
cutting-unitsideplatesusingthepreviously
removedcarriagebolts(Figure10).
g246878
Figure10
1.RightHOCbracket
assembly
4.Washers
2.Frontrollerassembly5.Carriageboltandange
locknut(3/8with5/8inch
hex)
3.LeftHOCbracket
assembly
2.Ontheleftside,slidetheadjuster-armrodofthe
HOCbracketintothegaponthegroomerdrive
boxandsecureitwithanadjusterpinandcotter
pinasshowninFigure11.
g232400
Figure11
1.Adjusterpin3.Cotterpin
2.Adjuster-armrod4.Groomerdrivebox
3.Ontheidlerassemblyside,alignthe
adjuster-armrodoftheHOCbracketwiththe
adjustercollarontheidlerassemblyandsecure
itwithanadjusterpinandcotterpin(Figure12).
g232388
Figure12
1.Adjusterpin4.Cotterpin
2.Adjuster-armrod5.Idlerassembly
3.Adjustercollar
4.Tightenthecarriageboltsandlocknutssecuring
theHOCbracketassembliestothesideplates
(Figure13).
7

g192299
Figure13
1.Adjustingbolt4.Flangenut
2.Locknut5.Capscrew
3.Carriageboltandange
locknut(3/8with5/8inch
hex)
5.TightenthelocknutontheHOCadjusterbolt,
thenbackoffthelocknut1/2turn(Figure13).
6.CenterthefrontrollerbetweentheHOCbracket
assembliesandlockitinplacewiththecap
screwsandangenuts(Figure13).
8
InstallingtheGroomer
DriveCap
Partsneededforthisprocedure:
3Cap
Procedure
OnlyforUniversalGroomerassemblieswithno
rearrollerbrushkitinstalled:
1.Applymedium-strengthcylindricalbonding
retainingcompound(suchasGreenLoctite
609®)aroundthesnapringgrooveandthe
outerdiametersurface(Figure14).
2.InstallthecapasshowninFigure14.
g242099
Figure14
1.Cap2.Applymedium-strength
bondingcompound
8

9
InstallingtheGroomer
AssemblyandOptional
BroomerKit
GroomerandBroomerKitsCome
Separately
Partsneededforthisprocedure:
12Bolt(1/4x1-1/2inches)
12Jamnut
12Shaftclamp
InstallingtheGroomerKit
OrderedSeparately
ModelNumberGroomer
0324127-inchGroomerBladeCartridgeKit
1.Obtainagroomerbladecartridgekitorabrush
kitappropriateforyourneedsandcuttingunit;
refertothetableabove.
2.Lineupthegroomerassemblywiththe
drive-stubshaftsofthegroomerdriveboxand
idlerassembly(Figure15).
g240752
Figure15
1.Drive-stubshaft4.Shaftclamp(4)
2.Groomerassembly5.Bolt(4)(Torqueto5-7N∙m
(46-60in-lb))
3.Jamnut(4)
3.Securethegroomertothemachineasshownin
Figure15using4bolts(1/4x1-1/2inches),4
jamnuts,and4shaftclamps.
4.Torquetheboltsto5to7N∙m(46to60in-lb).
InstallingtheBroomerKit
PartNumberBroomerKit
133-822227-inchBroomerKit
1.Obtaintheoptionalbroomerkitforgroomer
bladecartridgesappropriateforyourneedsand
cuttingunit;refertothetableabove.
2.Loosenthegroomerblade-retainingnutson
eachendofthegroomershaft(Figure16).
9

g032403
Figure16
1.Strapbuckle3.Strap
2.Retainingnut4.Brush
3.From1sideofthegroomerreel,slideabrush
intoeachgroovearoundthefulllengthofthe
groomerreel(Figure17).
g232518
Figure17
1.Strap3.T owardrearofmachine
2.Brush
4.Verifythatthebrushesareseatedinthegroomer
bladeslots(Figure16andFigure18).
g032402
Figure18
1.Brush2.Blade
5.Looselywrapthestraps,asshowninFigure
16,aroundthegroomerreelshaftandbrushes,
insertingthestrapsinthegroovesinthebrushes
Figure18.
Positionthebrushessothatthestrapsare
betweenthefollowingblades:2and3;12and
13;23and24or24and25;35and36,and45
and46.
Important:Youmustwrapthestrapsaround
thegroomerbladeandbrushassemblyinthe
primaryrotatingdirection.Figure17shows
thestrapsinstalledforforwardrotation.
Note:Ifthebroomerbrushesarenot
seatedproperlyinthebladeslots,loosenthe
groomer-bladeretainingnutsoneachendofthe
groomershaft,positionthebroomerbrushes
properlyinthebladeslots,andtightenthe
groomer-bladeretainingnuts(Figure16).
6.Tightenthegroomerbladeretainingnuts;torque
themto45.2N∙m(400in-lb).
7.Whilepushingascrewdriveragainstthestrap
buckle,graspthestrapwithalockingpliersand
pullthestrapstightuntiltheylockintothebrush
grooves(Figure16).
8.Trimthestrapsothatitis6mm(1/4inch)from
thebuckleandfoldtheexcessstrapoverthe
buckle.
10

10
InstallingtheWeights
GroomerOnly,withorwithout
FrontGrassBasketsandRear
CuttingUnitwithoutRearGrass
Basket
Partsneededforthisprocedure:
6Carriagebolt(5/16x3-1/2inches)
6Spacer
6Flangenut(5/16inch)
18Weight
Procedure
Forcuttingunitswithonlythegroomerkitinstalled
(norearrollerbrushkitandnoreargrassbasket
installed),refertoFigure19.
g192300
Figure19
Groomeronly
1.Bolts(5/16x3-1/2inch)3.Flangenut—5/16inch(2)
2.Spacer(2)4.Weight(6)
11
InstallingtheWeights
GroomerandRearRollerBrush
installed
Partsneededforthisprocedure:
6Carriagebolt(5/16x3-1/2inches)
6Spacer
6Flangenut(5/16inch)
12Weight
Procedure
Forcuttingunitswiththegroomerkitandtherear
rollerbrushkitinstalled,refertoFigure20.
Note:Thekitincludes6weightsforeachcutting
unit,however,thissetuprequiresonly4weightsper
cuttingunit.
g192302
Figure20
Groomerwithrearrollerbrushkitinstalled
1.Bolts(5/16x3inches)3.Flangenut—5/16inch(2)
2.Spacer(2)4.Weight(4)
11

12
InstallingtheWeights
RearCuttingUnitwithGroomer
Only,andwithRearGrassBasket)
Partsneededforthisprocedure:
1Carriagebolt(5/16x2-1/4inches),PartNo.
3230-7—soldseparately
1Carriagebolt(5/16x3-1/4inches),PartNo.
3230-13—soldseparately
1Carriagebolt(5/16x4-1/2inches),PartNo.
3230-30—soldseparately
2Spacer
1Flangenut(5/16inch)
2Locknut(5/16inch),PartNo.3296-47—sold
separately
2Weight
6Smallweight(PartNo.132-0734-03—soldseparately)
Procedure
Forarearcuttingunitwiththegroomerkitandthe
reargrassbasketinstalled(norearrollerbrushkit),
refertoFigure21.
Alsoinstalltheweightsonthefrontcuttingunits.
Note:Forfrontcuttingunitswiththegroomerkitand
thefrontgrassbasketsinstalled(norearrollerbrush
kit),refertoFigure19.
Note:Thecentercuttingunitdoesnotworkwithboth
therearrollerbrushkitandthereargrassbasketkit.
g192301
Figure21
Rearcuttingunitwithgroomerandreargrassbasket
installed
1.Bolt(5/16x4-1/2inches),
soldseparately
5.Weight(2),suppliedwith
thekit
2.Bolt(5/16x2-1/4inches),
soldseparately
6.Locknut(5/16inch),sold
separately
3.Bolt(5/16x3-1/4inches),
soldseparately
7.Flangenut(5/16inch),
soldseparately
4.Spacer(2),soldseparately8.Smallweight(4),sold
separately
12

Operation
Introduction
Groomingisperformedintheturfcanopyabovethe
soillevel.Groomingpromotesverticalgrowthofgrass
plants,reducesgrain,andseversstolons,producing
adenserturf.Groomingproducesamoreuniform
andtighterplayingsurfaceforfasterandtrueraction
ofthegolfball.
Groomingshouldnotbeconsideredasareplacement
forverticutting.Verticuttingisgenerallyamore
rigorousandperiodictreatmentthatcantemporarily
damagetheplayingsurface,whilegroomingisa
routineandgentlertreatmentdesignedtomanicure
theturf.
g006671
Figure22
1.Grassrunners(stolons)2.Thatch
Groomingbrushesarelessintrusivethanconventional
groomingbladeswhenadjustedtolightlycontactthe
turfcanopy.Brushingmaybebetterfortheultra-dwarf
cultivars,sincethesegrasstypeshaveanupright
growthpatternanddonotllinwellthroughhorizontal
growth.Brushescaninjureleaftissueiftheyareset
topenetratetoodeeplyintothecanopy.
Groomerbladesshouldneverpenetratethesoil.They
areeffectiveincuttingrunnersandremovingthatch.
Becausegroominginjuresleaftissue,avoidgrooming
duringperiodsofhighstress.Coolseasonspecies,
suchascreepingbentgrassandannualbluegrass,
shouldnotbegroomedduringhigh-temperature(and
high-humidity)periodsinmidsummer.
Manyvariablesaffecttheperformanceofgrooming,
includingthefollowing:
•Thetimeoftheyear(i.e.,thegrowingseason)and
theweatherpattern
•Thegeneralconditionofthegrass
•Thefrequencyofgrooming/cutting—bothhow
manycuttingsperweekandhowmanypasses
percutting
•Theheight-of-cutsettingonthemainreel
•Theheight/depthsettingonthegroomingreel
•Howlongthegroomingreelhasbeeninuse
•Thetypeofgrass
•Theoverallmanagementprogram(i.e.,irrigation,
fertilizing,spraying,coring,overseeding,etc.)
•Trafc
•Stressperiods(i.e.,hightemperatures,high
humidity,unusuallyhightrafc)
Thesefactorscanvaryfromfairwaytofairway.
Inspectthemowingareafrequentlyandchangethe
groomingpracticeasneeded.
Note:Usingthegroomerreelimproperlyortoo
aggressively(i.e.,toodeeportoofrequentgrooming)
mayunnecessarilystresstheturf,causingsevereturf
damage.Usethegroomercautiously.
Note:Continuechangingthedirectionofcut
wheneveryouusethegroomer.Thisenhancesthe
effectsofthegrooming.
Note:Operatethegroomerinastraightlineasmuch
aspossible.Usecautionwhenturningwhileoperating
thegroomer.
13

AdjustingtheGroomer
Height
DANGER
Contactwiththereelsorothermovingparts
canresultinpersonalinjury.
•Beforemakinganyadjustmentstothe
cuttingunits,disengagethereels,setthe
parkingbrake,shutofftheengine,and
removethekey.
•Keepyourhandsandclothingawayfrom
thereelsorothermovingparts.
1.Parkthemachineonacleanandlevelsurface,
lowerthecuttingunitscompletelytotheground,
shutofftheengine,engagetheparkingbrake,
andremovethekey.
2.Makesurethattherollersarecleanandthe
cuttingunitissettothedesiredheight-of-cut
(seeyourcuttingunitOperator’sManual).
3.Rotatethequick-uplevers(Figure23)tothe
ENGAGEDposition(thehandlepointstowardthe
frontofthecuttingunit.
Important:UsetheHeight-of-Cut(HOC)and
Height-of-Groom(HOG)recommendedrange
chartforsettingthegaugebar.
4.At1endofthegroomerreel,measurethe
distancefromthelowesttipofthegroomerblade
totheworkingsurface(Figure23).Turnthe
heightadjusterknob(Figure23)toraiseorlower
thegroomerbladetiptothedesiredheight.
g240964
Figure23
1.Heightadjusterknob3.Groomerheight(HOG)
2.Quick-uplever4.Numberofrearroller
spacers(belowsideplate
pad)
5.Repeatstep4attheoppositeendofthe
groomer,thencheckthesettingontherstside
ofgroomer.
Theheightsettingonbothendsofthegroomer
shouldbeidentical.Adjusttheheightas
required.
14

Height-of-Cut(HOC)andHeight-of-Groom(HOG)RecommendedRange
RecommendedHOG=HOC
GroomerEngagement
RecommendedHOG=HOC
GroomerEngagement
Height-of-Cut
(mm)
Height-of-Cut
(inch)
Numberof
RearRoller
Spacers(mm)(inch)
6.30.25003.1to6.30.125to0.250
9.50.37504.7to9.50.187to0.375
9.50.37514.7to9.50.187to0.375
12.70.50006.3to12.70.250to0.500
12.70.50016.3to12.70.250to0.500
12.70.50026.3to9.50.250to0.375
15.80.62509.5to15.80.375to0.625
15.80.62519.5to15.80.375to0.625
15.80.62529.5to12.70.375to0.500
19.00.750112.7to19.00.500to0.750
19.00.750212.7to19.00.500to0.750
19.00.750312.7to15.80.500to0.625
22.20.875115.8to22.20.625to0.875
22.20.875215.8to22.20.625to0.875
22.20.875315.8to19.00.625to0.750
25.41.002*19.0to25.40.750to1.00
25.41.00319.0to25.40.750to1.00
25.41.00419.0to22.20.750to0.875
Note:MaximumHOGrecommendedishalftheHOCto6mm(1/4inch)maximumengagement
*Movethegroomerfrontheight-of-cut(HOC)brackettothebottom(cuttingunitlocation)side-platehole.
ChangingtheGroomer
OperatingDirection
Thegroomerhas3settings:NEUTRAL,FORWARD,and
REVERSE.Tochangethedirectionofthegroomer,turn
theknobattheendofthegroomerdriveboxandalign
thedesiredpositionwiththeadjustmentnotch.
g246866
Figure24
1.Adjustmentnotch2.Knob
15

TestingtheGroomer
Performance
Important:Improperorover-aggressiveuseof
thegroomingreel(i.e.,toodeeportoofrequent
grooming)maycauseunnecessarystressonthe
turf,leadingtoseveredamage.Usethegroomer
cautiously.
DANGER
Contactwiththereelsorothermovingparts
canresultinpersonalinjury.
•Beforemakinganyadjustmentstothe
cuttingunits,disengagethereels,setthe
parkingbrake,shutofftheengine,and
removethekey.
•Keepyourhandsandclothingawayfrom
thereelsorothermovingparts.
Determinetheperformanceofthegroomerbefore
puttingitintoregularuse.
1.Setthemaincuttingreelstotheheight-of-cut
settingthatyouwouldnormallyusewithoutthe
groomingreel.UseaWiehlerolleronthefront
andafullrollerontherear.
Theamountofgrassremovedisakeyindicator
indeterminingtheheight/depthsettingofthe
groomingreel.
2.Seteachofthegroomingreelstothedesired
heightsetting.
3.Examinethetestareaanddetermineifthe
groomedareasgivesthedesiredresults.Ifnot,
increaseordecreasetheheightofthegroomers
andmakeanothertestpass.
Checkthetestarea2or3daysaftertherst
groomingforgeneralconditionanddamage.Ifthe
groomedareasareturningyellowandbrown,andthe
non-groomedareasaregreen,thenthegroomingwas
tooaggressive.
Maintenance
DANGER
Contactwiththereelsorothermovingparts
canresultinpersonalinjury.
•Beforemakinganyadjustmentstothe
cuttingunits,disengagethereels,engage
theparkingbrake,shutofftheengine,and
removethekey.
•Keepyourhandsandclothingawayfrom
thereelsorothermovingparts.
ChangingtheGearbox
Lubricant
ServiceInterval
Aftertherst100hours
Every500hours/Yearly(Whichevercomesrst)
1.Cleantheexternalsurfacesofthegroomer
housing.
Important:Ensurethatthereisnodirtor
clippingsontheoutsideofthegroomer
housing;ifdebrisgetsinsideofthegroomer
itcandamagethegearbox.
2.Removethedrainplugonthebottomofthe
housing(Figure27).
3.Removethellplugonthesideofthehousing
andloosentheair-ventplugonthetopsoair
canpassthrough(Figure27).
4.Alignasuitablecontainerbeneaththeoil-drain
porttocatchdrainedoil.
5.Tipthecuttingunitbackontothekickstand
untilthedrainportisatthebottomtoensure
completedrainage(Figure25).
16

g240875
Figure25
1.Removethedrainplug
fromthedrainport.
3.Loosentheair-ventplug.
2.Removethellplugfrom
thellport.
6.Rockthecuttingunitbackandforthtoensure
completedrainage.Whentheoiliscompletely
drained,placethecuttingunitonalevelsurface.
7.Installthedrainplug.
8.Useasyringe(PartNo.137-0872)tollthe
driveboxwith80-90Woil(approximately90cc).
g240898
Figure26
1.Syringewith80-90Woil2.Fillport
9.Installthellplugandtightentheair-ventplug.
10.Torqueallplugsto3.62to4.75N∙m(32to42
in-lb).
g241100
Figure27
Rightsidegroomerboxshown
1.Air-ventplug3.Drainplug
2.Fillplug
RemovingtheGroomer
DriveBox
Note:Retainallremovedpartsforlaterinstallation
unlessotherwisestated.
Important:Ifyouhaveanyissuesremovingthe
groomerdrivebox,refertoyourtractionunit
ServiceManualorcontactyourauthorizedToro
distributor.
1.Removethecapfromthegroomer.
2.Removetheclampboltsconnectingthegroomer
tothedrivebox(Figure15).
3.Removetheadjusterpinandcotterpin
connectingthegroomerdriveboxtotheadjuster
arms(Figure28).
17

g283882
Figure28
1.Adjusterpin3.Groomerdrivehex-head
2.Cotterpin4.Reinforcementscrew
4.Restrainthereelforremoval;refertoRestraining
theReelforRemovingThreadedInserts(page
18).
5.Installthereinforcementscrew(PartNo.
1-803022—soldseparately)totheinternal
threadsofthegroomerdrivehexheadand
torqueto13.5N⋅m(120in-lbs)asshownin
Figure28.
6.Removethegroomerdriveboxfromthecutting
reelbyturningthegroomerdrivehex-head
(Figure28).
Important:Ifthegroomerdriveboxis
installedontherightsideofacutting
unit,turnthegroomerdrivehex-head
counter-clockwise(right-handthread)to
removethedrive-boxshaftfromcuttingunit.
Important:Ifthegroomerdriveboxis
installedontheleftsideofacuttingunit,
turnthegroomerdrivehex-headclockwise
(left-handthread)toremovedrive-boxshaft
fromcuttingunit
Important:Youmustusea6-pointsocket
withheavywall.
CleaningtheGrooming
Reel
ServiceInterval:Aftereachuse
Cleanoffthegroomingreelafterusingitbyspraying
itwithwater.Donotdirectthewaterstream
directlyatthegroomerbearingseals.Donotpermit
thegroomingreeltostandinwatersothatthe
componentsrust.
InspectingtheBlades
ServiceInterval:Beforeeachuseordaily
Inspectthegrooming-reelbladesfrequentlyfor
damageandwear.Straightenbentbladeswitha
pliersandreplacewornblades.Wheninspectingthe
blades,checktoseethatnutsontherightandleft
blade-shaftendsaretight.
g010613
Figure29
1.Groomingblade3.Sharpedges
2.Dull(rounded)edges
RestrainingtheReel
WARNING
Thecuttingreelbladesaresharpandcapable
ofamputatinghandsandfeet.
•Keepyourhandsandfeetoutsideofthe
reel.
•Ensurethatthereelisrestrainedbefore
servicingit.
RestrainingtheReelforRemoving
ThreadedInserts
1.Loosentheshield-boltontheleftsideofthe
cuttingunitandraisetherearshield(Figure30).
18

2.Insertalong-handledprybar(recommended
3/8"x12"withscrewdriverhandle)throughthe
backofthecuttingreel,closesttothesideofthe
cuttingunitthatyouwillbetorquing(Figure30).
3.Placetheprybaragainsttheweldsideofthe
reelsupportplate(Figure30).
Note:Inserttheprybarbetweenthetopofthe
reelshaftandthebacksof2reelbladessothat
thereelwillnotmove.
Important:Donotcontactthecuttingedge
ofanybladeswiththeprybar;thismay
damagethecuttingedgeand/orcauseahigh
blade.
Important:Theinsertontheleftsideof
thecuttingunithasleft-handthreads.The
insertontherightsideofthecuttingunithas
right-handthreads.
g280383
Figure30
1.Threadedinsertfor
removal
4.Reelshaft
2.Loosentheshieldbolt.5.Reelsupportplate
3.Rearshield6.Prybarinsertedalong
theweldsideofthereel
supportplate.
4.Restthehandleoftheprybaragainsttherear
roller.
5.Completetheremovalofthethreadedinsert
whileensuringthattheprybarstaysinplace,
thenremovetheprybar.
6.Lowertherearshieldandtightentheshield-bolt.
RestrainingtheReelInstalling
ThreadedInserts
1.Insertalong-handledprybar(recommended
3/8"x12"withscrewdriverhandle)throughthe
frontofthecuttingreel,closesttothesideofthe
cuttingunitthatyouwillbetorquing(Figure31).
2.Placetheprybaragainsttheweldsideofthe
internalcuttingreelreinforcement(Figure31).
Note:Theprybarshouldcontactabladeatthe
front,thereelshaft,andabladeatthebackof
thebackofthereel,lockingitinplace.
Important:Donotcontactthecuttingedge
ofanybladeswiththeprybar;thismay
damagethecuttingedgeand/orcauseahigh
blade.
Important:Theinsertontheleftsideof
thecuttingunithasleft-handthreads.The
insertontherightsideofthecuttingunithas
right-handthreads.
g280384
Figure31
1.Threadedinsertfor
installation
3.Weldsideofsupportplate
2.Reelshaft4.Prybar
3.Restthehandleoftheprybaragainsttheroller
4.Pertheinsert’sinstallationinstructionsand
torquerequirements,completetheinstallationof
thethreadedinsertwhileensuringthatthepry
barstaysinplace,thenremovetheprybar.
19

DeclarationofIncorporation
TheT oroCompany,8111LyndaleAve.South,Bloomington,MN,USAdeclaresthatthefollowingunit(s)
conform(s)tothedirectiveslisted,wheninstalledinaccordancewiththeaccompanyinginstructionsontocertain
ToromodelsasindicatedontherelevantDeclarationsofConformity.
ModelNo.SerialNo.ProductDescriptionInvoiceDescriptionGeneralDescriptionDirective
03240—
UniversalGroomerDriveKit,
Reelmaster3100-DEdge
SeriesCuttingUnits
RM3100UNIVERSAL
GROOMERKIT(SETOF3)GroomerKit2006/42/EC
RelevanttechnicaldocumentationhasbeencompiledasrequiredperPartBofAnnexVIIof2006/42/EC.
Wewillundertaketotransmit,inresponsetorequestsbynationalauthorities,relevantinformationonthispartly
completedmachinery.Themethodoftransmissionshallbeelectronictransmittal.
ThismachineryshallnotbeputintoserviceuntilincorporatedintoapprovedT oromodelsasindicatedonthe
associatedDeclarationofConformityandinaccordancewithallinstructions,wherebyitcanbedeclaredin
conformitywithallrelevantDirectives.
Certied:AuthorizedRepresentative:
MarcelDutrieux
ManagerEuropeanProductIntegrity
ToroEuropeNV
Nijverheidsstraat5
2260Oevel
Belgium
JohnHeckel
Sr.EngineeringManager
8111LyndaleAve.South
Bloomington,MN55420,USA
March3,2018
Other manuals for 03240
1
Table of contents
Other Toro Power Tools Accessories manuals
Popular Power Tools Accessories manuals by other brands

Scheppach
Scheppach 55 Translation from the original instruction manual

NSI Solutions
NSI Solutions Rapid Z-CUT instruction manual

Bienen-Voigt & Warnholz
Bienen-Voigt & Warnholz 11584 instruction manual

DeWalt
DeWalt DCF6202 Original instructions

jbc
jbc FAE070 instruction manual

Rockler
Rockler Router Table XL Box Joint Jig instructions