manuals.online logo
Brands
  1. Home
  2. •
  3. Brands
  4. •
  5. Toyota
  6. •
  7. Automobile Accessories
  8. •
  9. Toyota PT228-89460 User manual

Toyota PT228-89460 User manual

TOYOTA 4-RUNNER 2006 - TOWING HITCH
Preparation
Page 1 of 7 pages
Issue: C 07/06/05
Part Number: PT228-89460 NOTE: Part number of this accessory may not be
the same as the part number shown.
Kit Contents
Item # Quantity Reqd. Description
1 1 High Assembly
2 1 Wiring Harness Bracket
3 1 Hardware Bag
4 1 Hitch Cover
5 2 Frame Spacer
6 2 Center Spacer
7 1 Close-out Panel
Hardware Bag Contents
Item # Quantity Reqd. Description
1 4 M12 x 1.25 x 45 Hex Flange
Bolt (Black)
2 4 M12 x 1.25 x 35 Hex Flange
Bolt (Black)
3 4 M8 x 1.25 x 25 Bolt w/Trapped
Washer (Black)
4 2 M8 x 1.25 x 20 Bolt w/Trapped
Washer (Black)
5 2 M6 x 1.00 x 20 hex Flange Bolt
(Black)
6 1 Harness Clamp/Cable tie
(P/N 82711-16830)
Additional Items Required For Installation
Item # Quantity Reqd. Description
1
2
Conflicts
Note:
Recommended Tools
Personal & Vehicle
Protection
Notes
Safety Glasses
Vehicle Protection Cloth (Shop Towel)
Special Tools Notes
None
Installation Tools Notes
Nylon Panel Removal Tool e.g. Panel Pry Tool #1
Toyota SST # 00002-06001-01
Ratchets ½" and ⅜"
Sockets (Deep Well) 10 mm, 12 mm, 13 mm,
17 mm
Socket Wrench
Extensions 6" min.
Torque Wrench (x2) 0-100 lbf-ft, 0-100 lbf-in
Exhaust Hanger Removal
Tool
e.g. Snap On P/N YA3202
Special Chemicals Notes
None
General Applicability
Note: All V-8 4-Runner vehicles
Recommended Sequence of Application
Item # Accessory
1
2
3
*Mandatory
Vehicle Service Parts (may be required for reassembly)
Item # Quantity Reqd. Description
1
2
3
Legend
STOP: Damage to the vehicle may occur. Do not
proceed until process has been complied with.
OPERATOR SAFETY: Use caution to avoid risk of
injury.
CAUTION: A process that must be carefully observed
in order to reduce the risk of damage to the
accessory/vehicle and to ensure a quality installation.
TOOLS & EQUIPMENT: Used in Figures calls out the
specific tools and equipment recommended for this
process.
TOYOTA 4-RUNNER 2006 - TOWING HITCH
Procedure
Page 2 of 7 pages
Issue: C 07/06/05
Care must be taken when installing this accessory to ensure damage does not occur to the vehicle. The installation of this
accessory should follow approved guidelines to ensure a quality installation.
These guidelines can be found in the "Accessory Installation Practices" document.
This document covers such items as:-
• Vehicle Protection (use of covers and blankets, cleaning chemicals, etc.).
• Safety (eye protection, rechecking torque procedure, etc.).
• Vehicle Disassembly/Reassembly (panel removal, part storage, etc.).
• Electrical Component Disassembly/Reassembly (battery disconnection, connector removal, etc.).
Please see your Toyota dealer for a copy of this document.
1. Inspection.
(a) Inspect parts for damage.
2. Prepare Vehicle for Hitch Installation.
(a) Cover exhaust pipe with clean shop towel.
(Fig. 2-1).
(b) Caution muffler may be sharp and or hot.
(c) Remove and save tie-down. Discard the two
(2) bolts removed from the vehicle.
(Fig. 2-2)
(d) Lower exhaust by disconnecting the rubber
exhaust hanger from one of the connection
points. (Fig. 2-3)
Fig. 2-1
Fig. 2-2
Vehicle Frame
Fig. 2-3
Exhaust Hanger Removal Tool
TOYOTA 4-RUNNER 2006 - TOWING HITCH
Procedure
Page 3 of 7 pages
Issue: C 07/06/05
(e) For vehicles equipped with air suspension,
loosen the air suspension cover by removing
the plastic fastener. Save fastener for
reinstallation. (Fig. 2-4)
(f) Using panel pry tool, unclip harness from the
frame. Install harness clamp close to harness
connector (around black wrap). Secure
harness to frame and trim excess on cable tie.
(Fig. 2-5)
(g) Remove the two (2) M8 bolts securing the
factory wiring bracket to the frame. Discard
the two (2) bolts. (Fig. 2-6)
(h) Remove the two (2) M6 bolts connecting the
7-pin plug to the bracket, slide the plug from
the bracket. Discard the bolts and factory
wiring bracket. (Fig. 2-7)
Fig. 2-5
Panel Pry Tool
Fig. 2-4
N
ylon Panel Removal Tool
Fig. 2-6
Socket, 12 mm
Fig. 2-7
TOYOTA 4-RUNNER 2006 - TOWING HITCH
Procedure
Page 4 of 7 pages
Issue: C 07/06/05
3. Attach Hitch Center to Vehicle.
(a) Install closeout panel and (2) spacer plates to
center attachment bracket by hand starting
(2) M12-1.25x45 black bolts through
closeout panel and spacer plates into forward
most set of holes. (Fig. 3-1)
(b) Slide hitch onto pre-installed bolts using
open ended slots to support the hitch.
(Fig. 3-1)
(c) Hand start two (2) M12-1.25x45 black bolts
to rear most position to secure the hitch and
spacer plates using a socket extension and a
17mm socket. Bolts can be fed through
chain holes. Do not tighten. (Fig. 3-1)
4. Install 7-Pin Wire Harness to Hitch.
(a) Install 7-pin wiring harness (removed in
Step B. 8.) to the provided wiring bracket
using two (2) M6-1.00x20mm bolts.
(Fig. 4-1)
(b) Install wiring bracket to inside surface of the
driver side hitch bracket using two (2)
M8x1.25x20 black bolts with trapped
washers. (Fig. 4-1)
(c) Be sure to feed wiring between the hitch tube
and the vehicle cross member.
(d) Tighten the M8 bolts to 19 ± 4 lbf•ft
(25 ± 5 N•m). (Fig. 4-1)
(e) Tighten M6 bolts to 94 ± 19 lbf•in
(10.4 ± 2 N•m). (Fig. 4-1)
5. Place Frame Spacers.
(a) Place frame spacers between hitch brackets
and vehicle frame. (Fig. E-1)
Fig. 3-1
Socket, 17 mm, Extension 6”
Closeout
Panel
Spacer Plates
Fig. 4-1
Socket, 10 mm, 12mm; Torque Wrench
Fig. 3-1
TOYOTA 4-RUNNER 2006 - TOWING HITCH
Procedure
Page 5 of 7 pages
Issue: C 07/06/05
6. Install Hitch to Frame Rail.
(a) Reinstall tie-down bracket to hitch using two
(2) M12 x 1.25x35 black bolts in driver side
rear most frame locations. (Fig. 6-1, Step 1)
(b) Secure hitch to frame using two (2) M12 x
1.25x35 black bolts in passenger side rear
most frame locations. (Fig. 6-1, Step 2)
(c) Hand start four (4) M8 x 1.25 x 25 black
bolts in forward most frame locations.
(Fig. 6-1, Step 3)
(d) Ensure all bolts engage frame spacers and the
spacers do not impede on frame welds.
7. Visually Center Hitch
(a) Visually center hitch so that closeout panel is
centered in fascia cut out. (Fig. 7-1)
8. Tighten Remaining Hitch Hardware.
(a) Tighten four (4) M12 bolts in the center to
60 ± 12 lbf-ft (80 ± 15 N-m).
(Fig. H-1, Steps 1 - 4)
(b) Tighten four (4) M12 bolts on the frame rail
to 60 ± 12 lbf-ft (80 ± 15 N-m).
(Fig. H-1, Steps 5 - 8).
(c) Tighten four (4) M8 bolts to 19 ± 4 lbf-ft
(25 ± 5 N-m). (Fig. H-1, Steps 9 - 12)
Fig. 6-1
Fig. 7-1
Fig. 8-1
Socket, 13 mm, 17 mm; Torque Wrench
TOYOTA 4-RUNNER 2006 - TOWING HITCH
Procedure
Page 6 of 7 pages
Issue: C 07/06/05
9. Reinstall Vehicle Components.
(a) Reconnect exhaust to the exhaust hanger
ensuring to fully engage the hanger.
(Fig. 9-1)
(b) Reinstall the air suspension cover by
replacing the one fastener. (Fig. 9-2)
(1) If fastener is damaged fit a new fastener,
(P/N 90467-09185).
(c) Place the hitch plug in the glove box.
Fig. 9-1
Exhaust Hanger Removal Tool
Fig. 9-2
TOYOTA 4-RUNNER 2006 - TOWING HITCH
Checklist - these points MUST be checked to ensure a quality installation.
Check: Look For:
Page 7 of 7 pages
Issue: C 07/06/05
Accessory Function Checks
Inspection torque (M12 bolts)
Inspection torque (M8 bolts)
Inspection torque (M6 bolts, 7-pin to
bracket)
Frame Spacers
Wiring Bracket
Hitch Plug
60 ± 12 lbf-ft (80 ± 15 N-m)
19 ± 4 lbf-ft (25 ± 5 N-m)
94 ± 19 lbf-in (10.4 ± 2 N-m)
Installed and off of welds
Installed and fed between hitch and cross
member.
Placed in glove box

Other Toyota Automobile Accessories manuals

Toyota PZ439-E9472-AB User manual

Toyota

Toyota PZ439-E9472-AB User manual

Toyota TSN 300 Corolla E12 L Series User manual

Toyota

Toyota TSN 300 Corolla E12 L Series User manual

Toyota PZ 416 - T0968 - 00 User manual

Toyota

Toyota PZ 416 - T0968 - 00 User manual

Toyota Bluetooth SWC User manual

Toyota

Toyota Bluetooth SWC User manual

Toyota PZQ72-48050 User manual

Toyota

Toyota PZQ72-48050 User manual

Toyota PVM User manual

Toyota

Toyota PVM User manual

Toyota PW5D0-0K001 User manual

Toyota

Toyota PW5D0-0K001 User manual

Toyota PORTABLE TYRE PUMP User manual

Toyota

Toyota PORTABLE TYRE PUMP User manual

Toyota T100' User manual

Toyota

Toyota T100' User manual

Toyota Fortuner UH9000S User manual

Toyota

Toyota Fortuner UH9000S User manual

Toyota interface kit for ipod User manual

Toyota

Toyota interface kit for ipod User manual

Toyota PZ420 I0291 ME User manual

Toyota

Toyota PZ420 I0291 ME User manual

Toyota PZ457-T0311-00 User manual

Toyota

Toyota PZ457-T0311-00 User manual

Toyota Landcruiser SC 2400x1840 SGF TRAY BODY User manual

Toyota

Toyota Landcruiser SC 2400x1840 SGF TRAY BODY User manual

Toyota 2005 4Runner Navi_U User manual

Toyota

Toyota 2005 4Runner Navi_U User manual

Toyota 00016-00401 User manual

Toyota

Toyota 00016-00401 User manual

Toyota 00016-34088 User manual

Toyota

Toyota 00016-34088 User manual

Toyota PZ403-9963F-00 User manual

Toyota

Toyota PZ403-9963F-00 User manual

Toyota Tundra 2014 User manual

Toyota

Toyota Tundra 2014 User manual

Toyota PZQ7089J15 User manual

Toyota

Toyota PZQ7089J15 User manual

Toyota ADVANCED AVX User manual

Toyota

Toyota ADVANCED AVX User manual

Toyota A2 L Series User manual

Toyota

Toyota A2 L Series User manual

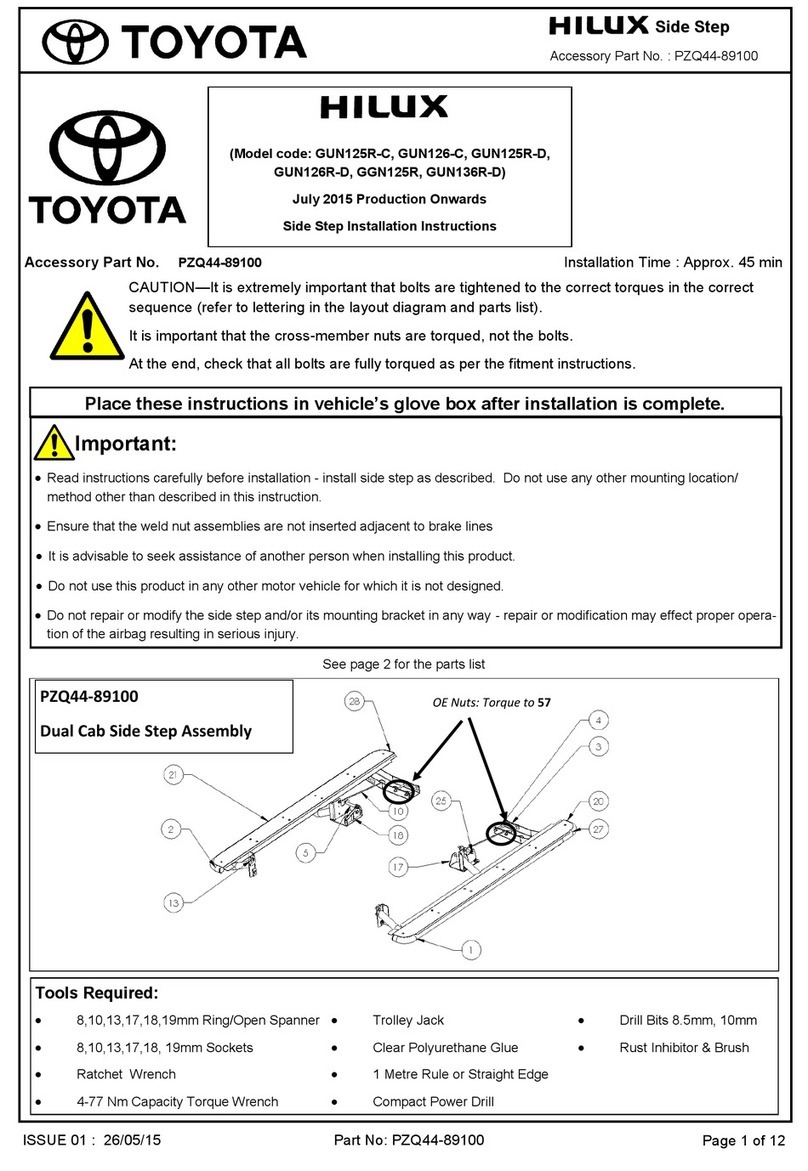
Toyota PZQ44-89100 User manual

Toyota

Toyota PZQ44-89100 User manual

Toyota THF 30 User manual

Toyota

Toyota THF 30 User manual

Popular Automobile Accessories manuals by other brands

Motobilt MB1212 manual

Motobilt

Motobilt MB1212 manual

Westin 40-1245 installation instructions

Westin

Westin 40-1245 installation instructions

Race Navigator RN PRO user manual

Race Navigator

Race Navigator RN PRO user manual

TechnoKom TKLS user manual

TechnoKom

TechnoKom TKLS user manual

Bestop HighRock 4x4 Element installation instructions

Bestop

Bestop HighRock 4x4 Element installation instructions

BIC VOLVO C30 T5 installation manual

BIC

BIC VOLVO C30 T5 installation manual

ULTIMATE SPEED 90578 Assembly and Safety Advice

ULTIMATE SPEED

ULTIMATE SPEED 90578 Assembly and Safety Advice

Virtual Reality Hands Free Bluetooth Car Kit MP3/WMA player & FM modulator... Installation and operation

Virtual Reality

Virtual Reality Hands Free Bluetooth Car Kit MP3/WMA player & FM modulator... Installation and operation

Kleinn Air Horns X3-KIT installation manual

Kleinn Air Horns

Kleinn Air Horns X3-KIT installation manual

hc-cargo 161048 user manual

hc-cargo

hc-cargo 161048 user manual

DVB FBTT1-01 installation manual

DVB

DVB FBTT1-01 installation manual

AMP Research Power Step installation guide

AMP Research

AMP Research Power Step installation guide

Kuda 043380 Installation instruction

Kuda

Kuda 043380 Installation instruction

Scosche BFHA quick start guide

Scosche

Scosche BFHA quick start guide

Datalogic Rhino II user manual

Datalogic

Datalogic Rhino II user manual

Yakima BlockHead manual

Yakima

Yakima BlockHead manual

Brodit 852599 ProClip quick guide

Brodit

Brodit 852599 ProClip quick guide

Thule 191 parts list

Thule

Thule 191 parts list

manuals.online logo
manuals.online logoBrands
  • About & Mission
  • Contact us
  • Privacy Policy
  • Terms and Conditions

Copyright 2025 Manuals.Online. All Rights Reserved.