Toyota HEADREST DVD REAR SEAT ENTERTAINMENT SYSTEM User manual

128-8655
1 of 32
OWNER’SOWNER’S
OWNER’SOWNER’S
OWNER’S
MANUMANU
MANUMANU
MANUALAL
ALAL
AL
HEADREST DVD REAR SEAT ENTERTAINMENT SYSTEM

128-8655
2 of 32

128-8655
3 of 32
INTRODUCTION
Your vehicle is equipped with a Headrest DVD Rear Seat Entertainment System (RSE). The system is designed to give you
and your passengers many years of video and audio entertainment in a mobile environment. The system allows you to
listen to audio CD’s and watch DVD’s. Video cameras as well as a variety of standard video games can be used with this
system. The DVD player is capable of playback of standard DVD’s, CD’s and CD-R/RW media. This includes CD’s with
MP3 format.
Please review this Owner’s Manual to become familiar with the features and controls as well as the very important safety
information. Please review User Manuals for video games and video game equipment when used as auxiliary inputs for
your Headrest DVD Rear Seat Entertainment System. Please read all of the safety and operating instructions before
operating the system and retain for future reference.
Federal Communication Commission (FCC) Compliance
Changesormodificationsnotapprovedcouldvoiduser’sauthoritytooperatetheequipment.Thisequipmenthasbeentestedand
found to comply with the limits for a Class B digital device, pursuant to Part 15 of the FCC Rules. These limits are designed to
provide reasonable protection against harmful interference in a residential installation. This equipment generates, uses and can
radiate radio frequency energy and, if not installed and used in accordance with the instructions, may cause harmful interference
andradiocommunications.Ifthis equipmentdoescause harmfulinterferenceto radioortelevision reception,whichcan bedetermined
by turning the equipment off and on, the user is encouraged to consult theirToyota dealer.
- I-

128-8655
4 of 32
-II-
SAFETY PRECAUTIONS
ThismanualcontainscertainCAUTIONandNOTICEWarningsthatareusedtopreventorreducethechanceofinjuryordamageto
passengersandvehicleequipment,respectively. If you are driving aTOYOTAorSCIONVehiclewithaRSE system, please adhere
tothe following guidelines:
!
CAUTION
ThisisaWARNINGagainstsomethingthatmaycause injury
topassengersif thewarningisignored. Youare informedwhat
youmustormustnotdoinorder to avoid or to reduce the risk
ofinjury to yourself and others.
For safety reasons, when changing video media it is
recommended that the vehicle is not in motion and that you
donot allow children to unfastenseat-belts to change video
mediaormake any adjustmentstothesystem exceptthrough
the remote control. System adjustments can be
accomplishedusingtheremote control unit, while seat-belts
remain fastened. Enjoy your entertainment system and
remember the safety of all of the passengers in the vehicle
shouldalways remain the number onepriority.
!
CAUTION
NOTICE
This is a WARNING against something that may cause
damageto thevehicleoritsequipmentifthe warningisignored.
You are informed what you must or must not do in order to
avoidorto reduce the riskofcausingdamage to the vehicleor
itsequipment
Thedrivermust not attempt tooperateanyfunction of the DVD
system while the vehicle is in motion. Give full attention to
driving and to the road. Pull off the road and park in a safe
placebeforeinsertingorextractingDVD’sfrom the system. A
remote control is included with the system to allow the rear
seat occupants to operate most system functions without
distractingthedriverorremovingseatbelts.
!
CAUTION

128-8655
5 of 32
-III-
!
CAUTION
Conversational speech on some DVDs is recorded at a low
volume to emphasize the impact of sound effects. If you
adjustthevolume assumingthattheconversations represent
the maximum volume level available for the DVD, you may
be startled by the louder sound effects or when you change
to a different audio source. Loud sounds may have a
significantimpactonthehumanbodyorposeadrivinghazard.
Keep this in mind when you adjust the volume.
Beforeputting onHeadphonesalwaysadjustthe volumesetting
to the lowest position.
!
CAUTION
The front glass on the liquid crystal display (LCD) screen
maybreakwhenhitwith a hard object. Iftheglassbreaks,do
not touch the liquid crystalline material. In case of contact
with skin, wash immediately with soap and water. Caution
childrentoavoidtouchingorscratchingthescreen,as it may
becomedirtyordamaged.
!
CAUTION
1. Keep the monitor clean and dry.
2. Alwaysseekqualifiedpersonneltoperformrepairs. Never
attemptyourownrepairs.
3. Do not drop the monitor or expose the monitor to strong
impacts.
4. Do not expose the monitor to direct sunlight for extended
periodsoftime.
!
CAUTION

128-8655
6 of 32
- I V-
Moisture in the air will condense in the DVD player under
extremelyhumidconditions or whenmovingfromacold place
toawarmone.Moisture condensation may cause damage to
the DVD and/or player. If moisture condensation occurs, do
notinsertaCDorDVDintotheplayer. If one is already in the
player, remove it.TurntheDVDplayerON to dry the moisture
beforeinserting a DVD. This could take an hour ormore.
NOTICE
Donotuseanysolventsorcleaningmaterialswhencleaning
theLCDdisplay.Donotuseanyabrasivecleaners,theymay
scratch the screen. Use only a lightly dampened lint free
cloth to wipe the screen if it is dirty.
NOTICE
Donotoperatevideogamesorvideo equipment if the power
cordsand/orcablesarebroken,splitordamaged. Carefully
placecordsand/orcables where they will not be stepped on
orinterferewiththeoperation of seats and/or compartments.
Disconnect video games and video equipment power cords
and/or cables when not in use. Do not allow the auxiliary
input jack to get wet or dirty. Do not clean any part of the
DVD player/screen with benzene, paint thinner or any other
solvent.
NOTICE NOTICE
Exercisecaretoprevent dirt and foreignobjectsfromentering
the DVD player compartment. Be especially careful not to
spill liquids of any kind onto the media controls or into the
system. If liquid is accidentally spilled onto the system,
immediately turn the system OFF and consult a qualified
servicetechnician.
NOTICE
Lock the LCD screens in the fully closed position when not in
use.
Whenthevehicleis parked in directsunlightorinanextremely
cold place for a long period of time, wait until the cabin
temperatureofthevehicleisatacomfortabletemperaturebefore
operating the system.
NOTICE
NOTICE
Theuseof a cellular phone inside or near the vehiclemay
causenoiseoraudio interference from the speakers of the
system, which you are listening to. However, this does not
indicateamalfunction.

128-8655
7 of 32
-V-
DonotplaytheRear Seat Entertainment System forextended
periods of time with the engine shut off as this will drain the
battery.
NOTICE
NOTICE
Do not attempt to service, repair or modify the Rear Seat
EntertainmentSystem. See your dealer if serviceis needed.
Do not insert foreign objects into the DVD openings.
NOTICE
Donot expose the liquid crystaldisplay (LCD) screen to direct
sunlightor intensiveultravioletraysforextensiveperiodsoftime.
Ultravioletraysdeterioratethe liquid crystal.
NOTICE

128-8655
8 of 32
-VI-
TABLE OF CONTENTS
INTRODUCTION ................................................................. I
FederalCommunicationCommission(FCC)Compliance I
SAFETYPRECAUTIONS ................................................II-V
QUICKSTARTGUIDE ........................................................ 1
Operatingthe DVD System ............................................ 1
CONTROLSANDINDICATORDIAGRAM .......................... 2
ControlFunctionDescriptionsfor M1 and M2 Monitor..... 2
M1 / M2 Panel Control ................................................... 2
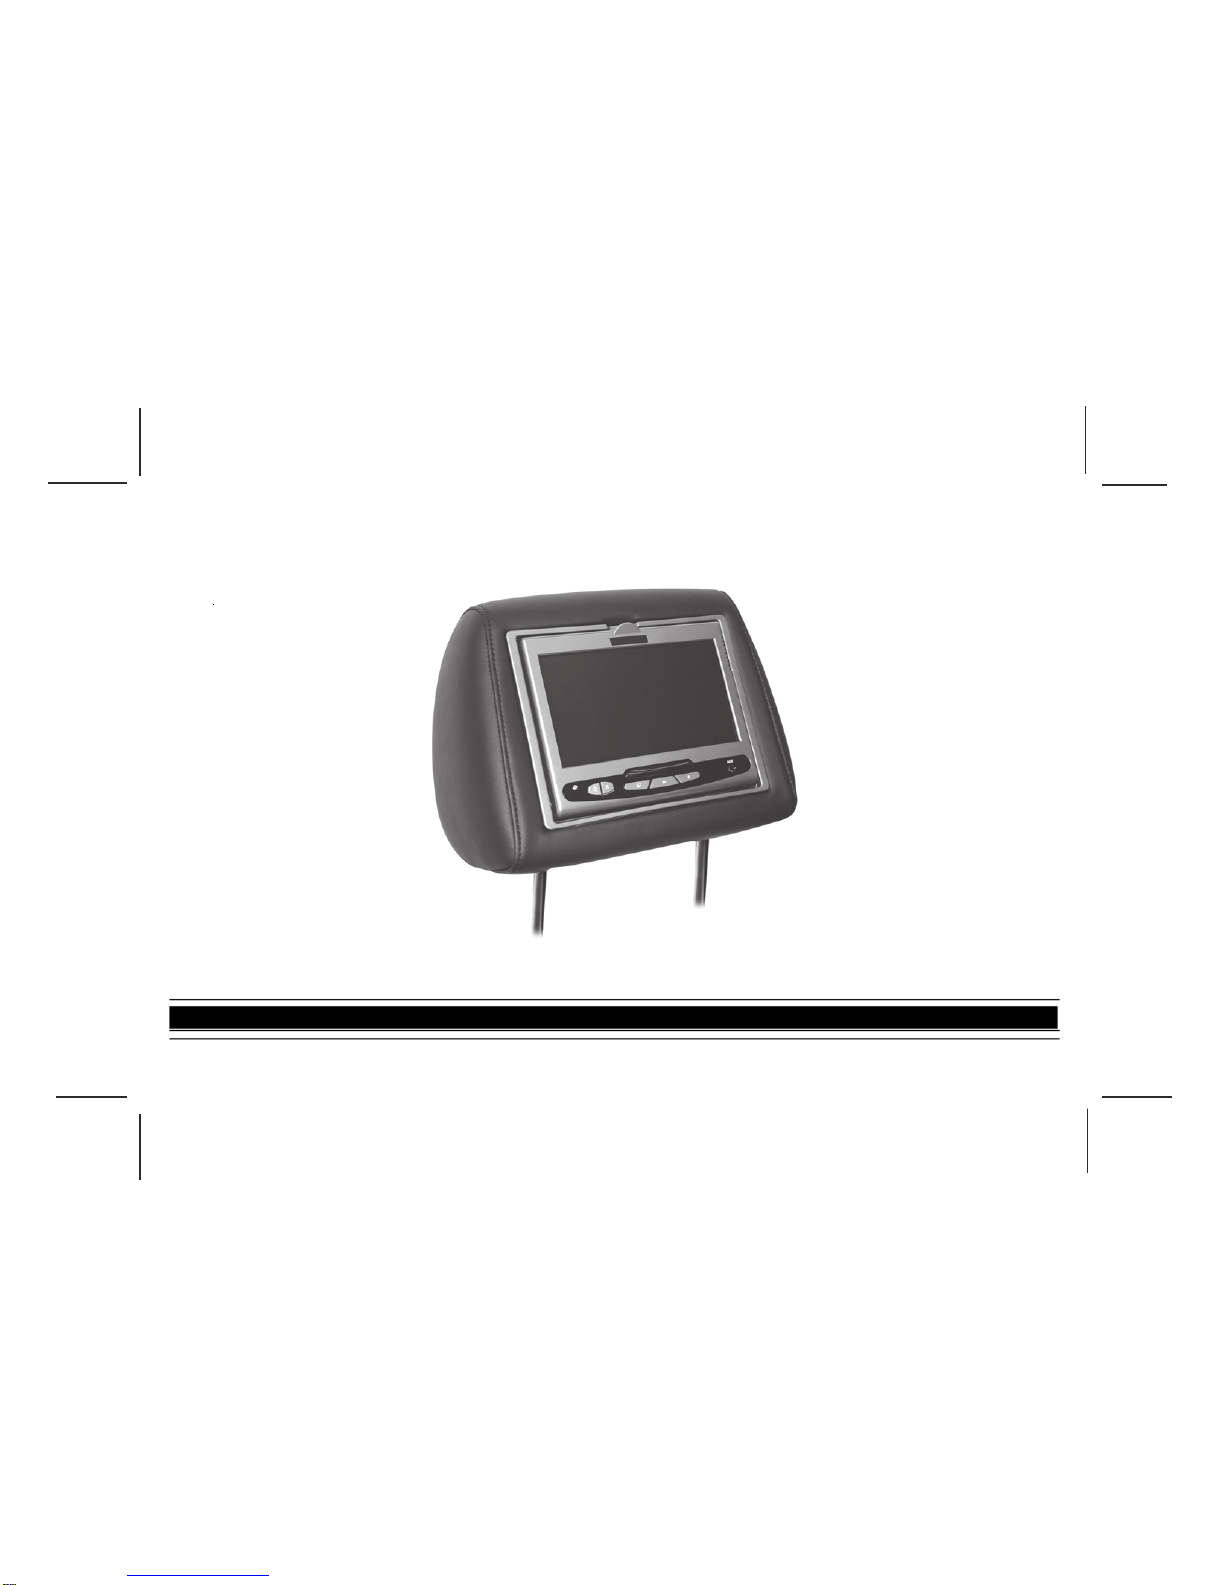
DVDHEADRESTSYSTEM OVERVIEW ............................. 3
REMOTECONTROL OPERATION...................................... 4
BatteryInstallation ......................................................... 4
RemoteControlFunctionalDescription....................... 5-9
WIRELESSHEADPHONES OPERATION ..........................10
WirelessHeadphonesSpecialFeatures ........................10
WirelessHeadphoneBatteryInstallation .......................10
OPERATION INSTRUCTIONS ...........................................11
Control Button Functions (M1 / M2 Unit) .......................11
DVD Basics ..................................................................12
RegionCoding ...............................................................12
Types of Discs Your System Will Play ..........................12
Disc Compatibility .........................................................12
Loading and Playing Discs ........................................12
To Load and Play a Disc...........................................12
Source Selection ......................................................12
SettingsandAdjustments ........................................... 13
UsingtheSetup Menu ............................................... 13
Exiting the Setup Menu ............................................. 13
Language Setup .......................................................... 13
LanguageforOn-ScreenDisplay ............................... 13
SubtitleSetup............................................................ 14
AudioSetup .............................................................. 14
Video Setup ................................................................. 15
TVDisplay................................................................. 15
TVType ..................................................................... 15
Rating Setup ................................................................ 16
Rating........................................................................ 16
Misc Setup..................................................................... 16
Factory Defaults ........................................................... 16
ScreenSaver.................................................................. 17
Playing Audio CDs ....................................................... 17
Playing MP3 Discs ....................................................... 18
Selecting a Play Mode .............................................. 18
SkippingSongs ......................................................... 18
SelectingFoldersandSongs..................................... 18
ProgramPlay ............................................................ 19
Deleting the Play List ................................................ 19
TROUBLESHOOTING ........................................................ 20
FUSEREPLACEMENT ....................................................... 21
SPECIFICATIONS .............................................................. 22
OWNER’SNOTES ..........................................................23-24

128-8655
9 of 32
QUICK START GUIDE
9. Tiltthescreen to a comfortable viewing position(the
headrest itself can be tilted forward to help achieve a
comfortableviewingposition).
10. SelectAV1 using the source button on the front panel
orremote control to view program materialon M1 or
selectfrom the other available sources DVD, orAUX
forM2Monitor.
*NOTE: To operate the M1 screen, press M1 on the
remote control. To operate the M2 screen,
press M2 on the remote control.
Operating The DVD System:
1. TurnontheM1 Monitor (passenger side) using the
Powerbutton on the front of thescreen or the *Remote
Control.Tiltthe screenforwardusingthecentertab
at the top of thescreen.
2. Insert a DVD, CD or MP3 disc into the slot (disc label
towarddriver).
3. The disc will start playing.
4. Tiltthemonitorto a comfortable viewing position (the
headrest itself can be tiltedforward to help achieve a
comfortableviewingposition).
5. When the DVD menu appears, select the menu item
using the cursor keys and press the Enter or Play
button.
6. Each wireless headphone has a CHA/CH B switch.
When sitting in front of the M1 monitor, use the CHA
switch setting. When sitting in front of the M2 monitor,
use the CH B switch setting. Set the headphone to
theproperchannelandpressthePower On/Off
switch.The power indicator will light up red. Turn the
volumedowntoits lowest setting before putting
them on your head.
7. Ifaudioplaybackthroughthevehicleradioispreferred,
set the radio toAUX mode. Verify that nothing is
connectedtothe vehicle radio’sAUXjack.
NOTE: Ifthereisaplug in the vehicle radio’sAUX jack;it
willoverridetheDVDaudio.
8. Turn on the M2 Monitor (driver’sside) using the power
button on the front of the screen or remote control.
-1-

128-8655
10 of 32
EJECT
1
2
M1 / M2 Panel Control
1. DVD disc insertion slot (disc label towards driver)
2. EJECTButton
3. PowerIndicatorLED
4. IRSensor
5. POWER Button
6. SOURCEButton
7. SCREENMODEButton (Normal, Wide, Off)
8. PLAY Button
9. STOPButton
10. IRTransmitterLEDs
11. AUX Input Jack (use with suppliedAV adaptor)
12. LCDScreen
CONTROLS AND INDICATOR DIAGRAM Control Function Descriptions for M1 and M2
Monitor
-2-
S
AUX
35
67 8 9
10
11
12
4

128-8655
11 of 32
DVD HEADREST SYSTEM OVERVIEW
1. The DVD Headrest system is a versatile audio / video
system which includes two monitors, each with a built-
in DVD player.
2. The M1 Monitor (passenger side) is comprised of a 7"
TFTLCDmonitorwithbuilt-in DVD player that allows the
usertoselectfromDVD,A/V1,or AUXsources.The M1
monitorhas a built-in infrared audiotransmitter (CHA)
foruse with the supplied two-channel wireless
headphones(CHA). The M1 monitor also has the ability
toprovide the audio source for outputto allow audio
playbackthroughthevehicleradio.
3. The M2 monitor (driver’s side) is comprised of a 7" TFT
LCDmonitorwithbuilt-in DVD player thatallowstheuser
to select from DVD,A/V1, orAUX sources. The M2
monitorhas a built-in infrared audiotransmitter (CH B)
for use with the supplied two channel wireless
headphones(CHB).
4. The monitors will show all of the system functions with
thecomprehensive On Screen Display (OSD).
5. TheDVDHeadrest System includes two IR
Headphones.The headphones have anA-B switch that
allowtheusers to select the audio from either the M1
(CHA) or the M2 (CH B).
6. Eachmonitorusesdifferent Remote Control IR codes.
TheM1Monitorwill only respond to the Remote Control
unit when the Monitor Select (M1) button is pressed on
remote control. The M2 Monitor will only respond to the
RemoteControlunit when theMonitorSelect(M2)button
on remote control is pressed.
7. TheM1andM2Monitorwillacceptan audio/videoinput
throughtheAUX(usewithsuppliedAVadaptor) input
locatedonthe frontoftheunit. Theaudio/video device
couldbea videogamesystem,video camera,orother
inputdevice.
8. Pivotthescreenuntilacomfortableviewinganglereached.
The internal lock limits the screen to a maximum
adjustmentof30 degrees fromclosedposition,the
headrestitselfcan betiltedforward tohelpachievea
comfortableviewingposition.
AUX IN AUX IN
30 degrees
9. Pivotthescreen 10. Eject disc
M1/M2 Screen
Insert disc
-3-
M1/M2 Screen
Eject disc

128-8655
12 of 32
-4-
REMOTE CONTROL OPERATION
Battery Cover
Lift for battery
installation
Battery Installation:
Before attempting to operate your remote control, install the
batteriesasdescribed below.
1. Turntheremotecontrolfacedown.Using afingernail,lift
thebattery coveroff.
2. Installtwo“AAA”batteries. Makesurethatproper polarity
(+/-)is observed.
3. Align the cover tabs withtheremote control and press
down until the cover clicks.

128-8655
13 of 32
Figure 1a. Remote Control
-5-
1. POWER Button* – Press this button to turn M1 or M2
Monitor ON. Press the button again to turn M1 or M2
MonitorOFF.
2. Monitor Select (M1 and M2 Buttons) – Press
correspondingbuttonto change the Remote Control
code to enable control of the M1 or M2 Monitor.
3. NUMBER Buttons –Allows the user to enter the
numbers 0 to 9 for selection of CD tracks, DVD
chapters, and password setting.
4. UP/DOWN (+/-) Buttons – Use these buttons
to make picture adjustments in the picture select
mode.
5. PIXButton(PICTURESELECT)–Eachtime thisbutton
is pressed, the on screen picture adjustment displays
the“adjustmentbar”forBRIGHTNESS,CONTRAST,
COLORorTINT.Oncethedesired adjustmentbaris
displayed, use the (+) / (–) button to adjust the setting.
TheOSDwillautomatically turn offifnoadjustmentsare
made within 6 seconds, or if any other button is pressed.
REMOTE CONTROL FUNCTIONAL
DESCRIPTION
* Functioncontrolisavailableonthe unitandremote control.
NOTE:Tocontroltheindividualunits(M1Monitor/M2Monitor)
presseitherM1orM2 before pressing any other button. For
example,toturnM1MonitorON,pressM1andthenthepower
button.

128-8655
14 of 32
7
10 9
8
6A
11
M1M2
+
–
6B
6C
Figure 1b. Remote Control
6a.Up ()/Down () Buttons – Use these buttons to scroll
upwardand downward,respectively,inmenu options.
6b. LEFT ()/Right () Buttons – Use these buttons to shift
leftandright,respectively, in the menu options.
6c. ENTER Button – Used to implement a selected setting.
7. SETUP Button – Press to display the Setup Menu which
allows the user to change the DVD player options such
asTVDISPLAY,OSDLANGUAGE,PARENTAL
CONTROLetc.Refer totheSettingsandAdjustments
sectionformoreinformation.
8. REPEATButton –Allows the user to repeat a selected
Title,ChapterorTrackof a DVD, CD orMP3.Referto
repeat function in this manual for each type of disc.
9. A-B Button –Allow user to repeat the playback from
pointA to point B.
10. RETURNButton–Notused on this model.
11. MENU Button –Allows the user to access the DVD
(DVDMODE) rootmenu.
-6-

128-8655
15 of 32
Figure 1c. Remote Control
12. SOURCE Button* – Press this button to select the
availablesources.On the M1 monitor,the sources are
DVD,AV1, & AUX. On the M2 Monitor, the sources are
DVD,AV1, &AUX.
13. SUBTITLE Button – Press to display and select the
subtitle language in DVD mode. Each time you press
thebutton,thesubtitle language changes.
NOTE:Thetype andnumberoflanguagesforsubtitlesvary
from disc to disc.
14. ANGLE Button – Press to display and select different
camera angles in DVD mode. Each time you press the
button,theangle changes.
NOTE:Thenumbers ofanglesvaryfrom disctodisc.Not
all discs contain this option.
15. ZOOM Button – Press this button to enlarge the picture
when playing a DVD disc.
PressZOOM button DVD Player Performs
Once Enlargethe picture 2 times of
the original size
Twice Enlargethepicture3times of
the original size
3 times Enlargethe picture 4 times of
the original size
4 times Pictureisreturned to original
size
-7-
12
13
15
M1M2
+
–
14

128-8655
16 of 32
Figure 1d. Remote Control
16. AUDIO Button – Press to display and select the
AUDIOlanguageinDVDmode. Each time you press
thebutton,the languagechanges.
NOTE:Thelanguages foraudiovaryfromdisctodisc.
17. DISPLAY Button – Press to display the current
disc information while the disc is playing. Press the
cursor()buttons to highlightthedesired
option. For title and chapter selection use the
numberbuttonstoenterthedesiredtitleorchapter
numberforangle,audio,andsubtitle.Press the
ENTERbuttonrepeatedly tochangetheitem.
Title
Chapter
Angle
Audio
Subtitle
18. IRT ON/OFF Button – Press this button to turn the
selectedunit (M1/M2)IRTransmitterON/OFF.
17
18
M1M2
+
–
16
-8-

128-8655
17 of 32
Figure 1e. Remote Control
19. PLAY() Button* – Press to activate the play mode
while a disc is loaded in the disc compartment.
20. SCAN FORWARD () Button – Press to search in a
forwarddirection.Press repeatedlytochange the
search speed from 2, 4, 8, 16 times the normal
speed.
21. SCAN BACKWARD () Button – Press to search in
abackwarddirection.Press repeatedly to changethe
search speed from 2, 4,8, 16 times the normal speed.
22. NEXT (l) Button – Press to skip to the next chapter,
track or song.
23. PREVIOUS (l) Button – Press to return to the
previouschapter,trackorsong.
24. PAUSE (II) Button –Allows the user to pause the
playback. Press the Play button to resume normal
playback.
25. STOP ()Button* – Press to stop playback.
-9-
20
19
M1M2
+
–
21
20
19
21
22
23
24
25

128-8655
18 of 32
VOL
Power
-10-
WIRELESS HEADPHONES OPERATION
The system includes built-in infrared transmitters for use with
WirelessHeadphones. Themastermonitor (M1) IR transmitter
uses CH A of the wireless headphones. An A-B switch allows
theuserto select the audio from either the M1 Master (CHA)or
the M2 Satellite (CH B).
Wireless Headphones Special Features
• DualChannel
• Automaticlevelcontrolprevents input signal overloading.
• Uses high frequency infrared light to assure a clean signal
forclearreception.
• Fold-flat ear pieces rotate 90° to facilitate storing in
seat back pocket or door pocket.
When sitting in front of the M1 screen, use the CH A switch
setting. When sitting in front of the M2 screen, use the CH B
switch setting.
To operate the Headphones:
1. Settheheadphones to the proper channeland press
thePower ON/OFF switch on the right-handearpiece
(Figure2)to turn the headphones ON. The power
indicator will light red.
2. Adjust the Volume level with the VOLControl Dial on
the right-hand ear piece (Figure 2) to its lowest setting
beforeputting them on your head.
3. PresstheON/OFFbutton again toturntheHeadphones
OFF.
Wireless Headphone Battery Installation
1. Remove the Battery Cover and remove old batteries
(Figure3).
2. Place two alkaline AAA batteries into the battery
compartmentofeachHeadphone,makingsurethatthe
battery polarity is correct.
3. ReplaceBatteryCover.
Figure 3. Replacing the Headphone Batteries
NOTE: The IR transmitter must be in the “ON” mode. See
IRTransmitter“RemoteControl Functional Description,
Item18.
NOTE: When storing the Wireless Headphones in the
seat back pocket or door pocket, pivot the ear pieces to
the flat position.
Figure 2. Wireless Headphones Controls and Indicators
Volume Control
Power
Indicator
LED (red)
Channel A-B
Switch
Battery
Cover
CH.A
CH.B
Power ON/OFF
Button

128-8655
19 of 32
There are six (6) buttons on the M1 unit and M2 unit:
1. POWER Button – Press this button to turn the unit
ON/OFF.
2. SOURCE Button – Press this button to select between
DVD,AV1,andAUX.
3. SCREEN MODE Button – Press this button to select
betweenWide(16:9),Normal(4:3)aspect ratio orscreen
off(displayOFF).
4. PLAY Button – Press this button to start playback.
5. STOP Button – Press this button to stop playback.
6. EJECT Button – Press this button to eject the disc.
OPERATION INSTRUCTIONS
Control Button Functions (M1/M2 Unit)
-11-
Figure4.Monitor Button Functions
S
AUX
123 4 5
6

128-8655
20 of 32
DVD Basics
To get the optimum use out of your DVD Headrest System,
please read this section completely.
Region Coding
BoththeDVD player andDVDsarecodedby region.These
region codes must match in order for the disc to play. If
the codes don’t match, the disc won’t play. This unit is set to
region1 (USA) and will not play discsthathave a region code
differentfromregion1.Theunitwilldisplay“Wrong Region”.
Types of Discs Your System Will Play
• DVD disc* - DVD discs which contain video.
• Audio discs -Audio CDs contain musical or sound
content only.
• MP3 discs -Adisc that contains audio files (for
example,aCD-RwithdownloadedMP3files).
* This system is capable of playing most recordable DVD
formats.However,dueto thevarietyof discmanufacturersand
software,playback cannotbeguaranteed foreverydisc.
DiscCompatibility
Before you load a disc, make sure that it is compatible with the
player.Insertthe disc withthelabelfacingthedriver.
NOTE: The following discs cannotbe played with this player:
• MiniDisc
• Laserdisc
• CD-I,CD-ROM,DVD-ROM,SuperAudioCD(SACD),
DVDAudio
• BD(Blue-Ray Disc™)andHD (HighDefinition)DVD
discs
Loading and Playing Discs
To Load and Play a Disc
Press the Power button to turn the unit ON. Pivot the screen
forward,selectDVDmodeand insert the disc (label towards
driver)intothe disc insertion slot.
Source Selection
M1Sources:
DVD,AV1, AUX
DVD-SelectDVDtoviewtheinternal(M1) DVD player.
AV1 - SelectAV1 to view the source that is selected on the
M2monitor.
AUX- SelectAUX to view the source that isconnected to the
AUXinput*on the frontoftheunit.
M2Sources:
DVD,AV1, AUX
DVD-SelectDVDtoviewtheinternal(M2) DVD player.
AV1 - SelectAV1 to view the source that is selected on the
M1monitor.
AUX- SelectAUX to view the source that isconnected to the
AUXinput*on the frontoftheunit.
*TheAUX inputrequiresthe useofthesuppliedAVadapter
cable(1/8"-to-RCA).Plugtheexternalsourceintothe3 RCA
jacks(red-to-red, white-to-white,yellow-to-yellow)and plugthe
1/8" plug into theAUX jack on the front of the screen.
-12-
This manual suits for next models
1
Table of contents
Other Toyota Car Video System manuals

Toyota
Toyota Navigation and Multimedia System User manual

Toyota
Toyota 2015 Entune User manual

Toyota
Toyota PX-4226A-C User manual

Toyota
Toyota Touch 2 User manual

Toyota
Toyota Scion iA 2016 Quick start guide

Toyota
Toyota 2018 yaris User manual

Toyota
Toyota Land Cruiser Station Wagon 2020 User manual

Toyota
Toyota RAV4 2020 User manual

Toyota
Toyota Touch 2 Assembly instructions

Toyota
Toyota DVD-AVX User manual