TREND NETWORKS VDV Series User manual

VDV II SERIES
Now Create
and Manage Test
Reports with
AnyWARE Cloud
TREND
TREND
TREND
Depend On Us
User Manual
Cloud Connected
VDV Series

2www.trend-networks.com 158851 Rev 1.
Cloud Connected VDV II Series
Basic | Plus | Pro
User Manual
158851 Rev.1 (2023)
© TREND NETWORKS 2023
The information contained in this document is the property of TREND NETWORKS and is
supplied without liability for errors and omissions. No part of this document may be reproduced
or used except as authorized by contract or other written permission from TREND NETWORKS
The copyright and all restrictions on reproduction and use apply to all media in which this
information may be placed. TREND NETWORKS pursues a policy of continual product
improvement and reserves the right to alter without notice the specification, design, price or
conditions of supply of any product or service. All rights reserved.
TREND NETWORKS
Trend Networks House
728 London Road
High Wycombe, Buckinghamshire
HP11 1HE, United Kingdom

2www.trend-networks.com 158851 Rev 1. 3
Depend On Us
VIDEO
(F-Coax) port
VOICE (6 Pin RJ)
port DATA (8 Pin RJ) port
ON/OFF button
Display
TONE button
TOOLS/SAVE button
Dual Port Remote
Unit VOICE port
Dual Port Remote
Unit
VIDEO port
selection ( ) button
VOICE port selection
() button
Dual Port Remote
Unit DATA port
Storage for Coax
Remote Unit
DATA port selection
button
WARNING!
Do not attach to AC power or telecoms cables carrying >60volts. The VDV II
testers may be damaged and cause a safety hazard to the user.
CAUTION!
Improperly crimped, damaged or un-crimped plugs can damage the ports on
the VDV II testers. Inspect plugs for proper termination and crimping before
inserting into the tester. Contacts should always be recessed into the plastic
grooves of the plug. Only use 8-Position plugs with the 8-Pin (DATA) port and
6-Position plugs with the 6-Pin (VOICE) port.
!
!

4www.trend-networks.com 158851 Rev 1.
POWER
To remove / insert the battery:
• Remove the battery cover screw and
the battery cover from the back of the
tester.
• Remove / insert the battery, taking care
to connect correctly and not to trap the
cable.
• Replace the battery cover and screw.
To switch the tester ON:
Press the ON/OFF button.
• The display shows the selected port
(VOICE, VIDEO or DATA).
• If the Battery Low Indicator is shown, the
battery should be replaced with a new
9V battery.
Battery
cover
Setting
Indicator
Backlight
Indicator
(Plus/Pro)
DATA port
selected
Battery
Low
Indicator
VOICE
port
selected
VIDEO
port
selected
Settings:
• Press the TOOLS/SAVE button to enter the settings
menu.
• Each press of the TOOLS/SAVE button advances to the next
setting. The available settings depending on the model are,
• Port blink, On or O
• NVP setting
• Backlight timer
• Length units, ft/m
• Wiremap test mode, 4-pair or 2-pair
• Bluetooth, On or O
• Press or to cycle through the available options for each
setting.
• Press the TOOLS/SAVE button repeatedly until the Setting
Indicator disappears.
Battery
cover screw

4www.trend-networks.com 158851 Rev 1. 5
Depend On Us
Port Blink (Plus & Pro only)
When set to ON causes the link LED on the connected port to
slowly flash, enabling visual location of the switch port. The VDV
II can also be connected directly to an Ethernet device to check if
it’s port is responding to link pulses.
• Press or turn Port Flash On ( symbol).
• Connect to an active Ethernet port/cable.
• The link LED on the switch will flash 2 seconds on, 2 seconds o
then repeat.
• Press or to turn Port Flash O ( symbol).
Length Calibration (Pro model)
Adjust the NVP (Nominal Velocity of Propagation) value with the
or buttons to set the TDR to the electrical characteristics of
the cable being tested.
Set the NVP value from the cable data sheet. If the data sheet
is not available, connect a known length of cable that is at least
20ft/6m long to the desired test port and adjust the NVP until
the displayed length matches the length of the cable. The far end
of the cable does not need to be terminated or connected to the
remote.
Typical NVP values
Cat 3 65
Cat 5/5e/6/6A 68-72
Cat 7 79
Telephone 65
RG59/RG6 82
NVP
Length Zeroing (Pro Model)
The TDR length can be set to 0.0 by pressing the
++buttons simultaneously. This can be
performed without any cables connected so the measured
length during testing includes all connected cables. Or it can be
performed with a patch cord connected so the measured length
during testing excludes the length of the patch cord.

6www.trend-networks.com 158851 Rev 1.
Length Calibration (Plus model)
Adjust the pF (picofarad) value to adjust the capacitance with the
or buttons to the characteristics of the cable being tested.
Alternatively, connect a known length of cable (at least 20ft/6m
long) and adjust until the displayed length matches the length of
the cable.
Backlight Timer (Plus & Pro models)
Adjust the backlight timer in steps of 0 (o), 10, 30, 60, or 300
seconds. The backlight timer resets each time a button is pressed.
The backlight timer is disabled when connected to an Ethernet
switch or PoE switch/injector.
Length Units (Plus & Pro models)
Toggle the length measurement between feet (ft) and meters (m)
using the or buttons.
2 or 4 Pair Testing (Pro model)
The VDV II Pro can be set to test 4 pair cable (default setting) or
2 pair cable.
In 2 pair mode, the test will Pass when pins 1,2,3 and 6 are
connected. 2 pair mode should be used when testing industrial
cabling using RJ45-to-M12 patch cords.
• Press or to toggle between the 4PAIr and 2PAIr modes.
Bluetooth Settings
Turn the Bluetooth radio ON or OFF using the or buttons.
The unique ID of the tester is shown at the bottom of the screen.
The ID of the tester will be displayed when connecting the tester
to the TREND AnyWARE Cloud App.

6www.trend-networks.com 158851 Rev 1. 7
Depend On Us
TERMINATIONS
The Dual Port Remote Unit can be stored in the bottom end of the Tester, with the jacks
either inside for protection or outside for testing patch cables without removing it from
the Tester, and provides internal storage for the Coax Remote Unit.
Connections
To connect to a cable and to confirm correct connection:
• Use the correct port (VOICE, VIDEO or DATA)
according to the cable connector type. (Use VOICE for
RJ11, RJ12, RJ14 or RJ25 connectors, VIDEO for F 75 Ω
Coax or DATA for RJ45 connectors).
• Press the corresponding port button (VOICE, VIDEO or
DATA).
• The display shows the selected port.
• Connect one end of the cable to the selected port on
the tester and the other end to a Remote Unit for cable
identification and testing or to an Identifier for cable
identification only.
• The display shows the type of termination (Remote
Unit or Identifier) and its Number to assist identification
when a number of dierent terminations are in use.
Dual Port
Remote Unit
# 1 (Standard)
Wiremap/Length/ID
Coax
Remote Unit
# 1 (Standard)
# 1 to 12 (Optional - 158053)
Wiremap/Length/ID
RJ45
Remote Unit
# 1 to 12 (Optional - 158050)
Wiremap/Length/ID
RJ45
Identifier
# 1 to 24 (Optional - 158051)
Length/ID
Identifier
Indicator
Termination
Number
Remote Unit
Indicator

8www.trend-networks.com 158851 Rev 1.
To test a cable:
Connect the cable to the tester and to a
suitable Remote Unit as described above.
• Cable testing runs continuously (except
when in TOOLS/SAVE mode or if
voltage is detected). There is no need to
start or stop the cable test.
Cable test results are shown using the two
rows of numbers in the lower half of the
display. The top row of numbers refers
to the pins at the near end. The numbers
displayed, and S(Shield), depend on the
port in use…
VOICE – Pins 1, 2, 3, 4, 5 and 6 are shown
VIDEO – S and Pin 1 are shown
DATA – Pins 1, 2, 3, 4, 5, 6, 7 and 8
are shown. S is shown if the shield is
connected.
The lower row of numbers refers to the
pins at the far end. The numbers displayed
show which pin at the far end is connected
to which pin at the near end. Open circuits
and short circuits are shown. Multiple
short circuits are shown in sequence.
Split Pair test:
!next to the Split Pair symbol is displayed
when the test is disabled.
• When the Split Pair test is enabled, split
pairs will cause the test to fail.
• When the Split Pair test is disabled, split
pairs will not cause the test to fail.
To disable / enable the Split Pair test:
Press and hold the network mode button
for 2 seconds to change the setting.
CABLE TESTING
Shows when
Test Passed
Shows that Pin 8
is open
Shows when Split Pair
test is disabled
Flashes when
Split Pair is
detected
Shows when a crossover
(uplink cable) is detected (does
not cause the test to fail)
Shows that
Pin 6 is connected to Pin 7
Shows when
Test Failed
Shows that Shield
and Pins 1, 2 and 3 are
correctly connected
Shows that
Pin 4 and Pin 5
are reversed

8www.trend-networks.com 158851 Rev 1. 9
Depend On Us
LENGTH MEASUREMENT (PLUS & PRO MODELS)
To measure the cable length:
Connect the cable to the tester.
• The display shows the cable length.
Press the port selection button of the
currently selected port to cycle through
the dierent pairs.
• The display changes to show the
overall cable length or the length of an
individual pair inside the cable.
• When the overall length setting is
selected, the length of the shortest pair
in the cable is displayed as required by
TIA & ISO cabling standards.
• By investigating the individual pair
lengths, cable faults can be found.
• The Pro model will display the distance to
terminated, opened and shorted pairs.
• The Plus model will display the distance to
terminated and opened pairs.
• The individual pairs are often dierent lengths
and may be longer than the overall cable
because of the internal twisted construction.
Length of shortest pair Length of pair 1-2Length of Pair 3-6
Max
Ethernet
Speed
ETHERNET SERVICE DETECTION (PRO MODEL)
The VDV II Pro displays the maximum link
speed (100M/1000M/2.5G/5G/10G) when
connected to an active Ethernet port.
The PoE indicator and voltage are
displayed if the Ethernet port has active
PoE.
Note: the PoE display is an indication that
PoE is present on the circuit, this is not a
PoE load test.

10 www.trend-networks.com 158851 Rev 1.
VOLTAGE MEASUREMENT (PRO MODEL)
If a voltage greater than approximately
2 volts is detected on any pin(s), cable
testing and length measurement are
not possible. The Pro model displays
information about the voltage(s) present
and the type of service that those voltages
indicate, where applicable.
The display shows the detected voltage
and the pins on which it is present,
together with polarity. Depending on the
port and the voltages on the pins, the
display also shows the type of service
detected on the cable.
Port Service Voltage Pins
Voice PBX >30v 3-4 or 2-5
Data
PoE (See previous section)
PBX >30v 4-5
ISDN >30v 3/6 – 4/5
Example 1 –
PBX service on
VOICE port
Example 2 –
ISDN service on
DATA port
Example 3 –
Unknown service
on DATA
Shows Pins 3 and 6
are 38volts positive
compared to Pins
4 and 5
Shows Pin 1 is
23volts positive
compared to Pin 7
Shows analog
telephone
service (PBX)
Shows digital
telephone
service (ISDN) Warning
Indication
Shows Pin 2 is
48volts positive
compared to Pin 5

10 www.trend-networks.com 158851 Rev 1. 11
Depend On Us
To switch on tone generation:
Press the TONE button.
• The currently selected tone type is
generated on the currently selected pins
of the currently selected port.
• Tone generation continues until switched
o or for a maximum of 144 minutes.
To change the port that the tone is
applied to:
Press the desired port selection button.
• The tone is applied to the selected port
using the tone type and pin settings that
were last used on that port.
To change the pins that the tone is
applied to:
Press the port selection button of the
currently selected port.
• The pins that the tone is applied to
change each time the button is pressed.
To change the tone type:
Press the TONE button.
• The tone type changes each time the
TONE button is pressed.
The tone generation can be controlled
from the far end of the cable, to assist in
confirming that the correct cable has been
traced.
TONE GENERATION
VDV II can be used together with a compatible tracing probe (available from TREND
NETWORKS) to identify and trace cables. VDV II can generate various types of tone on various
combinations of pins. Choice of tone type and pin connection is best determined by experiment
to achieve the best results with a particular probe and cable combination.
Analog
tone active
Shows
tone type
Digital
tone
active
Shows the
port that
the tone is
applied to
Tone generator
active Shows pins
that tone is
applied to
To control the tone generation from
the far end:
Briefly apply a short circuit between any
two wires of the cable.
• The sound of the tone changes.
To switch o the tone generation:
Press and hold the TONE button.
• The tone generation stops and normal
cable testing is resumed.

12 www.trend-networks.com 158851 Rev 1.
PORT BLINK (PLUS & PRO MODELS)
To assist in confirming correct cabling of Ethernet installations, VDV II Pro can generate
Ethernet signalling on one end of a cable which causes the port LED of the device
connected to the other end to flash.
Port Blink is only available when the DATA mode is selected.
To switch on Hub Blink:
Press the TOOLS/SAVE button until the Ethernet Device Indicator
flashes.
Press or
• The symbol displays when Port Blink is switched on.
• The Port Segment of the Ethernet Device Indicator blinks.
• Port blinking continues until switched o or for a maximum of
144 minutes.
To switch o Port Blink:
Press the TOOLS/SAVE button
• The Ethernet Device Indicator Port Segment stops flashing.
• Port Blink stops.
Ethernet
Device
Indicator
Port
Segment

12 www.trend-networks.com 158851 Rev 1. 13
Depend On Us
The VDV II testers can be used with the TREND AnyWARE Cloud App to store test results and
upload to TREND AnyWARE Cloud to manage projects and generate reports.
Process overview
• Download the TREND AnyWARE Cloud App from the Apple App Store or Google Play Store
and sign-in to your AnyWARE Cloud account.
New users can create a new account on the App.
• Pair the tester to the AnyWARE Cloud App.
• Connect the VDV II to the cable being tested.
• Send the result from the VDV II to the AnyWARE Cloud App where the result is stored.
• Upload completed jobs to AnyWARE Cloud where results can be viewed and organized.
• Generate test reports of jobs or individual test results.
Log-in or create a free account on TREND AnyWARE Cloud
The connected tester will be automatically registered to your AnyWARE account and all uploaded
results will sent to this account.
USING VDV II WITH THE TREND ANYWARE CLOUD APP
Use an existing account AnyWARE
Create a new AnyWARE account

14 www.trend-networks.com 158851 Rev 1.
All test saved by the VDV II will upload to the account used to log into the app. If you have an
existing AnyWARE Cloud account and want the test to upload to that account, enter the user
name/password for that AnyWARE Cloud account.
• Once logged in the app will default to the Home screen and begin searching for a tester.
Pair tester to App
• Turn on the tester and ensure Bluetooth is
turned on.
• Device with ID 41 detected but not
connected.
• Tap the device ID to pair with the App.
Tester paired to App
When successfully connected to the App, a
picture of the tester and its Device ID will be
displayed on the Home Screen.
The tester is automatically registered to the
AnyWARE Cloud account used to log in.

14 www.trend-networks.com 158851 Rev 1. 15
Depend On Us
Create a new job
• Press the Jobs button to open the Jobs
screen.
• Press + to create a new job. Names can be
up to 25 characters long. Up to 500 jobs
can be saved in the App.
• Enter a name then press CREATE JOB.
Job list
The Jobs screen displays a list of jobs, the
number of tests in each job, the upload status
and the date/time of the last update.
Set Operator name
• Press the Operator button to set the name
of the operator.
• The operator’s name will appear on the
test reports saved on the App.

16 www.trend-networks.com 158851 Rev 1.
Test Setup
• Press the Start button to begin saving
tests from the tester.
• Tap the Job name to select the Job where
tests are saved.
• Enter the ID for the next test to be saved.
The ID will auto-increment each time a
new test is saved.
• Optionally enter text into the CABLE
INFORMATION field. This text will appear
on the report to identify the type of cable
tested.
• An image can be added to the record
before or after the test is saved, but
before the job is uploaded to the Cloud.
Press the button to select an existing
image from the phone or use the camera
to take a new picture.
Adding Photos to a Test
• A photo can be added to the record
before or after the test is saved, but
before the job is uploaded to the Cloud.
Press the button to select an existing
image from the phone or use the camera
to take a new picture.

16 www.trend-networks.com 158851 Rev 1. 17
Depend On Us
Saving Tests to the AnyWARE App
• Connect the VDV II to the cable or PoE
link to be tested and wait for the result to
appear on the screen.
• Change to the Start screen on the app.
• Press the Save button on the tester
for 2 seconds. This will send the current
test result to the App and save the record.
• The Test ID and Job name will be
displayed on the App when the test is
saved.
• The last digit/letter of the Test ID will
increment and the App is ready to save a
new test.
Delete a Job
• Tap Jobs to view the job list.
• Swipe the Job name to the right to delete
the Job.
Deleting a job permanently deletes the
tests from the App. Upload tests remain
on the Cloud when deleted from the App.
Viewing Saved Results
• Tap Jobs to view the Job list. The list of
Jobs displays the current number of tests
stored in each Job.
• The blue cloud with the arrow next to
the Job name indicates a Job contains
tests that have not been uploaded to
AnyWARE Cloud.
• Tap the Job name to view the tests stored
in the Job.

18 www.trend-networks.com 158851 Rev 1.
Test List
• The test list displays the Test ID, date/
time, type of test, and pass/fail result if
applicable. Only wiremap and PoE tests
display a pass/fail result.
• Tap the Test ID to view the test information
Test Information
• Before a Job is uploaded to AnyWARE
Cloud, only the test information, not the
test results are available.
After a Job is uploaded to AnyWARE
Cloud, the results are processed and can
be viewed on the AnyWARE App.
• Before uploading to AnyWARE Cloud the
Test ID can be modified by tapping the
edit button in the upper-right corner.
• Tap JOB to open the Job List and move
the current test to a dierent job.
• Tap the below IMAGE to add or change
the image attached to the Test ID.
• Tap the waste bin in the bottom-right
corner to delete the test.

18 www.trend-networks.com 158851 Rev 1. 19
Depend On Us
Uploading Test to AnyWARE Cloud
A Wi-Fi or mobile data connection is required
to upload results
• Tap the blue upload icon beside the
Job name to upload only that Job to
AnyWARE Cloud.
• Tap Upload All to upload all Jobs from the
App to AnyWARE Cloud.
Viewing Uploaded Test Results
• After a job is uploaded to AnyWARE
Cloud the test results can be viewed on
the App.
• The test results are read-only and cannot
be modified once the tests have been
uploaded to AnyWARE Cloud.
• After the Job is uploaded, the arrow will
change to a tick mark which indicates all
tests in the Job are uploaded.

20 www.trend-networks.com 158851 Rev 1.
Viewing Uploaded Test Results on AnyWARE Cloud
• Log into AnyWARE Cloud to view uploaded test results.
www.anyware.trend-networks.com
• The Job Tree and list of Jobs is shown in the order of most recent at the top by default.
• Click on the Job name in the tree or in the blue box to open the Job and view the test results.
This manual suits for next models
4
Table of contents
Other TREND NETWORKS Test Equipment manuals
TREND NETWORKS
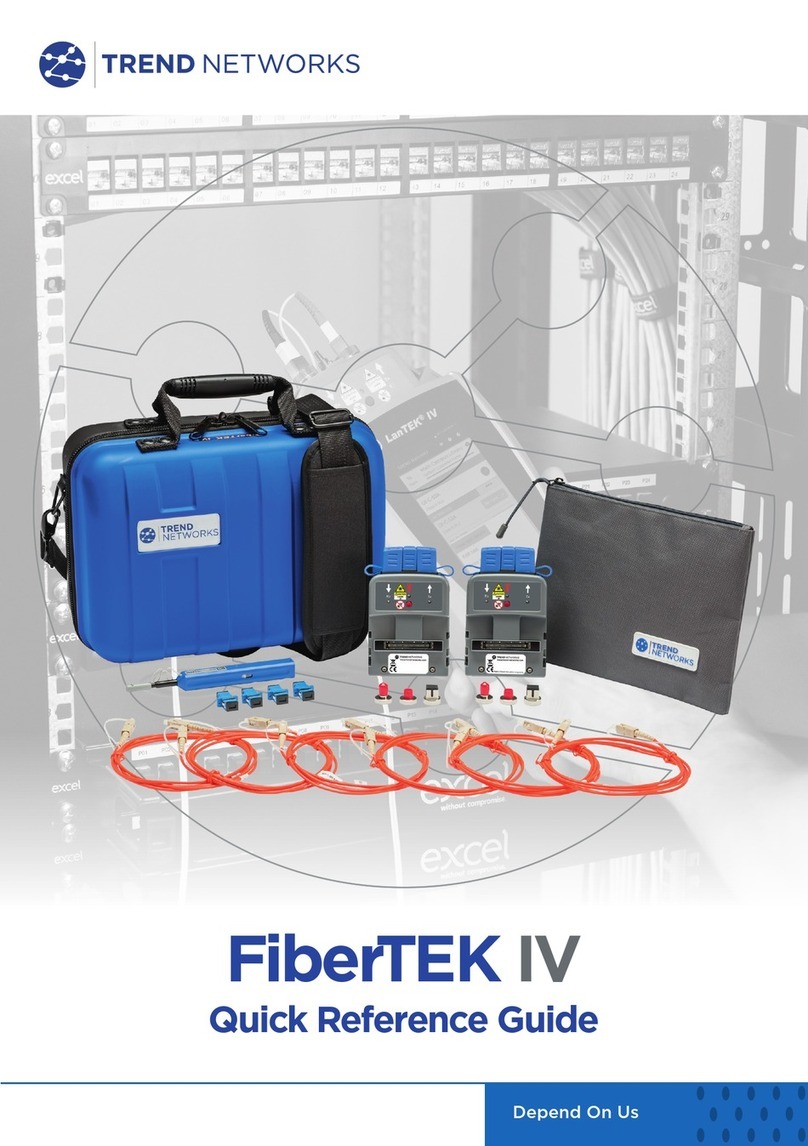
TREND NETWORKS FiberTEK IV User manual

TREND NETWORKS
TREND NETWORKS SignalTEK 10G User manual

TREND NETWORKS
TREND NETWORKS LanTEK IV-S User manual
TREND NETWORKS
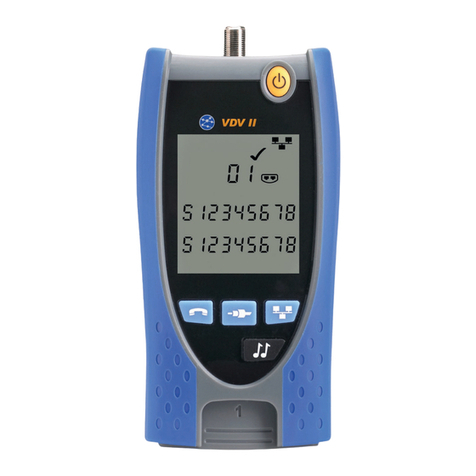
TREND NETWORKS VDV II User manual

TREND NETWORKS
TREND NETWORKS LanTEK IV User manual
TREND NETWORKS
TREND NETWORKS FIBERMASTER User manual
