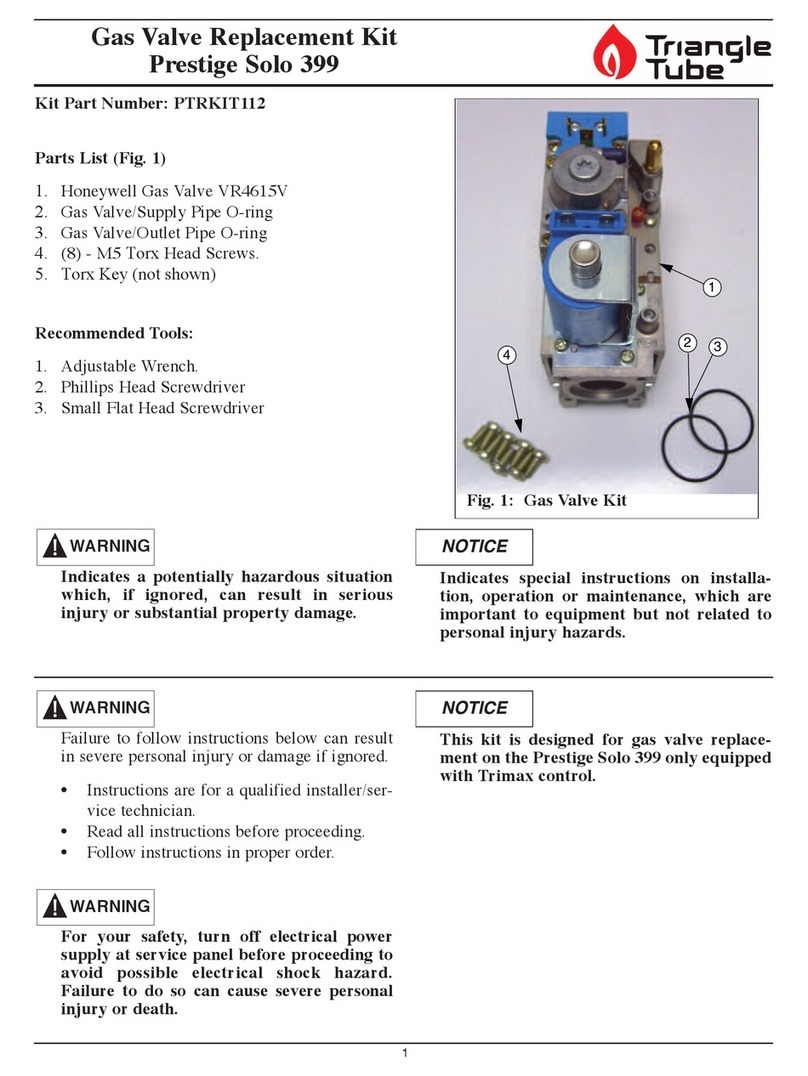
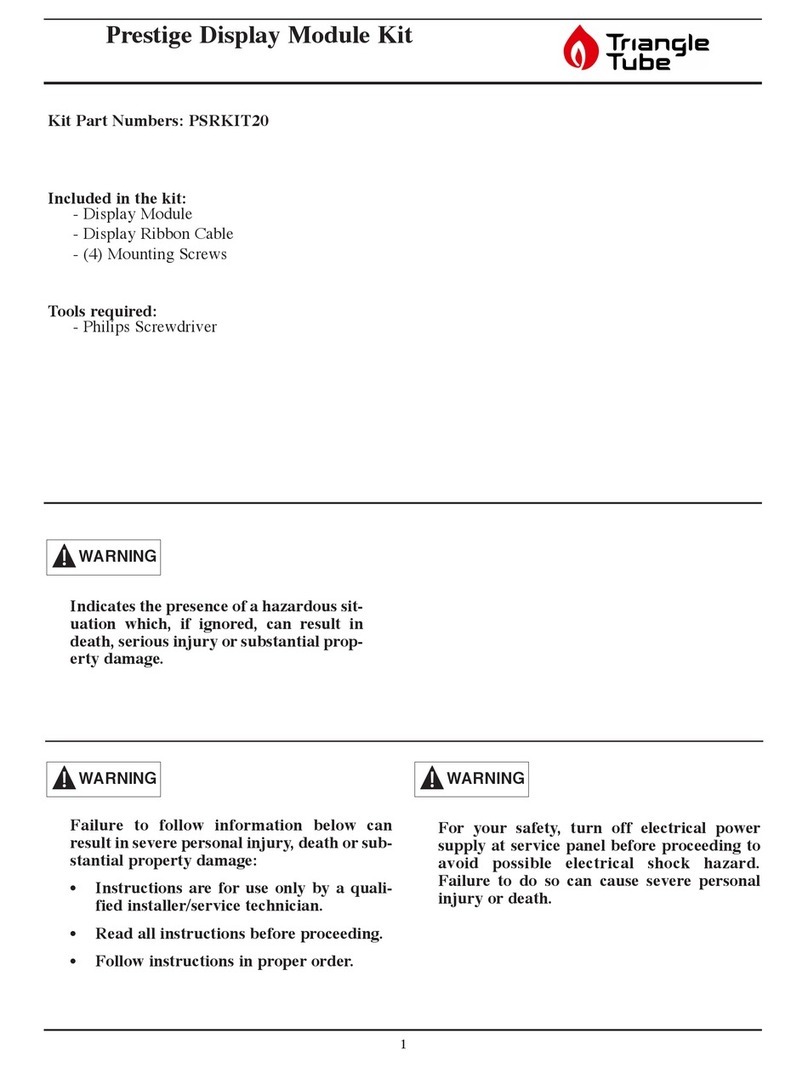
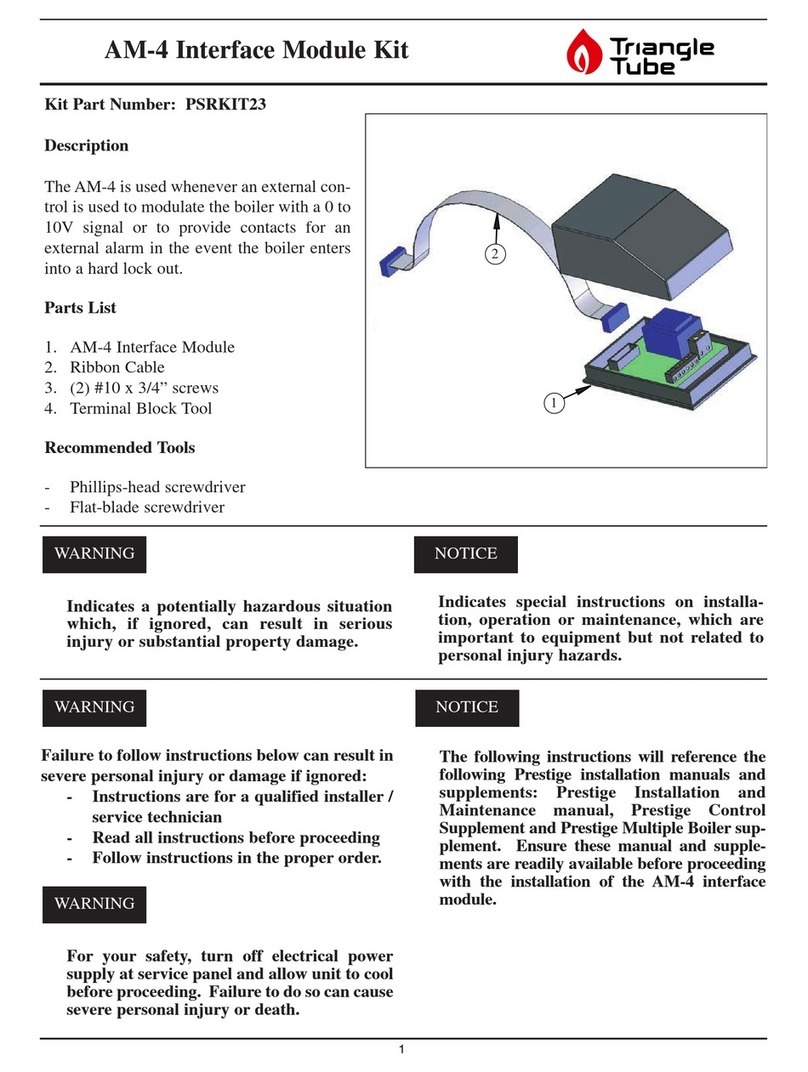
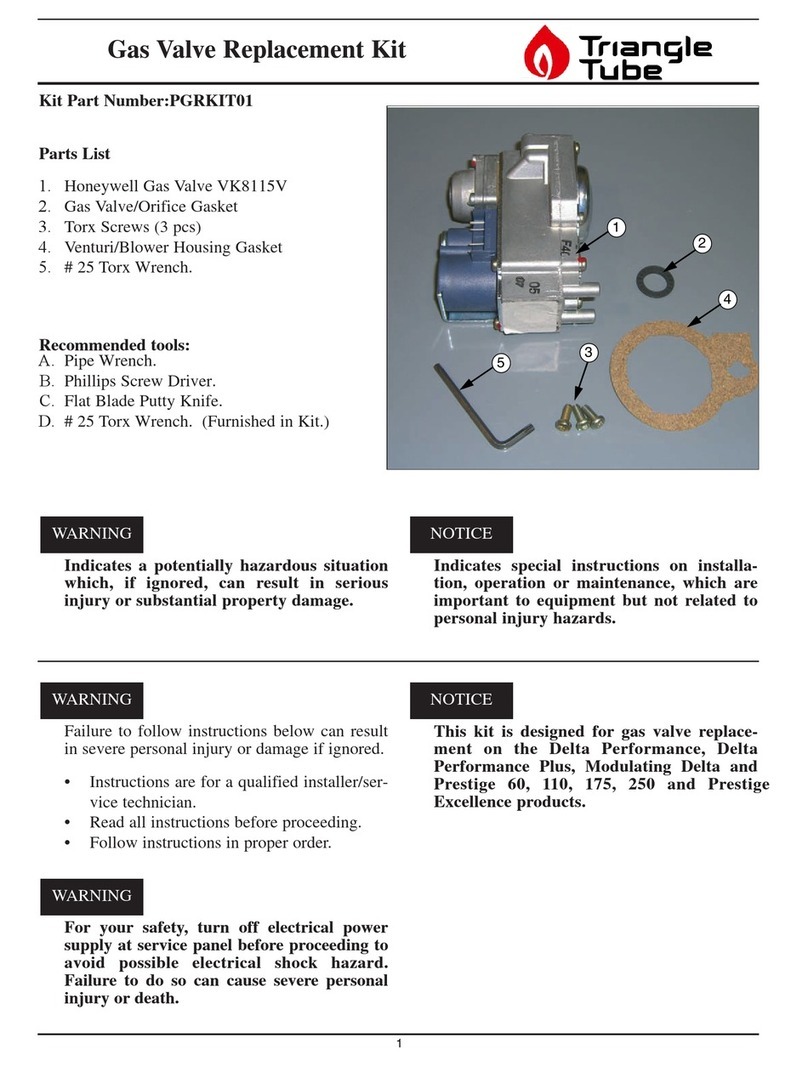
TriangleTube Prestige Trimax 399 User manual

1
Prestige Trimax 399
Ignition Kit - Installation Instructions
1.1. Applicability
Prestige boilers with “PT”-prexed serial number, as
indicated on data plate.
Kit Part Number Model
PTRKIT303 PT 399
Table 1 - PT Ignition Kit Numbers
1.2. Purpose
This kit (see Fig. 3 for details) replaces the existing TriMax
control module, the igniter and wiring, the internal
venting tube and the heat exchanger insulation.
1.3. Initial tasks
Conrm the replacement kit is appropriate for the boiler
to be worked on (see Table 1).
Write down all the appliance settings, including the
cascade settings (if the boiler is in a cascade) for reference
before bringing any change to the appliance. A reference
table is provided on the last page of this document.
1.4. Boiler preparation
1.4.1 Required Tools and Material
• Screwdriver, at head
• Screwdriver, cross head
• 10 mm socket/wrench
• Wrench, Torx 20
• Flue gas analyzer
1.4.2 Preparation Procedure
1. Turn the boiler o by pressing the on/o power
switch.
2. Allow boiler to cool down.
3. Disconnect electrical power at the external electric box
• Avoid electrical shock by disconnecting the
electrical supply prior to performing any operation
on the internal parts of the boiler.
DANGER
DANGER
• Before any operation on the internal components
of the appliance, allow the appliance to cool
down to room temperature. Some components
can be very hot.
• Failure to comply will result in substantial property
damage, serious injury, or death.
4. Remove boiler front panel as follows:
• Remove the thumb screw along the upper
edge of the unit.
• Lift the panel up and tilt back slightly to remove
the front panel.
5. Slide left and right tabs of control panel inward and
lower control panel. See Fig. 1
6. Pull the retaining tabs on top of the rear cover to
remove the rear control box cover. See Fig. 2.
Fig. 1 - Opening and Lowering the Control Panel
Retaining tabs
Fig. 2 - Opening the Retaining Tabs
Revision Date: 1/28/2020 2020-33 Prestige Trimax 399 Ignition Kit

2
PRESTIGE IGNITION KIT - INSTALLATION INSTRUCTIONS
1
2
4
3
Bk. Black
Br. Brown
R. Red
V. Violet
W. White
Gr. Green
Gr
Br
WBk
V
Fig. 3 - Prestige Solo & Excellence - Ignition Kit
Item Description Qty
1
Igniter 1
Screws, igniter 2
Gasket, igniter 1
Bracket, spark generator (not illustrated) 1
2 Spark generator 1
3 Wiring, spark generator 1
4Control Module, TriMax 1
Burner insulation (not illustrated) 1
“PU”Sticker, S/N adaptation (not illustrated) 1

3
PRESTIGE IGNITION KIT - INSTALLATION INSTRUCTIONS
Before disconnecting any wire connections, mark
and label all connections and location of the
connections.
7. Disconnect the ignition cable by grasping the igni-
tion terminal and pulling rmly upwards from the
back of the control module.
8. Remove all (8) Molex wiring connectors from the
Control Module.
9. Support TriMax Control Module with one hand
while removing individual Molex connectors,
pressing tabs on Molex plugs for quick release.
See Fig. 4 below.
Fig. 4 - Disconnecting and Removing the Control Panel
8 Molex
connectors
Screw
location
Screw
location
1.5. Burner Insulation and Igniter Replacement
1.5.1 Required Tools and Material
• Flat head screwdriver
• Extended Phillips/Torx head screwdriver
• Torx wrench
• Cord saw or similar tool to cut venting pipe
1.5.2 Removal of Internal components
1. See Fig. 5 for reference. Remove air intake (3) from
venturi. Retain for reinstallation.
Before disconnecting any wire connections, mark
and label all connections and location of the
connections.
2. Open top access panels by removing top access
panel (1) located above the heat exchanger on the
top jacket panel.
NOTICE
NOTICE
Fig. 5 - Boiler Components
3. Disconnect all connectors from the blower and the
gas valve.
4. Using 2 wrenches, disconnect the gas supply pip-
ing (2) inside the boiler at the brass union located
just below the gas valve. The gas piping can remain
inside the boiler or be removed for additional clear-
ance / access.
5. Holding the gas valve/venturi assembly with one
hand, release the mounting screws that secure the
venturi to the blower.
6. Remove the gas valve/venturi assembly and hard-
ware from the blower. Retain for reinstallation.
1.5.3 Checking the Orifice Size
1. Remove 4 screws securing the 90° gas pipe to the
venturi and check the presence of an orice and its
size (see Fig. 6).
2. Make sure that the correct orice (see Table 2), is
installed on the boiler. Replace or install one as re-
quired.
3. Reassemble gas valve and 90° pipe assembly and
the venturi and set assembly aside for later reinstal-
lation.
PT 399
2
3
1

4
ket, on the burner mounting plate support, paying
attention not to damage the new insulation.
Fig. 7 - Prestige Trimax - New Igniter
3. Tighten 2 igniter screws by hand, then torque
screws between 13 and 18 lbf-in.
Do not exceed the recommended max. torque
value for the igniter attachment screws to
prevent the igniter stems from distorting.
4. Place burner/burner plate/insulation assembly care-
fully in position. Do not secure the assembly just yet.
5. If removed previously, reinstall the blower and gas-
ket.
6. Secure burner plate using the retained nuts. Torque
at 50 lbf-in.
7. Reinstall the venturi/gas valve assembly on blower
using retained screws.
8. Reconnect the gas pipe to the gas valve connec-
tion.
1.5.6 Installation of Spark Generator
1. Install spark generator on bracket using 2 screws.
2. Locate the spark generator with bracket (A) on the
blower (B). (See Fig. 9), and secure using 2 of the
venturi-to-blower screws.
3. Connect the spark generator cable with connector
(C) to the new igniter.
NOTICE
PRESTIGE IGNITION KIT - INSTALLATION INSTRUCTIONS
Fig. 6 - PT 399 Orice location
Orice
location
PT version NG LP
399 0.339” – 8.6mm 0.264” – 6.7mm
Table 2 - Orice Sizes
1.5.4 Removing the Burner and Insulation
1. Remove heat exchanger bracket located at the
back of the heat exchanger. Discard bracket.
2. Remove burner plate nuts securing the burner mount-
ing plate to the heat exchanger using a socket wrench.
3. Remove burner plate/burner and blower by releas-
ing the 4 bolts and remove blower from burner
plate. Retain for later reinstallation. Then remove
burner, burner plate and burner insulation.
4. Remove insulation from burner. Discard according to
applicable local regulations.
5. Disconnect the igniter wiring from the igniter. Discard.
6. Using the Torx wrench, release two screws and
remove the igniter and gasket from the burner
mounting plate. Discard all.
If the gasket is stuck on the igniter support, use
a flat head tool and release it carefully from the
surface. Be careful not to scratch the surface.
7. Clean combustion chamber. Refer to the installa-
tion manual of the appliance.
1.5.5 Installation of new Insulation and Burner
1. Slide the newly supplied burner insulation over the
existing burner tube.
2. Install the new igniter (See Fig. 7), with its new gas-
NOTICE

5
PRESTIGE IGNITION KIT - INSTALLATION INSTRUCTIONS
1.5.7 Control Module Replacement
1. Remove the 2 screws securing the Control Module into
the enclosure and remove the Control Module. Retain
screws for new Control Module installation. See Fig. 4.
2. Discard Control Module according to applicable lo-
cal regulations.
3. Install new TriMax control module with 2 retained
screws.
4. Reinstall the rear cover of the control module.
1.5.8 Wiring Connection (See Fig. 12)
1. Reconnect all disconnected plugs to blower, gas
valve and sensors, as required.
2. Reconnect light green grounding cable (disconnect-
ed from old igniter) to the gas valve grounding tab.
3. Connect new brown cable to ignition transformer and
to control module grounding tab F01. See Fig. 12.
4. Connect new violet wire to igniter grounding tab
and to control module grounding tab F00.
5. Reconnect all disconnected Molex wiring connec-
tors to the Control module, except X02.
6. Connect spark generator wiring to the control
module and to unconnected Molex connector.
7. Connect new green grounding wire to one of the
left grounding tabs on the casing.
8. Connect green grounding cable that used to be
connected to F00 to the grounding tab on the new
violet cable connection.
1.5.9 Checking the Combustion Settings
1. Turn boiler on.
2. Allow the appliance to stabilize and insert the gas an-
alyzer probe in the top vent adapter measuring port.
3. Check combustion values as follows (please refer-
ence the Installation Manual of the appliance for
more details on the controls):
• Press the round INSTALLER button.
• Enter the installer access code “054” by using
the LEFT and RIGHT buttons to select a digit
and the UP and DOWN buttons to change the
digit. Press the OK button to conrm.
• Using the RIGHT button, highlight the Manual
Operation icon, then press the OK button.
• Press the OK button while the FAN icon is high-
lighted to manually re the burner and power
the CH circulator.
• Press the RIGHT button to adjust the ring rate
from 1% to 100%.
1x
ENTER ACCESS CODE
05[4]
Manual Operation
Manual Operation
FAN
CH1
CH2
DHW
Released
O
O
O
Fig. 8 - Accessing the Combustion Adjustment Interface
• If the CO2level during high re (100%) diers
by more than 0.4% from the recommended
combustion setting (See Table 3) adjust the
throttle screw (see Fig. 10) as follows:
• Counter-clockwise rotation of the throttle
screw at High Fire : O2decreases, CO2 increases
• Clockwise rotation of the throttle screw at
High Fire : O2increases, CO2decreases.
• Once the combustion level is set at high re
(100%), manually place the boiler into low re
(1%) mode by pressing the LEFT button to
adjust ring rate down.

6
PRESTIGE IGNITION KIT - INSTALLATION INSTRUCTIONS
Fig. 9 - Spark Generator and Bracket (PT 399)
Fig. 10 - Throttle and Oset Locations
NG LP
High Fire
CO29.5% 11.2%
O24.0% 4.0%
CO < 100 ppm <100 ppm
Low Fire
CO29.5% 11.2%
O24.0% 4.0%
Table 3 - Recommended Combustion Levels
• If the CO2 combustion level during low re
(1%) diers by more than 0.4% from the
recommended combustion setting (See Table
3), remove plastic cover from Oset screw (See
Fig. 10) and adjust as follows:
• Counter-clockwise adjustment of the oset
screw at Low Fire : O2 increases, CO2 decreases
• Clockwise adjustment of the oset screw at
Low Fire : O2 decreases, CO2 increases.
1.5.10 Return to Service
1. Reinstall the air intake on the venturi.
2. Close top access panel, as required.
3. Check that all wiring connections are secure.
4. Check that the gas connection is tight.
5. Supply power to the boiler through the external elec-
tric box.
6. Open gas supply.
7. Turn boiler on using the boiler On/O switch.
8. Perform any required conguration change in the Tri-
Max setup according to the initial settings indicated
in “Default Values and Adjustments” on page 8.
9. Reinstall the boiler front panel.
10. On the rating plate of the appliance, install the
sticker provided with the kit. This will indicate that
the boiler has been upgraded with the ignition kit,
for future reference.
Fig. 11 - - Prestige Solo & Excellence - Rating Plate Correction
PU Stick here
Throttle
Oset
(Remove
plastic
cover to
access
screw)
B
C
A

7
PRESTIGE IGNITION KIT - INSTALLATION INSTRUCTIONS
Fig. 12 - - Prestige Solo & Excellence - PCB Wiring - POSTMOD
Gr
Br
WBk
V
F00
F01
V
To left side casing
grounding tabs
Connect to uncon-
nected Molex
connector in exist-
ing boiler wiring
DO NOT reconnect
original boiler
wiring Molex
connector here
Connect here
Bk. Black
Br. Brown
R. Red
V. Violet
W. White
Gr. Green

8
PRESTIGE IGNITION KIT - INSTALLATION INSTRUCTIONS
PRESTIGE TriMax Control
and/or Display Module Replacement
6
Table 1: TriMax Settings
Revised Date: 1/14/14 2011-55 Prestige_TriMax Control &/or Display Module Repl
DOMESTIC SETTING FACTORY DEFAULT MINIMUM SETTING MAXIMUM SETTING EXISTING SETTING
DHW Operation Enabled
Demand Switch
Boiler DHW Setpoint 186°F [86°C] 96°F [35°C] 188°F [87°C]
DHW Storage Setpoint 140°F [60°C] 68°F [20°C] 150°F [65°C]
DHW On Differential 6°F [3°C] 4°F [2°C] 18°F [10°C]
DHW Storage Adder 46°F [25°C] 0°F [0°C] 54°F [30°C]
DHW Post Pump Time 1 minute OFF 30 minutes
DHW Priority Timeout OFF OFF 120 minutes
DHW Priority Enabled
DHW Call Blocking 0 minute 0 minute 30 minutes
DHW to CH Call Blocking 1 minute 0 minute 30 minutes
Antilegionella Function Disabled
HEATING SETTING FACTORY DEFAULT MINIMUM SETTING MAXIMUM SETTING
EXISTING SETTING
Heating Operation Enabled
Demand Switch &
Outdoor Reset
Absolute Max CH Setpoint 188°F [87°C] 68°F [20°C] 188°F [87°C]
CH1 Maximum Setpoint 180°F [82°C] 68°F [20°C] 188°F [87°C]
CH1 Minimum Setpoint 120°F [49°C] 60°F [15°C] 188°F [87°C]
Reset Curve Coldest Day 0°F [-18°C] -30°F [-34°C] 50°F [10°C]
Reset Curve Warmest Day 64°F [18°C] 60°F [15°C] 78°F [25°C]
CH2 Circuit Enabled
CH2 Maximum Setpoint 140°F [60°C] 68°F [20°C] 188°F [87°C]
CH2 Minimum Setpoint 80°F [27°C] 60°F [15°C] 188°F [87°C]
Warm Weather Shutdown OFF OFF 78°F [25°C]
Pump Constant Circulation Disabled
CH Post Pump Time 1 minute OFF 20 minute
Freeze Protection Enabled
Frost Protection Setpoint -22°F [-30°C] -22°F [-30°C] 50°F [10°C]
Parallel Shift Value 0°F [0°C] 0°F [0°C] 144°F [80°C]
CH Call Blocking 1 minute 0 minute 30 minutes
System Pump CH1/CH2
CASCADE SETTING FACTORY DEFAULT MINIMUM SETTING MAXIMUM SETTING EXISTING SETTING
Stage Delay 60 seconds 0 second 255 seconds
Minimum Firing Rate 30% 0% 100%
Maximum Firing Rate 398 MBH [117kW] 0 MBH [0kW] 869 MBH [255kW]
CH / DHW Boilers 0 0 6
Automatic Rotation Enabled
CH Proportional Gain 7 1 255
CH Integral Gain 245 1 255
DHW Proportional Gain 7 1 255
DHW Integral Gain 245 1 255
BOILER SETTING FACTORY DEFAULT MINIMUM SETTING MAXIMUM SETTING EXISTING SETTING
Prestige Model Solo
Lockout Temperature 210°F [99°C]
Modbus Address 0=BCST 0 247
Prestige_TriMax_Control_Display_Module_DCR639 1/14/14 9:45 AM Page 6
1.6. Default Values and Adjustments
This manual suits for next models
2
Table of contents
Other TriangleTube Control Unit manuals
TriangleTube
TriangleTube PSRKIT74 User manual

TriangleTube
TriangleTube Optima Series Installation instructions
TriangleTube
TriangleTube PRESTIGE TriMax PTRKIT109 User manual

TriangleTube
TriangleTube PGRKIT01 User manual

TriangleTube
TriangleTube Prestige Trimax 175 User manual

TriangleTube
TriangleTube PGRKIT18 User manual

TriangleTube
TriangleTube PGRKIT16 User manual

TriangleTube
TriangleTube CHALLENGER CC 85 User manual

TriangleTube
TriangleTube PSRKIT23 User manual
TriangleTube
TriangleTube PTRKIT112 User manual