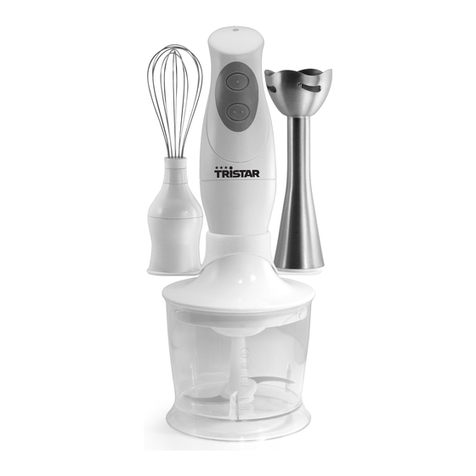
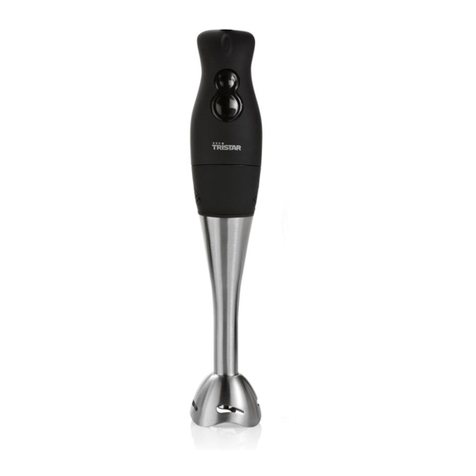
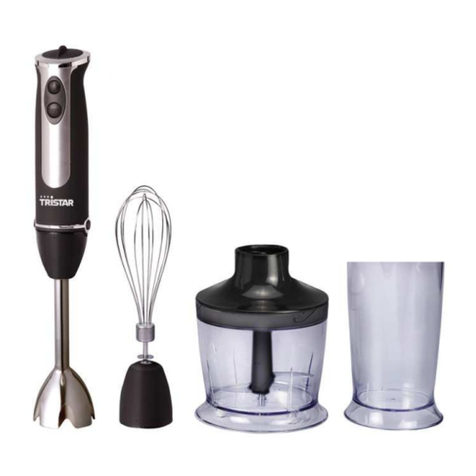
TriStar MX-4165 User manual

MX-4165
EN
NL
FR
DE
ES
PT
PL
IT
SV
Instruction manual
Gebruiksaanwijzing
Mode d'emploi
Bedienungsanleitung
Manual de usuario
Manual de utilizador
Instrukcja obsługi
Manuale utente
Bruksanvisning

2
Instruction manual

3
EN
Dear customer,
Congratulations and thank you for purchasing this high quality product.
Please read the instruction manual carefully so that you will be able to make
the best possible use of the appliance. This manual includes all the necessary
instructions and advice for using, cleaning and maintaining the appliance. If
you follow these instructions you will be guaranteed off an excellent result, it
saves you time and will avoid problems. We hope you will have a great deal of
pleasure from using this appliance.
SAFETY REQUIREMENTS
• This device meets the safety requirements. Please read the instruction
manual carefully before using the device. Please keep these
instructions, the guarantee certificate, the sales receipt and, if possible,
the carton with the inner packaging.
• This appliance is not intended to be used by persons (including
children) with reduced physical, sensory or mental capabilities, or lack
of experience and knowledge, unless they have been given supervision
or instructions concerning the use of the appliance by a person that is
responsible for their safety.
• Children should be supervised to ensure that they do not play with the
appliance.
• Do not allow children to use the appliance without supervision.
• Do not leave the appliance unsupervised while switched on.
• By ignoring the safety instructions the manufacturer can not be hold
responsible for the damage
• To protect children against the dangers of an electrical appliances,
please make sure that you never leave the appliances unattended.
There for you have to select a storage place for the appliance where
children are not able to grab it. Make sure that the cable is not hanging
in a downward position.
• This appliance is only to be used for household purposes and only for
the purpose it is made for.
• All repairs should be made by a competent qualified electrician(*).
• It is absolutely necessary to keep this appliance clean at all times
because it comes into direct contact with food.
• Check if the voltage of the appliance corresponds to the main voltage
of your home. Rated voltage: AC220 - 240 V~, 50/60Hz. The socket must
be at least 16A or 10 A slow-protected.
• "This appliance complies with all standards regarding electromagnetic
fields (EMF). If handled properly and according to the instructions in
this user manual, the appliance is safe to use motor unitd on scientific
evidence available today"
• The use of accessory that are not recommended by the manufacturer
can cause injuries and will invalidate any warranty that you may have.
• Do not use this appliance outdoors.
• To protect yourself against an electric shock, do not immerse the cord,
plug or appliance in the water or any other liquid.
• Unplug the appliance from the socket before changing accessories or
cleaning.
• Do not use this appliance with a damaged cord or plug or when the
appliance has malfunctions, or has been damaged in any manner.
To avoid a hazard make sure that a damaged cord or plug will be
replaced by an authorized technician(*). Do not repair this appliances
by yourself.
• Do not use this appliance near direct heat sources.
• Unplug the appliance from the socket when you are not using it.
* Competent qualified electrician: after sales department of the producer
or importer or any person who is qualified, approved and competent to
perform this kind of repairs in order to avoid all danger. In any case you
should return the appliance to this electrician.
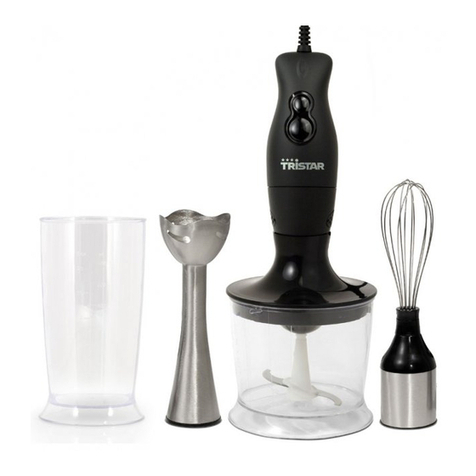
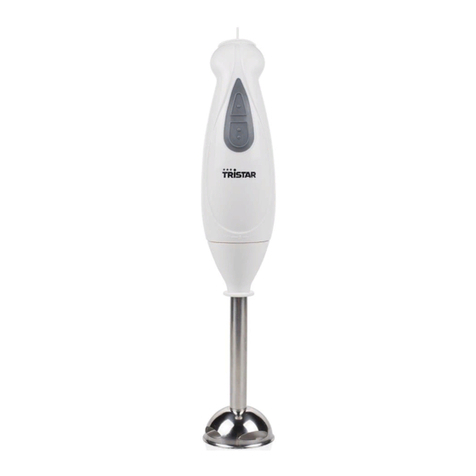
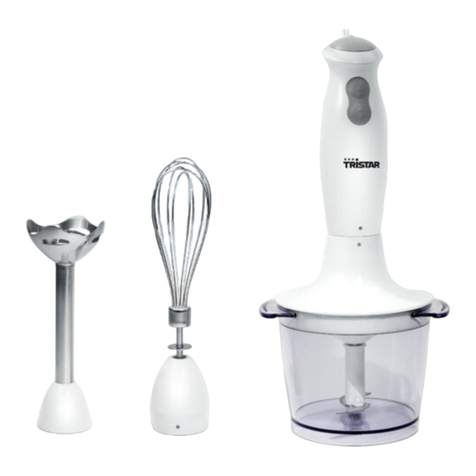
Stick blender set
1
6
12 7
8
2
3
4
5
10
9
11
4
PARTS LIST
1. Speed selector
2. Normal speed button
3. Turbo speed button
4. Motor unit
5. Whisk
6. Release buttons
7. Blender Stick
8. Whisk adaptor
9. Bowl
10. Lid
11. Blade unit
12. Measuring cup
BEFORE USE
• Remove the appliance from its packaging.
• Remove all packaging material such as plastic film, filler material, cable-
ties and box packaging.
• Check the packaging contents for completeness.
• Do not operate the appliance if package contents is incomplete or ap-
pear damaged. Return it immediately to the dealer.
• Risk of suffocation! Packaging materials are not toys. Plastic bags, foil
and Styrofoam parts can suffocate children. Always keep all packaging
materials away from children.
• Wash before using for the first time, the Blender Stick (No. 7), the Whisk
(No. 5), the bowl (No. 9), the measuring cup (No. 12) and the Blade unit (No.
11) in warm soapy water. Rinse and dry thoroughly.These parts are also
dishwasher safe.
• CAUTION! The Blade unit is very sharp, always pick up the Blade unit at
the plastic part, avoid all bodily contact with the blades, they can seri-
ously injure you. Attention! Never immerse the motor unit (No. 4), the
Whisk adaptor (No. 8),the lid (No. 10) in water or other liquid or rinse
under the tap. Clean these parts with a damp cloth.
USE OF THE DEVICE WITH THE BLENDER STICK
• The Blender Stick is intended for: Blending fluids, e.g. dairy products,
sauces, fruit juices, soups, mixed drinks and shakes. Mixing soft ingredi-
ents, e.g. pancake batter or mayonnaise.
Pureeing cooked ingredients, e.g. for making baby food.
• Put the Blender Stick (No. 7) on the motor unit (No. 4) until it it locks in
place and a 'click' sound is heard.
• Immerse the blade guard completely in the ingredients to avoid splashing.
• Press and hold the normal (No. 2) or turbo (No. 3) speed button to
switch on the appliance When you use the normal speed button, you
Instruction manual

5
EN
can adjust the speed with the speed selector (No. 1). The higher the
speed, the shorter the processing time required. To select a different
speed setting, turn the speed selector to the preferred setting before or
while you press the normal speed button.
• When you use the turbo speed button, the appliance operates at maximum
speed. In this case, you can’t adjust the speed with the speed selector.
• Blend the ingredients by moving the appliance slowly up and down
and in circles.
• Press the release buttons (No. 6) to disconnect the motor unit of the
Blender Stick.
USING THE HAND WHISK
• The Whisk is intended for stiring minor ingredients such as egg white,
cream, instant desserts and eggs and sugar for cakes. Do not beat thicker
mixtures such as margarine and sugar, this may damage the Whisk. For
this use the blender stick (No.7). Connect the whisk (No.5) to the whisk
base (No.8) by pushing the whisk into the opening on the whisk base.
Now connect the whisk base to the motor unit.
• Immerse the whisk completely in the ingredients. - To avoid splashing,
start processing at normal speed by pressing the normal speed button
(No. 2). To select a different speed setting, turn the speed selector (No.
1) to the preferred setting before or while you press the normal speed
button.
USING THE CHOPPER
• The chopper is intended for chopping ingredients such as nuts, meat,
onions, hard cheese, boiled eggs, garlic, herbs, dry bread etc.
• The blades are very sharp! Be very careful when you handle the blade
unit, especially when you remove it from the bowl, when you empty
the bowl and during cleaning.
• Place the Blade unit (No. 11) at the pivot point in the middle of the
bowl (No. 9).
• Attention! The Blade unit is very sharp. Screw the lid (No.10) clockwise
onto the bowl. Place the motor unit (No. 4) on the lid until it locks in
place and a 'click' sound is heard..
• Press and hold the normal (No. 2) or turbo (No. 3) speed button to
switch on the appliance. When you use the normal speed button, you
can adjust the speed with the speed selector.
• (No. 1). The higher the speed, the shorter the processing time required.
To select a different speed setting, turn the speed selector to the pre-
ferred setting before or while you press the normal speed button.
• When you use the turbo speed button, the appliance operates at maximum
speed. In this case, you can’t adjust the speed with the speed selector.
• After processing, release the normal or the turbo speed button to
switch off the appliance and wait until the blade has stopped rotating.
• Press the lid release buttons (No. 6) and turn the lid anti-clockwise to
remove it.
TIPS
• If the ingredients stick to the wall of the bowl, release the button to
switch off the appliance and loosen the ingredients with a spatula or
add some liquid.
• The appliance chops very quickly. Use the normal speed button or the
turbo speed button. If you use the turbo speed button, use it briefly to
prevent the food from becoming too finely chopped.
Stick blender set
6
• Do not let the appliance run too long when you chop (hard) cheese or
chocolate. Otherwise these ingredients become too hot, start to melt
and turn lumpy.
• Do not use the blade unit to chop very hard ingredients like coffee beans,
turmeric, nutmeg and ice cubes, as this may cause the blade to get blunt.
CLEANING AND MAINTENANCE
• Always remove the plug from the outlet when not in use or when the
device is being cleaned.
• Clean the Blender Stick (No. 7), the Whisk (No. 5), the bowl (No. 9), the
measuring cup (No. 12) and the Blade unit (No. 11) in warm soapy
water. Rinse and dry thoroughly. CAUTION! The Blade unit is very
sharp, always pick up the Blade unit at the plastic part, avoid all bodily
contact with the blades, they can seriously injure you. These parts are
also dishwasher safe. Never immerse the motor unit (No. 4), the Whisk
adaptor (No. 8) and the lid (No. 10) in water or other liquid or rinse
under the tap. Clean these parts with a damp cloth. This parts are not
dishwasher safe.
CAUTION! The knives are very sharp, never try it yourself to undo the chop-
per blade of the Blender Stick and be careful by cleaning it. Avoid all bodily
contact with the blades, they can seriously injure you or someone else.
GUARANTEE
• Tristar is not liable for damages occurred through:
o In case the appliance has been dropped.
o In case the appliance has been technically changed by the owner or
another third party.
o In case of improper use of the appliance.
o In case of normal wear of the appliance.
• By executing repairs the original warranty period of 2 years will not
be extended, nor the right to a complied new warranty. This warranty
is only legal on European soil. This warranty does not overrule the
European directive 1944/44CE.
• Always keep your receipt, without this receipt you cannot claim any
form of warranty what so ever.
• Damage caused by not following the instruction manual, will lead to
a void of warranty, if this results in consequential damages Tristar will
not be liable.
• Tristar will not be liable for material damage or personal injury caused
by improper use or if the safety instruction are not properly executed.
• Other then cleaning, as mentioned in this manual, there is no other
maintenance necessary.
• When the application should be repaired, make sure that this will be
performed by an authorized company.
• This appliance may not be amended or changed.
• If problems arise during the 2 years from the date of purchase, which
are covered by the factory warranty, you can go back to the point of
purchase to replace it for a new one.
• For questions or compliances please contact your retailer “point of
purchase”.
• This appliances is covered with a 24 month guarantee starting on the
date of purchase (receipt).
Instruction manual

7
EN
• Only material or manufacturing defects are included in this warranty.
• If you wish to make a claim please return the entire machine in the
original packaging to your dealer together with the receipt.
• Damage to accessories does not mean automatic free replacement of
the whole appliance. In such cases please contact our website:
www.tristaronderdelen.eu. Breakage of glass or plastic parts are always
subject to a charge.
• Defects to consumables or parts subject to wearing , as well as
cleaning, maintenance or the replacement of said parts are not covered
by the guarantee and hence are to be paid!
• The guarantee lapses in case of unauthorized tampering.
• After the expiry of the guarantee repairs can be carried by the
competent dealer or repair service against the payment of the ensuing
costs.
GUIDELINES FOR PROTECTION OF THE
ENVIRONMENT
This appliance should not be put into the domestic garbage
at the end of its durability, but must be offered at a central
point for the recycling of electric and electronic domestic appliances. This
symbol on the appliance, instruction manual and packaging puts your
attention to this important issue. The materials used in this appliance
can be recycled. By recycling used domestic appliances you contribute
an important push to the protection of our environment. Ask your local
authorities for information regarding the point of recollection.
Packaging
The packaging is 100% recyclable, return the packaging separated.
Product
This device is equipped with a mark according to the European Directive
2002/96/EC on Waste Electrical and Electronic Equipment (WEEE). By
ensuring that this product will be correctly processed into waste, it will
help prevent possible negative consequences for the environment and
human health.
EC declaration of conformity
This device is designed, manufactured and marketed in accordance with
the safety objectives of the Low Voltage Directive "No 2006/95/EC", the
protection requirements of the EMC Directive 2004/108/EC "Electromagnetic
Compatibility" and the requirement of Directive 93/68/EEC.
Stick blender set
8
Gebruiksaanwijzing
Geachte klant,
Gefeliciteerd met de aankoop van dit kwaliteitsproduct. Lees de
gebruiksaanwijzing zorgvuldig door zodat u optimaal gebruik kunt maken van dit
apparaat. In deze handleiding vindt u alle benodigde aanwijzingen en adviezen
voor het gebruik, schoonmaak en onderhoud van het apparaat. Als u deze
aanwijzingen volgt, hebt u altijd een uitstekend resultaat, bespaart u tijd en kunt u
problemen voorkomen. Wij hopen dat u dit apparaat met plezier zult gebruiken.
VEILIGHEIDSVOORSCHRIFTEN
• Lees de gebruiksaanwijzing aandachtig door voordat u het apparaat voor
het eerst gebruikt. Bewaar de gebruiksaanwijzing, het garantiecertificaat,
de verkoopbon en indien mogelijk de kartonnen doos met de binnenste
verpakking om deze indien nodig later te kunnen raadplegen.
• Dit apparaat is niet bedoeld voor gebruik door personen (waaronder
kinderen) met verminderde lichamelijke, zintuiglijke of geestelijke
vermogens, of die gebrek aan ervaring of kennis hebben, tenzij iemand
die verantwoordelijk is voor hun veiligheid toezicht op hen houdt of
hun heeft uitgelegd hoe het apparaat dient te worden gebruikt.
• Als de veiligheidsinstructies niet worden opgevolgd, kan de fabrikant
niet verantwoordelijk worden gesteld voor schade die daar eventueel
het gevolg van is.
• Om kinderen te beschermen tegen de gevaren van elektrische apparatuur
mag u ze nooit zonder toezicht bij het apparaat laten. Selecteer daarom
een plek voor uw apparaat op dusdanige wijze dat kinderen er niet bij
kunnen. Zorg er voor dat het snoer niet naar beneden hangt.
• Dit apparaat is alleen voor huishoudelijk gebruik en voor het doel waar
het voor bestemd is.
• Reparaties dienen te geschieden door een bekwame gekwalificeerde
dienst(*).
• Het is noodzakelijk om dit toestel zuiver te houden aangezien het in
direct contact komt met eetwaren.
• Controleer of het voltage dat wordt aangegeven op het apparaat,
overeenkomt met de plaatselijke netspanning voordat u het apparaat
aansluit. Voltage 220V-240V 50Hz. De contactdoos moet met ten
minste 16 A of 10 A traag beveiligd zijn.
• Dit apparaat voldoet aan alle richtlijnen met betrekking tot
elektromagnetische velden (EMV). Mits het apparaat op de juiste wijze en
volgens de instructies in deze gebruiksaanwijzing wordt gebruikt, is het
veilig te gebruiken volgens het nu beschikbare wetenschappelijke bewijs.
• Gebruik nooit accessoires die niet aanbevolen worden door de
fabrikant. Deze kunnen gevaar opleveren voor de gebruiker en schade
toebrengen aan het apparaat.
• Gebruik het apparaat nooit buitenshuis.
• Dompel het snoer, de stekker en/of het apparaat nooit in het water of
een andere vloeistof, dit om u te beschermen tegen een elektrische
schok.
• Haal de stekker uit het stopcontact als u toebehoren wisselt en voor
onderhoudswerkzaamheden.
• Gebruik het apparaat niet indien de stekker, het netsnoer of het
apparaat zelf beschadigd is. Indien het netsnoer beschadigd is, moet
u het laten vervangen door een geautoriseerd servicecentrum(*) om
gevaar te voorkomen.
• Gebruik het apparaat nooit in de buurt van directe hitte bronnen.
• Haal het stekker uit het stopcontact wanneer het apparaat niet
gebruikt wordt.
* Bekwame gekwalificeerde dienst: after-sales-dienst van de fabrikant of de
invoerder, die erkend en bevoegd is om dergelijke herstellingen te doen
zodat elk gevaar vermeden wordt. Gelieve het toestel bij problemen naar
deze dienst terug te brengen.

1
6
12 7
8
2
3
4
5
10
9
11
9
NL
ONDERDELENBESCHRIJVING
1. Snelheidsregelaar
2. Knop voor normale snelheid
3. Knop voor turbosnelheid
4. Behuizing
5. Garde
6. Ontgrendelknoppen
7. RVS staaf
8. Garde opzetstuk
9. Hakmolen
10. Deksel
11. Mes
12. Maatbeker
VOOR HET EERSTE GEBRUIK
• Verwijder alle verpakkingen van het apparaat.
• Was, voordat u het apparaat voor de eerste keer gebruikt de RVS staaf
(nr. 7), de garde (nr. 5), de hakmolen (nr. 9), de maatbeker (nr. 12) en het
mes (nr. 11) in een warm sopje. Spoel ze hierna af en droog ze grondig.
Deze delen zijn tevens afwasmachine bestendig.
• Let op! Het mes is zeer scherp, pak het altijd vast aan het kunststof
gedeelte anders kunt u zich ernstig verwonden. Let op! De behuizing
(nr. 4), het garde opzetstuk (nr. 8) en het deksel (nr. 10) nooit in water
of in een andere vloeistof dompelen, of onder de kraan afspoelen maar
met een vochtige doek afnemen.
• Laat de Mixer nooit langer dan 1 minuten continu draaien, en laat de Mixer
daarna altijd 15 seconden afkoelen.
GEBRUIK VAN DE RVS STAAF
• De RVS staaf is bedoeld voor:
Het mengen van vloeistoffen, bijv. zuivelproducten, sauzen, vruchten-
sappen, soepen, drankjes en milkshakes.Voor het mixen van zachte
ingrediënten, bijv. pannenkoekbeslag of mayonaise. Het pureren van
gekookte ingrediënten, bijv. voor het bereiden van babyvoedsel.
• Druk de RVS staaf (nr. 7) op de behuizing (nr. 4) zodat deze vast klikt.
• Steek de stekker in het stopcontactdompel de meskap volledig onder
in de ingrediënten om spatten te voorkomen. Houd de knop voor
normale snelheid (nr. 2) of de knop voor turbosnelheid (nr. 3) ingedrukt
om het apparaat in te schakelen.
• Als u op de knop voor normale snelheid drukt, kunt u de snelheid
aanpassen met de snelheidsregelaar (nr. 1). Hoe hoger de snelheid, hoe
korter de vereiste bewerkingstijd. Om een andere snelheid te selecte-
ren, draait u de snelheidsregelaar naar de gewenste stand voordat of
terwijl u op de knop voor normale snelheid drukt.
Staafmixerset

10
Gebruiksaanwijzing
• Wanneer u op de knop voor turbosnelheid (nr. 3) drukt, werkt het
apparaat op maximumsnelheid. In dit geval kunt u de snelheid niet
aanpassen met de snelheidsregelaar.
• Meng de ingrediënten door het apparaat langzaam in het rond en op
en neer te bewegen. Druk op de ontgrendelknoppen (nr. 6) om de RVS
staaf van de behuizing te ontkoppelen.
GEBRUIK VAN DE GARDE
• De garde is bedoeld voor het kloppen van lichte ingrediënten zoals eiwit,
room, instant toetjes, en eieren en suiker voor gebak. Klop geen dikkere
mengsels zoals margarine en suiker, hierdoor kan de garde beschadigd
raken. Gebruik hiervoor de RVS staaf (nr. 7).
• Druk het garde opzetstuk (nr. 8) op de behuizing (nr. 4) zodat deze vast
klikt en plaats de garde (nr. 5) in het garde opzetstuk (nr. 8), deze klikt
vast. Druk op de ontgrendelknoppen (nr. 6) om het garde opzetstuk
van de behuizing te ontkoppelen. Plaats de ingrediënten in de maatbe-
ker (nr. 12) en dompel de garde volledig in de ingrediënten. Begin op
normale snelheid te kloppen door op de knop voor normale snelheid
(nr. 2) te drukken om spatten te voorkomen.
• Om een andere snelheid te selecteren, draait u de snelheidsregelaar
(nr. 1) naar de gewenste stand voordat of terwijl u op de knop voor
normale snelheid drukt. Ga na ongeveer 1 minuut verder op turbosnel-
heid door op de knop voor turbosnelheid (nr. 3) te drukken.
GEBRUIK VAN DE HAKMOLEN
• De hakmolen is bedoeld voor het hakken van ingrediënten zoals noten,
vlees, uien, harde kaas, gekookte eieren, knoflook, kruiden, droog brood enz.
• De messen zijn zeer scherp! Wees voorzichtig wanneer u de mesunit
hanteert, vooral wanneer u deze uit de kom verwijdert, wanneer u de
kom leegt en tijdens het schoonmaken.
• Plaats het mes (nr. 11) op het draaipunt in het midden van de kom (nr.
9) en plaats de ingrediënten in de kom (nr. 9). Let op! Het mes is zeer
scherp.
• Draai het deksel (nr. 10) met de klok mee op de kom. Plaats de behui-
zing (nr. 4) op het deksel totdat deze vast klikt.
• Houd de knop voor normale snelheid (nr. 2) of de knop voor turbo-
snelheid (nr. 3) ingedrukt om het apparaat in te schakelen. Als u op
de knop voor normale snelheid drukt, kunt u de snelheid aanpassen
met de snelheidsregelaar (nr. 1). Hoe hoger de snelheid, hoe korter de
vereiste bewerkingstijd. Om een andere snelheid te selecteren, draait u
de snelheidsregelaar naar de gewenste stand voordat of terwijl u op de
knop voor normale snelheid drukt.
• Wanneer u op de knop voor turbosnelheid (nr. 3) drukt, werkt het
apparaat op maximumsnelheid. In dit geval kunt u de snelheid niet
aanpassen met de snelheidsregelaar.
• Laat na het verwerken de knop voor normale snelheid of de knop voor
turbosnelheid los om het apparaat uit te schakelen en wacht totdat het
mes gestopt is met draaien. Druk op de ontgrendelknoppen (nr. 6) om
het het deksel van de behuizing te ontkoppelen en draai het deksel
tegen de klok in om het te verwijderen.

11
NL
TIPS
• Als de ingrediënten aan de wand van de kom blijven kleven, laat de
knop dan los om het apparaat uit te schakelen en verwijder de ingredi-
enten van de wand met een spatel of door wat vloeistof toe te voegen.
• Het apparaat hakt zeer snel. Gebruik de knop voor normale snelheid
of de knop voor turbosnelheid. Als u de knop voor turbosnelheid
gebruikt, moet u deze slechts kort gebruiken om te voorkomen dat het
voedsel te fijn wordt gehakt.
• Laat het apparaat niet te lang doorwerken wanneer u (harde) kaas of
chocolade hakt. Deze ingrediënten worden anders te heet, waardoor
ze gaan smelten en klonteren.
• Gebruik de hakmolen niet om zeer harde ingrediënten zoals koffiebo-
nen, kurkuma, nootmuskaat of ijsblokjes te hakken, hierdoor kan het
mes bot worden.
SCHOONMAKEN VAN HET APPARAAT
• Verwijder altijd de stekker uit het stopcontact indien het apparaat niet
wordt gebruikt of als het apparaat gereinigd wordt. De behuizing (nr.
4), het garde opzetstuk (nr. 8) en het deksel (nr. 10) nooit in water of in
een andere vloeistof dompelen of onder de kraan afspoelen maar met
een vochtige doek afnemen.
• De RVS staaf (nr. 7), de garde (nr. 5), de hakmolen (nr. 9), de maatbeker
(nr. 12) en het mes (nr. 11) afwassen in een warm sopje. Spoel ze hierna
af en droog ze grondig. Deze delen zijn tevens afwasmachine besten-
dig. Let op! Het mes is zeer scherp, pak het altijd vast aan het kunststof
gedeelte anders kunt u zich ernstig verwonden.
LET OP! De messen zijn zeer scherp, probeer nooit zelf het mes van de RVS
staaf (nr. 7) los te halen en pas op met het schoonmaken ervan. Voorkom
ieder lichamelijk contact met de messen, deze kunnen u of anderen
ernstig verwonden.
GARANTIEVOORWAARDEN
• Tristar is niet verantwoordelijk voor schade:
o Ten gevolge van een val of ongeluk.
o Indien het apparaat technisch is gewijzigd door gebruiker of derden.
o Door oneigenlijk gebruik van het apparaat.
o Door normale gebruiksslijtage.
• Door eventuele reparatie wordt de oorspronkelijke garantieperiode
van 2 jaar niet verlengd. Deze garantie is slechts geldig op Europees
grondgebied. Deze garantie heft de gebruikersrechten volgens
Europese richtlijn 1944/44CE niet op.
• Bewaar altijd uw aankoopbewijs, zonder dit aankoopbewijs kunt u
geen aanspraak maken op enige vorm van garantie.
• Bij schade veroorzaakt door het niet opvolgen van de
gebruiksaanwijzing, vervalt het recht op garantie! Voor vervolgschade
die hieruit ontstaat zijn wij niet aansprakelijk.
• Voor materiële schade of persoonlijk letsel veroorzaakt
door ondeskundig gebruik of het niet opvolgen van de
veiligheidsvoorschriften zijn wij niet aansprakelijk. In dergelijke
gevallen vervalt elke aanspraak op garantie.
• Anders dan het schoonmaken, zoals genoemd in deze handleiding, is
aan dit apparaat geen ander onderhoud noodzakelijk.
• Indien er reparaties moeten worden uitgevoerd, mag dit uitsluitend
door een geautoriseerd bedrijf gebeuren.
• Het product mag niet worden gewijzigd of veranderd.
• Indien zich problemen zouden voordoen gedurende 2 jaar na
aankoopdatum, welke gedekt zijn door de fabrieksgarantie, kunt u het
apparaat ter vervanging aanbieden bij uw aankooppunt.
• Voor vragen of klachten kunt zich melden bij uw verkooppunt.
• Dit apparaat heeft 24 maanden garantie vanaf de datum van aankoop
(kassabon).
• Uitsluitend materiaal- en/of fabricagefouten zijn inbegrepen in deze
garantie.
Staafmixerset

12
Gebruiksaanwijzing
• Als u gebruik wilt maken van uw garantieaanspraak , zorgt u er
dan voor dat u het volledige apparaat in zijn originele doos en
aankoopbewijs inlevert bij uw aankooppunt.
• Schade aan accessoires of onderdelen betekend niet automatisch dat
het gehele apparaat zal worden vervangen. In dit soort gevallen moet
u contact opnemen met onze serviceafdeling. Afgebroken glazen/
plastic onderdelen of accessoires vallen niet onder de garantie en
zullen dus altijd tegen een vergoeding kunnen worden vervangen.
• Defecten aan hulpstukken of aan de slijtende onderdelen, alsmede
reiniging, onderhoud of de vervanging van slijtende delen vallen niet
onder de garantie en zullen dus in rekening worden gebracht!
• De garantie vervalt in geval van ongeoorloofde manipulatie.
• Na het verstrijken van de garantie reparaties kunnen worden
uitgevoerd door de bevoegde dealer of reparatie service tegen de
betaling van de daaruit voortvloeiende kosten.
AANWIJZINGEN TER BESCHERMING VAN
HET MILIEU
Dit product mag aan het einde van zijn levensduur niet bij
het normale huisafval worden gedeponeerd, maar dient
bij een speciaal inzamelpunt voor het hergebruik van elektrische en
elektronische apparaten te worden aangeboden. Het symbool op artikel,
gebruiksaanwijzing en verpakking attendeert u hierop. De gebruikte
grondstoffen zijn geschikt voor hergebruik. Met het hergebruik van
gebruikte apparaten of grondstoffen levert u een belangrijke bijdrage aan
de bescherming van ons milieu. Informeer bij uw lokale overheid naar het
bedoelde inzamelpunt.
Verpakking
Het verpakkingsmateriaal is 100% recyclebaar, lever het
verpakkingsmateriaal gescheiden in.
Product
Dit apparaat is voorzien van het merkteken volgens de Europese
richtlijn 2002/96/EG inzake afgedankte elektrische en elektronische
apparaten(AEEA). Door ervoor te zorgen dat dit product op de juiste
manier als afval wordt verwerkt, helpt u mogelijk negatieve consequenties
voor het milieu en de menselijke gezondheid te voorkomen.
EC-conformiteitsverklaring
Dit apparaat is ontworpen, vervaardigd en in de handel gebracht
in overeenstemming met de veiligheidsdoeleinden van de
“laagspanningsrichtlijn”nr. 2006/95/EC, de beschermingsvoorschriften van
de EMC-richtlijn 2004/108/EC “Elektromagnetische compatibiliteit” en de
vereiste van richtlijn 93/68/EG.

13
NL
Cher client,
Félicitations et merci d'avoir acheté ce produit de haute qualité. Veuillez lire
ce manuel d'instructions avec attention pour pouvoir profiter du meilleur de
cet appareil. Ce manuel contient toutes les instructions et avis nécessaires
pour l'utilisation, le nettoyage et l'entretien de l'appareil. Si vous suivez
ces instructions, vous avez la garantie d'un excellent résultat, ceci vous
économisera du temps et des soucis. Nous espérons que vous éprouverez
beaucoup de plaisir en utilisant cet appareil.
INSTRUCTIONS DE SÉCURITÉ
• Cet appareil respecte les exigences de sécurité. Veuillez lire
attentivement les instructions de ce manuel avant d'utiliser l’appareil.
Veuillez conserver ces instructions, le bon de garanti, la facture et, si
possible, le carton et les emballages du produit.
• Cet outil n’est pas conçu pour être utilisé par des personnes (enfants
inclus) souffrant de déficiences physiques, sensorielles ou mentales, ou
ne disposant pas des compétences et connaissances nécessaires, sauf
sous la surveillance et sur instruction d’une personne responsable de
leur sécurité.
• Si vous ignorez ces instructions de sécurité, le fabricant récuse toute
responsabilité pour les dommages.
• Afin de protéger les enfants des dangers liés aux appareils électriques,
ne les laissez jamais sans surveillance. Rangez l'appareil dans un
endroit où les enfants ne peuvent pas accéder. Vérifiez que le câble ne
pend pas.
• Cet appareil est réservé à une utilisation familiale et seulement pour
son utilisation prévue.
• Toutes les réparations doivent être effectuées par un électricien qualifié (*).
• Il est primordial de garder cet appareil propre car il entre directement
en contact avec des aliments.
• Vérifiez si la tension de l'appareil correspond à la tension du secteur de
votre domicile. Tension nominale : 220 à 240 V 50 Hz. La fiche doit être
protégée à au moins 16 ou 10 A.
• "Cet appareil respecte toutes les normes relatives aux champs
magnétiques. Si vous manipulez correctement cet appareil en suivant
les instructions de ce manuel, son utilisation sera sûre d’après les
connaissances scientifiques actuelles."
• L’utilisation d’accessoires non recommandés par le fabricant de
l’appareil peut entraîner des dommages corporels et rendre la garantie
caduque.
• Ne pas utiliser cet appareil à l'extérieur.
• Pour éviter un choc électrique, n’immergez pas le cordon, la fiche ou
l’appareil dans l’eau ou dans un autre liquide.
• Débranchez la prise de l’appareil avant de changer des pièces ou
d’effectuer un entretien.
• N'utilisez pas l'appareil si son cordon et sa prise sont endommagés
ou s'il présente des dysfonctionnements, ou s’il est endommagé de
quelque manière que ce soit. Pour des raisons de sécurité, si le cordon
ou la fiche sont endommagés, veillez à ce qu’ils soient remplacés par
un technicien agréé (*). Ne réparez pas cet appareil vous-même.
• N’utilisez pas cet appareil à proximité d’une source de chaleur.
• Débranchez la prise d’alimentation de l’appareil après utilisation.
* Électricien qualifié agréé : Le service après-vente du fournisseur ou de
l’importateur ou toute personne qualifiée, agréée et compétente pour
effectuer ce genre de réparations pour des raisons de sécurité. Dans tous
les cas, vous devrez apporter l'appareil à cet électricien.
Set Plongeur

1
6
12 7
8
2
3
4
5
10
9
11
14
DESCRIPTION DES PIÈCES
1. Sélecteur de vitesse
2. Bouton de vitesse normale
3. Bouton de vitesse turbo
4. Base
5. Mixer
6. Bouton de dégagement
7. Tige inox
8. Base du Mixer
9. Bol
10. Couvercle
11. Lame
12. Verre doseur
AVANT L’UTILISATION
• Retirez l’appareil de l’emballage.
• Avant la première utilisation, lavez la tige inox (No. 7), le Mixer (No.
5), le bol (No. 9), le verre doseur (No. 12) et la lame (No. 11) dans l’eau
chaude savonneuse. Rincez et séchez avec soin. Ces pièces peuvent
également aller au lave-vaisselle.
• ATTENTION ! La lame est très tranchante, saisissez toujours la lame par
la partie en plastique, évitez tout contact direct avec les lames, elles
peuvent vous blesser. Prudence ! N’imgergez jamais la base (No. 4),
la base du Mixer (No. 8), le couvercle (No. 10) dans l’eau ou tout autre
liquide et ne les rincez pas sous le robinet. Nettoyez ces pièces à l’aide
d’un chiffon humide.
• Ne laissez jamais le Mixer enclenché pendant plus d’une minute de
fonctionnement continuel et laissez-le toujours refroidir pendant 15
secondes.
UTILISATION DE L’APPAREIL AVEC LA TIGE INOX
• La tige inox est destinée :
Au mélange des liquides, par ex. produits laitiers, sauces, jus de fruits,
soupes, boissons et milk-shakes.
Au mélange d’ingrédients mous, par ex. pâte à crêpes ou mayonnaise.
A la mise en purée d’ingrédients cuits, par ex. pour faire de la nourriture
pour bébé.
• Placez l’axe en inox (no. 7) sur le socle (no. 4) jusqu’à ce qu’il s’enclenche.
• Immerger complètement le protecteur de la lame dans les ingrédients
pour éviter des éclaboussures.
• Tenez les boutons de vitesse normale (no.2) ou turbo (no. 3) enfoncés
pour allumer l’appareil. Lors de l’utilisation du bouton normal de vi-
Mode d’emploi

15
FR
tesse, la vitesse peut être réglée avec le sélecteur de vitesse (no. 1). Plus
la vitesse est élevée, moins de temps est requis pour le mélange. Pour
sélectionner un réglage de vitesse différent, tournez le sélecteur de
vitesse sur le réglage désiré avant ou pendant que le bouton de vitesse
normale est appuyé.
• Lors de l’utilisation du bouton de vitesse turbo, l’appareil fonctionne à
la vitesse maximum. Dans ce cas, la vitesse ne peut pas être réglée avec
le sélecteur de vitesse.
• Mélangez les ingrédients en déplaçant l’appareil doucement de haut
en bas et en tournant.
• Appuyez sur les boutons de déverrouillage (no. 6) pour débrancher la
base du hachoir.
UTILISATION DU MIXER À MAIN
• Le Mixer est destiné à mélanger des ingrédients ayant peu de consis-
tance, comme des jaunes d’œuf, de la crème, des desserts instantanés
et de la crème et des œufs pour faire des gâteaux. Ne mélangez pas de
mixtures plus épaisses comme de la margarine et du sucre, cela pour-
rait endommager le Mixer. Utilisez la tige inox (No. 7). Installez la base
du Mixer (No. 8) sur la base (No. 4) jusqu’à ce qu’elle s’enclenche et que
le mystère soit en place (No. 5) sur la base du Mixer (No. 8).
• Appuyez sur les boutons de dégagement (No. 6) pour débrancher la
base du Mixer.
• Immergez le fouet entièrement dans les ingrédients. Pour éviter les
éclaboussures, démarrez en vitesse normale et appuyant sur le bouton
de vitesse normale (No. 2). Pour sélectionner un réglage de vitesse
différent, faites tourner le sélecteur de vitesse (No. 1) sur le réglage
souhaité avant ou pendant que vous appuyez sur le bouton de vitesse
normale. Continuez en vitesse turbo après environ 1 minute en ap-
puyant sur le bouton de vitesse turbo (No. 3).
UTILISATION DU HACHOIR
• Le hachoir est destiné à hacher les ingrédients comme les noix, la
viande, les oignons, les fromages durs, les œufs durs, l’ail, les herbes, le
pain sec, etc.
• Les lames sont très coupantes ! Faites très attention lorsque vous mani-
pulez les lames, tout particulièrement lorsque vous retirez celles-ci du
bol, lorsque vous videz le bol et pendant le nettoyage.
• Placez la lame (No. 11) sur le pivot au centre du bol (No. 9).
• Prudence ! Les lames sont très tranchantes. Serrez le couvercle (No. 10)
dans le sens des aiguilles d’une montre sur le bol. Placez la base (No. 4)
sur le couvercle jusqu’à ce qu’elle s’enclenche.
• Appuyez et maintenez le bouton de vitesse normale (No. 2) ou turbo
(No. 3) pour mettre l’appareil en route. Lorsque vous utilisez le bouton
de vitesse normale, vous pouvez ajuster la vitesse à l’aide du sélecteur
de vitesse (No. 1). Plus la vitesse est élevée, plus le temps de hachage
est court. Pour sélectionner un réglage de vitesse différent, faites
pivoter le sélecteur sur le réglage souhaité avant ou pendant que vous
pressez le bouton de vitesse normale.
• Lorsque vous utilisez le bouton de vitesse turbo, l’appareil fonctionne
à vitesse maximale. Dans ce cas, vous ne pouvez pas ajuster la vitesse à
l’aide du sélecteur de vitesse.
• Une fois que vous avez terminé, relâchez le bouton de vitesse turbo ou
le bouton de vitesse normale pour éteindre l’appareil et attendez que
les lames aient fini de tourner. Appuyez sur le bouton de dégagement
du couvercle (No. 6) et faites tourner le couvercle dans le sens inverse
des aiguilles d’une montre afin de retirer celui-ci.
Set Plongeur

16
CONSEILS
• Si les ingrédients collent à la paroi du bol, relâchez le bouton pour
éteindre l’appareil et détachez les ingrédients avec une spatule ou
ajoutez du liquide.
• L’appareil hache très rapidement. Utilisez le bouton de vitesse normale
ou le bouton de vitesse turbo. Si vous utilisez le bouton de vitesse
turbo, actionnez celui-ci brièvement afin que les aliments ne soient pas
hachés trop menu.
• Ne laissez pas fonctionner l’appareil pendant trop longtemps lorsque
vous hacher du fromage ou du chocolat (dur). Au cas contraire, il se
peut que ces ingrédients deviennent trop chauds, commencent à
fondre ou forment des grumeaux.
• N’utilisez pas l’unité à lames pour hacher des ingrédients très durs,
comme des grains de café, du curcuma, de la noix de muscade ou des
glaçons, les lames pourraient perdre leur tranchant.
NETTOYAGE ET ENTRETIEN
• Débranchez toujours l’appareil du secteur lorsqu’il n’est pas utilisé ou
avant de le nettoyer.
• Nettoyez la tige inox (No. 7), le Mixer (No. 5), le bol (No. 11), le verre
doseur (No. 12) et la lame (No. 11) dans l’eau chaude savonneuse.
Rincez et séchez avec soin. ATTENTION ! La lame est très tranchante,
saisissez toujours la lame par la partie en plastique, évitez tout contact
direct avec les lames, elles peuvent vous blesser. Ces pièces peuvent
également aller au lave-vaisselle. N’immergez jamais la base (No. 4), la
base du Mixer (No. 8) et le couvercle (No. 10) dans l’eau ou tout autre
liquide et ne les rincez pas sous le robinet. Nettoyez ces pièces à l’aide
d’un chiffon humide. Ces pièces ne peuvent pas aller au lave-vaisselle.
ATTENTION ! Les lames sont très coupantes, n’essayez jamais de démonter
vous-même la lame du hachoir de la tige inox et faites attention lors du
nettoyage. Évitez le contact des lames sur la peau, elles peuvent vous
blesser sérieusement ou blesser quelqu’un d’autre.
GARANTIE
• Tristar décline toute responsabilité pour les dommages entraînés par
les cas suivants :
o En cas de chute de l’appareil.
o Si l’utilisateur ou un tiers a effectué des modifications techniques sur
l’appareil.
o En cas d’utilisation inappropriée de l’appareil.
o En cas usure normale de l’appareil.
• Si l’appareil subi des réparations, la garantie initiale de 2 ans ne sera
pas prolongée, cela n’entraîne pas de droit à une nouvelle garantie.
Cette garantie n’est valable que sur le sol européen. Cette garantie
n’annule pas la directive européenne 1944/44CE.
• Conservez toujours votre reçu, car sans celui-ci vous ne pourrez
réclamer aucune sorte de garantie.
• Les dommages causés par le non respect des instructions de ce manuel
rendront la garantie caduque, Tristar décline toute responsabilité en
cas de dommages indirects.
• Tristar décline toute responsabilité en cas de dégâts matériels ou de
dommages corporels causés par une utilisation inappropriée ou si les
instructions de sécurité n’ont pas été convenablement observées.
• Seuls le nettoyage et l’entretien mentionnés dans ce manuel sont
nécessaires à cet appareil.
• Confiez toute réparation à un centre technique agréé.
Mode d’emploi

17
FR
• Il est interdit de modifier cet appareil.
• Si des problèmes surviennent pendant la période de 2 ans suivant
la date d’achat, qui est couverte par la garantie d’usine, vous pouvez
ramener l’appareil au point d’achat pour en demander un nouveau.
• Adressez vos questions sur la conformité au « point d’achat » de votre
détaillant.
• Cet appareil est couvert par une garantie de 24 mois à partir de la date
d’achat (reçu).
• Cette garantie ne couvre que les défauts matériels et les vices de
fabrication.
• Si vous souhaitez faire une réclamation, veuillez retourner à votre
distributeur toute la machine dans l’emballage d’origine, accompagnée
du reçu.
• Si les accessoires sont endommagés, cela ne signifie pas que toute
la machine sera remplacée gratuitement. Dans de tels cas, veuillez
contacter notre assistance téléphonique. Des pièces brisées en verre ou
en plastique sont toujours sujettes à des frais.
• Les défauts des consommables ou des pièces susceptibles de s’user,
ainsi que le nettoyage, l’entretien ou la réparation desdites pièces ne
sont pas couverts par la garantie et doivent donc être payés.
• La garantie est caduque en cas de modification non autorisée.
• Après l’expiration de la garantie, les réparations peuvent être
effectuées par un distributeur compétent ou par un réparateur contre
un paiement pour les frais occasionnés.
DIRECTIVES POUR LA PROTECTION DE
L’ENVIRONNEMENT
Cet appareil ne doit pas être jeté aux ordures ménagères à
la fin de sa durée de vie, mais doit être rendu à un centre de
recyclage d’appareils ménagers électriques et électroniques. Ce symbole
sur l’appareil, La notice d’emploi et l’emballage attirent votre attention sur
ce sujet important. Composants utilisés dans cet appareil sont recyclables.
En recyclant les appareils ménagers. Usagés, vous contribuez à un apport
important à la protection de notre. Environnement. Adressez vous aux
autorités locales pour des renseignements concernant le centre de
Recyclage
Emballage
L’emballage est 100% recyclable, retournez-le séparément.
Produit
Cet appareil comporte un symbole conforme à la Directive Européenne
2002/96/CE relative aux Déchets d’Equipements Electriques et
Electroniques (DEEE). En veillant à ce que cet appareil soit correctement
recyclé, des effets éventuellement nuisibles à l’environnement et à la santé
humaine seront évités.
Déclaration de conformité EC
Cet appareil est conçu, fabriqué et commercialisé conformément aux
consignes de sécurité de "Low Voltage Directive "No 2006/95/EC, les
conditions de protection de la Directive CEM 2004/108/EC "Compatibilité
Electromagnétique" et la stipulation de la Directive 93/68/CEE.
Set Plongeur

18
Sehr geehrter Kunde,
Wir gratulieren Ihnen und bedanken uns für den Kauf dieses hochwertigen Produkts.
Bitte lesen Sie sorgfältig die Bedienungsanleitung, um das Gerät bestmöglich
nutzen zu können. Diese Anleitung beinhaltet alle erforderlichen Anweisungen und
Empfehlungen für Gebrauch, Reinigung und Wartung des Geräts. Wenn Sie diese
Anweisungen befolgen, garantieren wir ein hervorragendes Ergebnis, zeitsparend
und problemlos. Wir hoffen, dass Sie mit diesem Gerät viel Vergnügen haben werden.
SICHERHEITSVORSCHRIFTEN
• Dieses Gerät entspricht den Sicherheitsanforderungen. Bitte vor
Inbetriebnahme des Geräts die Bedienungsanleitung sorgfältig lesen.
Bitte diese Anleitung, den Garantieschein, die Quittung und, falls
möglich, den Karton mit der Innenverpackung aufbewahren.
• Dieses Gerät darf nicht von Personen (einschließlich Kindern)
mit eingeschränkten körperlichen, sensorischen oder geistigen
Fähigkeiten, oder Mangel an Erfahrung und Wissen bedient werden,
außer wenn sie unter Beaufsichtigung oder Anleitung bezüglich des
Geräts von einer für ihre Sicherheit verantwortlichen Person stehen.
• Kinder sollten beaufsichtigt werden, um sicherzustellen, dass sie nicht
mit dem Gerät spielen.
• Achten Sie darauf, dass Kinder das Gerät nicht unbeaufsichtigt benutzen.
• Lassen Sie das Gerät nie unbeaufsichtigt, solange es eingeschaltet ist.
• Beim Ignorieren der Sicherheitshinweise kann der Hersteller nicht für
Schäden haftbar gemacht werden.
• Um Kinder vor Gefahren durch Elektrogeräte zu schützen, bitte
sicherstellen, dass die Geräte niemals unbeaufsichtigt bleiben. Deshalb
muss ein Aufbewahrungsort für das Gerät gewählt werden, der für Kinder
unzugänglich ist. Sicherstellen, dass das Kabel nicht nach unten hängt.
• Dieses Gerät darf nur für den privaten Gebrauch und den dafür
bestimmten Zweck benutzt werden.
• Alle Reparaturen sollten von einem kompetenten, qualifizierten
Elektriker vorgenommen werden (*).
• Es ist absolut notwendig, das Gerät immer sauber zu halten, weil es in
direkten Kontakt mit Nahrungsmitteln kommt.
• Überprüfen Sie, ob die Gerätespannung mit der Netzspannung
Ihres Hauses übereinstimmt. Nennspannung: 220-240 V~ 50 Hz. Die
Steckdose muss mit mindestens 16 A oder 10 A träge abgesichert sein.
• Dieses Gerät entspricht allen Standards bezüglich elektromagnetischer
Felder (EMF). Bei sachgerechter Handhabung laut Anweisung in
dieser Bedienungsanleitung ist das Gerät, basierend auf den heutigen
wissenschaftlichen Erkenntnissen, sicher in der Anwendung.
• Die Benutzung von Zubehör, das nicht vom Hersteller empfohlen
wurde, kann Verletzungen verursachen und führt zum Erlöschen von
eventuellen Garantieansprüchen.
• Dieses Gerät nicht im Freien verwenden.
• Zum Schutz vor Stromschlag Kabel, Stecker oder Gerät nicht in Wasser
oder sonstige Flüssigkeiten tauchen.
• Ziehen Sie den Netzstecker bevor Sie Zubehör austauschen oder das Gerät
reinigen.
• Das Gerät nicht mit kaputtem Kabel oder Stecker benutzen, oder
wenn das Gerät Fehlfunktionen aufweist oder in irgendeiner Weise
beschädigt ist. Kabel oder Stecker dürfen nur von einem autorisierten
Techniker ausgetauscht werden, um Gefahren zu vermeiden. (*). Dieses
Gerät nicht selbst reparieren.
• Das Gerät nicht neben direkten Wärmequellen benutzen.
• Bei Nichtbenutzung Netzstecker ziehen.
* Kompetenter, qualifizierter Elektriker: Kundendienstabteilung der Herstellers
oder Importeurs oder alle Personen, die zum Vermeiden aller Gefahren für
diese Reparaturen qualifiziert, geprüft und kompetent sind. Auf jeden Fall
sollte das Gerät bei einem Elektriker eingereicht werden.
Bedienungsanleitung

1
6
12 7
8
2
3
4
5
10
9
11
19
DE
TEILE BESCHREIBUNG
1. Geschwindigkeitsregler
2. Normal-Geschwindigkeit
3. Taste Turbo-Geschwindigkeit
4. Motoreinheit
5. Schneebeser
6. Freigabetasten
7. Mixstab
8. Schneebesenfuß
9. Schüssel
10. Deckel
11. Messereinheiteinheit
12. Messbecher
VOR DER INBETRIEBNAHME
• Nehmen Sie das Gerät aus seiner Verpackung.
• Entfernen Sie sämtliches Verpackungsmaterial, wie Folien, Füllmaterial,
Kabelhalter und Kartonverpackung.
• Prüfen Sie den Lieferumfang auf Vollständigkeit.
• Sollte der Verpackungsinhalt unvollständig oder Beschädigungen
feststellbar sein, nehmen Sie das Gerät nicht in Betrieb. Bringen Sie es
umgehend zum Händler zurück.
• Erstickungsgefahr! Das Verpackungsmaterial ist kein Spielzeug. An Plas-
tiktüten, Folien und Styroporteilchen können Kinder ersticken. Halten
Sie daher Verpackungsmaterial immer von Kindern fern.
• Reinigen Sie vor der ersten Inbetriebnahme den Mixstab (Nr. 7), den
Schneebesen (Nr. 5), die Schüssel (Nr. 9), den Messbecher (Nr. 12) und
das Messereinheit (Nr. 11) in warmem Seifenwasser. Spülen Sie alles
gründlich und trocken Sie alles sorgfältig. Diese Teile sind nicht für die
Geschirrspülmaschine geeignet.
• VORSICHT! Das Messereinheit ist sehr scharf. Fassen Sie das Messerein-
heit immer am Kunststoffteil an und vermeiden Sie Kontakt mit den
Schneiden, da diese zu schweren Verletzungen führen können. Achtung!
Tauchen Sie den Fuß (Nr. 4), den Schneebesenfuß (Nr. 8) und den Deckel
(Nr. 10) niemals in Wasser oder in andere Flüssigkeiten und spülen Sie sie
niemals unter dem Wasserhahn ab.
• Reinigen Sie diese Teile mit einem feuchten Tuch. Betreiben Sie den
StabSchneebesen niemals länger als 1 Minute und lassen Sie ihn
danach immer 15 Sekunden abkühlen.
Stabmixer Set

20
VERWENDUNG DES GERÄTS MIT DEM
MIXSTAB
• Der Mixstab ist für folgende Zwecke gedacht:
Mischen von Flüssigkeiten, z. B. Milchprodukte, Soßen, Fruchtsäfte,
Suppen, Mixgetränke und Shakes.
Mischen von weichen Zutaten, z. B. Pfannkuchenteig oder Mayonnaise.
Mischen von gekochten Zutaten, z. B. für die Zubereitung von Baby-
nahrung.
• Den Mixstab (Nr. 7) auf die Basis (Nr. 4) stecken, bis er einrastet.
• Den Klingenschutz vollständig in die Zutaten tauchen, um Spritzer zu
vermeiden.
• Drücken und Halten Sie die Tasten Normal- (Nr. 2) oder Turbo-
• Geschwindigkeit (Nr. 3) gedrückt, um das Gerät einzuschalten. Wenn
• Sie die Taste Normalgeschwindigkeit verwenden, können Sie die
• Geschwindigkeit mit dem Geschwindigkeitsregler (Nr.1) einstellen.
• Je höher die Geschwindigkeit, desto kürzer ist die erforderliche
• Verarbeitungszeit. Um eine andere Geschwindigkeitseinstellung
• auszuwählen, drehen Sie den Geschwindigkeitsregler auf die ge-
wünschte Einstellung, bevor oder während Sie auf die Taste Normalge-
schwindigkeit drücken.
• Wenn Sie die Taste Turbo-Geschwindigkeit verwenden, läuft das Gerät
mit maximaler Geschwindigkeit. In diesem Fall kann die Geschwindig-
keit nicht mit dem Geschwindigkeitsregler geregelt werden.
• Lassen Sie nach dem Verarbeiten die Taste Normal- oder Turbo-Ge-
schwindigkeit los, um das Gerät auszuschalten
• Die Zutaten durch langsame Auf- und Abdrehbewegungen des Geräts
mischen. Die Auslösetasten (Nr. 6) drücken, um die Schneebesenklin-
gen von der Basis zu trennen.
VERWENDUNG DES HANDSCHNEEBESENS
• Der Schneebesen ist für das Rühren von hauptsächlich flüssigen
Zutaten, wie Eiweiß, Sahne, Instant-Desserts und Eiern und Zucker
für Kuchen gedacht. Rühren Sie keine dickeren Mischungen, wie
Margarine und Zucker damit, da dies zu Schäden am Schneebesen
führen kann. Verwenden Sie dafür den Mixstab (Nr. 7). Verbinden Sie
den Schneebesen (Nr.5) mit dem Schneebesenadapter (Nr.8), indem
Sie den Schneebesen in die Öffnung am Schneebesenadapter stecken.
Verbinden Sie nun den Schneebesenadapter mit der Motoreinheit.
• Tauchen Sie den Besen vollständig in die Zutaten.
• Um Spritzer zu vermeiden, starten Sie die Verarbeitung mit normaler
Geschwindigkeit durch Drücken der Taste Normal-Geschwindigkeit (Nr.
2). Um eine andere Geschwindigkeit Einstellung auszuwählen, drehen
Sie den Geschwindigkeitsregler (Nr. 1) auf die gewünschte Einstellung
vor oder während Sie die Taste Normal-Geschwindigkeit drücken.
VERWENDUNG DES HACKMESSEREINHEITS
• Das HackMessereinheit ist für das Hacken von Zutaten, wie Nüssen,
Fleisch, Zwiebeln, Hartkäse, gekochten Eiern, Knoblauch, Kräutern,
trockenem Brot usw., gedacht.
• Die Schneiden sind sehr scharf! Gehen Sie bei der Handhabung der
Messereinheiteinheit sehr vorsichtig vor, besonders wenn Sie sie aus
der Schüssel entfernen, wenn Sie die Schüssel ausleeren und bei der
Reinigung.
• Setzen Sie das Messereinheit (Nr. 11) auf den Lagerpunkt in der Mitte
der Schüssel (Nr. 9) auf.
Bedienungsanleitung
Table of contents
Languages:
Other TriStar Blender manuals

TriStar
TriStar MX-4157 User manual

TriStar
TriStar BL-4421 User manual

TriStar
TriStar BL-4435 User manual

TriStar
TriStar MX-4154 User manual

TriStar
TriStar MX-4156 User manual

TriStar
TriStar MX-4118 User manual

TriStar
TriStar MX-4114 User manual

TriStar
TriStar BL-4431 User manual

TriStar
TriStar MX-4146DR User manual

TriStar
TriStar MX-4154 User manual

TriStar
TriStar BL-4427 User manual

TriStar
TriStar BL-4446 User manual

TriStar
TriStar BL-4435 User manual

TriStar
TriStar BL-4433 User manual

TriStar
TriStar BL-4010 User manual

TriStar
TriStar BL-4426 User manual

TriStar
TriStar MX-4168 User manual

TriStar
TriStar MX-4154 User manual

TriStar
TriStar BL-4417 User manual

TriStar
TriStar BL-4430 User manual