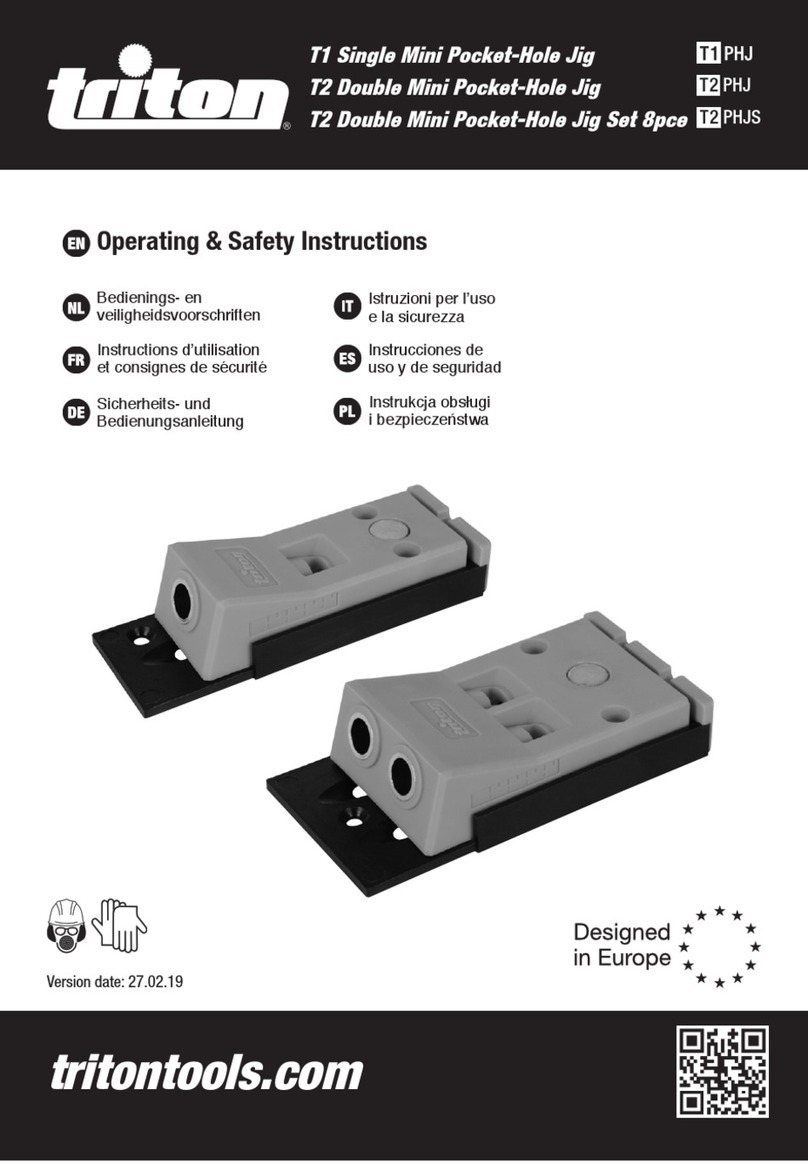
Triton T3 Assembly instructions

Version date: 22.02.19
tritontools.com
T3 Handy Pocket-Hole Jig
3/4"(19mm)
Operating & Safety Instructions
Bedienings- en
veiligheidsvoorschriften
Instructions d’utilisation
et consignes de sécurité
Sicherheits- und
Bedienungsanleitung
Istruzioni per l’uso
e la sicurezza
Instrucciones de
uso y de seguridad
Instrukcja obsługi
i bezpieczeństwa
T3 PHJ
376107_Manual.indd 1 22/02/2019 16:24

2
F
D
B
E
C
A
376107_Manual.indd 2 22/02/2019 16:25

3
HG
I
376107_Manual.indd 3 22/02/2019 16:25

4
EN
Introduction
Thank you for purchasing this Triton product. This manual contains
information necessary for safe and effective operation of this
product. This product has unique features and, even if you are
familiar with similar products, it is necessary to read this manual
carefully to ensure you fully understand the instructions. Ensure all
users of the product read and fully understand this manual.
Intended Use
Pocket hole jig for quick and efficient repeated use on 19mm (3/4")
wood without the need for a clamp. For joinery work on panel fixing,
corners and mitre joints.
Operation
WARNING: Always adhere to all safety advice and instructions
for any power tool used in conjunction with this product.
IMPORTANT: Always apply appropriate downward force on the jig
when creating the pocket hole.
IMPORTANT: Always practise on a scrap piece of wood before
making a pocket hole in the workpiece.
Note: Ideally, the drill tip should emerge close to the middle of the
material being drilled.
1. Position depth collar at 19mm (3/4") indicator on the drill bit
(Image A)
Note: Ensure the workpiece thickness is near 19mm (3/4”) to
create a suitable pocket hole.
2. Align grub screw over the flat surface and tighten using the
hex key (Image B)
3. Securely attach the drill bit to drill
4. Position the jig at the edge of the workpiece over the edge for
extra stability (Image C)
5. Insert the drill bit into the jig drill guide until it locks in place in
the drill hold plate (Image D)
6. Apply appropriate downward pressure on the jig handle
(Image E)
7. Begin drilling so the drill hold plate releases the drill bit
(Image F)
Note: Apply slow but firm pressure when drilling into harder woods
to ensure the drill bit cuts into the workpiece smoothly.
8. Continue until the depth collar makes contact with the jig to
create the hole (Image G)
Note: Keep the jig clear of chip and dust to ensure the drill operates
effectively.
9. Remove the drill bit from the drill hold plate (Image H)
10. Repeat steps to create the required number of holes and finish
using the self-tapping screws and plugs (Image I)
Timber Thickness Screw
13 – 18mm / 1/2" - 11/16" 25mm / 1"
19 – 25mm / 3/4" – 1" 30mm / 1– 1/4"
26 – 30mm / 1" – 1-1/4" 35mm / 1-1/2"
Note: For hard wood use a fine thread, and for soft wood use a
coarse thread.
Accessories
A full range of accessories including jigs, plugs, screws and bits is
available from your Triton stockist.
Maintenance
Contact
For technical or repair service advice, please contact the helpline on
(+44) 1935 382 222
Web: tritontools.com/en-GB/Support
Address:
Powerbox
Boundary Way
Lufton Trading Estate
Yeovil, Somerset
BA22 8HZ, United Kingdom
Original Instructions
376107_Manual.indd 4 22/02/2019 16:25

GB
5
NL
Inleiding
Hartelijk dank voor de aankoop van dit Triton-product. Deze
handleiding omvat informatie die nodig is voor een veilig en
efficiënt gebruik van dit product. Dit product is in het bezit van
unieke kenmerken en, zelfs indien u bekend bent met gelijkaardige
producten, is het nodig om deze handleiding aandachtig door te
lezen om er zeker van te zijn dat u de instructies volledig begrijpt.
Zorg ervoor dat alle gebruikers van het product deze handleiding
volledig gelezen en begrepen hebben.
Voorzien gebruik
Handige pocket-boormal voor snel en herhaald gebruik op
19 mm (3/4”) hout, zonder de noodzaak tot het gebruik van een
klem. Kan gebruikt worden voor het bevestigen van panelen,
hoeken, en verstekverbindingen.
Werking
WAARSCHUWING: Respecteer steeds alle
veiligheidswaarschuwingen en - instructies wanneer u gebruik
maakt van elektrisch gereedschap in combinatie van dit product.
BELANGRIJK: Train altijd op een stukje hout voordat u een
pocketgat in het werkstuk maakt.
BELANGRIJK: Oefen steeds een aangepaste neerwaartse kracht uit
op de mal tijdens het aanbrengen van het pocketgat
Opmerking: Ideaal dient de punt van de boor tevoorschijn te komen
in de buurt van het midden van het geboorde materiaal.
1. Positioneer de dieptekraag op de 19 mm (3/4”) indicator op
het boorbit (Afb. A)
Opmerking: Zorg ervoor dat het werkstuk 19 mm (3/4”) is.
2. Lijn de stelschroef uit over het vlakke oppervlak en span ze aan
met behulp van de zeskantsleutel (Afb. B)
3. Bevestig het boorbit stevig in de boormachine
4. Positioneer de mal aan de rand van het werkstuk en haak de
tanden over de rand voor extra stabiliteit (Afb. C)
5. Plaats het boorbit in de boorgeleiding van de mal tot het op zijn
plaats vast blijft zitten in de boorhouderplaat (Afb. D)
6. Oefen een voldoende neerwaartse druk uit op het handvat van
de mal (Afb. E)
7. Begin te boren zodat de boorhouderplaat het boorbit loslaat
(Afb. F)
Let op: Pas langzame maar stevige druk toe bij het boren in hardere
houtsoorten om te zorgen dat de boor in het werkstuk soepel snijdt.
8. Ga verder tot de dieptekraag contact maakt met de mal om het
gat te creëren (Afb. G)
Opmerking: Houd de mal vrij van spanen en stof om ervoor te
zorgen dat de boormachine efficiënt haar werk kan doen.
9. Verwijder het boorbit uit de boorhouderplaat (Afb. H)
10. 1Herhaal de stappen om het gewenste aantal gaten aan
te brengen en werk af met de zelfsnijdende schroeven en
pluggen (Afb. I)
Houtdikte Schroef
13 – 18 mm / 1/2" - 11/16" 25 mm / 1"
19 – 25 mm / 3/4" – 1" 30 mm / 1– 1/4"
26 – 30 mm / 1" – 1-1/4" 35 mm / 1-1/2"
Opmerking: Voor hard hout dient u een fijne schroefdraad te
gebruiken, en voor zacht hout een grove schroefdraad.
Accessoires
Een heel gamma aan accessoires, met inbegrip van houders,
pluggen, schroeven en bits, is verkrijgbaar bij uw Triton-leverancier.
Onderhoud
Contact
Voor advies in verband met technische zaken of met herstellingen,
gelieve contact op te nemen met (+44) 1935 382 222
Web: tritontools.com/nl-NL/Support
Adres:
Powerbox
Boundary Way
Lufton Trading Estate
Yeovil, Somerset
BA22 8HZ, Verenigd Koninkrijk
Vertaling van de originele instructies
376107_Manual.indd 5 22/02/2019 16:25

ENGBFR
6
Introduction
Nous vous remercions d’avoir choisi cet équipement Triton.
Ces instructions contiennent les informations nécessaires
au fonctionnement efficace et sûr de ce produit. Veuillez lire
attentivement ce manuel pour vous assurer de tirer pleinement
avantage des caractéristiques uniques de votre nouvel équipement.
Gardez ce manuel à portée de main et assurez-vous que tous les
utilisateurs l’aient lu et bien compris avant toute utilisation.
Usage conforme
Gabarit de perçage oblique pour usage rapide et efficace sur
le bois d’épaisseur 19 mm (3/4”) sans recourir à une pince de
serrage. Peut être utilisé pour les travaux d’assemblages, les joints
angulaires et les joints à onglets.
Instructions d’utilisation
AVERTISSEMENT : NE JAMAIS tenir le gabarit avec les mains
lors du perçage ; le gabarit doit être maintenu par serrage ou vissé
sur la pièce ou surface de travail. Le non-respect de cette consigne
peut endommager l’outil et/ou entraîner des blessures graves.
IMPORTANT : Toujours appliquer une force suffisante sur le gabarit
lors du perçage.
IMPORTANT : Essayez toujours le gabarit sur une chute de bois
avant de l’utiliser sur votre pièce finale.
Remarque : Idéalement, l’extrémité du foret devrait émerger près
du milieu du matériau.
1. Positionnez la bague de profondeur sur le marquage
19 mm (3/4”) du foret (Image A).
Remarque : Vérifiez bien que l’épaisseur de la pièce de travail est
de 19 mm (3/4”) afin d’effectuer le perçage adapté.
2. Alignez la vis de la bague sur la partie plate du foret puis serrez
à l’aide de la clé hexagonale fournie (Image B).
3. Connectez le foret à une perceuse.
4. Positionnez le gabarit sur le bord de la pièce de travail, et
utilisez les dents amovibles pour plus de stabilité (Image C).
5. Insérez le foret dans le guide de perçage du gabarit jusqu’à ce
que celui-ci se verrouille dans le plateau de verrouillage
(Image D).
6. Appliquez une force suffisante sur la poignée du gabarit
(Image E).
7. Commencez à percer, le plateau de verrouillage relâchera le
foret (Image F).
Remarque : Appliquez une pression ferme mais lente lors du
perçage dans les bois plus durs pour permettre au foret de percer
proprement.
8. Continuez à percer jusqu’à ce que la bague de profondeur entre
en contact avec le gabarit (Image G).
Remarque : Veillez à ce que le gabarit soit exempt de poussière et
copeaux afin d’assurer l’efficacité du perçage.
9. Retirez le foret du plateau de verrouillage (Image H).
10. Répétez ces étapes afin d’obtenir le nombre de trous requis puis
finissez l’assemblage à l’aide des vis auto-taraudeuses et
chevilles fournies (Image I).
Épaisseur du bois Vis
13 – 18 mm / 1/2" - 11/16" 25 mm / 1"
19 – 25 mm / 3/4" – 1" 30 mm / 1– 1/4"
26 – 30 mm / 1" – 1-1/4" 35 mm / 1-1/2"
Remarque : Utilisez un filetage fin pour les bois durs, et un filetage
grossier pour les bois souples.
Accessoires
Une grande variété d’accessoires, y compris des gabarits, vis,
chevilles et embouts, est disponible auprès de votre revendeur
Triton.
Entretien
Contact
Pour tout conseil technique ou réparation, veuillez nous contacter :
Téléphone : (+44) 1935 382 222
Site web : www.tritontools.com/fr-FR/Support
Adresse :
Powerbox
Boundary Way
Lufton Trading Estate
Yeovil, Somerset
BA22 8HZ, United Kingdom (Royaume-Uni)
Traduction des instructions originales
376107_Manual.indd 6 22/02/2019 16:25

GBDE
7
Übersetzung der Originalbetriebsanleitung
(Abb. I). Für eine professionelle Endbearbeitung können nun
die Abdeckdübel in die Taschenlöcher eingesetzt werden.
Holzstärke Schraubengröße
13–18 mm (1/2 Zoll – 11/16 Zoll) 25 mm (1 Zoll)
19–25 mm (3/4 Zoll – 1 Zoll) 30 mm (1-1/4 Zoll)
26–30 mm (1 Zoll – 1-1/4 Zoll) 35 mm (1-1/2 Zoll)
Hinweis: Verwenden Sie bei der Bearbeitung von Hartholz stets
Schrauben mit Feingewinde.
Zubehör
Ein umfassendes Zubehörsortiment einschließlich verschiedener
Bohrschablonen, Taschenlochstöpsel, -schrauben und -bohrer ist
über Ihren Triton-Fachhändler erhältlich.
Wartung und Pflege
Kontakt
Informationen zu Reparatur- und Kundendiensten erhalten Sie unter
der Rufnummer (+44) 1935/382222.
Webseite: tritontools.com/de-DE/Support
Postanschrift:
Powerbox
Boundary Way
Lufton Trading Estate
Yeovil, Somerset
BA22 8HZ
Großbritannien
Einführung
Vielen Dank, dass Sie sich für dieses Triton-Werkzeug entschieden
haben. Diese Anleitung enthält wichtige Informationen für das
sichere und effektive Arbeiten mit diesem Produkt. Bitte lesen Sie
diese Anleitung sorgfältig durch, um den größtmöglichen Nutzen
aus dem einzigartigen Design dieses Produkts ziehen zu können.
Bewahren Sie diese Anleitung griffbereit auf und sorgen Sie dafür,
dass alle Benutzer dieses Geräts sie gelesen und verstanden haben.
Bestimmungsgemäße Verwendung
Taschenloch-Bohrlehre für Schreiner- und Tischlerarbeiten zur
präzisen, wiederholten Erstellung von Taschenlöchern an
Rahmen- und Eckverbindungen in 19-mm-(3/4-Zoll)-starkem Holz
ohne Einsatz einer Spannvorrichtung.
Bedienung
WARNUNG! Befolgen Sie stets die Sicherheitshinweise und die
Bedienungsanleitung des Elektrowerkzeugs, das in Verbindung mit
diesem Produkt verwendet wird.
WICHTIG: Üben Sie bei der Erstellung von Taschenlöchern immer
einen angemessen Druck auf die Bohrlehre aus.
WICHTIG: Üben Sie die Erstellung von Taschenlöchern immer erst
an einem Stück Ausschussmaterial, bevor Sie Taschenlöcher in Ihr
Werkstück bohren.
1. Positionieren Sie den Tiefeneinstellring an der 19-mm-
(3/4-Zoll)-Markierung auf dem Bohrer (Abb. A).
Hinweis: Vergewissern Sie sich, dass das Werkstück eine Stärke
von 19 mm (3/4 Zoll) hat.
2. Richten Sie die Madenschraube mit der flachen Einkerbung am
Bohrer aus und ziehen diese mithilfe des Sechskantschlüssels
fest (Abb. B)
3. Setzen Sie den Bohrer in die Bohrmaschine und befestigen
Sie ihn.
4. Setzen Sie die Bohrschablone an der Werkstückkante an, für
zusätzliche Stabilität haken Sie die Anschlagszähne am Ende
der Bohrlehre über die Kante (Abb. C).
5. Führen Sie den Bohrer in die Bohrführung ein, bis er in der
SpeedDrive™ Bohrverriegelung einrastet (Abb. D).
6. Üben Sie angemessen Druck auf den Handgriff aus (Abb. E).
7. Sobald Sie mit dem Bohrvorgang beginnen, wird die
SpeedDrive™ Bohrverriegelung freigegeben (Abb. F).
Hinweis: Drücken Sie beim Bohren in härteres Holz langsamen,
aber festen Druck, um sicherzustellen, dass der Bohrer reibungslos
in das Werkstück einschneidet.
8. Fahren Sie mit dem Bohrvorgang fort, bis der Tiefeneinstellring
an der Bohrlehre anschlägt (Abb. G).
Hinweis: Halten Sie die Bohrlehre frei von Sägespänen und Staub,
um ein effektives Bohren gewährleisten zu können.
9. Entfernen Sie den Bohrer aus der SpeedDrive™
Bohrverriegelung (Abb. H).
10. Wiederholen Sie die Schritte, um die erforderliche Anzahl
von Löchern zu erstellen. Fügen Sie nun mithilfe der
selbstschneidenden Schrauben Ihr Werkstück zusammen.
376107_Manual.indd 7 22/02/2019 16:25

ENGBIT
8
Traduzione delle istruzioni originali
Introduzione
Grazie per aver acquistato questo prodotto Triton. Questo manuale
contiene le informazioni necessarie per un funzionamento sicuro
ed efficace di questo prodotto. Questo prodotto ha caratteristiche
uniche e, anche se si ha familiarità con prodotti simili, è necessario
leggere attentamente questo manuale per assicurarsi di
comprendere a pieno le istruzioni. Assicurarsi che tutti gli utenti del
prodotto leggano e comprendano a pieno questo manuale.
Uso Previsto
Dima per fori a tasca veloce ed efficiente per usi ripetuti su legni
da 19 mm (3/4") senza necessità di morsetto. Può essere usato per
lavori su giunture come il fissaggio di pannelli e angoli.
Funzionamento
ATTENZIONE: attenersi sempre a tutti i consigli e le istruzioni
di sicurezza relativi a qualsiasi utensile elettrico utilizzato in
combinazione con questo prodotto.
IMPORTANTE: applicare sempre la giusta forza verso il basso sulla
dima durante la creazione del foro a tasca.
IMPORTANTE: Fare sempre una prova su un legno di scarto prima
di lavorare sul pezzo.
Nota: Si consiglia di far emergere la punta del trapano in prossimità
della parte centrale del pezzo di lavoro.
1. Posizionare il collare di profondità sull’indicatore da
19 mm (3/4") sulla punta del trapano (Immagine A)
Nota: assicurarsi che il pezzo da lavorare sia di circa 19 mm (3/4"),
di modo da creare un foro a tasca appropriato.
2. Allineare la vite senza testa sulla superficie piana e serrare
usando la chiave esagonale (chiave americana) (Immagine B)
3. Collegare saldamente la punta al trapano
4. Posizionare la dima sul bordo del pezzo con i meccanismi di
blocco oltre il bordo per una maggiore stabilità (Immagine C)
5. Inserire la punta del trapano nella guida di perforazione fino
a quando non si blocca nella piastra di blocco del trapano
(Immagine D)
6. Applicare un’adeguata pressione verso il basso
sull’impugnatura della dima (Immagine E)
7. Iniziare la perforazione in modo che la piastra di fissaggio del
trapano rilasci la punta del trapano (Immagine F)
Nota: Applicare una pressione lenta ma decisa quando si perforano
legni più duri per far sì che la punta si infili nel pezzo in maniera
perfetta.
8. Per creare il foro, continuare finché il collare di profondità non
entra in contatto con la dima (Immagine G)
Nota: pulire la dima libera da scarti e segatura per garantire che la
punta funzioni in modo efficace.
9. Rimuovere la punta dalla piastra di fissaggio del trapano
(Immagine H)
10. Ripetere i passaggi per creare il numero richiesto di fori e
terminare il lavoro inserendo le viti autofilettanti e i tasselli
(Immagine I)
Spessore del legno Vite
13 – 18mm / 1/2" - 11/16" 25mm / 1"
19 – 25mm / 3/4" – 1" 30mm / 1– 1/4"
26 – 30mm / 1" – 1-1/4" 35mm / 1-1/2"
Nota: per legno duro usare una filettatura sottile e per un legno
tenero usare una filettatura più grossa.
Accessori
Una gamma completa di accessori tra cui dime, tasselli, viti e punte
è disponibile presso il proprio rivenditore Triton
Manutenzione
Contatti
Per consigli tecnici e per eventuali riparazioni, si prega di
contattare il nostro servizio di assistenza telefonico al numero
(+44) 1935 382 222
Sito web: tritontools.com/it-IT/Support
Indirizzo:
PowerBox
Boundary Way
Lufton Trading Estate
Yeovil, Somerset
BA22 8HZ, Regno Unito
376107_Manual.indd 8 22/02/2019 16:25

GBES
9
Traducción del manual original
Introducción
Gracias por haber elegido esta herramienta Triton. Estas
instrucciones contienen la información necesaria para utilizar este
producto de forma segura y eficaz. Lea atentamente este manual
para obtener todas las ventajas y características únicas de su nueva
herramienta. Conserve este manual a mano y asegúrese de que
todas las personas que utilicen esta herramienta lo hayan leído y
entendido correctamente.
Aplicaciones
Guía para realizar agujeros ocultos repetitivos en maderas de 19,05
mm (3/4") sin necesidad de utilizar abrazaderas. Indicada para
realizar ensambles en paneles, esquinas y juntas a inglete.
Funcionamiento
ADVERTENCIA: Siga siempre todos los consejos e instrucciones
de seguridad para cualquier herramienta eléctrica utilizada junto
con este producto.
IMPORTANTE: Presione la guía mientras realice el agujero oculto.
IMPORTANTE: Realice un agujero de prueba en un trozo de material
desechable antes de realizar los agujeros ocultos.
1. Ajuste el tope de profundidad en el indicador de 19,05 mm
(3/4") situado en la broca (Imagen A).
Nota: Asegúrese de que el grosor la pieza de trabajo sea de
19,05 mm (3/4") poder crear el agujero oculto.
2. Apriete el tornillo prisionero sobre una superficie plana
utilizando la llave hexagonal (Imagen B).
3. Introduzca la broca en el taladro.
4. Coloque la guía en el borde de la pieza de trabajo y posicione
las lengüetas sobre el borde de la pieza de trabajo para mayor
estabilidad (Imagen C).
5. Introduzca la broca en la guía hasta que entre en contacto con
la placa de la guía (Imagen D).
6. Presione sobre la empuñadura de la guía según sea necesario
(Imagen E).
7. Comience a realizar el agujero para que la placa de sujeción
libere la broca (Imagen F).
Nota: Presione lentamente y firmemente cuando perfore maderas
duras para que la broca pueda perforar el material correctamente.
8. Continúe perforando hasta que el tope de profundidad entre en
contacto con la guía (Imagen G).
Nota: Mantenga la guía limpia sin polvo o virutas para poder
realizar el agujero correctamente.
9. Retire la broca fuera de la placa de sujeción guía (Imagen H).
10. Repita los pasos anteriores para realizar todos los agujeros
necesarios y utilice los tornillos y los tacos de madera
suministrados (Imagen I).
Grosor de la pieza de trabajo Tornillo
13 – 18 mm / 1/2" - 11/16" 25 mm / 1"
19 – 25 mm / 3/4" – 1" 30 mm / 1– 1/4"
26 – 30 mm / 1" – 1-1/4" 35 mm / 1-1/2"
Nota: Utilice un tornillo de rosca fina para maderas duras y un
tornillo de rosca gruesa para maderas blandas.
Accesorios
Existen gran variedad de accesorios, guías, tapones, tornillos y
atornilladores para esta herramienta disponibles en su distribuidor
Triton más cercano.
Mantenimiento
Contacto
Servicio técnico de reparación – Tel: (+44) 1935 382 222
Web: tritontools.com/es-ES/Support
Dirección:
Powerbox
Boundary Way
Lufton Trading Estate
Yeovil, Somerset
BA22 8HZ, Reino Unido
376107_Manual.indd 9 22/02/2019 16:25

ENGBEPL
10
Wprowadzenie
Dziękujemy za zakup tego produktu marki Triton. Zapoznaj
się z niniejszymi instrukcjami: zawierają one informacje
niezbędne dla bezpiecznej i wydajnej obsługi produktu.
Produkt posiada szereg unikalnych funkcji, dlatego też,
nawet, jeśli jesteś zaznajomiony z podobnymi produktami,
przeczytanie instrukcji obsługi umożliwi Ci pełne
wykorzystanie tego wyjątkowego projektu. Przechowuj
niniejsze instrukcje w zasięgu ręki i upewnij się, że
użytkownicy narzędzia przeczytali i w pełni zrozumieli
wszystkie zalecenia.
Zastosowanie zgodne z przeznaczeniem
Przyrząd wiertarski do otworów kieszeniowych umożliwia
szybkie i wydajne wielokrotne użycie na drewnie o grubości
19 mm 3/4" bez korzystania z zacisku. Sprawdza się
podczas mocowania paneli, narożników i połączeń kątowych
na ucios.
Obsługa
OSTRZEŻENIE: W przypadku korzystania z
elektronarzędzi należy zawsze przestrzegać zaleceń
bezpieczeństwa i instrukcji danego narzędzia.
WAŻNE: Podczas wykonywania otworu kieszeniowego
zawsze przyłożyć odpowiednią siłę nacisku do dołu.
WAŻNE: Zaleca się, aby zawsze przetestować ustawienia
na drobnym kawału drewna, przed wykonaniem otworów
kieszeniowych w materiale obróbki.
Uwaga: Najlepiej, aby końcówka wiertła pojawiła się blisko
środka nawiercanego.
1. Ustawić kołnierz głębokościowy na wskaźniku
19 mm 3/4" znajdującym się na wiertle (zdjęcie A).
Uwaga: Upewnij się, że grubość materiału jest bliska
19 mm 3/4", aby wykonać odpowiednie otwory kieszeniowe.
2. Wyrównać wkręt dociskowy nad płaską powierzchnią i
dokręć kluczem sześciokątnym (zdjęcie B).
3. Odpowiednio przymocować wiertło do wiertarki.
4. Umieścić przyrząd na krawędzi obrabianego przedmiotu
aby uzyskać dodatkową stabilność (zdjęcie C).
5. Włożyć wiertło do prowadnicy wiertła, aż do
zablokowania w odpowiednim położeniu w płycie
przytrzymującej wiertło (zdjęcie D).
6. Przyłożyć odpowiednią siłę nacisku do dołu na uchwyt
(zdjęcie E).
7. Rozpocząć wiercenie, aby płyta przytrzymująca wiertło
zwolniła (zdjęcie F).
Uwaga: Zastosuj nieduży ale pewny nacisk podczas
wiercenia w twardszym drewnie, aby się upewnić, że wiertło
wchodzi gładko w materiał obróbki
8. Aby wykonać otwór, kontynuować wiercenie, aż kołnierz
głębokościowy zetknie się z przyrządem (zdjęcie G).
Uwaga: Zadbać o to, aby przyrząd nie uległ
zanieczyszczeniu wiórami ani pyłem, by wiertło działało
skutecznie.
9. Wyjąć wiertło z płyty przytrzymującej wiertło (zdjęcie H).
10. Powtórzyć powyższe kroki, aby wykonać wymaganą
liczbę otworów, i wykończyć detal za pomocą wkrętów
samogwintujących i kołków (zdjęcie I).
Grubość drewna Wkręt
13 – 18 mm / 1/2" - 11/16" 25 mm / 1"
19 – 25 mm / 3/4" – 1" 30 mm / 1– 1/4"
26 – 30 mm / 1" – 1-1/4" 35 mm / 1-1/2"
Uwaga: W przypadku twardego drewna należy użyć gwintu
drobnozwojnego, a w przypadku drewna miękkiego –
grubozwojnego.
Akcesoria
Pełen asortyment akcesoriów, w tym przyrządów, kołków,
wkrętów i bitów, jest dostępny u dystrybutorów produktów
marki Triton.
Konserwacja
Kontakt
W celu uzyskania porady technicznej lub dotyczącej
naprawy, należy skontaktować się z infolinią pod numerem
(+44) 1935 382 222
Web: tritontools.com/pl-PL/Support
Adres:
Powerbox
Boundary Way
Lufton Trading Estate
Yeovil, Somerset
BA22 8HZ, Wielka Brytania
Tłumaczenie oryginalnej instrukcji
376107_Manual.indd 10 22/02/2019 16:25
11
Notes
376107_Manual.indd 11 22/02/2019 16:25

376107_Manual.indd 12 22/02/2019 16:25
Table of contents
Languages:
Other Triton Tools manuals

Triton
Triton TWSMPJ Assembly instructions

Triton
Triton 303468 Assembly instructions

Triton
Triton TR281928 Assembly instructions

Triton
Triton ETA 300 Quick guide

Triton
Triton TW8CPHJ Assembly instructions

Triton
Triton T6 PHJ Assembly instructions

Triton
Triton SJA420 Quick guide

Triton
Triton DCA 250 Quick guide

Triton
Triton Pocket-Hole Jig 7pce Assembly instructions

Triton
Triton T1 Assembly instructions