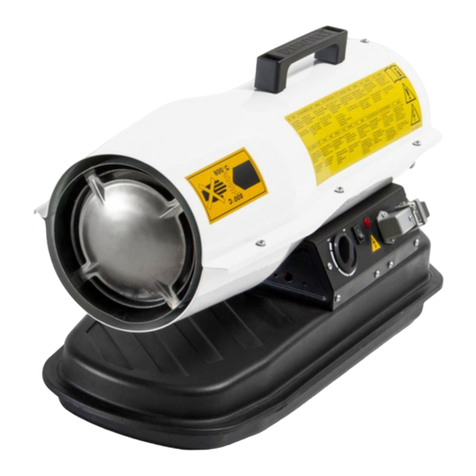
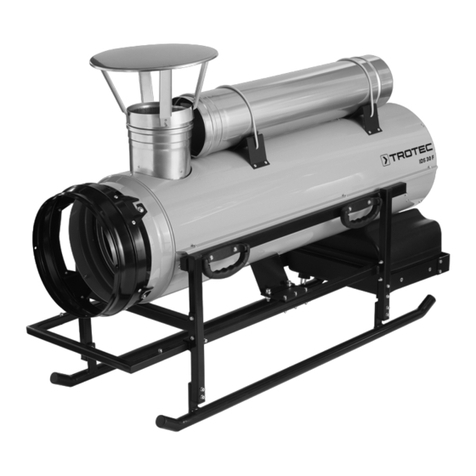
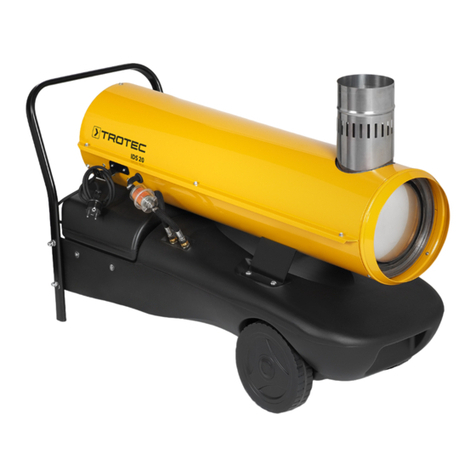
Trotec IDS 30 User manual

TRT-BA-IDS20/30-RE-001-INT
IDS 20 / 30
TROTEC® GmbH & Co KG • Grebbener Straße 7 • D-52525 Heinsberg
Tel.: +49 2452 962-400 • Fax: +49 2452 962-200
www.trotec.de • E-Mail: [email protected]
DE Bedienungsanleitung – Ölheizaggregate .................A - 1
EN Operating manual – Oil heating units ...................B - 1
FR Manuel d´utilisation – Chauffage au fioul ................C - 1
TR Kullanım kılavuzu – Yağ ısıtma üniteleri ................D - 1
DA Betjeningsvejledning – oliefyraggregater ...............E - 1
SV Användarmanual - oljeaggregat .......................F - 1

Bedienungsanleitung – IDS 20 / 30
DE A-1
Inhaltsverzeichnis
1. Hinweise zur Benutzung des Handbuchs.................................A-1
Zeichenerklärung ............................... A-1
2. Lieferumfang .......................................................................... A-1
3. Garantiebestimmungen .......................................................... A-1
4. Allgemeine Sicherheitshinweise .............................................A-2
5. Funktion und Produkteigenschaften ........................................A-2
6. Technische Daten ................................................................... A-2
Brennstoffe ................................... A-3
7. Bestimmungsgemäßer und nicht-bestimmungsgemäßer
Gebrauch ................................................................................ A-3
bestimmungsgemäßer Gebrauch ................... A-3
nicht-bestimmungsgemäßer Gebrauch .............. A-3
8. Aufstellungsbedingungen ....................................................... A-3
9. Gerätebeschreibung ............................................................... A-3
Ölheizaggregat. . . . . . . . . . . . . . . . . . . . . . . . . . . . . . . . . A-3
Kontrolltafel ................................... A-3
10. Installation und Inbetriebnahme ..............................................A-4
11. Abgasführung ......................................................................... A-4
Kamindurchführung ............................. A-4
Wanddurchführung ............................. A-4
12. Funktionen und Bedienung ..................................................... A-4
Einschalten des Ölheizaggregats ................... A-4
Abschalten des Ölheizaggregats ................... A-5
Betrieb nach Störung wieder aufnehmen ............ A-5
Sicherheitseinrichtungen .........................A-5
13. Transport ................................................................................ A-5
14. Pege und Wartung ................................................................ A-6
Reinigung nach jeweils 50 Betriebsstunden .......... A-6
Reinigen des Ölheizaggregats ..................... A-6
15. Entsorgung ............................................................................. A-6
Ölheizaggregat ................................ A-6
Heizöl ....................................... A-6
Verpackung ................................... A-6
16. Service und Reparatur ............................................................ A-6
17. Fehlersuche ............................................................................ A-6
18. Anhang .................................................................................. A-9
Schaltplan . . . . . . . . . . . . . . . . . . . . . . . . . . . . . . . . . . . . A-9
1. Hinweise zur Benutzung des Handbuchs
Diese Bedienungsanleitung enthält alle wichtigen Informationen, die Sie
für eine sichere Inbetriebnahme und Nutzung Ihres Ölheizaggregats be-
nötigen.
Sie bietet Ihnen Unterstützung beim Betrieb des Gerätes und für das
Beheben möglicher Probleme sowie Informationen zu Entsorgung und
Kundendienst.
Lesen Sie dieses Handbuch, bevor Sie das Ölheizaggregat zum ersten
Mal verwenden vollständig durch.
Bewahren Sie die Gebrauchsanweisung auf und halten Sie sie griffbereit,
um bei Bedarf nachschlagen zu können.
Beachten Sie alle hier enthaltenen Sicherheitshinweise und Angaben zur
Nutzung und Pflege.
Das Handbuch sollte dem Gerät beiliegen, wenn Sie es anderen Perso-
nen zur Nutzung überlassen.
Zeichenerklärung
WARNSYMBOL. Dieses Zeichen leitet einen Gefah-
renhinweis ein, der bei Nichtbeachtung zu schwe-
ren Verletzungen bzw. Tod und/oder Sachschäden
führen kann.
Zusätzliche Informationen, die für die Verwendung
hilfreich sein können.
2. Lieferumfang
Zum Lieferumfang des Ölheizaggregats gehören:
1 2345678910
111214 13
1 Bedienungsanleitung 9 Ölheizaggregat ISD 20
2 Montageanleitung oder IDS 30
3 Rad 2x 10 Stütze/Handgriff
4 Unterlegscheibe 2x 11 Schraube 2x
5 Achse 12 Unterlegscheibe 2x
6 Sprengring 2x 13 Hutmutter 2x
7 Radabdeckung 2x 14 Montagewerkzeug
8 Schornsteinanschluss
120/150 mm
3. Garantiebestimmungen
Die Gewährleistung für das Ölheizaggregat IDS 20 bzw. das IDS 30 be-
trägt 12 Monate.
Schäden am Gerät, die durch das Nichtbeachten der in diesem Handbuch
enthaltenen Informationen entstehen, sind von der Gewährleistung aus-
geschlossen.
Für Schäden, die durch eigenmächtige Veränderungen am Gerät bzw.
dessen Zubehör enstehen, ist der Hersteller nicht haftbar.
Die weiteren Garantiebedingungen entnehmen Sie bitte den Allgemeinen
Geschäftsbedingungen (AGB), die auf unserer Website eingesehen wer-
den können: www.trotec.de.

Bedienungsanleitung – IDS 20 / 30
A-2 DE
4. Allgemeine Sicherheitshinweise
Beachten Sie die folgenden Sicherheitshinweise!
Ein Nichtbeachten kann schwerwiegende Folgen
für die Gesundheit von Personen sowie Sach-
schäden und Schäden für die Umwelt zur Folge
haben.
Explosionsgefahr!
• Betreiben Sie das Gerät nicht in feuer- und explosionsgefährdeter
Umgebung. Stellen Sie es auch dort nicht auf.
• Stellen Sie das Gerät nicht auf brennbarem Untergrund ab.
• Entfernen Sie entzündliche Stoffe und Chemikalien aus der un-
mittelbaren Betriebsumgebung.
Beeinträchtigung der Funktion und Beschädigung des Gerätes!
• Verwenden Sie das Gerät nicht im Freien.
• Stellen Sie das Gerät standsicher auf.
• Halten Sie die Ansaug- und Ausblasöffnungen frei.
• Bedecken Sie das Gerät nicht während des Betriebes.
• Trennen Sie das Gerät erst vom Stromnetz, wenn das Gerät voll-
ständig abgekühlt ist.
• Nutzen Sie zur Reinigung des Gerätes keinerlei Chemikalien.
Verletzungsgefahr und Sachschäden durch defekte Geräte!
• Überprüfen Sie vor jeder Nutzung das Gerät, dessen Zubehör und
Anschlussteile auf mögliche Beschädigungen. Verwenden Sie
keine defekten Geräte oder Geräteteile.
• Nutzen Sie das Gerät niemals, wenn Sie Schäden an Stecker und
Kabeln feststellen. Defekte Stromkabel stellen eine ernsthafte
Gefahr für die Gesundheit dar.
Lebensgefahr durch Stromschlag!
• Schließen Sie das Gerät nur an technisch intakte Stromquellen
an. Nutzen Sie niemals beschädigte Steckdosen!
• Ziehen Sie das Anschlusskabel aus der Steckdose indem Sie am
Stecker anfassen.
• Fassen Sie elektrische Anschlusskabel niemals mit feuchten
Händen an!
• Schützen Sie elektrische Anschlusskabel vor Beschädigungen
durch z. B. Tiere.
• Nehmen Sie keinerlei Veränderungen und Reparaturen am Gerät
vor!
• Setzen Sie das Gerät keinen Flüssigkeiten aus.
• Bringen Sie keine Flüssigkeiten in das Innere des Gerätes. Soll-
te dies doch einmal geschehen, ziehen Sie den Netzstecker und
lassen das Gerät von einer Fachwerkstatt überprüfen.
Verletzungsgefahr!
• Stecken Sie keine Gegenstände in die Ansaug- und die Ausblas-
öffnung des Gerätes.
• Fassen Sie nicht in die vorhandenen Öffnungen.
• Lassen Sie Kinder oder Tiere in der Nähe des laufenden Gerätes
nicht unbeaufsichtigt!
• Betreiben Sie das Gerät nicht in Räumen mit unzureichender
Verbrennungsluft-Zufuhr.
• Vermeiden Sie unsachgemäßen Umgang mit Brennstoff.
Umweltverschmutzungsgefahr!
• Lassen Sie ausgetretenen Brennstoff nicht im Erdreich versi-
ckern oder in die Kanalisation gelangen.
5. Funktion und Produkteigenschaften
Das Ölheizaggregat IDS 20 bzw. das IDS 30 dient zum Erwärmen von
Raumluft, um eine schnelle Beheizung von großen Räumen zu erzielen.
Das Ölheizaggregat wird mit Heizöl betrieben. Es handelt sich um ein
Gerät mit indirekter Verbrennung und verfügt über einen Abgasanschluss
für die Abfuhr der Abgase über den Kamin.
Die Wahl zwischen zwei Betriebsarten stellt sicher, dass die Regelung des
Ölheizaggregats sowohl manuell durch den Anwender als auch automa-
tisch mit Unterstützung des Thermostats möglich ist.
6. Technische Daten
Typ IDS 20 Typ IDS 30
Kenngröße Wert Wert
Artikelnummer 1.430.000.120 1.430.000.125
Elektroanschluss 230 V 230 V
Frequenz 50 Hz 50 Hz
Nennstrom max. 1,25 A 1,56 A
Leistungsaufnahme 300 W 370 W
Luftmenge 550 m³/h 1150 m³/h
Gebläse Axial-Ventilator Axial-Ventilator
Nennwärmebelastung max. 23,4 kW 34 kW
Nennwärmeleistung 19,6 kW 32 kW
Temperaturerhöhung ΔT 1) 95 °C 70 °C
Verbrauch Öl max. 2,23 l/h 3,25 l/h
Tankinhalt 42 l 42 l
Lufttransportschlauchanschluss 2) - 1 x ø 300 mm
Schornsteinanschluss ø 120 mm ø 150 mm
Thermostatanschluss Serie Serie
Verbrennung indirekt indirekt
Düse 0,40-80° S (gal/h) 0,60-80° S (gal/h)
Schalldruckpegel (Abstand 1m) 70 dB (A) 75 dB (A)
Länge 1075 mm 1215 mm
Breite 440 mm 440 mm
Höhe 615 mm 670 mm
Gewicht 40 kg 48 kg
1) kennzeichnet die Temperaturerhöhung. ΔT + Umgebungstemperatur = Aus-
lasslufttemperatur
2) optional

Bedienungsanleitung – IDS 20 / 30
DE A-3
Brennstoffe
Für das Ölheizaggregat IDS 20 bzw. das IDS 30 sind folgende Brennstoffe
zugelassen: Heizöl EL, Diesel
7. Bestimmungsgemäßer und nicht-bestimmungsgemäßer
Gebrauch
bestimmungsgemäßer Gebrauch
Das Ölheizaggregat IDS 20 bzw. das IDS 30 wurde zur Warmlufterzeu-
gung entwickelt und darf ausschließlich in Innenräumen eingesetzt wer-
den.
Das Gerät eignet sich zur Beheizung von großen Räumen wie z. B. Lager-
räumen, Werkstätten, Baustellen, Gewächshäuser oder Viehställe. Es ist
für den Einsatz ohne häufige Ortswechsel vorgesehen. Das Ölheizaggre-
gat IDS 30 ist zur Verwendung mit einem Lufttransportschlauch geeignet.
Jede Anwendung außerhalb dieser Verwendungsbestimmung ist nicht
zulässig!
nicht-bestimmungsgemäßer Gebrauch
Das Gerät darf nicht in feuer- und explosionsgefährdeten Räumen und
Bereichen aufgestellt und betrieben werden.
Das Gerät darf nicht in Räumen mit unzureichender Verbrennungsluft-
Zufuhr eingesetzt werden.
8. Aufstellungsbedingungen
Bei der Wahl des Aufstellungsortes des Ölheizaggregats sind eine Reihe
räumlicher und technischer Bedingungen zu berücksichtigen. Eine Nicht-
beachtung kann die Funktionstüchtigkeit des Gerätes bzw. des Zubehörs
beeinrächtigen oder zu Gefahren für Menschen und Sachen führen.
Bei der Aufstellung ist Folgendes zu beachten:
• Das Gerät darf ausschließlich in Innenräumen betrieben werden
• Das Gerät muss standsicher und auf unbrennbarem Untergrund
aufgestellt werden
• Das Gerät muss in der Nähe eines Kamins oder einer Außenwand
installiert werden
• Das Gerät muss an eine ordnungsgemäß abgesicherte Netz-
steckdose angeschlossen werden
• Der Aufstellungsraum des Gerätes muss ausreichend belüftet
sein
• Der Mindestabstand der Ansaugöffnung des Gerätes zur Wand
muss min. 1 m betragen (siehe Abbildung)
min. 1 m
• Der Mindestabstand des Gerätes zu entflammbaren Materialien
muss min. 3 m betragen
• Die Ansaug- und Ausblasöffnungen dürfen nicht bedeckt sein
• Es dürfen sich keine Wände oder großen Gegenstände in der
Nähe des Gerätes befinden
• Es muss eine ausreichende Anzahl von Feuerlöschanlagen vor-
handen sein
9. Gerätebeschreibung
Das Ölheizaggregat IDS 20 bzw. das IDS 30 besteht aus folgenden Kom-
ponenten:
Ölheizaggregat
1 2 3 4 5 6 7
9
10
12
11
8
1 Brennkammer 7 Ventilator
2 Brenner 8 Heizölfilter
3 Düse 9 Heizölkreislauf
4 Magnetventil 10 Stütze/Handgriff
5 Pumpe 11 Rad
6 Motor 12 Tank
Kontrolltafel
1 2 3 4 5
1 Reset-Taste mit Kontrolllampe 4 Lampe
2 Wahlschalter 5 Stromversorgungskabel
(Dauerbetrieb/Thermostatbetrieb)
3 Thermostatsteckdose

Bedienungsanleitung – IDS 20 / 30
A-4 DE
10. Installation und Inbetriebnahme
• Überprüfen Sie die Vollständigkeit des Lieferumfangs Ihres Ölhei-
zaggregats. Bei Fehlen eines Zubehörteils wenden Sie sich bitte
an den Kundendienst von Trotec oder an den Fachhändler, bei
dem Sie das Gerät erworben haben.
• Überprüfen Sie das Ölheizaggregat und deren Anschlussteile auf
mögliche Beschädigungen.
• Montieren Sie die Stütze/den Handgriff und die Räder an das
Ölheizaggregat. Siehe hierzu die beiliegende Montageanleitung.
Nutzen Sie das beiliegende Montagewerkzeug.
• Beachten Sie die im Kapitel „Aufstellungsbedingungen“ be-
schriebenen Voraussetzungen.
• Installieren Sie die Abgasführung des Gerätes fachgerecht an
einen Kamin oder an einer Außenwand wie in Kapitel „Abgas-
führung“ dargestellt.
• Füllen Sie das Heizöl bei abgeschalteten und abgekühlten Gerät
in den Tank.
• Überprüfen Sie das Gerät vor der Inbetriebnahme und kontrol-
lieren Sie es regelmäßig während der Verwendung auf seinen
ordnungsgemäßen Zustand.
• Überprüfen Sie, dass die Merkmale des Stromnetzes denen auf
dem Geräteschild entsprechen.
• Vergewissern Sie sich vor jedem Anschalten des Gerätes, dass
sich der Ventilator frei bewegt, bevor Sie den Netzstecker in die
Netzsteckdose stecken.
• Schließen Sie das Stromversorgungskabel an eine ordnungsge-
mäß abgesicherte Netzsteckdose (230 V / 50 Hz /10 A) an. Auf
Baustellen muss gemäß VDE 0100/0105 der Steckdose ein FI-
Schalter vorgeschaltet sein.
Das Ölheizaggregat ist nun betriebsbereit. Nutzen Sie das Gerät entspre-
chend den im Kapitel 12 „Funktionen und Bedienung“ beschriebenen
Funktionen.
11. Abgasführung
• Informieren Sie vor der Projektierung der Abgasanlage den zu-
ständigen Schornsteinfeger gemäß DIN 18160.
Verletzungsgefahr durch Vergiftung!
Unsachgemäße Installation der Abgasführung kann zu
gesundheitlichen Schäden führen.
Lassen Sie die Installation von einem Fachhandwerker
durchführen!
• Sorgen Sie für ungehinderte und ausreichende Verbrennungsluft-
Zufuhr (z. B. durch Be- und Entlüftungsöffnungen in Türen, De-
cken, Fenstern, Wänden oder Raumluftverbund).
• Lassen Sie regelmäßig die Abgaswerte des Brenners überprüfen.
Kamindurchführung
B
1
D
2
C
3
A
5
4
Wanddurchführung
E
6
5
A
C
2
D
B
1
A min. 1 m 1 Schornsteinanschluss
B min. 1 m 2 Wanddurchführung mit Rohrknie min. 5°
C so kurz wie möglich 3 Kamin - innen min. 20x20 cm
D ≥ ø 120 mm/150 mm 4 Reinigungsöffnung mit Explosions-
E min. 1 m schutzklappe
5 Außenwand
6 Zugverstärker H-förmig
12. Funktionen und Bedienung
Das Gerät darf nur von Personen benutzt werden, die in der Bedienung
des Gerätes unterwiesen worden sind.
Einschalten des Ölheizaggregats
Das Ölheizaggregat verfügt über zwei Betriebsarten:
1. Manueller Betrieb
Der Generator kann im manuellen Modus arbeiten.

Bedienungsanleitung – IDS 20 / 30
DE A-5
• Schalten Sie das Gerät ein indem Sie den Wahlschalter auf die
Position „ON“ (Dauerbetrieb) stellen.
2. Automatischer Betrieb
Das Ölheizaggregat kann nur dann automatisch arbeiten, wenn eine
Steuereinrichtung (optional) angeschlossen wird, wie z. B. ein Thermo-
stat. Das Thermostat wird an der Thermostatsteckdose angeschlossen.
• Schalten Sie das Gerät ein indem Sie den Wahlschalter auf die
Position „ON + “ (Thermostatbetrieb) stellen.
Wenn der Anlaufzyklus beendet ist, dann bestätigt die elektronische
Steuereinheit durch eine kurze rote Blinkanzeige der Reset-Taste, dass
der Anlauf des Gerätes abgeschlossen ist.
Abschalten des Ölheizaggregats
• Schalten Sie das Gerät ab, indem Sie den Wahlschalter auf die
Position „0“ stellen.
• Falls Sie ein Thermostat verwenden, schalten Sie das Gerät über
die Einstellungen der Steuereinrichtung ab (z. B. indem das Ther-
mostat auf eine niedrigere Temperatur geregelt wird).
Die Flamme erlischt und der Ventilator läuft für ca. 90 Sekunden weiter,
um den Brenner abzukühlen.
Beschädigung des Gerätes durch Überhitzung!
Schalten Sie das Gerät niemals ab, indem Sie den Netz-
stecker ziehen. Dadurch kann das Gerät überhitzen.
Schalten Sie das Gerät ordnungsgemäß ab. Ziehen Sie
den Netzstecker erst ab, wenn der Ventilatormotor voll-
ständig angehalten hat.
• Warten Sie bis die automatische Nachkühlung beendet ist.
• Sichern Sie das Gerät gegen Wiedereinschalten, indem Sie den
Netzstecker ziehen.
Betrieb nach Störung wieder aufnehmen
Bei der ersten Inbetriebnahme bzw. nach vollkommener Entleerung des
Heizölkreislaufs kann der Zufluss von Heizöl zur Düse ungenügend sein.
Dann reagiert die Flammenkontrolleinrichtung und das Gerät blockiert.
• Warten Sie ca. 1 Minute ab.
• Drücken Sie die Reset-Taste ca. 5 Sekunden lang.
• Schalten Sie das Gerät ein.
Wenn das Gerät weiterhin nicht anläuft:
• Vergewissern Sie sich, dass im Tank noch Heizöl vorhanden ist.
• Drücken Sie die Reset-Taste.
Um die Störungsursache zu ermitteln:
• siehe die Kapitel „Sicherheitseinrichtungen“ und „Fehlersuche“
Sicherheitseinrichtungen
Das Ölheizaggregat ist mit einer elektronischen Flammen- und Höchst-
temperaturüberwachung ausgestattet, die mithilfe einer Fotozelle und
eines Sicherheitsthermostats arbeitet.
Die elektronische Steuereinheit steuert die Anlauf-, Stillsetzungs- und
Sicherheitsabschaltzeiten, falls Funktionsstörungen auftreten. Die Steu-
ereinheit ist mit einer Reset-Taste ausgestattet, deren Farbe (Betriebsan-
zeige) abhängig vom Betriebsmodus ist:
• ausgeschaltet bei Pausen- oder Standby-Modus des Gerätes in
Erwartung der Heizungsanforderung
• grüne Daueranzeige bei Normalbetrieb des Gerätes
• rote Daueranzeige bei Sicherheitsabschaltung des Gerätes
• orangefarbene Blinkanzeige bei Betriebsunterbrechung infolge
starker Netzschwankungen (T < 175 V oder T > 265 V); der Be-
trieb wird automatisch bei Stabilisierung der Spannung zwischen
190 V und 250 V wieder aufgenommen
Wenn das Gerät die Sicherheitsabschaltung ausgelöst hat:
• Drücken Sie zur Wiederaufnahme des Betriebes die Reset-Taste
3 Sekunden lang.
Verletzungsgefahr durch Verpuffung!
Unverbranntes Heizöl kann sich in der Brennkammer an-
sammeln und bei der darauf folgenden Wiedereinschal-
tung entzünden.
Führen Sie niemals mehr als zwei Wiederanläufe in Folge
durch.
Wenn die Sicherheitsabschaltung weiter besteht:
• Stellen Sie vor erneuter Inbetriebnahme des Ölheizaggregats die
Störungsursache fest (siehe Kapitel „Fehlersuche“) und beseiti-
gen Sie sie.
• Drücken Sie die Reset-Taste ist mindestens 5 Sekunden lang.
Das Selbstdiagnoseprogramm startet. Nach dessen Abschluss nimmt die
Reset-Taste eine Farbe (Selbstdiagnoseanzeige) abhängig von der Stö-
rungsursache an:
• orangefarbene Blinkanzeige bei Erfassung einer falschen Flam-
me während des Anlaufs
• rote Blinkanzeige bei Erfassung einer fehlenden Flamme wäh-
rend des Anlaufs
• rot/grüne Blinkanzeige bei Erfassung einer fehlenden Flamme
während des Betriebs
• orangefarbene Daueranzeige bei internem Fehler der elektroni-
schen Steuereinrichtung
Um die Störungsursache zu ermitteln:
• siehe Kapitel „Fehlersuche“
13. Transport
• Schalten Sie das Gerät ab wie unter „Funktionen und Bedienung“
beschrieben.
• Warten Sie bis das Gerät ganz abgekühlt ist.
• Bevor Sie das Gerät transportieren oder verstellen, prüfen Sie,
dass der Tankverschluss fest verschlossen ist.
Umweltverschmutzungsgefahr!
Während des Transports oder der Handhabung des Ge-
rätes kann Heizöl auslaufen. Der Füllstopfen des Tank-
verschlusses gewährleistet keine Dichtheit, damit Luft
eingeleitet und der Tank während des Betriebs entleert
werden kann.
Transportieren oder verstellen Sie das Gerät nur mit fest
verschlossenem Tankverschluss.
Bedienungsanleitung – IDS 20 / 30
A-6 DE
14. Pflege und Wartung
Für den einwandfreien Betrieb des Gerätes sind die Brennkammer, der
Brenner und der Ventilator regelmäßig zu reinigen.
• Schalten Sie das Gerät ab wie unter „Funktionen und Bedienung“
beschrieben.
• Warten Sie bis das Gerät vollständig abgekühlt ist.
Reinigung nach jeweils 50 Betriebsstunden
• Demontieren Sie den Heizölfilter. Nehmen Sie den Filtereinsatz
heraus und reinigen Sie ihn mit sauberem Heizöl.
• Demontieren Sie das Gehäuseoberteil und reinigen Sie das In-
nenteil sowie die Flügel des Ventilators mit einem Reinigungsv-
lies und bei starker Verschmutzung mit einer Messingbürste.
• Prüfen Sie den Zustand aller Kabel und der Hochspannungsste-
cker.
• Demontieren Sie den Brenner und reinigen Sie seine Bestandteile
mit einer Messingbürste.
• Reinigen Sie die Elektroden. Prüfen Sie den Abstand der Elektro-
den und stellen Sie ihn bei Bedarf ein (siehe Abbildung).
2 - 3 mm
• Lassen Sie die Brennkammer vom Kundendienst reinigen.
• Montieren Sie die Bauteile in umgekehrter Reihenfolge.
Reinigen des Ölheizaggregats
• Wischen Sie das Gerät außen mit einem feuchten Tuch ab. Die
Lack- und die Kunststoffflächen dürfen nicht gescheuert werden.
Verwenden Sie keinen lösungsmittelhaltigen Reiniger.
15. Entsorgung
Das Heizöl muss aus dem Tank des Ölheizaggregats abgelassen und auf-
gefangen werden.
Ölheizaggregat
Elektronische Geräte gehören nicht in den Hausmüll, sondern müssen
in der Europäischen Union - gemäß Richtlinie 2002/96/EG des EUROPÄ-
ISCHEN PARLAMENTS vom 27. Januar 2003 über Elektro- und Elektro-
nik-Altgeräte - einer fachgerechten Entsorgung zugeführt werden. Bitte
entsorgen Sie dieses Gerät nach der entgültigen Außerbetriebnahme ent-
sprechend den geltenden gesetzlichen Bestimmungen.
Heizöl
Brennstoffe müssen nach den örtlichen Vorschriften entsorgt werden.
Verpackung
Die Verpackung des Ölheizaggregats besteht aus Pappe/Papier und
Kunststoff. Die Entsorgung muss entsprechend den örtlichen Vorschriften
in die vorgesehenen Behälter oder auf einem Wertstoffhof erfolgen.
16. Service und Reparatur
Bevor Sie sich zur Lösung eines bestehenden technischen Problems an
unseren Kundendienst wenden, versuchen Sie den aufgetretenen Fehler
mit Hilfe der Hinweise im Kapitel „Fehlersuche“ zu beseitigen.
Bei weiteren Fragen zu Funktion und Betrieb des Ölheizaggregats sowie
für weitere Informationen im Schadensfall oder zu Gewährleistungsfra-
gen stehen wir Ihnen jederzeit gern zur Verfügung.
Wenden Sie sich bitte an:
Trotec GmbH Co KG
Grebbener Straße 7
D-52525 Heinsberg
Tel.: 49 (0) 2452 / 962 - 400
Fax.: 49 (0) 2452 / 962 - 200
E-Mail: [email protected]
www.trotec.de
17. Fehlersuche
Lebensgefahr durch unsachgemäße Reparatur!
Versuchen Sie niemals Veränderungen am Gerät oder
Reparaturen durchzuführen. Eigenmächtige Verände-
rungen können zu schweren Verletzungen oder Tod
führen. Lassen Sie Reparaturen nur von einer zertifi-
zierte Fachwerkstatt ausführen.

Bedienungsanleitung – IDS 20 / 30
DE A-7
Problem Reset-Taste Ursache Fehlerbehebung
Betriebsanzeige Selbstdiagnose-
anzeige
Ventilator läuft nicht an
und Flamme zündet nicht
ausgeschaltet - Steuereinrichtung falsch
eingestellt
- Kontrollieren Sie, dass die Steuereinrichtung
korrekt eingestellt ist (z. B. die am Thermostat
eingestellte Temperatur muss höher sein als die
Raumtemperatur).
Steuereinrichtung fehler-
haft
- Lassen Sie die Steuereinrichtung vom Kunden-
dienst auswechseln.
Ventilator läuft nicht an
oder schaltet ab während
des Anlaufs oder Betriebs
orangefarbene
Blinkanzeige
- keine Stromversorgung - Überprüfen Sie die Merkmale der elektrischen An-
lage (230 V - 1~ - 50 Hz).
- Überprüfen Sie die Funktionsfähigkeit und Stel-
lung des Wahlschalters.
- Überprüfen Sie die Unversehrtheit der Sicherung.
Spannung < 175 V - Kontrollieren Sie die Versorgungsspannung. Das
Gerät startet automatisch neu, wenn die Span-
nung 190 V überschreitet.
Spannung > 265 V - Kontrollieren Sie die Versorgungsspannung. Das
Gerät startet automatisch neu, wenn die Span-
nung 250 V unterschreitet.
Ventilator schaltet ab
während des Anlaufs
oder Betriebs
rote Daueran-
zeige
orangefarbene
Blinkanzeige
Flamme vorhanden vor
Zündung des Transforma-
tors
- Beauftragen Sie den Kundendienst um das Ge-
rät zu reinigen und die Heizölrückstände aus der
Brennkammer zu entfernen.
Fotozelle fehlerhaft - Lassen Sie die Fotozelle vom Kundendienst aus-
wechseln.
rote Blinkanzeige
oder rot/grüne
Blinkanzeige
Motorwicklung unterbro-
chen oder durchgebrannt
- Lassen Sie den Motor vom Kundendienst aus-
wechseln.
Motorlager blockiert - Lassen Sie das Motorlager vom Kundendienst
auswechseln.
Motorkondensator durch-
gebrannt
- Lassen Sie den Motorkondensator vom Kunden-
dienst auswechseln.
keine Zündung - Überprüfen Sie die Verbindungen der Zündkabel
an Elektroden und Transformator.
- Überprüfen Sie die Position und den Abstand der
Elektroden.
- Überprüfen Sie die Sauberkeit der Elektroden.
- Lassen Sie den Transformator vom Kundendienst
auswechseln.
Flammkontrollvorrichtung
fehlerhaft
- Lassen Sie die Flammkontrollvorrichtung vom
Kundendienst auswechseln.
Fotozelle fehlerhaft - Lassen Sie die Fotozelle vom Kundendienst reini-
gen oder auswechseln.
Brenner erhält keinen oder
nur ungenügenden Heizöl-
zufluss
Beauftragen Sie den Kundendienst um:
- die Unversehrtheit der Kupplung zwischen Pumpe
und Motor zu überprüfen.
- den Heizölkreislauf auf eingedrungene Luft zu
überprüfen und um die Dichtheit der Leitungen
und der Filterdichtung zu überprüfen.
- die Düse zu reinigen oder auszuwechseln .

Bedienungsanleitung – IDS 20 / 30
A-8 DE
Problem Reset-Taste Ursache Fehlerbehebung
Betriebsanzeige Selbstdiagnose-
anzeige
Magnetventil fehlerhaft Beauftragen Sie den Kundendienst um:
- die elektrischen Verbindungen zu überprüfen.
- das Sicherheitsthermostat LI zu überprüfen.
- das Magnetventil zu reinigen oder auszuwechseln.
orangefarbene
Daueranzeige
Interner Fehler der elektro-
nischen Steuereinheit
Beauftragen Sie den Kundendienst um:
- die Steuereinheit zurückzusetzen; mindestens
zwei Anläufe versuchen. Wenn die Störung weiter
besteht, dann die Steuereinheit auswechseln.
Ventilator läuft an und
Flamme brennt mit
Rauchbildung
grüne Daueran-
zeige
-ungenügende Verbren-
nungsluft-Zufuhr
- Enrfernen Sie alle Hindernisse oder Verstopfungen
an Ansaug- und/oder Ausblasöffnungen.
- Lassen Sie die Position des Lufteinstellungsrings
vom Kundendienst überprüfen.
- Lassen Sie die Trägerscheibe des Brenners vom
Kundendienst reinigen
Verbrennungsluft-Zufuhr
zu groß
- Lassen Sie die Position des Lufteinstellungsrings
vom Kundendienst überprüfen.
verwendetes Heizöl verun-
reinigt bzw. enthält Wasser
- Ersetzen Sie gebrauchtes Heizöl durch sauberes
Heizöl.
- Reinigen Sie den Heizölfilter.
eingedrungene Luft im
Heizölkreislauf
- Lassen Sie die Dichtheit der Leitungen und des
Heizölfilters vom Kundendienst kontrollieren
unzureichende Heizölmen-
ge am Brenner
Beauftragen Sie den Kundendienst um:
- den Pumpendruckwert zu überprüfen.
- die Düse zu reinigen oder auszuwechseln.
zuviel Heizöl am Brenner Beauftragen Sie den Kundendienst um:
- den Pumpendruckwert zu überprüfen.
- die Düse auszuwechseln.
Gerät schaltet nicht ab grüne Daueran-
zeige
-Dichtung des Magnetven-
tils fehlerhaft
- Lassen Sie das Magnetventil vom Kundendienst
auswechseln.

Bedienungsanleitung – IDS 20 / 30
DE A-9
18. Anhang
Schaltplan
AP Steuereinheit FO Fotozelle
TA Thermostatanschluss CO Kondensator
ST Kontrolllampe MV Ventilator-Motor
LI 1 Sicherheitsthermostat FUA Sicherung 3,15 A
EV 1 Magnetventil RV Wahlschalter

Operating manual – IDS 20 / 30
EN B-1
Table of Contents
1. Notes on how to use the manual............................................. A-1
Legend ...................................... A-1
2. Scope of delivery .................................................................... A-1
3. Guarantee provisions .............................................................. A-1
4. General safety instructions ..................................................... A-2
5. Function and product characteristics ...................................... A-2
6. Technical data ........................................................................ A-2
Fuels ........................................A-3
7. Proper and improper use ........................................................ A-3
proper use .................................... A-3
improper use ................................. A-3
8. Installation conditions ............................................................. A-3
9. Description of device ..............................................................A-3
Oil heating unit ................................ A-3
Control panel .................................. A-3
10. Installation and commissioning ............................................... A-4
11. Exhaust system ...................................................................... A-4
Chimney duct. . . . . . . . . . . . . . . . . . . . . . . . . . . . . . . . . . A-4
Wall duct ..................................... A-4
12. Functions and operation ......................................................... A-4
Switching on the oil heating unit ................... A-4
Switching off the oil heating unit ................... A-5
Resuming operation after a failure .................. A-5
Safety equipment ............................... A-5
13. Transport ................................................................................ A-5
14. Care and maintenance ............................................................ A-6
Cleaning after every 50 operating hours ............. A-6
Cleaning the oil heating unit ....................... A-6
15. Disposal ................................................................................. A-6
Oil heating unit ................................A-6
Heating oil .................................... A-6
Packaging .................................... A-6
16. Service and repair .................................................................. A-6
17. Troubleshooting ...................................................................... A-6
18. Appendix ................................................................................ A-9
Circuit diagram ................................ A-9
1. Notes on how to use the manual
This operating manual contains all important information required for a
safe commissioning and use of your oil heating unit.
It provides you with support for operating the device and remedying pos-
sible problems as well as with information on disposal and customer
service.
Please read this manual thoroughly and completely before using the oil
heating unit for the first time.
Please store this operating manual and keep it within reach in order to
consult it if necessary.
Please observe all safety instructions and information on use and main-
tenance contained in this manual.
This manual should be attached to the device if the latter is made avail-
able to other persons for use.
Legend
WARNING SYMBOL. This symbol is followed by a
hazard warning which contains instructions whose
non-compliance may cause serious injuries and/or
death and/or property damage.
Additional information which might be helpful when
using the device.
2. Scope of delivery
The scope of delivery of the oil heating unit includes:
1 2345678910
111214 13
1 Operating manual 9 Oil heating unit ISD 20
2 Assembly instruction manual or IDS 30
3 Wheel 2x 10 Support/handle
4 Washer 2x 11 Screw 2x
5 Axis 12 Washer 2x
6 Snap ring 2x 13 Cap nut 2x
7 Wheel cover 2x 14 Assembly tools
8 Chimney connection
120/150 mm
3. Guarantee provisions
The warranty period granted for the oil heating unit IDS 20 and/or IDS 30
shall be 12 months.
Any damage to the device resulting from non-compliance with the in-
structions contained in this manual shall be excluded from the guarantee.
The manufacturer shall assume no liability for damages to the device
and/or its accessories that are caused by unauthorised modifications.
For any further terms of guarantee, please refer to the General Terms
and Conditions (GTC), which are available on our website: www.trotec.de.

Operating manual – IDS 20 / 30
B-2 EN
4. General safety instructions
Please observe the following safety instructions!
Any non-compliance with these instructions may
have serious consequences for the health of per-
sons and could result in property damage and
damage to the environment.
Risk of explosion!
• Do not operate the device in potentially flammable or explosive
environments. Do not install it in such environments either.
• Do not place the device on a flammable surface.
• Remove any inflammable materials and chemicals from the im-
mediate operating environment.
Functional impairment of and damage to the device!
• Do not use the device outdoors.
• Install the device in a stable position.
• Keep the intake and exhaust openings free.
• Do not cover the device during operation.
• Only disconnect the device from the mains once it has cooled
down completely.
• Do not use any chemicals for cleaning the device.
Risk of injury and damage to property due to defective devices!
• Before each use of the device, check its accessories and connec-
tion parts for possible damages. Do not use any defective devices
or device parts.
• Do not use the device if you detect any damage to its plug and
cables. Defective power cables represent a serious health threat.
Danger to life through electrical shock!
• Only connect the device to power sources that are in good tech-
nical order. Do not use damaged wall outlets!
• Pull the connection cable out of the wall outlet by pulling it at
its plug.
• Do not touch electrical connection cables when your hands are
wet!
• Protect the electrical connection cables against damage caused
by, for example, animals.
• Do not carry out any changes or repairs on the device!
• Do not expose the device to any liquids.
• Do not apply any liquids to the interior of the device. If this does
happen nevertheless, pull out the power cord and have the de-
vice checked by a specialist workshop.
Risk of injury!
• Do not insert any objects into the intake and exhaust opening of
the device.
• Do not reach into the existing openings.
• Do not leave children or animals unattended near the operating
device!
• Do not operate the device in rooms with insufficient supply of
combustion air.
• Avoid the improper use of fuels.
Risk of environmental pollution!
• Do not let any leaked fuel seep away into the soil and prevent it
from entering the sewer system.
5. Function and product characteristics
The oil heating unit IDS 20 and/or IDS 30 is used to heat up room air in
order to achieve a fast heating of large rooms.
The oil heating unit is operated with heating oil. The device features an
indirect combustion and is provided with an exhaust connection in order
to discharge the exhaust gas via the chimney.
A selection of two operating modes ensures that the oil heating unit can
be controlled both manually by the user as well as automatically with the
support of the thermostat.
6. Technical data
Type IDS 20 Type IDS 30
Parameter Value Value
Article number 1.430.000.120 1.430.000.125
Electrical connection 230 V 230 V
Frequency 50 Hz 50 Hz
Nominal current max. 1.25 A 1.56 A
Power consumption 300 W 370 W
Air volume 550 m³/h 1150 m³/h
Fan Axial fan Axial fan
Nominal heat load max. 23.4 kW 34 kW
Nominal heat output 19.6 kW 32 kW
Temperature increase ΔT 1) 95 °C 70 °C
Oil consumption max. 2.23 l/h 3.25 l/h
Tank capacity 42 l 42 l
Air transportation hose connec-
tion 2)
- ø 1 x 300 mm
Chimney connection ø 120 mm ø 150 mm
Thermostat connection series series
Combustion indirect indirect
Nozzle 0.40-80° S (gal/h) 0.60-80° S (gal/h)
Sound pressure level (at distance
of 1 m)
70 dB (A) 75 dB (A)
Length 1075 mm 1215 mm
Width 440 mm 440 mm
Height 615 mm 670 mm
Weight 40 kg 48 kg
1) indicates the temperature increase. ΔT + ambient temperature = exhaust air
temperature
2) optional

Operating manual – IDS 20 / 30
EN B-3
Fuels
The following fuels have been approved for use with the oil heating unit
IDS 20 and/or IDS 30: heating oil EL, diesel
7. Proper and improper use
Proper use
The oil heating unit IDS 20 and/or IDS 30 has been developed for the
generation of hot air and may only be used indoors.
The device can be used for heating large rooms such as storerooms,
workshops, building sites, greenhouses and cowsheds. It has been de-
signed for stationary operation without frequently changing locations.
The oil heating unit IDS 30 can be used in conjunction with an air trans-
portation hose.
Any application deviating from the above-mentioned use is deemed in-
admissible!
Improper use
The device may not be installed or operated in potentially inflammable
and explosive rooms or areas.
The device may not be used in rooms with an insufficient supply of com-
bustion air.
8. Installation conditions
When choosing the installation location of the oil heating unit, a number
of spatial and technical conditions must be taken into account. Any non-
compliance may impair the functioning of the device and/or of the acces-
sories or result in hazardous situations for people and property.
The following points are to be observed during installation:
• The device may only be used indoors
• The device must be installed in a stable position and placed on
a fireproof surface
• The device must be installed near a chimney or external wall
• The device must be connected to a properly secured mains
socket
• The installation room of the device must be sufficiently ventilated
• The minimum distance of the intake opening of the device to the
wall must be at least 1 m (see figure)
min. 1 m
• The minimum distance of the device to inflammable materials
must be at least 3 m
• The intake and exhaust openings must not be covered
• There may be no walls or large objects near the device
• A sufficient number of fire-extinguishing systems must be available
9. Description of device
The oil heating unit IDS 20 and/or IDS 30 consists of the following
components:
Oil heating unit
1 2 3 4 5 6 7
9
10
12
11
8
1 Combustion chamber 7 Fan
2 Burner 8 Heating oil filter
3 Nozzle 9 Heating oil circuit
4 Solenoid valve 10 Support/handle
5 Pump 11 Wheel
6 Motor 12 Tank
Control panel
1 2 3 4 5
1 Reset button with indicator lamp 4 Lamp
2 Selector switch 5 Power supply cable
(continuous operation/thermostat operation)
3 Thermostat socket

Operating manual – IDS 20 / 30
B-4 EN
10. Installation and commissioning
• Check that the scope of delivery of your oil heating unit is com-
plete. If an accessory part is missing, please contact the Trotec
customer service or the specialist dealer from whom you pur-
chased the device.
• Check the oil heating unit and its connection parts for possible
damages.
• Mount the support/the handle and the wheels to the oil heating
unit. Please refer to the supplied assembly instruction manual
for further information. Please use the supplied assembly tools.
• Make sure to comply with the requirements described in the
chapter „Installation conditions“.
• Correctly connect the exhaust system of the device to a chimney
or an external wall as shown in the chapter „Exhaust system“.
• Fill the heating oil into the tank with the device switched off and
cooled down.
• Inspect the device prior to commissioning and check it regularly
for its proper condition during operation.
• Make sure that the characteristics of the mains supply corre-
spond to those indicated on the rating plate.
• Each time before switching on the device, make sure that the fan
can move freely before plugging the power plug into the mains
socket.
• Connect the power supply cable to a properly secured mains
socket (230 V / 50 Hz / 10 A). On construction sites, a residual
current circuit breaker must be connected upstream of the mains
socket according to VDE 0100/0105.
The oil heating unit is now ready for operation. Use the device according
to the functions described in chapter 12 „Functions and operation“.
11. Exhaust system
• Before planning the installation of the exhaust system, the local
chimney sweep must be informed according to DIN 18160.
Risk of injury due to intoxication!
Improper installation of the exhaust system may cause
health problems.
Have the installation carried out by a specialised craftsman!
• Make sure that an unobstructed and sufficient supply of combus-
tion air (e. g. by means of ventilation openings in doors, ceilings,
windows, walls or an ambient air network) is provided.
• Have the exhaust gas values of the burner checked regularly.
Chimney duct
B
1
D
2
C
3
A
5
4
Wall duct
E
6
5
A
C
2
D
B
1
A min. 1 m 1 Chimney connection
B min. 1 m 2 Wall duct with pipe elbow min. 5°
C as short as possible 3 Chimney - min. internal dimensions 20x20 cm
D ≥ ø 120 mm/150 mm 4 Opening for cleaning with explosion
E min. 1 m protection cap
5 External wall
6 Draft reinforcement, H-shaped
12. Functions and operation
The device may only be used by persons who have been trained in op-
erating the device.
Switching on the oil heating unit
The oil heating unit features two operating modes:
1. Manual mode
The generator can operate in manual mode.

Operating manual – IDS 20 / 30
EN B-5
• Switch the device on by setting the selector switch to the position
„ON“ (continuous operation).
2. Automatic mode
The oil heating unit can only operate in automatic mode if a control device
(optional) is connected to it, e.g. a thermostat. The thermostat is to be
connected to the thermostat socket.
• Switch the device on by setting the selector switch to the position
„ON“ + “ (thermostat operation).
If the start-up cycle has been completed, the electronic control unit will
confirm that the start-up of the device is complete by activating a red
flashing light on the reset button.
Switching off the oil heating unit
• Switch the device off by setting the selector switch to the posi-
tion „0“.
• If you are using a thermostat, switch the device off via the set-
tings of the control device (e.g. by setting the thermostat to a low
temperature).
The flame is extinguished and the fan will continue running for approx. 90
seconds in order to cool down the burner.
Damage to the device due to overheating!
Do not switch off the device by pulling out the power
cord. This may cause the device to overheat.
Switch the device off properly. Only disconnect the power
plug if the fan motor has come to a complete standstill.
• Wait until the automatic aftercooling has been completed.
• Secure the device against being accidentally switched on again
by pulling out the power cord.
Resuming operation after a failure
During the initial commissioning of the device or after the heating oil
circuit has been completely emptied, the inflow of heating oil to the noz-
zle may be insufficient. This will cause the flame control system to be
activated and the device will be blocked.
• Wait for approx. 1 minute.
• Press the reset button for approx. 5 seconds.
• Switch on the device.
If the device is still not starting up:
• Make sure that there is enough heating oil in the tank.
• Press the reset button.
In order to determine the cause of the fault:
• see the chapters „Safety equipment“ and „Troubleshooting“
Safety equipment
The oil heating unit features an electronic flame and maximum tem-
perature monitoring system that uses a photoelectric cell and a safety
thermostat.
The electronic control unit controls the start-up, shutdown and safety
shutdown times in the event of malfunctions. The control unit is equipped
with a reset button whose colour (operation indicator) is depending on
the operating mode:
• switched off if the device is in pause or standby mode and ex-
pecting the heating demand
• continuous green light for normal operation of the device
• continuous red light for safety shutdown of the device
• flashing orange light if the the operation is interrupted due to
considerable mains fluctuations (T < 175 V or T > 265 V); the
operation is automatically resumed if the voltage has stabilised
in the range of 190 V to 250 V
If the device has triggered the safety shutdown:
• Press and hold down the reset button for 3 seconds in order to
resume operation.
Risk of injury due to deflagration!
Unburned heating oil may accumulate in the combustion
chamber and can be ignited when the device is switched
on the next time.
Do not restart the device two times in a row.
If the safety shutdown is still activated:
• Determine and remove the cause of the fault before commission-
ing the oil heating unit again (see chapter „Troubleshooting“).
• Press and hold the reset button for at least 5 seconds.
The self-diagnostic programme will start. Once the programme has been
completed, the reset button will light up in the colour (self-diagnostic
indicator) depending on the cause of the fault:
• flashing orange light if an incorrect flame has been detected dur-
ing start-up
• flashing red light if a missing flame has been detected during
start-up
• flashing red/green light if a missing flame has been detected dur-
ing operation
• continuous orange light if an internal error of the electronic con-
trol device has occurred
In order to determine the cause of the fault:
• see chapter „Troubleshooting“
13. Transport
• Switch the device off as described in the chapter „Functions and
operation“.
• Wait until the device has cooled down completely.
• Before transporting or adjusting the device, check if the tank cap
is tightly closed.
Risk of environmental pollution!
Heating oil may leak during transport or handling of the
device. The filling plug of the tank cap does not guaran-
tee tightness in order to allow air to be introduced and
the tank to be emptied during operation.
Only transport or shift the device with the tank cap tightly
closed.

Operating manual – IDS 20 / 30
B-6 EN
14. Care and maintenance
In order to ensure a trouble-free operation of the device, the combustion
chamber, the burner and the fan are to be cleaned regularly.
• Switch the device off as described in the chapter „Functions and
operation“.
• Wait until the device has cooled down completely.
Cleaning after every 50 operating hours
• Dismount the heating oil filter. Remove the filter insert and clean
it using clean heating oil.
• Dismount the upper housing part and clean the inner part as well
as the fan blades using a cleaning fleece and a brass brush if it
is heavily soiled.
• Check the condition of all cables and high-voltage connections.
• Dismount the burner and clean its components using a brass
brush.
• Clean the electrodes. Check the distance of the electrodes and
adjust it if required (see figure).
2 - 3 mm
• Have the combustion chamber cleaned by the customer service.
• Mount the components in the reverse order.
Cleaning the oil heating unit
• Wipe the exterior of the device using a wet cloth. The painted
and plastic surfaces may not be scoured. Do not use any solvent-
based cleaning agents.
15. Disposal
The heating oil must be drained from the tank of the oil heating unit and
collected.
Oil heating unit
Electronic equipment may not be disposed of in the domestic waste, but
must be correctly disposed of in accordance with the EUROPEAN PARLIA-
MENT directive 2002/96/EC of 27th January 2003 regarding used electri-
cal and electronic equipment. Please dispose of this device according to
the applicable legal regulations after its final decommissioning.
Heating oil
Fuels must be disposed of according to the local regulations.
Packaging
The packaging of the oil heating unit consists of cardboard/paper and
plastic. The materials must be disposed of in the designated containers
according to the local regulations or at a recycling depot.
16. Service and repair
Before contacting our customer service in order to solve an existing tech-
nical problem, please try removing the error by following the instructions
described in the chapter „Troubleshooting“.
If you have any further questions regarding the functioning and operation
of the oil cleaning unit or if you wish to receive further information in
the event of a claim or with regard to guarantee aspects, please do not
hesitate to contact us at any time.
Please contact:
Trotec GmbH Co KG
Grebbener Straße 7
D-52525 Heinsberg
Tel.: 49 (0) 2452 / 962 - 400
Fax.: 49 (0) 2452 / 962 - 200
Email: [email protected]
www.trotec.de.
17. Troubleshooting
Danger to life due to improper repair!
Do no attempt to carry out modifications or repairs on
the device. Any unauthorised modification may result
in serious injuries or even death. Have repairs carried
out by a certified specialist workshop.

Operating manual – IDS 20 / 30
EN B-7
Problem Reset button Cause Error correction
Operation indi-
cator
Self-diagnostic
indicator
Fan does not start run-
ning and flame is not
ignited
switched off -
Control device is incorrectly
set
- Check if the control equipment is correctly set
(e.g. the temperature set at the thermostat must
be higher than the room temperature).
Control device defective - Have the control device replaced by the customer
service.
Fan does not start run-
ning or switches off dur-
ing start-up or operation
flashing orange
light
- no power supply - Check the characteristics of the electrical system
(230 V -1~ - 50 Hz).
- Check the function and position of the selector
switch.
- Check if the fuse is intact.
Voltage < 175 V - Check the supply voltage. The device will auto-
matically restart if the voltage exceeds 190 V.
Voltage > 265 V - Check the supply voltage. The device will auto-
matically restart if the voltage falls below 250 V.
Fan switches off during
start-up or operation
continuous red
light
flashing orange
light
Flame is present prior
to the ignition of the
transformer
- Contact the customer service and have the device
cleaned and heating oil residues removed from
the combustion chamber.
Photoelectric cell defective - Have the photoelectric cell replaced by the cus-
tomer service.
flashing red light
or flashing red/
green light
Motor winding interrupted
or blown
- Have the motor replaced by the customer service.
Motor bearing blocked - Have the motor bearing replaced by the customer
service.
Motor capacitor blown - Have the motor capacitor replaced by the cus-
tomer service.
no ignition - Check the connections of the ignition cables to the
electrodes and the transformer.
- Check the position and the distance of the elec-
trodes.
- Check if the electrodes are clean.
- Have the transformer replaced by the customer
service.
Flame control system
defective
- Have the flame control equipment replaced by the
customer service.
Photoelectric cell defective - Have the photoelectric cell cleaned or replaced by
the customer service.
Burner is not or only in-
sufficiently supplied with
heating oil
Contact the customer service in order to:
- have the integrity of the coupling between the
pump and motor checked.
- have the heating oil circuit checked for air that
may have entered the circuit and to have the tight-
ness of the lines and filter seal checked.
- have the nozzle cleaned or replaced.

Operating manual – IDS 20 / 30
B-8 EN
Problem Reset button Cause Error correction
Operation indi-
cator
Self-diagnostic
indicator
Solenoid valve defective Contact the customer service in order to:
- have the electrical connections checked.
- have the safety thermostat LI checked.
- have the solenoid valve cleaned or replaced.
continuous orange
light
Internal error of the elec-
tronic control unit
Contact the customer service in order to:
- have the control unit reset; try to start-up the de-
vice at least twice. If the fault still occurs after-
wards, replace the control unit.
Fan starts running and
flame burns with smoke
formation
continuous
green light
-insufficient supply of com-
bustion air
- Remove all obstacles or blockages from the intake
and/or exhaust openings.
- Have the position of the air setting ring checked by
the customer service.
- Have the support disc of the burner cleaned by the
customer service
Supply of combustion air
too high
- Have the position of the air setting ring checked by
the customer service.
used heating oil contami-
nated and/or containing
water
- Replace used heating oil with clean heating oil.
- Clean the heating oil filter.
air has entered the heating
oil circuit
- Have the tightness of the lines and heating oil filter
checked by the customer service
insufficient heating oil
quantity at the burner
Contact the customer service in order to:
- have the pump pressure value checked.
- have the nozzle cleaned or replaced.
too much heating oil at the
burner
Contact the customer service in order to:
- have the pump pressure value checked.
- have the nozzle replaced.
Device does not switch
off
continuous
green light
-Solenoid valve seal
defective
- Have the solenoid valve replaced by the customer
service.

Operating manual – IDS 20 / 30
EN B-9
18. Appendix
Circuit diagram
AP Control unit FO Photoelectric cell
TA Thermostat connection CO Capacitor
ST Indicator lamp MV Fan motor
LI 1 Safety thermostat FUA Fuse 3.15 A
EV 1 Solenoid valve RV Selector switch

Manuel d‘utilisation – IDS 20 / 30
FR C-1
Table des matières
1. Remarques relatives à l‘utilisation du manuel ......................... A-1
Symboles ..................................... A-1
2. Fournitures ............................................................................. A-1
3. Conditions de garantie ............................................................ A-1
4. Consignes générales de sécurité ............................................ A-2
5. Fonction et caractéristiques du produit ................................... A-2
6. Caractéristiques techniques .................................................... A-2
Combustibles .................................. A-3
7. Utilisation conforme et non conforme ..................................... A-3
utilisation conforme ............................. A-3
utilisation non conforme ......................... A-3
8. Conditions d‘installation.......................................................... A-3
9. Description de l‘appareil ......................................................... A-3
Chauffage au oul .............................. A-3
Panneau de contrôle ............................ A-3
10. Installation et mise en service ................................................ A-4
11. Conduit d‘évacuation des fumées ........................................... A-4
Passage de cheminée ........................... A-4
Passage mural ................................. A-4
12. Fonctions et utilisation ............................................................A-4
Mise en marche du chauffage au oul ...............A-4
Arrêt du chauffage au oul ........................ A-5
Remise en marche après un dysfonctionnement ....... A-5
Dispositifs de sécurité ........................... A-5
13. Transport ................................................................................ A-5
14. Entretien et maintenance ........................................................A-6
Nettoyage après toutes les 50 heures de fonctionnement
. . A-6
Nettoyage du chauffage au oul. . . . . . . . . . . . . . . . . . . . A-6
15. Mise au rebut ......................................................................... A-6
Chauffage au oul .............................. A-6
Fioul ........................................ A-6
Emballage .................................... A-6
16. Service après-vente et réparations ......................................... A-6
17. Recherche des pannes ........................................................... A-6
18. Annexe ................................................................................... A-9
Schéma électrique ............................. A-9
1. Remarques relatives à l‘utilisation du manuel
Le présent manuel d‘utilisation contient toutes les informations impor-
tantes dont vous avez besoin pour une mise en service et une utilisation
sûres de votre chauffage au fioul.
Il vous aidera lors de l‘utilisation de l‘appareil et pour la résolution de
possibles problèmes, et vous fournit des informations sur l‘élimination et
le service après-vente.
Lisez complètement ce manuel avant d‘utiliser le chauffage au fioul pour
la première fois.
Conservez le mode d‘emploi et gardez-le à portée de la main pour pou-
voir le consulter en cas de besoin.
Observez toutes les consignes de sécurité et indications relatives à l‘uti-
lisation et à l‘entretien qui sont comprises dans ce manuel.
Le manuel doit être joint à l‘appareil si vous transmettez celui-ci à
d‘autres personnes.
Symboles
SYMBOLE D‘AVERTISSEMENT Ce symbole repré-
sente une indication de danger qui, en cas de non-
respect, peut entraîner des blessures graves voire
le décès et/ou des dommages matériels.
Informations complémentaires qui peuvent être
utiles pour l‘utilisation.
2. Fournitures
Les fournitures du chauffage au fioul comprennent:
1 2345678910
111214 13
1 Manuel d’utilisation 9 Chauffage au fioul ISD 20
2 Manuel de montage ou IDS 30
3 Roue 2x 10 Support/poignée
4 Rondelle 2x 11 Vis 2x
5 Axe 12 Rondelle 2x
6 Bague d’arrêt 2x 13 Écrou borgne 2x
7 Protection de roue 2x 14 Outil de montage
8 Raccord de cheminée
120/150 mm
3. Conditions de garantie
La garantie pour le chauffage au fioul IDS 20 et IDS 30 s‘élève à 12 mois.
Sont exclus de la garantie les dommages sur l‘appareil survenant en rai-
son du non-respect des informations contenues dans le présent manuel.
Le fabricant décline toute responsabilité pour les dommages survenant
à la suite de modifications effectuées sans autorisation sur l‘appareil ou
ses accessoires.
Vous trouverez les autres conditions de garantie dans les conditions géné-
rales de vente (CGV) consultables sur notre site Internet: www.trotec.de
This manual suits for next models
1
Table of contents
Languages:
Other Trotec Heater manuals

Trotec
Trotec IDS 20 User manual

Trotec
Trotec TCH 18 E User manual

Trotec
Trotec TFC 13 E User manual

Trotec
Trotec IRO 15 User manual

Trotec
Trotec TCH 25 E User manual

Trotec
Trotec TIH 350+ User manual

Trotec
Trotec IR 1200 S User manual

Trotec
Trotec TDS 20 User manual

Trotec
Trotec TDS 50 User manual

Trotec
Trotec IDS 20 User manual

Trotec
Trotec IR 1500 S User manual

Trotec
Trotec IDE 20 D User manual

Trotec
Trotec TCH 20 E User manual

Trotec
Trotec IDX 30 D User manual

Trotec
Trotec TFC 22 E User manual

Trotec
Trotec IDE 20 D User manual

Trotec
Trotec TDS 100 User manual

Trotec
Trotec TFH 19 E User manual

Trotec
Trotec TFH 2000 E User manual

Trotec
Trotec TCH 1510 E User manual