4
EN
1. Open wall switch
AOpen the wall switch with a screwdriver.
2. Learn code to Trust Smart Home receiver
To control 1 or several receivers simultaneously, assign the
transmitter code to 1 or more receivers. Read the receiver’s
manual for the code learning procedure. Send an ON-signal
by pressing the [ON] button while the learn mode is active.
3. Ax the transmitter using screws
AUse a flathead screwdriver to remove the button first.
BThen place the flat screwdriver in the recess of the
frame and lift the screwdriver to unclip the frame from
the back plate.
CScrew the backplate to a location with a flat surface
(make sure the arrow on the back plate points up). First
click the frame back onto the backplate and then the
push button.
4. Ax the transmitter using double-sided tape
AApply double-sided tape to the back of the wireless
switch.
BStick the wireless wall switch onto a flat surface, e.g.
a wall.
5. Control 1 or multiple Trust Smart Home
receivers
You can assign the AWST-8802 to one receiver or you can
assign the AWST-8802 to multiple receivers, to control
them simultaneously. Read the receivers manual for the
code learning procedure.
6. Manual operation of a Trust Smart Home on/
o receiver
APress ON once to switch the receiver on.
BPress OFF to switch the receiver o.
7. Manual operation of a Trust Smart Home
dimmer receiver
APress ON once to switch the receiver on.
BPress ON again to activate the dim-mode. The light will
slowly dim up and down.
CPress ON a third time to select the desired light
intensity.
DPress OFF to switch the receiver o.
8. Manual operation of a Trust Smart Home
electric screens receiver
ASend an ON-signal to raise the screen.
BSend an ON-signal again to stop.
CSend an OFF-signal to lower the screen.
DSend an OFF-signal again to stop.
Read the receivers manual to reverse the direction of the
screen, if needed.
9. Replace transmitter battery
AUse a flathead screwdriver to remove the button first.
BThen place the flat screwdriver in the recess of the
frame and lift the screwdriver to unclip the frame from
the back plate.
CRemove the battery by inserting the flat screwdriver
into the slot and sliding the battery out.
Insert a new CR2032 battery. Make sure the + side is facing
up. The wireless wall switch is now ready for use again.
1. Önen des Wandschalters
AÖnen Sie den Wandschalter mit einem Schraubendreher.
2. Trainieren des Trust Smart HomeEmpfängers
Zum gleichzeitigen Steuern von einem oder mehreren
Empfängern weisen Sie den Sendercode einem oder
mehreren Empfängern zu. Das Verfahren zum Lernen der
Codes entnehmen Sie bitte der Gebrauchanleitung des
Empfängers. Senden Sie ein ON-Signal. Dazu drücken Sie die
Taste [ON], während der Lernmodus aktiv ist.
3. Befestigen des Senders mit Schrauben
AEntfernen Sie zunächst mithilfe eines
Schlitzschraubendrehers die Taste.
BStecken Sie den Schraubendreher dann in die Aussparung
im Rahmen und heben Sie ihn an, um den Rahmen von der
Rückplatte zu lösen.
CSchrauben Sie die Rückplatte an eine flache Oberfläche (der
Pfeil auf der Rückplatte muss nach oben zeigen). Klicken
Sie zuerst den Rahmen und dann die Taste wieder auf die
Rückplatte.
4. Befestigen des Senders mit doppelseitigem
Klebeband
AKleben Sie doppelseitiges Klebeband auf die Rückseite des
Funkschalters.
BKleben Sie das Unterteil des Funkschalters auf eine flache
Oberfläche, z. B. eine Wand.
5. Einen oder mehrere Trust Smart HomeEmpfänger
Den AWST-8802 können Sie einem Empfänger zuweisen, oder
mehreren Empfängern zur gleichzeitigen Steuerung. Das
Verfahren zum Lernen der Codes entnehmen Sie bitte der
Gebrauchanleitung des Empfängers.
6. Handbedienung eines Trust Smart HomeEin-Aus-
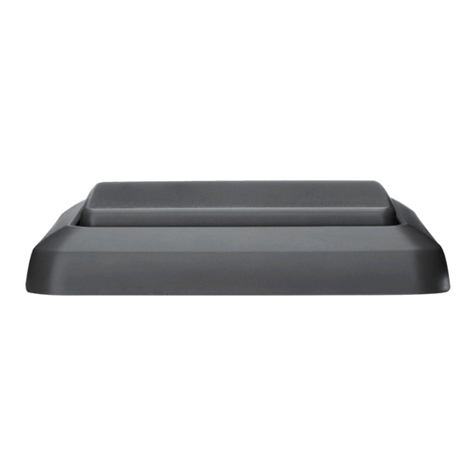
AWST-8802 DOUBLE WIRELESS WALL SWITCH
