Trust UPS 1000 VA User manual

UPS 1000 VA
Quick Installation Guide
17680

Protect
?FAQ trust.com/17680/faq
20110308R1 © Trust International B.V.
?
6
1
4
53
a
b
c
2

OXXTRON 1000VA UPS – User’s Manual
1
Index
Language Page
English 2
Deutsch 4
Français 6
Italiano 8
Español 10
Português 12
Nederlands 14
Dansk 16
Suomi 18
Norsk 20
Svenska 22
Polski 24
Česky 26
Slovenčina 28
Magyar 30
Română32
Български 34
Русский 36
Ελληνικά 38
T
ürkçe 40
Hrvatski 42

OXXTRON 1000VA UPS – User’s Manual
2
Package contents (Package contents)
On/Off button
Status LEDs:
Red
Yellow
Green
AC input port
Fuse holder
Output
Loop through cables (2x)
Installation (Installation)
-
T
urn off your compu
t
er.
- Disconnect the AC input cables from your computer and from its monitor.
- Connect your computer’s AC input cable to the UPS’ AC input port ( ).
- Use loop through cables ( ) to connect the computer and its monitor to the UPS backup outputs
().
-
T
urn on the UPS.
- Charge the UPS for 8 hours.
-
T
he equipment connected to the UPS can be switched on.
Replacing the fuse (Replacing the fuse)
- Make sure the UPS is completely off, (disconnect mains power).
- Use a spare fuse of same rating (250V, 5A)!
- Open the fuse holder ( ).
- Replace the fuse and close the fuse holder.

OXXTRON 1000VA UPS – User’s Manual
3
Safety & proper usage reminders (Safety & proper usage reminders)
-When connected to mains power, the UPS needs to be On for its battery to charge.
-Do not open or repair this device, and keep it away from liquids.
-If the battery is opened or damaged, the substances released may be flammable and harmful to
skin, eyes.
-Always connect the UPS to an earthed wall socket.
-Do not connect a multiple socket to the UPS.
-The output ports may still be powered, even when the device is turned off.
-Make sure the device is not placed on a heat-sensitive surface and that the UPS has sufficient
ventilation.
Troubleshooting (Troubleshooting)
Indication Reason and Action
Y
ellow LED steady
No beeps
Reason: The battery is charging.
Action: No action required.
Y
ellow and green LEDS steady
No beeps
Reason: The battery is fully charged, and the UPS is functioning
normally.
Action: No action required
Red LED flashing
1 beep every 5 seconds
Reason: The UPS is not powered (power outage)
T
he UPS is powering the connected devices with its battery.
Action: Save your documents and shut down the computer.
Red LED steady
2 beeps every second
Reason: The UPS is not powered (power outage).
T
he battery will be empty within 2 minutes.
Action: Save your documents and shut down the computer urgently.
Red LED steady
4 beeps every 2 seconds
Reason: The UPS is overloaded.
Action: Disconnect some devices from the UPS output ports.
Red LED steady
Continuous beeping
Reason: The UPS is in short circuit.
Action: Check each of the connected devices to identify the faulty one.
No LEDs
No beeps
Reason: The battery is discharged, or the fuse needs replacing.
Action: Connect the UPS to a power source, or replace the fuse.

OXXTRON 1000VA UPS – User’s Manual
4
Lieferumfang (Package contents)
Ein-/Aus-Schalter
Statusanzeigen:
Rot
Gelb
Grün
Netzanschluss
Sicherungshalter
Ausgang
Stromversorgungskabel (2x)
Installation (Installation)
- Schalten Sie den Computer aus.
- Ziehen Sie die Netzkabel vom Computer und dem Monitor ab.
- Schließen Sie das Netzkabel des Computers an den Netzanschluss des USV-Geräts an ( ).
- Verbinden Sie Computer und Monitor über die Stromversorgungskabel ( ) mit den USV-
A
usgängen
des USV-Geräts ( ).
- Schalten Sie das USV-Gerät ein.
- Lassen Sie das USV-Gerät 8 Stunden lang aufladen.
- Die an das USV-Gerät angeschlossene Ausrüstung kann eingeschaltet werden.
Austauschen der Sicherung (Replacing the fuse)
- Stellen Sie sicher, dass das USV-Gerät vollständig spannungsfrei ist (vom Stromnetz getrennt).
- Verwenden Sie eine Ersatzsicherung gleicher Nennleistung (250V, 5A)!
- Öffnen Sie den Sicherungshalter ( ).
-
T
auschen Sie die Sicherung aus und schließen Sie den Sicherungshalter.

OXXTRON 1000VA UPS – User’s Manual
5
Sicherheits- und Gebrauchshinweise (Safety & proper usage reminders)
-Zum Aufladen des Akkus muss das USV-Gerät an den Netzstrom angeschlossen und eingeschaltet
sein.
-Öffnen bzw. reparieren Sie das Gerät nicht und halten Sie es von Flüssigkeiten fern.
-Wenn der Akku geöffnet oder beschädigt wird, treten möglicherweise entzündliche und für Haut
und Augen gefährliche Stoffe aus.
-Verbinden Sie das USV-Gerät stets mit einer geerdeten Wandsteckdose.
-Schließen Sie keine Mehrfachsteckdose an das USV-Gerät an.
-Auch bei ausgeschaltetem Gerät führen die Ausgänge möglicherweise noch Spannung.
-Stellen Sie sicher, dass das USV-Gerät auf keinen wärmeempfindlichen Flächen steht und
ausreichend belüftet ist.
Fehlerbehebung (Troubleshooting)
Anzeichen Ursache und Abhilfe
Gelbe LED leuchtet ständig
Keine Signaltöne
Ursache: Akku lädt.
Abhilfe: Keine Handlung erforderlich.
Gelbe und grüne LED leuchtet ständig
Keine Signaltöne
Ursache: Der Akku ist aufgeladen und das USV-Gerät ist in
Normalbetrieb.
Abhilfe: Keine Handlung erforderlich.
Rote LED blinkt
1 Signalton alle 5 Sekunden
Ursache: Am USV-Gerät liegt keine Netzspannung an (Stromausfall).
Das USV-Gerät versorgt die angeschlossenen Geräte über den Akku.
Abhilfe: Speichern Sie alle Dokumente und schalten Sie den Computer
aus.
Rote LED leuchtet ständig
2 Signaltöne pro Sekunde
Ursache: Am USV-Gerät liegt keine Netzspannung an (Stromausfall).
Der Akku wird in 2 Minuten leer sein.
Abhilfe: Speichern Sie alle Dokumente und schalten Sie den Computer
sofort aus.
Rote LED leuchtet ständig
4 Signaltöne alle 2 Sekunden
Ursache: Das USV-Gerät ist überlastet.
Abhilfe: Trennen Sie einige Geräte von den USV-Ausgängen.
Rote LED leuchtet ständig
Konstanter Signalton
Ursache: Kurzschluss des USV-Geräts.
Abhilfe: Überprüfen Sie alle angeschlossenen Geräte, um den Defekt
zu finden.
LEDs leuchten nicht
Keine Signaltöne
Ursache: Der Akku ist entladen oder die Sicherung muss ausgetauscht
werden.
Abhilfe: Schließen Sie das USV-Gerät an eine Stromquelle an oder
ersetzen Sie die Sicherung.

OXXTRON 1000VA UPS – User’s Manual
6
Contenu de l'emballage (Package contents)
Bouton On/Off
Diodes électroluminescentes d'état:
rouge
jaune
verte
Port d'entrée CA
Porte-fusible
Sortie
Câbles de courant bouclés (2x)
Installation (Installation)
- Eteignez votre ordinateur.
- Débranchez les câbles d'entrée CA de votre ordinateur et du moniteur.
- Branchez le câble d'entrée CA dans le port d'entrée CA de l'UPS ( ).
- Utilisez les câbles de courant bouclés ( ) pour relier votre ordinateur et son moniteur aux sorties
de l'onduleur UPS ( ).
- Allumez l'onduleur.
- Chargez l'onduleur pendant 8 heures.
- L'équipement relié à l'onduleur peut être allumé.
Remplacement du fusible (Replacing the fuse)
- Assurez-vous que l'onduleur est complètement éteint (débranchez l'alimentation secteur).
- Utilisez un fusible de rechange de même puissance (250 V, 5 A) !
- Ouvrez le porte-fusible ( ).
- Remplacez le fusible et fermez le porte-fusible.

OXXTRON 1000VA UPS – User’s Manual
7
Rappels de sécurité et d'utilisation appropriée (Safety & proper usage reminders)
-Lorsqu'il est branché sur le secteur, l'onduleur doit être allumé pour que sa batterie charge.
-N'ouvrez pas et ne réparez pas ce dispositif et maintenez-le éloigné des liquides.
-Si la batterie est ouverte ou endommagée, les substances ainsi libérées sont inflammables peuvent
provoquer des blessures au niveau de la peau ou des yeux.
-Branchez toujours l'onduleur sur une prise murale reliée à la terre.
-Ne branchez pas de prise multiple sur l’UPS.
-Les ports de sortie peuvent être encore alimentés, même si l'onduleur est éteint.
-Assurez-vous que le dispositif n'est pas placé sur une surface sensible à la chaleur et que la
ventilation est suffisante.
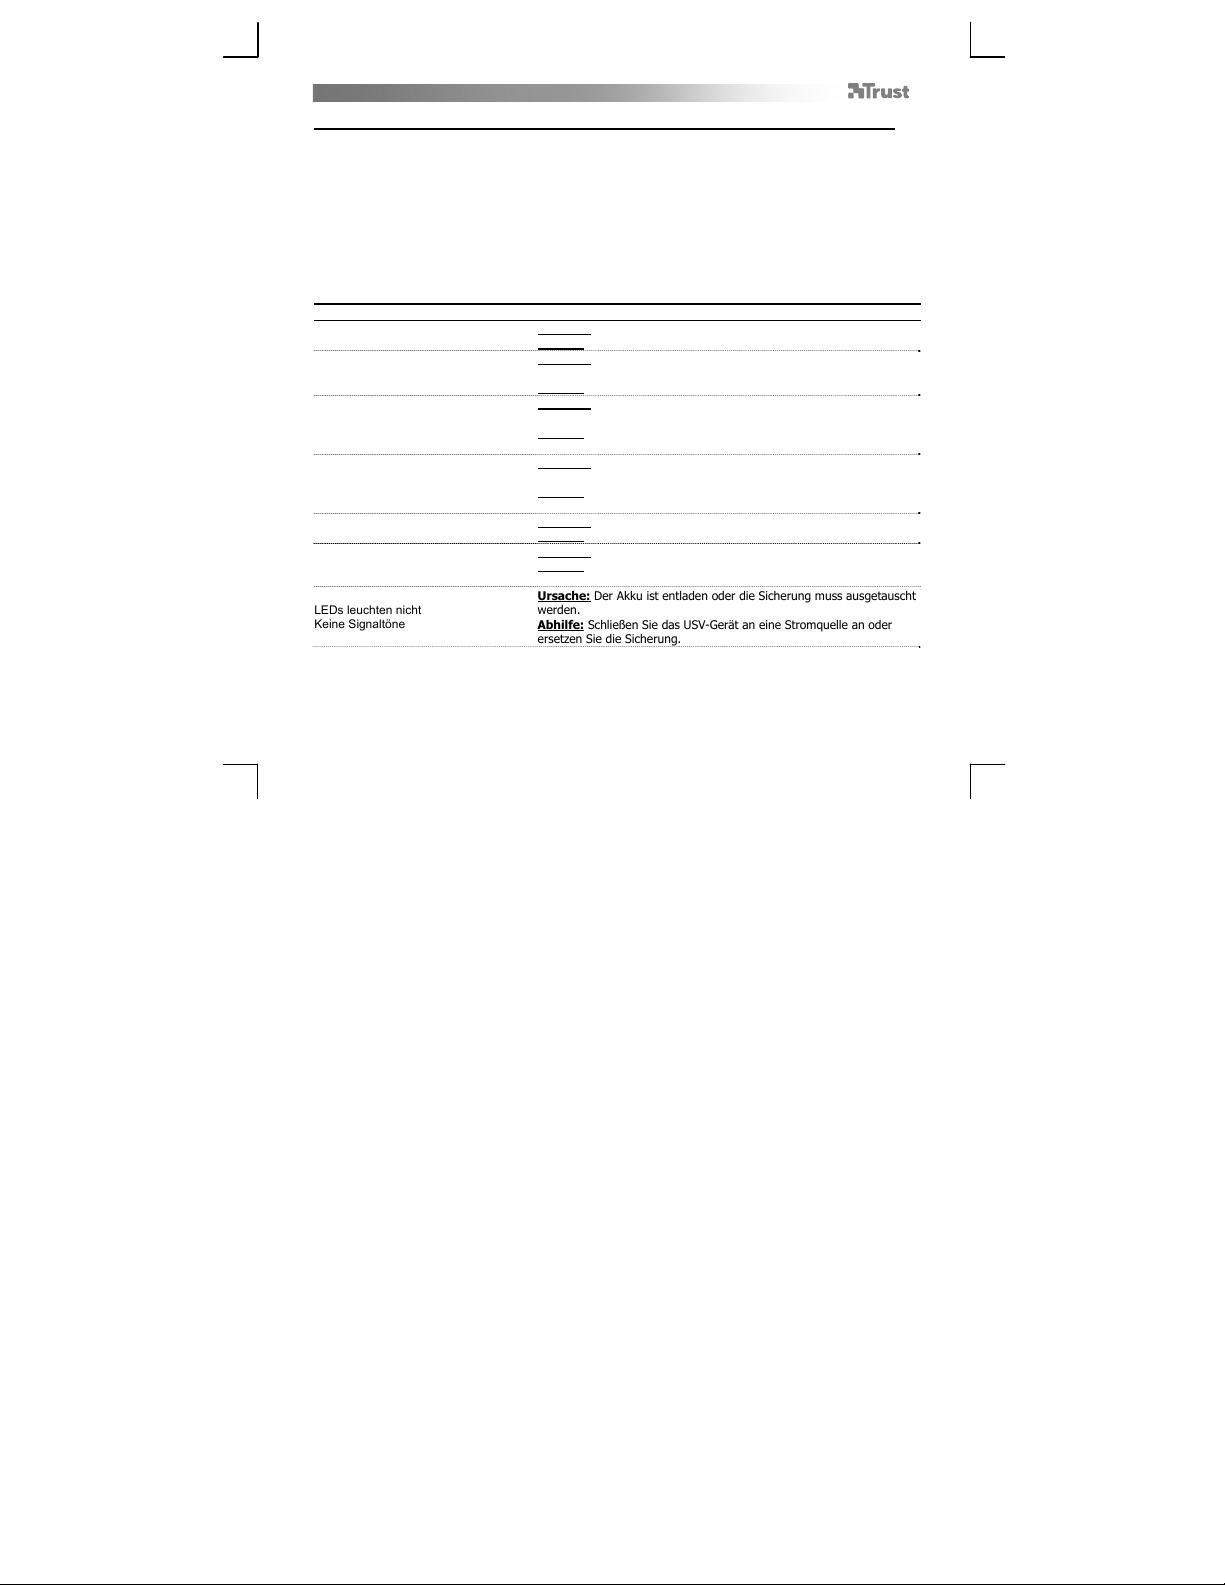
Dépannage (Troubleshooting)
Indication Raison et action
Diode électroluminescente jaune
allumée en continu
Pas de bip
Raison : la batterie est en cours de chargement.
Action : aucune action requise.
Les diodes électroluminescentes jaune
et verte sont allumées en continu
Pas de bip
Raison : la batterie est complètement chargée et l'onduleur
fonctionne normalement.
Action : aucune action requise.
La diode électroluminescente rouge
clignote
1 bip toutes les 5 secondes
Raison : l'onduleur n'est pas alimenté (panne de courant)
L'onduleur alimente les dispositifs qui lui sont connectés à l'aide
de sa batterie.
Action : enregistrez vos documents et éteignez l'ordinateur.
La diode électroluminescente rouge est
allumée en continu
2 bips toutes les secondes
Raison : l'onduleur n'est pas alimenté (panne de courant)
La batterie sera déchargée dans 2 minutes.
Action : enregistrez vos documents et éteignez immédiatement
l'ordinateur.
La diode électroluminescente rouge est
allumée en continu
4 bips toutes les 2 secondes
Raison : l'onduleur est surchargé.
Action : débranchez quelques-uns des dispositifs des ports de
sortie de l'onduleur.
La diode électroluminescente rouge est
allumée en continu
Bip continu
Raison : l'onduleur est en court-circuit.
Action : vérifiez chacun des dispositifs connectés pour
identifier celui qui est défaillant.
A
ucune diode électroluminescente
allumée
Pas de bip
Raison : la batterie est déchargée ou le fusible doit être
remplacé.
Action : branchez l'onduleur à une source d'alimentation ou
remplacez le fusible.

OXXTRON 1000VA UPS – User’s Manual
8
Contenuto della confezione (Package contents)
Pulsante di Acceso / Spento
LED di stato:
Rosso
Giallo
Verde
Porta ingresso CA
Portafusibili
Uscita
Cavi per collegamento "loop through" (2x)
Installazione (Installation)
- Spegnere il PC.
- Scollegare i cavo di ingresso CA dal computer e dal monitor.
- Collegare il cavo di ingresso CA del computer alla porta di ingreso CA dell'UPS ( ).
- Utilizzare i cavi per collegamento "loop through" ( ) per collegare il PC e il monitor alle uscite di
backup del gruppo di continuità ( ).
- Accendere il gruppo di continuità.
- Caricare il gruppo di continuità per 8 ore.
- L'apparecchiatura collegata al gruppo di continuità può essere accesa.
Sostituzione del fusibile (Replacing the fuse)
- Verificare che il gruppo di continuità sia completamente spento (scollegare l'alimentazione di rete).
- Utilizzare un fusibile di ricambio dello stesso tipo (250 V, 5 A).
- Aprire il portafusibili ( ).
- Sostituire il fusibile e chiudere il portafusibili.

OXXTRON 1000VA UPS – User’s Manual
9
Promemoria di sicurezza e per il corretto utilizzo (Safety & proper usage reminders)
-Una volta collegato all'alimentazione di rete, il gruppo di continuità deve essere acceso affinché la
batteria si carichi.
-Non aprire né riparare questo dispositivo e tenerlo lontano dai liquidi.
-Se si apre o si danneggia la batteria, le sostanze rilasciate potrebbero essere infiammabili e nocive
per la pelle e per gli occhi.
-Collegare sempre il gruppo di continuità ad una presa a parete provvista di messa a terra.
-Non collegare prese multiple al gruppo di continuità.
-Le porte di uscita potrebbero essere ancora alimentate, anche quando il dispositivo è spento.
-Assicurarsi che il dispositivo non sia collocato su superfici sensibili al calore e che il gruppo di
continuità disponga di sufficiente ventilazione.
Risoluzione dei problemi (Troubleshooting)
Indicazione Causa e Soluzione
LED giallo fisso
Nessun segnale acustico
Causa: la batteria si sta caricando.
Soluzione: nessuna azione richiesta.
LED giallo e verde fissi
Nessun segnale acustico
Causa: la batteria è completamente carica e il gruppo di continuità
funziona normalmente.
Soluzione: nessuna azione richiesta.
LED rosso lampeggiante
1 segnale acustico ogni 5 secondi
Causa: il gruppo di continuità non è alimentato (interruzione di
alimentazione).
Il gruppo di continuità sta alimentando i dispositivi collegati alla sua
batteria.
Soluzione: salvare i documenti e spegnere il PC.
LED rosso fisso
2 segnali acustici ogni secondo
Causa: il gruppo di continuità non è alimentato (interruzione di
alimentazione).
La batteria si scaricherà entro 2 minuti.
Soluzione: salvare i documenti e spegnere il PC immediatamente.
LED rosso fisso
4 segnali acustici ogni 2 secondi
Causa: il gruppo di continuità è sovraccarico.
Soluzione: scollegare alcuni dispositivi dalle porte di uscita del gruppo
di continuità.
LED rosso fisso
Segnale acustico continuo
Causa: il gruppo di continuità è in cortocircuito.
Soluzione: controllare tutti i dispositivi collegati al fine di individuare
quello guasto.
Nessun LED
Nessun segnale acustico
Causa: la batteria è scarica oppure è necessario sostituire il fusibile.
Soluzione: collegare il gruppo di continuità ad una sorgente di
alimentazione oppure sostituire il fusibile.

OXXTRON 1000VA UPS – User’s Manual
10
Contenido de la caja (Package contents)
Botón de encendido / apagado
LED de estado:
Rojo
Amarillo
Verde
Puerto de entrada de CA
Soporte para el fusible
Salida
Cables de conexión derivada (2x)
Instalación (Installation)
- Apague el ordenador.
- Desconecte los cables de entrada de CA de su ordenador y de su monitor.
- Conecte el cable de entrada de CA de su ordenador al puerto de entrada de CA del SAI ( ).
- Utilice los cables de conexión derivada ( ) para conectar el ordenador y su monitor a las salidas de
seguridad del SAI ( ).
- Encienda el SAI.
- Cargue el SAI durante 8 horas.
- Ahora ya podrá encender el dispositivo conectado al SAI.
Sustitución del fusible (Replacing the fuse)
- Asegúrese de que el SAI está totalmente apagado (desconecte la conexión a la red eléctrica).
- Utilice un fusible de recambio con la misma potencia nominal (250 V, 5 A).
- Abra el soporte para fusible ( ).
- Sustituya el fusible y cierre el soporte para fusible.

OXXTRON 1000VA UPS – User’s Manual
11
Recordatorios de seguridad y de uso correcto (Safety & proper usage reminders)
-Cuando está conectado a la red eléctrica, es necesario que el SAI esté encendido para que su
batería se cargue.
-No abra ni repare este dispositivo; manténgalo alejado de los líquidos.
-Si se abre o daña la batería, las sustancias liberadas podrían ser inflamables y dañinas para la piel y
los ojos.
-Conecte siempre el SAI a una toma de corriente de pared con conexión a tierra.
-No conecte una base múltiple al SAI.
-Los puertos de salida podrían tener corriente incluso con el dispositivo apagado.
-
A
segúrese de que el dispositivo no está colocado en una superficie sensible al calor, y de que el SAI
tiene la ventilación suficiente.
Solución de problemas (Troubleshooting)
Indicación Motivo y acción
LED amarillo encendido de forma fija
No se emiten pitidos
Motivo: La batería se está cargando.
Acción: No es necesario realizar ninguna acción.
LED amarillo y verde encendidos de forma fija
No se emiten pitidos
Motivo: La batería está totalmente cargada y el SAI
funciona de forma normal.
Acción: No es necesario realizar ninguna acción.
LED rojo parpadeando
1 pitido cada 5 segundos
Motivo: El SAI no está recibiendo corriente (corte de
suministro eléctrico)
El SAI está alimentando los dispositivos conectados con su
batería.
Acción: Guarde sus documentos y apague el ordenador.
LED rojo encendido de forma fija
2 pitidos cada segundo
Motivo: El SAI no está recibiendo corriente (corte de
suministro eléctrico).
La batería estará agotada dentro de 2 minutos.
Acción: Guarde sus documentos y apague el ordenador a la
mayor brevedad posible.
LED rojo encendido de forma fija
4 pitidos cada 2 segundos
Motivo: El SAI está sobrecargado.
Acción: Desconecte algunos dispositivos de los puertos de
salida del SAI.
LED rojo encendido de forma fija
Pitido continuo
Motivo: El SAI está cortocircuitado.
Acción: Revise todos los dispositivos conectados para
identificar el dispositivo defectuoso.
Los LED están apagados
No se emiten pitidos
Motivo: La batería está descargada o es necesario sustituir
el fusible.
Acción: Conecte el SAI a una toma de corriente o sustituya
el fusible.

OXXTRON 1000VA UPS – User’s Manual
12
Conteúdo da embalagem (Package contents)
Botão Ligar/Desligar
LEDs de estado:
Vermelho
Amarelo
Ligado
T
omada de entrada C
A
Suporte do fusível
Saída
Cabos
Loop through
(2x)
Instalação (Installation)
- Desligue o seu computador.
- Desligue os cabos de entrada CA do computador e do respectivo monitor.
- Ligue o cabo de entrada CA do computador à tomada de entrada CA da UPS ( ).
- Utilize cabos
Loop through
( ) para ligar o computador e o respectivo monitor às saídas de reserva
da UPS ( ).
- Ligue a UPS.
- Carregue a UPS durante 8 horas.
- Pode ligar o equipamento que se encontra ligado à UPS.
Substituição do fusível (Replacing the fuse)
- Certifique-se de que a UPS se enconta completamente desligada (desligue da corrente eléctrica).
- Utilize um fusível sobressalente do mesmo valor (250V, 5A)!
- Abra o suporte do fusível ( ).
- Substitua o fusível e feche o suporte.

OXXTRON 1000VA UPS – User’s Manual
13
Advertências de segurança e utilização (Safety & proper usage reminders)
-Quando se encontra ligada à corrente eléctrica, a UPS tem de estar ligada (On) para carregar a
respectiva bateria.
-Não abra ou repare este dispositivo e mantenha-o afastado de líquidos.
-Se a bateria for aberta ou danificada, as substâncias libertadas podem ser inflamáveis e nocivas
para a pele e os olhos.
-Ligue sempre a UPS a uma tomada com terra.
-Não ligue a UPS a uma ficha de tomada tripla.
-Mesmo após desligar o dispositivo, as portas de saída podem ainda ter corrente.
-Certifique-se de que o dispositivo não é colocado sobre uma superfície termossensível e que a UPS
tem ventilação suficiente.
Resolução de problemas (Troubleshooting)
Indicação Motivo e Acção
LED amarelo aceso
Nenhum sinal sonoro
Motivo: A bateria está a carregar.
Acção: Nenhuma acção necessária.
LEDs amarelo e verde acesos
Nenhum sinal sonoro
Motivo: A bateria está completamente carregada e a UPS está a
funcionar normalmente.
Acção: Nenhuma acção necessária.
LED vermelho a piscar
1 sinal sonoro a cada 5 segundos
Motivo: A UPS não tem alimentação (falha de corrente)
A UPS está a utilizar a bateria para alimentar os dispositivos ligados.
Acção: Guarde os seus documentos e desligue o computador.
LED vermelho aceso
2 sinais sonoros por segundo
Motivo: A UPS não tem alimentação (falha de corrente)
A bateria ficará descarregada dentro de 2 minutos.
Acção: Guarde os seus documentos e desligue imediatamente o
computador.
LED vermelho aceso
4 sinais sonoros a cada 2 segundos
Motivo: A UPS está sobrecarregada.
Acção: Desligue alguns dispositivos das portas de saída da UPS.
LED vermelho aceso
Sinal sonoro contínuo
Motivo: A UPS está em curto-circuito.
Acção: Verifique cada um dos dispositivos ligados para identificar
qual deles está na origem do problema.
LEDs apagados
Nenhum sinal sonoro
Motivo: A bateria está descarregada ou o fusível tem de ser
substituído.
Acção: Ligue a UPS a uma fonte de alimentação ou substitua o
fusível.

OXXTRON 1000VA UPS – User’s Manual
14
Inhoud van de verpakking (Package contents)
Aan/uit-knop
Status-LEDs:
Rood
Geel
Groen
AC-invoerpoort
Zekeringhouder
Uitgang
Doorluskabels (2x)
Installatie (Installation)
- Schakel uw computer uit.
- Koppel de AC-kabels los van uw computer en de monitor.
- Sluit de AC-kabel van uw computer aan op de AC-invoerpoort van de UPS ( ).
- Gebruik de doorluskabels ( ) om de computer en bijbehorende monitor aan te sluiten op de UPS-
uitgangen ( ).
- Schakel de UPS in.
- Laad de UPS gedurende 8 uur op.
- De apparatuur die op de UPS is aangesloten, kan worden ingeschakeld.
De zekering vervangen (Replacing the fuse)
- Zorg dat de UPS volledig is uitgeschakeld (verbreek de verbinding met de netvoeding).
- Gebruik een nieuwe zekering met dezelfde classificatie (250V, 5A)!
- Open de zekeringhouder ( ).
- Vervang de zekering en sluit de zekeringhouder.

OXXTRON 1000VA UPS – User’s Manual
15
Instructies voor een veilig & juist gebruik (Safety & proper usage reminders)
-Nadat de UPS is aangesloten op de netvoeding, moet deze aan worden gezet om de accu op te
laden.
-Dit apparaat mag niet worden geopend of gerepareerd. Houd het uit de buurt van vloeistoffen.
-Als de accu wordt geopend of beschadigd, kunnen brandbare stoffen vrijkomen die schadelijk zijn
voor huid en ogen.
-Sluit de UPS altijd aan op een geaarde contactdoos.
-Sluit op de UPS geen meervoudige contactdoos aan.
-Als het apparaat is uitgeschakeld, kunnen de uitgangen nog steeds onder spanning staan.
-Plaats het apparaat niet op een warmtegevoelig oppervlak en zorg dat er rondom de UPS voldoende
ventilatie plaatsvindt.
Probleemoplossing (Troubleshooting)
Indicatie Reden en actie
Gele LED brandt continu
Geen piepjes
Reden: De accu wordt opgeladen.
Actie: Geen actie nodig.
Gele en groene LEDs branden continu
Geen piepjes
Reden: De accu is volledig opgeladen en de UPS functioneert
normaal.
Actie: Geen actie nodig
Rode LED knippert
1 piepje om de 5 seconden
Reden: De UPS wordt niet van voeding voorzien (stroomuitval)
De accu van de UPS voorziet de aangesloten apparaten van
spanning.
Actie: Sla uw documenten op en schakel de computer uit.
Rode LED brandt continu
2 piepjes per seconde
Reden: De UPS wordt niet van stroom voorzien (stroomuitval).
De accu zal binnen 2 minuten leeg zijn.
Actie: Sla uw documenten op en schakel de computer direct uit.
Rode LED brandt continu
4 piepjes om de 2 seconden
Reden: De UPS is overbelast.
Actie: Verbreek de verbinding tussen een aantal apparaten en de
UPS-uitgangen.
Rode LED brandt continu
Voortdurende pieptoon
Reden: De UPS heeft kortsluiting.
Actie: Controleer de aangesloten apparaten om te ontdekken welk
apparaat defect is.
Geen LEDs
Geen piepjes
Reden: De accu is leeg of de zekering moet worden vervangen.
Actie: Sluit de UPS aan op een voedingsbron of vervang de
zekering.

OXXTRON 1000VA UPS – User’s Manual
16
Pakkens indhold (Package contents)
On/Off-knap
Status-LED'er:
Blinker
Gul
Grøn
Indgangsport til vekselstrøm
Sikringsholder
Output
Kredsløbskabler (2x)
Installation (Installation)
- Sluk computeren.
- Afbryd indgangskablerne til vekselstrøm fra computeren og dens skærm.
- Slut computerens indgangskabel til vekselstrøm til UPS’ens indgangsport til vekselstrøm ( ).
- Brug kredsløbskabler ( ) til at slutte computeren og dens skærm til UPS-backup-outputs ( ).
-
T
ænd UPS'en.
- Oplad UPS'en i 8 timer.
- Udstyret, der er tilsluttet UPS'en, kan tændes.
Udskiftning af sikring (Replacing the fuse)
- Sørg for, at UPS'en er helt slukket (afbryd strømforsyningen).
- Brug en reservesikring med samme ampere (250V, 5A)!
- Åbn sikringsholderen ( ).
- Udskift sikringen, og luk sikringsholderen.

OXXTRON 1000VA UPS – User’s Manual
17
Sikkerhed & oplysninger om korrekt brug (Safety & proper usage reminders)
-Når den er tilsluttet strømforsyningen, skal UPS'en være tændt for, at batteriet kan oplade.
-Åbn, eller reparer ikke enheden, og hold den væk fra væsker.
-Hvis batteriet er åbnet eller beskadiget, kan de frigivne substanser være antændelige og skadelige
for hud og øjne.
-Slut altid UPS'en til et jordet vægstik.
-Undlad at forbinde flere stik til UPS’en.
-Output-portene kan stadig være strømførende, selv når enheden er slukket.
-Sørg for, at enheden ikke placeres på en varmefølsom overflade, og at UPS'en har tilstrækkelig
ventilation.
Fejlfinding (Troubleshooting)
Indikation Årsag og handling
Gul LED konstant
Ingen bip
Årsag: Batteriet oplader.
Handling: Ingen handling nødvendig.
Gul og grøn LED konstant
Ingen bip
Årsag: Batteriet er fuldt opladet, og UPS'en fungerer normalt.
Handling: Ingen handling nødvendig
Rød LED blinker
1 bip hvert 5. sekund
Årsag: UPS'en er ikke strømført (strømudfald)
UPS'en bruger batteriet til at strømføre de tilsluttede enheder.
Handling: Gem dine dokumenter, og luk computeren.
Rød LED konstant
2 bip hvert sekund
Årsag: UPS'en er ikke strømført (strømudfald).
Batteriet vil være tomt i løbet af 2 minutter.
Handling: Gem dine dokumenter, og luk computeren hurtigt.
Rød LED konstant
4 bip hvert andet sekund
Årsag: UPS'en er overbelastet.
Handling: Afbryd nogle enheder fra UPS-output-portene.
Rød LED konstant
Uafbrudt bip
Årsag: UPS'en er kortsluttet.
Handling: Kontroller hver af de tilsluttede enheder for at identificere
den fejlbehæftede.
Ingen LED'er
Ingen bip
Årsag: Batteriet er afladet, eller sikringen skal udskiftes.
Handling: Slut UPS'en til en strømkilde, eller udskift sikringen.

OXXTRON 1000VA UPS – User’s Manual
18
Pakkauksen sisältö (Package contents)
Virtapainike
T
ilan LED-valot:
Punainen
Keltainen
Vihreä
Verkkovirtaportti
Sulakepesä
Lähtö
Loop through -kaapelit (2x)
Asennus (Installation)
- Sammuta tietokone.
- Irrota virtajohdot tietokoneesta ja sen näytöstä.
- Kiinnitä tietokoneen verkkovirtajohto UPS-laitteen verkkovirtaporttiin ( ).
- Käytä loop through -kaapeleita ( ) ja kytke tietokone ja sen näyttö UPS-varavirtalaitteeseen ( ).
- Käynnistä UPS-laite.
- Lataa UPS-laitetta 8 tuntia.
- UPS-laitteeseen kytketyt laitteet voidaan laittaa päälle.
Sulakkeen vaihtaminen (Replacing the fuse)
- Varmista, että UPS-laite on kokonaan pois päältä (irrota pistorasiasta).
- Käytä samanlaista varasulaketta (250 V, 5 A)!
- Avaa sulakepesä ( ).
- Vaihda sulake ja sulje sulakepesä.
Table of contents
Languages:
Other Trust UPS manuals

Trust
Trust 1000 User manual

Trust
Trust Energy Protector 325 User manual

Trust
Trust 17678 User manual

Trust
Trust PW-4040T User manual

Trust
Trust 1300 VA User manual

Trust
Trust PW-4120M User manual

Trust
Trust 18162 User manual

Trust
Trust 400 User manual

Trust
Trust PW-5060S 600VA UPS User manual

Trust
Trust 17681 User manual
Popular UPS manuals by other brands

Lowell power
Lowell power UPS9AC-1000 User & installation manual

DSPM
DSPM Power Lynx 1 Technical specifications

Njoy
Njoy Aira 600 user manual

Alpha Technologies
Alpha Technologies Tri Power X33 HIMOD HP user manual

MGE UPS Systems
MGE UPS Systems Pulsar Esprit 313.5 kVA Brochure & specs

CyberPower
CyberPower UT1500EG user manual