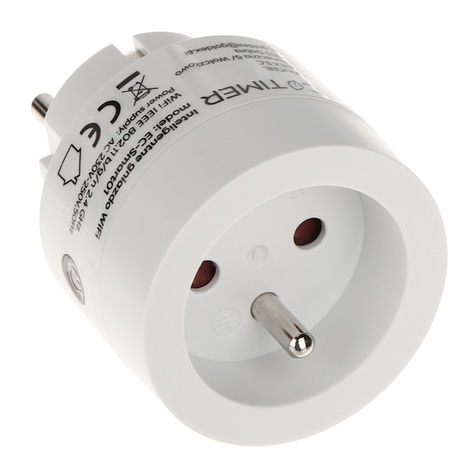
TUYA laxihub 6972055684105 User manual

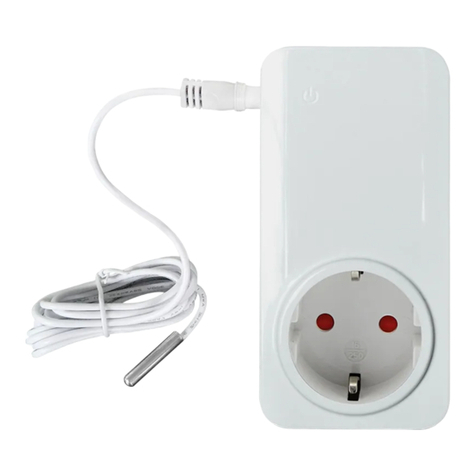
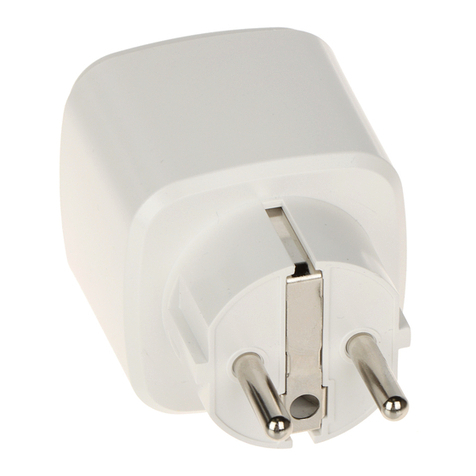
EN Wi-Fi&BLE Smart Socket
FR Prise intelligente Wi-Fi&BLE
ES Enchufe inteligente Wi-Fi&BLE
DE Smarte Wi-Fi&BLE-Steckdose
IT Presa intelligente Wi-Fi&BLE
User Manual

Smart socket connects to Internet via Wi-Fi and is remotely
controlled by smartphone App. It supports timing switch, power
meter function and energy saving, etc. You can also use Amazon
Alexa and Google Assistant to control smart socket by voice.
PRODUCT OVERVIEW
THE PREPARATORY WORK
1. Scan the QR code or search "Arenti" or
"SmartLife" at App Store and Google Play.
Download and install the App at your
phone.
2. Make sure your phone has connected
to your home Wi-Fi (2.4Ghz).
3. Power on the Wi-Fi smart socket, and
you can see the LED in blue flash. If not,
please long press the reset button for 5
seconds to restore the factory settings.
SmartLife
Available for iOS and Android
Arenti

1. Sign up a new account or log in the account.
2. Open the "Arenti" App, click "Add" or "+", and select "Smart
Socket".
3. Power on and reset the socket. And input your WiFi's passwords.
Then follow the on-screen instructions.
4. When you have added the socket successfully, click the device
to enter the controlling interface, and you can click "..." to set up,
such as name modification, time management and device version
checking.
5. On the "timing" interface, click "+" on the top right corner to
add a timing scene. Enter the timing name, and then add needs to
perform a single or multiple tasks so that the socket can be a key
management device after saving.
ADD DEVICE TO ARENTI

1. Sign up a new account or log in the account.
2. Open the "SmartLife" App, click "Add Device" or "+", and select
"Electrical > Socket (Wi-Fi)".
3. Power on and reset the socket. And input your WiFi's passwords.
Then follow the on-screen instructions.
4. When you have added the socket successfully, click the device
to enter the controlling interface. And you can click " " to
manage the device.
5. On the "Timer" interface, click "+" on the bottom to add a
scene. You can set up the timing and select days you need.
6. On the "Electric" interface, you can view the current, voltage
and power.
7. On the "Setting" interface, you can view the logs and relay
status.
ADD DEVICE TO SMARTLIFE

La prise intelligente se connecte à Internet via Wi-Fi et est
contrôlée à distance par l'application pour smartphone. Il prend
en charge le commutateur de synchronisation, la fonction de
compteur de puissance et l'économie d'énergie, etc. Vous pouvez
également utiliser Amazon Alexa et Google Assistant pour
contrôler la prise intelligente par la voix.
PRÉSENTATION DU PRODUIT
LE TRAVAIL PRÉPARATOIRE
1. Scannez le code QR ou recherchez
«Arenti» ou «SmartLife» sur App Store et
Google Play. Téléchargez et installez
l'application sur votre téléphone.
2. Assurez-vous que votre téléphone est
connecté à votre réseau Wi-Fi domestique
(2,4 GHz).
3. Allumez la prise intelligente Wi-Fi, et
vous pouvez voir la LED en flash bleu.
Sinon, appuyez longuement sur le bouton
de réinitialisation pendant 5 secondes pour
restaurer les paramètres d'usine.
Disponible pour iOS et Android
SmartLife
Arenti
1. Créez un nouveau compte ou connectez-vous au compte.
2. Ouvrez l'application "Arenti", cliquez sur "Ajouter" ou "+" et
sélectionnez "Smart Socket".
3. Mettez sous tension et réinitialisez la prise. Et saisissez les
mots de passe de votre WiFi, puis suivez les instructions à l'écran.
4. Une fois que vous avez ajouté le socket avec succès, cliquez sur
le périphérique pour accéder à l'interface de contrôle, et vous
pouvez cliquer sur "..." pour configurer, comme la modification
du nom, la gestion du temps et la vérification de la version du
périphérique.
5. Sur l'interface «chronométrage», cliquez sur «+» dans le coin
supérieur droit pour ajouter une scène de chronométrage. Entrez
le nom du timing, puis ajoutez les besoins pour effectuer une ou
plusieurs tâches afin que le socket puisse être un périphérique de
gestion de clés après l'enregistrement.
AJOUTER UN PÉRIPHÉRIQUE À ARENTI

1. Créez un nouveau compte ou connectez-vous au compte.
2. Ouvrez l'application «SmartLife», cliquez sur «Ajouter un
appareil» ou «+» et sélectionnez «Électricité> Prise (Wi-Fi)».
3. Mettez sous tension et réinitialisez la prise. Et saisissez les mots
de passe de votre WiFi, puis suivez les instructions à l'écran.
4. Une fois que vous avez ajouté le socket avec succès, cliquez sur
le périphérique pour accéder à l'interface de contrôle. Et vous
pouvez cliquer sur " " pour gérer l'appareil.
5. Sur l'interface "Minuterie", cliquez sur "+" en bas pour ajouter
une scène. Vous pouvez configurer le calendrier et sélectionner
les jours dont vous avez besoin.
6. Sur l'interface "Electrique", vous pouvez visualiser le courant, la
tension et la puissance.
7. Sur l'interface "Paramètres", vous pouvez afficher les journaux
et l'état du relais.
AJOUTER UN APPAREIL À SMARTLIFE

El enchufe inteligente se conecta a Internet a través de Wi-Fi y se
controla de forma remota mediante la aplicación de teléfono
inteligente. Admite interruptor de temporización, función de
medidor de potencia y ahorro de energía, etc. También puede
usar Amazon Alexa y Google Assistant para controlar el enchufe
inteligente por voz.
DESCRIPCIÓN DEL PRODUCTO
EL TRABAJO PREPARATORIO
1. Escanee el código QR o busque "Arenti"
o "SmartLife" en App Store o Google Play.
Descargue e instale la aplicación en su
teléfono.
2. Asegúrese de que su teléfono esté
conectado a la red Wi-Fi de su hogar
(2.4Ghz).
3. Encienda el enchufe inteligente Wi-Fi y
verá el LED parpadeando en azul. De lo
contrario, mantenga presionado el botón
de reinicio durante 5 segundos para
restaurar la configuración de fábrica. Disponible para iOS y Android
SmartLife
Arenti

1. Registre una nueva cuenta o inicie sesión en la cuenta.
2. Abra la aplicación "Arenti", haga clic en "Agregar" o "+" y
seleccione "Smart Socket".
3. Encienda y reinicie el enchufe. Ingrese las contraseñas de su
WiFi y siga las instrucciones en pantalla.
4. Cuando haya agregado el enchufe correctamente, haga clic en
el dispositivo para ingresar a la interfaz de control, y puede hacer
clic en "..." para configurar, como la modificación del nombre, la
administración del tiempo y la verificación de la versión del
dispositivo.
5. En la interfaz de "sincronización", haga clic en "+" en la esquina
superior derecha para agregar una escena de sincronización.
Ingrese el nombre de tiempo y luego agregue las necesidades para
realizar una o varias tareas para que el enchufe pueda ser un
dispositivo de administración de claves después de guardar.
AÑADIR DISPOSITIVO A ARENTI APP

1. Registre una nueva cuenta o inicie sesión en la cuenta.
2. Abra la aplicación "SmartLife", haga clic en "Agregar
dispositivo" o "+" y seleccione "Eléctrico> Enchufe (Wi-Fi)".
3. Encienda y reinicie el enchufe. Ingresa las contraseñas de su
WiFi y siga las instrucciones en pantalla.
4. Cuando haya agregado el enchufe correctamente, haga clic en
el dispositivo para ingresar a la interfaz de control. Y puede hacer
clic en " " administrar el dispositivo.
5. En la interfaz "Temporizador", haga clic en "+" en la parte
inferior para agregar una escena. Puede configurar el tiempo y
seleccionar los días que necesite.
6. En la interfaz "Eléctrica", puede ver la corriente, el voltaje y la
potencia.
7. En la interfaz "Configuración", puede ver los registros y el
estado del relé.
AÑADIR DISPOSITIVO A SMARTLIFE APP

Smarte Steckdose stellt über WLAN eine Verbindung zum Internet
her und wird von der Smartphone-App ferngesteuert. Es unterstützt
Zeitschaltuhr, Leistungsmesserfunktion und Energieeinsparung
usw. Die Steckdose ist kompatibel mit Amazon Alexa und Google
Assistant, damit Sie es mit Sprachbefehl steuern können.
PRODUKTÜBERSICHT
DIE VORBEREITENDE ARBEIT
1. Scannen Sie den QR-Code oder suchen
Sie im App Store und bei Google Play
nach "Arenti" oder "SmartLife". Laden Sie
die App herunter und installieren Sie sie
auf Ihrem Telefon.
2. Stellen Sie sicher, dass Ihr Telefon eine
Verbindung zu Ihrem Heim-WLAN
(2,4 GHz) hergestellt hat.
3. Schalten Sie die smarte WLAN-
Steckdose ein und Sie können die LED in
Blitz sehen. Wenn nicht, drücken Sie die
Reset-Taste 5 Sekunden lang, um die
Werkseinstellungen wiederherzustellen.
Verfügbar für iOS und Android
SmartLife
Arenti

1. Eröffnen Sie ein neues Konto oder melden Sie sich im Konto an.
2. Öffnen Sie die "Arenti" App, klicken Sie auf "Hinzufügen" oder
"+" und wählen Sie "Smart Socket".
3. Schalten Sie die Steckdose ein und setzen Sie sie zurück. Geben
Sie das Passwort Ihres WLANs ein. Befolgen Sie dann die
Anweisungen auf dem Bildschirm.
4. Wenn Sie die Steckdose erfolgreich hinzugefügt haben, klicken
Sie auf das Gerät, um die Steuerungsschnittstelle aufzurufen, und
klicken Sie zum Einrichten auf "...", z. B. Namensänderung,
Zeitverwaltung und Überprüfung der Geräteversion.
5. Klicken Sie auf der Oberfläche "Timing" oben rechts auf "+",
um eine Timing-Szene hinzuzufügen. Geben Sie den Steckdose-
Namen ein und fügen Sie dann hinzu, dass eine oder mehrere
Aufgaben ausgeführt werden müssen, damit die Steckdose nach
dem Speichern ein Schlüsselverwaltungsgerät sein kann.
GERÄT ZU ARENTI HINZUFÜGEN

1. Eröffnen Sie ein neues Konto oder melden Sie sich im Konto an.
2. Öffnen Sie die "SmartLife" -App, klicken Sie auf "Gerät
hinzufügen" oder "+" und wählen Sie "Elektrik> Steckdose (Wi-Fi)".
3. Schalten Sie die Steckdose ein und setzen Sie sie zurück. Geben
Sie das Passwort Ihres WLANs ein. Befolgen Sie dann die
Anweisungen auf dem Bildschirm.
4. Wenn Sie die Steckdose erfolgreich hinzugefügt haben, klicken Sie
auf das Gerät, um die Steuerungsschnittstelle aufzurufen. Und Sie
können auf " " klicken, um das Gerät zu verwalten.
5. Klicken Sie auf der Oberfläche "Timer" unten auf "+", um eine
Szene hinzuzufügen. Sie können das Timing einstellen und die
gewünschten Tage auswählen.
6. Auf der Schnittstelle "Elektrisch" können Sie Strom, Spannung
und Leistung anzeigen.
7. Auf der Oberfläche "Einstellungen" können Sie die Protokolle
und den Relaisstatus anzeigen.
GERÄT ZU SMARTLIFE HINZUFÜGEN

La presa intelligente si connette a Internet tramite Wi-Fi ed è
controllata da remoto tramite l'app per smartphone. Supporta
interruttore di temporizzazione, funzione misuratore di potenza
e risparmio energetico, ecc. Puoi anche utilizzare Amazon Alexa
e Google Assistant per controllare la presa intelligente con la
voce.
PANORAMICA DEL PRODOTTO
IL LAVORO PREPARATORIO
1. Scansiona il codice QR o cerca "Arenti"
o "SmartLife" su App Store e Google Play.
Scarica e installa l'App sul tuo telefono.
2. Assicurati che il tuo telefono sia
connesso alla rete Wi-Fi domestica
(2,4 Ghz).
3. Accendi la presa intelligente Wi-Fi e
puoi vedere il LED lampeggiante blu. In
caso contrario, premere a lungo il
pulsante resrt per 5 secondi per
ripristinare le impostazioni di fabbrica. Disponibile per iOS e Android
SmartLife
Arenti

1. Registra un nuovo account o accedi all'account.
2. Apri l'app "Arenti", fai clic su "Aggiungi" o "+" e seleziona "Smart
Socket".
3. Accendere e ripristinare la presa. E inserisci le password del tuo
WiFi, quindi segui le istruzioni sullo schermo.
4. Dopo aver aggiunto correttamente il socket, fare clic sul
dispositivo per accedere all'interfaccia di controllo e fare clic su "..."
per configurare, ad esempio, la modifica del nome, la gestione
dell'ora e il controllo della versione del dispositivo.
5. Sull'interfaccia "timing", fare clic su "+" nell'angolo in alto a destra
per aggiungere una scena di timing. Immettere il nome timing,
quindi aggiungere le esigenze per eseguire una o più attività in
modo che il socket possa essere un dispositivo di gestione delle
chiavi dopo il salvataggio.
AGGIUNGI DISPOSITIVO AD ARENTI

1. Registra un nuovo account o accedi all'account.
2. Apri l'app "SmartLife", fai clic su "Aggiungi dispositivo" o "+" e
seleziona "Elettrico> Presa (Wi-Fi)".
3. Accendere e ripristinare la presa. E inserisci le password del tuo
WiFi, quindi segui le istruzioni sullo schermo.
4. Dopo aver aggiunto correttamente il socket, fare clic sul
dispositivo per accedere all'interfaccia di controllo. E puoi fare clic
su " " per gestire il dispositivo.
5. Nell'interfaccia "Timer", fare clic su "+" in basso per aggiungere
una scena. Puoi impostare i tempi e selezionare i giorni di cui hai
bisogno.
6. Sull'interfaccia "Electric" è possibile visualizzare la corrente, la
tensione e la potenza.
7. Sull'interfaccia "Impostazioni" è possibile visualizzare i registri e
lo stato del relè.
AGGIUNGI DISPOSITIVO A SMARTLIFE
This manual suits for next models
1
Table of contents
Languages:
Other TUYA Accessories manuals

TUYA
TUYA PIR 323-Z-TY User manual

TUYA
TUYA T23 User manual

TUYA
TUYA ATLO-P1-TUYA User manual

TUYA
TUYA Smart V10W User manual

TUYA
TUYA M100 Pro User manual

TUYA
TUYA J5 User manual

TUYA
TUYA 96236 Instruction manual

TUYA
TUYA TM001-ZA Owner's manual

TUYA
TUYA SimPal-TY130 User manual

TUYA
TUYA EC-SMART01 User manual
Popular Accessories manuals by other brands

Franklin
Franklin Go Pro 14348 Assembly instructions

Dorner
Dorner 2200 series installation manual

IFM
IFM IFS Series operating instructions

Safety Technology International
Safety Technology International STI-32000 Instruction guide

Welby
Welby 20099 user manual

BASETech
BASETech 1593791 operating instructions